Jump to content

Trailer brake controller without tow package


Recommended Posts

Hey guys. I have been driving a used 2007 Silverado Classic for about a year now. The truck has a regular cab, regular bed, 4.3L V6, and did not come with a tow package from the factory. After I started to realize I would need it for towing some smaller to medium trailers,  I got the basic 4 way package and hitch installed at U Haul this past December, and also installed a Hopkins 7-blade/4-pin piece to the wiring cable just above the spare tire. However, I also would prefer to hook in a trailer brake system to save on wear and tear on my brake pads when moving larger trailers that I might occasionally haul. While the standard 2007 Silverado Classic (it's really just a 2006 Silverado) that comes with a tow package comes with the wiring, the wiring to the STUD #1 fuse in my engine bay fuse box, which normally has the power to a trailer brake controller, is absent from anywhere I can see around the box on mine. I also notice that the wiring to the trailer brake output in my truck is not connected to anything, and is just an empty wire running back to the end of the truck.  STUD #2 is already connected under the box, which does not show the usual "install all the wires yourself" advice on most trailer brake controller videos from etrailer.com

I am wondering if the red/power and blue/trailer brake wiring is hiding anywhere within any bundles and just needs to be connected together into the fuse box and to a trailer controller, or if I have to tap into my firewall and wire up everything myself. 


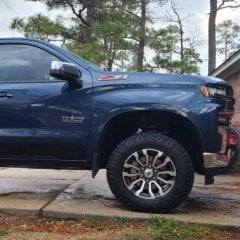
Here is a representation of the truck I have below: 
22400674.jpg


Here is the fuse box. Stud #1 seems to be used by the trailer brake controller's power wire, as most etrailer.com videos show these are already wired on towing equipped vehicles. 
2005-chevy-silverado-1500-fuse-box-diagr
 

Edited by thapatman54
Link to comment
Share on other sites

I think the wires are hiding around the electrical box. After you take off the top cover for the fuses and then the larger surrounding plastic cover, around the box, the red wire with the ring terminal should be hiding in that harness waiting to connected to the stud. The blue wires should also be hiding in there too, but they will be unhooked. You should see both ends of the blue wires in there with male and female matching connectors and they should hook right up. Install a proper size maxifuse and your good to go there. 


For the trailer brake control, they make a plug and play harness that connects under the dash at the panel beside the parking brake and goes right to the back of your trailer brake control.

Link to comment
Share on other sites

1 hour ago, Clutch Bo said:

Towing with a v6? 


I towed a small trailer most of a summer years ago in my 99.  RCSB with the 4.3 V6.


I actually got arrested and publicly flogged for doing it.  Would not recommend :lol:

Edited by Nick The Great
  • Like 1
Link to comment
Share on other sites

So I took a look underneath my fuse box once I got a chance. After checking out the etrailer guide posted in here; it seems like Chevrolet's engineers came up with another way to "cut costs"

Here is the photo from the 1999-2006 fuse box, with wiring to be installed underneath the right side where it is overlapped by a support bar. 


faq046_ff_250.jpg


And here is my actual fuse box. I can see the female blue trailer brake plug is available, and that the 30 amp for Stud 2 is ready to go (apparently found out THAT is for a brake controller on my model. Go figure). However, even after removing my fuse box and looking at the jumble of wires, I did not see any hookups, or masses of electrical tape that could be a tell tale. 


SYgBRH8.jpg


Not too sure what that 3 way plug is just above the stud...

5 hours ago, Nick The Great said:


I towed a small trailer most of a summer years ago in my 99.  RCSB with the 4.3 V6.


I actually got arrested and publicly flogged for doing it.  Would not recommend :lol:

Sounds like 'ol smokey was a little bit kinky with ya. 


6 hours ago, Clutch Bo said:

Towing with a v6? 

Sometimes you gotta work with what you have. I'm a college student, and I will only be using the trailer brakes mostly for trailer control and reducing wear on my pads. Besides, heaviest thing I see myself hauling in this is a pipe trailer with rail ties loaded on it for a museum I volunteer for. 

Link to comment
Share on other sites

So I took a look underneath my fuse box once I got a chance. After checking out the etrailer guide posted in here; it seems like Chevrolet's engineers came up with another way to "cut costs"

Here is the photo from the 1999-2006 fuse box, with wiring to be installed underneath the right side where it is overlapped by a support bar. 
 
faq046_ff_250.jpg
 
And here is my actual fuse box. I can see the female blue trailer brake plug is available, and that the 30 amp for Stud 2 is ready to go (apparently found out THAT is for a brake controller on my model. Go figure). However, even after removing my fuse box and looking at the jumble of wires, I did not see any hookups, or masses of electrical tape that could be a tell tale. 
 
SYgBRH8.jpg
 
Not too sure what that 3 way plug is just above the stud...
Sometimes you gotta work with what you have. I'm a college student, and I will only be using the trailer brakes mostly for trailer control and reducing wear on my pads. Besides, heaviest thing I see myself hauling in this is a pipe trailer with rail ties loaded on it for a museum I volunteer for. 
If it didn't come with the tow package, I would guess it lacks the wiring. Simple enough to run wiring to the 7-way...but you need heavy wire for the 12v+, 12v-, and the brake...I would go no less than 10ga wire.

2012 2500hd 6.0l CCSB 4wd


Link to comment
Share on other sites

32 minutes ago, sdeeter19555 said:

Need brakes for anything over 3k in most states...

2012 2500hd 6.0l CCSB 4wd


Not all trailers have the need for a brake controller in terms of an electronic one though.  There is always trailers with surge brakes. 

Link to comment
Share on other sites

  • 1 year later...

More than a year later, I ran two wires to the fuse box pieces. Drilled into the rubber wire boot through the firewall, then ran them to connectors I got from a Pick-n-Pull. Installed a working brake controller. 14 gauge wire, connectors left over from adding cruise control (seperate forums that included some used eBay parts and a Pick-n-pull harness. Works great!)

Here's a pretty in depth tutorial with what you're gonna have to do to get the same. 

All of the pin slots are on the "Center Instrument Panel Fuse Block" for and are as follows:
 

E10 = 12V battery supply 

D9 = Ground

F10 = Brake signal to trailers

F9 = Brake signal from brake pedal (tail lights) [Side note: 1999-2002 Silverado/Sierra/Avalanche/Escalade/Suburban/Tahoe/Yukon/Denali will have their wire position in the "D10"   pin for the brake signal. It does not matter as this is already wired in]

To remove the slots, remove the bolt with a small socket (I think it was 1/4"?) until loose, then separate with a small screwdriver or a knife. Undo the sky blue pin connector locks. 

You might notice that slots D9 and F9 (D10) are already hooked in, so just need to do two wires to the inside of the hood in the fuse box pictured above. 

F10 is the brake controller output, and is blue. I used blue14 gauge wire(https://www.autozone.com/miscellaneous-non-automotive/electrical-wire/electrical-wire-primary-wire/119764_0_0), and a reclaimed junkyard plug. You will need a male plug to install into the female plug that is already routed to the back of the truck into a 7 way connection underneath the spare tire (All wires are already hooked from around the fuse box back to the back of the truck to this plug. Please watch eTrailer's numerous guides on it like this one on a 2006 Sierra: https://www.youtube.com/watch?v=DtGZkOOjC9k)

You can find a male plug for the F10 wire (ACDELCO PT2905) offered from RockAuto in the link below


https://www.rockauto.com/en/moreinfo.php?pk=4654488&cc=1433485&jsn=1224

E10 is the 12 volt battery supply for the controller and is black on the controller wire, but red running from the Center Instrument Panel Fuse Block to the fuse box under the hood. I also ran that with 14 gauge red wire (https://www.autozone.com/miscellaneous-non-automotive/electrical-wire/electrical-wire-primary-wire/163386_0_0) with a reclaimed junkyard plug, however this also requires a nut as well to tack onto Stud #2. Stud #2 was already hooked in with a 30A (Pink) FMX Maxi fuse on my truck, but if it is not there, please insert one to run the controller. 

Here is a link to a 30A FMX Maxi fuse
https://www.walmart.com/ip/Wirthco-Engineering-Inc-24930-Fuse-Fmx-30A/286480896


You can find the nut needed for Stud #2 (M8-1.25 Zinc Plated Hex Flange Nut specifically) below:
https://www.etrailer.com/Accessories-and-Parts/Fastenal/185917.html
Another thing needed is a ring wire connector. While I got mine from a salvage yard box, any 16-14 Gauge (blue connector size), M8 Wire Ring Connector will do. 

Put two Delphi (now Aptiv) 15304711-L pins (These are the same that are used for Cruise Control jobs as well. I can link to that in the future forum post). The link to some is below.
https://www.mouser.com/ProductDetail/Aptiv-formerly-Delphi/15304711-L?qs=sGAEpiMZZMs7eK6h2EBtKnSHa2PTj7tE1SJ5ALJOOso%3D

Insert the Red wire into slot E10, and insert the Blue wire into Slot F10 directly above it. Run these wires through the rubber boot directly above the box by drilling from the  outside into the cab, and be EXTREMELY CAREFUL to keep distance from ALL OTHER WIRES. (Would you like to rewire all 72 wires that can fit into that instrument panel box, among others?)

Butt connect these wires with Heat Shrink 14-16 Gauge Crimp Wire Butt Connectors (https://www.walmart.com/ip/HT-16-PIECE-HEAT-SHRINK-SPLICE-CONNECTORS/724148527) to the appropriate ends. Attach the red wire onto Stud #2's stud, and secure down with the nut. Attack the male into the female connector for the blue output wire. 

Finally, test all of these connections by clamping a GM plug for trailer brake controllers into it before you finish your install. (Like the Hopkins 47795 GM Brake Control Connector)
http://www.hopkinstowingsolutions.com/products/braking/brake-control-connectors/47795.html


Test the battery wire to the ground (usually black to white) with a circuit probe (should be a constant). The brake line (red) to ground with a probe should make a light when the brakes are pressed (like the brake lights, which is what after all they're wired for). And finally, find a volt meter with a continuity tester (it will beep if the black and red on it are touched), and hook it to your 7 way on the bottom right as pictured below. 
7-Way-RV-Style-Trailer-Plug-Wiring-Diagr

Hopefully, if all works out, put everything back together, and you're ready to install a brake controller. Hope this helps.

P.S.: Be sure to also add 12+ Auxiliary Power Supply (1:30 position on the plug as illustrated above) by replacing the "B+" plug with a 40A (green) FMX Maxi fuse into Stud #1, and connecting the terminal plug with a M6 Zinc Plated Hex Flange Nut. This was already hooked into my truck and only needed the fuse, however the resources below should help those who need it

40A (green)  FMX Maxi fuse

https://www.walmart.com/ip/Wirthco-Engineering-Inc-24940-Fuse-Fmx-40A/219434580

M6 Nut for Stud #1

https://www.etrailer.com/Accessories-and-Parts/Fastenal/185916.html

Edited by thapatman54
Link to comment
Share on other sites

Join the conversation

You can post now and register later. If you have an account, sign in now to post with your account.

Guest
Reply to this topic...

×   Pasted as rich text.   Paste as plain text instead

  Only 75 emoji are allowed.

×   Your link has been automatically embedded.   Display as a link instead

×   Your previous content has been restored.   Clear editor

×   You cannot paste images directly. Upload or insert images from URL.


×
×
  • Create New...

Important Information

By using this site, you agree to our Terms of Use.