

Old School Mechanic
-
Posts
36 -
Joined
-
Last visited
Recent Profile Visitors
2,419 profile views


Old School Mechanic's Achievements
")
Enthusiast (2/11)
17
Reputation
-
 Looks like a needle bearing to me too.
 -
Yep, they done that with older engines for years...the trouble was not many serviced those "air filters", which were more like a sponge material, the real old ones were in the oil filler cap, nobody changed those. They became clogged and then the pcv wouldn't work right which caused crank case pressure then oil leaks. Keep em clean
-
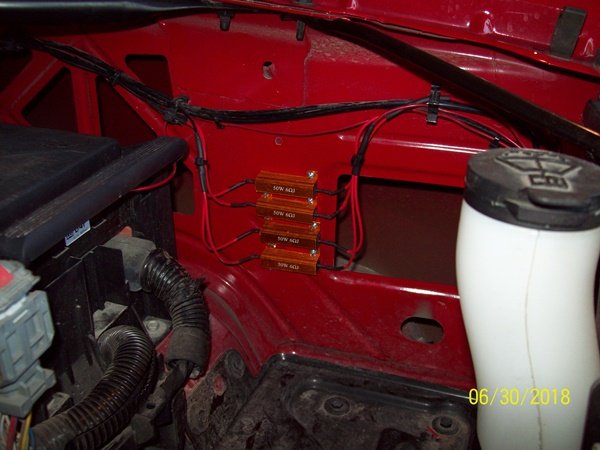
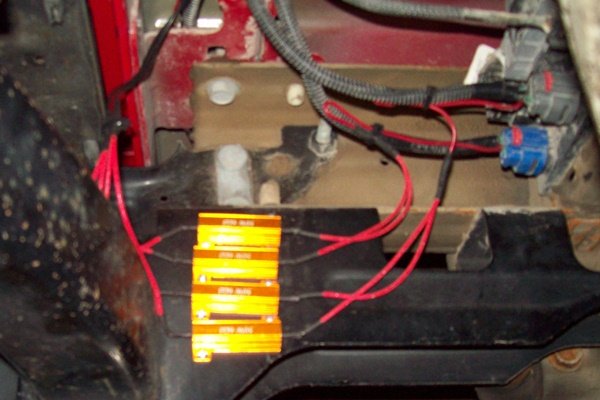
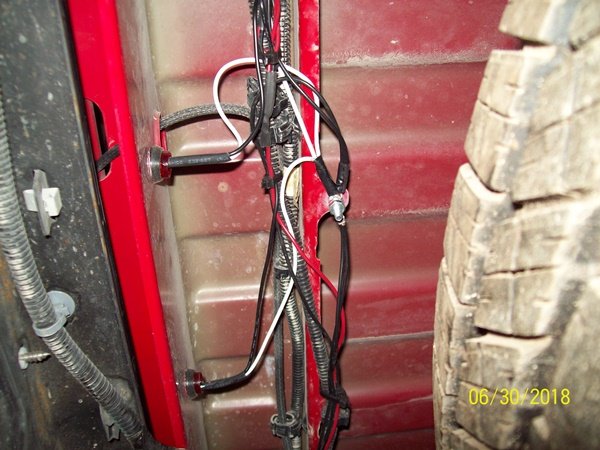
First, both black wires are ground, but don't wire it there at the socket, there should be another connector that runs both sockets per corner, that is a lot easier to get to. In the front they are on each side of the fans. In the rear there is a junction block above the spare tire on the left side. Use a test light to determine which wire is the turn, the other will be your parking light. Hook your test light ground to any clean non painted metal then probe your wire, like I see you have done. Turn your lights on and the test light should come on and stay on with parking and will flash for the turn. Your resistors can be hooked up from either end into the power wire, can't mess that up. You only need to splice into one wire, but you will have to use two resistors (you have two turn signals in each corner, right?) Hook two wires from one end of the resistors together and splice into the power wire. Hook the other two ends together and I would run them to a good ground, you need to mount those resistors because they will get hot, don't just wrap them with tape to something that will melt or let them dangle. Don't use those scotch locks...they will cause trouble in the long run, make a good solder joint. So here's what I did. One end of the resistor has to go to power, the other end goes to ground. It does not matter which end goes where... On the front, I ran two resistors in parallel, two wires down to one and spliced into the 6 pin connectors on each side of the shroud. One wire spliced into the turn signal power wire. The other ends of the 2 resistors, I did the same way, 2 wires into 1, and ran that wire to the body ground located on the firewall. Works great. Mounted my resistors on the inner fender, easy to get to. (See pics below) I tried to use just one resistor, no go, still hyper flash, you have to use two. I didn't try to wire them in series, since I found wiring in parallel works. I found that you really only need one wire going to the connector, the hot side of the turn signal, and the other end of the resistor can be grounded anywhere that is ground, even if you have to make the wire longer to get there. You don't have to wire the ground to the ground wire at the 6 pin connector going to the bulb is what I'm saying. You can, but you don't have to, make it easy on yourself. One splice for each corner instead of four. On my 2015 Front left turn 6 pin connector X110 wire was BU/WH Front right turn 6 pin connector X120 wire was GN/VT ---Check the wiring diagram for your truck ! The right side connector is a pain, you have to remove the air filter box to get to it, and also to replace the bulbs. On both sides you can get to the bulbs through a small opening on the inner fender. Two resistors for each side, just ran a wire to the right side and spliced into the 6 pin connector over there. Run the other end of the resistors to the stud. The same thing can be done for the rear turn signals with two bulbs on each side...there is a junction block just to the left of the spare tire, one wire one splice, then just find a good ground. Both wires for rear turn lights were D-GN but in different connectors. Rear left turn junction block X63A connector X2 Rear right turn junction block X63A connector X3 ---Check the wiring diagram for your truck ! To get to the rear turn signal bulbs and back up light, you must remove the tail light housing. With the tail gate down you will see 2 screws to remove, then carefully pull the housing straight back. There are clips on the very end that fit into holes in the bed, that I broke when removing the housing, that are replaceable... GM part # 22876572, good luck. Rear resistors mounted to reese hitch, single wire to junction box plug. Other end going to ground. TEST ALL THE BULBS BEFORE YOU INSTALL THEM BACK IN THE HOUSING. If they do not work take them out of the socket and turn 180 degrees and push back in to the socket and try again. Most LED's are polar. Resistors mounted front turn signals Here's a good ground under the hood Rear resistors mounted. I made my own "good ground" in the rear. I have some marker lights grounded there also. Hope this helps.

-
The two tubes from the CAI are to allow filtered air into the engine. Vent. It's not pushing air from the engine into the CAI. Engine vacuum then pulls the air (and other gasses/oil [blow-by]) out through the pcv valve. This stuff is then sucked into the cylinders through the intake valves and burned. Since direct fuel injection sprays fuel directly into the cylinders and not sucked in through the intake valve like a carburetor or throttle body injection the intake valves don't get "washed" off by the gasoline, therefore they get build up from blow-by from the pcv system. A catch can could come in handy, reducing the amount of stuff that gets sucked back into the engine. Hope this helps
-
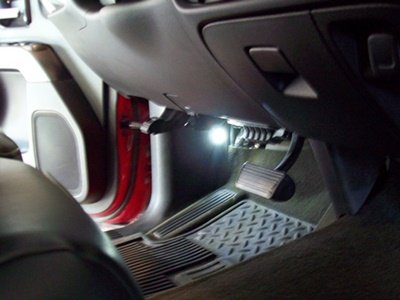
I'm loving my new footwell lighting!!!
Old School Mechanic replied to bholden's topic in 2014-2018 Silverado & Sierra Mods
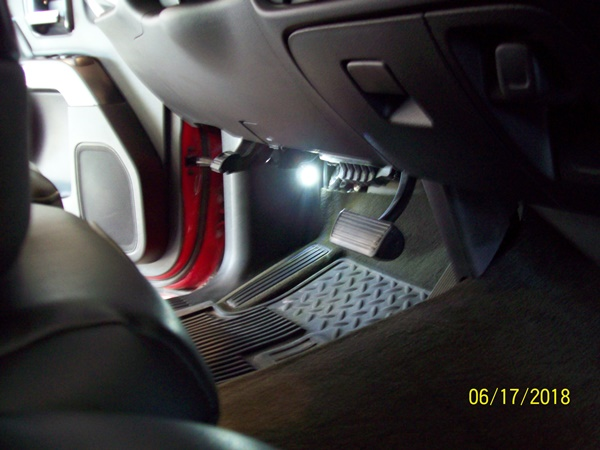
Yea, I don't know why GM doesn't.... Mine aren't near as cool as bholden, but they do the trick for me. I was looking for some marker lights, ran across these on eBay I think I got 30 for $11.99 or something like that, used the white's for inside. Surprisingly bright. Takes a 3/4 hole that a rubber grommet fits in then just push the light into the grommet. Wired these into the bcm interior light wire...I think it was gray/white stripe...but, don't hold me to that
-
If you do a flush, make sure to replenish the system with oil also. You should replace the dryer too. Your compressor should have come with oil in it, but some will gather in the condenser you replaced, and also the evaporator you are going to flush, and in the dryer. We are talking about a few ounces here. I assume you vacuumed the system before recharge? If you did you will loose a little there too. You'll have to look in a service manual to see what the correct amount of oil your system needs. Try to put exactly the amount of Freon in that is on the label. By your pressure readings above you may have not got enough Freon in there. Readings on gauges, not running, will read a little higher than the outside temperature in Fahrenheit. 77 sounds a little low, unless it was cold outside... Hope this helps
-
It sounds to me like you have a restriction in the high side. Did you "flush" the system? When a compressor takes a dump it will leave pieces of it in the system. If you didn't clean out the evaporator or the lines there still may be stuff in there. Usually it will gather at the expansion valve, and in the lines running to it, and could cause it to stick and not operate properly. Pressures should be about 26-29 low side and about 200-250 high side (steady) depending on outside temp. Max AC, high blower. Hope this helps
-
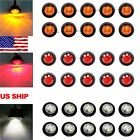
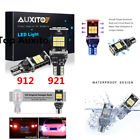
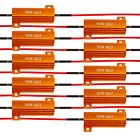
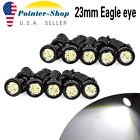
There are alot of people out there telling how to do something, everyone has their own ideas and this is just how I did it. To do the basic LED switch, and I'm just talking about my 15, because it's the only one I have done. I think in 16 they changed sockets, maybe not until 17? , and I haven't really looked at the GMC, but I think the basics should be similar. I have a 2015 Silverado SCLB LT, two turn signal bulbs on each side, front and back. Someone on this forum said you need a resistor for each bulb, and I found that to be true. I thought to myself "this is gonna suck" because I didn't want to splice into each bulb with a resistor. Wiring in these resistors is just a work around to "fool" the BCM, so it doesn't think there is a bulb out and turn on a warning telling you so. You would think there would be some computer guy out there that could make a software program and you could plug your laptop into your truck and change the settings that control the lights. My DiabloSport hand held tuner can change my PCM & TCM, so what gives? What ever happened to the ole' flasher? Anyway, So here's what I did. One end of the resistor has to go to power, the other end goes to ground. It does not matter which end goes where... On the front, I ran two resistors in parallel, two wires down to one and spliced into the 6 pin connectors on each side of the shroud. One wire spliced into the turn signal power wire. The other ends of the 2 resistors, I did the same way, 2 wires into 1, and ran that wire to the body ground located on the firewall. Works great. Mounted my resistors on the inner fender, easy to get to. Two resistors for each side, just ran a wire to the right side and spliced into the 6 pin connector over there. Run the other end of the resistors to the stud. Note: These resistors get hot, so you should mount them to metal and not let them touch things that will melt. I tried to use just one resistor, no go, still hyperflash, you have to use two. I didn't try to wire them in series, since I found wiring in parallel works. I found that you really only need one wire going to the connector, the hot side of the turn signal, and the other end of the resistor can be grounded anywhere that is ground, even if you have to make the wire longer to get there. You don't have to wire the ground to the ground wire at the 6 pin connector going to the bulb is what I'm saying. You can, but you don't have to, make it easy on yourself. Many years ago when I was young 1977, I was in school for automotive technology, a fancy way to say grease monkey. The first class I had was automotive electric, where we were going to learn about starters, alternators, points and condenser etc., and the first words out of the teacher's mouth was very loud... "Ground is ground is ground, until it isn't ground, then it isn't ground ! and never forget that". My classmates all looked at each other and said WTF? This old guy is talking crazy. But all it really means is that all ground wires end up in the same place, the negative side of the battery, and I have never forgotten that. In my years of experience, I have found that probably 75% of all light problems are caused by a bad ground. The rest have a loose "bad" connection, or something that isn't ground. So don't use scotch locks to make your connections. Yes they are quick and easy, but they will only cause problems later. Make good solder connections, and use quality, adhesive lined, shrink tube to seal out moisture. So, back to the subject. One splice for each corner instead of four. On my 2015 Front left turn 6 pin connector X110 wire was BU/WH Front right turn 6 pin connector X120 wire was GN/VT ---Check the wiring diagram for your truck ! The right side connector is a pain, you have to remove the air filter box to get to it, and also to replace the bulbs. On both sides you can get to the bulbs through a small opening on the inner fender. The same thing can be done for the rear turn signals with two bulbs on each side...there is a junction block just to the left of the spare tire, one wire one splice, then just find a good ground. Both wires for rear turn lights were D-GN but in different connectors. Rear left turn junction block X63A connector X2 Rear right turn junction block X63A connector X3 ---Check the wiring diagram for your truck ! Rear resistors mounted to reese hitch, single wire to junction box plug. Other end going to ground. I made my own ground with other LED going to it with no ill effects. To get to the rear turn signal bulbs and back up light, you must remove the tail light housing. With the tail gate down you will see 2 screws to remove, then carefully pull the housing straight back. There are clips on the very end that fit into holes in the bed, that I broke when removing the housing, that are replaceable... GM part # 22876572, good luck. TEST ALL THE BULBS BEFORE YOU INSTALL THEM BACK IN THE HOUSING. If they do not work take them out of the socket and turn 180 degrees and push back in to the socket and try again. Most LED's are polar. I had no trouble replacing the rest with LED, I also did the center cargo light and center brake light, same bulbs as backup lights in the tail lights. I like to try and find the best deals on stuff, and for my money eBay is the place to go. So here is a list of the stuff I used. You can copy and paste the description into search on eBay and they should come up. Many different sellers, so shop around. Resistors - you'll need 8, they come as a pack of 10. $11.99 - Free Shipping 10pcs 50W 6 ohm Load Resistor Fix LED Bulb Fast Hyper Flash Turn Signal w/ T-Tap ( I haven't looked, but someone may make a 100W 12 ohm resistor to flash 2 bulbs? ) Turn signals front and rear, on my truck, use the same bulb, they come as a pack of 10. These bulbs are all white, you need 8. My lenses are solid amber in front and solid red in rear...no clear at all. $18.99 - Free Shipping 10x White 7443 7440 T20 33-SMD RV Camper Turn Signal Stop Light Bulbs 12V-24V Back up lights, center cargo and brake, you'll need 5. They come as a pack of 2. Wish I coulda found a better deal on these. $11.39 - Free Shipping - Total $34.17 AUXITO 912 921 LED Backup Light Bulbs 1000 Lumens High Power 2835 15-SMD Chipset License plate lights come as a pack of 10, don't know what I'm going to do with the other 8. $8.54 - Free Shipping AUXITO 10x T10 20 SMD LED White Super Bright Car Lights Bulb - 194,168,2825,W5W Auxiliary Back up lights pack of 10. These are bright. Put them in the step. $9.99 - Free Shipping 10x23mm Eagle Eye 12SMD 4014 LED White Back Up Reverse Daytime Running Light Marker lights pack of 30, 10 red, 10 amber, 10 white. ( I used a couple of the white ones on the inside kick panels to light up the floor boards) $19.95 - Free Shipping 30X Red Amber White 12V 3/4" Round Marker Light Clearance 3 LED Bullet US Ship These bulbs are cross referenced part numbers I got from my OWNERS Manual. Yours may be different. Hopefully these lights are all of good quality and will last a long time. These lights look better in real life than my crappy photography shows...... Hope this helps, and good luck to those who try this.
-
You can use standard LED turn signal bulbs, just wire in resistors. Some say their LED bulbs are CANbus ready, but they're not. I have a 2015 and switched all my bulbs, except headlights, to LED.
-
Fantastic idea for those of you with 2016+ trucks with those sockets, very clean. Are the rear sockets like the front? Did you mount the resistor somewhere? They get hot and you don't want them touching plastic or other wiring or just flopping around. I found that you really only need one wire going to the socket, the hot side, and the other end of the resistor can be grounded anywhere that is ground, even if you have to make the wire longer to get there. You don't have to wire the ground to the ground wire going to the bulb is what I'm saying. I have a 2015, two turn signal bulbs on each side. Someone on this forum said you need a resistor for each bulb, and I found that to be true, I tried just one for two bulbs, didn't work, hyperflash still. So I ran two resistors in parallel, two wires down to one and spliced into the 6 pin connector. One wire spliced into the turn signal power wire, the other end of the resistors, did the same and ran that wire to the body ground located on the firewall. Works great. Mounted my resistors on the inner fender, easy to get to. You could probably do the same for your set up and only have to drill one hole in your socket. Two resistors for each side, just ran a wire to the right side and spliced into the 6 pin connector over there. Good solid solder joint. I wouldn't use the scotch locks they send with the resistors. Run the other end of the resistors to the stud. The same thing can be done for the rear turn signals with two bulbs on each side...there is a junction block just to the left of the spare tire, one wire one splice, then just find a good ground. Rear resistors mounted to reese hitch, single wire to junction box plug. Other end going to ground. Made my own ground, I have some other led's grounded to the same stud with no ill effects.
-
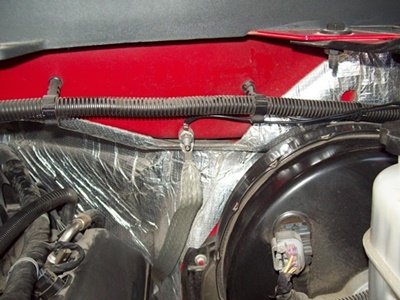
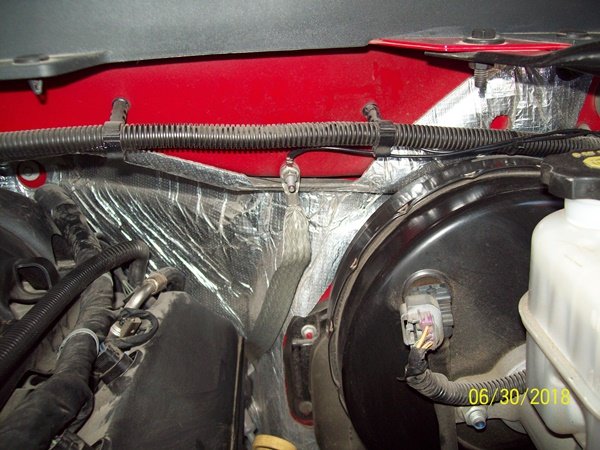
What is this for?
Old School Mechanic replied to Armo325's topic in 2014-2019 Engine, Driveline, & Exhaust
I noticed the same on my 2015...mine is taped, yes I said taped, to the white thing that is zip tied to the wiring harness. You would think they could find a better place for it and secure it a little more professionally. -
2011 Silverado With Chevy Shake?
Old School Mechanic replied to Humphrey_73's topic in 1999-2013 Silverado & Sierra 1500
Yes, it could very well be in the drive train, especially if you have a carrier bearing. Crawl under and push up and down on the drive shaft near the u-joints look for movement, and at carrier bearing if you have one. And of course look for damage to the drive shaft tube. Hope this helps -
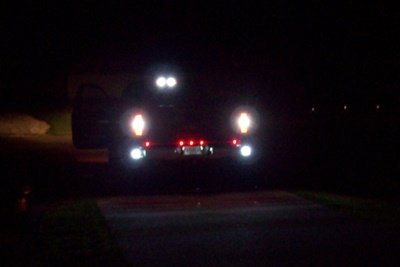
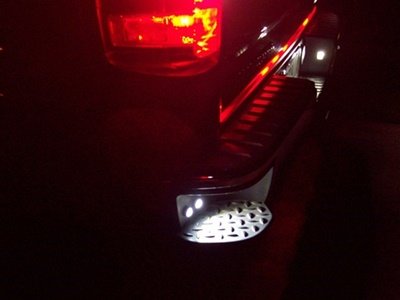
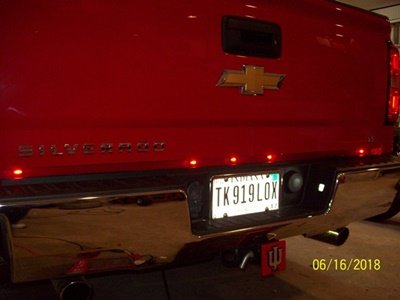
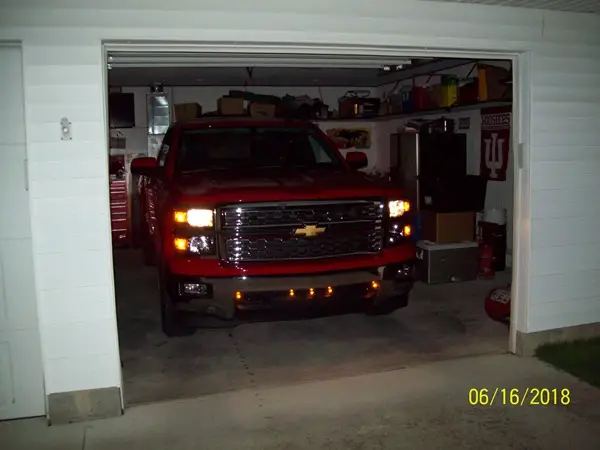
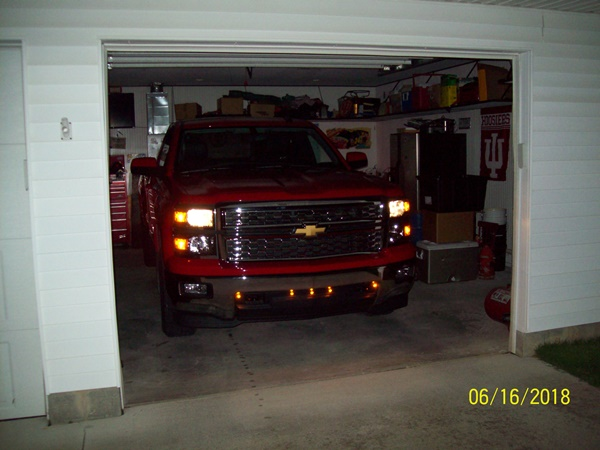
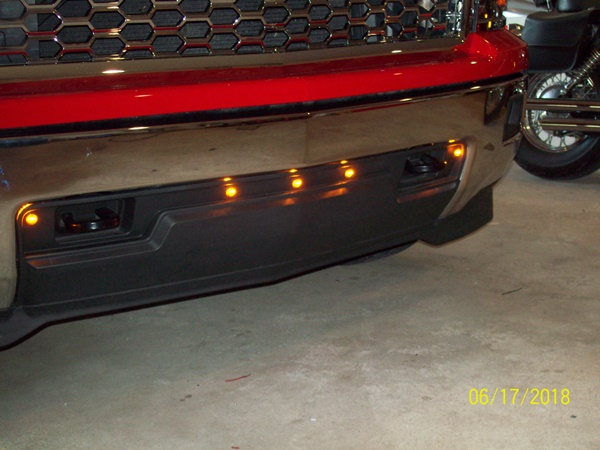
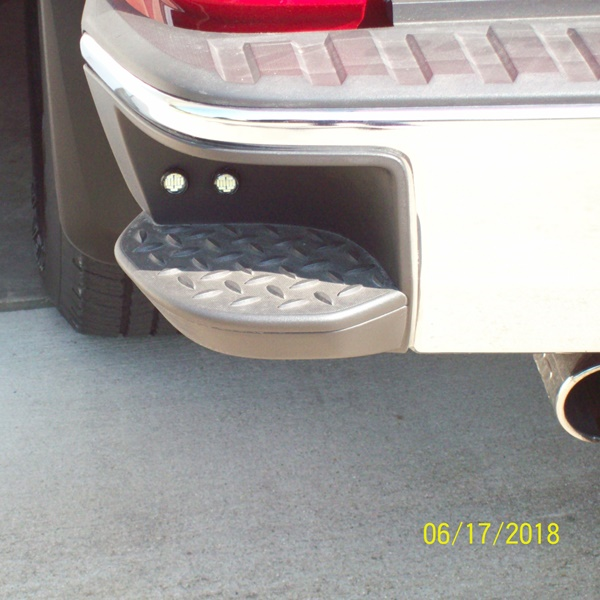
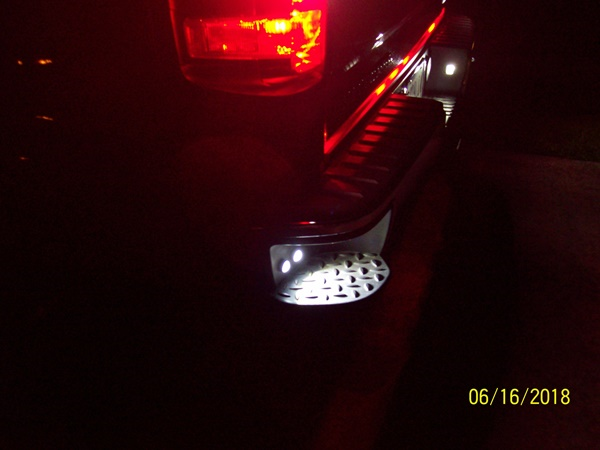
Yea, old fashioned pick-up. Did some light work to it over the weekend. Put on some marker lights and I too was about to cry when I was drilling holes in my truck Front Markers Put some led back up lights in the step, worked out well. I usually back into my garage, the regular bulb back ups just weren't bright enough. Did the back-up light / cargo light mod and put led's in, now I can light up the neighborhood. Of course I needed rear markers. And I thought what the hell, might as well put some on the inside too. I don't know why Chevy doesn't put some lights on the floor board ? Now inside lights up nice. These aren't the bright ones like I put on the rear step, I think these are 3watt and the ones on the step are 15 watt. At least that's what the package said.... Now I'm waiting on some resistors to arrive so I can put led's in the parking and turn signals.
-
Here's what I did. I wanted mine to work in both positions, come on in reverse and with the switch the back up lights would light. So all I needed was a wire that would fit and not fall out. It's a paper clip with a piece of shrink tube on it bent in a "U" so you can push it in there. Guys were having trouble with the diode because the wire is too thin, you only need about a half an inch of wire exposed. As far as it being dark out for them to come on with the fob...that's true...or you could just cover the light sensor in the middle of the dash. I put some bright led's in the step too.
-
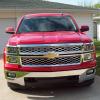
RED TRUCK CLUB I like it. Nice rides guys/gals. Wow the old 86 brings back memories. Before computers took completely over. Had a 2008 short bed like Grumpy's, yes it was red, traded for this 2015, with a few more bells and whistles.


-
Forum Statistics
246k
Total Topics2.6m
Total Posts -
Member Statistics
333,592
Total Members8,960
Most Online
-
Who's Online 7 Members, 1 Anonymous, 752 Guests (See full list)