

turbocdubs
-
Posts
23 -
Joined
-
Last visited
Recent Profile Visitors
1,862 profile views


turbocdubs's Achievements
")
Enthusiast (2/11)
11
Reputation
-
2017+ Reverse Camera Dimmer Fix
turbocdubs replied to turbocdubs's topic in 2014-2018 Silverado & Sierra Mods
alright are you sure you lifted the correct pin and it is taped up and out of the way? because mine did this same thing from the factory. It sucks but I'd pull it back out and double check -
2017+ Reverse Camera Dimmer Fix
turbocdubs replied to turbocdubs's topic in 2014-2018 Silverado & Sierra Mods
Ahh yeah I understand that completely, but to make it quick as possible watch some 2014+ radio removal clips on YouTube and pay attention to where all of the clips are at, grab some electrical tape and a pick walk out to the truck and it can literally be a 5-10 min job- 27 replies
-
- 1
-

-
- reverse camera
- too bright
- (and 2 more)
-
2017+ Reverse Camera Dimmer Fix
turbocdubs replied to turbocdubs's topic in 2014-2018 Silverado & Sierra Mods
Yep that’s all! why wait? Go ahead and do it today! I know sometimes it can seem a little daunting at first but the hardest/longest part is pulling the radio surround off, after that I promise you it’s one of the easiest things you can do. Just take your time and pull evenly after that obstacle comes the connector again just take your time be patient, it’s really simple small picks help a ton (harbor freight 1.99 specials will do the job) you’ll be surprised how easy it is!- 27 replies
-
- 1
-
-
- reverse camera
- too bright
- (and 2 more)
-
2017+ Reverse Camera Dimmer Fix
turbocdubs replied to turbocdubs's topic in 2014-2018 Silverado & Sierra Mods
Hence the (2017+)- our 16 works perfectly normal requiring no mods -
2017+ Reverse Camera Dimmer Fix
turbocdubs replied to turbocdubs's topic in 2014-2018 Silverado & Sierra Mods
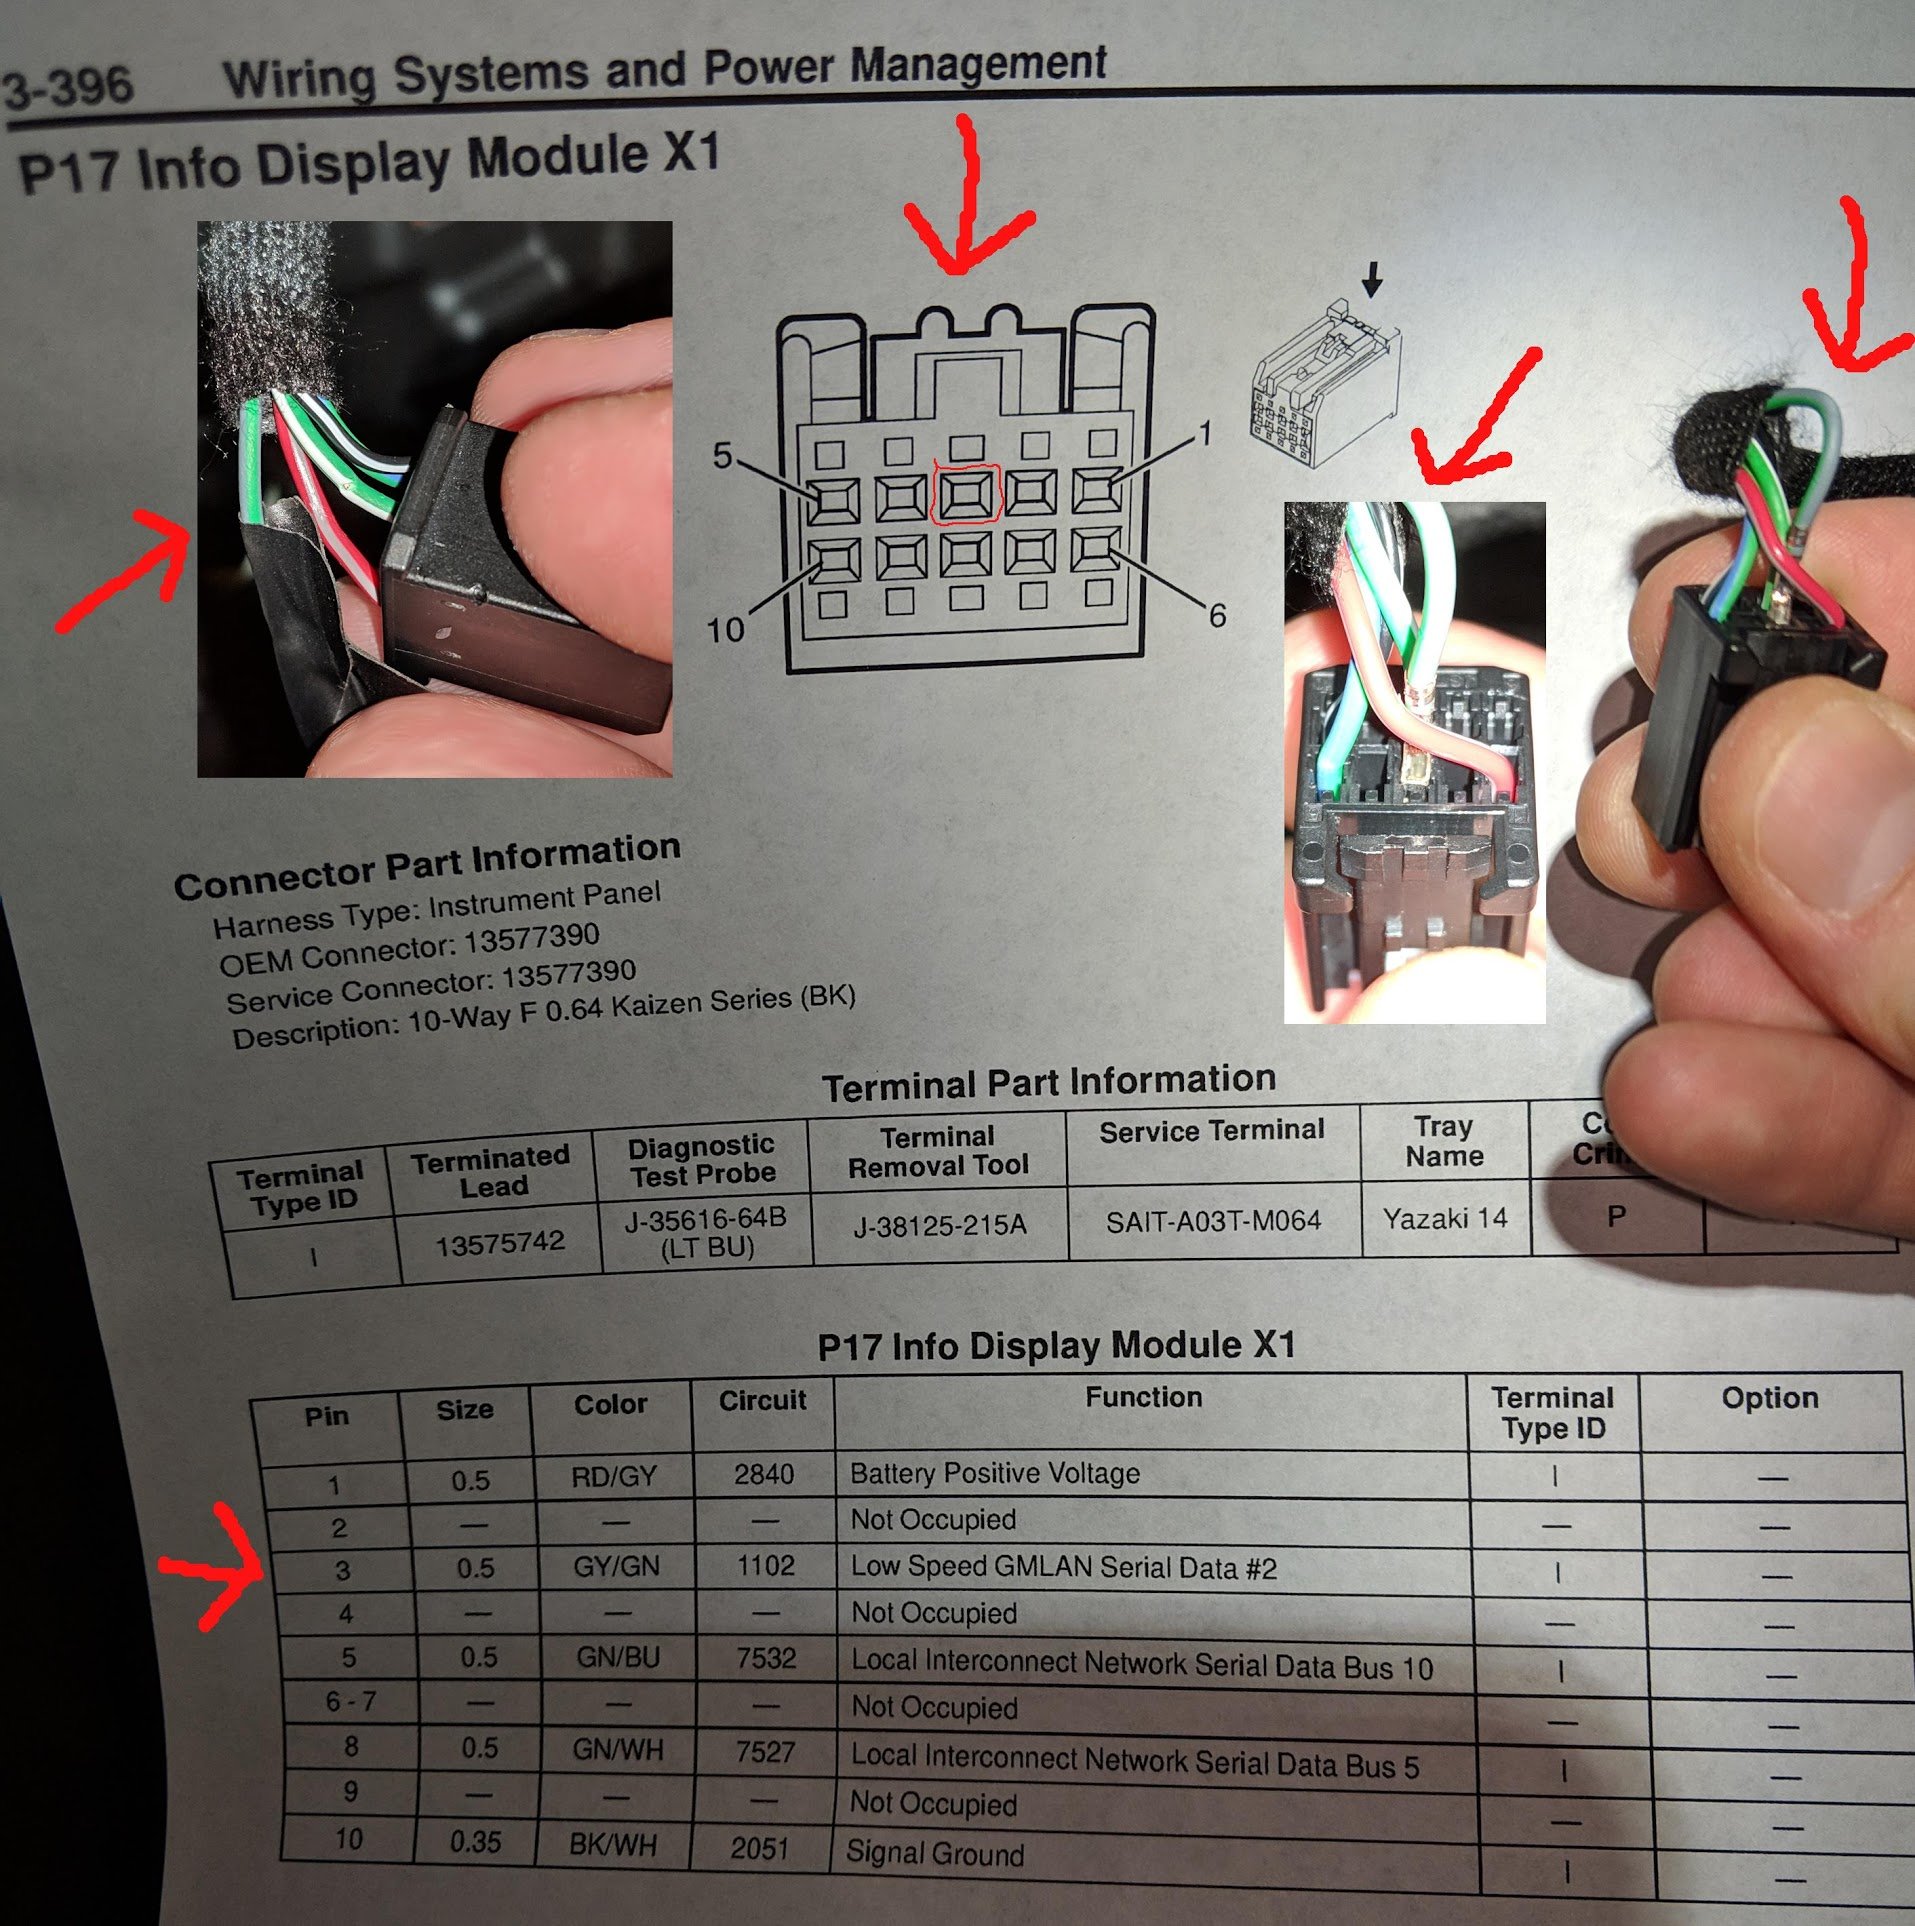
Hopefully the vid works, but that's a full brightness and full dim and can be anything in between with the actual dimmer wheel.. I drove it tonight and noticed when I had the gauges full dim then put it in reverse it never got brighter then dimmed it just stayed dim and I loved it haha its the simple things in life IMG_4926.MOV
- 27 replies
-
- 1
-
-
- reverse camera
- too bright
- (and 2 more)
-
2017 backup camera won't dim
turbocdubs replied to 1990dtgl98's topic in 2014-2018 Silverado & Sierra Mods
try this -
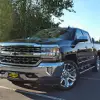
Anyone with a 2017+ knows the back up camera is a little bright at time especially if you like to drive with the gauges dimmed, then you reach over to dim it and nothing happens, this is especially irritating when backing a trailer and you have to use the mirrors. I had this issue on my 2017 and I'm quite certain this exist on ALL 2017-18 Silverados/GMCs/1500s/2500s etc. It has to do with a LAN network GM added, anyways last year I went and did the TSB 17-NA-269 and it did help some but I was still irritated I couldn't use my dimmer to turn it down to match the gauges like on the 2016 we have. So after some digging I found someone just as dedicated in the Colorado/Canyon crowd. All credit goes to (nmz787) on ColoradoFans.com for his hard work and testing. So you can either use some trim tools or just your hands, I'm comfortable grabbing and yanking on the factory plastics without worry, some people are not and the tools make it easier. First remove the radio surround (the part that holds the heated/cooled seat switches if applicable) this has 8 Clips I think 2 above the radio and 2 below the ac controls then one on each corner. You can use tools to go from the corners or you can reach near the upfitter switches (park assist/adj pedals/traction control,etc.) find a edge or lip and pull upward firmly and evenly, some can be a real PITA but possible. Then slowly work around each clip the more you get the easier it gets. Once the surround is removed unclip the heated seat switches if applicable then set the surround to the side. Now to the radio LCD Panel, it has 4 bolts and 2 clips in the middle holding it in. remove the 4 bolts and start with the middle of either side of the panel (left or right) an again firmly but evenly pull out on one side once one side is out you can pull out the other side with ease. Okay so now that the LCD panel is out you should see 2 plugs, one are the far right side(passenger side of screen) and one on the left (drivers side of screen) the left is a mini usb, the right is a 10 pin connector. Go ahead and unclip both, no special tools required. Now move onto the 10 Pin plug. this is the hardest part of the whole thing, take out the white pin retaining clip (nmz787 used tweezers, I used 2 picks) once that is removed, lift up the black tab holding the pin in and remove the #3 pin, it SHOULD be a grey and green wire. The connector will show a 1 and a 5 on one side of the connector, in between that is the #3 pin. Remove it and tape it up good and re-insert the white pin retaining clip and plug both connectors back in. That's it, Now time for reassembly. I'm not sure of the voltage inside of that LAN wire so make sure it's taped up and secured just for safe measure. (I taped the terminal and then taped it back against the harness out of the way.) (I don't recommend cutting it out just incase you need to return it to factory for whatever reason.) Once that's secure place the LCD panel back in the clip slots and re-install the 4 bolts. Once those are secured replace the surround by first plugging in the seat switches if applicable then clipping the surround back in, then bam you're done and SHOULD have a fully dimmable reverse camera that follows the dimmer wheel. I hope I explained this well enough for anyone to do. This is extremely easy for anyone to do the hardest part is pulling the those clips out and the white retaining pin. I know this is ridiculous to some and shouldn't have to be done on a 60K truck but it's the world we live in. I also don't know if GM has any updated modules or cameras in 2019 that do this same job for the 17-18 trucks so if you are uncomfortable doing this please check that first but I am very happy with the outcome with my 2017 nothing oddball yet and everything still functions as normal with the wonderful function of a real dimmer not the band aid TSB. I hope this helps others as much as it helped me, after all that's what these forums are for. Good luck to everyone and like always this forum and any forums, it's members, me and "nmz787" are not responsible for any damage that you might do. I've attached the original post on the other forum (I hope that's okay, I don't want to endorse another forum or take credit for someone else's work, I just want to help others as this is a rather irritating issue for a lot of 2017+ owners) Also some pictures showing the "nighttime screens" and full dim https://www.coloradofans.com/forums/201-2nd-gen-electronics-audio-lighting/403329-fixing-2018-reverse-camera-display-too-bright-non-functional-dimmer.html
- 27 replies
-
- 6
-
-

-
- reverse camera
- too bright
- (and 2 more)
-
Intake manifold swap?
turbocdubs replied to Meethead's topic in 2014-2019 Engine, Driveline, & Exhaust
Check the WOT cam tuning, you'll get even more gains up top. alot of power to pick up in the cam tables


-
Forum Statistics
246k
Total Topics2.6m
Total Posts -
Member Statistics
333,517
Total Members8,960
Most Online
-
Who's Online 7 Members, 0 Anonymous, 548 Guests (See full list)