sage55
-
Posts
161 -
Joined
-
Last visited
-
Days Won
1
sage55's Achievements
")
Enthusiast (4/11)
43
Reputation
-
Great tip for sure! I had never thought of that before and then when I took out the tail light to look around I noticed this as well and did the same for my wires! It's certainly an improvement. My only wish was that they had a flood lense on them. While they do light up the night they are more of a throw than a spread. But either way it's a big step up from what it was stock.
-
A massive thanks to both @64BAwagon and @gemarsh for guiding my slow self through this process. It toiok me entirely way to long to "get it" than it should have, but the lights are installed and work great. They are bright, but don't seem to be overly bright where it's effecting the camera at all. I made a few position adjustments this morning, so we'll see how it looks again tonight. I like the slim design as they nearly disappear until they turn on. They are going to make seeing using my mirrors much easier! My tail light was a bit different from yours @64BAwagon as I believe the 2023 AT4's are all LED's so I only had a single plug for the tail light. The plug did have a reverse light of course but I didn't see much room to splice how I wanted or to mount the relay. Instead, I went to the passenger side of the truck and where the tail light harness plugs into the truck is where I put everything. Spliced into the backup wire (light green-ish color) on the wire harness to add my backup signal wire to the relay. I soldered the wires together, used 3-to-1 adhesive heat shrink, then wrapped it with electrical tape and wire loom. I did a minor detour from your drawing, where as I put my grounds all off the relay (similar to how the factory rough country harness did). So for the lights I used their wiring plugs and wire, I just cut the wire MUCH shorter. I then connected the grounds and a 12 awg ground together on the relay and the other end of the 12 awg wire to where the spare tire cable clips to the truck. Power was ran from the driver side battery to the back of the truck. Also in wire loom and with a 10 amp inline fuse. The connectors to the relay are all marine grade and heat shrunk, with electrical tape wrapped around the wire and wire loom. Inside the connectors to the relay were filled with dielectric grease. Besides trying to understand all this, the longest parts of doing all of it was running the power back from the battery to the back of the truck and cutting the factory harness wire. I wanted to avoid this so much and keep putting my clipped up to cut it and then stopping. haha I'm happy with the results and feel I shouldn't have any issues with it at all. Thanks again guys! @Pryme I know this probably wasn't for me, but I use 3M 88 tape myself.

-
Did you also use the solder heat shrink butt connectors for your connection?
-
@64BAwagon you are far too kind buddy. Thanks so much for all your help. I thought I had a spool of 10 or 12 AWG wire, but it doesn't seem the case. So I just placed an order for 100' 12 AWG silicone stranded tinned wire. As well as 100' Dorman 3/8 split loom - all of which should be here on Monday.
-
Okay I'm following you. So relay and wire all in the back and just run a single 12+ from the battery in the front. Will 16 AWG suffice or should I get bigger wire? What came with the original light harness, the ring terminal cables look to be maybe 12 or 10 AWG.
-
Well you and @gemarsh are both correct - the Curt adapter isn't going to work out like I had hoped. I bought it because I really didn't want to cut into any factory wires and I figured I'd have all my connections I needed right there in the adapter or the 5way T - but neither were the case. After posting the info above about the relay, I went back out and grabbed a test light and nope... I don't have power back there as expected. Even putting with the truck running and in reverse I'm not getting anything from the center pin (reverse light). Because no trailer is connected - just like @gemarsh mentioned. And then it hit me, that makes sense, as I just bought a power adapter for my travel trailer camper for this very reason. The factory 7 way doesn't provide the correct power, and after I bought one of these I had lights and cameras working on my trailer again. So I'm returning the Curt T adapter (good thing I haven't cut into it yet). @64BAwagon that drawing very much helps. I'm a very slow monkey and pictures help out a bunch. haha Seriously, this really does help! So I'm thinking I'll mount the relay under the hood, run the power source to the battery and ground somewhere in the engine compartment. From there I'm wondering, would you think I'd be fine running ground and power from the relay all the way back to the lights? This way I could re-use the wire it came with and use their factory plugs on the light themselves. I also have 16 AWG flexible stranded wire I would run from Post 85 to maybe somewhere in the engine compartment (if possible?) or run it all the way back and sadly tap into the factory reverse light on one of the tail lights. I was planning on soldering and heat shrinking any cuts or connections a 3 to 1 adhesive heat shrink, but I also have plenty of solder heat shrink combo butt connectors I could use. To make connections to the relay, I plan on using marine heat shrink spade and ring connectors.
-
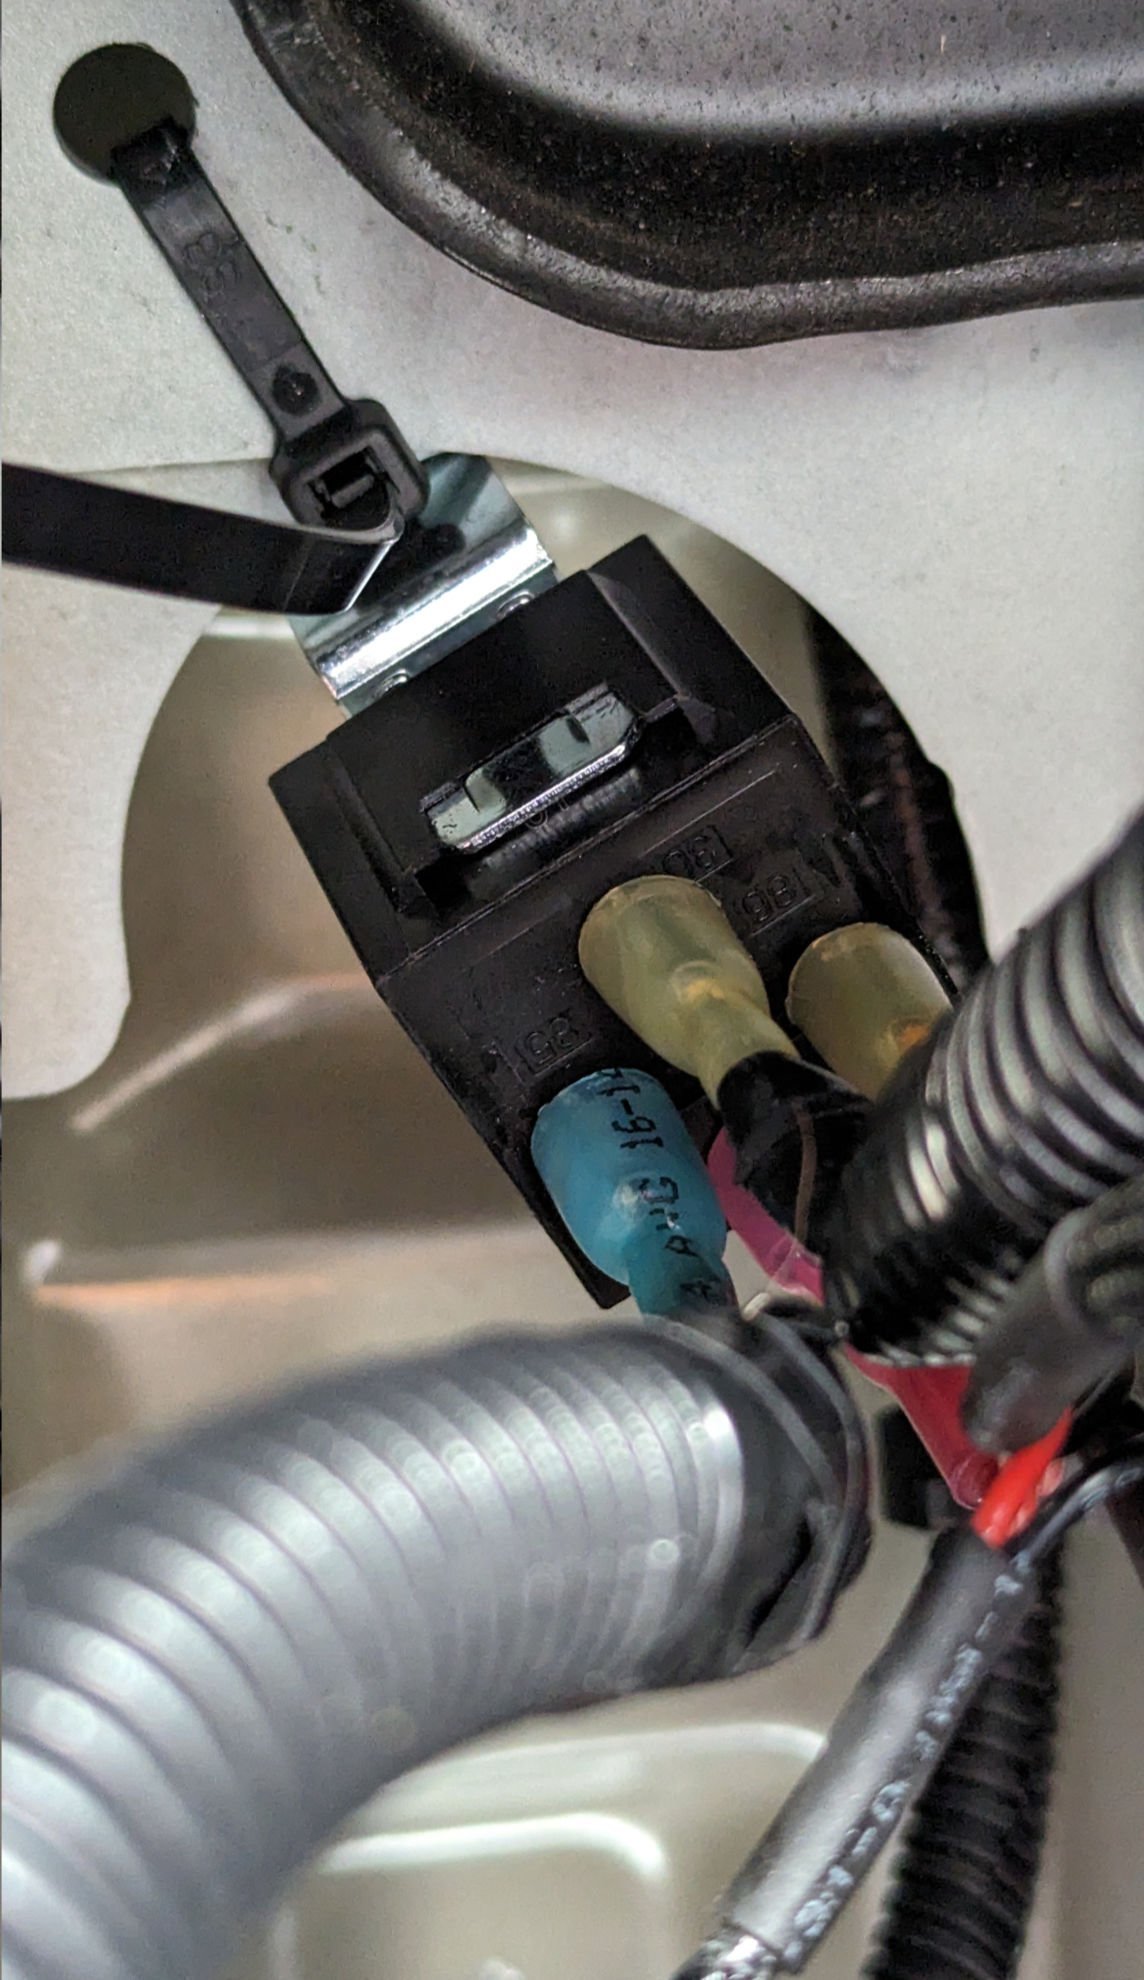
@gemarsh and @64BAwagon I really appreciate you both and the graphic certainly helps as I'm more of a visual learner than a reading one so thank you for this. I do wonder are Post 86 and 85 interchangeable on the reply by chance? Here is a picture of the relay that came with the lights with it's wiring harness removed which looks similar to what your graphic shows, expect there is also a 87A but I'll ignore that. As you see Post 85 is on the right side of the picture and in your graphic says it should be ground. However, if I attach the included wiring harness that came with the lights it's all flipped around. Red wire labels 1 and 2 are the power rings and ground with the ring terminals. 3 & 4 are the positive leads that go directly to the lights and use Post 30. 5 & 6 are the grounds for the lights and go to Post 86 (which is shown as power in your grahpic?) 7, 8, & 9 are the on / off switch that was included in the lights. So it looks like they are using Post 86 for ground and Post 85 as power?
-
I apologize, but I think I might be more confused now. The above is a picture of the harness that came with the lights. The wires to the left are battery positive and negative. The two sets of wires to the right are connections for the lights themselves, and the bundle of wires in the middle is the switch. Below is the Curt T harness. The wires going down are the 5 way connector. How would you suggest hooking this up?
-
Thanks @gemarsh, when you say use the 7 way tee and then start to mention connections to the relay, that's the wires coming off the 5way lead from the 7way T yes? @64BAwagon what do you mean this will tie up the 7way? Will I now be able to use it for my trailer?
-
I'm wanting to add some additional light on the back of my 2023 2500 AT4. So, I've purchased a CURT (56584) 7way T with a 5way plug as well a set of Rough Country 6" slim light bars (97026B) for a side by side. My thoughts were to add the 7way T so I didn't have to cut or tap into any factory wires and then wire the lights to the 5way reverse wire. But after getting the lights from Rough Country today, I'm a bit confused on how I can do this. The light bars come with a wiring harness that includes a relay, two wires plugs for each light, a battery +/- leads and a on/off switch (which I don't want since I don't want to turn them on/off by switch but when the truck is in reverse). Any suggestions on how I could make this work?
-
Yeah they told me the same thing about being the largest volume. I have no way to confirm that, but after seeing their lot size (it's HUGE) and the fact they have SOOO many trucks (both 1500's and 2500's) I can only guess they aren't lying. I can't see GM sending them tons of trucks if they weren't moving them. When all the dealers within 200 miles of me, either have nothing or 1-2 AT4's. Sucks to hear no discount on the custom order though. Has RAM built the truck already and you're just waiting for delivery at this point, or have they not even started on it yet?
-
I know this might sound crazy, but Laura says on their website they offer free airport pickup from the St Louis airport. Based on their Google reviews, several people have taken them up on that offer too. They are certainly a step-up over many other dealers I've dealt with in my long history of buying and trucks and cars. Used interest rates are certainly high. New isn't great but it's a lot better than used. GM is offering 4.69% on new 2500's up to 60 months.
-
I didn't do a custom build, but I just bought a Sierra 2500 AT4 from https://www.laurabuickgmc.com/ and honestly, I can't recommend them enough to other buyers. These guys are outstanding. These guys, more specifically our sales man Ross Mandernach, were amazingly easy to work with. Zero pressure, no hidden costs, no gotchas, no crazy up charges that I was getting from other dealers. Laura GMC was the only dealer that had a huge selection of AT4's. Most dealers have 1-2 and others had zero but a couple in transit that they would have loved for me to buy before it arrived. Laura had 29 AT'4 as of just a few days ago and nearly as many Denali's. So, not only being a fantastic process. I also got my AT4 for nearly $6,000 off MSRP. @pr3dict I don't know where you're coming from but if you're up for a drive check these guys out. I just checked this morning on carguru and autotrader and only found 2 dealers that are selling under MSRP, but those were only $3,000 off.
-
Headlight replacements for 2011 GMC Sierra
sage55 replied to sage55's topic in 1999-2013 Silverado & Sierra 1500
I'd like to be under $500 for new headlight assemblies to replace these old foggy lenses. Well the headlight assembly is really foggy and needs to be replaced. So I'll be looking at more than just LED bulbs. -
The headlights in our 2011 GMC Sierra 1500 are pretty worn out and foggy. So we're looking to replace the headlights with something new and not sure if I should go with stock GMC headlights or if there is a quality aftermarket option? Anyone have any suggestions?