Search the Community
Showing results for tags 'remove'.
-
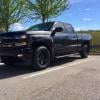
I did a thread a week ago on pinstripes I figured out they are painted on pinstripes not decal. I took eraser wheel to them and it didn't do anything. Is there a way to take off painted pinstripes off without damaging paint? Also how do I know if they are under clear coat?? Did they do many chevy trucks with painted pinstripes. It's a 2016.
-
Our 2015 Yukon Denali we just bought with 101k miles on it, it rides a little rough. We have driven a tahoe before and it hasn't felt this bad. After doing some research I am finding out the magnetic ride suspension goes bad pretty quickly and becomes a rough ride. I saw somewhere that some people were removing the magnetic ride suspension on denalis and replacing it with the regular suspension thats on the lower trims of yukons and tahoes. Has anyone here done this? If so any issues caused by doing this? Also if anyone has done this, I would be interested in finding out exactly what parts are the best to swap to the regular suspension (part numbers etc.), as there are many different part numbers for the same shocks on gm's parts website, wouldn't know exactly what to start with when it comes to converting the magnetic ride back to standard. Thanks.
-
Here is a 2014+ GM 1500 HOW TO: Remove Fuel Injectors If you haven't already look at the HOW TO: Remove the Air box and the Intake Manifold topics Disconnect Battery terminal remove air box assembly remove intake manifold release any built up pressure by unscrewing the fuel filler cap. Remove the foam insulator pad Disconnect the Fuel injector connectors Remove mounting bolts on fuel rail. Remove fuel rail with injectors Using snap ring pliers remove the ring around the injector remove injector replace with unnecessarily high flowing injectors Have fun!! If these are helpful let me know what guides you'd like me to post.
-
Always Start with disconnecting Battery Terminal. REMOVE AIR BOX ASSEMBLY. Disconnect Vacuum push connections A's. Unscrew Air Box from Throttle body. Pull away from Manifold. 4. Unscrew MAF using Torques bit. 5. Pull up on red tab on MAF. Press and pull up to remove. 6. Unscrew C-clamp on filter box and remove assembly.
-
I'm planning to have my chrome bumpers powder coated to match the black truck but I'm wondering how involved this is... looks like a lot of plastic to take off the the rear bumper alone. Anyone able to tell me how to go about stripping them?
-
Hi all, Next weekend I am going to be replacing the bed on my wife's 2007 Sierra 1500 (115k miles). The old one is rusty, and I picked up a new one for a amazing deal. while the bed is off, ill clean up the frame. I have been researching this, however I still have a few questions, I hope you guys can help me with: Are there 4 or 6 bolts? I can only find 4. Is it worth replacing the fuel pump? What Size are the bolts? Do I have to remove the bumper? Is this a fairly quick job? Thanks!
-
(Pictures are not uploading properly, I will fix it when I can and put them in the appropriate places in the post) I want to start off by saying, pictures are limited, as the only bolts you need to remove (10 total) are fairly obvious and in your face, the only two that are 'difficult' to find I will explain where they are. I special ordered my truck how I wanted it with every option I needed, but I left off the chrome package because I don't like chrome. But then my dad bought a black LT RCSB and I loved the chrome bumper so I decided I had to have one while I look for all blue color matched (Z71) front end parts. The first part that needs to come off is the plastic trim under the hood, that is on top of the radiator/grille. There are 10 push-pins that hold it on. I used the second tool in the picture, lift the first stage of the clip, once its up about 3/4 inch, get under the base and pull it completely out. Next, the grille is held on with 4 10mm bolts, these bolts don't do much honestly. Pulling the grille itself out was the most challenging part of the whole job. There are clips in front of each bolt that will slide back in their slots if you breath too hard. On the middle/driver's side clip, there is a plastic locator pin that appears to be nearly impossible to leave intact and remove the grille, so I cut it off flush - there are enough pressure clips to keep everything aligned. I started at the passenger side and removed the top clip, then pulled the grille out at the middle cross piece. Don't be afraid of pulling too hard, the pressure clips release with some force. Once the grille pull out approximately 1", you can lift the grille up and out. This leaves the bumper. There are a total of 6 bolts that attach the bumper to the truck, 4 accessible now that the grille is removed, the other 2 are harder to get too, one on each side. If you lay down in front of each tire and look up, you will see the brace that secure the bumper. Remove the one 15mm bolt that on each side (leave side with 2 bolts on the frame). Now you can remove the four 18 mm bolts that are in front of the radiator. The bumper should rest on its mounts once all bolts are removed without a risk of falling, but be careful regardless. That will leave you with something that looks like this, kind of intimidating at first. I had to transfer all the appropriate brackets from my back bumper to my chrome one, a little bit of effort but if you have gotten this far you won't have an issue. Then everything goes back together exactly the opposite as it came apart.
-
Howdie folks, I'm fairly new around here. Been creeping for 2-3 weeks and have seen/gotten many great ideas from the threads I have been through. I feel like I've noticed a lot of the deep ocean blue owners doing a total debadge (bowtie as well) and have debated on why other truck owners don't seem to do it as often on the other colors. I've already debadged my doors/tailgate in terms of lettering, but I left the bowtie on the tailgate partially for symmetrical reasons as well as the fear of regretting it. I haven't seen it taken off of many (if any that I can recall) victory red trucks. What would your guys' opinion be regarding the rear bowtie on a victory red Silverado? Take it off, or leave it on??
-
Before you get all judgy I didn't want to remove them let me explain Today I went to a exhaust repair shop, my truck (2010 Silvetado LT 4x4 Crew Cab - 5.3L) was doing some weird noise that I though it was related with the exhaust, I was thinking it was a leak. They checked and told me that my filters were obstructed and because of that my truck wasn't accelerating very good and could cause damage to the manifold gasket and even worst. So they tell me that they will remove them and weld a straight pipe so the air can flow normally and I can gain all the power back (keep in mind that at that moment I hadn't realize those "filters" were the catalytic converters) after that I decided to install a muffler to improve the sound a little bit. So they finished all the work I was happy with they sound, after leaving the shop the check engine light turned on and I hear the same sound coming from the manifold. I went back and they told I need to replace the exhaust manifold gasket wich I think is okay because my truck is on 150k mile range. So here is my real question: Is my check engine light on because of the gasket? because of the CC? or both? Keep in mind I'm from Venezuela, nobody here care about emissions and about fuel (I can fill my empty tank with 0.60$) my problem is with the CEL and I'm ordering a set of manifold gasket to replace them. Thank you for your time and help.
- 7 replies
-
- catalytic converter
- remove
-
(and 1 more)
Tagged with:
-
Simple question. I am currently wiring in my blackvue cameras and am looking to remove the door sill assembly on the drivers side (not sure if that's the right term). It seems like the whole plastic assembly is just clicked in and can be popped out, but before breaking any plastic pieces, I want to make sure that this would be the right approach. Can someone send me a link to a video and/or instructions as to how to remove the whole assembly? Just so you guys know what I am talking about, I have attached a picture. I am connecting the wires to an external cellink b battery which will be located under the driver seat. Thanks