

tuckin22
-
Posts
48 -
Joined
-
Last visited
tuckin22's Achievements
")
Enthusiast (3/11)
9
Reputation
-
2015 Sierra W/T to no so W/T
tuckin22 replied to 04palass's topic in 2014-2018 Silverado 1500 & Sierra 1500
That sucks there is not an GM part number for the illuminated GMC emblem. Curious to see how the illumination shows through. Did you ever get the backup camera wired up? -
Fuel wheels on 35’s for sale in Oklahoma City
tuckin22 replied to tuckin22's topic in Classifieds (Buy/Sell/Trade)
Bump. Forgot I had these. Went into storage. Still for sale. -
2014 Silverado Regular Cab Interior (OKC)
tuckin22 replied to tuckin22's topic in Classifieds (Buy/Sell/Trade)
Few more weeks parts gone. Updated list. -
2015 Sierra W/T to no so W/T
tuckin22 replied to 04palass's topic in 2014-2018 Silverado 1500 & Sierra 1500
Attached are my particular notes on what I did. The part numbers outlined in red are terminals that I got from Mouser. Blue and orange are comments to myself. In the schematic, blue outlined part numbers are noted there to keep me from having to go back and forth between the schematic and the pinout. I got most from my local dealership. I might have found terminal equivalents to those now; however, I haven't had a chance to order some and try them out. So, no clue on the loose terminal part number yet. On the X50A X4 to X50A X4 portion, it looks really weird, but apparently what happens is a jump from one circuit to another has to occur. I was able to find the mentioned open spot in my trucks build. So I used those mentioned locations. I will say I do think that a later year mentioned another location, but that left the X4 connector and went into the X3 or something like that, and mine didnt have that pin in the fuse box. I have had this running for a handful of months now without issue. I didn't take any pictures of the locations that all this stuff happens as I am bad at that. May go get a picture of the X138 to show you what to look for. Hope this all helps ya. BACK UP CAMERA NOTES.pdf -
2015 Sierra W/T to no so W/T
tuckin22 replied to 04palass's topic in 2014-2018 Silverado 1500 & Sierra 1500
Nice!! About to do the 16+ Silverado LED taillights myself on my 14. Going to run them without the resistors and see if WAMS can program the BCM to delete the hyper flash and whatnot. Good luck with the OEM camera. I added it as well. Wired it up like factory. I had the runs of wires from the X63A to the X138 but was missing a couple runs of wires between X138/X50/X275/HMI. Was pretty simple once I got some terminal pigtails. I like to find the bare terminals so I can have nonstop runs without wire splices, but couldn’t get anyone to help figure out the bare terminal part numbers at some locations. Side note is you likely have X138 since it is a WT, the rest of the trims I believe have the X185 which has the interior runs and the chassis runs. So you may need to run those. Will have to find my markups to the schematics if you want them. -
2014 Silverado Regular Cab Interior (OKC)
tuckin22 replied to tuckin22's topic in Classifieds (Buy/Sell/Trade)
Bump. Really want this gone this year. Give some offers. -
2014 Silverado Regular Cab Interior (OKC)
tuckin22 replied to tuckin22's topic in Classifieds (Buy/Sell/Trade)
Bump. -
2014 Silverado Regular Cab Interior (OKC)
tuckin22 replied to tuckin22's topic in Classifieds (Buy/Sell/Trade)
Bump, parting everything out now. -
2014 Silverado Regular Cab Interior (OKC)
tuckin22 replied to tuckin22's topic in Classifieds (Buy/Sell/Trade)
Bump Parting out. -
2014 Silverado Regular Cab Interior (OKC)
tuckin22 replied to tuckin22's topic in Classifieds (Buy/Sell/Trade)
Bump. Parting out. -
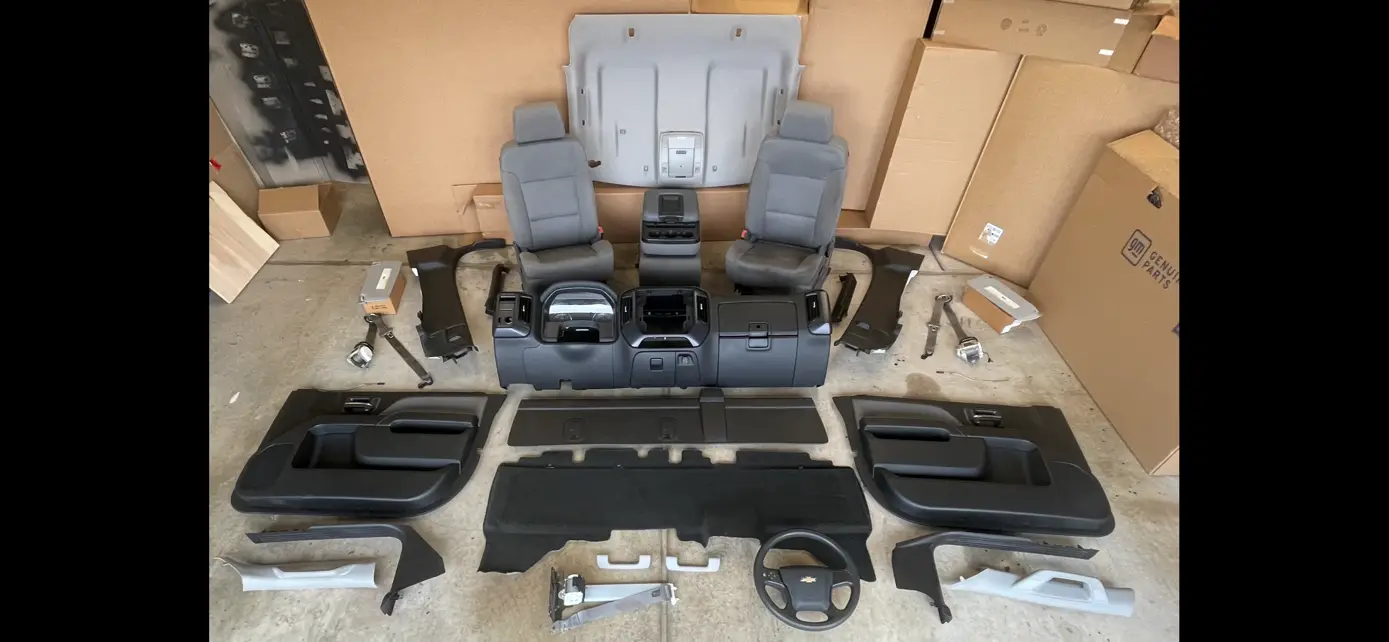
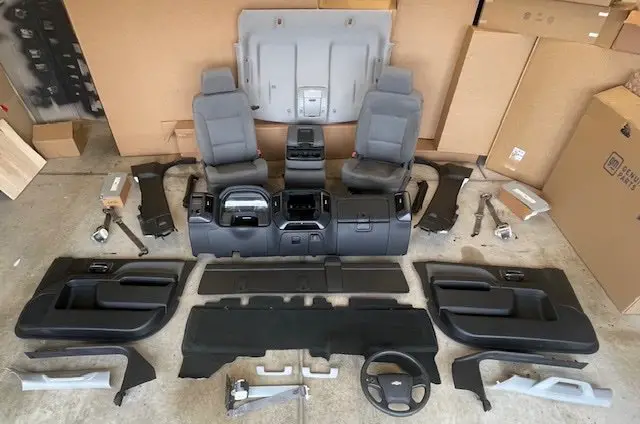
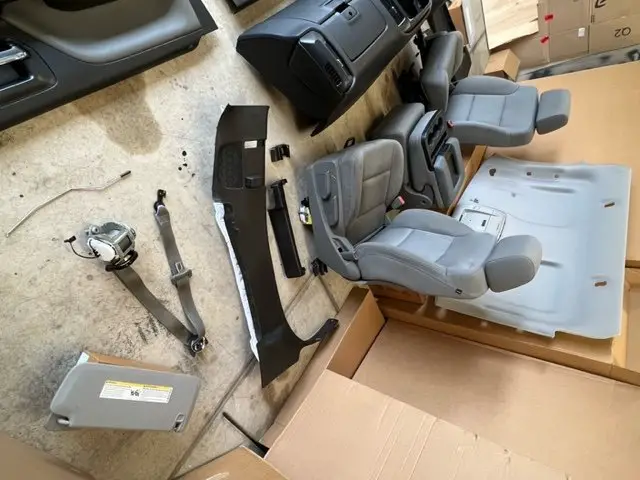
Hey All, Parting out interior from a 2014 Regular Cab Silverado 1500 work truck. $50-Driver B pillar 23426681 Will include with driver side, Passenger B pillar 23426684 Sold-Driver A pillar 23483726 $35-Passenger A pillar 22817382 $35- Back wall carpet 23471733 $70-Jumpseat belt 22816979, now 19301676 Sold-Cluster 23448509 $50-Back wall panel 23455514 Sold-Both door panels 23201060 and 23201064 Sold-Driver seat belt 23472516, now 19330298 Sold-Passenger seat belt 23472512, possibly now 19330295 $25-Passenger door sill 23433433 $25-Driver door sill 23433430 $300-Airbag 23204334 $80-Steering wheel 23134349, possibly now 84401281 $150-Headliner 23153865, possibly now 23413397, will include coat hooks and overhead console $25- Driver seat rail cover 23427385 and 23204162 $25- Driver seat rail cover 23427380 and 23204167 $25-Both Assist handles $100-Both Visors Sold-Dash. Would include knee bolster, cluster visor, fuse panel covers, glove box, speaker panel/defrost grille, etc. OBO as well. Might have missed some items shown in pictures. Did a High Country interior swap so old interior has to go. What is shown in the overall picture is everything we have. Minus seats. Should fit 2014-2018 regular cabs. Local pickup preferred. NOTE: Passenger side B pillar is slightly damaged where the plastic welds are on the backside - Please see picture. I am bad at grading and pricing so if better pictures are wanted, let me know. Plastics are 7-8 out of 10. Cloth is 5.5-6 out of 10. If not picking up local, buyer covers shipping.

-
2015 Sierra W/T to no so W/T
tuckin22 replied to 04palass's topic in 2014-2018 Silverado 1500 & Sierra 1500
So, I know a while back you had a quick markup attached. I found someone had marked something up on here (couldn’t find the thread I came from so apologies if it is biting off whoever did it) that was basically explaining from point a to b, I was searching for something else and thought of this thread here. I haven’t verified it completely as I am not there yet. But thought it might help. POWER SLIDING REAR WINDOW INFO.pdf -
Passenger seat manual to power help needed
tuckin22 replied to tuckin22's topic in Modifications & Accessories
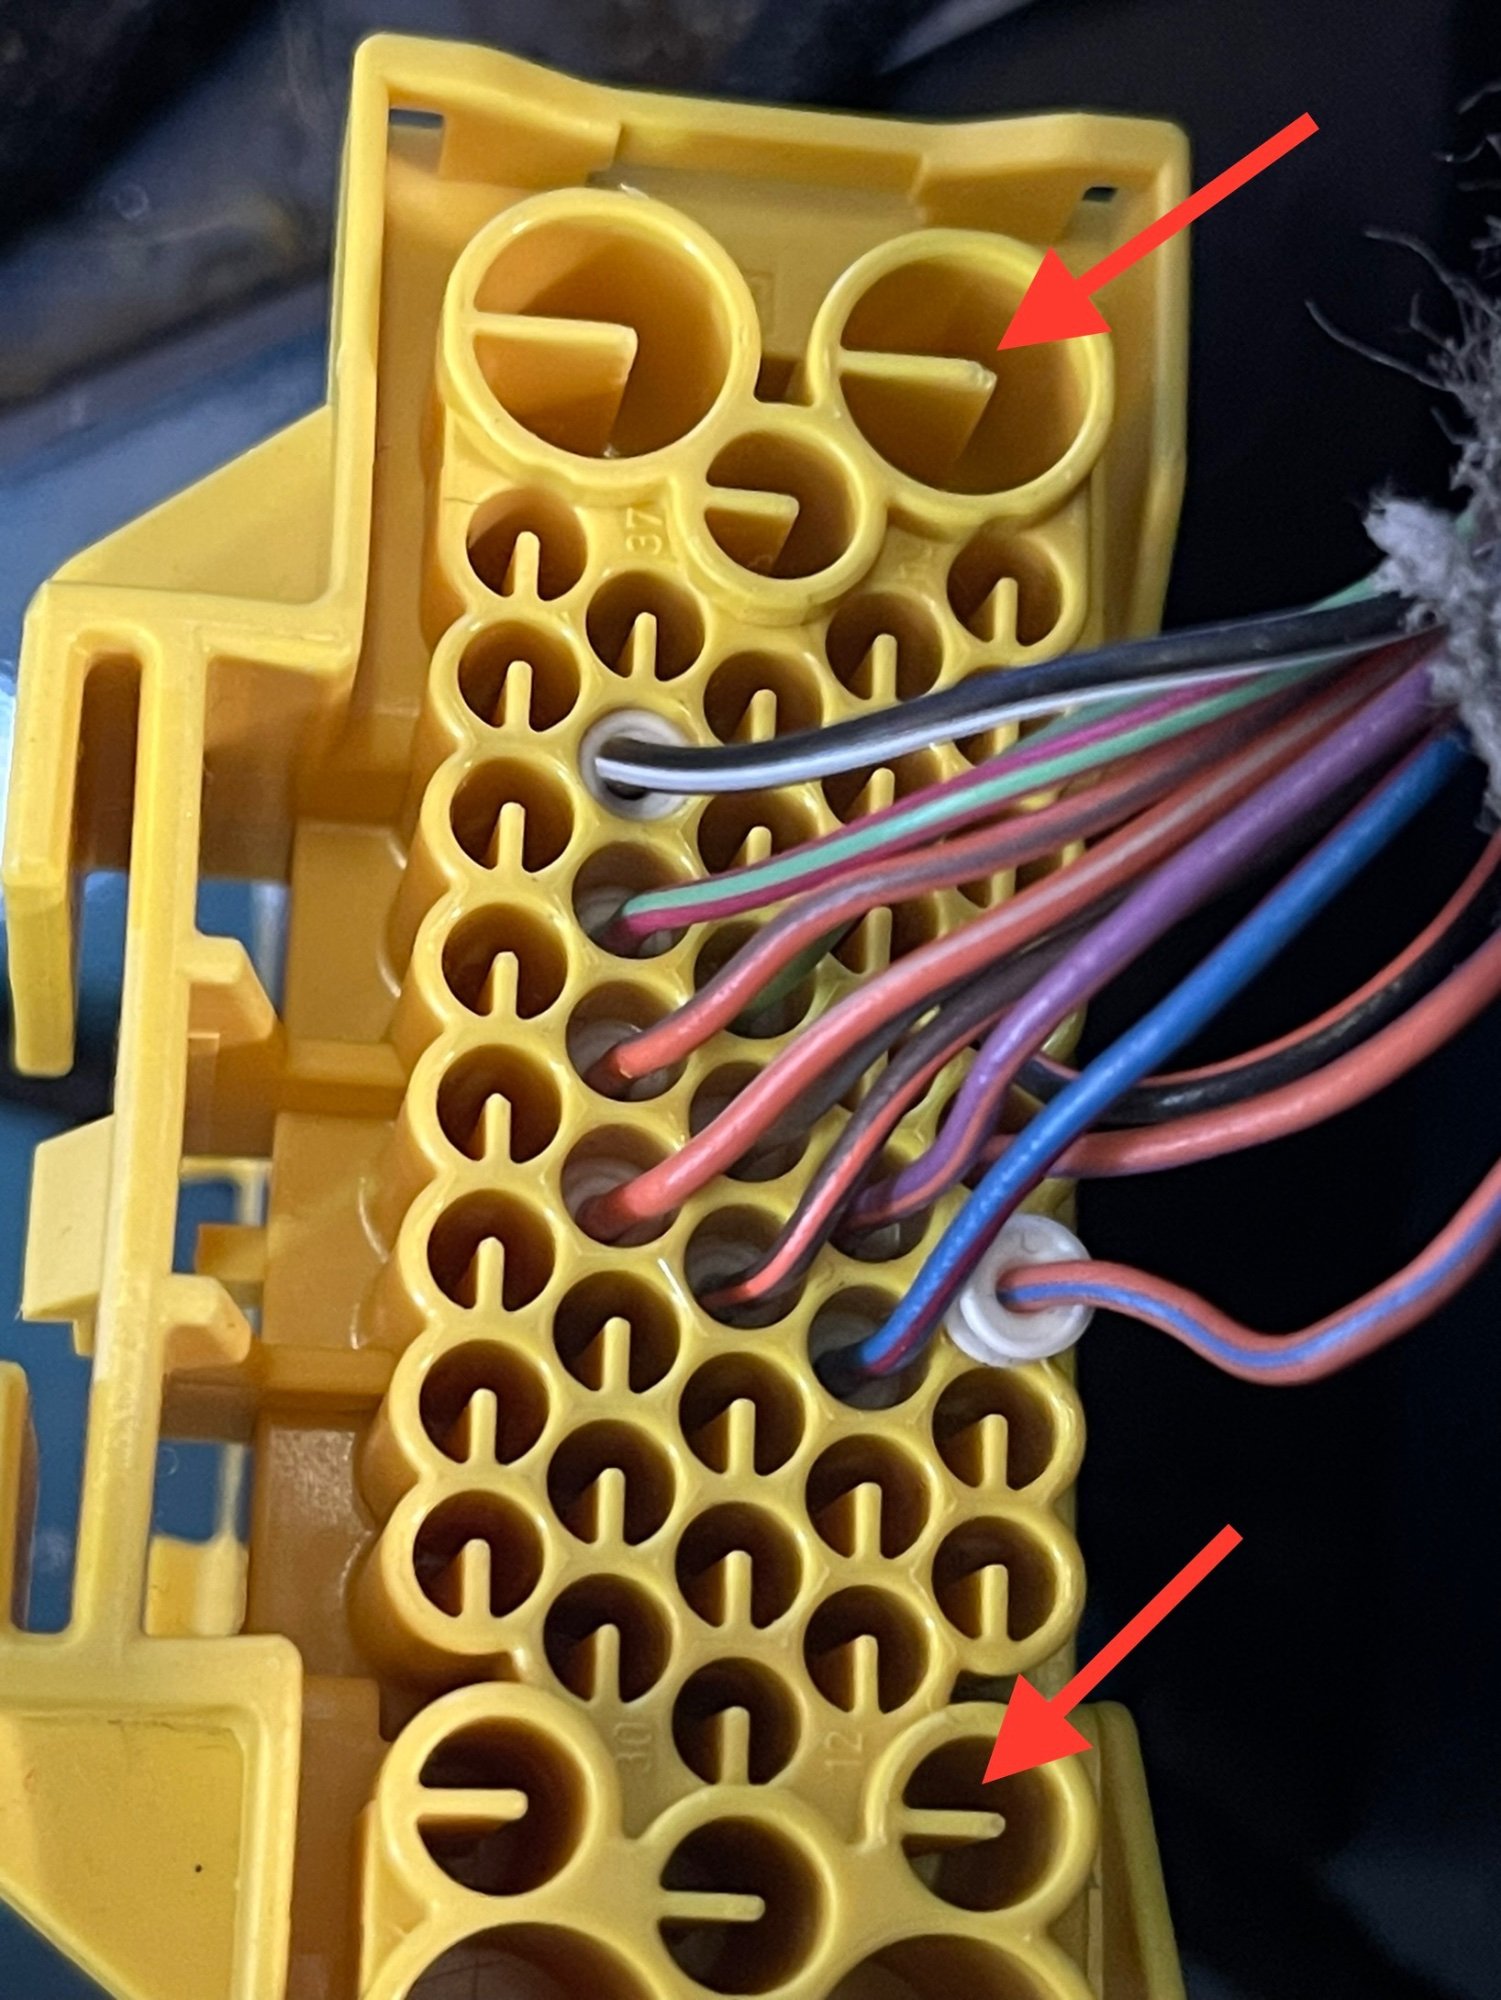
Just wanted to circle back on this and share what I did. I didn’t take any pictures of the process. So I will try to explain what I did best I can. I de-pinned everything and got the connector off. Then removed the black portion inside the connector. There are 4 tabs that hold it in. I had to push them away from the black portion then pull on the purple tpa. See first picture. Once I got that out, the connector housing is just a shell. I used a screwdriver to break off the tab inside and then a drill bit in my hand to clean up the rest of the tab inside the hole. See second picture. Once I did that, I lined up the hole in the drill press and sent it on through. For the power wire in Phil’s kit, 5/32 seemed to work best, for the ground, it was 5/16.
-
Passenger seat manual to power help needed
tuckin22 replied to tuckin22's topic in Modifications & Accessories
Also, noticed that there is a special tool needed to de-pin. Any tricks to de-pin this so I can use a drill press? -
Passenger seat manual to power help needed
tuckin22 replied to tuckin22's topic in Modifications & Accessories
Ok. Thanks for the reply. How much of a pain is it to fully remove the tpa? To give me a good chance to minimize drilling damage. Haven’t found much on that even in the body builder manuals.


-
Forum Statistics
250.4k
Total Topics2.7m
Total Posts -
Member Statistics
342,824
Total Members8,960
Most Online
-
Who's Online 0 Members, 0 Anonymous, 428 Guests (See full list)
- There are no registered users currently online