Search the Community
Showing results for tags 'smittybilt'.
-
This would be the second Smittybilt cover i have owned (The first one i sold to someone who liked it on the spot) I wanted to have a Tonneau Cover again, because i travel a lot and need to have my luggage and other important stuff dry from rain, puddles, etc, and i didnt want to hurt my bank account. I decided to go again for the SmittyBilt Smart Cover because of a few reasons: -I live in Mexico, and ordering a big package gets expensive, not even considering import taxes, so i dont want to overspend -I had previously owned a Smart Cover just like this one (PN 2610032) and i knew what i was going to get -I just need my stuff to stay dry, and thus cover does that perfectly -It gives a much nicer apperance to the truck and hides what you have on the bed What I Like: -Water does not go in the bed -Extremely Easy to isntall/remove and fold/unfold and doesnt require any tools. -Its rather inexpensive, $270.00 US$ on eBay, compared to other covers that can be north of a grand $$$ -Its very decent quality (Considering the price) -I like how it looks on the truck -Its very Durable, my dogs walk over it with no problems -Its very light What I dont like (But can live with) -Its difficult to keep clean, even if you wash it, retains a dusty apparence. -It can be cut with a knife by anyone -Dust can get inside the bed And if youre like me and prefer a video over reading, i made this video about it. Hope you like it, support on my YouTube Channel is always appreciated !
-
- smittybilt
- smart cover
-
(and 2 more)
Tagged with:
-
Hey Guys, After lurking on the forums and finding nothing on how to install a roof tent onto our trucks; I decided to take the plunge and see what it would take to get this done. As these style of tents are up there in pricing, (even more so for those of us in Canada), I didn't want to deal spending money excessively on rack systems that wouldn't be compatible with the tent, so I spoke directly with Smittybilt to see what they would recommend for mounting the tent on our trucks. At first I was considering using one of their contractor ladder racks as they were rated for 1000lbs and offered the ability to mount additional accessories such as light bars, tools and etc. however, their tech-line representative stated that the contractor racks would not only be too wide to properly secure tent but would be limited to having only one position of how the tent opens provided I found or made the appropriate brackets to make it work. Since I was already going into reasonably uncharted territory, I wanted to take the simpler route that even the entry level novice would be comfortable installing using regular household tools with a buddy or two. This led me to the TracRac ladder rack system - as every tent and roof related accessory supplier has led me to believe our roofs aren't rated for carrying weight in general - since it installs in the bed and has cross rails to mount additional items on the sides. In the interest of not making this post redundant, as both kits have fairly reasonable supplied instructions, I will note the key aspects and tips for installation. Installation was performed on: 2015 Sierra 1500 crew with 5’8” box Part numbers used: 1x TracRac 37002 1x Smittybilt 2783 4x 773680 -5” zinc bracket Home Depot Additional tools: 7/32 Allen key and/or Socket 3/16 Allen key and/or Socket Tape measure - preferably one that reads in inches Drill and drill kit Dust pan and brush or vaccum 1-2 additional sets of hands Assemble TracRac: https://c2.rt-static.com/shared/pdf/manufacturers/297/tracrac-pro2.pdf I found it easier to mount the posts first then worry about attaching the crossbars afterwards. The clamps supplied from TracRac are drilled on both sides and the instructions will not make it clear which side is the top or bottom. They are also lined with paint on the inside so before installing the clamps it is a good idea feed the recommended screws into the clamp a few times beforehand just to make it easier to install. The side that forms an inner ridge is the side that goes on top. This will go into the groove found on the posts. The Smittybilt tent has a 47" x57" spread, so be sure to make sure the distance between the front and rear bars posts is around 3.5FT to 3.75FT, this will allow you ample space to properly position the tent onto the bars. The supplied instructions state that for the front the required spacing between clamps must be at least 3” apart, and for the rear 7” apart. I chose to have both the front and rear to have the same spacing since I do not plan on mounting a tool box in the bed of the truck. Once the posts have installed measure lengths of the cross bars to be equally spaced out from the posts as best you can. So that they are evenly placed. I did not install the supplied tie downs on the crossbars yet as I wanted to make sure the roof tent will fit correctly before installing them.
-
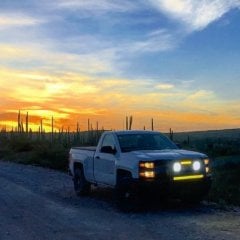
So finally got enough done to her that I felt good about posting a picture. Stripped all the chrome except the headlights and emblem. Installed the Smittybilt M1 (which is a bitch let me say) and the ICI Magnum RT steps myself and got a RC Level 2.5/1 with Discoverer A/T3's 275/70/18 on PROCOMP 7032 18x9 wheels. I'm pretty happy with it all so far.
- 7 replies
-
- 2
-
-
- high country
- blacked out
-
(and 6 more)
Tagged with: