
ifixedit
-
Posts
354 -
Joined
-
Last visited
Content Type
Profiles
Forums
Gallery
Events
Articles
RPO
Store
Blogs
Everything posted by ifixedit
-
 Thanks for the reply, Richard. Besides the gauge on the dash being way over 14 volts most of the time I've measured the voltage with the load tester, a multi meter and a scanner, all show the same. To me when the headlights are off, especially after driving it for a half hour or more there seems to be no reason it would suddenly need to jump to 15.25 volts and stay there. Which again brings up the question should the truck have a voltage sensor on the negative battery cable? Just for the fun and to make a comparison I hooked up the scanner to my 2023 Z71 crew cab this morning and watched the voltage from start all the way to work which is about a half hour. Yes, it did at very first just go over 15 volts but then settled to a consistent 14.3 the rest of the trip and never moved. Marc
 -
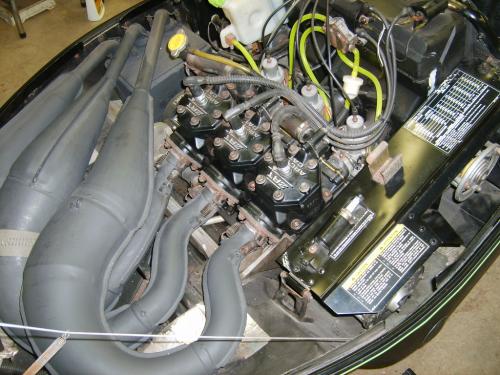
Hello all, It's been a while since I've visited or posted here and I'm hoping someone can help solve a mystery. I picked up a nice clean 2012 'plain Jane' 2WD regular cab HD2500 work truck with the 6.0 'G' vin code (no AFM) last summer. An issue as of late is it seems the alternator is over charging nearly all of the time. When I first start the truck it will immediately jump to 15+ volts and go as high as 15.25 or so and will then settle down some to around 14.8+ volts and never goes any lower but it will still all of a sudden just spike to over 15 volts while I'm driving or sitting idling. I noticed this recently during the day (in cooler weather). I verified the daytime headlights are working which puts some load on the system but it will still often jump to over 15 volts and again never goes below about 14.8. If I turn the headlights on (which also turns the tail lights on), and load the system down some the voltage then drops to around 14.3 / 14.4 volts and will stay there, turning the fan to high along with the lights on doesn't seem to do much more to lower the voltage and it still stays around 14.3 or so which seems normal but it never goes below 14 volts, but as soon as I turn the headlights off it jumps right back up to nearly or over 15+ volts. I've done some research and this particular year is supposed to have a voltage sensor on the negative cable which communicates with the computer to tell the regulator how much to charge. This particular truck does not have one on the negative cable. Further research shows a voltage sensor for this year of truck but all seem to be only for the 1500's and not for the HD2500. What I'm wondering is if anyone can confirm for sure if there is supposed to be a voltage sensor on the negative cable of the HD2500 or not, or if the previous owner possibly removed it for some reason? I though it might be the battery, however the battery is nearly new and load tests perfectly and is not losing it's charge. I've also cleaned up all the grounds going to the engine and including the one on the frame under the drivers side door. The only other idea I currently have is the regulator on the alternator is bad. My concern is if this keeps up I'm going to cook the battery. Any advice would be greatly appreciated. Thanks, Marc
-
Hi all, I saw an old post here from 2014 I replied to on this subject, but thought since it is now 2019 and maybe there's been a few changes that I'd start a new thread and see if anyone here has the answer to this. The wife and I just picked up new trucks on lease, mine a 19 Silverado LD and her's a 19 Colorado. I'd like to be able to activate the backup camera while towing just to be sure things with the trailer, hitch, straps, (nothing is ready to fall off! ?) ect., are OK as I drive. On the Colorado there's a camera icon on the display you can tap while driving and you can then see behind you same as when you're backing up. The dealer claims I can do the same with my LD, however there is no camera icon on the display like there is on the Colorado, and so far haven't been able to figure out if I can even make the camera work while driving or not. I did read on the internet that there's possibly a setting to activate the camera while in forward gears in the 'driver assist' settings. Haven't tried it yet but if anyone here can confirm one way or the other would be greatly appreciated.
-
The wife and I just picked up new trucks, mine a 19 LD and hers a 19 Colorado. On the Colorado you can activate the camera while driving. There's an icon on the display, just tap it and viola, you can see behind while you're driving. The dealer told me on my LD that I could do the same thing but there's no camera icon on the display like there is on the Colorado, and so far haven't been able to figure out how to make it work. You'd think if the Colorado does it then the Silverado would as well? I too would like to view behind while towing as an example and you'd think this would be a standard thing. I read online that there may be a setting in the 'driver assist' settings to use the backup camera while driving forward. I'll do some additional investigating and see what I come up with.
-
This is true, rap on them with a rubber mallet.
-
No problem, I was kind of wondering if that's what you meant. The only other culprit I'd be investigating if all else has failed is to check out your front hub bearings. They are notorious for giving up the ghost right around 70-80K miles, and they do make some very illusive and weird sounds from grinding and clunking sounds to rumbling sounds, squeaking, etc., etc., when they are going out. I've had a couple hub bearings go out now in my 299,000 miles. Another tell tale sign that a front hub bearing is getting bad is the truck will pull to one side or the other when you are braking, you may also have an excessive amount of brake dust on one or both of the front rims as when the bearing is bad it puts things out of alignment when the caliper clamps down on the rotor. An easy way to check for a bad hub bearing is to first jack up your front tires one at a time, get them off the ground so you can grab the wheel and pull back and forth and up and down, if you have any play then it's time to investigate the hub bearings further.
-
No, no, no, steering shaft, not drive shaft. Re-read my post.
-
I know exactly what's making that noise. The 03's (and other years?) have that annoying steering column / steering shaft rattle / clunk that will develop / worsen over time. Yes, it does it over bumps, even on some fairly minor bumps, mine does it as well. It is supposedly due to lack of grease where the steering shaft pieces slip over each other somewhere under the hood. Mine has been more minor so I haven't investigated yet, but a friend had the same problem with his 03. Sorry I don't have all the details but I guess there's a bolt you can take out and slide things back and forth to get the grease where it's supposed to be and you can also then re-grease, put it back together and the noise will go away, although this is reportedly the more temporary fix. I understand there is /are replacement part(s) that fixes the problem permanently.
-
Yeah, sorry to hear this, what a mess. I'd be trying the same, get under the front edge of the key with a punch or better yet some kind of punch with a narrow flat end that fits in the key-way, that key can't be stuck in there that firmly. Unfortunately, it does look though like the end of the crank is pretty boogered up and the key-way itself is ruined. Looks like at some point by the evidence of the JB Weld that the balancer completely spun all the way around on the end of the crank, taking out the key-way in the process and it really messed up the entire end of the crank. Perhaps time for at least a different short block? That or you do a budget repair, find a good used crank, yank the engine, replace the crank, rod and main bearings, timing set, etc.? Either way it's gonna be a hassle at this point.
-
Now that I have a chance to look over your latest picture again this morning on a larger screen, it appears to me anyways that on the later SBC's that they incorporate 2 separate keys, one for the lower timing chain gear and one for the balancer, my old 350 only uses one key for both. In any case neither key are really sticking out high enough to secure the gear or the balancer, and both could be easily sheared which seems to be the case anyways for the balancer, it looks like the key was sheared off at some time in the past and the balancer spun on the end of the crankshaft. Both keys certainly look like they've allowed movement of both the gear and balancer. Also note the gap between the key and the inside of the key-way in lower gear, that gear is ready to shear off the key as well and I can see damage to the gear key way, everything has been moving around and it's all a pretty sloppily assembled situation. Again, if you can get both keys out and clean up the key-ways (and that isn't JB Weld forming part of the key-way) and get the correct size keys fit in, with a new timing set and an undamaged or new balancer as well, you may be able to save it. Keep us posted.
-
Oh great, JB Weld! Someone did the old quickie fix job and sent it down the road. From the picture the key way doesn't look all that bad. Get the lower gear off, get what appears to be the remaining portion of the old key stock out of the slot and see what you have. If the slot is mostly straight and not too damaged you may be able to clean it up with a small file, get a new key, make sure it fits snug in the slot and then closely inspect the slot in the balancer as well. Since it's a lot tougher to change a crankshaft, at least make sure the slot in the balancer is perfectly straight and undamaged. If it's at all questionable find a new balancer. It looks like whoever did the previous lousy repair job was either in a hurry or was being lazy and was too cheap to go get a new key. You may be able to save it!
-
Yeah, I hate to say it, but it doesn't look too good. Looking over the pics again I can see the circular wear pattern out towards the end of the crank snout indicating the balancer has been rotating back and forth on the end of the crank which would take out the key-way. From the marks and pitting it looks like it's been doing that for quite some time and something finally moved enough to cause it to make the noise you heard. Was probably the balancer banging back and forth on the loose key-way. You might get lucky enough to clean up the key way, secure a new key in it, and find a good balancer (as I'm sure the one that came off is junk) and put it back together. If any part of it is questionable though, how long it will last that way is a crap shoot at best. The balancer has got to be on tight and secure as they are what absorbs the rotational forces and pulses of each firing, something a loose or questionably secured balancer will not handle for long.
-
Well, it doesn't appear that it has jumped a tooth, but the chain is very stretched, especially if you can get that kind of slack on both sides of the chain. I'm also looking closely at the key-way and the key-stock on the crank snout, it's hard to tell from the pictures, but both look a bit beat up and out of alignment, I also see what appears to be metal shavings on the key-stock. The key-way in the crank snout where the key fits should be nice and straight and clean with everything lined up, it doesn't appear that way from what I can see, it looks like something there shifted, like the key-stock itself is broke in half closest to the lower gear. Hopefully the end of the crank and key way is not damaged, if it is the thing is a goner or very troublesome to fix at best. Does your harmonic balancer show any damage? Looks to me like there's some kind of damage there and the balancer itself was damaged and or moved out of position and is what was causing the noise?
-
Sounds good, keep us posted on what you find!
-
With any luck at worst you've got a few bent push-rods and nothing more. It wouldn't have even been running any longer if you had pistons slamming into valves and so on, that would take a severely jumped (by several teeth) timing chain so I wouldn't worry too much there, the chain is probably badly stretched and is off by one tooth and you might be missing a tooth on the upper gear. Regardless, now that you're in there you'll want to install a new timing chain and gear set, then take every push-rod out and inspect them for straightness, if you need a few new ones you could always rob what you need from an engine at a junk yard. If you opt for used push-rods just be sure they are the exact same length and that the center of the push-rod is clear from one end to the other so the oil can flow through them. If they sit for a long time the hole in the middle of the push-rod can plug up from the dried up gunk, they're easy to clean up and make like new though.
-
I ask about the backfire because it is probably what caused the timing chain to jump a tooth. Now that I think about it, unless you really know what to do, finding top dead center won't do much for you as you have to know how to determine proper cam lobe lift timing in relation to rotation after top dead center. I'd instead get the timing chain cover off ASAP and get a look at things in there, it will probably be pretty obvious once you get in there. You'll probably find at a minimum a badly stretched chain, perhaps a tooth missing from a gear and so on. If things aren't real obvious, you can then roll the engine over and see if the timing marks on the gears line up or not like I provided in the illustration above. As far as the rocker arm adjustment goes, that's pretty simple. Once everything is back together, simply rotate the engine going one cylinder at a time and just as the lifter for each cylinder's intake and exhaust are beginning to come up on the cam lobe, tighten the rocker arm nut down to zero lash (tightened just enough to get no play between the tip of the rocker arm and the valve stem), this will be your initial setting. Then once you've gone through each cylinder, exhaust and intake rockers adjusting each to zero lash, you can then go ahead and start the engine and do your final adjustment of each rocker. You will want to stop by the auto parts store for some oil deflector clips to attach to the rocker arms so you don't have oil squirting and running all over the place while you make the final adjustment on the rockers. As you adjust each rocker arm nut with the engine running, typically most will call for slowly backing off (loosening) the nuts on the rocker arms one at a time until you hear clicking, then slowly tighten the nuts a quarter turn at a time, pause a second or two, and continue a quarter turn at a time until you've made a half turn total, and you're done. Some will call for the same procedure, quarter turns at a time, and end up at 3/4 of a turn total, I've always gone with a half turn total. In any case, I'm now betting your timing chain jumped.
-
First off, if you've got anything other than perfectly straight push rods, you've got a more serious problem. The easiest way to determine if the push rods are bent or not is to roll them on a perfectly flat surface, if they don't roll or roll with a wobble, you've got problems in the valve-train. I'd venture to guess there's a chance your timing chain has jumped a tooth or two which usually results in bent push rods. Rotating the engine will not tell much as even a collapsed lifter will still move up and down as the cam lobe rotates, but those bent push rods would indicate a more serious problem than a collapsed lifter at this point. This may not be easy for you to do, but you need to find top-dead-center of the #1 piston and compare it to the timing mark on the harmonic balancer against the 0 mark on the timing chain cover if it is so equipped. If not equipped or you can't tell, the timing cover is going to have to come off for further inspection, I'd probably be taking it off for further investigation anyways. I'm not sure on these years, but they may have used the cheap nylon timing gears and a tooth or two may have broken off causing the chain to jump. You'll know when you get it apart. You want to see something similar to this when you get the cover off, scroll down in this link to see the images >>> http://www.chevytalk.org/fusionbb/showtopic.php?tid/198828/ As you rotate the engine, the timing marks on the gears should line up perfectly across from each other. You said this truck has 204,000 miles on it? Did it recently backfire by chance? In any case probably could be very due for a timing chain and gear set. Unless you already have a harmonic balancer puller and the knowledge to do this job, you're looking at taking it to a mechanic.
-
Tough to tell from the video, it sounds like it's idling pretty decently but there does seem to be a slight miss. I think once you get the valve covers off you will find something amiss. Keep us posted on what you find.
-
Viewing the plugs 1,2 and 5 look the worst, possibly some oil fouling but the things are pretty worn out too and their color could simply be due to not firing properly. Yeah, I'd say it was certainly time to change them, they've got some miles on them. I'm going to stick with my earlier prediction, collapsed lifter or broken rocker arm. A couple of questions.... When it is idling, does it make a fairly loud ticking noise, does it especially tick right at start up? If so does the ticking quiet down or keep it up? Does it idle smoothly or is the idle rough? By rough I mean you will feel the entire truck shaking, again especially right after start up.
-
Pull the valve covers and check for a broken or cracked rocker arm, sounds like that's what it is, they can break on a moments notice. If a rod was hammering that hard the engine would have very low oil pressure, would likely be smoking like a steam ship, and probably would have already quit by now, so I doubt it is a rod bearing. The 350 bottom ends are about as bullet proof as they come so it would be very uncommon for anything in the bottom end on these engines to let loose just like that under normal driving on a daily basis, that is unless you had REALLY abused it with some very high and prolonged RPM's over and over which I doubt you've done. If all the rocker arms are fine, it could also be a collapsed lifter. Get the valve covers off, go over each rocker arm carefully looking for one that's loose. If you find a loose rocker arm that appears to be intact, then you've got a collapsed lifter and possibly a bent or damaged push rod as well as things were likely banging into each other with all the excess clearance. Look the parts over closely for damage before you decide to re-use them. Unfortunately a collapsed lifter that refuses to pump up will require removal of the intake to replace it. An old trick to free up the lifter is to add about a quart or so of kerosene to the oil and let it idle for a few minutes, if that doesn't take care of it the intake is going to have to come off to get at the lifter. If the kerosene trick does work you're going to want to change the oil ASAP.
-
Rattle/Clunk in steering column
ifixedit replied to xXZ-71Xx's topic in 1999-2013 Silverado 1500 & Sierra 1500
Pretty common on these years. A friend of mine had the same problem on his 03, mine does it now and then as well. He said the local mechanic told him there's a sleeve of sorts that slides over the steering shaft as it comes out of the firewall. Although I have yet to investigate it to see exactly how it works, he says the sleeve is supposed to have some grease in it and it gets dry and hence the noise. He said there's a bolt that you take out so you can slide the sleeve back and forth to get the grease back in there and that solves the noise. Gonna have to check that out one of these days.
-
Forum Statistics
250.5k
Total Topics2.7m
Total Posts -
Member Statistics
342,870
Total Members8,960
Most Online