

bone450
-
Posts
4 -
Joined
-
Last visited
Recent Profile Visitors
758 profile views

bone450's Achievements
New Member (1/11)
1
Reputation
-
Shutter/Misfire under low RPM and load
bone450 replied to ic3man5's topic in Troubleshooting & Recalls
I’m having similar issue; I take it the cause to the issues have not been determined other than tuning it out. I started getting the shutter in my 2015 5.3l w/ 6 speed at around 83k miles. Light load, light throttle position, from a cold start is the most likely conditions for it to shutter, if it does it at all. I can normally get it to happen around 1,000 – 1,500rpm and 40mph or 60mph range. From a cold start with a slight incline is the most reproducible conditions. Adjusting throttle position will make it go away. A CEL will only show up if you let it shutter/chug long enough so it thinks it’s a misfire. Maybe it is a misfire for all I know. Had it at the dealer twice for this, I told them transmission, they were adamite it was plugs and wires, I was skeptical, but did not have time to deal with it myself. Plugs and wires did nothing, had the same condition on the ride home. Took it back they could not reproduce. Are the handheld scanners worth it or do you need the thousand-dollar items to do any real DIY troubleshooting? I think it’s the transmission (torque converter) but am resisting dumping more money into this thing or the dealer that is guessing the same as I could. -
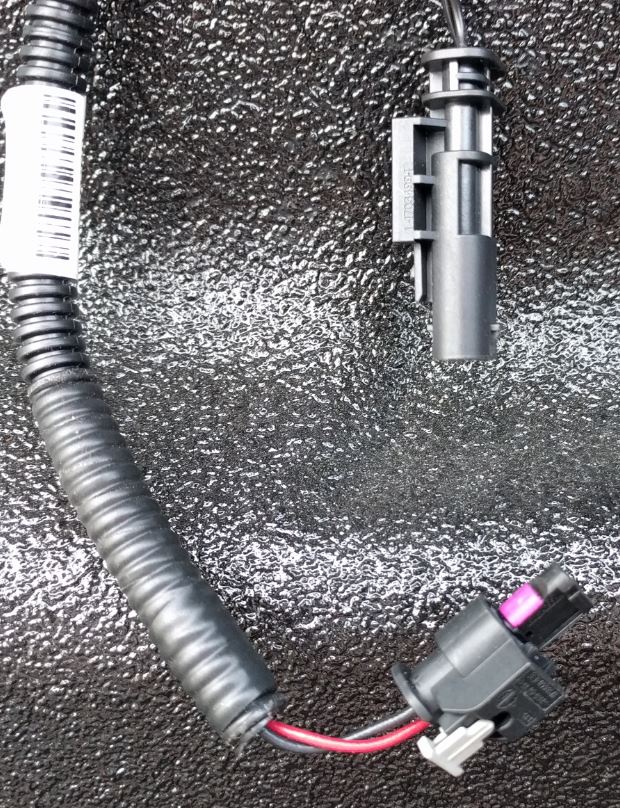
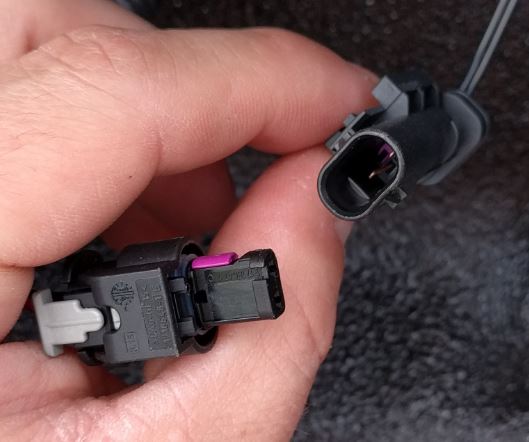
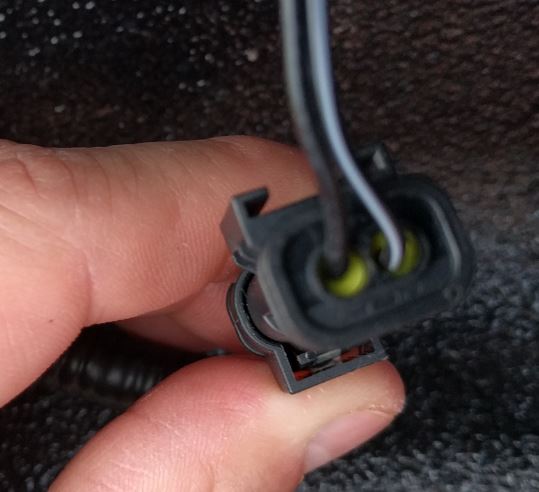
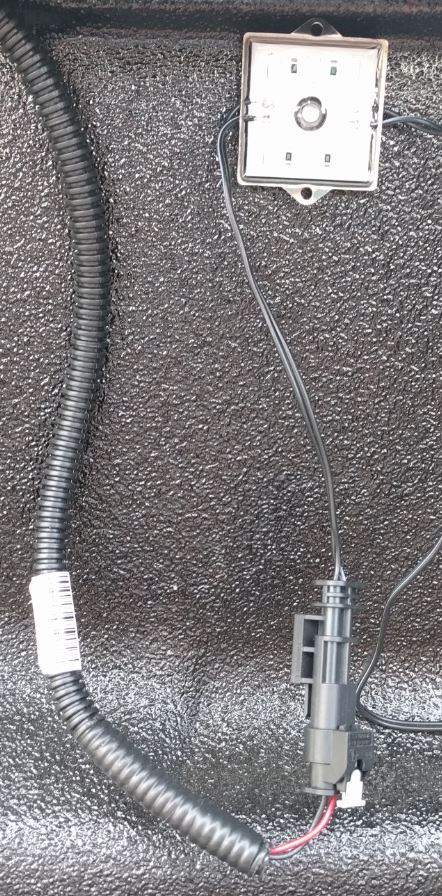
If you buy the $27 harness you get what was pictured previously. A full harness which connects by the spare tire and has connectors for the lights. In this picture you can see the light end of the harness (GM harness has the plastic loom material on it). If you want to connect to the GM harness with a factory connector buy the items I stated previously. Note you may need different contact / pin size and seal size depending on your wire gage and insulation diameter. If you buy the items I mention above this is what you get: To assemble the connector I did the following: Cut the wire to length. Do not strip the wire. Slide the insulated wire through the seal. Strip the wire. Maybe 3/16". Bring the seal flush to the end of the stripped insulation. Wrap the gull-wing crimp on the contact around the seal. This will hold the contact and seal together pretty good before you crimp the wire. I did this with my fingers and finished it up with a needle nose. Crimp the contact to the wire. I didn't have the proper tools so I crimped it a little and then soldered the connections. If using LED's verify what wire you need to be positive and negative. You can stick the pins into the GM harness at this time to verify. Insert the wires into the housing. You should hear a click once fully inserted. I used an allen wrench to shove the wire and seal into the housing. Hope this helps. If you don't want factory connections just cut off the ends and connect how you want.

-
I will get some pictures up tonight.
-
Great info in this thread. Thought I would add a little more. I used the lights mentioned previously: http://m.ebay.com/itm/8pc-Truck-Bed-White-LED-Lighting-Light-Kit-For-Chevy-Dodge-GMC-Trucks-/161940110503?nav=SEARCH I got the gm wire harness# 22878806. The connector housing on the light ends are: TE# 1-1718643-1 found here: http://www.te.com/usa-en/product-1-1718643-1.html I wanted my aftermarket lights to plug into the harness using the stock plugs so I found the mating connector. 3 parts are required, the housing, the seals (2X), and the contacts (2X) (pins). Housing: TE# 1-1703498-1 http://www.mouser.com/Search/m_ProductDetail.aspx?R=1-1703498-1virtualkey57100000virtualkey571-1-1703498-1 Seal: TE# 967067-2 http://www.mouser.com/Search/m_ProductDetail.aspx?R=967067-2virtualkey57100000virtualkey571-967067-2 Contact: TE# 1718758-1 http://www.mouser.com/Search/m_ProductDetail.aspx?R=1718758-1virtualkey57100000virtualkey571-1718758-1 I bought everything from mouser, bought extras just in case I messed up. $10 for enough parts to do 4 connections. Hope this helps.


-
Forum Statistics
250.3k
Total Topics2.7m
Total Posts -
Member Statistics
342,711
Total Members8,960
Most Online