My Leveling kit story.
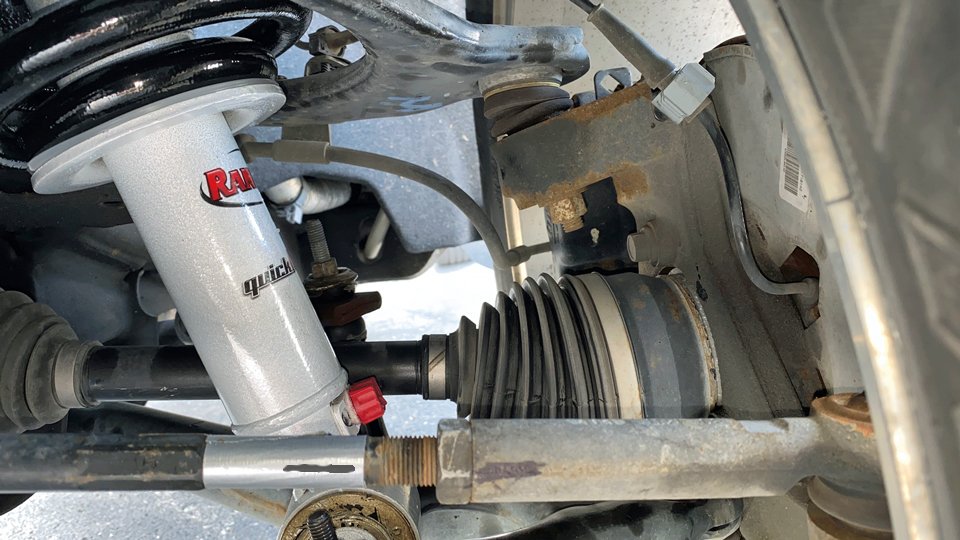
The left rear shock on my 2017 Sierra SLT Z71 was covered in oily dirt from a slow leak. I decided to solve that problem by upgrading to the Rancho QuickLift 2" struts (P/N RS999198) for the front and the Rancho RS9000XL 0" shocks (RS999198) for the rear. I bought all of it from Rock Auto. $569 total.
The Original GM Rancho Shocks and Struts, aside from one of them leaking, were OK but I felt they could have been firmer.
I wanted to post here to add some information on what was involved in the install.
The new Rancho shocks and struts have an adjustment knob with 9 settings. I watched some youtube videos of people complaining about the adjuster knobs freezing up over time. I took the adjusters (they are a red plastic) off and applied DC4 to the inside (Dow Corning 4) which is sort of like silicone sealer that never hardens and it's water proof. Reinstalled the adjusters.
I set all 4 of them to position 3.
I checked the toe in and camber before-hand with the vehicle sitting on the ground and again after using a jack to raise it up 2".
I noticed the toe in angle changed by about 3/16" additional. As truck was jacked up to 2" higher, the steering rod angles changed. This pulled the front of the wheels inward.
In my opinion, the CV angles didn't change that much, it didn't look like it would cause any accelerated wear. The upper ball joint does not appear to be at a severe angle. Perhaps if i drove this off road a bunch it would make a difference but for street operations I think it's fine.
Since I was doing this install by myself I had to disconnect the sway bar links at the lower control arms to get the new struts to go in. If there were 2 people involved I think I could have gotten them in by prying down on the upper arms with a lever against the springs. It only took a couple of minutes to unbolt the sway bar links.
There was no need to disconnect the upper ball joint or the tie rod ends. I went after the 3 strut tower nuts from the engine compartment, that allowed an air ratchet (with extensions) on the 18 mm nuts. The new nuts supplied with the struts are actually 15 mm, the same as the lower bolts.
I lowered the vehicle on to plastic trash bags that were folded in half and had grease sandwiched between the folds to make the alignment check easier.
The initial adjustment to the tie rod(s) was to lengthen them one full turn. That seemed to reset the toe to the original front to back measurements of the tire . I measured the distance at a tire groove on each.
I measured the camber angle with my phone's leveling app and it showed it was still at zero as it was in the beginning.
I didn't worry about the caster.
The steering wheel angle was off to the right a few degrees but the vehicle drove straight at 75 mph. I tweaked the tie rod end lengths 1/8 turn at a time equally until the steering angle was perfect. I think the toe angle is really close but I will take it to an alignment shop this week.
I haven't done a headlight re-aim yet but I lowered them both by one turn on the adjuster, for now.
I like how the truck looks now that it sits 2" higher in the front.