
nmyron
-
Posts
50 -
Joined
-
Last visited
Content Type
Profiles
Forums
Gallery
Events
Articles
RPO
Store
Blogs
Everything posted by nmyron
-
You'd want to check with the manufacturer of the UCA kit... Most I have looked at require a wheel with more offset, or spacers. I have stamped steel control arms, and I ended up pulling my 2" MotoFab kit because I got wheel rub on the UCA at lock, and unfortunately there are situations in my daily driving life where I end up hitting wheel lock, I didn't want to destroy the back of my wheels or front edge of my UCA. I ended up trading in my original 2017 Sierra Elevation for a 17 Sierra SLE Z71, still had stamped control arms. I plan on waiting to do any lifting at all until I acquire a UCA kit and new wheels. YMMV of course, but I don't know if you'll get what you want without a new wheel kit if you go with an aftermarket UCA kit.
-
To @spenpet's point, no matter what way you go, adjust your headlights after simply to make sure your light is going where it needs to be, and you're not blinding oncoming drivers
-
Post Pics of Your 2014+
nmyron replied to jomuehlbauer's topic in 2014-2018 Silverado 1500 & Sierra 1500
Is it iridescent, or is it just printed to look that way? Either way, looks sharp. -
Hey all, been a member on the forum for a while now, just browsing through the "clubs" section and found you guys here from good ol Midwest USA. Figured I'd join up and chime in. Better yet, I found a group of y'all from Ohio! Beavercreek here, just west of Dayton. Bout 50 min from Hilliard in good traffic (I used to live up there).
-
Post Pics of Your 2014+
nmyron replied to jomuehlbauer's topic in 2014-2018 Silverado 1500 & Sierra 1500
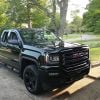
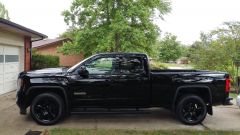
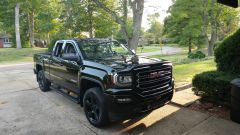
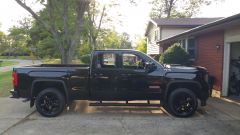
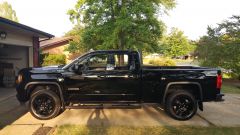
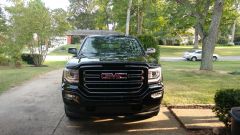
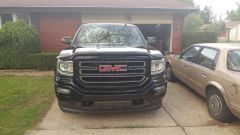
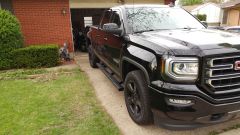
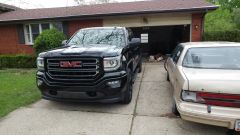
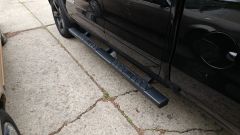
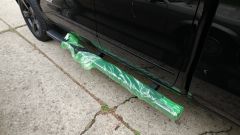
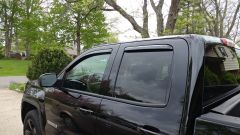
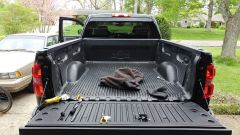
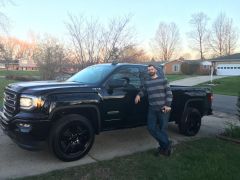
Thought I would put up a new post. A few weeks back I took my 17 Elevation to the dealership I purchased from, just to take a look around. They made me a great offer on a buyback to get me into a demo '17 SLE. More favorable financing terms, much lower payment, and I walked out the door with 12k more truck than I drove in with. Ended up with this here truck, with a much nicer looking interior. I got a factory spray in with this deal. Too bad I had just shelled out to have the full Ziebart treatment done on my prior ride the months prior to getting the swap out At first, was a little unhappy with the chromed bumpers. But after a couple thousand miles, and cleaning bug junk off these, I'm a little happier to be honest. They're a lot easier to keep clean. Otherwise, I got the rest of the same gear I installed on the prior. Some good Star Armor steps from Tyger Auto, the same upgraded LED backup/cargo upgrades, did the one-wire hack to get the reverse and cargo lamps to light up with one another. Need to order some ventvisors to keep the rain out when the windows are cracked on the highway, and will probably take this one down to my local Ziebart shop to have it done up as well. Did the full bugflector on this truck, I had the Hoodflector on the last one, but it's narrower shape and lower slope ended up with me catching a few rocks up high on the glass. The bugflector is a bit more wide/tall, and has a higher angle of attack in relation to the hood, so I'm hoping that will do a better job of deflecting rocks up and away. Also, this go round I did Weathertech No-Drill mudflaps, I didn't want to shoot any screws through steel this time. Even though I did a super-thorough job of rustproofing the holes (several coats of paint over both sides of each hole), I'd rather just not risk rust at all this time. -
From the album: nmyron's '17 Sierra 1500 SLE
-
Traded in my Elevation for a Sierra SLE. Dealer bought it back at a great price, and gave me a hell of a deal on a demo SLE with a few more gadgets than my last ride.
-
-
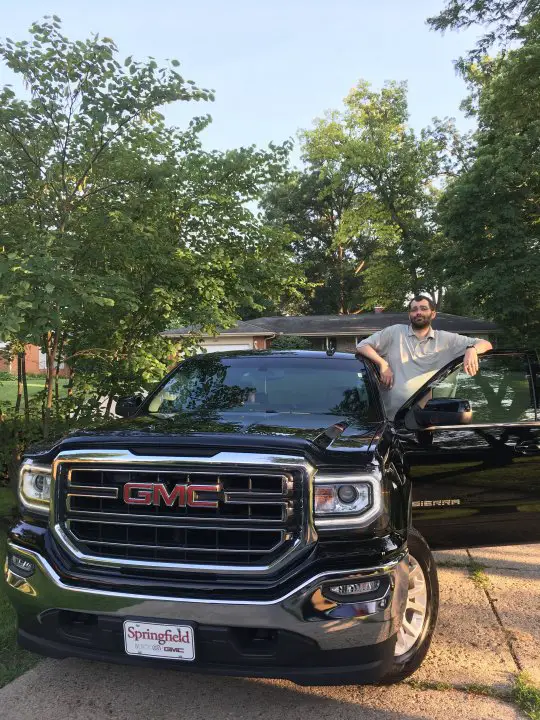
From the album: nmyron's '17 GMC Sierra 1500
-
-
-
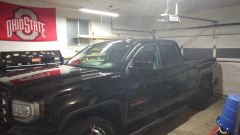
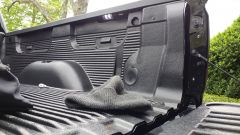
After backup lamp replacement and cargo/reverse hack
nmyron posted a gallery image in General/Off Topic
From the album: nmyron's '17 GMC Sierra 1500
-
Cargo Lights on with Reverse Lights
nmyron replied to El Conquistador's topic in Modifications & Accessories
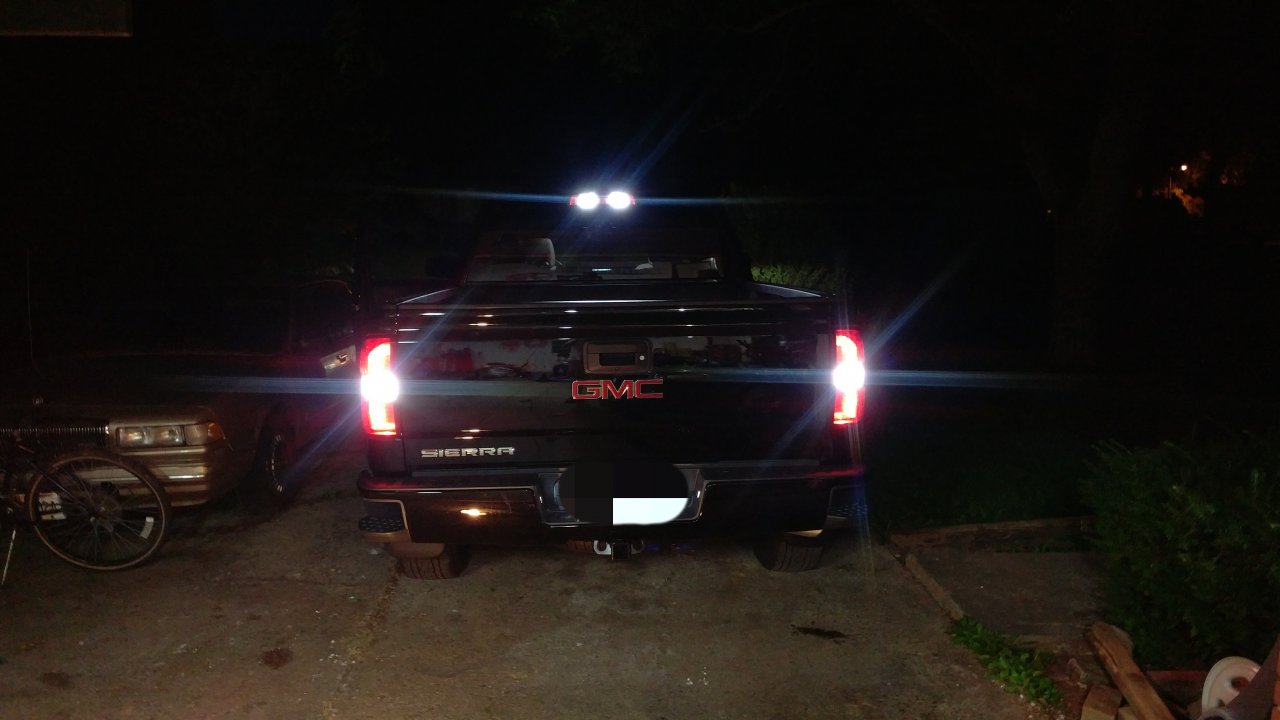
I just have to say thanks to the OP and the rest. Just did this on my 2017. Used a piece of single-strand 24ga hookup I had laying around. I got a nice set of LED backup and cargo replacement bulbs from eBay (link will be below), right after I picked the truck up because (esp in the rain) at night my backup camera was useless. They helped, some. I hit the seller up (had one of the plate lights go out) and asked about some brighter reverse lamps, and for an extra cost he shipped me a pair to try. Much better, and then when combined with the cargo lamp hack found here, it's almost as bright behind the truck in reverse as in front! https://rover.ebay.com/rover/0/0/0?mpre=https%3A%2F%2Fwww.ebay.com%2Fulk%2Fitm%2F182525013600 This link is for the original reverse lamps and cargo bulbs. I am asking the seller for an updated listing for the new reverse lamps and cargo bulbs. Will update when/if provided. Here is a pic of the original upgrade reverse lamps to compare. -
As far as having the lift in, I did 2" MotoFab. Same overall height as the RC blocks, just CNC aluminum instead of plastic. To @ChevyGuy72 - Ride felt very similar to stock. Just a tad stiffer. However, something to consider is that since these trucks have coilovers in the front, you're not going to get much deflection out of them. Those springs are designed to carry the weight of the entire front end of the truck. I noticed while reinstalling that if I applied too much jack pressure to the underside of the lower ball joint (to hold the spindle in place while I reinstalled the upper ball joint nut) it would start lifting the truck off the stands before it began compressing the springs. I have no experience with preload spacers, so I can't speak to if that is contributing to your rough ride. I'd have loved to keep it lifted. As you can see, I took the blocks out and reverted to stock. I ran the lift for a week, and after encountering the rub even when I was trying actively to avoid it, I gave up and decided it wasn't for me. I loved the look, it gave it a much more aggressive stance. But I'm already in the hole enough with the cost of the alignment, I don't want to risk any severe damage to the wheels, tires or control arms.
-
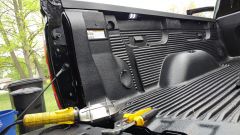
So, here are the photos from the rubbing at lock between my wheel/tire and Upper Control Arm. 2017 GMC Sierra Elevation, 20" stock GMC wheels, stock 275 55 20 Continental ContiTracks. This is the small polished spot on the driver upper control arm after lift kit installation and realignment; passenger shows the same wear in the same place. This very outer lip is polished all the way around the wheel on the inner side of the driver front wheel; passenger is the same.
-
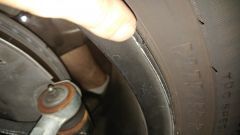
From the album: nmyron's '17 GMC Sierra 1500
polished face of back of wheel from Upper Control Arm contact after front leveling lift installation -
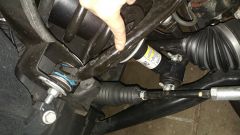
From the album: nmyron's '17 GMC Sierra 1500
Polished spot on Upper Control Arm where wheel/tire rub after front leveling kit installation -
I'm confused, I guess, by your replies. You stated my comment made no sense. A truck is manufactured to a certain specification, including the overall length of the strut at rest, length of the lower control arm, length of the upper control arm, and height of the spindle/knuckle. Combined with steering rack and tie rods these elements all work to create steering/suspension geometry. By installing the block that lengthens the strut, pushing the lower control arm down, requiring the upper to be pulled down as well (effectively creating the suspension lift), this changes the factory steering/suspension geometry by moving the knuckle "down", and induces positive camber which must now be aligned out. To remove that positive camber in my case required that so much negative camber be induced by tightening the eccentric bolts in the upper control arms to near their maximum amount of movement. The result being, at steering lock on a level surface caused my sidewall to rub the front of my upper control arm. However later I did find that in certain circumstances during suspension action while turning that rubbing would also occur on the back edge of the wheel, probably due to sidewall roll. I'd be happy to send some photos when I get back to Ohio from Utah on Sunday. But I guess I'm confused by the fact that your confused.
-
I appreciate your opinion. But I am back to bone stock, and I have no wheel or tire contact at my UCA after removing the lift. The act of lengthening the strut does change the steering geometry. If it didn't, there would be no need for realignment to reset the camber. The act of shifting the lower control arm down with the spacers moves the spindle down, which in turn requires moving the UCA down. All this is a change from the stock steering geometry. When you install these lifts, you have to use a prybar to pull the UCA down so the balljoint reinserts into the upper ball joint through hole in the spindle. This is not necessary without the lift, because the spindle returns to it's stock height. I am able to lift the spindle into place with a jack and pin it in place with out a prybar. Without the lift, geometry returns to normal. As I said, I'm not guaranteeing anything. Simply sharing my experience. Maybe you have had little to no need to drive at steering lock, or maybe your camber kit setup on your truck was a bit different. I can't speak to that. What I can speak to are the polished spots on my UCA's and the back edges of my wheels where my tire and wheel made contact while pulling in/out my driveway. I live on a narrow street, with a double car drive, and have to take the truck to lock to make the turn onto my driveway skirt. This is where I found the rub. Others can also speak to this same experience per the posts I have linked.
-
It's possible spacers would solve it. I just don't really feel like adding a failure point between my hubs and wheels. That's just more work any time I need to get in there, as you'd have to torque the spacers, then torque the wheels... Then the added complexity of figuring out how to stop the hubs from spinning while torqueing down the spacers... Then driving it 500 miles, pulling the wheels to check the spacer torque, then re-torqueing the wheels... That's 2 hours of a weekend that are much better spent elsewhere. I bought a new truck to have something I don't need to fix every few months. If I wanted to keep working underneath a truck I would've kept my last ride :-) There are plate spacers that are available from Rough Country, and there is a place called WheelTech on eBay that sells solid Billet plates in 6x5.5 for GM trucks in 8mm as well. Both are options, but in the thread where these were mentioned, the OP never replied as to if any long term issues were experienced with them. So, without some solid "Hey I've had these for 2 years and they're great" kind of reviews, I'm very leery of installing them. The last thing I need is to be hauling a trailer or going on a trip with my fam and lose a wheel cause my studs sheared off. Also, there is the added complexity of the fact that there is not a shop around that will work with them. If you have spacers, and have to have your brakes done or some such, the shops around me won't re-install your spacers per their company policy. They have to remove them, and leave them inside the truck for you to re-install after delivery. Again, more headache than I'm interested in dealing with. If the spacers are the bolt down variety, it's very possible that I'd have to cut the studs down to fit them under the wheels, resulting in the shop saying they can't put my wheels back on because my studs are too short, as well, since they can't reinstall the spacers before installing the wheels. I'm sure a good suspension lift with new UCA's would do it. Their 4.75" is a combo suspension/body... Body lifts aren't true lifts however, they offer no advantage in the real world except to lift the body off the frame, and require in this case adding brackets to relocate parts from the factory locations. I'd probably opt for the 5" suspension lift. But then again, it's $1300 :-) And I don't need 5" more ground clearance, or the reduced gas mileage inherent in blowing the current setup's aerodynamics by jacking it up that high off the ground and the added underbody positive air pressure. I'd be more likely to pick up some stock-alike wheels with a higher offset if I were to go back to it. But, honestly, now that it's out, I'm not interested. If anything, I'm a little upset at myself for wasting the money in the first place. It just seemed like a good idea at the time, and a cheaper alternative to new wheels and/or a full lift kit. But, as I already knew all too well, cheaper is not always better. Some people are having great luck with this stuff, but I note that the majority of those folks also sprung for new, higher-offset wheels and larger tires. I was hoping to keep everything stock but the front ride height. But that doesn't seem in the cards for me. I bought the Sierra for the look, the mileage, and some other things like integrated trailer brake controller and such. I could've gotten a lifted one off the lot, as my dealership sells models that have lifts pre-installed. Next time I buy, I might consider that instead. That way it's already done for me, and I don't have to get into it on my own. You live, you learn I guess :-)
-
Stock 20's on the stock Contis, rubbed the sidewall on the upper control arm. During the realignment after removing the lift the tech pointed out that I, too, was rubbing the inner rim edges against the UCA as well as JJT suggested his brother was experiencing.
-
Nah. Really I didn't want to vary from stock besides lifting the nose. I like the look of these wheels, it's one of the reasons I opted for the Elevation. I'll just hold out until I can get new rims, if that's an investment I can ever convince the wife we need to make (seems unlikely...)
-
JJT mentions in the below post that his brother is rubbing metal to metal on wheel/UCA with stock 20's and tires. http://www.gm-trucks.com/forums/topic/153363-2014-leveling-kits/?p=2031502 I linked the prior post where I was informed that anyone running the 20's rubs, if they know it or not, or will admit it or not. Here it is again for your consideration. http://www.gm-trucks.com/forums/topic/153363-2014-leveling-kits/?p=2031072 Here is another thread that I ended up locating once I found I was making tire/UCA contact at lock http://www.gm-trucks.com/forums/topic/169320-calling-all-leveledlifted-trucks-with-all-terrain-factory-20s/ I don't think it matters the brand of lift, or the size of tire. No matter what it is, you are extending the length of the strut at least 2" or more. The more you extend the overall length of the strut, the more the wheel will camber out, and the more your alignment shop will need to crank on the eccentric bolts in your UCA to pull that camber out reducing the suspensions overall adjustment range (meaning that if a part begins to wear but is not out of spec it's possible it won't be able to be brought into alignment with the remaining adjustment and you'll be in for early part replacements not due to early wear but due to less fault tolerance). Not only that, but the more you push the suspension down by increasing the overall size of the lift, the more likely it will be that it will induce rub at/near lock I believe. Those UCA's and the suspension geometry are designed to fit inside that wheel in the way it is setup. By lengthening the strut the UCA is forced down similar to if you were to drop a wheel into a hole, except the camber angle of the top edge is pulled closer to the inside to compensate for the lift, reducing the total movement available before contact occurs. In the factory setup when that UCA travels down, the upper edge of the tire would also travel out because it's attached to the hub/knuckle and wouldn't make contact. But since our wheels are pulled in it's like the suspension is always sitting at extension, but they are cambered in to compensate, resulting in premature contact. I'm not guaranteeing you anything, I'm simply providing my experience and findings in my own situation when running the stock 20's and stock tires as well as the findings of others. I wish I had found these same things out a week and a half ago. I would have left things as they were until I could afford new wheels with an increased offset, instead of going through the mess of installing this stuff, paying to have the factory alignment adjusted to compensate, then spending another 2 hrs in my shop to pull it back out and another trip to the alignment rack to move it back to factory alignment. The idea of wheel spacers did not leave me feeling warm and fuzzy inside. Sorry to go on, but there is my $0.02
-
Read my last couple posts. I did the two inch kit from MotoFab. Mind you that's not the 2.5 or 3 from R.C. but it is less height going in the same place. I am pulling mine back out due to tire contact at lock with the Upper Control Arm. And it seems another is having similar issues where in the back side of the wheel is making contact with the UCA. With the low offset of the factory 20's I don't feel running them in combination with a lift is a good idea. You'll likely either rub metal to metal or metal to rubber. Likely more agressively as well since your alignment shop will probably have to adjust your UCA more to compensate for the additional camber angle induced by the larger spacers. So IMHO any lift on the stock 20's is not going to do you well. You might be better off saving your pennies to get a higher offset wheel and tire set prior to installing your lift kit. And TBH I wish someone else had posted these same statements up-thread as it would've saved me the investment in cash and time to install/remove this stuff and have it aligned a total of three times now. I only found another thread about rubbing on the stock 20's well after I was already invested in the installation, and only the other day did someone suggest that it is the secret shame (effectively) of all lifted factory 20 owning Silvy/Sierra owners out there that they too rub at full lock. See the below linked post. http://www.gm-trucks.com/forums/topic/153363-2014-leveling-kits/?p=2031072 At least, if you do opt to proceed, you're well forewarned of the possible outcome and likely damage to your tires and/or wheels.
-
My tire sidewall is what is making contact. The paint on the inside of the rim is still intact. But then again, I felt it the third day I had the lift on and have been making a concerted effort to avoid steering lock at all costs until I decide what route I want to take to solution. The choices as I see them are 1. New wheels (not likely) 2. Remove the lift 3. Install some wheel spacers I'm torn between 2 and 3. I like the lift, but since installation, finding this issue, and subsequently loading the bed up and seeing the rear end squat and the resulting idea of 'needing' an AirLift kit to overcome this or lifting the rear to instill more of the rake I was trying to do away with... I'm thinking it's doing more overall harm than good. I have a 6 month warranty on my alignment, so I am considering just pulling it back out and putting the stock bolts and clips back in and resetting it to factory spec alignment. Not to mention the fact that to get it 0'ed out for toe and camber they had to pull most of the adjustment out of the UCA's... So when the suspension begins to wear it will be extremely fault intolerant; there is so little room to adjust the alignment left that if things wear even slightly between rotations/alignments, it seems unlikely there will be room to adjust it out. All of that being said, I am pretty sure I just talked myself into removing it tonight. Hear that??? It's the sound of a $40 lift and $100 alignment being flushed down the toilet...
-
So I was just able to confirm that on the stock 20's with the 2" blocks I am getting wheel rub against the upper control arms. Has anyone else had this issue??
-
I did the MotoFab 2" level kit up front on my '17 Sierra 1500, and I have had it in for just over a week. I'm getting some slight wheel rub on the left when at left turn lock. After reading through I'm thinking this shouldn't be. The guys at my local alignment shop had a helluva time getting it aligned. Took two trips before the camber and toe was right, and upon getting camber/toe dialed in my cross caster is out one degree to the right side. -0.4° left and +1.4° right. Any advice to be had? This is an Elevation Edition sitting on the factory 20"s with the factory 275 55 20 Conti's Edit: I guess -0.4 and 1.4 is really 1.8 huh...

-
Forum Statistics
250.4k
Total Topics2.7m
Total Posts -
Member Statistics
342,833
Total Members8,960
Most Online
-
Who's Online 3 Members, 0 Anonymous, 323 Guests (See full list)