Jump to content

pmot1200

Member
  • Posts

    20
  • Joined

  • Last visited

Profile Information

  • Name
    Tom
  • Location
    Maryland
  • Gender
    Male
  • Drives
    2017 Silverado Dbl Cab Z71

Recent Profile Visitors

1,991 profile views

pmot1200's Achievements

Enthusiast

Enthusiast (2/11)

5

Reputation

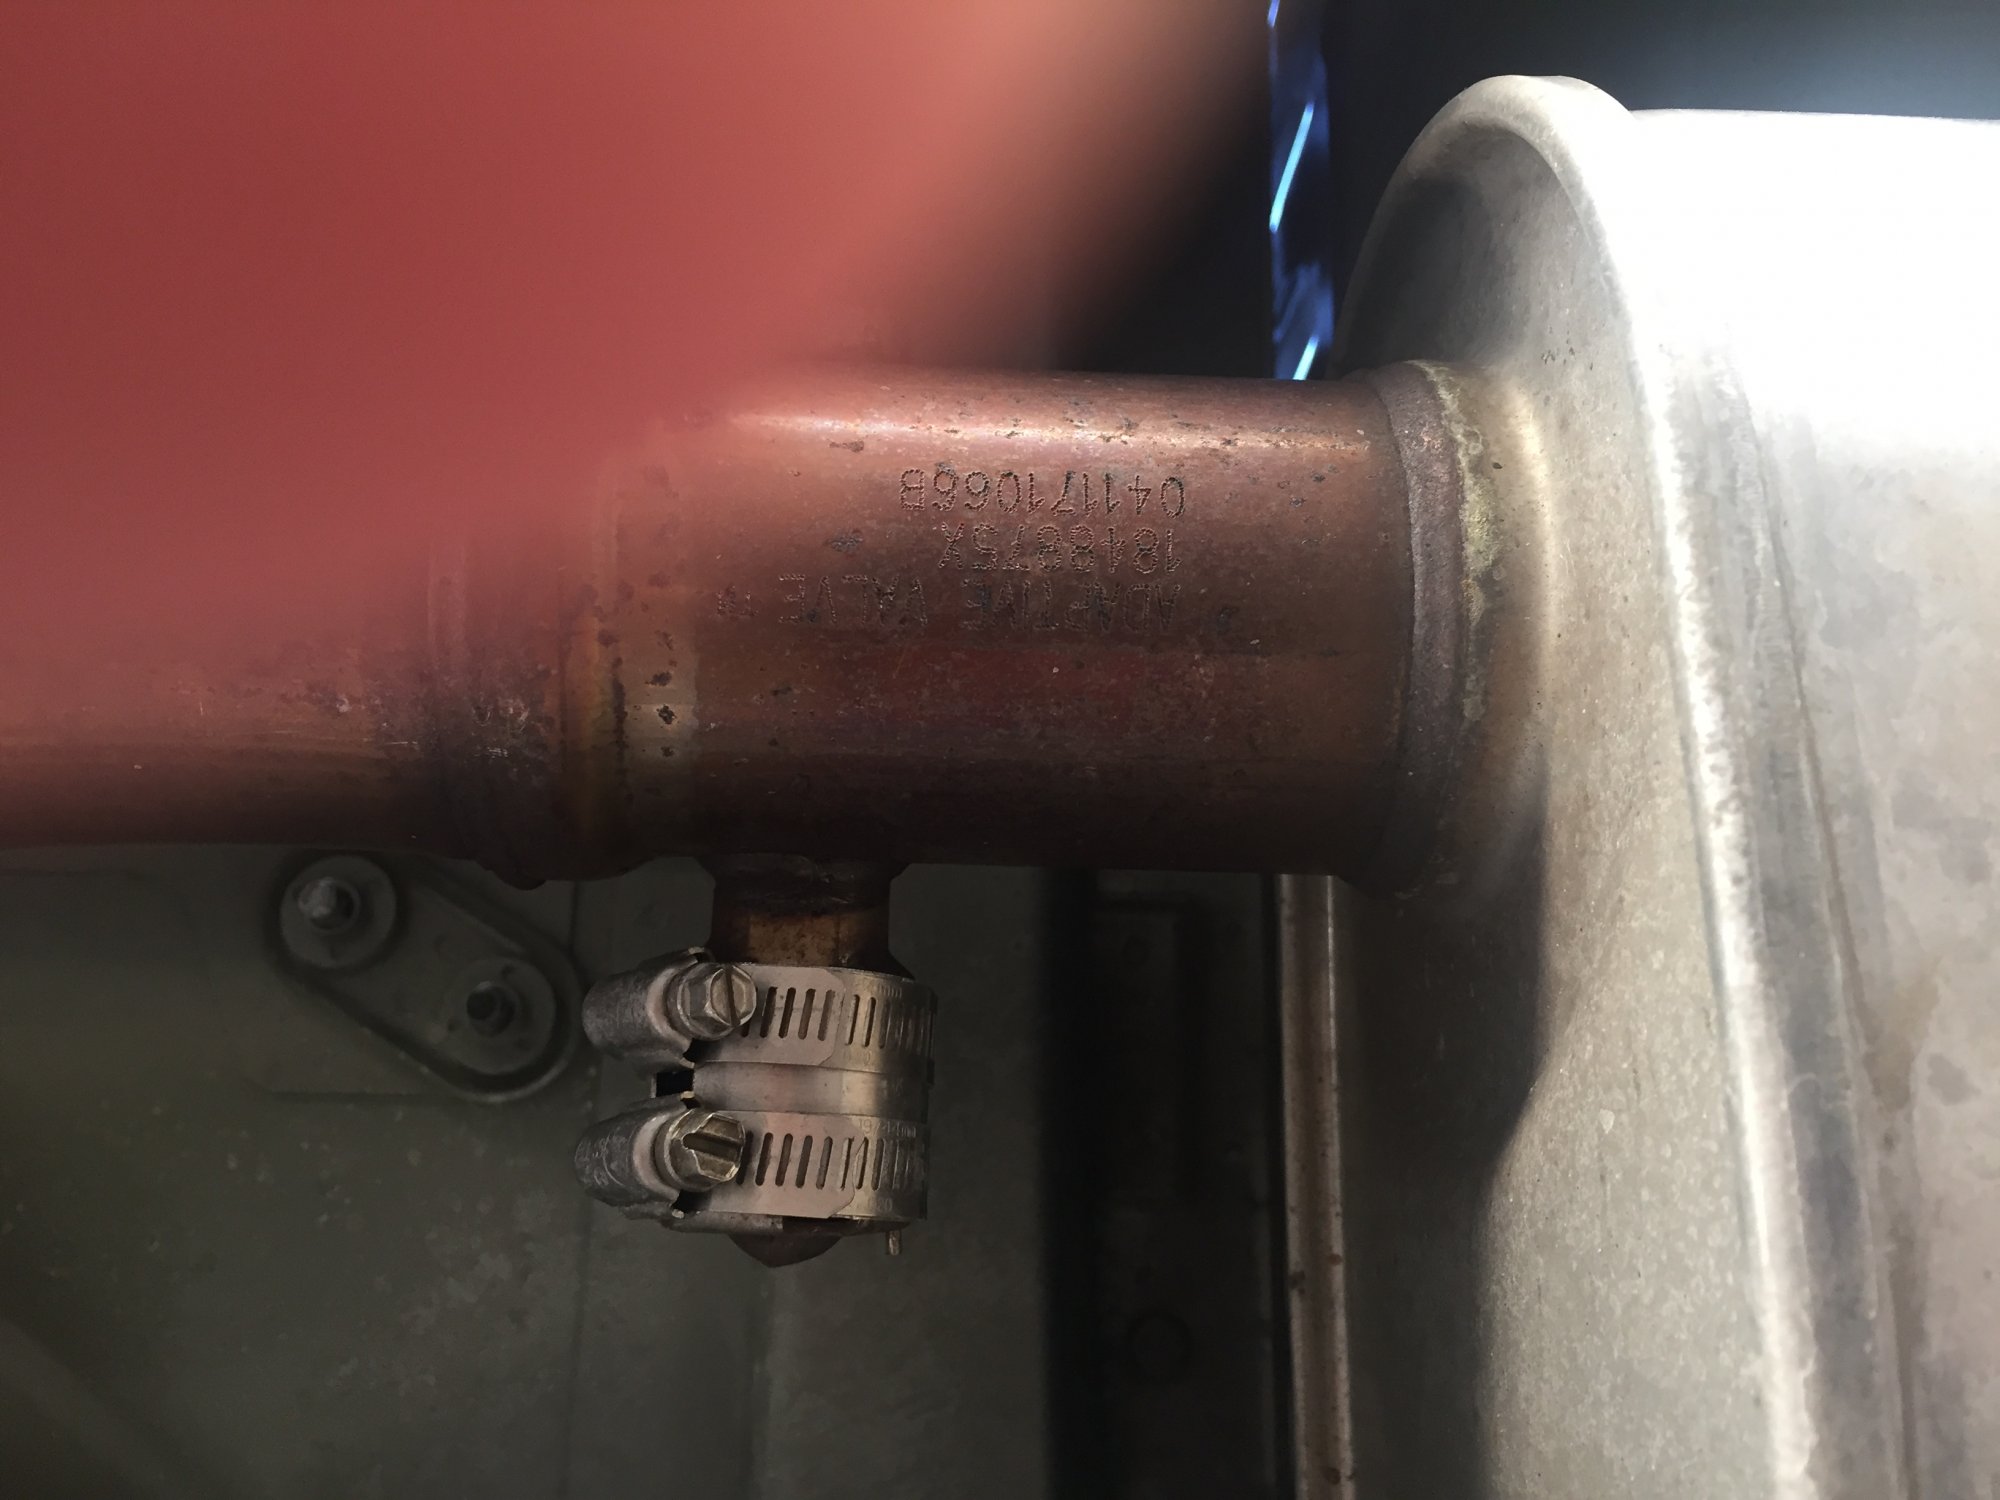
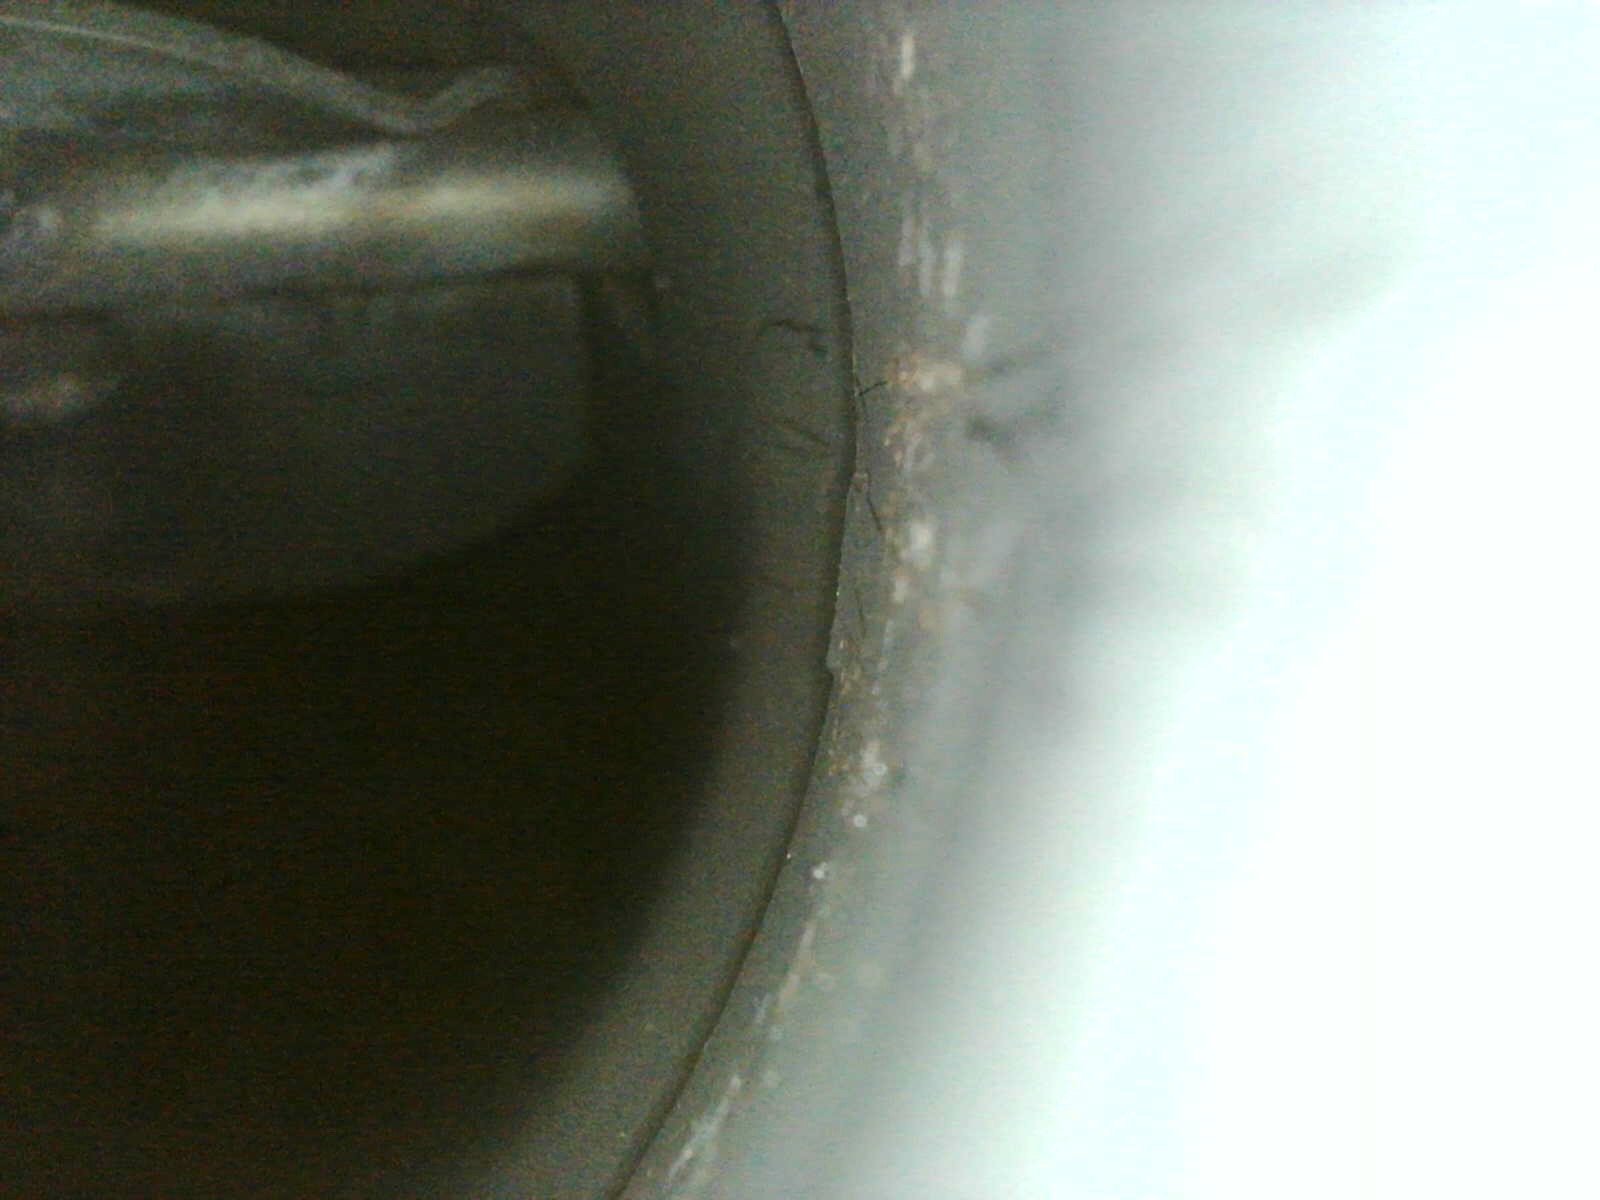
  1. The easy solution for me was to clamp the valve in full open position. No more rattle noise and no v4 drone either. I used a portable scope to run through the exhaust ( removed clamp near flex coupling) to verify the full open position of the adaptive valve. See pics. Full open, normal (mostly closed) and full ccw.
  2. The flapper on my 2017 , 5.3, ext cab started making a noise at start up recently. 3500 miles on the truck. After reading this and other posts I decided to clamp it to full open position by taking a piece of aluminum sheet metal(about 1/16”) , cutting to 1.25” wide x 4.25” long, wrapping around the valve and securing with 2 hose clamps to the full open position. Noise at idle is gone and no humming or helicopter noise during 4cly mode while driving. Might be a dumb question....can someone confirm that full rotation to stop in clockwise direction (facing the val ve, from pass side, muffle to the left,)against the spring is in fact the full open position?
  3. You can indeed use the wire harness that came with the DL3 mirrors in your LT, but you will need to modify them. They have additional wires that send reference voltage and communicate with the memory module that your LT probably does not have. Unless you cut/disconect the additional circuits, some of your mirror control features will not work. Others in this forum have also document this. I think its less trouble to add the 2 wires and ground jumper to the original Lt harness.
  4. The upfitters manual (800+pages- downloadable pdf) has all the connectors, pin numbers , circuit number, terminal types that you will need. It also helps to have a spare wire harness to look at outside the vehicle. Once you have your 4 wires with correct terminals on each end, (2 per side), you need to run them from the mirror connector along harness to large 41 pin door connector, unlock connector (mine was pink) with a small screwdriver, push the 2 terminals into place(#3) on mine). Wrap, tie, tape as needed, push large connector back into body connector..no connection or splicing anywhere under dash. Lastly run short ground jumper at mirror connector. Note that the 4 wires needed are roughly 16" long each. I can get a more precise measurement if someone is interested.
  5. The auto dim only works if the auto dim rearview mirror and additional wiring are installed. I did not do that..not important to me as I rarely drive the truck at night. As for auto tilt, no, I think you would need the memory control module and software programming to make it work in Lt models.
  6. Just completed my upgrade to the DL3 power fold mirrors. This forum and the upfitter's manual were a huge help! All original features plus the power fold, blinkers and puddle lights work perfect. No factory wires spliced, tapped or cut into. I have a 2015 LT, dbl cab, z71. Keep in mind that this write up applies to my 2015 truck. The 2 circuits needed on each side were already in place to my door connector, just not in my door harnesses. This may not be the case for all models/years. Here is a quick overview of my upgrade. 1.Purchased dl3 mirrors with wire harnesses from a forum member for $300 shipped. Thanks Gordon. 2. Purchased switch gm pn 23154702. from gmpartsheadquarters.com. 3.Cannibalized one of the spare harnesses & removed 4 wires with terminals complete plus 2 short wires for the ground jumper on mirror connector #510/610. A bit of a job, but well worth it in order to eliminate the need to splice into any of the factory wiring on the truck. 4. Removed door panels and upper window trim panel. Highly recommend watching some of the youtube videos on this procedure. Get a set of the plastic body panel tools. They are inexpensive and very helpful. 5. Fished 2 wires with terminals (from spare harness) through from door connector X500/X600 to mirror connect X510/X610. Unlocked connector locks , inserted pin terminals into each connector , closed connect locks. One wire is for puddle lamp supply (circuit5996), other is for turn signal (circuit1314/1315). Wire tie and tape wrap neatly to factory harness. This is the most time consuming, just be patient and take your time. 6. Put short ground jumper into X510/X610 mirror connector pin 5 location and jump to ground circuit 1150/1250 pin 11. This is ground for puddle lamp. 7. Install mirrors, my torque setting was 5.5 ft lbs. Install door and trim panels. That's it. One observation that I did not see mentioned in this topic...The puddle lights are tied to the day/night sensor and only get bright at night when the unlock button is pushed on key fob, then they are nice and bright. Don't panic if they don't seem to work in the daylight. If anyone would like more detail or pictures just let me know.
  7. Just completed my install of the center console. Love it. Definately worth doing if you don't need the jump seat. The steps and comments on this forum were very helpful. Ended up taking me about a 8 hours total. Got all the parts from gmpartsheadquarters.com. Shipping was 4 days. I have all outlets up front working, LED under lid and the 3 usb's to play music, pandora and charge devices. Both 12v outlets in the rear and storage part of console work. I did not connect the usb, sd reader and aux jack in the under lid storage compartment. Not important to me. 4 usb's , 4 12v outlets and the AC outlet are enough. Removed the jumpseat wire harness complete in tact(a pain just everyone says), spliced wires in for the rear most outlet, added about 6" of wire to the under lid outlet, zip tied it to the new console harness and plugging back into original under seat area. The mini usb, comm plug and 12v outlet ( originally connected under lid in jump seat) all plugged right into the front panel. The 2nd 12v and 110v outlets get the connections from center stack up front. I tapped into the front 12v outlet to power the LED light (always hot). This approach might not be the best for all but it leaves both wiring harnesses mostly in tact, allowing for later mods if needed. I now have my jumpseat for sale on ebay if anyone is interested. One other note: you can attach the front bracket 7mm bolts (4) without removing the radio bezel and lower piano switches. Just need to reach a little to get the top 2 in.
  8. Hey Jchildress, I have 2015 Lt with black leather, jump seat (500 miles on truck) and live in Maryland. Let me know if you are interested in some type of trade.
  9. I am close to ordering the parts needed to do the swap. Before I do, would anyone in the Mid Atlantic area be interested in trading their black center console for the jump seat w/console? I have the bench seat in black leather. My Z71 dbl cab has 350 miles. Let me know soon if interested.
×
×
  • Create New...