Bangback
-
Posts
66 -
Joined
-
Last visited
-
Days Won
1
Content Type
Profiles
Forums
Gallery
Events
Articles
RPO
Store
Blogs
Everything posted by Bangback
-
I haven't, however, I've read that you can't have a fast charging setup with 3 coils. The original GM version of the charger was a single coil, whereas the 2018 version is a 3 coil version, which can provide a good interface for the coils and be more lenient on having a good position to deliver the maximum charge possible. Perhaps they did this to address all the complaints from the single coil version about people not being able to find the "sweet spot" on the charging pad for the phone to stay charging? I guess what I'm trying to say is that even if you have a fast charging custom setup with the proper power hookup, if the phone isn't exactly aligned for that single coil, you might not see full advantage of the faster charging? I might be wrong about fast chargers only being single coil, but I don't think I've seen a fast charger yet that is 3 coil? On my other wireless chargers I've used at home, I've found that if you don't have a high enough powered USB power supply, the pad can act finicky. Even if your car adapter says 2.1A, a lot of them aren't right and don't truly put out that power. You might want to test your current with a amperage tester or perhaps try another power source, which could help you with the slow charge issue?
-

Growling noise-dashboard pass side
Bangback replied to seamus2154's topic in 2015-2020 Tahoe, Suburban, Yukon & Escalade
I’ve had issues in the past on my other cars where mice have gotten into system and died or have tried to build a nest in the blower motor. When that happens, it creates an imbalance in the blower and it makes a low frequency rumble. It’s probably not what you have, but you never know... -
Good to know that the new design has 3 coils! That should make it less critical as to where to place the phone for the optimal charging position. I haven't done any testing yet with charge times with the new charger. I do have the latest version of iOS on the iPhone X, which should have 7.5W wireless charging enabled. I could try to capture some charging times, but won't know for sure what the actual voltage and wattage coming in is. In about 10 minutes or less on a short drive I took, the phone went from 70% to 73%, from what I've seen so far.
-
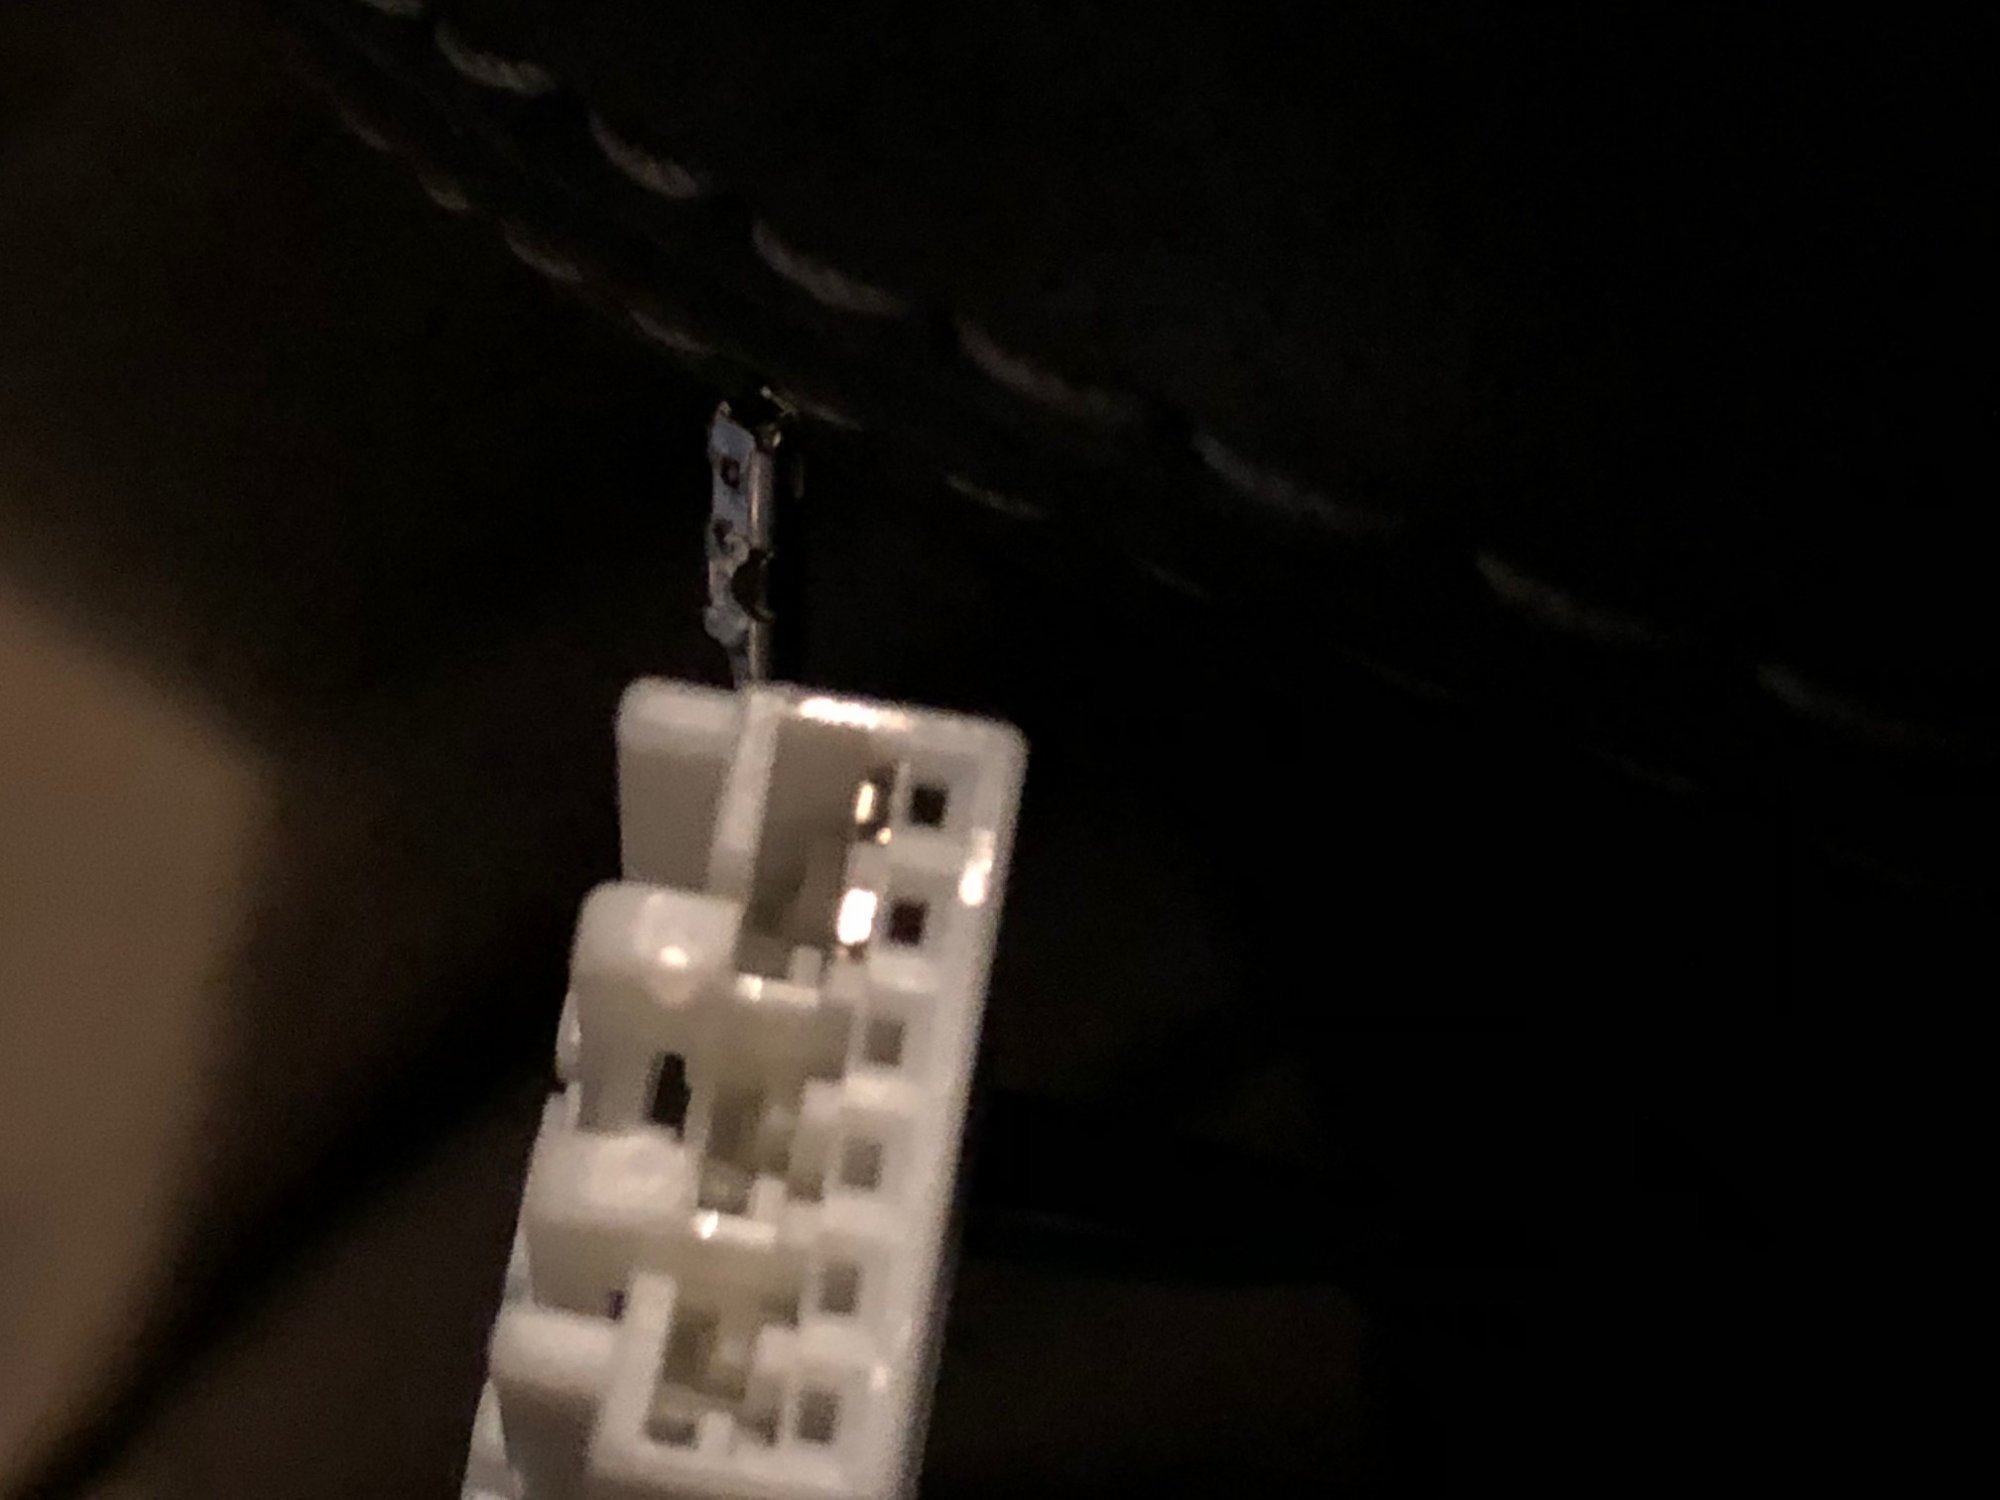
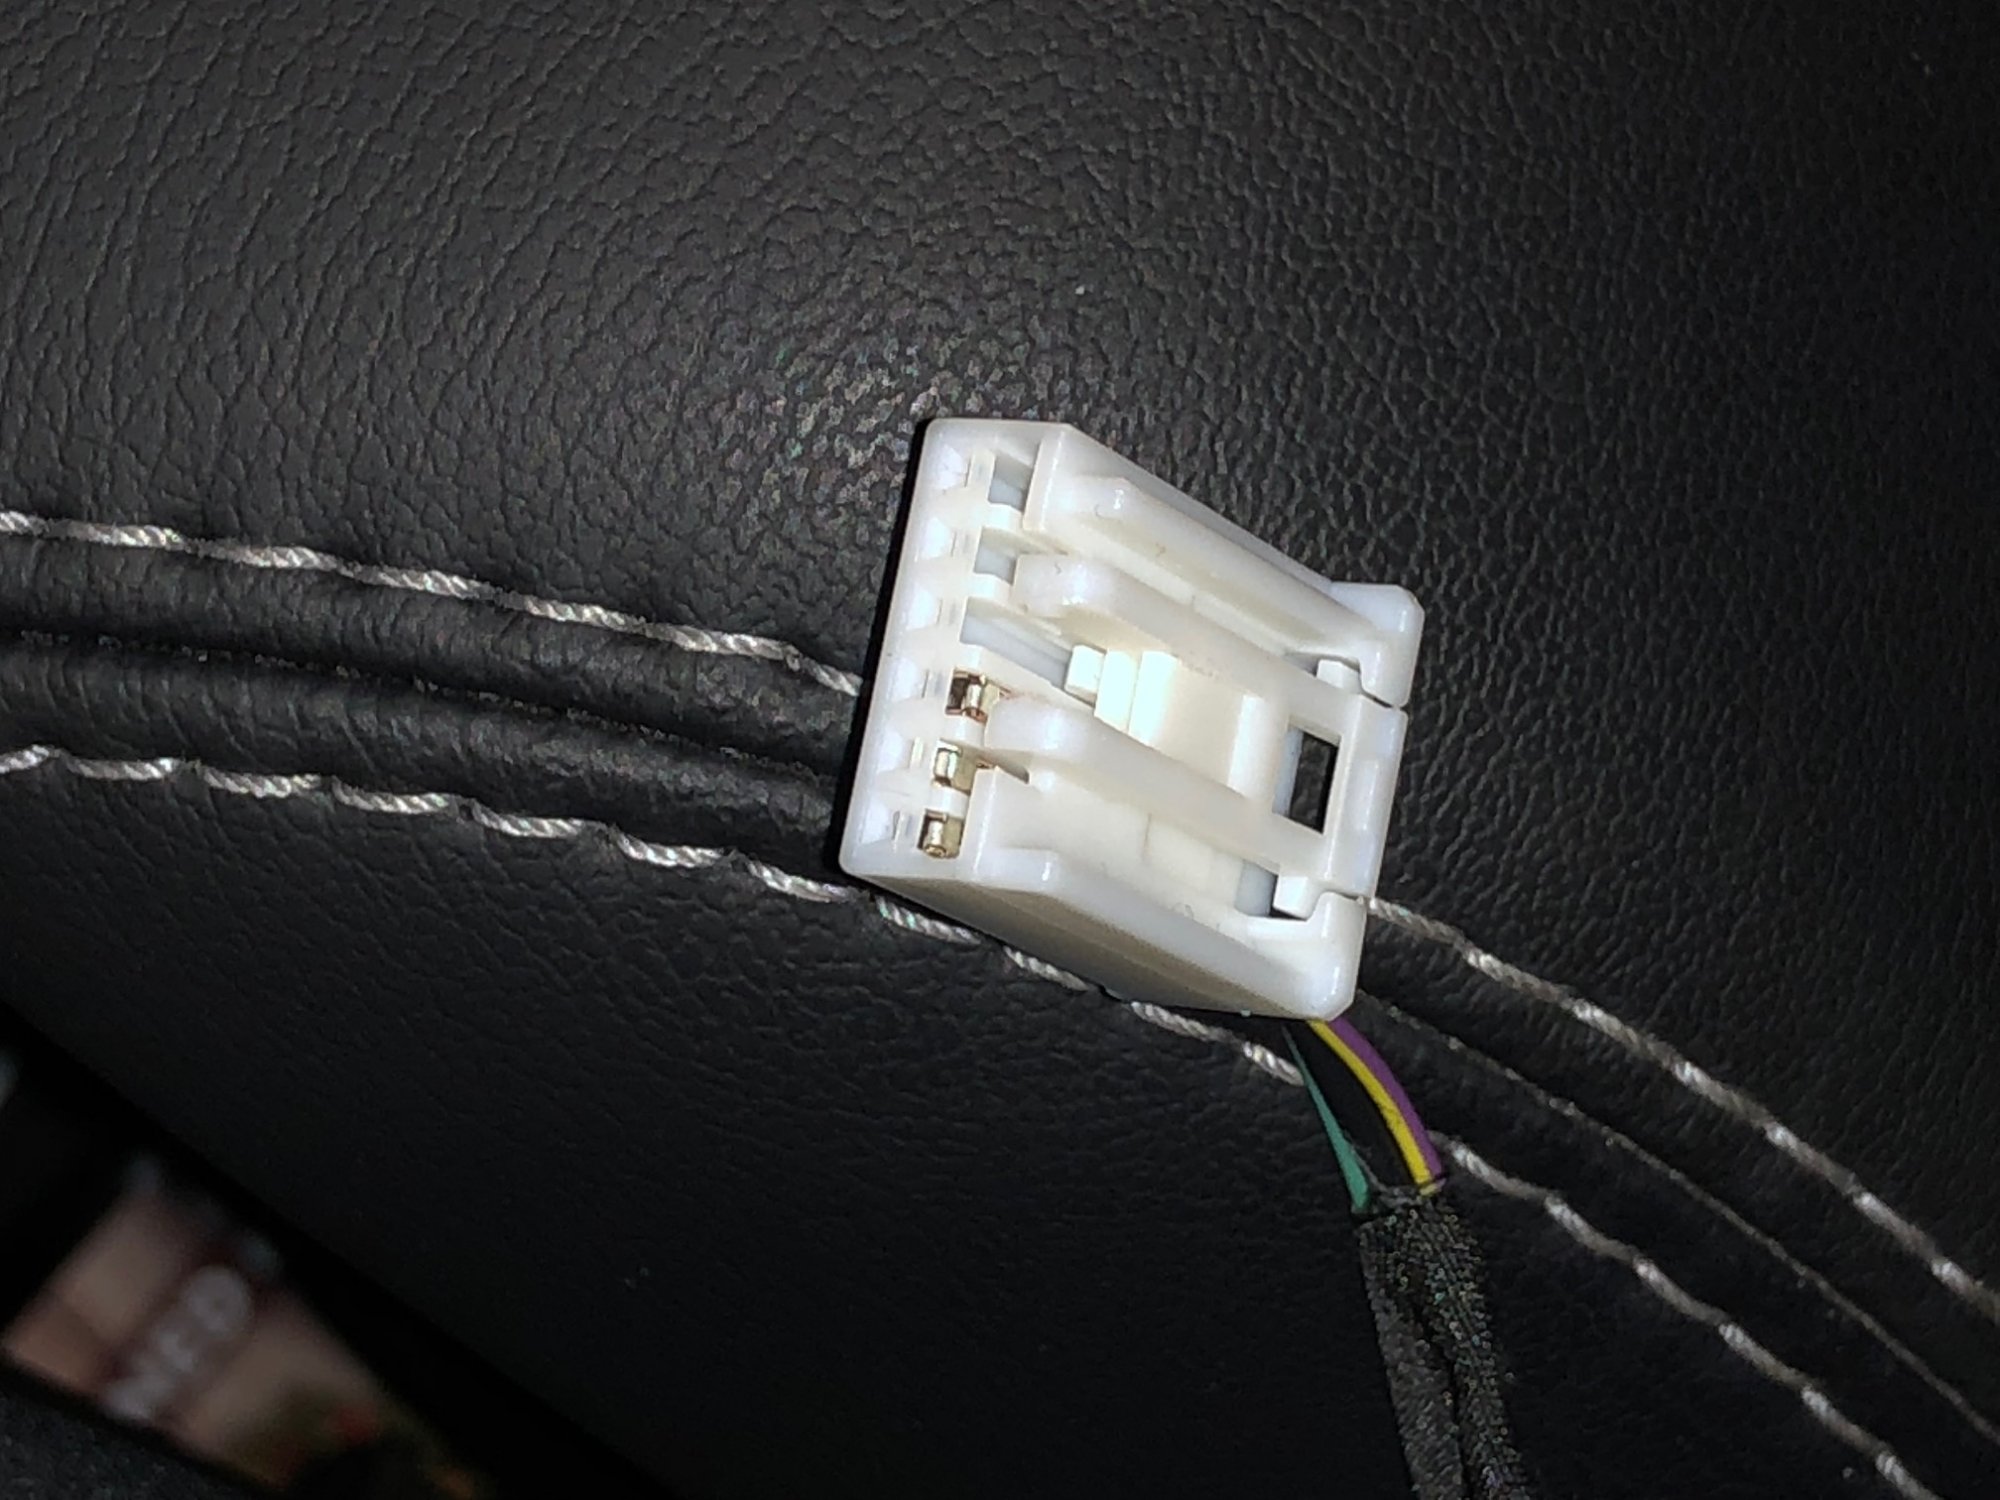
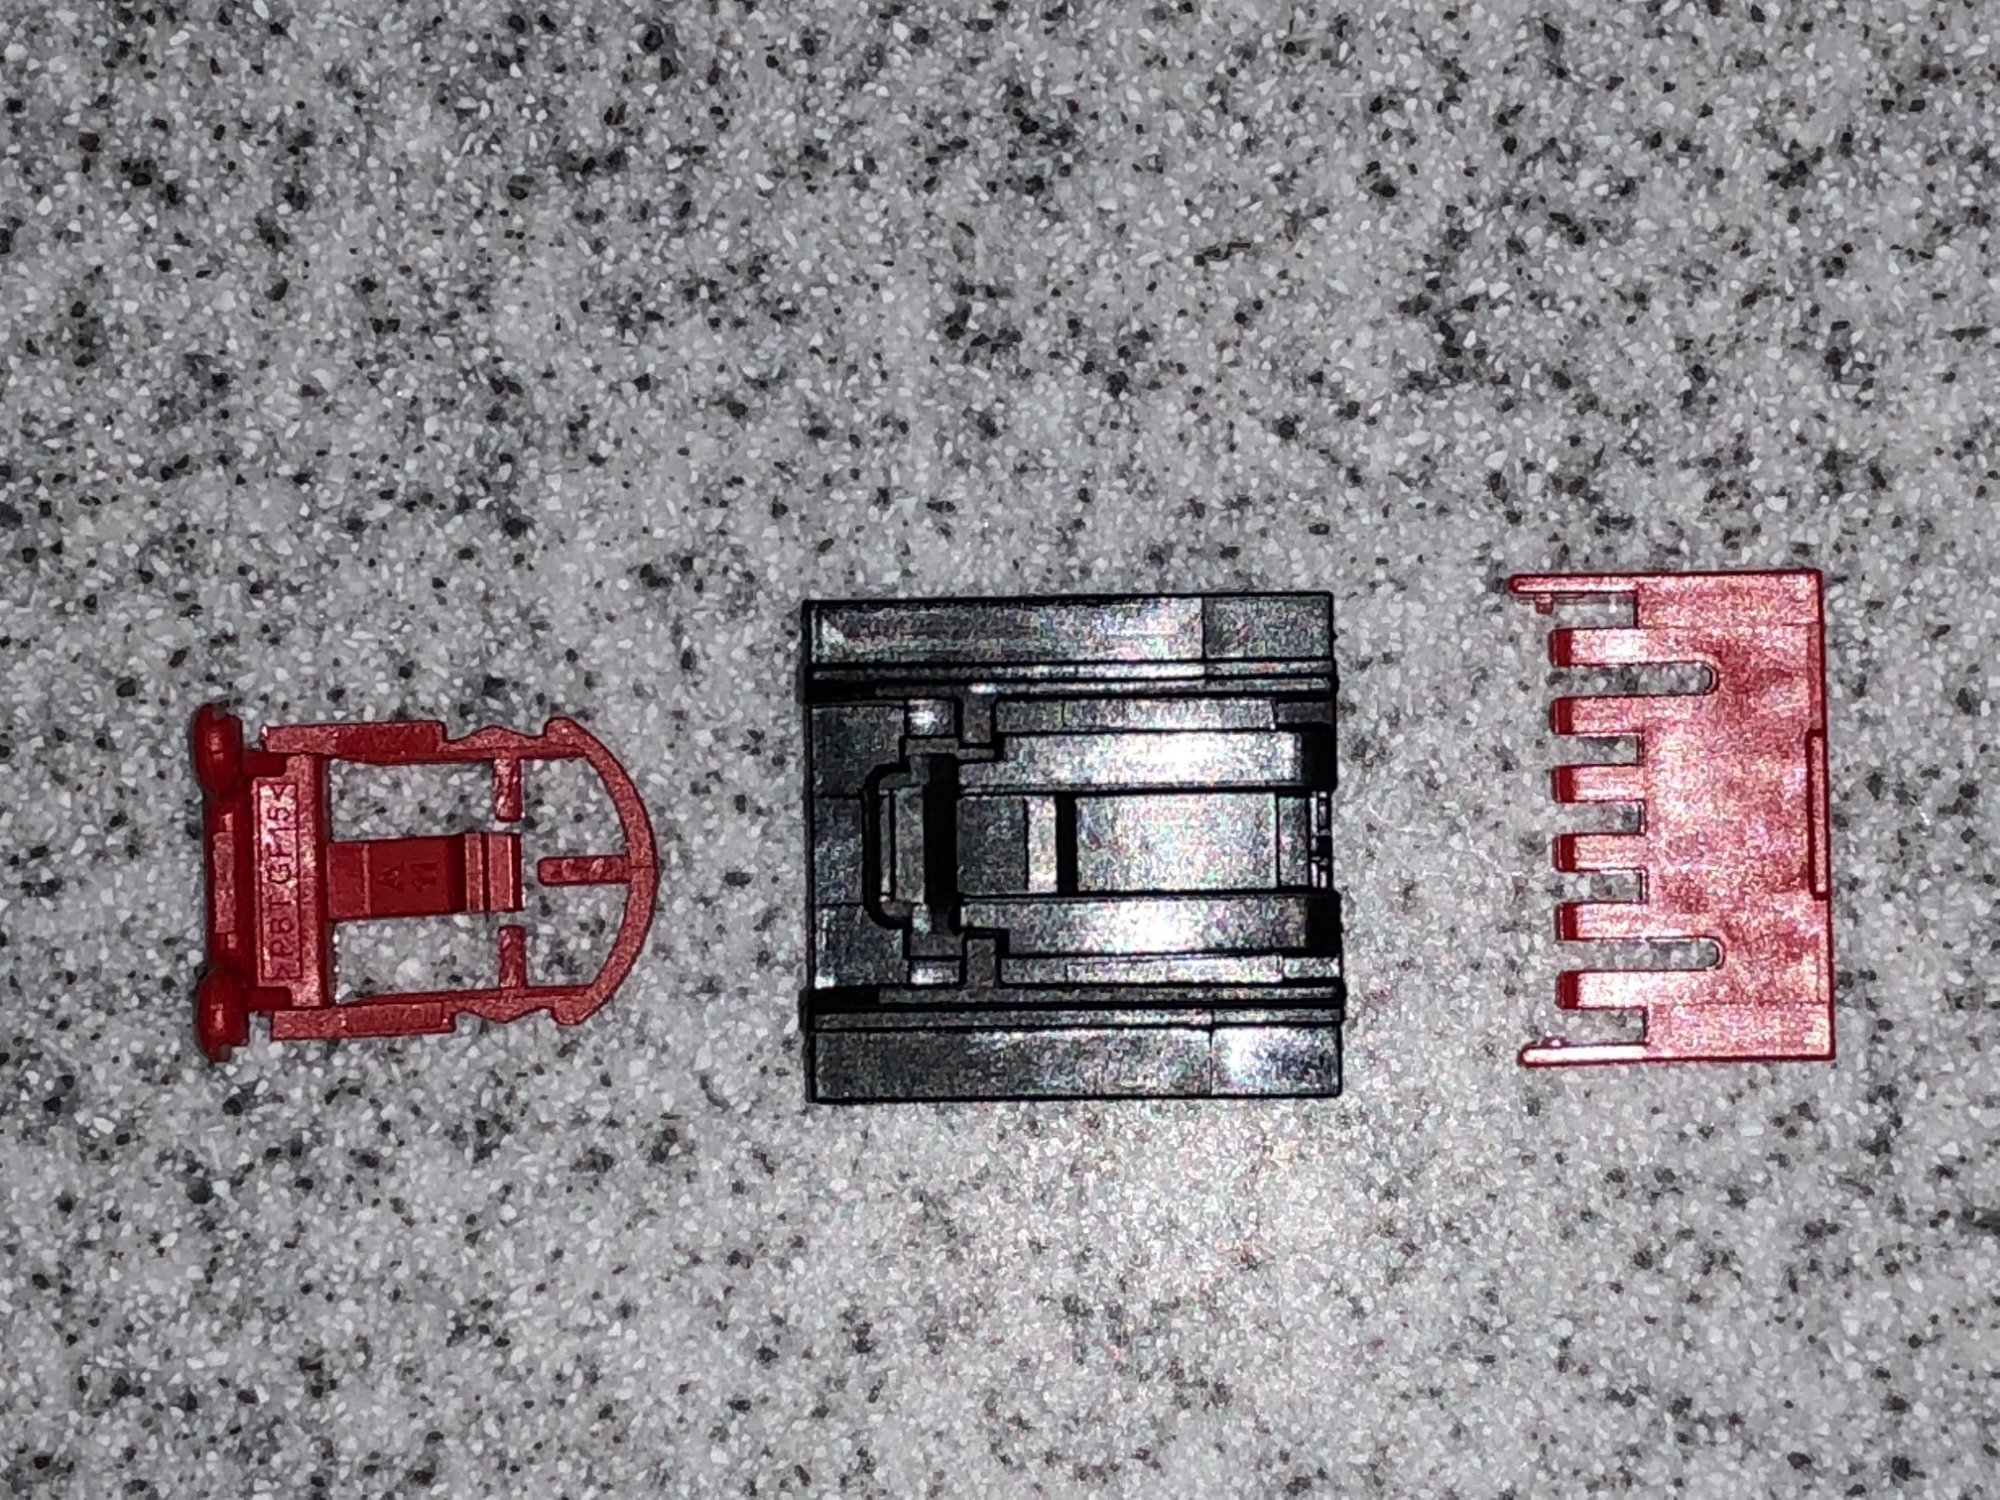
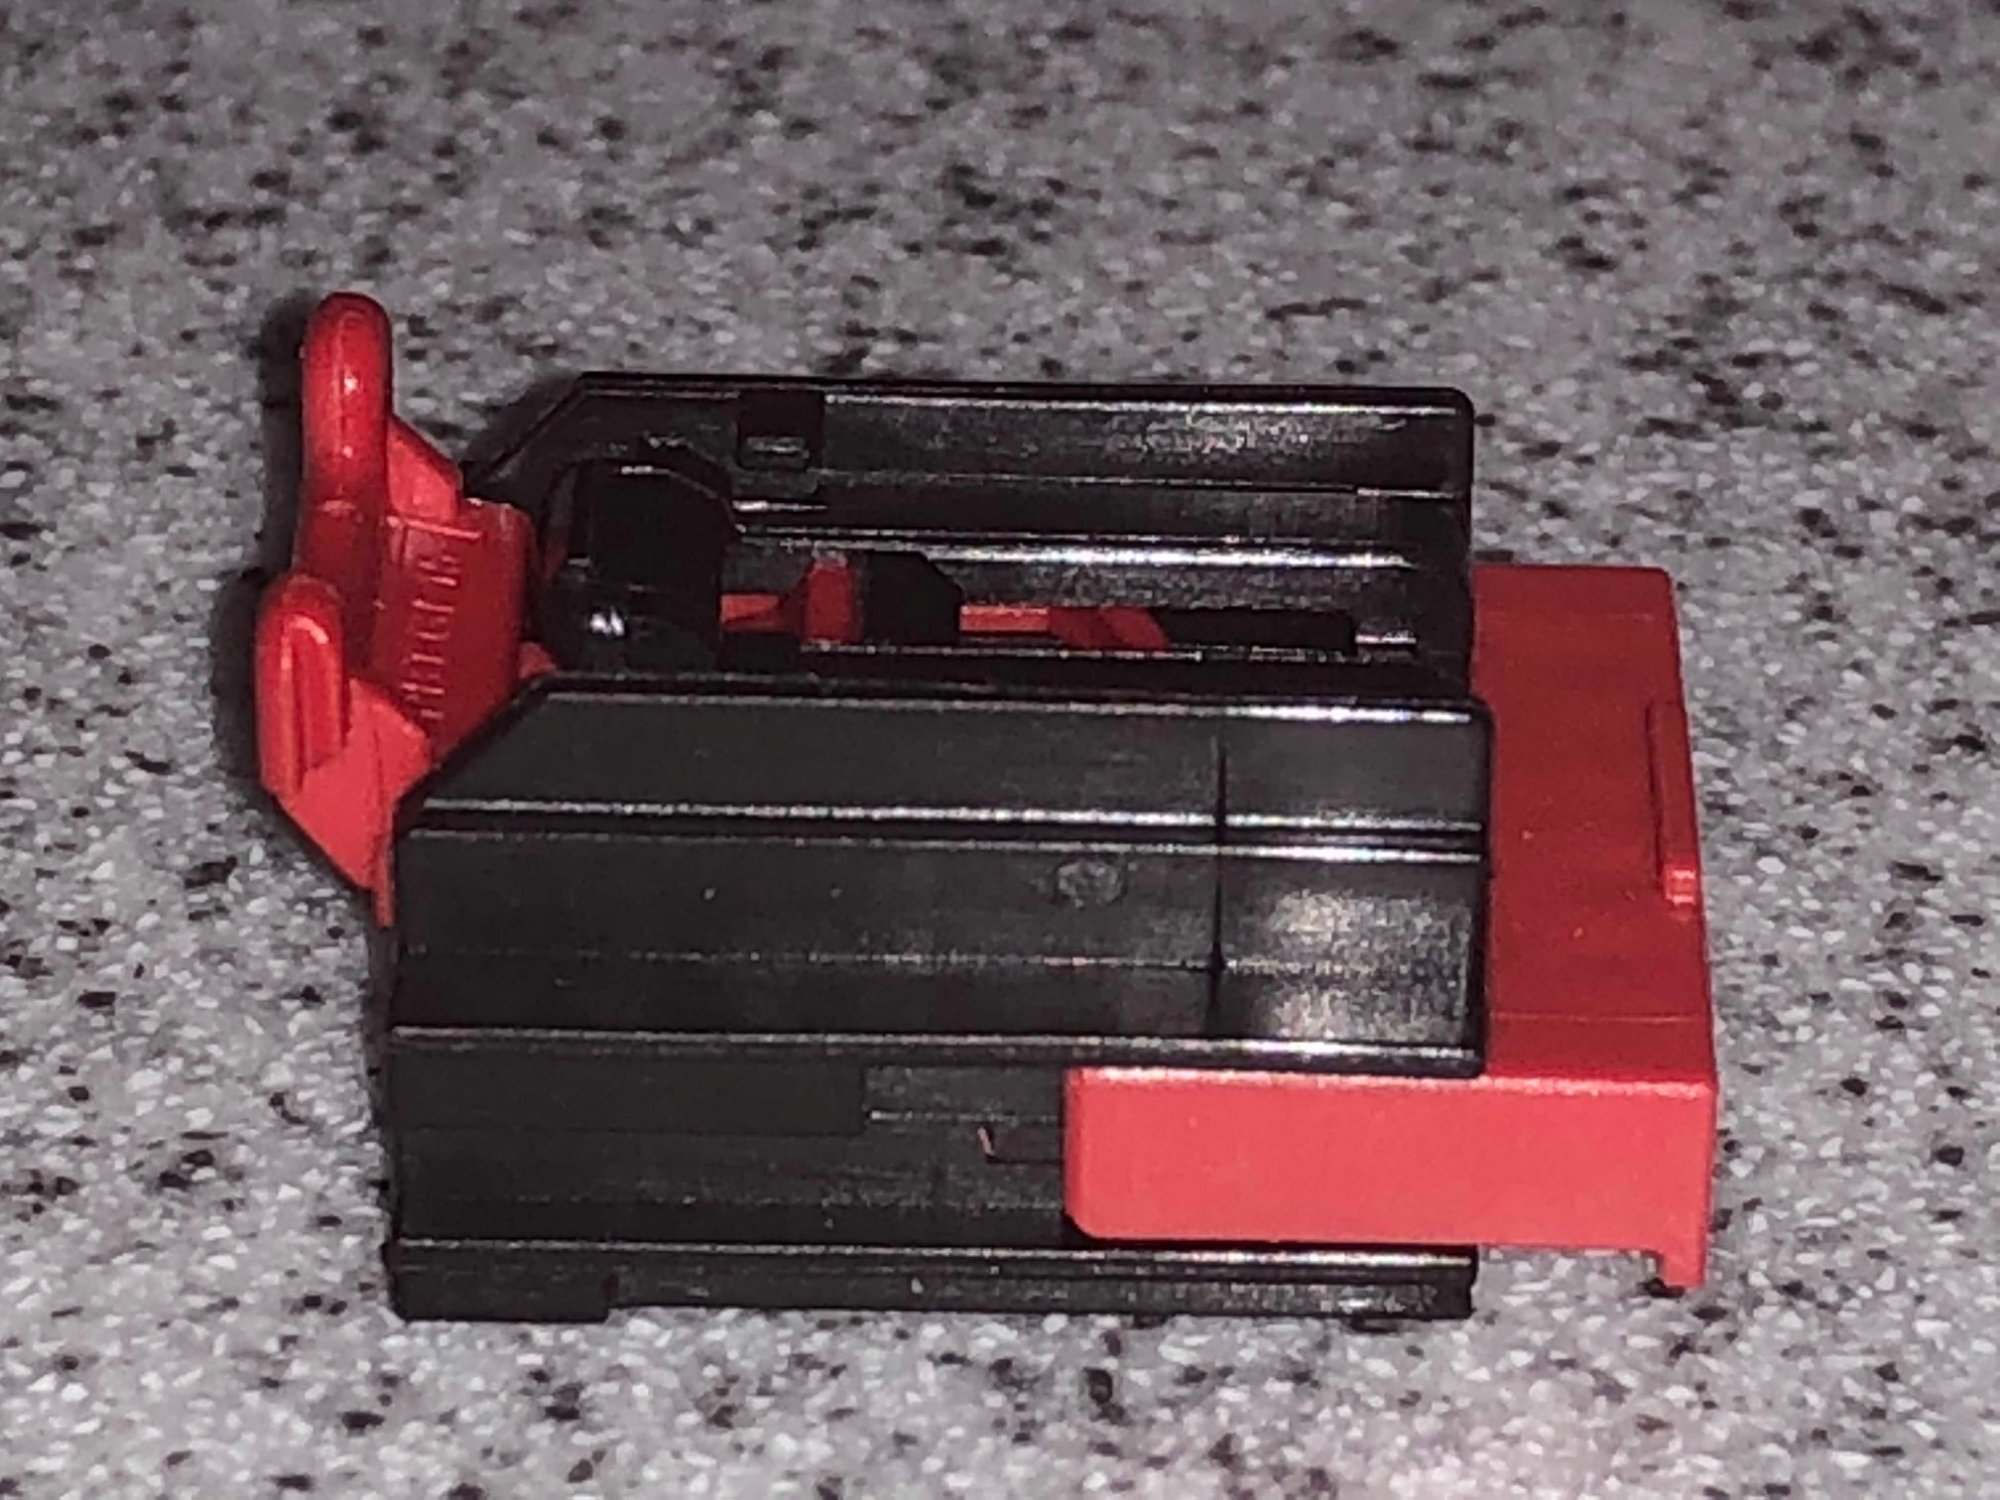
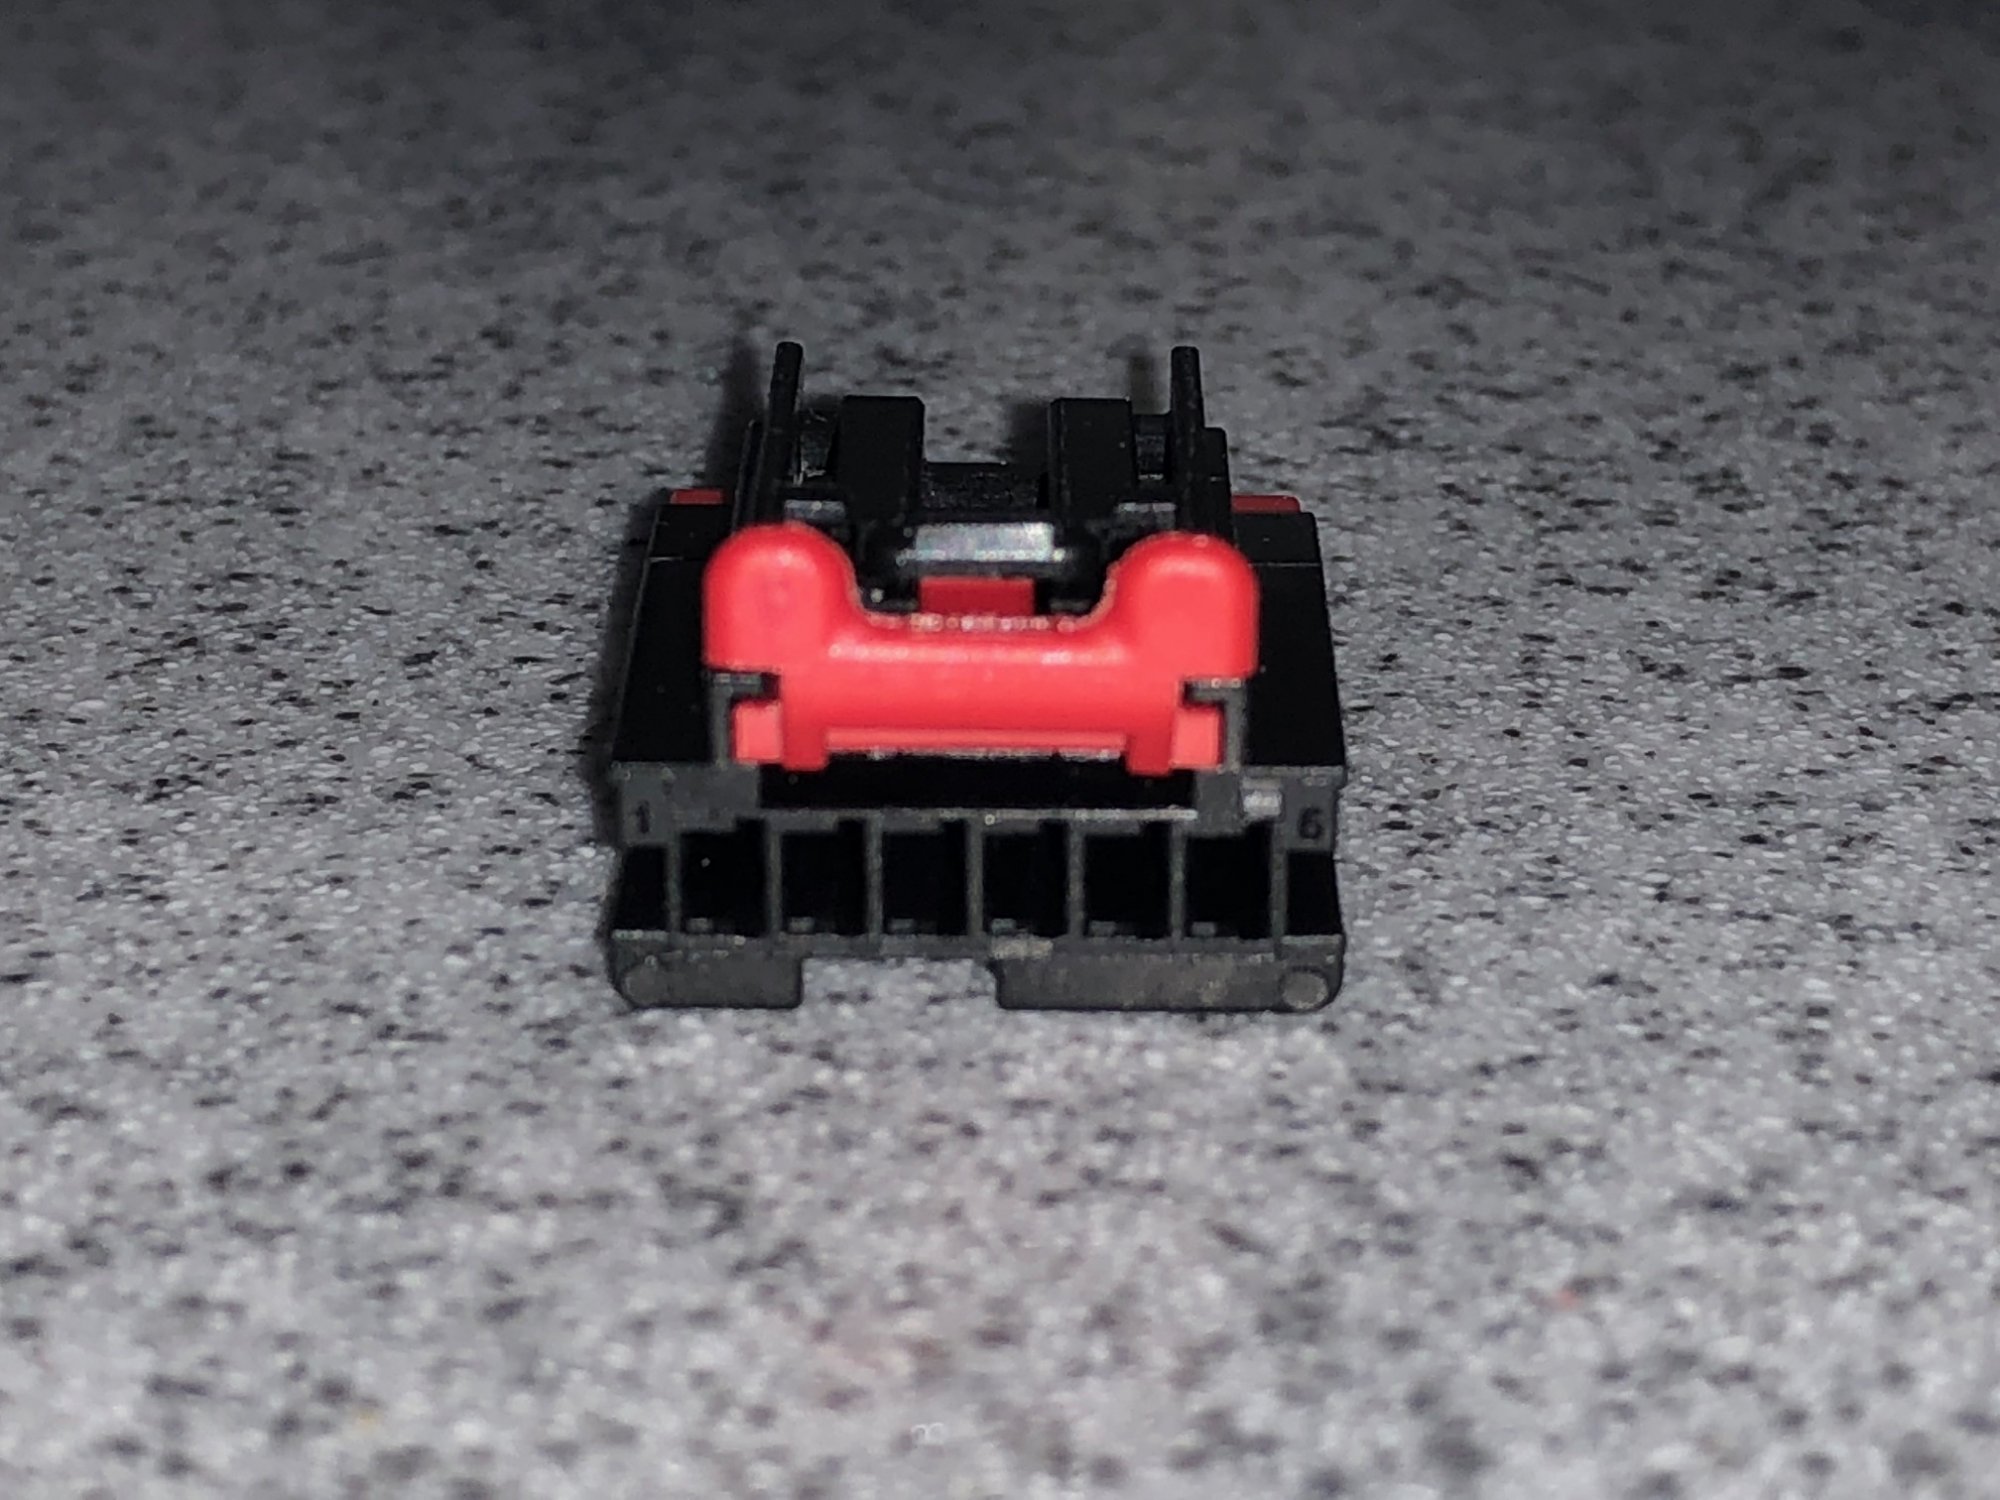
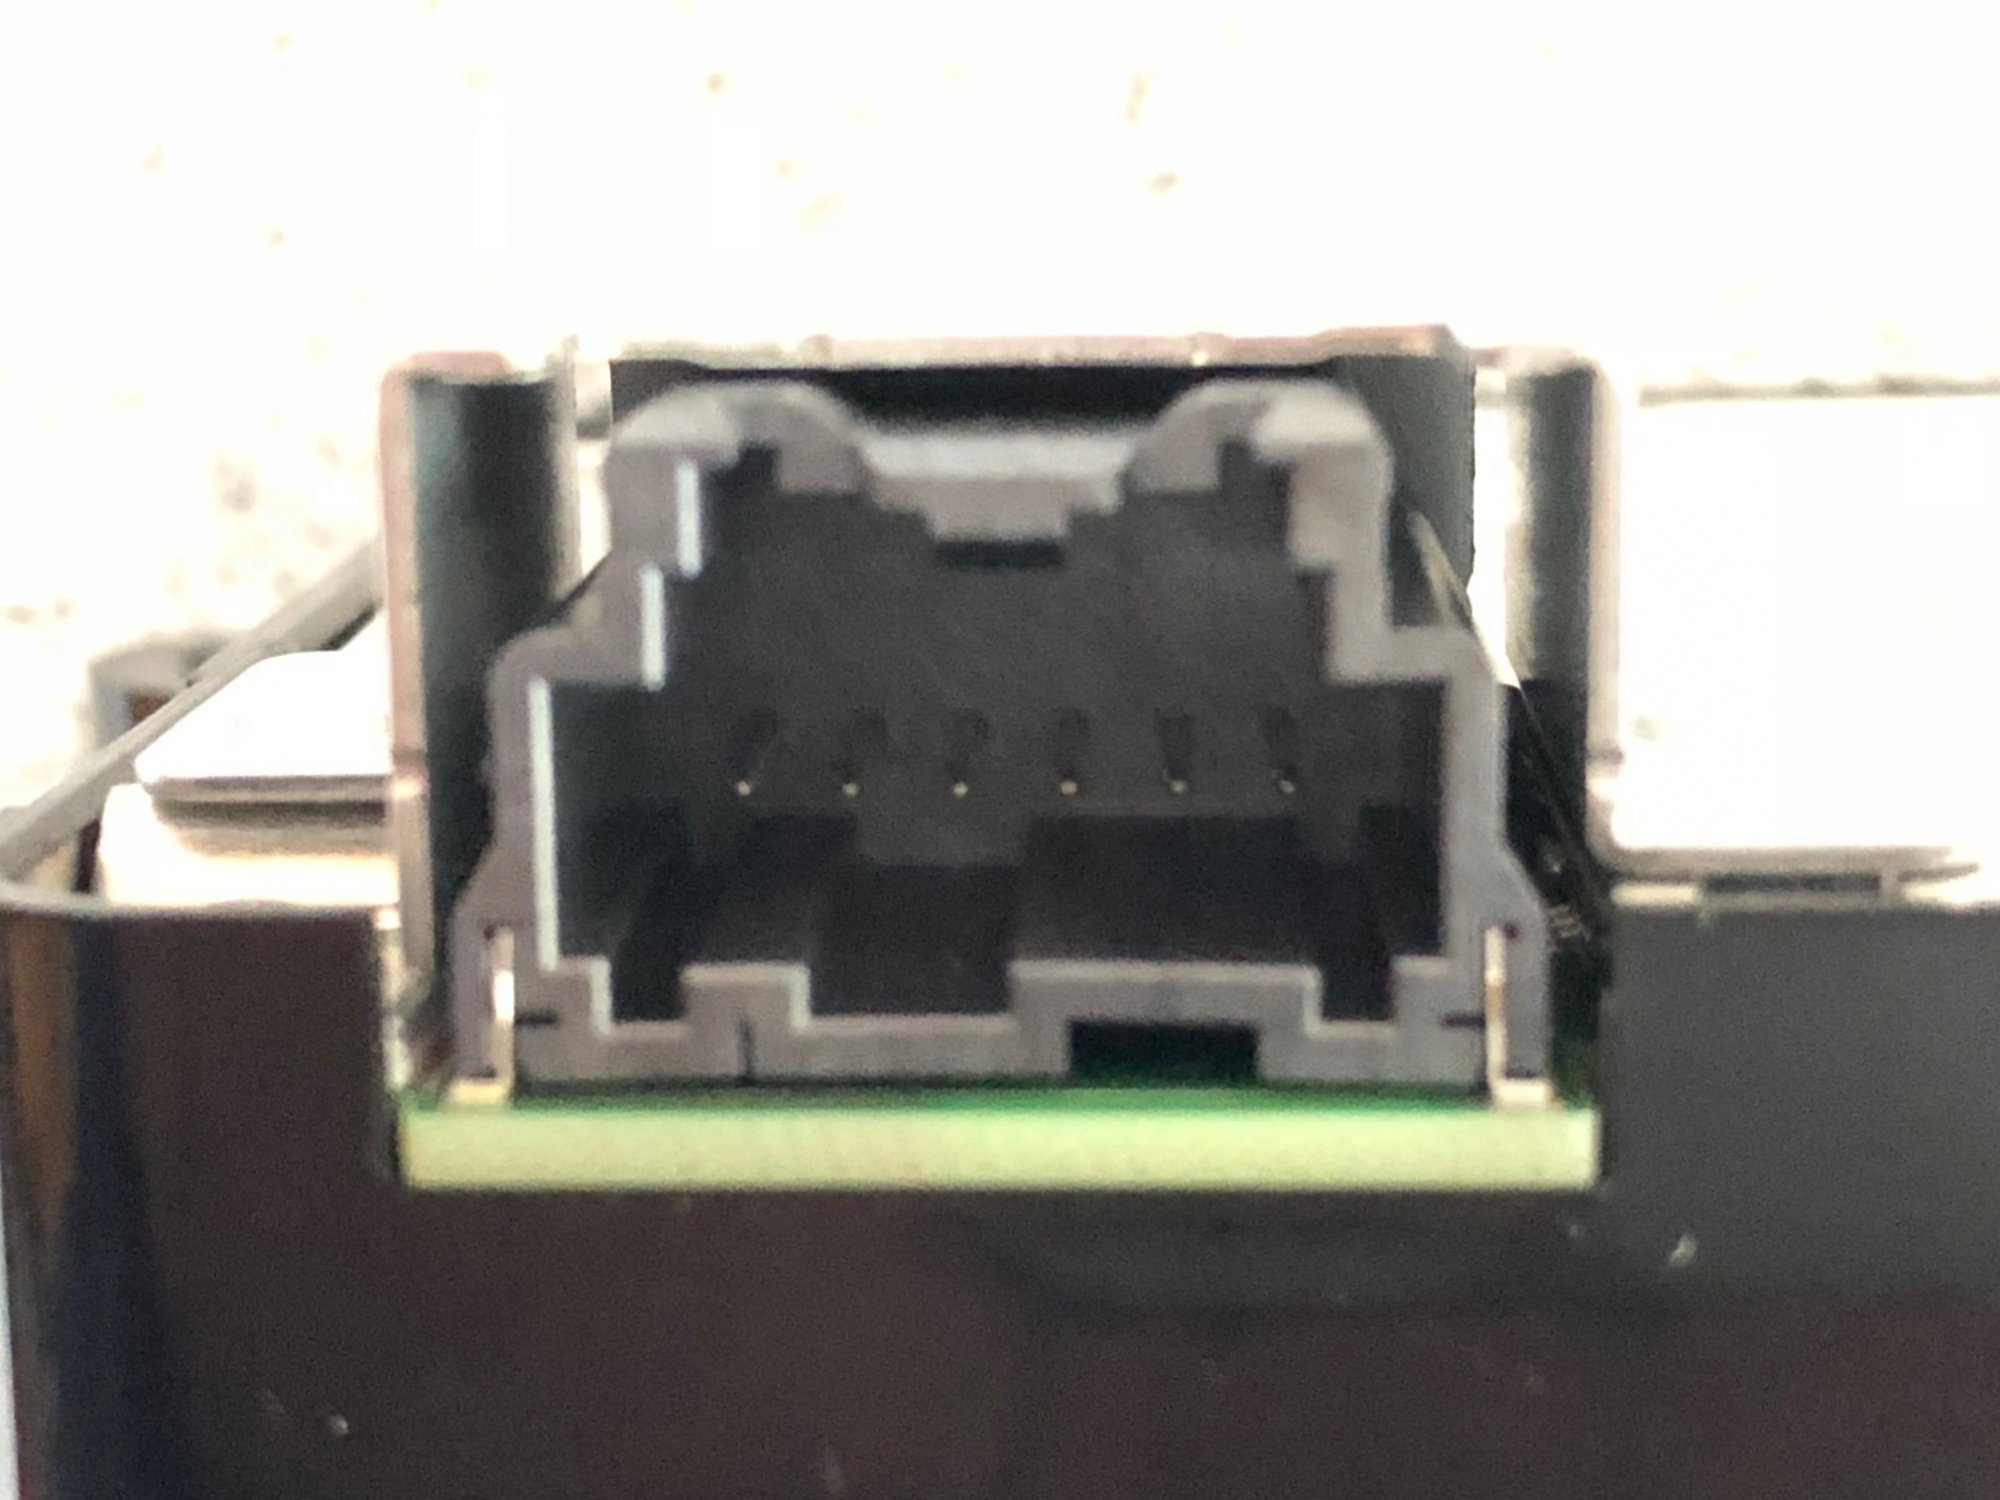
Make sure your ignition is off as well as the radio. Once the red piece is off, look deep within the connector and you will see white tabs over the tops of the metal pins, from looking into the end of the plug where the charging module pins plug in. Gently take your precision flathead screwdriver and lift up a little bit on the white tab. The wire should now easily pull out from the back of the connector. It shouldn't take too much force. If it doesn't easily come out, you may not have the white tab lifted high enough. NOTE when you remove the wire, remember how the metal crimp pin is oriented in the old plug. You will be plugging into the new connector with this same orientation. Also try not to touch the wires together and short anything out, just in case there is power. Temporarily taping them apart so they don't touch isn't a bad idea. You will then see the "nub" on the metal piece that rtreptow7 referred to earlier. It is shown in the picture below of the metal crimp pin, on the top side. This needs to be compressed a little bit with pliers or use your flathead screwdriver to press in the nub. If you don't press this in, it will be very difficult to slide the metal piece into the new plug. The picture shown of the metal crimped wire is the correct orientation as if you are looking straight down from the top of the connector. This "nub" will look like it's on the right side of the pin when placed into the new connector. Again, on the new connector, I entirely removed the red end piece for installation. Just lift the sides of the red piece with the screwdriver and it will pop right off. After you press in the "nub" on metal crimp pin, just slide it in, and listen for an audible "click". Check the end of the connector and you should see the metal pin go all the way to the back of the new plug. Do this for all 3 wires, make sure you have the colors in the right spots, then put the red piece back on the end. The new module is an exact fit to where the old module is. It bolts right on with the same screws. Plug your new connector in and test. It should now work! Good luck!

-
The old connector is shown here, which is white with a red component. First note the color of the wires and which slots they are in. Don't pay attention to the bars on the connector. They are on different sides from the old connector to the new connector, and they will just confuse you. Just pay attention to where the push lever is on top of the connector and note that the wires are in the left 3 holes. They will go in the same left three holes on the new connector, with the push lever on top. First thing you will want to do is to remove the red plastic piece. I used a small flathead precision screwdriver. Just push on the middle red tab and push it outward. It will take some force, but the piece should slowly slide out, as seen in the pictures below.
-
Here is the connector from Mouser, 571-2035363-4 , for the new unit. This is needed for the new charging module. The old plug will not fit at all into the new module, so this new connector is needed. When it arrives from Mouser, all the pieces are attached. I personally found it easier installing the wires into the new connector with the big red piece off the end removed. To do that, simply use a small flathead screwdriver and carefully pry up the sides. It will come right off.
-
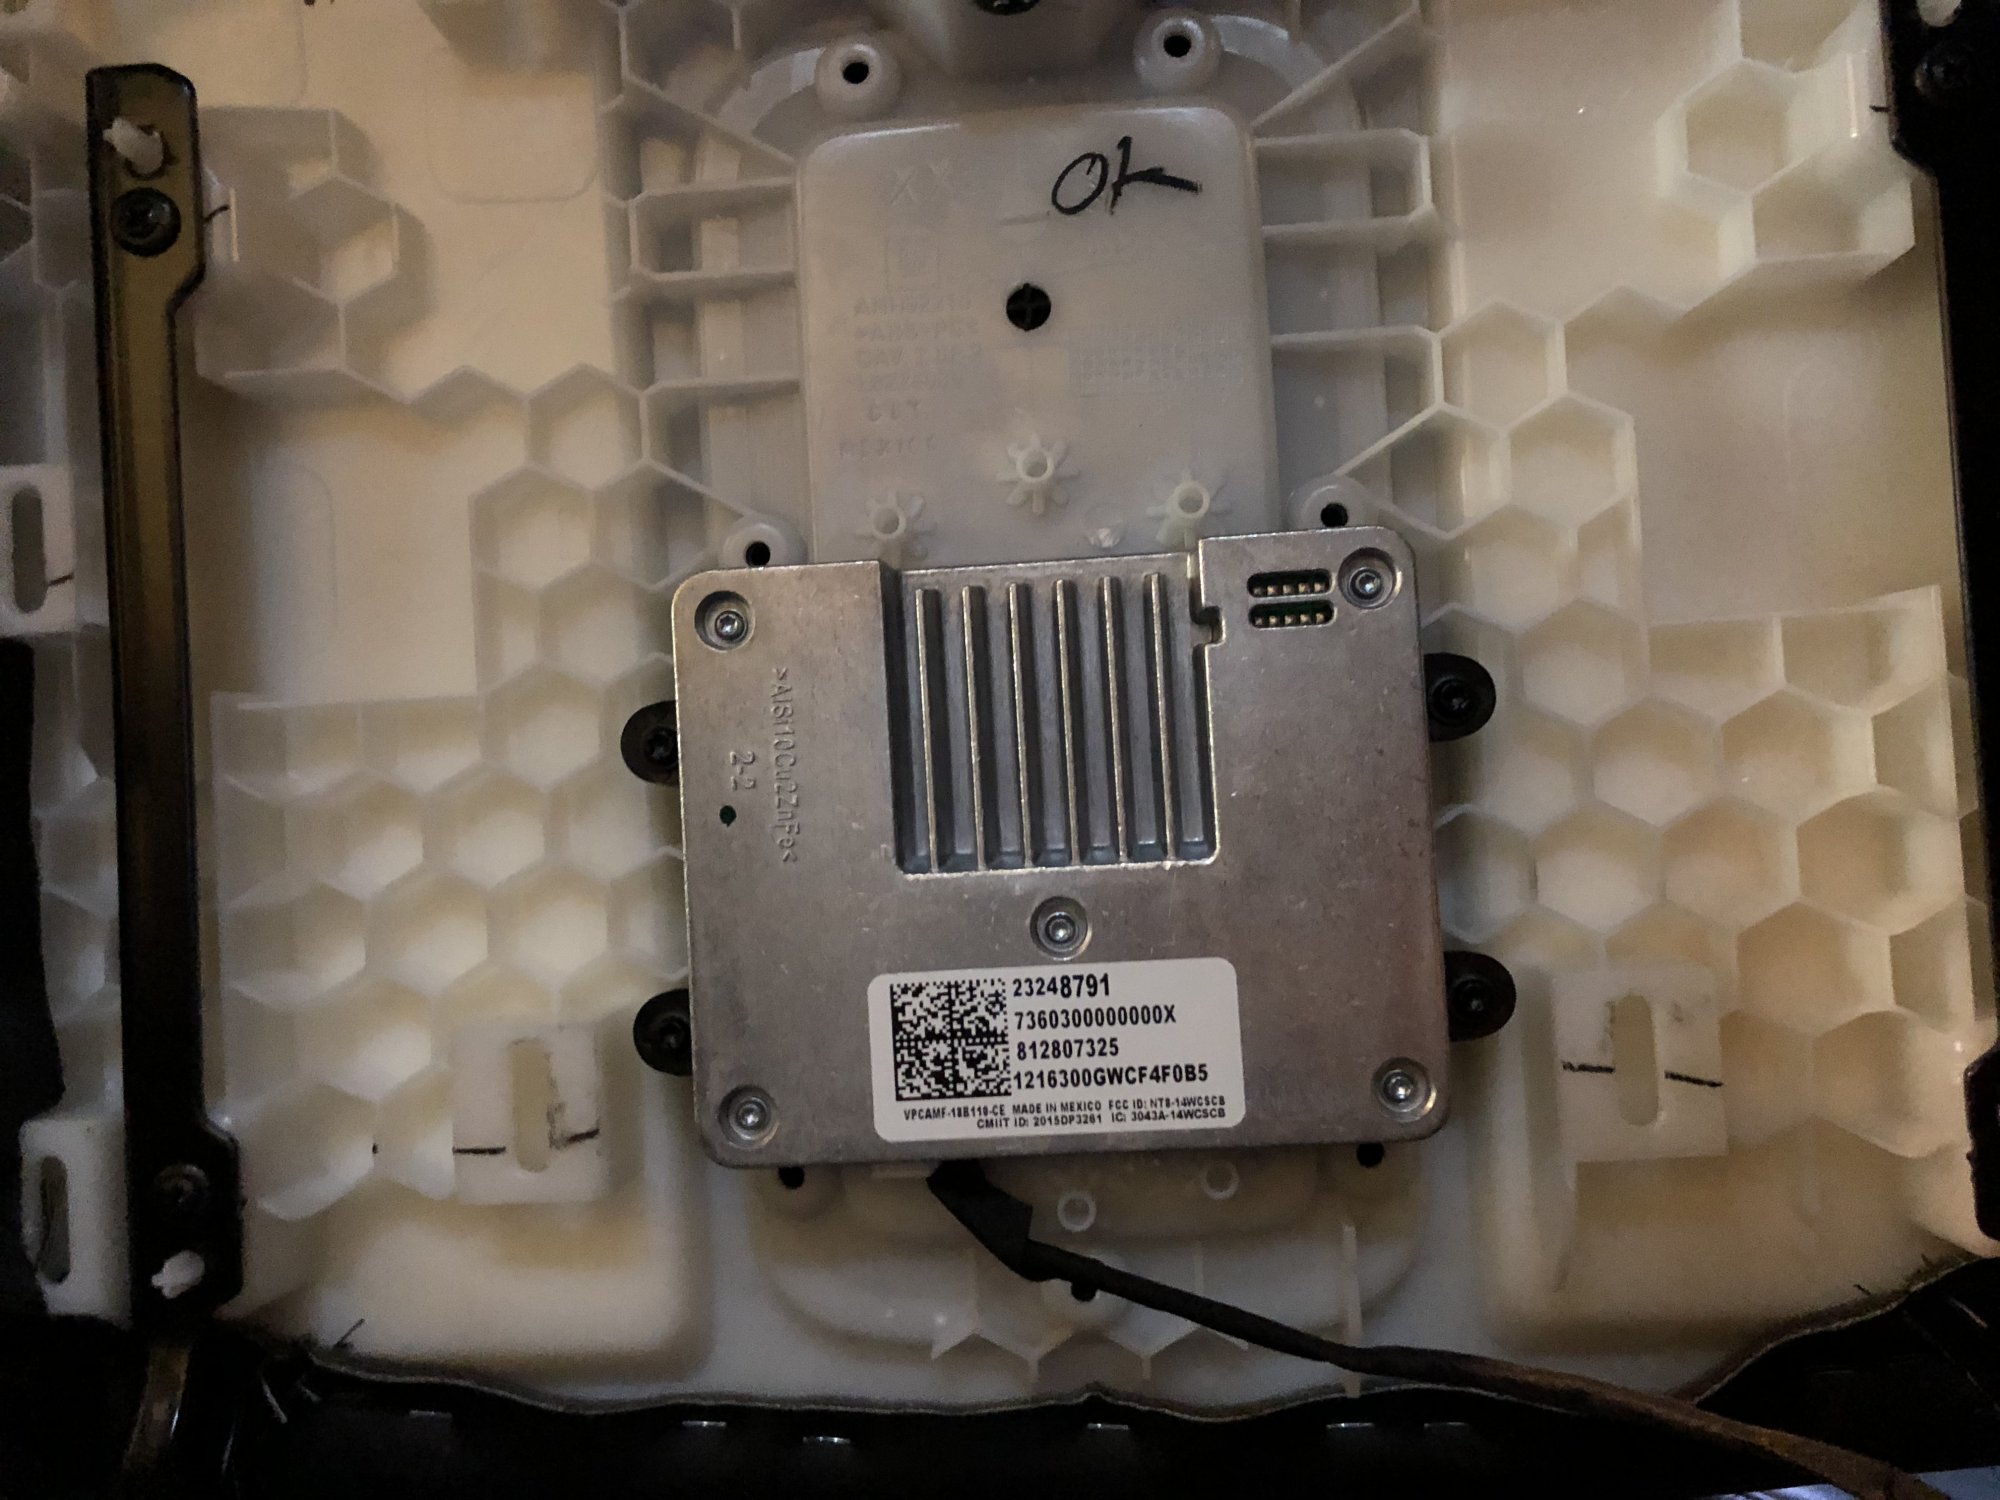
Thanks to everyone and rtreptow7 for doing the research and legwork on getting the part numbers for the new 2018 charging module and the associated connector part with Mouser. I finally got my module today, and will include some additional pictures to complement the ones rtreptow7 posted. Box of the module, and the module itself:
-
Here is the FCC filing information for this module, including a user manual and photographs of the inside: https://fccid.io/BEJWC900A05
-
I have a similar issue on my '17 Suburban. Took out the magnet and screen as well. Mine will usually work fine when i put it on and take it off the wireless charger, but sometimes it doesn't respond. When then happens, I plug in the lighting cable for a second, then after that, it seems to work OK again, being able to wirelessly charge after that. Others have had the same issue, and when they plug their cable in, it doesn't fix it. The better solution is to use the 2018 module, once people figure out if it works with pre 2018 models, with the proper harness also. My 9 rib rubber liner seems to work OK with the 2017 charger without the magnet/screen, but a 10 rib liner would give more flexibility for phone placement.
-
I'm sure mine will start acting like yours after a while! I'm so frustrated that I'm almost at the point of taking out the whole GM unit, and putting a cheap $10 Qi charger in there and just hooking it up to USB.
-
Here is a better picture of the back. Only 9 ribs. You would think that if they revised a part, that it would have a different part number. If they are using the same part number as the old 9 rib rubber piece, it is going to be difficult to try to locate the new 10 rib batch.
-
-
I ordered this part number last week and got this: (9 ribs, not 10):
-
Interestingly enough, when the phone won't charge on the wireless pad, if I plug in a lightning cable hooked up to the truck's USB port, then place it on the wireless pad while still connected to the cord, it will begin to charge wirelessly. Even after i disconnect the cable, it will maintain normal behavior for wireless charging. I can take it off the pad, put it back on right side up, upside down, etc, and it will still recognize the iPhone X and charge. This could be a temporary workaround to have something working until we figure everything out with the 2018 modules?
-
For the bottom of the armrest compartment, perhaps?
-
I played with the charger some more tonight and I'm now having the same problem that you're having. It won't charge my phone unless i turn on the truck with the phone on the mat. It didn't do that this morning though as I was able to repeatedly remove and replace the phone on the charging mat, and it would begin charging each time. The screen that we took out must have some function that is needed for the phones to initialize charging? I think at this point, the best thing to do is to see if the 2018 module would work in its place, with the new connector and new rubber liner.
-
That's great! Were you able to get a part number for the new liner?
-
This is a picture of mine. My vehicle was built near the end of December 2016. Maybe there are variations in modules across different time periods that still have the same part number?
-
Hmm. What is the part number on your charger? Perhaps there are different ones out there? Mine is 23248791. You could try to unplug the harness again from the module, then try plugging in again? Perhaps there are different states that the module can be in when first initialized by plugging in? For me, I could have sworn the first time I plugged it in, the connector was tight, but then nothing appeared to work. When unplugging it, then plugging it in again with the phone on top of the charger, it seemed to work afterwards? It wouldn't make sense either if the charger consistently had power even with the car off, because then it would just drain the battery.
-
Yes, the 2018 has a different charging module. Some have said that the rubber console mat (or as GM calls it, just "LINER") is different, or at least a different part number. From the pictures I have seen on chevrolet.com, it looks the same compared to 2017, but it's possible it could be different? I tried the mod posted by another user on this thread to my '17 charger by removing the screen/magnet, and it seems to be working, even with the '17 rubber liner and '17 bezel, in the factory configuration, without having to flip the rubber, etc, that others have had to do. With it working with the '17 parts, perhaps the '18 parts are the same as the '17 and earlier, with the exception for the '18 charger (plus the different connector)?
-
I did some testing this morning in my '17 Suburban. I left this morning with an 87% charge on my iPhone X and put it on the armrest charger. 25 minutes later, I took a look at the phone and it was up to 94%. The phone was not hot, and the lightning bolt was steadily displayed on the Suburban display for the entire duration. I asked a friend what he though the magnet/screen ribbon cable set up might be for. Again, this is just pure guessing, but he thought that it looked like an antenna, and that perhaps it was acting as a filter so that only the Qi frequencies would be able to be passed from the coil? The guess is that maybe it's just connected to filtered ground and the grid pattern itself is what is causing the filtering? Perhaps it is something that is needed to compliance against unwanted transmissions that are out of band for Qi? This is probably older technology and new chargers may not need this anymore? The magnet is just used to ensure the device is properly centered on the coil, lining up with a magnet in the device itself. Anyone else have any ideas?
-
For those of you that tried the screen/magnet removal trick and didn't have it work, I also tried this, and it didn't work at first. No matter what orientation I put the phone in, with the charging module unscrewed from the armrest with direct phone to back of charger contact, nothing would trigger charging on the phone or the lightning bolt on the truck screen. However, when I unplugged the white connector from module for a few seconds, and plugged it back in, it immediately began to work! I had my iPhone X resting on the black charger surface when I plugged it back in, and have had no issues since. It works in the standard rubber tray configuration, right side up, and upside down. It works after i turn off the ignition and start it back up. So if it didn't work the first time for you, try unplugging it, then plugging it back in (with the phone on the charger while you do it). I don't know if the phone laying on the charger made any difference, but that's how it started working for me! It even works well with the official Apple iPhone X Silicone case, which is what I am now using with it. I'm not exactly sure what the screen with the magnet does. I can imagine the magnet is to help center devices with magnets so it orients correctly with the charging coil. My guess with the screen with the grid is perhaps it's some kind of feedback power control method? The grid has 4 contacts of where it connects to the PCB. The two outer ones make a loop around the screen, whereas the two middle contacts are just a short with each other. Perhaps it senses exactly how much induction is coming out of the coil? Maybe the side effect of having this screen is that it blocks too much of the induction? Again, this is just pure speculation on my part.
-
For those that still want the part number for this, it is in the picture below in the upper left corner.
-
Yes, but doesn't iOS 11.2 offer up 7.5W wireless charging? You're probably right though -- if the 16-17 chargers can't handle 5W, 7.5W isn't going to be any better?
-
New and have "heated" seats issue
Bangback replied to 2015ltz's topic in 2015-2020 Tahoe, Suburban, Yukon & Escalade
I wonder if shoving some stryofoam or some foam in the middle of the HED would help things out, if a cable tie doesn't work? Then it shouldn't shift.