


Core-Lokt
-
Posts
86 -
Joined
-
Last visited
Content Type
Profiles
Forums
Gallery
Events
Articles
RPO
Store
Blogs
Everything posted by Core-Lokt
-
Hello @jaszr2 Do you have a link for the item? I put a replacement bumper on my truck and consequently had to relocate the shutters. I studied on them a while, and figured if you left a couple key blades, you could get most of the airflow with probably no throwing codes.
-
In the 6.6 gas thread, I added information in my fluid change thread about these gauges and temperatures. With very limited data, it so far looks like ~30 degrees difference between front and rear.
-
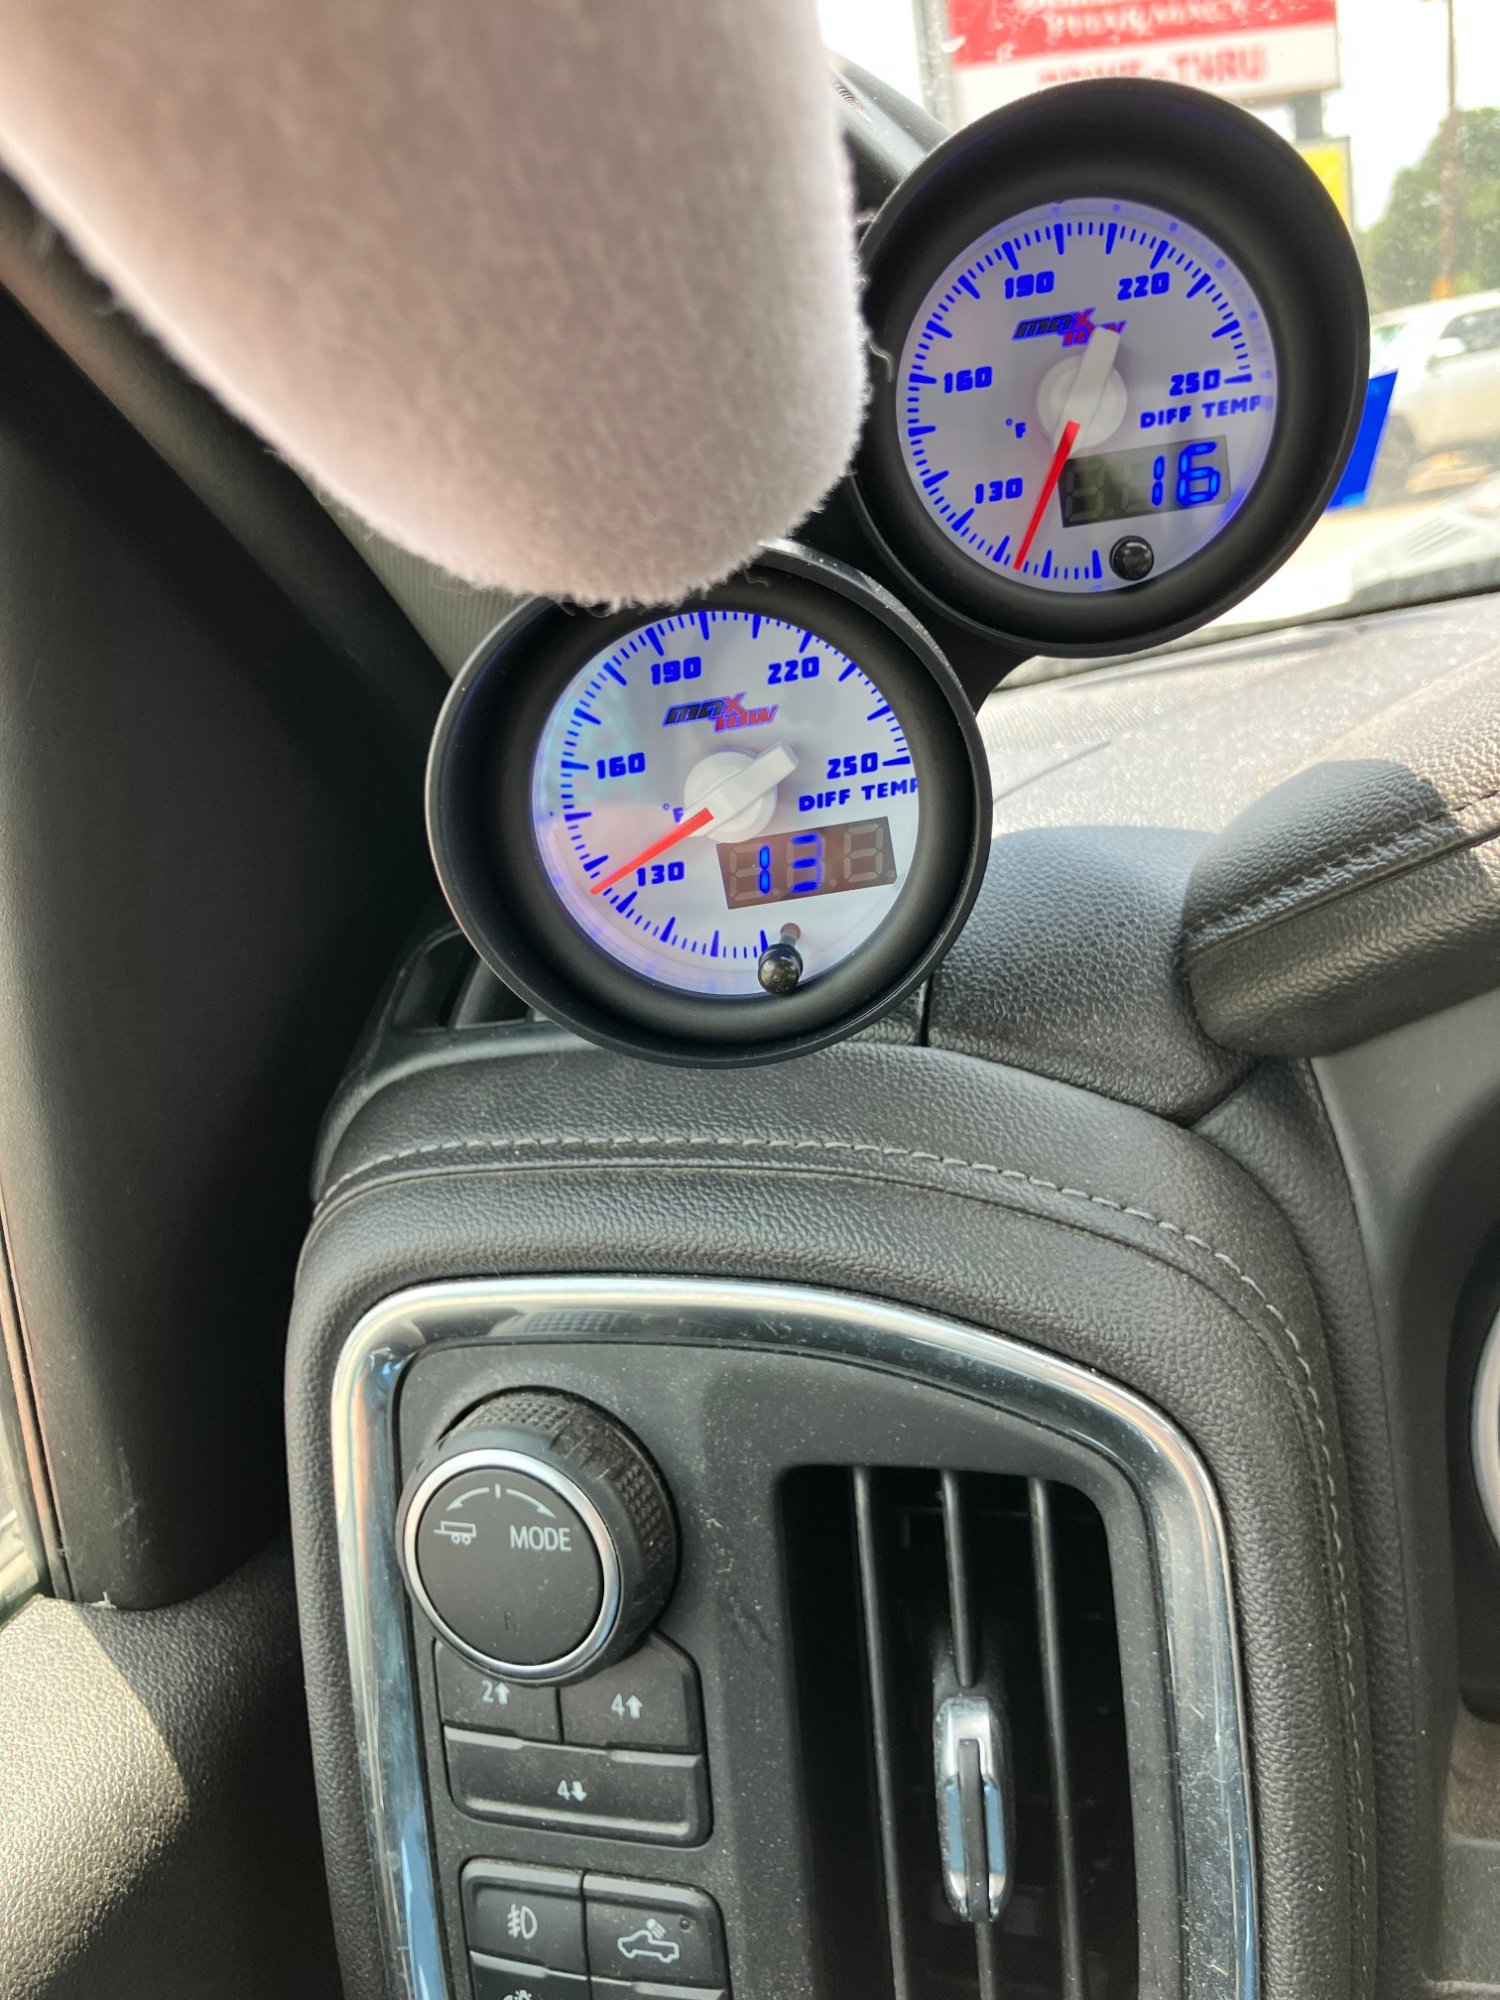
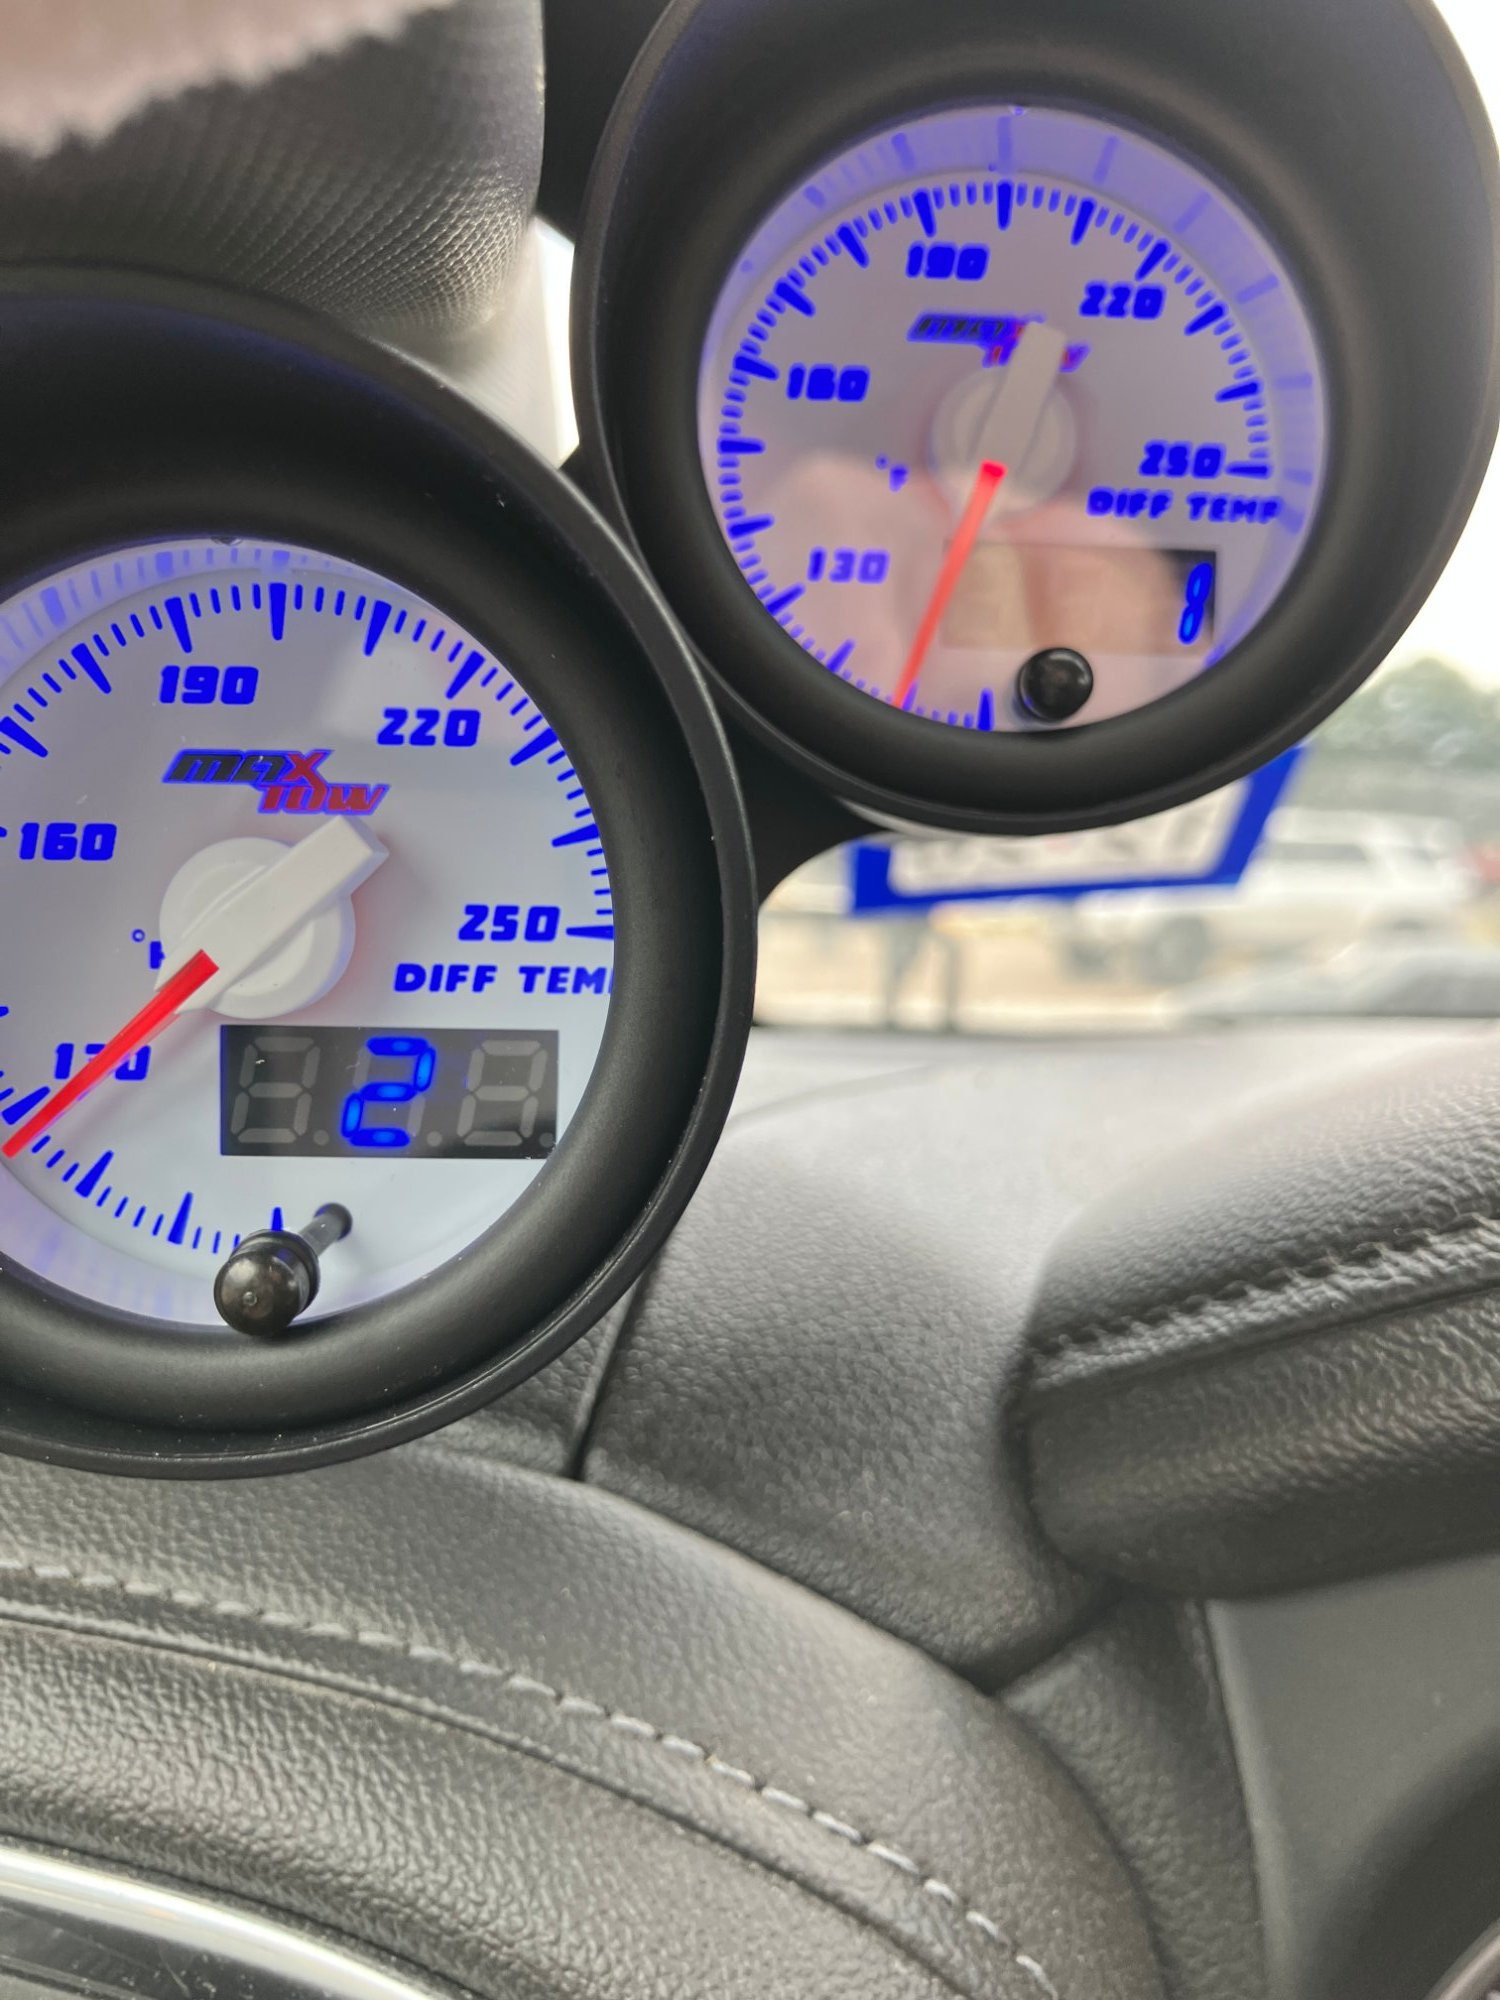
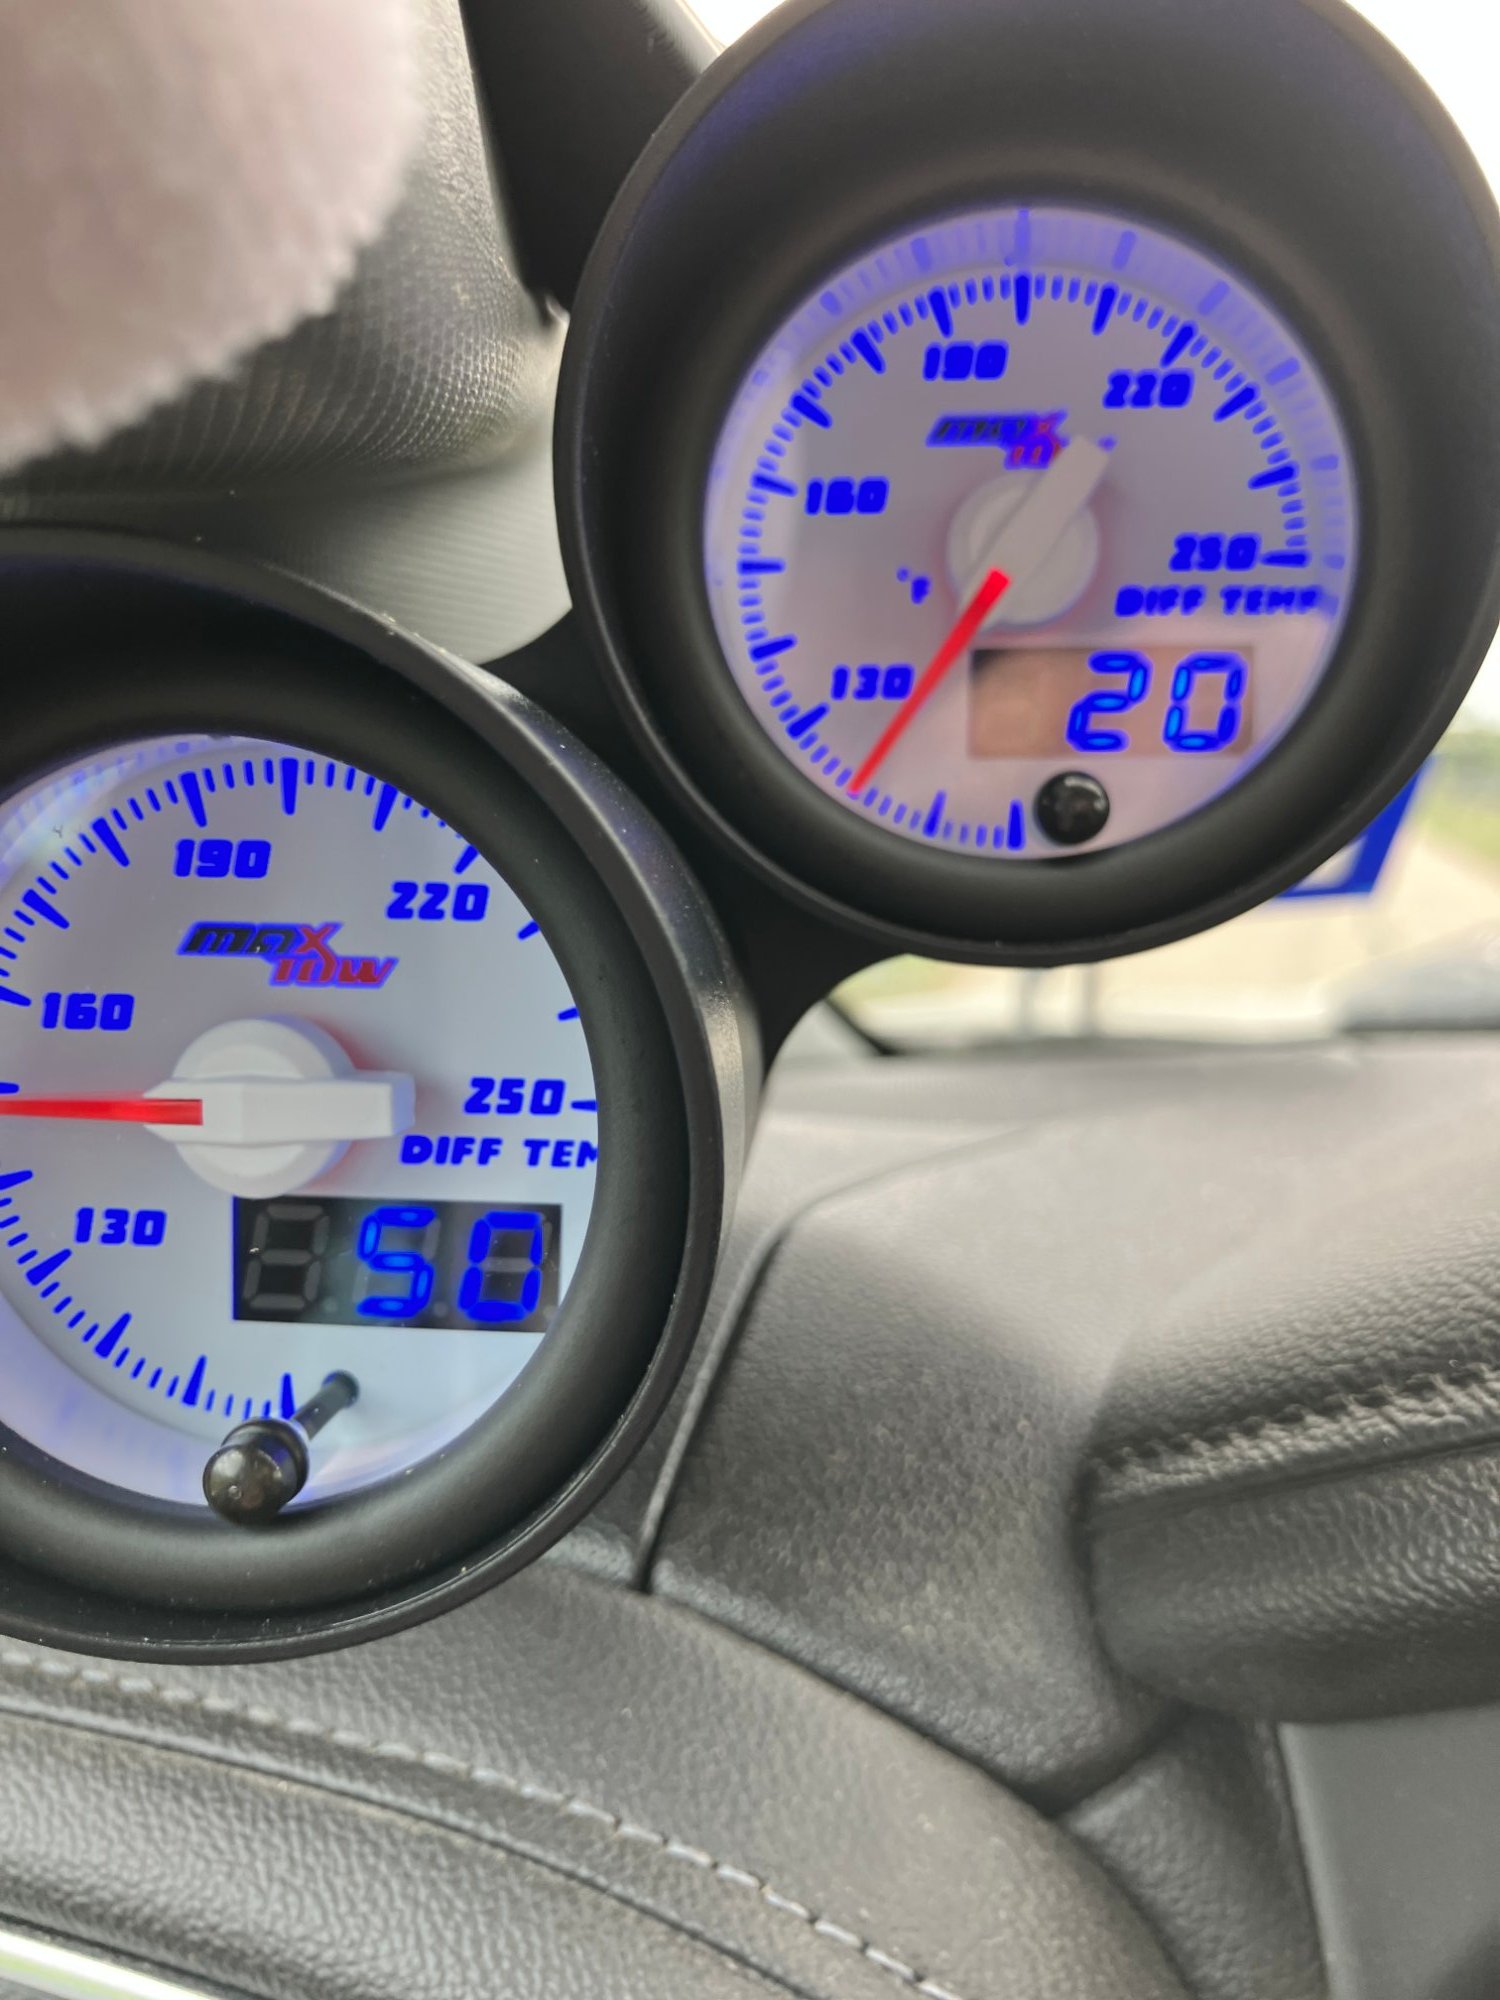
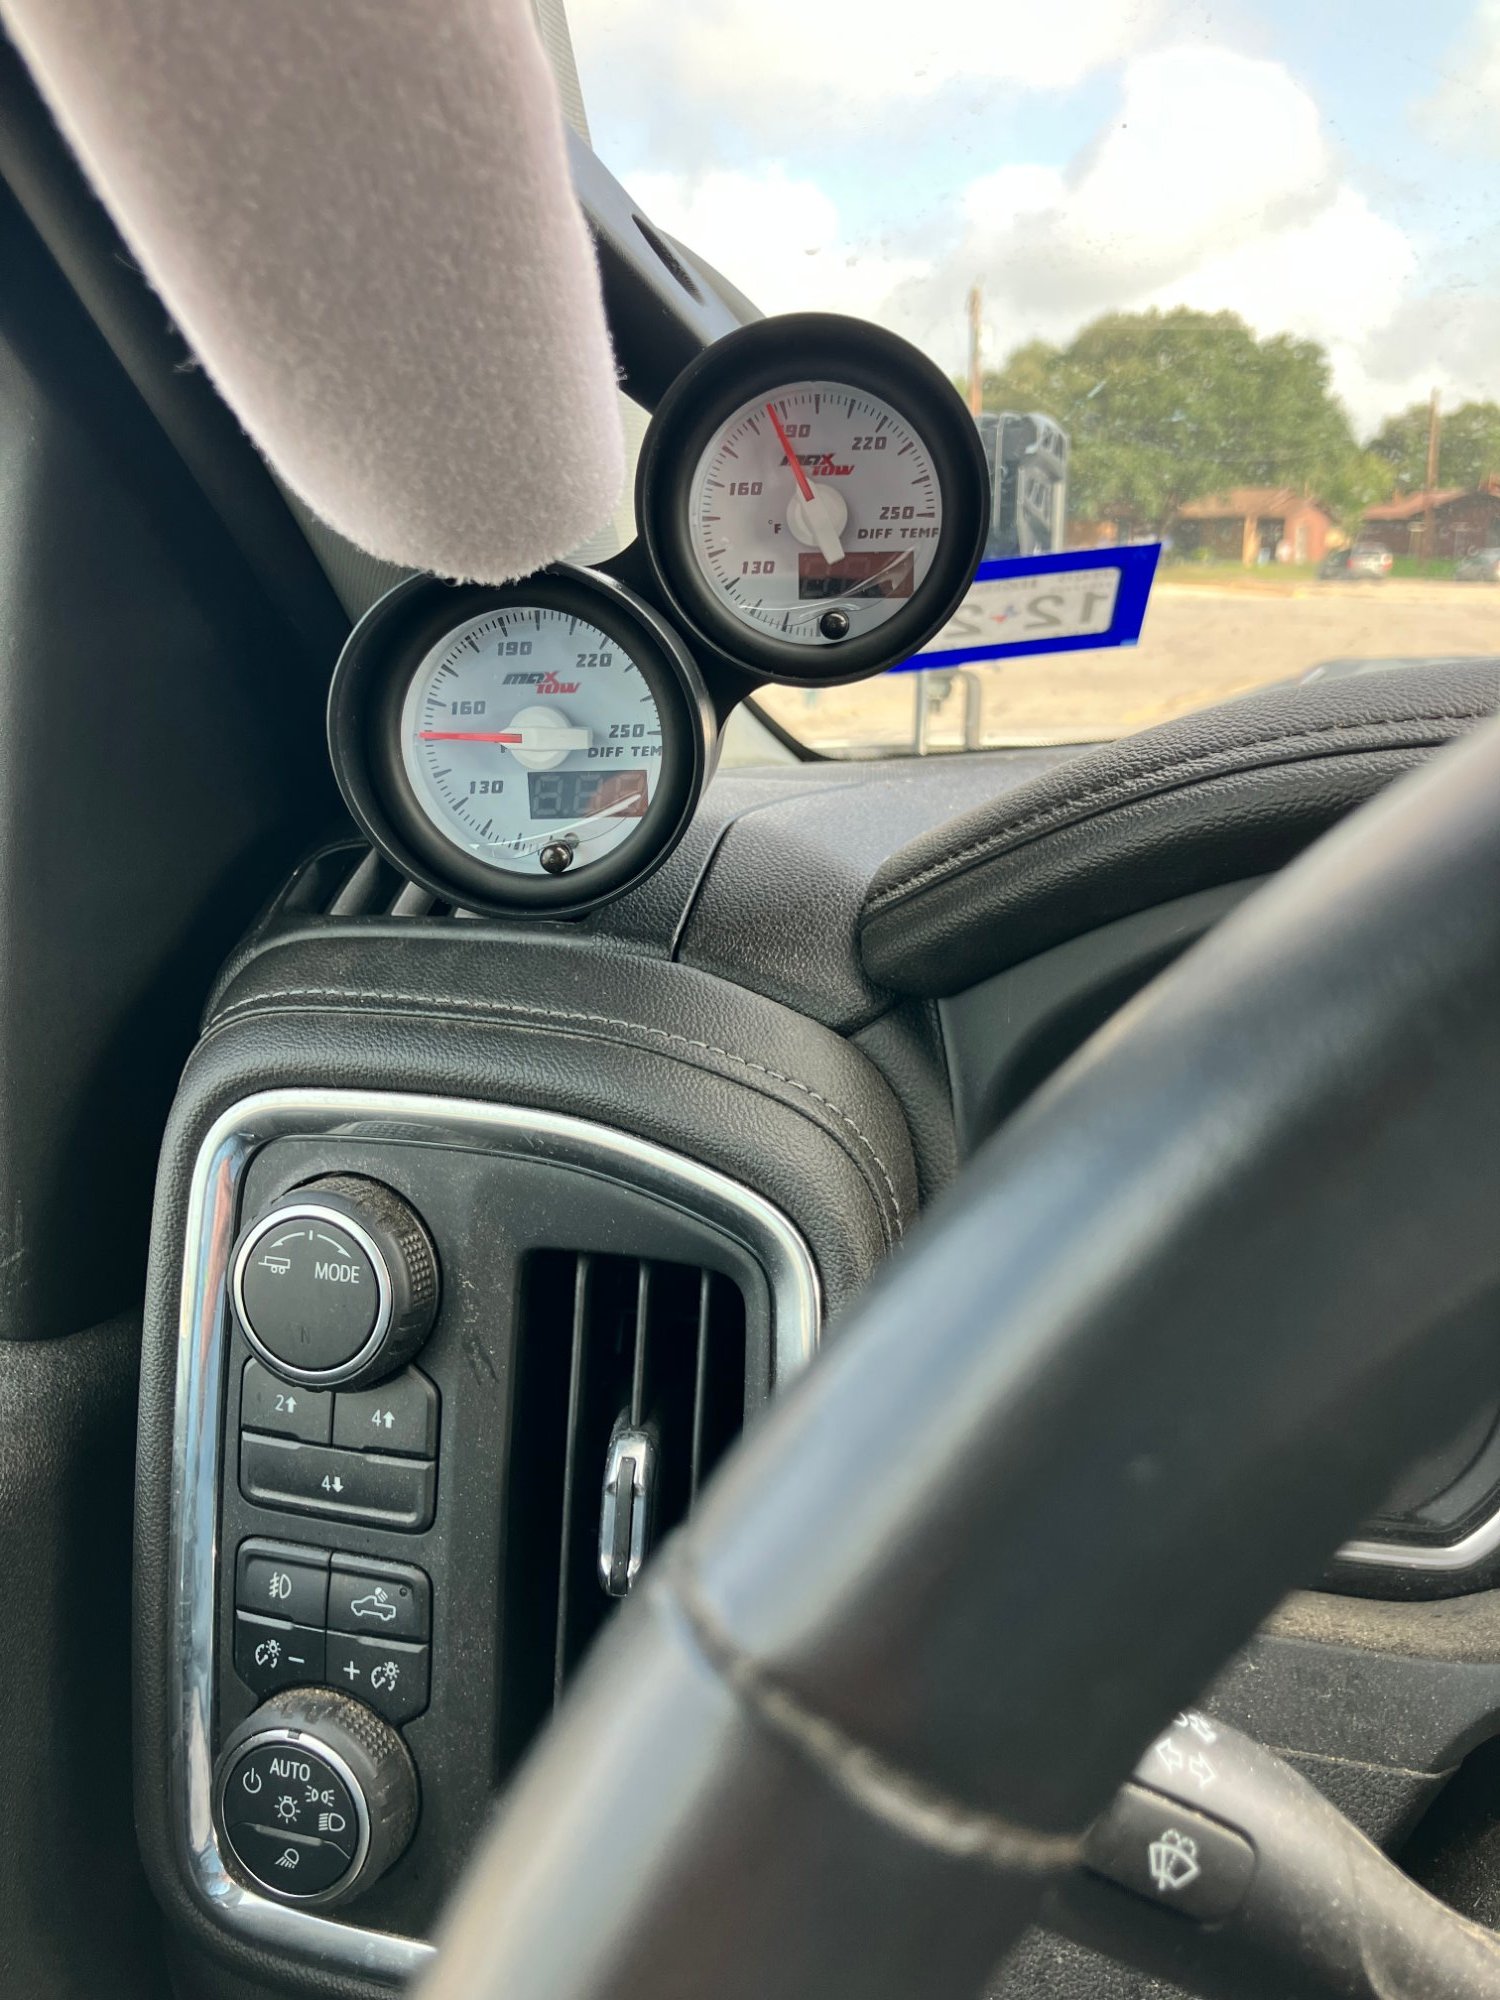
I know; crap pictures. Anyway, as a finale of sorts to this thread, I had replaced both differential covers and since they had the capability of adding temperature probes, I did that. These are MaxTow analog/digital gauges with stepper motors. They'll flutter around like crazy for a moment and start at a nominal 100 degrees Fahrenheit. I drove a 30-mile loop to the grocery store, averaging 70 MPH (as much as 80 to see if there was a quick spike in temperature. The air temperature is 102 (ambient ?). but the first pic is 7 miles into the trip. The second is getting back into the truck after leaving the store; differential temperatures dropped about three to four degrees in 15 minutes. The third pic in on the road to my house, about a mile away. In that run, I saw a high of 150F on the rear differential, and 121F on the front. I'm sure a longer drive or towing will see higher than that, and when that happens, I can update the observations.

-
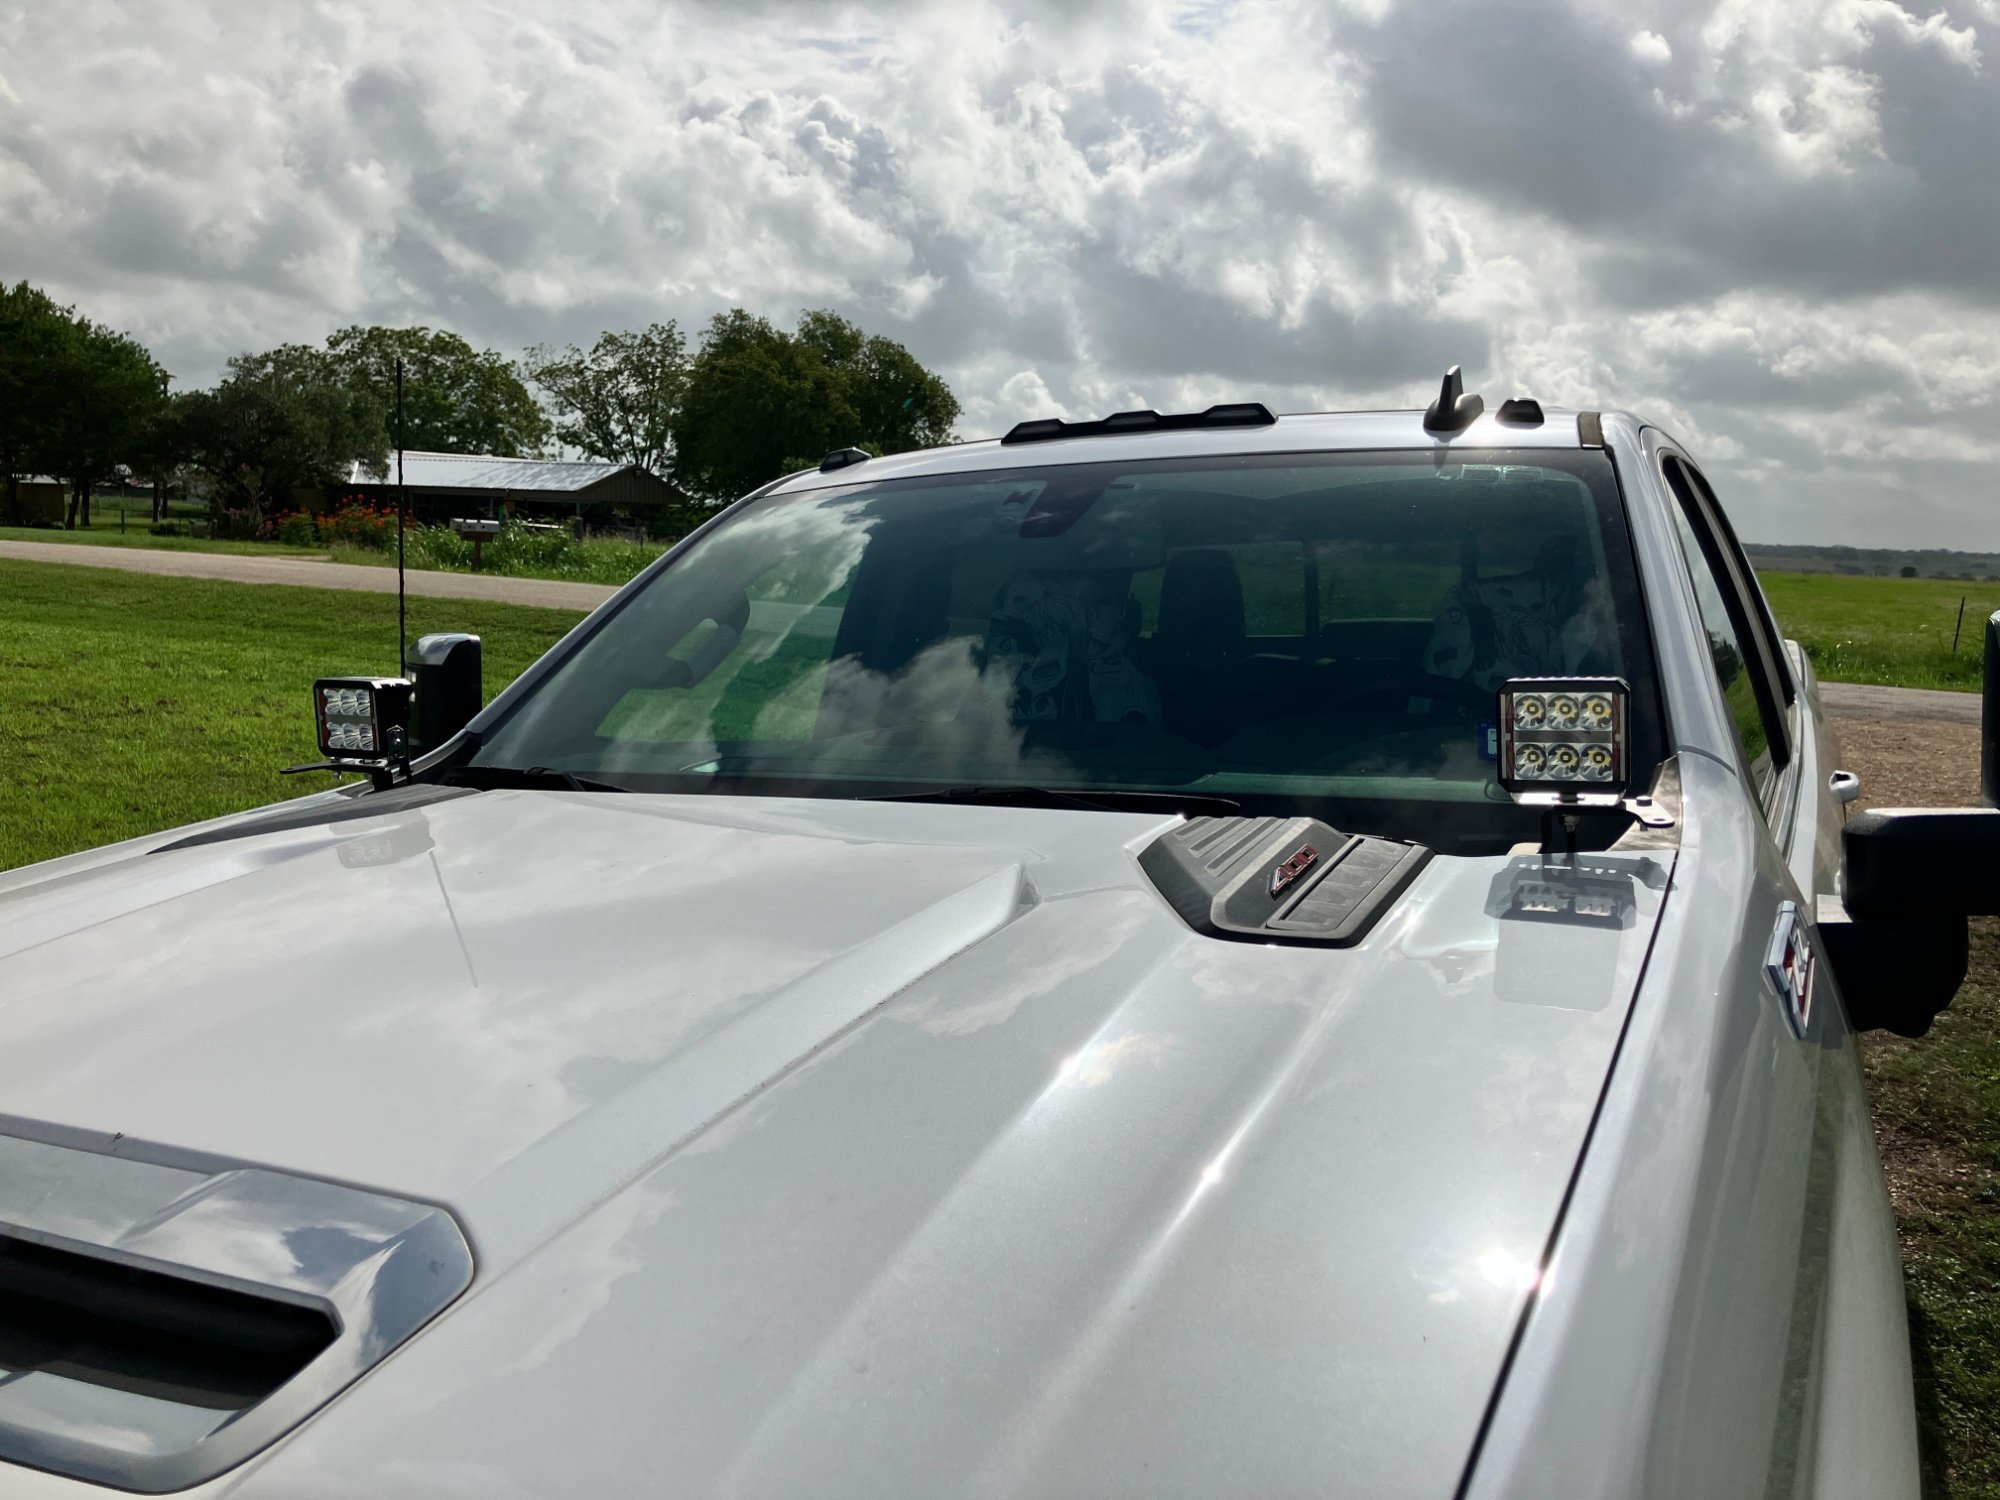
If you’re interested in any cowl pod lights, I can recommend the Parkwood Welding mounts. Offhand, I only recall one other option from a place in Arizona that was waaayyy more expensive. I have a pic of my truck with the lights in a post, here.
-
Yes; I have a Banks rear cover, and a PPE front with sensors. This weekend I hope to get them heated-up. I’m not planning any towing in the near future, but when I do (and anything notable is observed), I’ll make mention of it.
-
I know the upfitter switch deal well; my truck didn't have it, so in one day I retrofitted/wired the kit, and since I knew I'd have several panels off, I did the same day a High Country cluster, and console charging/cooling. That charger cooling tube was the worst part of the deal. The gauges are MaxTow. I don't need an iDash, as the HC cluster has all that information, and I'm using the OBD for a pass-through for the Intellihaul cameras? or the GM dash camera?, anyway. I'm ending up going under the hood to the fuse box. I identified constant hot/switched hot/illumination and have some piggyback taps in. Just waiting for an 4-wire 18-gauge cable to come in the 29th to finish. I already ran the sensors, and have the gauges/pod mounted. If I could've found what I needed on the fuse panel by the light switch, they'd be up and going.
-
Thanks; I looked there a few minutes, and I think I can find something. I really never looked there, as I thought it was stuff like PTO/aftermarket bodies/accessories like snow plows.
-
I'm putting in an A-pillar pod/gauges, and I'm asking if anybody can identify a (preferably) fuse for a switched power and illumination circuit on the driver's side interior fuse panel. Offhand, everything I checked with a test light was constant-hot, and I'd much rather uses a piggyback fuse. I can certainly find a wire, but I'd rather not half-tap. Thanks in advance for any help.
-
I bought the truck new in December 2022, and it's got 60,000 miles. The front cover magnet had slightly more glitter, but overall very clean, no off odor, and good-colored; really nothing to report. My truck has Hi-Lo transfer case, and the fluid looked great, as well. I have towed..maybe 1,000 miles. Yes, this was the first change for all three driveline items. I'll probably do the transmission at next oil change.
-
I got the time to change the fluids in the transfer case and front differential, and I intended to replace the front cover. This is a PML cover, and the noteworthy things about it are all hardware is there, the fill plug level is the same height (but on the side), and it holds a pint more per the instructions. There's no good place to take a pic, so that's the best I could do.
-
Roadmaster makes some quality parts; I have their sway bar. I considered the RAS, but I ended up bagging. I didn't know what kind of ride I'd get with RAS, and the bags have interior jounce bumpers, so I can run 0 pounds pressure. I figured I'd have the best of normal suspension ride with assist on-demand. But it seems you got pretty much the same in one item.
-
Thinking on things over the week, I decided to use the remaining oil in the pouch. Basically, there's a gallon in the differential, minus a tiny bit of spillage and whatever remained in the bags. I think Banks designed this cover biased towards the standard Ram fill (some of those applications are greater than others, but by Amsoil's website, capacity is minimum about a pint greater than GM applications. In the picture, the differential appears fairly tilted, but it is really slightly tilted; the camera angle is skewed. With ~8 pints, the level is midway on the sight glass; you can see the center hole of the baffle to more closely judge the level. Regardless the 6.3 pint fill spec, I'm going to leave it as-is. I don't blame Banks for erring on the conservative side, and I don't know why there's such a difference in specs between GM and Ram. And I'd also speculate the cover volume is pretty much the same as the stamped steel, as @Chuck FB noted relative volume with his recollection of another member's fill experience.
-
Good find and points, sir.
-
I agree it's ambiguous, and somewhat complicated with a shared application. For S&Gs, I just looked on Amsoil's website for a 2023 Ram 2500 with 6.4 gas. https://www.amsoil.com/lookup/auto-and-light-truck/2023/ram/2500-pickup/6-4l-8-cyl-engine-code-j-esb-j/ There's a lot of listings for Ram rear differentials, and too early in the morning to dig into the variants. But there's a big difference in fluid volume called for between them and GM applications, assuming it's the same axle assembly. So, if GM differentials tend to be underfilled, what does everyone think about a 7 pint fill, as opposed to the 6.3 pints listed on Amsoil's website? It would somewhat conservatively split the difference between Ram and GM specs.
-
I’m going off the instructions.
-
I think the Banks cover is higher capacity, given I don’t see oil in the sight glass. They say to observe factory capacity over sight glass. I used approximately 6 1/4 pints bc I assume not being able to fully drain bags, and a tiny bit of spillage when I squeezed. Got Amsoil ATF as-indicated on their website. I have gas engine and six speed. Transmission service will happen after the transfer case and front differential (I’ll likely get another cover with drain, also). Besides the dipstick mod, idk what’s all underneath the pan.
-
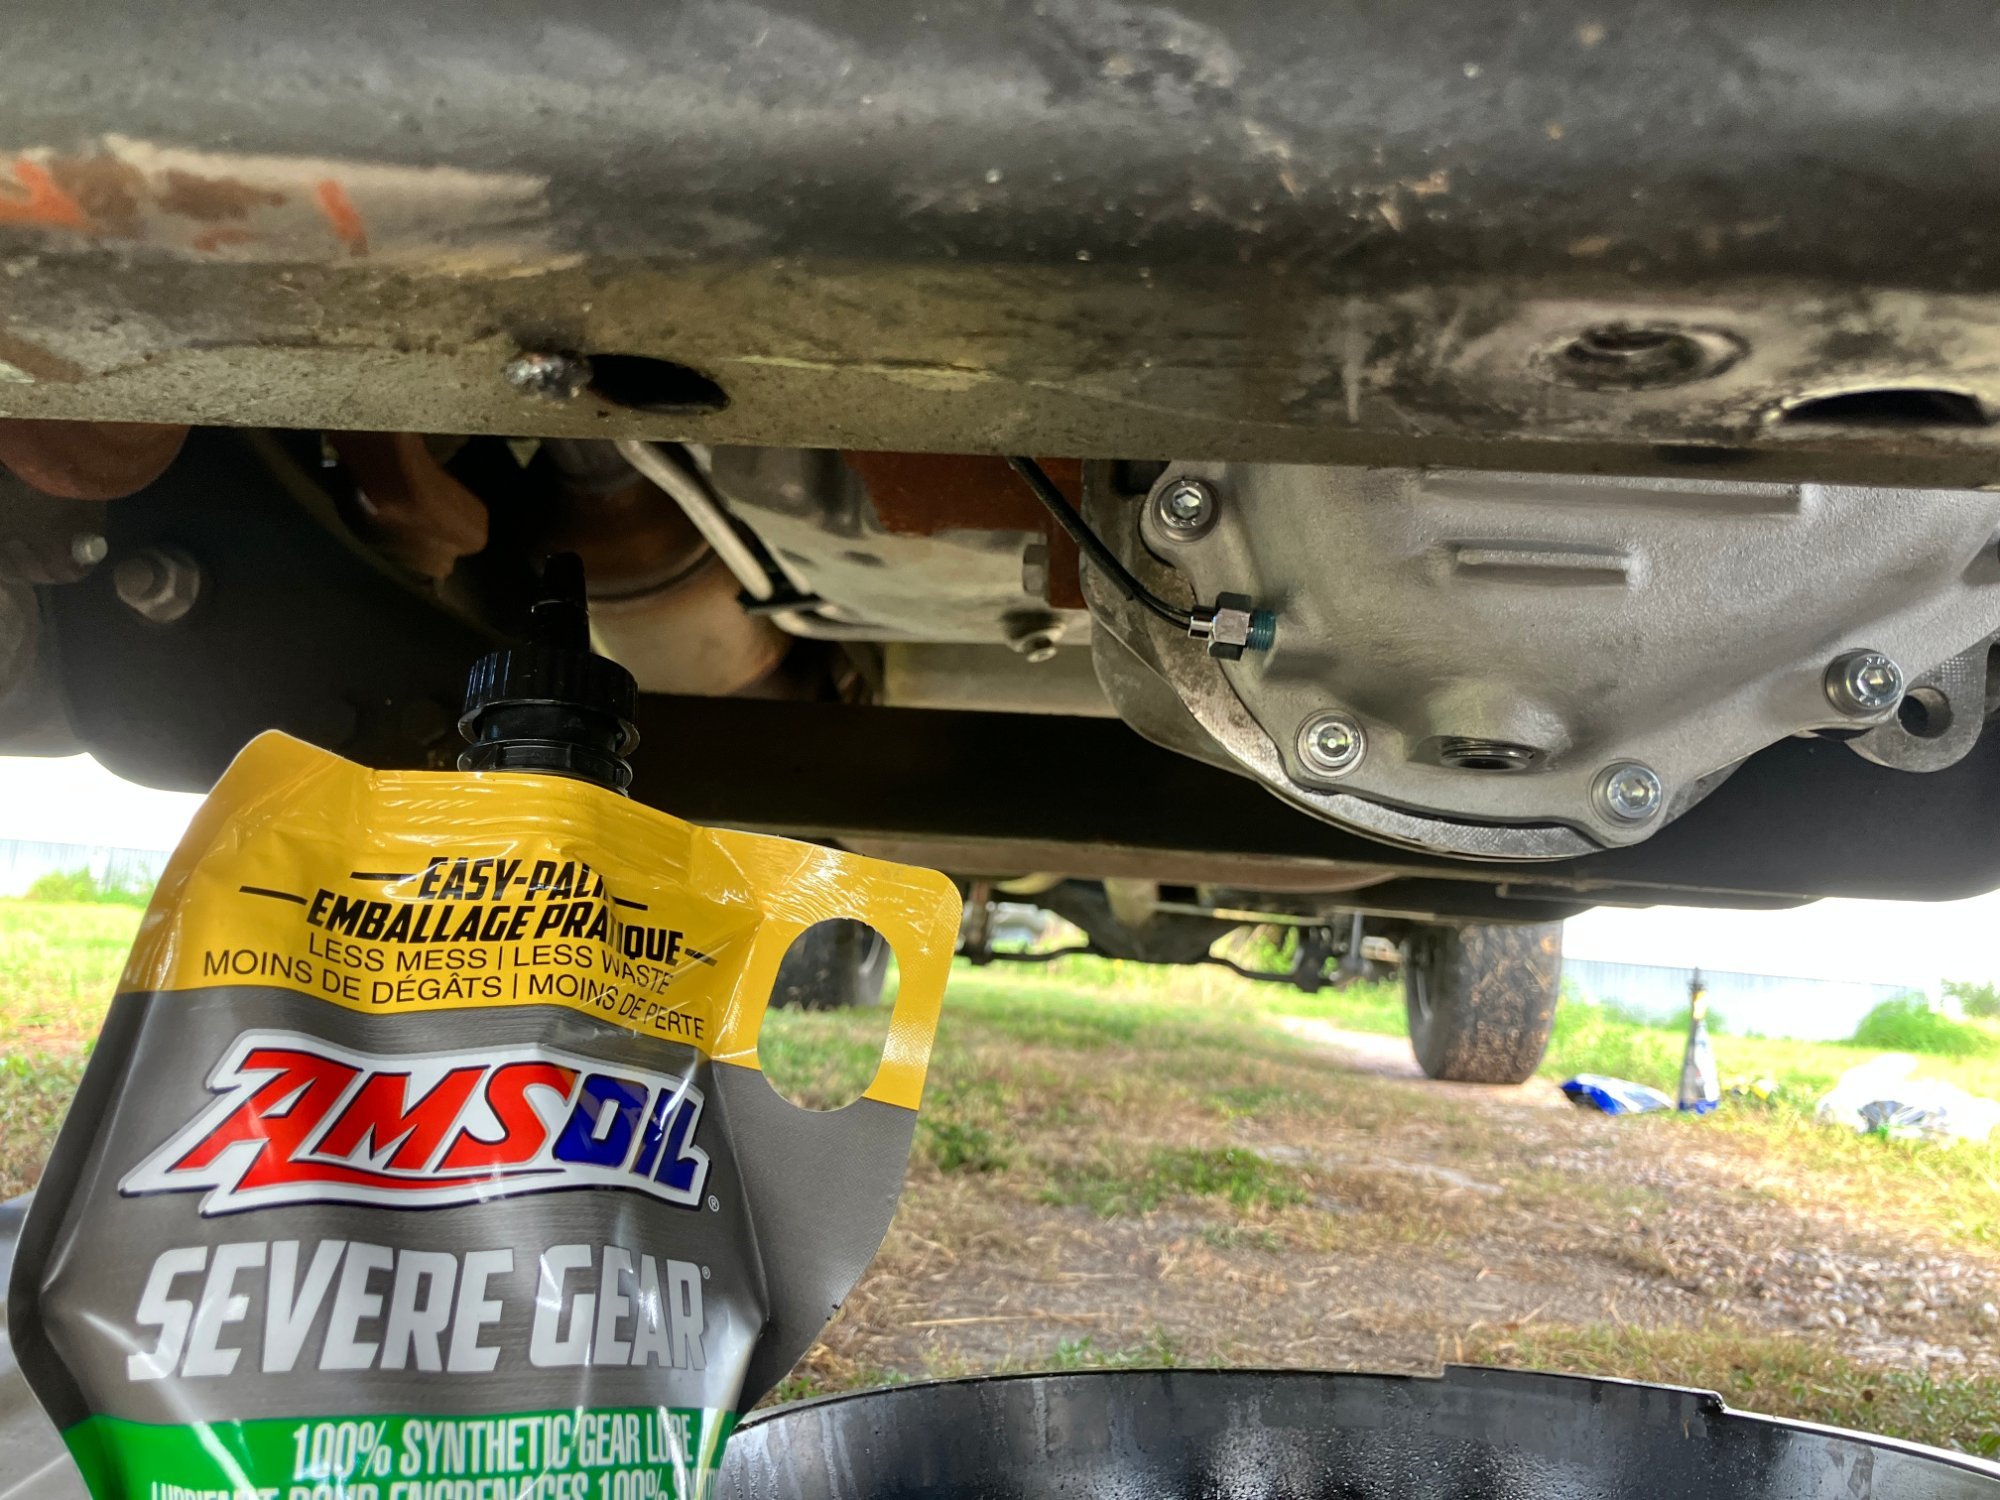
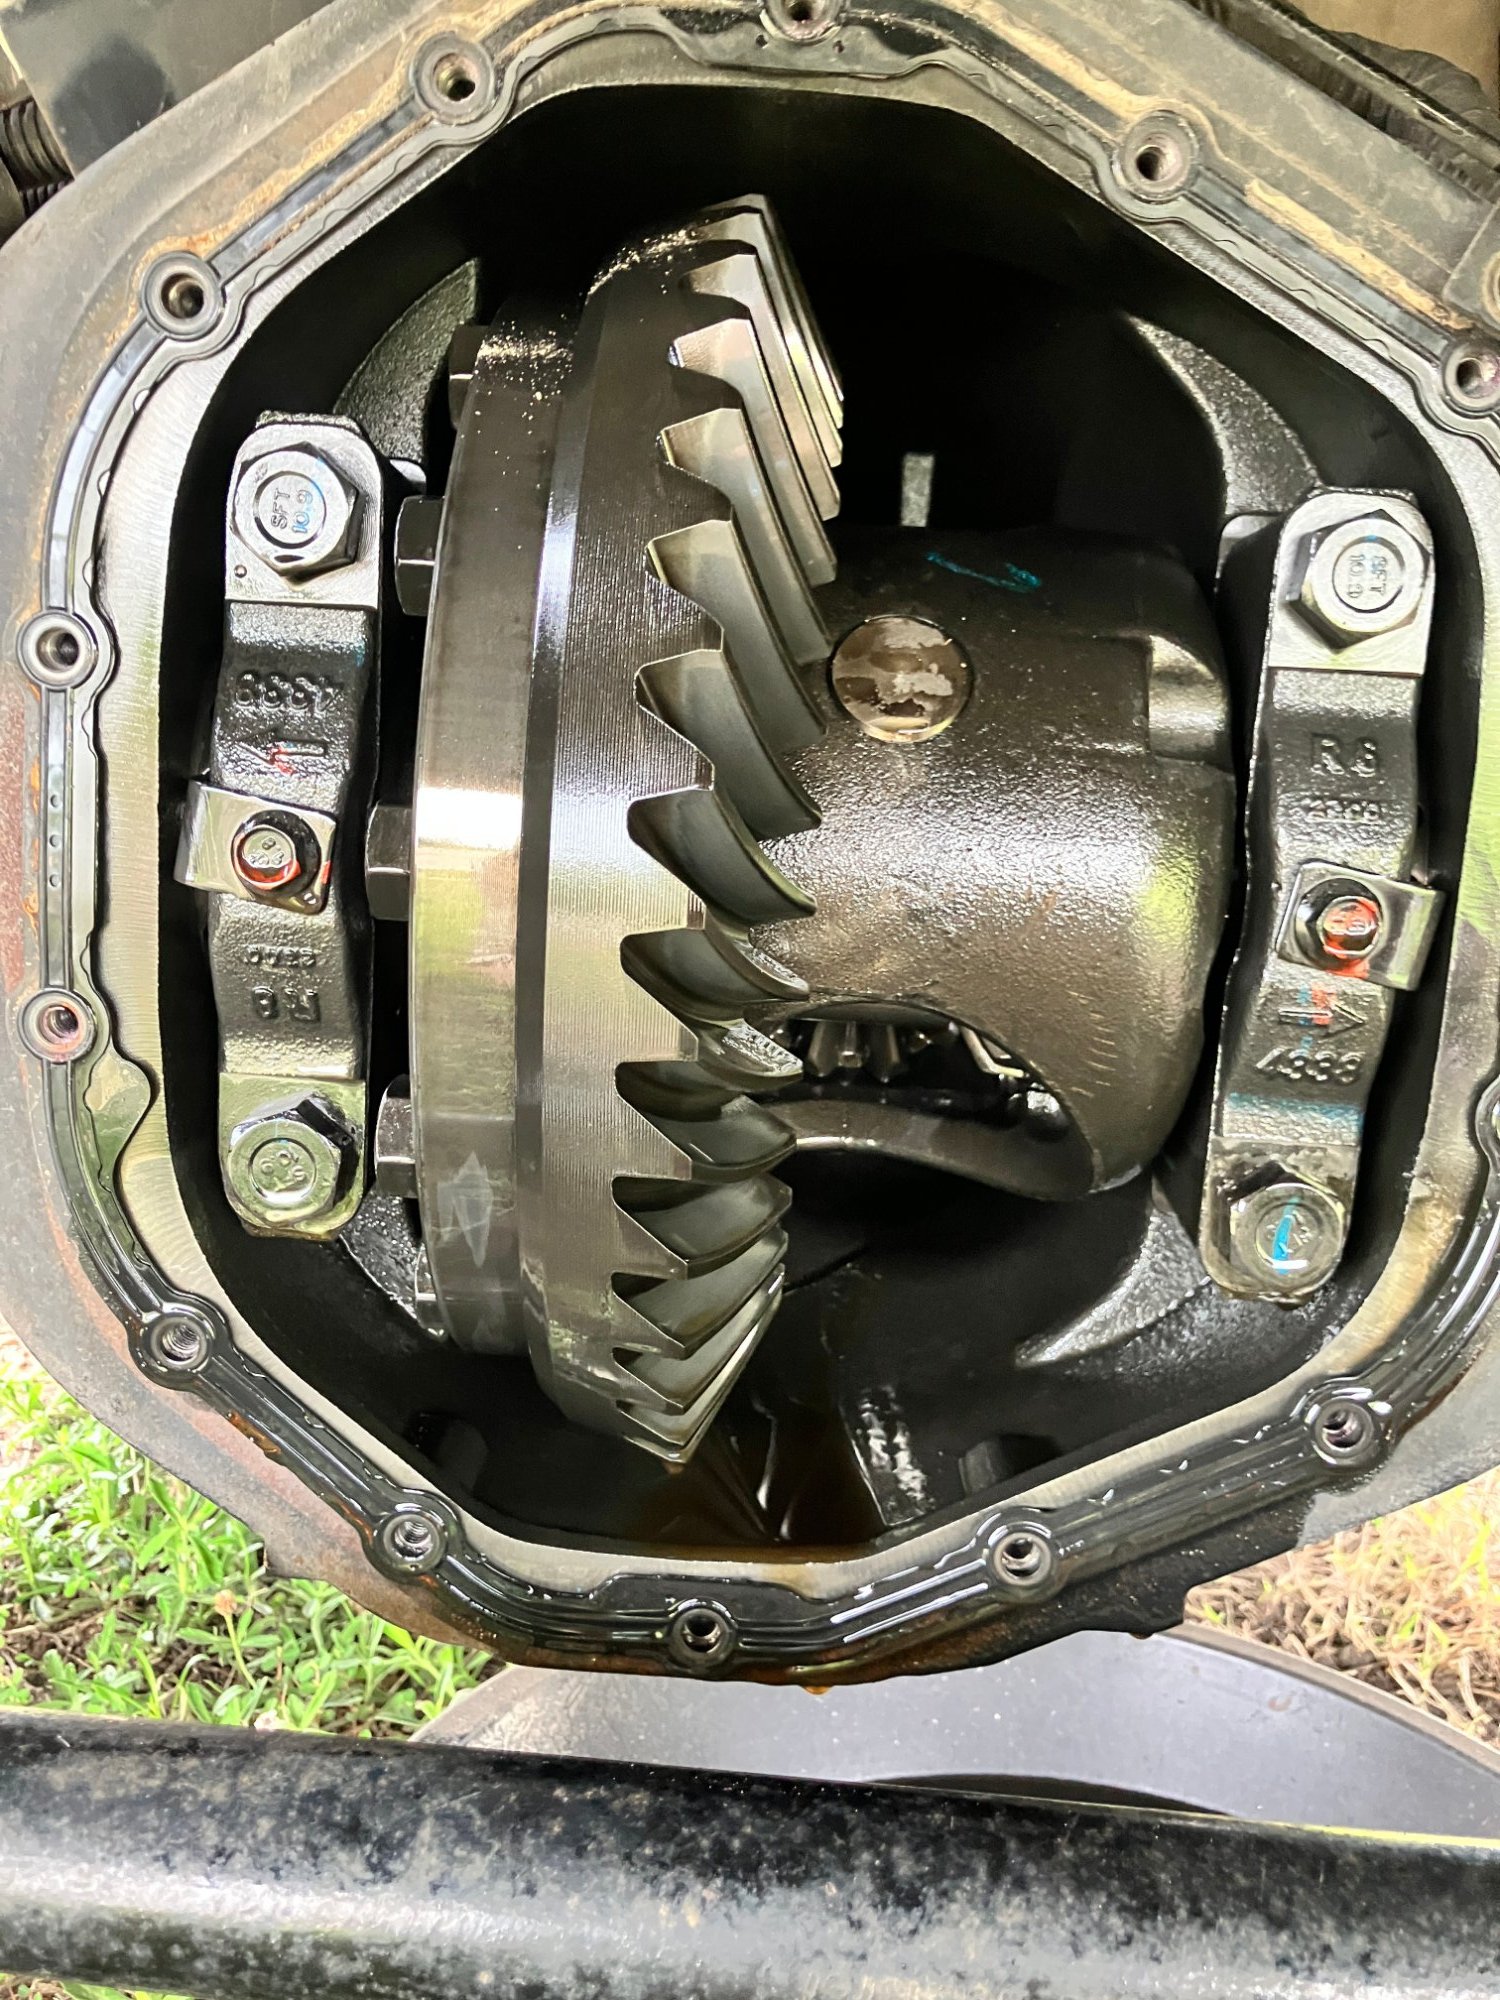
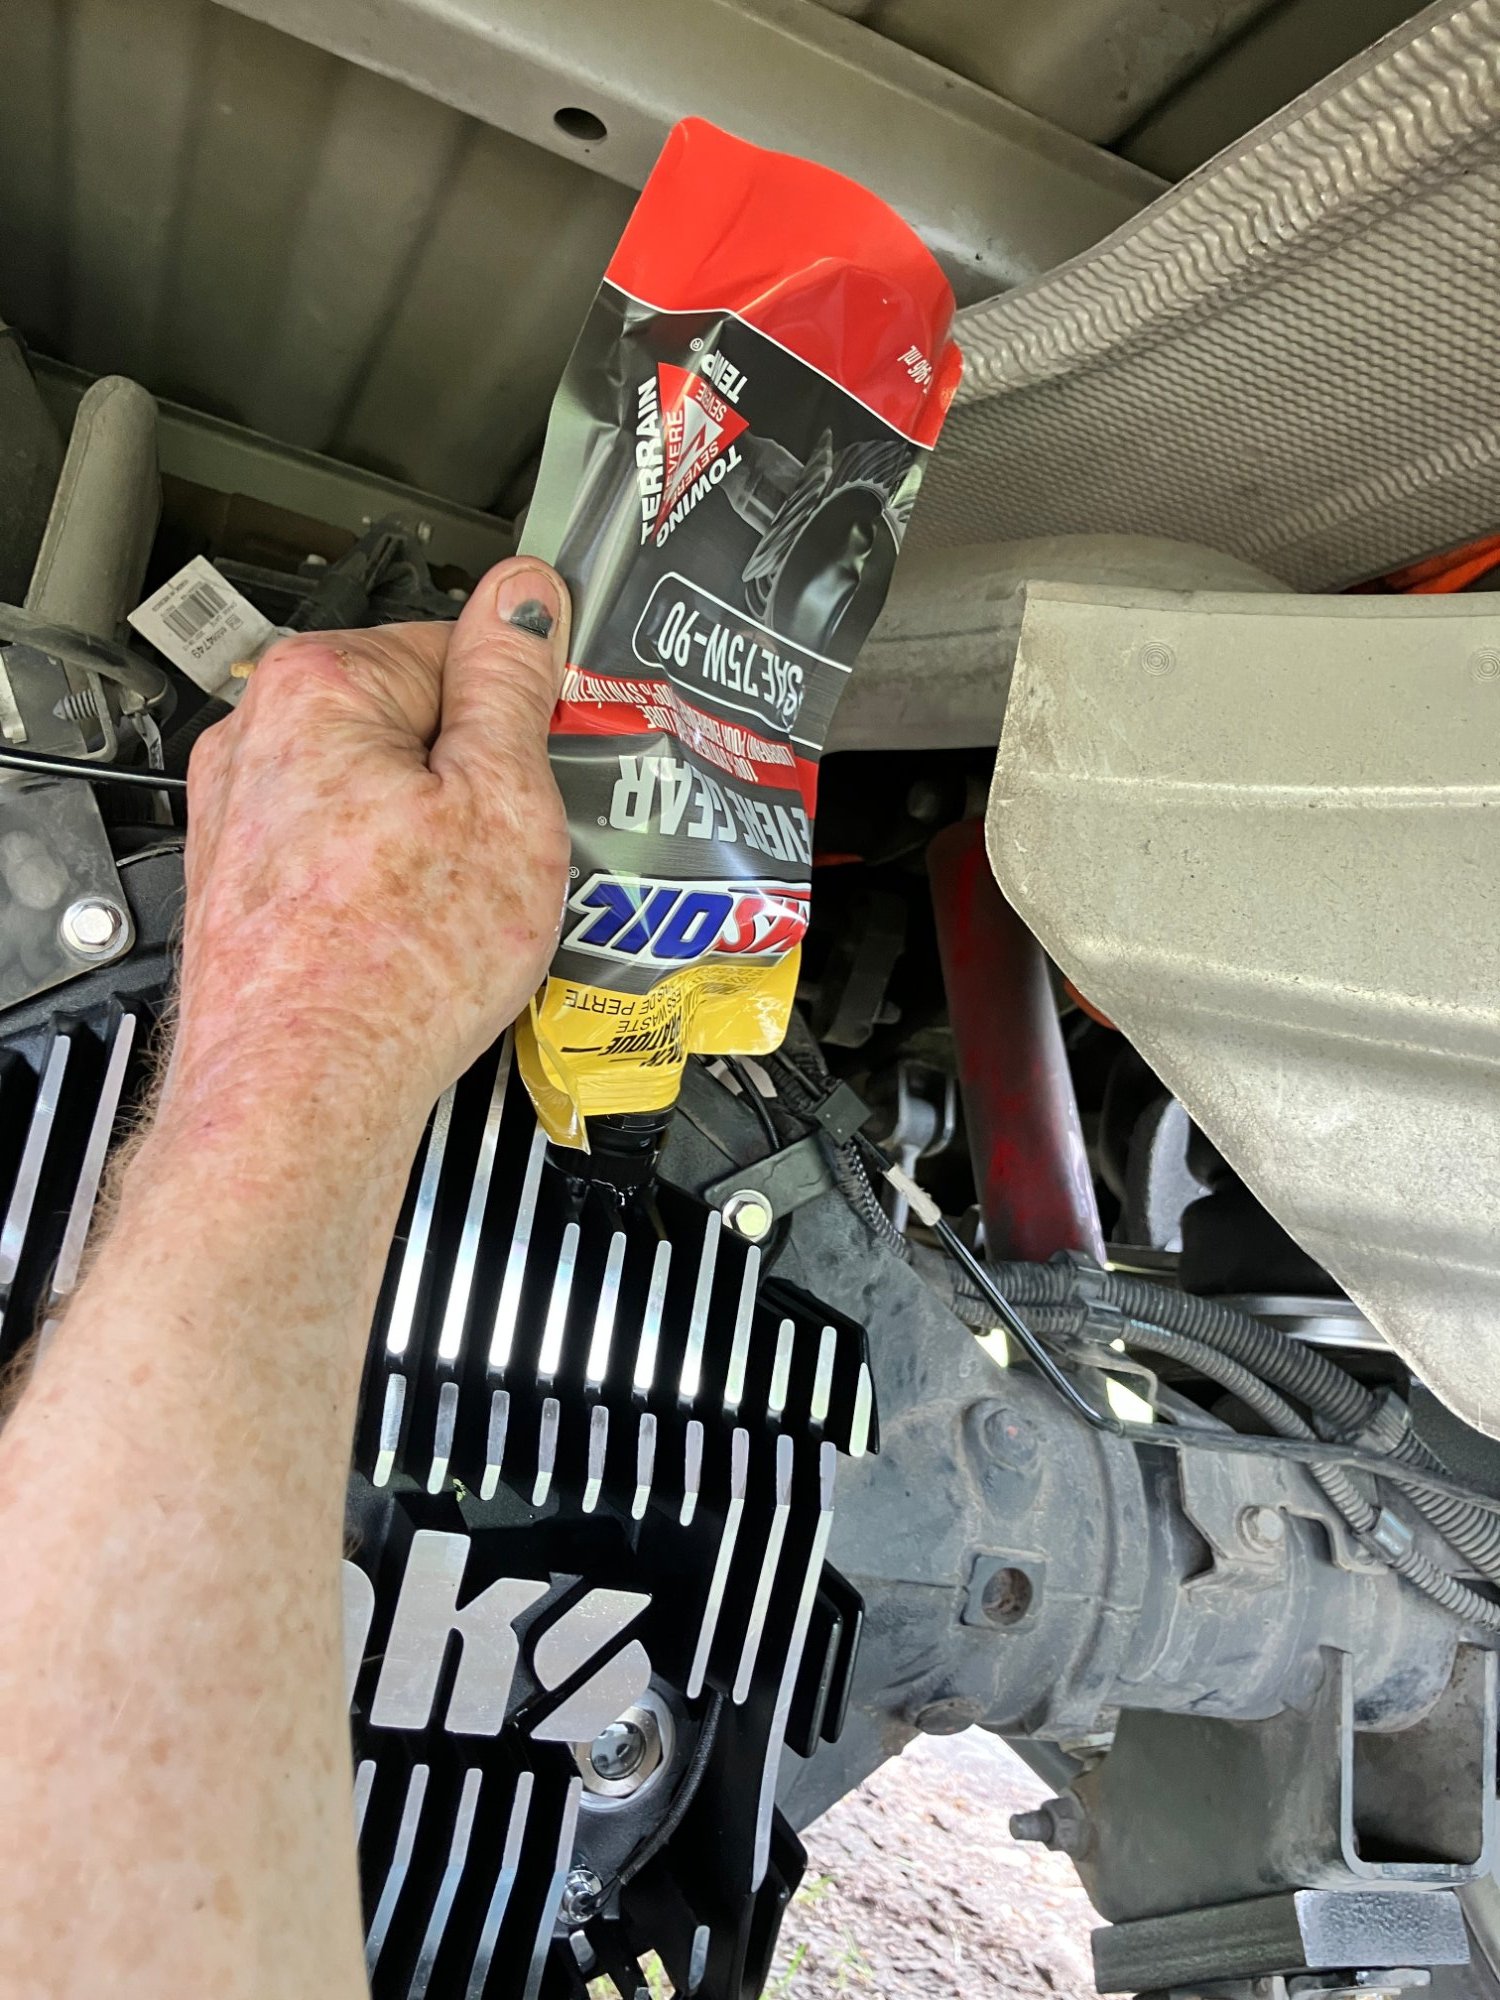
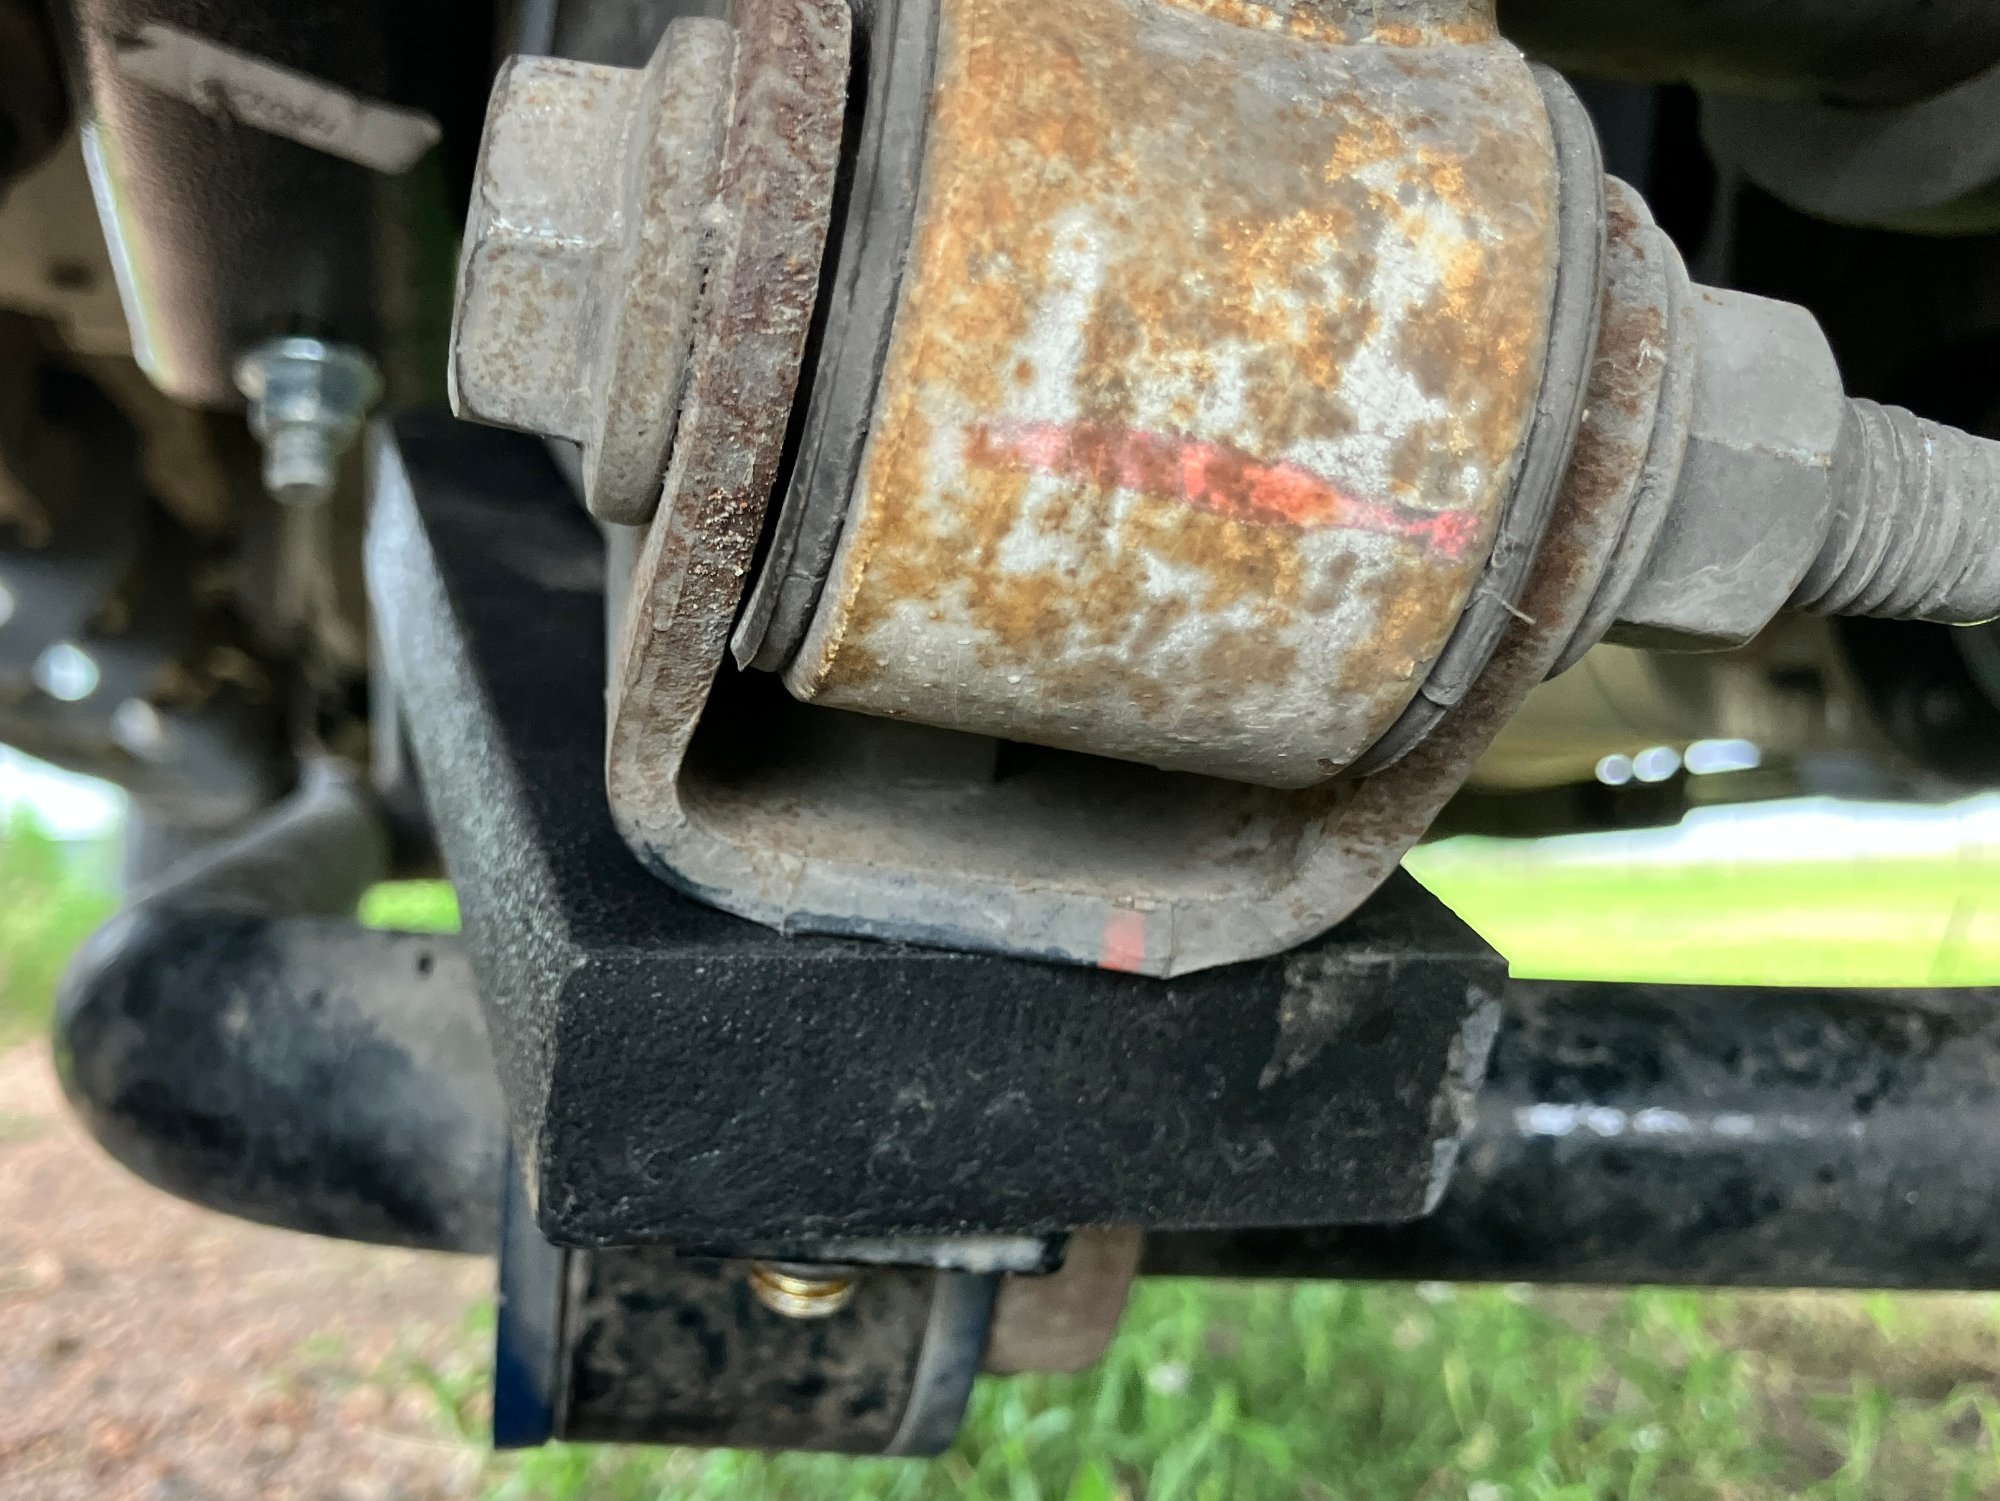
It's raining on and off today, but I was able to change the rear oil and cover before it started. I ended up getting the Amsoil 75W85 for the front, 75W90 for the rear, and the right fluid for the transfer case. I wanted a cover with a drain, so that's pretty much the reason for the aftermarket one. I have a Roadmaster sway bar and had to fabricate 1" spacers for clearance, so that might be helpful if anyone has that on their truck and considering the cover swap. Old oil had 60,000 miles and just the slightest metal fuzz on the magnet; everything looked super nice. Fourth pic is just to highlight the spacers to accommodate the cover. Those bags sure make it easier than the old siphon guns.
-
Thanks, y'all. After reading this, I ordered the Amsoil. It's quite a bit more than Valvoline full-synthetic, but I reckon it's worth the premium.
-
I'm going to change the fluids in both differentials and the transfer case. If anybody knows specs/capacities on these, could you post them? And is there a friction additive for the rear differential. Thanks in advance.
-
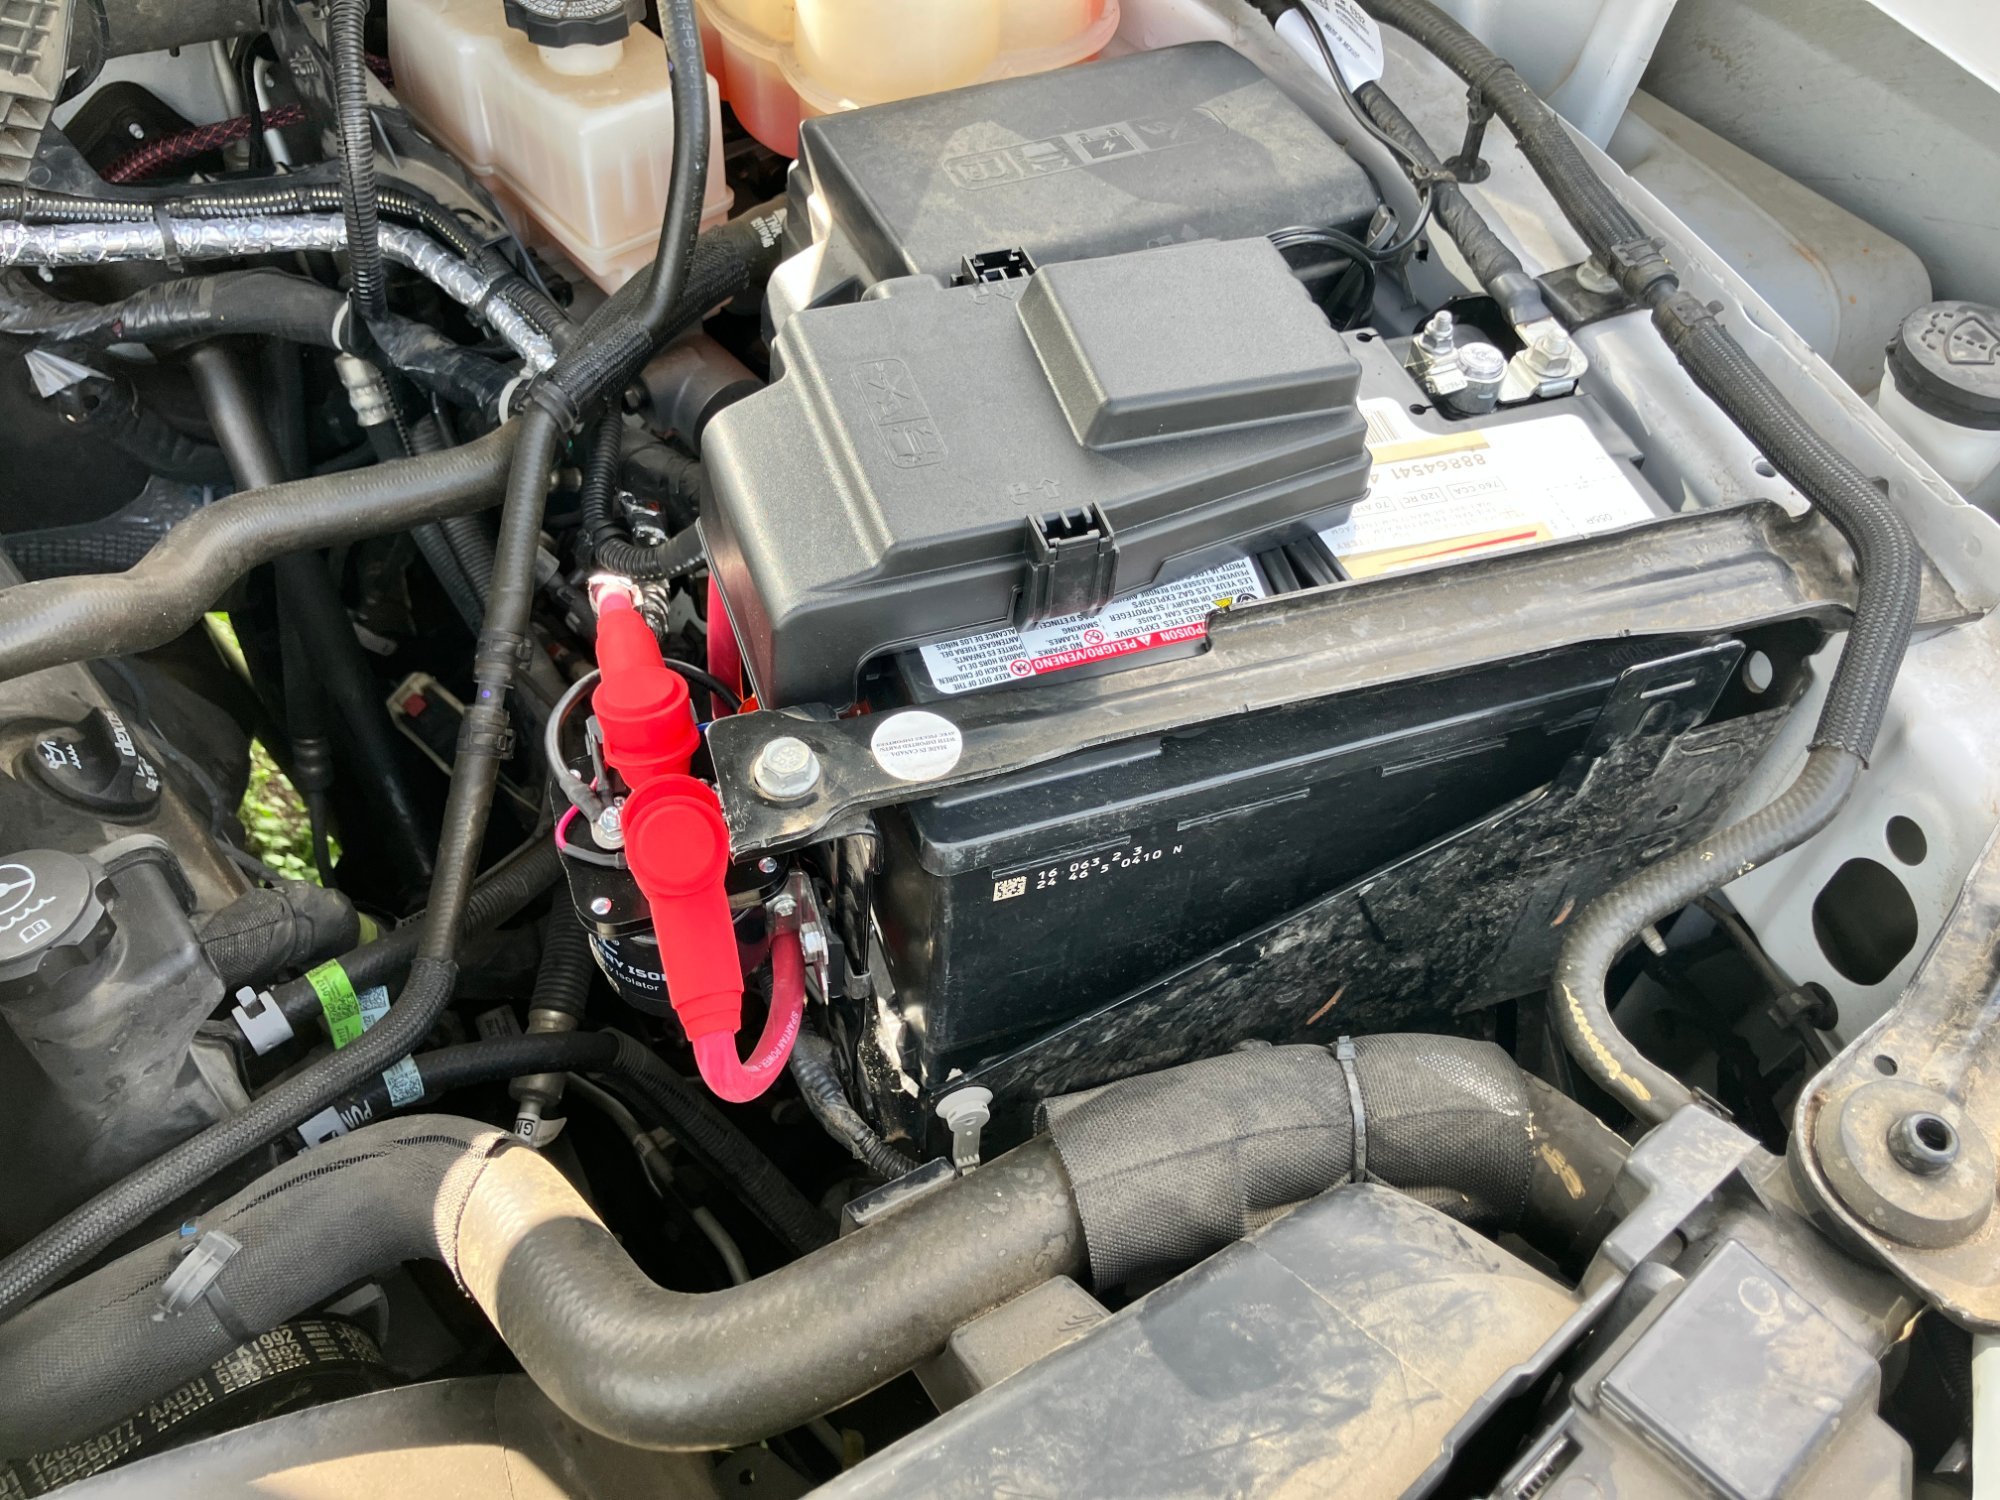
Forgot to add that I installed upfitter switches a while back, and went from the 175A? terminal end included with the kit, and the aluminum-wrapped cable in loom in the pic is the one running from main to isolator. Otherwise, I ran the cable along the firewall and probably most would think it OEM.
-
Hey, all. Been a hot minute since I've been here, but still enjoying my truck. The truck I ordered would've had dual batteries, but y'know, peak COVID supply chain issues. It's a less-than-optimal issue in that the isolator should've been by the main, but space is an issue. I'd been trying to figure out some of the parts, and this video filled in the blanks. He set his up like a diesel and I isolated them. His video will have the parts, and about the only thing I did differently was add a Recoil 500A smart isolator, Recoil terminal covers, and a Battery Tender pigtail. With the pigtail, I can plug in the Battery Tender voltmeter to the second battery. Initial start showed second battery at 12.7V, and upon start ramped up and dropped down to isolation voltage cutoff. There is a port you can plug a push-button lead into the isolator and override the isolation to jump the main. Not the point of the post, but I did put some pod lights on, too. They're from Nilight and pretty unremarkable except they have a thermostat to defrost. The brackets are from Parkwood Welding. I didn't get quite the truck I ordered, but little by little, I'm making it that way.
-
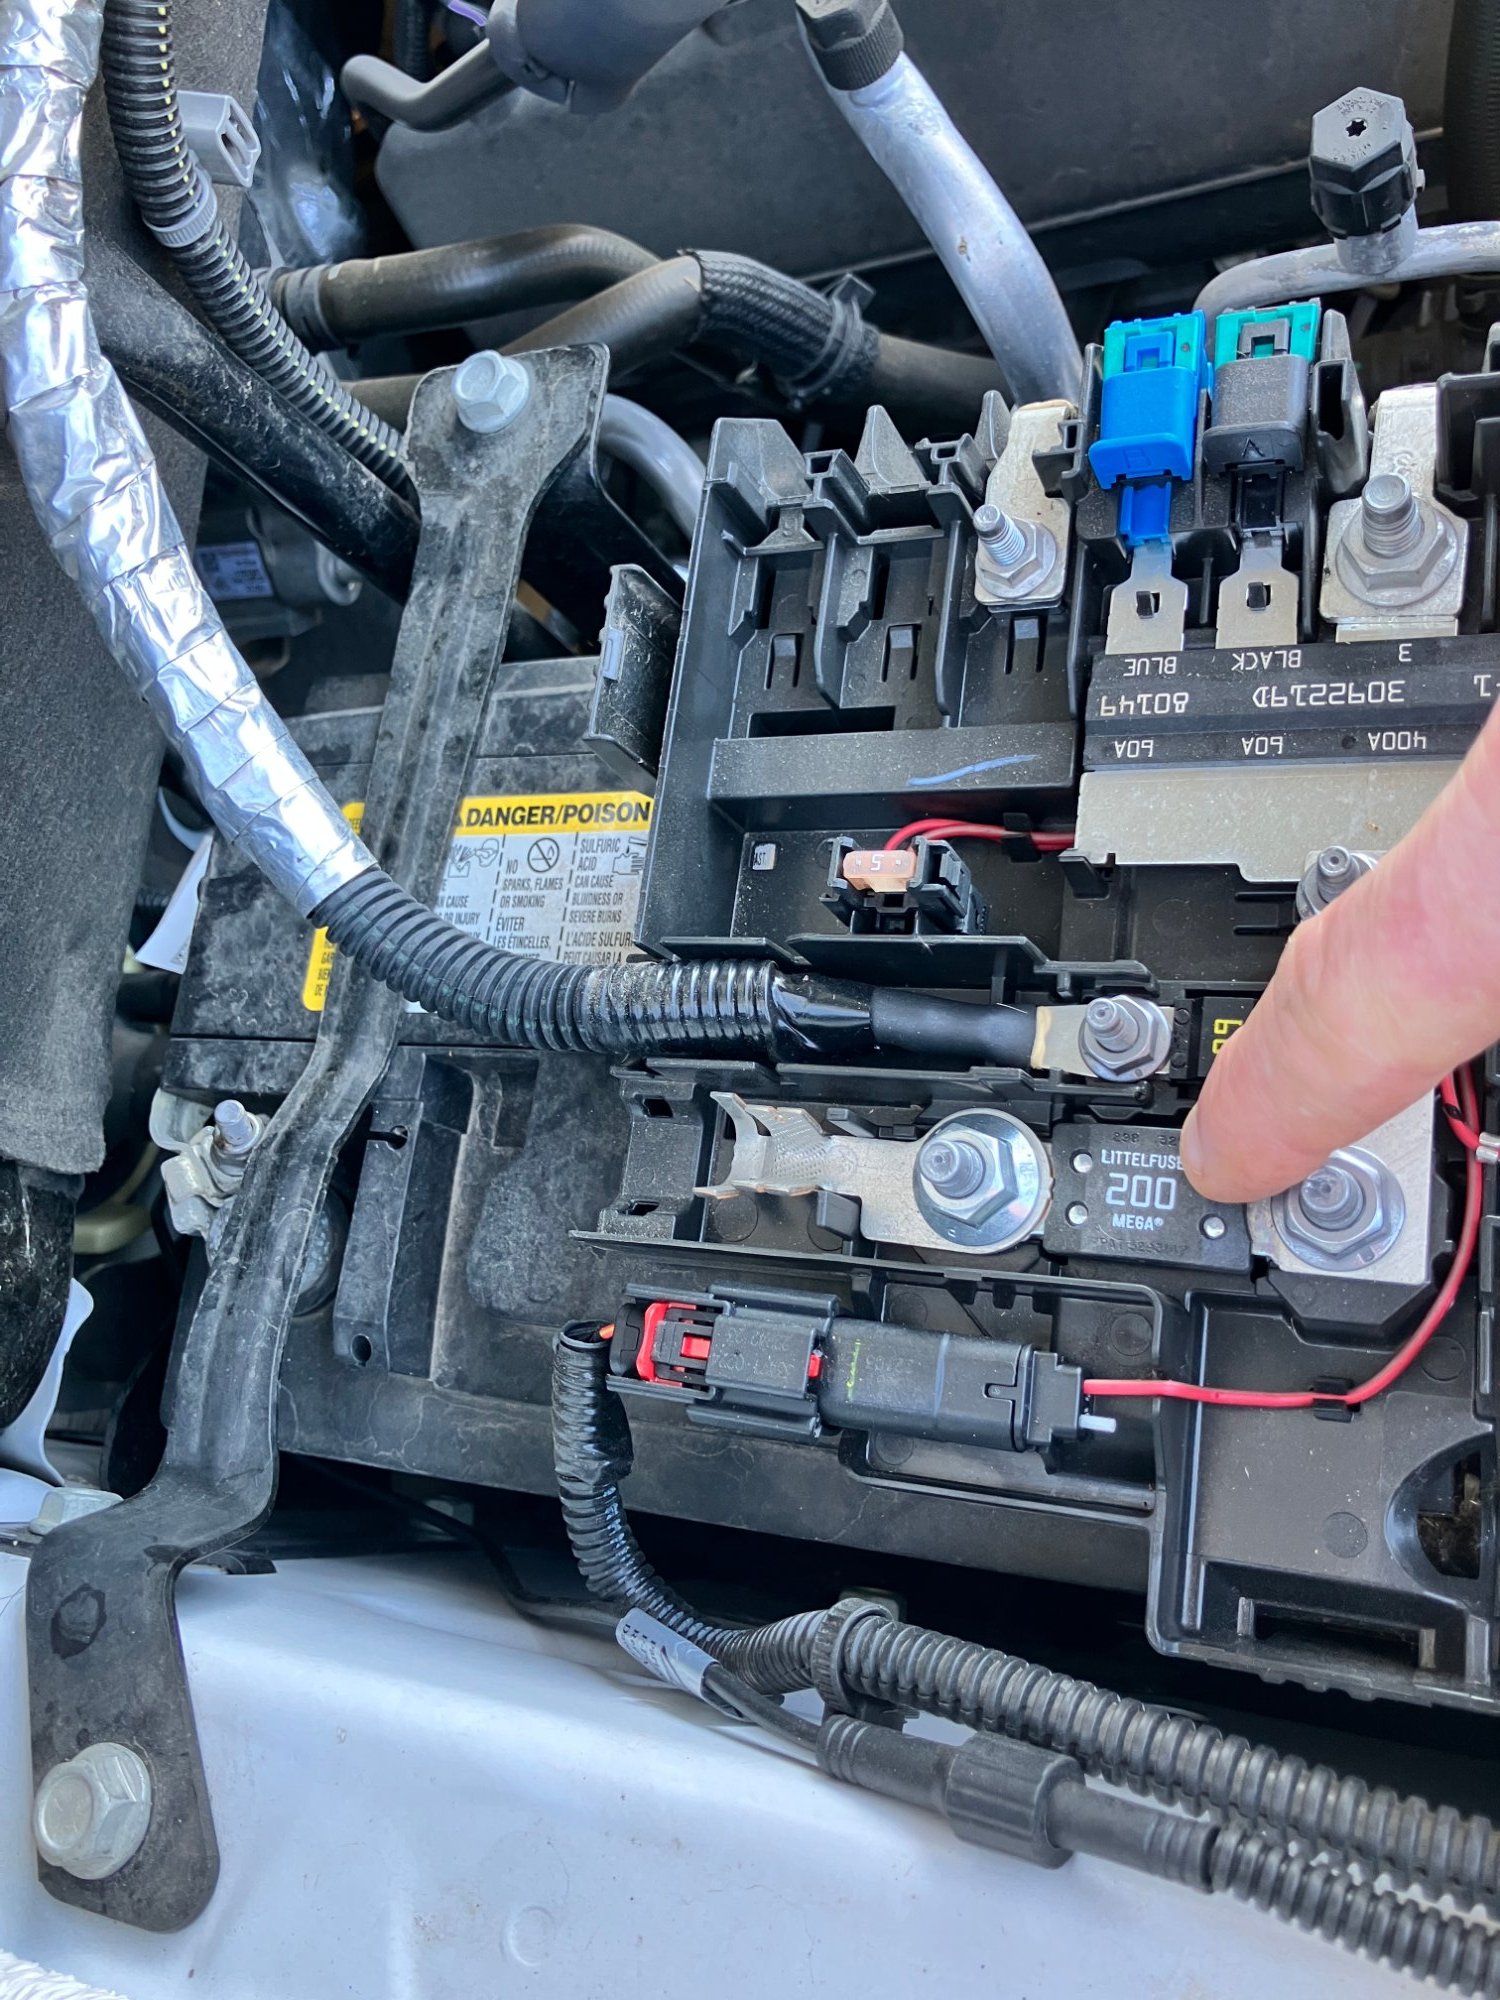
I ordered a truck a couple years ago, but it was held indefinitely for whatever reason. So I ended up with a truck not quite what I spec'ed out. One thing not on the truck I ended up with was dual batteries. I'd like to put in an auxiliary battery through an isolator, and was wondering if it's possible to attach a cable to the terminal I'm pointing to in the picture to do it. Please ask any questions if something isn't clear, and Thanks in advance for any help.
-
Are there any rear covers that retain access to the seatback doors? I've got some cheap Amazon covers on the front, but would like to get the rear covered.
-
With the right tools, it's ~30 minutes time, and easy enough. Again, with a Bose system, be careful drilling the large hole so as to not damage subwoofer. Picture three is at 30 minutes run time in 90+F ambient temperature on initial run, but you can see frost forming. Picture two is the internal illumination. The capacity is clearly sized for cans (9). For S&Gs, I got some of the mini 8 1/2 oz. bottles and you can get six in, but four will be sideways. I'll post if anything interesting occurs.
-
I ordered a 3 1/2" hole saw, but got a 3 9/16" one, so I had to return/re-order a 3 1/2" one. Finally everything came together and I got this refrigerator installed today. I have a few pics, but the linked videos are a tutorial themselves and no need to repeat.







-
Forum Statistics
250.5k
Total Topics2.7m
Total Posts -
Member Statistics
342,938
Total Members8,960
Most Online
-
Who's Online 3 Members, 0 Anonymous, 690 Guests (See full list)