Search the Community
Showing results for tags 'Custom Trail Boss'.
Found 2 results
-
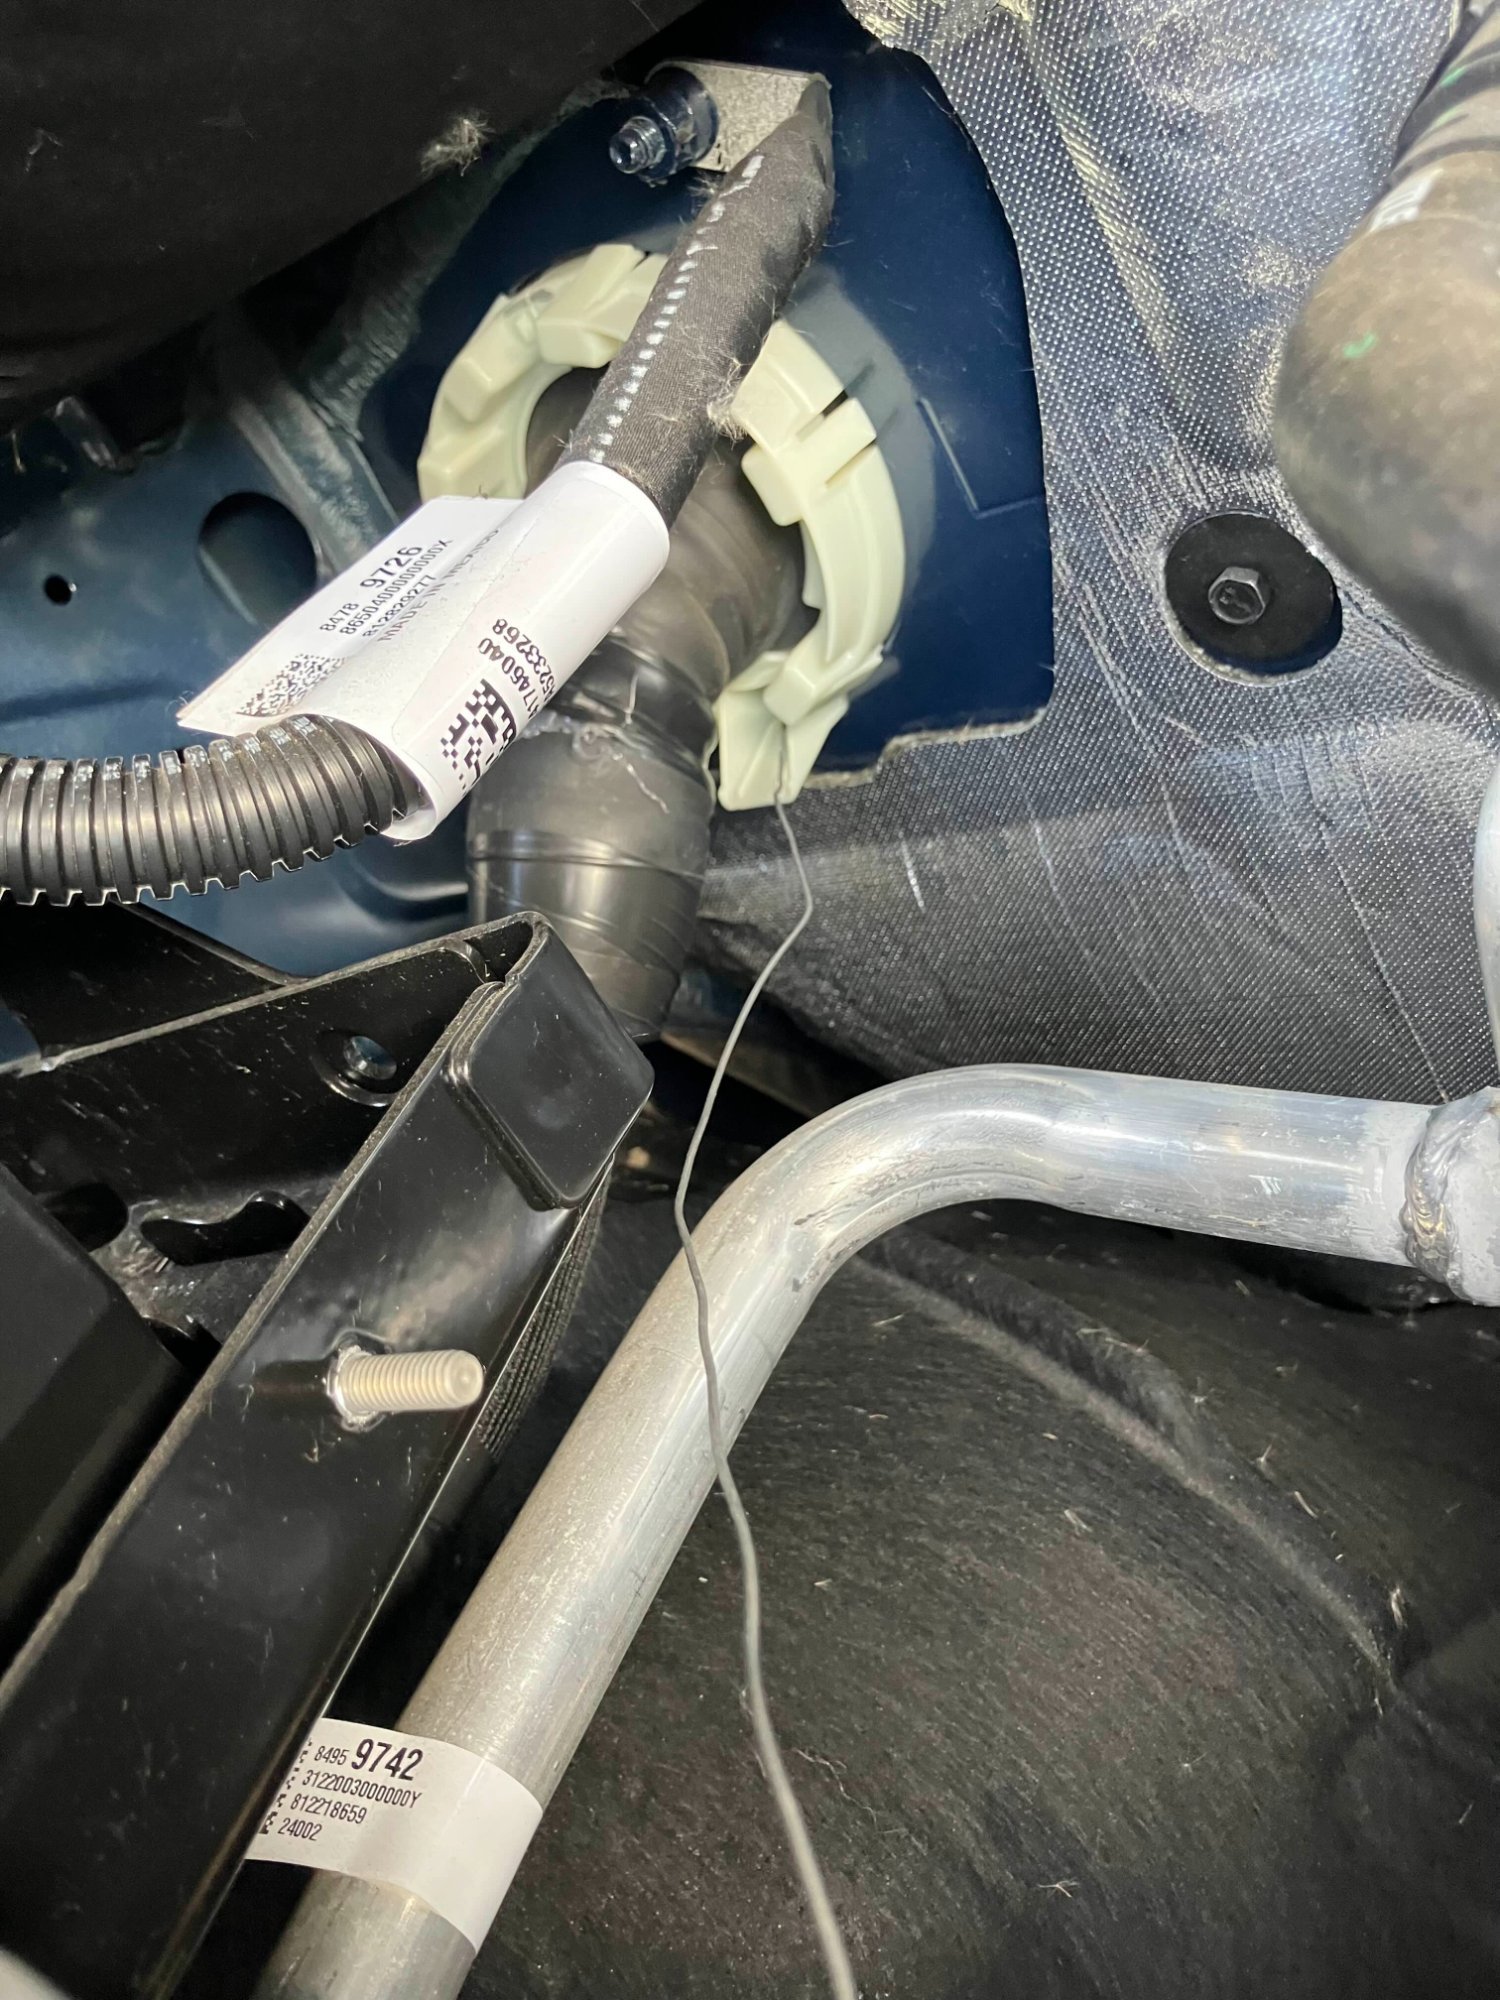
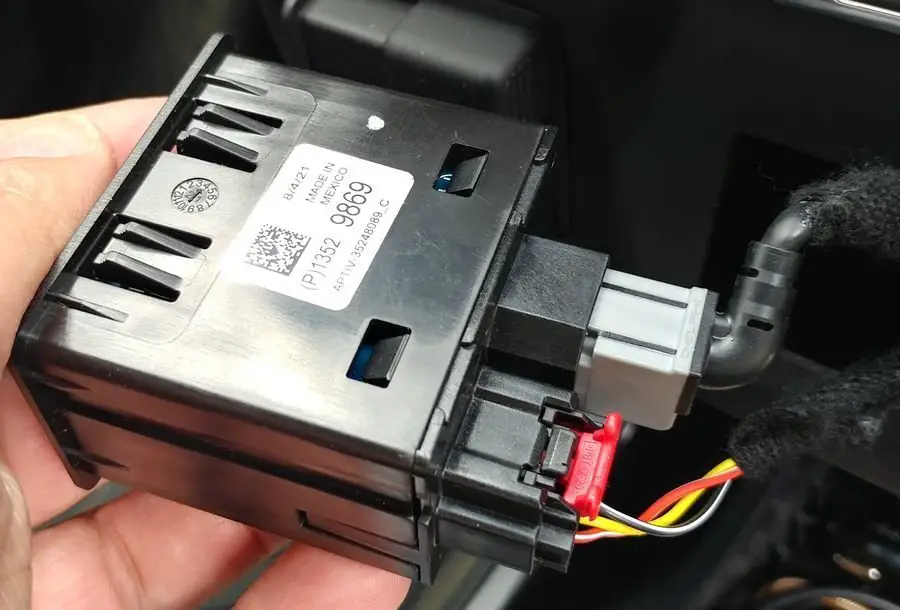
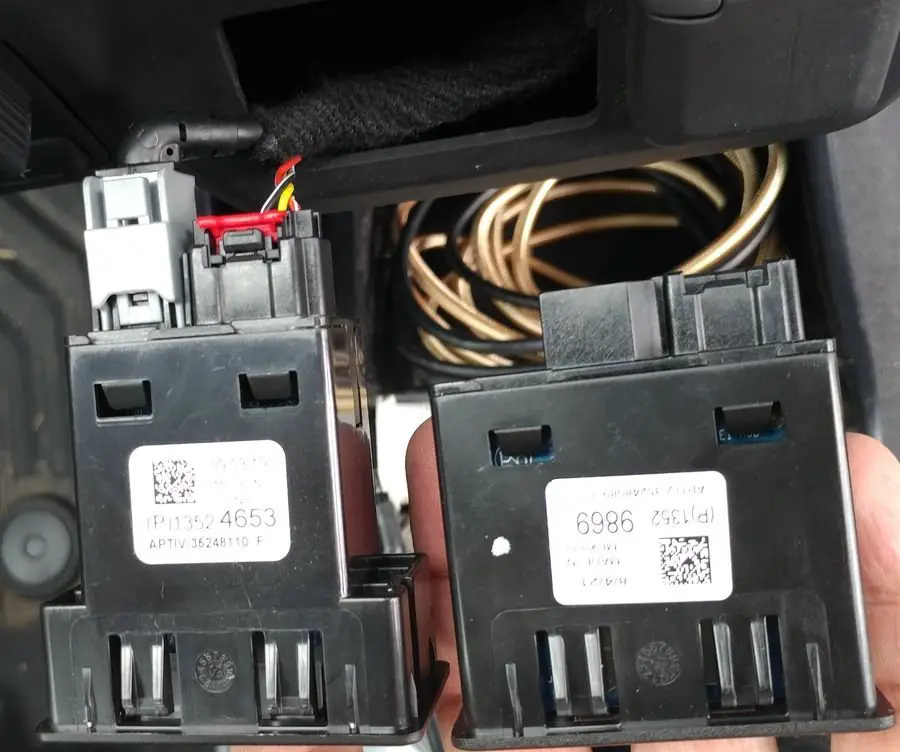
 Hey all, first post and hoping this can help out. As many of you know and or finding out, the 24's and up are apparently a new style Firewall Grommet system leading into the truck from behind the battery. But not to worry, this will hopefully be the clearest new how to so far without a youtuber making a video of this. The truck now, instead of having a nipple coming from the firewall grommet on the engine bay side, is now a plastic bezel. The nipple can be located from under the dash still, however, and is still just as easy as an install as before. Pic 1 is from the engine bay. You can see the channel where the wire will exit/enter the truck. Pic 2 is from inside the truck and what is looks like if you peel the grommet back, which does not need to be done because then you'll need to replace the rubber around the grommet to around the plastic shroud which is not the easiest thing to do. Just use an exacto #1 and cut a plus from the inside of the truck in the nipple. Pic one shows where the wire will exit. Pic 3 shows a 4ga wire in it. It fits 4ga wire really well. No sure about 2 or 0... you may have to trim the nipple off then just make the plus/X cut bigger. I also did not need to remove the battery to do any of this. Just work from mid engine with a ladder/step stool. Not the side of the truck. Step 1. Take out the multifunction power supply converter box and bracket that is located behind the glove box and bolted to the kick panel right underneath the firewall grommet. The two tabs holding this box in need to be pulled towards you (the rear of the truck) and slid up. They will be blocked by the A/C fan I believe it is, but nevertheless cannot be pulled all the way up enough. Carefully pull it out. You'll have to finagle it a bit, but the box will come out. This is the only way to access the second 10mm nut that's on the stud holding the bracket in place. You do not need to remove the wire harness. I didn't. Remove both 10mm nuts with an extended socket. Step 2. I used an exacto like #1 blade and sliced a plus sign in the power wire pass through nipple. Step 3. Electrical tape a long zip tie to the wire. Use a little soapy water or some lubricant (I used just a little petroleum jelly) to slide the power wire through the hole. I went from the inside of the truck and pushed it to the outside (inside the engine bay). Continue install as you would with all the other older amp/power wire install guides out there. ...Special Notes... You may need to remove the plastic cover kickplate that is plastic welded to the floorboard part of the carpet placeholder cover. I did this by removing the fuse box cover plate then removing the 8mm screws. This allows you to pull the panel backwards and pop out the kickplate. The floorboard part must be pulled upwards. Do not try to separate these two pieces at the seam! They are plastic welded together. For another good run through check out here: https://www.trailboss.org/threads/firewall-grommet-change-in-the-2024-lt-trail-boss-for-power-wire.2109/ Hope my photos are more helpful.
-
 After seeing @Semedar's post here: I decided to order part number 13525431 and upgrade the USB port on my 2020 Custom Trail Boss, to the part which has a USB-A, USB-C and SD Card slot. Since we are apparently limited to the IOR stereo system, any upgrades to the audio system are good. I ordered the part from eBay for about $29 shipped, and it arrived in under a week. To remove the original USB adapter, I first looked at the new part to see the plastic retention clips on the top and bottom. I then used my plastic trim tools to pry around the existing part. I was able to get the skinny trim tool under the bottom to open up a gap, then I placed a bigger trim tool in the gap. Next, I used the skinny trim tool on the top to work it out. Knowing that I had to release the two clips up top, I pushed down in those areas who pulling out on the USB assembly. It made a somewhat sickening sounding snap when each of the retention clips released, but to my surprise, nothing was broken. Keeping the top pulled out, I then moved to the bottom with the small trim tool and clicked those clips in, until the entire assembly was released. I then removed the USB assembly from the dash. To my relief, the parts were the same size and the connectors were the same. The difference on the connectors being that the USB port is upside down, requiring you to invert the somewhat tight cable. But it was no problem and both connectors were able to clip into the new assembly. Before inserting the new USB assembly into the dash, I first tried out the USB-A connector by plugging my phone into it and verifying that I could still launch Android Auto, which it did. I then pushed the new USB assembly into the dash until it clicked, and all was well. I didn't try the USB-C connector yet, but I assume it will work. I'll have to get my wife's iPhone to try that, since I don't have any USB-C cables for my Android devices. Here's the new part installed: I tested out the SD card reader by copying some songs onto an older 1GB SD card that was formatted as FAT32. I inserted the card into the reader and on the radio, I could select the SD card with the buttons on the left were AM and FM were. I had two files in the root directory and other songs in folders, but it scanned the whole card and seemed to play them in a shuffle order by default. Hopefully that can be changed, so I can play specific folders. This was a great cheap upgrade to add some additional functionality to our IOR limited vehicles. Here's a comparison shot between the old and new parts installed: Thanks again to @Semedar for pointing me in the right direction!