Search the Community
Showing results for tags 'Custom'.
-
I have a 2022 Silverado 1500 four-wheel-drive. The dealer ordered the 2 inch lift kit they offer and I’m waiting for it to come in and have it installed. But I noticed that the kit doesn’t come with upper control arms. Is that going to be a problem? (***UPDATE*** ) so I had the factory lift gm offers installed. When I picked it up, it looked great but as soon as I went to drive it off the lot. I could tell something was wrong it felt completely different. I figured it was just a break in period. But even after a day or two, I was getting crazy bad vibration at low speeds. Took it back. They ended up putting one of the U-bolts on wrong (I have pictures if wanted) they fix that and told me the vibration was gone. I get my keys go to drive away vibrations right back. I turn right back around. this time they have a mechanic ride with me. He clearly hears an feels a vibration, says somethings wrong so we turned around and he takes it back in. Three hours later they bring my truck back they had to remove the back blocks said there was no taper to them and it was messing up drive line. I got it back and the vibration is still there. (Now annoyed that only the front is lifted and still vibrating). I have them take the whole lift kit off. Put it back to stock. (Now remind you my truck has been down and I’m missing work for 5 days at this point) And after that Whole ordeal, I was done with the truck since I couldn’t have it how I wanted it and decided to trade it in and they made me a good deal on a 2023 5.3 LT.z71 I know many have gotten this lift installed said it worked out for some reason it did not for me. I’m much happier with the new truck.
-
I'm sure these types of questions are asked daily but I'm wondering if 2020 18" Trailboss wheels will fit my 2021 Custom that currently has the stock 20" wheels on it. Thanks!
-
For sale are my set of custom painted, OEM Sierra Denali LED Tail Lights. I had these painted to go on my truck and unfortunately they took so long I had to go a different direction before I got them back.. I have since moved up to a 3/4 diesel and am hoping these can find an owner who will appreciate the time, effort, and $$$ that went into creating them! These OEM LED Tail Lights are selling for $300 - $500 a piece online, and the cost to have these custom painted Mineral Metallic to match the Denali paint + the lens smoked (lightly, not enough to dim them when lit!) was $700 - looking to get $1,000 including shipping. Can cut a better deal if wanting to pick up in person in the Houston, TX area. Please reach out for additional pictures, questions, etc. I respond much quicker via text (405) 642-9097 Thanks!
- 1 reply
-
- 1
-

-
- LED
- tail lights
- (and 11 more)
-
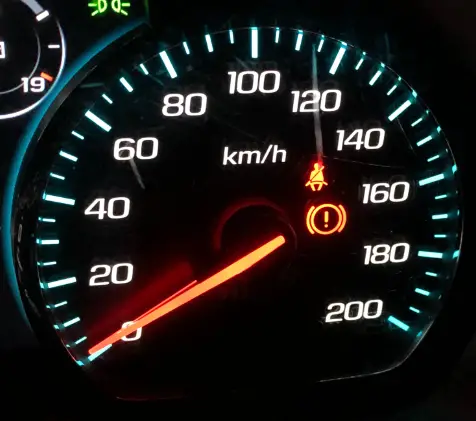
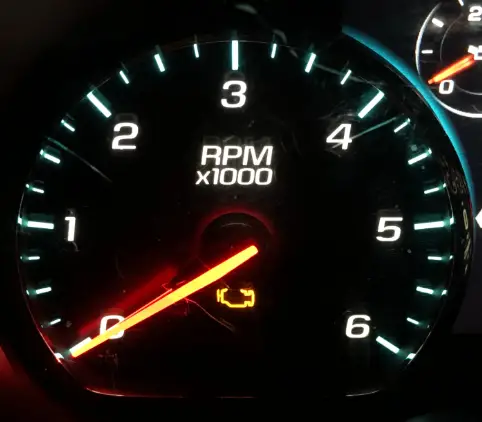
Hey everybody, Just wanted to check in again and let you all know about another exciting service we're happy to be offering... The Denali Cluster Upgrade! Many of you have requested this upgrade and I'm happy to report we have successfully completed the mod. If you're interested in this, you'll need to know a few things. Acquire a new or used GMC Denali cluster. This can be a Sierra or a Yukon cluster. (Please note: If you buy your cluster 2nd hand, DO NOT plug it into your vehicle.) Diesel/Gas: The cluster will need to match some aspects of your current vehicle. For example, if you have a gas spec vehicle you'll need to find a cluster that has an RPM gauge that goes to 6000rpm. If you have a diesel spec vehicle (2500, 3500) you'll need to find a cluster that has an RPM gauge that goes to 5000rpm. Both shown below. MPH/KPH: We can do BOTH USA and Metric market clusters. If you live in the USA, you'll want to get a cluster that has a speedometer that goes up to 140. If you live in a metric country, you'll want a cluster that goes to 200. Both options shown below. COLOR: If you have a GMC and you want to keep your RED color theme, you'll want to find a 2016 GMC Denali cluster. If you have a Silverado, have done a blue conversion, or have upgraded your HMI to the newer blue theme and you're looking for a BLUE gauge theme, you'll want a 2017-2018 Denali cluster. Android Auto/Carplay: For all of you Android Auto users wanting the use of your volume and track selection flippers back, this fixes it!!! once installed you'll once again have access to your flippers. This also allows for the long press of the voice button on the steering wheel to activate Google Assistant as well as Siri for Apple Carplay. Year Matching: There has been a lot of talk that all modules that are installed into the vehicle need to be of the same year. After extensive testing we have found this to be mainly false. As long as the modules are of the same generation you should be A-OK for the install. That means if you have a 2.0 HMI vehicle (2014-2015) you can use a 2014-2015 Denali cluster. If you have a vehicle with a 2.5 HMI (Carplay Enabled, 2016-2018) you can use any 2016-2018 cluster so long as it matches your vehicle specs as mentioned above. And if you have a 2014-2015 and would like to upgrade to a blue themed cluster while adding Android Auto / Carplay, we are more than happy to facilitate the upgrade all at once. Please reach out to me if you have any questions or are interested in getting this mod done to your own vehicle. Thanks for watching and enjoy the demo.
-
I have a 2021 Silverado 1500 Custom. As soon as it starts getting cold outside (around or just below freezing) the screen on my back up camera frequently goes green. Brought it into the dealership last winter and they couldn't recreate the problem so they weren't able to do anything. Anyone else have this happening and know if there is a fix?
- 1 reply
-
- backup cam
- green
-
(and 2 more)
Tagged with:
-
Part: GM 13525431, Receptacle Assembly, Multi Media *Jet Black Just posting a thread on here if someone who has a 2019 Silverado with the one USB type B port, you can easily upgrade to a module that has a USB-C, USB-B, and an SD card port very quickly and easily in under 5 minutes. I bought mine from eBay and it ran me $27.19 plus shipping. I bought a trim removal kit on Amazon and used the one circled to pry it from the bottom and when the bottom popped out a bit, I pried it from the left side and it just popped out very quickly. After that, just unplug the old one and plug in the new one. FYI, I also bought the module that just has just the USB-C and USB-B ports (without the SD card port) and I don't believe that one would work since it needs an extra cable to be plugged into and I was searching around and didn't find one -- you probably need a different harness for that one. What I've noticed so far is that Apple CarPlay will pickup my iPhone a bit faster, skip through the songs a bit faster, and it charges my phone a bit faster, as well. I haven't tried the SD card functionality yet but I can hope that it may be a necessary requirement for people that have IOR radios to upgrade to the IOS ones with navigation.
-
Got my full console from Ebay used in like new condition. I did alot of research to figure out how to wire it so all the functions would work. I.e. wireless phone charger and usb/ cigarette liter ports for the rear passenger. I have a currently have a 22 2.7l Custom that doesn't have the required connection under the front passenger seat. After hours of looking at schematics and testing wires, I managed to hard wire my center console to the fuse box on the passenger side. Wire on the CC harness to Fuse box Both Red/white to F5 (Battery positive) Violet to F20 (Accessory on) Violet/yellow to F23 (Accessory on) BOTH Black to Ground below the Fuse box. The only section I wasn't able to get working yet is the USB in the middle of the console (the one with the map SD card). This one I believe needs to be connected to the radio that has the built in navigation. (once I get one I'll update this post.
-
I haven't seen anyone with official numbers. displaying the height of our trucks so I decided to pull it in the garage and measure up a couple of points. Keep in mind, this is a 2019 Trail Boss Custom, Z71, Crew Cab, Standard Bed, with ~3000miles. Everything is completely stock and the tank was 95% full. I measured the following heights; - all 4 corners(at the fender) measured at the center of the wheel - front diff (lowest point) - rear diff (lowest point) - front shroud/bumper (lowest point) I've taken the measurements twice, once SETTLED and once UNSETTLED. To better define the terms, the settled measurements were taken by simply driving the truck in the garage, and measuring. I weigh around 200lbs ( seems to matter as there was a little lean tot he driver side). The unsettled measurements were taken by, lifting the vehicle, front and back, just to the point where the tires were off, then slowly letting the jack down and removing it. SETTLED Measurements; DS front - 39 1/4" DS rear - 41 3/8" PS front - 39 1/2" PS rear - 41 3/8" front diff - 13" rear diff - 9" bumper - 13 5/16" UNSETTLED Measurements; DS front - 39 7/8" DS rear - 41 1/2" PS front - 40 1/8" PS rear - 41 3/8" front diff - 13 3/8" rear diff - 9" bumper - 14" I've added all the pictures to this gallery ----> I've attached a couple of critical photos I think everyone should be aware of.
-
Has anyone taken a Custom Trail Boss and done the LT Trail Boss fog lights on it? I am looking for a plug and play kit if there is one out on the market. I'm trying not to source every single individual part from GM. I'm pretty sure I would have to go get the BCM reprogrammed if I'm not mistaken.
- 11 replies
-
- 1
-

-
- custom
- trail boss
-
(and 7 more)
Tagged with:
-
Are you Looking to change your headlights and grille on your custom Silverado to the LED HID / signature curtain daytime running lights that High Country’s come with and the bow tie grille ? Here’s how I did this to my Custom Trailboss ... how to video. Videos nothing special but it’ll give you the pics with notes /video clips that I took so you can convert yours over if your wanting to . Back when I did this conversion I couldn’t find anything online that really shows how you do this so hopefully this helps the next person do this . Takes about 3-4 hours cost is about $3k for all new oem parts . I got my headlights , wire harness through Gen5DIY.com $2400 and the bow tie grille $580 through gm parts warehouse. Both are great companies I’d fully recommend that made the process really easy . I’ll list the part numbers too if you wanna research and look for some lower prices if wanna go with used parts or shop around if you wanna that route but don’t forget you’ll still need the headlight harness which is about $250 from Gen5DIY to make all the lights work properly . After you sell your used Custom headlights and grille parts from the conversion you can get back about 1k dropping the cost involved about 2k with new parts. May ask why not just buy the LT trail boss ., well here’s why I did not .. when I researched this is what I found ., My Red Custom trail boss came with the halogen lights and the LT Trailboss has the better looking lights that are LED (not too bright though but have a good look to them still) but they are not HID LED which are way brighter unless you buy the midnight black edition trail boss or the high country which #1 I wanted the red trail boss not black , # 2 I wanted HID LED lights not just the LED lights , so I made my own custom set up for a small cost compared to getting a midnight edition Trailboss or high country part numbers LT Black Trailboss Grill with Z71 emblem 84493318 New 2019-2021 Silverado 1500 High Country HID LED head light assembly Drivers side LH. : 84621852 Passenger side RH : 84621853
- 14 replies
-
- 2
-

-
- Custom
- Customtrailboss
- (and 6 more)
-
Picked up my Custom Trail Boss yesterday and I really like the truck, mechanically speaking. My biggest beef is with the interior storage options. Specifically the fact the center console doesn't have a storage compartment even though the thing is huge and the owner's manual shows there should be a storage compartment. There's not a storage compartment under the seatback either, despite what appears to be a HUGE empty cushion sitting there. I have a Z71 Suburban, so I know I'm spoiled but this is crazy how few places there are to store stuff in the cab. I'm hoping a better center console can be swapped out, but I'm worried about what options may exist with the rear seat power and air vents. Let me know if anyone comes across anything that can be added or modified to increase the utility for the front seat passengers. Thanks!
- 401 replies
-
- 1
-

-
- trail boss
- custom
-
(and 2 more)
Tagged with:
-
2016 Silverado 1500 custom Hopefully they fit. 2 inch leveling kit up front. Pre runner bumper. Rears stock. Got -38 mm wheels coming in. 17x9. Shipped today. should look good. much debated topic I didn’t see anything on the size either. I’ll be that guy. It should fit nicely I’m thinking. It’s a 33.8x12.2r17 ordered today. 11/2
-
Hi I have a 2017 custom extended cab 1500 silverado. Color is olympic white. Want to color match the door handles which are black textured plastic. Local dealer could get some in and paint them for $1200. Any ideas where to find olympic white door handles for a more reasonable price? Used to be some available on ebay I heard but that was before I had the truck and I can't find any now there either. Any ideas would be greatly appreciated.
- 1 reply
-
- summit white
- white
-
(and 5 more)
Tagged with:
-
I need to add a second battery to my 2020 Silverado CC. In previous years, it was simple. There was even a place. I don't see a single option or place to fit one. I called my local dealer multiple times to ask, but they never call back. Anyone else figured out a way to do this? Where is a good spot?
- 10 replies
-
- battery
- 2nd battery
-
(and 3 more)
Tagged with:
-
Have a set of used Chevrolet Headlight Assemblies off my 2019 Silverado Custom Trailboss. Truck has 8,000 miles on it / lights are in “like new” condition with no issues . asking $700 for the pair plus shipping (most places in US is approx $85). I’ve got more pics but I can only add 1 due to the restraint on attached pics on this post so message me if your interested. I just recently did a headlight conversion , grill change to the high country headlight assemblies is why these are for sale. I also have the black custom Trailboss grille for sale if anyone needs that as well. It’s listed separately.
-
- 2020silverado
- headlights
- (and 8 more)
-
Hey guys, I'm back with another very exciting feature to reveal. It's been requested by many of you that I release a Video in Motion mod for the 2.5HMI for quite some time now. Well, I'm happy to say I've finally cracked it and I'm happy to offer this service for the loyal viewers of this forum. First of all, let's talk basics. If you have a 2014-2016 you'll notice you can play video but only while in park. And if you have a 2017 or a 2018 GM vehicle you'll notice you cannot play video at all! Well, I have solved this problem with a 2 for 1 solution. Regardless of your year between 2014-2018, I am happy to offer Video in Motion and Video Enabling for ALL 2014-2018 GM models Please, do not hesitate to contact me if you'd like this done. Special forum pricing will be given as a thank you towards everyone who has supported me and has encouraged me along the way. I would not have been able to do this without you guys. Thanks for putting your faith in me. Enjoy the demo, and like always, if you're interested - send me a PM. Until next time... -Mag *Edit* - For those of you who are curious, this allows videos to be played through USB. We will be adding other input options in the future. This will also allow full navigation controls in nav as well as texting and keyboard use which is usually restricted while driving. And this should be a given but this is for off-road or passenger use only. Please let me know if you have any more questions!
-
So i have a 2021 Silverado Custom and Ive been wanting to upgrade my clusters and Steering wheel. I see alot of people saying it the Audio controls dont work because of the radio but from what I've seen there are LT trims that also have IOR radios(like the customs and w/t) and Steering wheel controls. With that being said, then the wiring is possible for steering wheel audio controls to work, no? and if the clusters are swapped as well, wouldnt the steering wheel be able to connect to the new clusters?
-
I just rolled over 30k miles on my cc4wd, '16 with the 5.3, and 8 speed. I have read more than a handful of people recommending getting a tune (usually when the warranty runs out)...so this is my first post about that...before I really start my research, I wanted to get some real life experiences and expectations... I get that i can make my truck run like a banshee...but I don't need a hot rod...I just want to get optimal power and optimal MPG under normal driving...I rarely tow anything...and I drive pretty conservatively... in my scenario...would you still recommend a tune? what can I expect to get out of one? is there any that are the best value, what about getting a tune off the shelf verses going to a shop and getting it done? if I lose any mpg's it probably wouldnt be worth it...so I need to at least stay the same or improve...so keep that in mind... any insight and opinions would be appreciated!
-
Looking at crew cab short bed 4x4’s with the V8’s. I just can’t wrap my head around not having low range so it’ll either be a Z71 or a Trail Boss. Been watching prices and I’m seeing Custom Trail Boss trucks starting to get close to the prices of the LT. As in within a grand or even less. Anyone bought a Custom and regret it? I have a 2011 Silverado 1500 4x4 and my wife has a 2017 Yukon 4x4. Both have the 6L80 transmission and hers has the Ecotec 5.3 V8. Very happy with that engine and transmission combo and even with less power my ‘11 moves and drives well with the 3.42 gears. Will I miss anything with a Custom instead of a regular LT Z71? 6 spd vs 8 spd? Gas mileage? Something else?
-
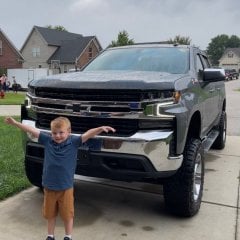
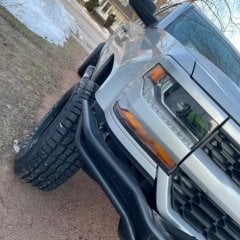
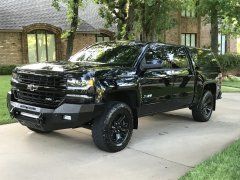
Looking for more ideas on how to spruce up the Custom model front end but I'm having a hard time finding accessories specifically for the Custom model. Any ideas or help appreciated! I've currently added Fabtech 3" Stealth suspension lift, 35's, Fuel Titan 20x9, Phillips Diamond Vision Halogen HID highs and lows(very impressed), purchased but not installed yet the Daytime running lamp LED strip for above the Lowbeam lights.
- 3 replies
-
- custom grill
- custom
-
(and 7 more)
Tagged with:
-
-
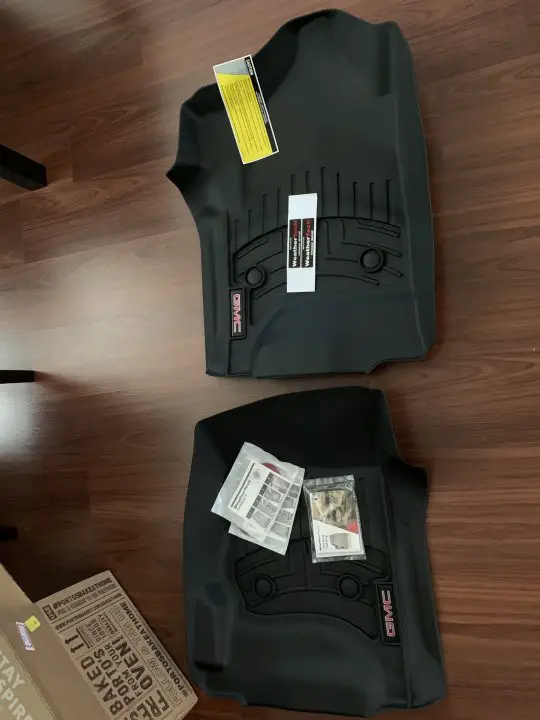
- GMC
- weathertech
- (and 5 more)
-
-


.thumb.jpg.b785d5fe4b22caa0cc48402118991c9b.jpg)





.thumb.jpg.aef3ee62cf381ec92219ef5dbb307317.jpg)


