Search the Community
Showing results for tags 'silverado'.
-
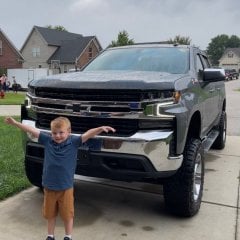 Are you Looking to change your headlights and grille on your custom Silverado to the LED HID / signature curtain daytime running lights that High Country’s come with and the bow tie grille ? Here’s how I did this to my Custom Trailboss ... how to video. Videos nothing special but it’ll give you the pics with notes /video clips that I took so you can convert yours over if your wanting to . Back when I did this conversion I couldn’t find anything online that really shows how you do this so hopefully this helps the next person do this . Takes about 3-4 hours cost is about $3k for all new oem parts . I got my headlights , wire harness through Gen5DIY.com $2400 and the bow tie grille $580 through gm parts warehouse. Both are great companies I’d fully recommend that made the process really easy . I’ll list the part numbers too if you wanna research and look for some lower prices if wanna go with used parts or shop around if you wanna that route but don’t forget you’ll still need the headlight harness which is about $250 from Gen5DIY to make all the lights work properly . After you sell your used Custom headlights and grille parts from the conversion you can get back about 1k dropping the cost involved about 2k with new parts. May ask why not just buy the LT trail boss ., well here’s why I did not .. when I researched this is what I found ., My Red Custom trail boss came with the halogen lights and the LT Trailboss has the better looking lights that are LED (not too bright though but have a good look to them still) but they are not HID LED which are way brighter unless you buy the midnight black edition trail boss or the high country which #1 I wanted the red trail boss not black , # 2 I wanted HID LED lights not just the LED lights , so I made my own custom set up for a small cost compared to getting a midnight edition Trailboss or high country part numbers LT Black Trailboss Grill with Z71 emblem 84493318 New 2019-2021 Silverado 1500 High Country HID LED head light assembly Drivers side LH. : 84621852 Passenger side RH : 84621853
- 16 replies
-
- 2
-

-
- Custom
- Customtrailboss
- (and 6 more)
-
Now that some limited details and rumors are starting to trickle out about the options for the 2027 Silverado and Sierra, I'm curious- does the rumors of the larger displacement Generation 6 engines change your future buying choice? Vote in the poll and let me know your thoughts below, i'm seriously interested in what people are thinking!
-
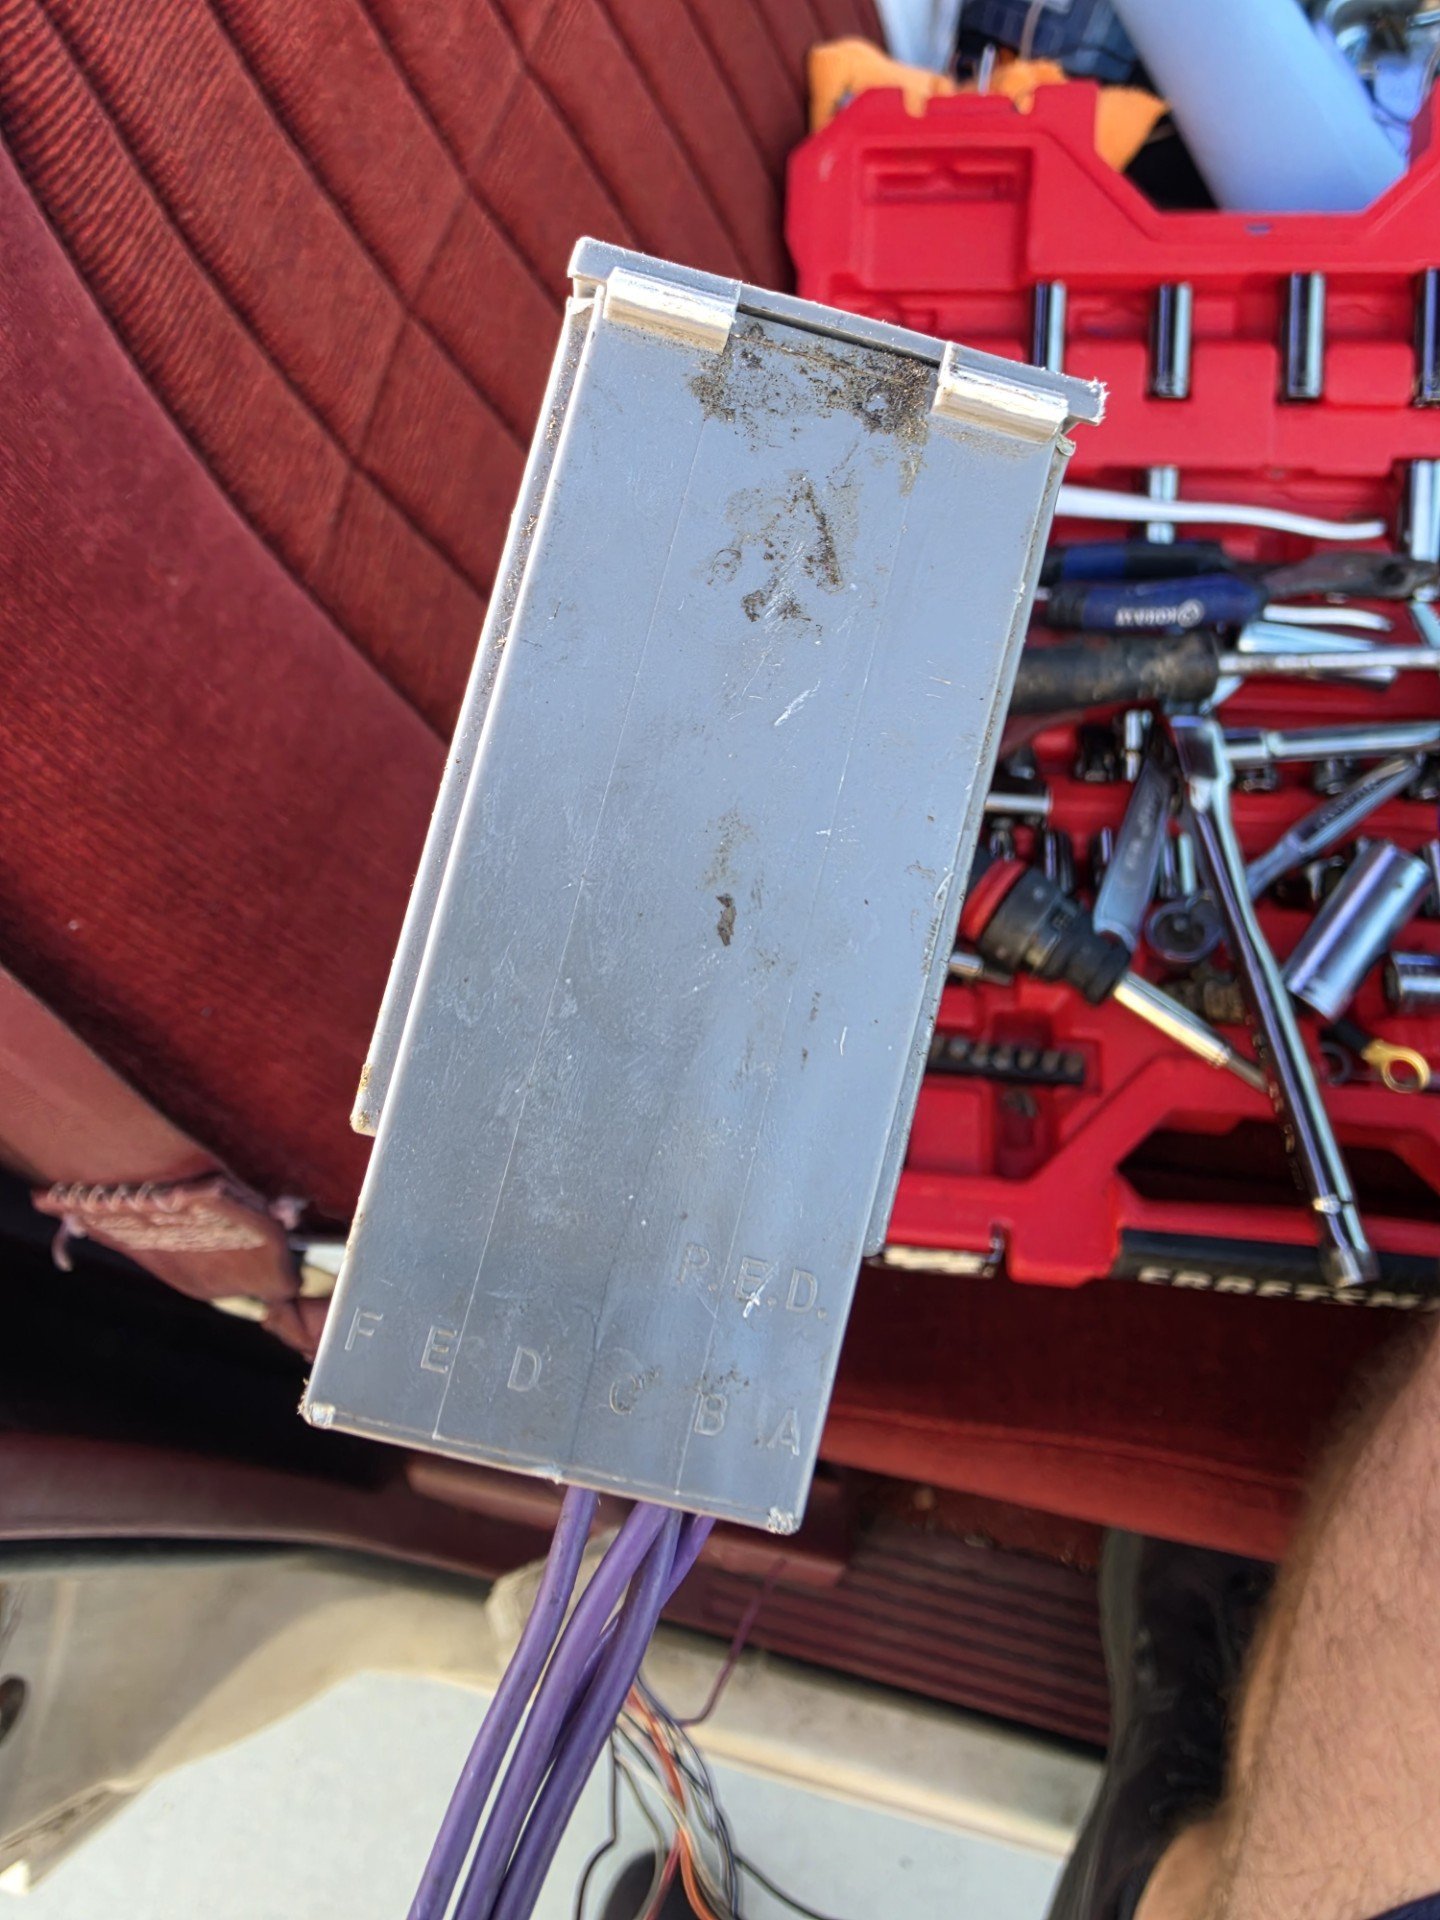
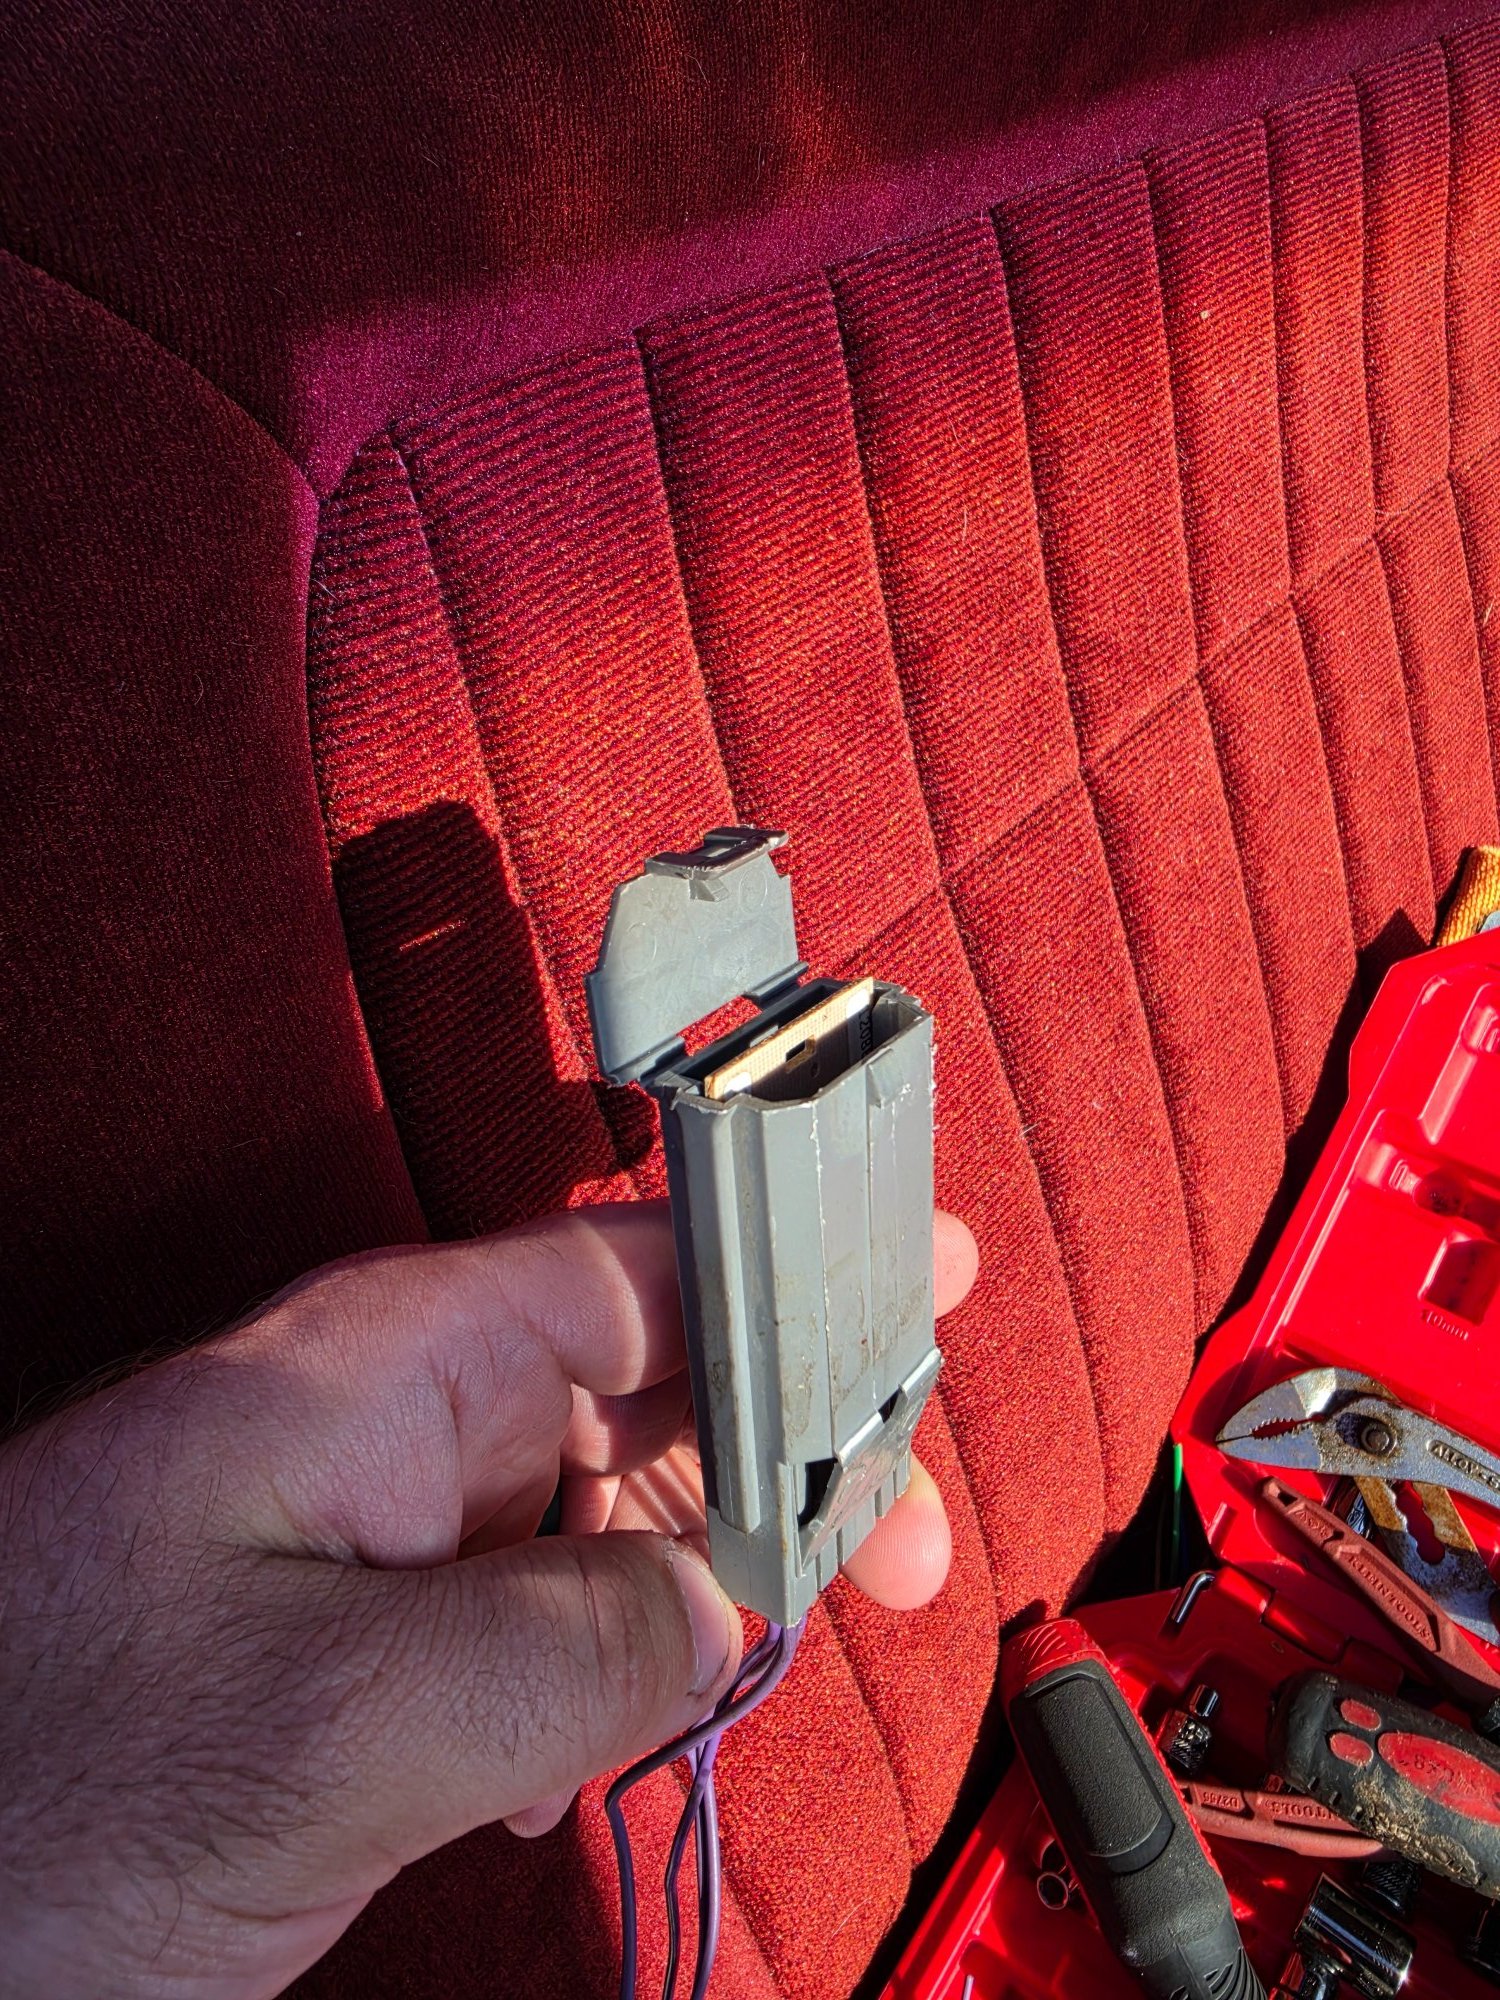
 I am currently in the process of rewiring my old truck, I purchased a wiring harness but there was no place to wire in this small board. It was originally wired into the original harness, under the dash, next to the ECM. Can anyone help me identify what this is? Would it cause my truck to crank but not spark? A wiring diagram would be awesome as well.
-
Not sure if anyone else has seen this yet... Next-Gen 2027 Chevy Silverado Revealed Thanks to Patent Images Design seems evolutionary. Pulls from the 2024-current HD and the new 2025-current Tahoe/Suburban. Cab greenhouse looks identical to the current T1 trucks, but all the sheet metal is new. Almost like just another facelift to the current truck. Hopefully the powertrain has more excitement to offer.
-
 Hi everyone, I’m trying to track down a communication issue on my truck and could use some help locating the exact point of failure. I believe I have an open or bad connection on the TCM wiring. I already checked continuity from TCM pins 6 and 7 to the OBD2 connector pins 6 and 14, and there is no continuity at all the meter shows infinite resistance / no connection. I tested with the TCM, ECM, BCM, and ABS pump disconnected from the circuit. I also found that X109 is supposed to be involved with the CAN High and CAN Low circuits, but when I tried to check continuity from the ECM and TCM to X109, I couldn’t get continuity there either. At this point, I’m not 100% sure X109 is the correct connector for the section I need to diagnose. What I’m trying to do is isolate the open by checking from the TCM connector to the next connector in the circuit, so I can narrow down exactly where the break is and hopefully repair the connection. I’m still learning this stuff and doing my best with some DIY experience, so I’d really appreciate any guidance on which connector I should trace from the TCM to next, and how to localize the open more efficiently. Thanks a lot in advance for any help.
 -
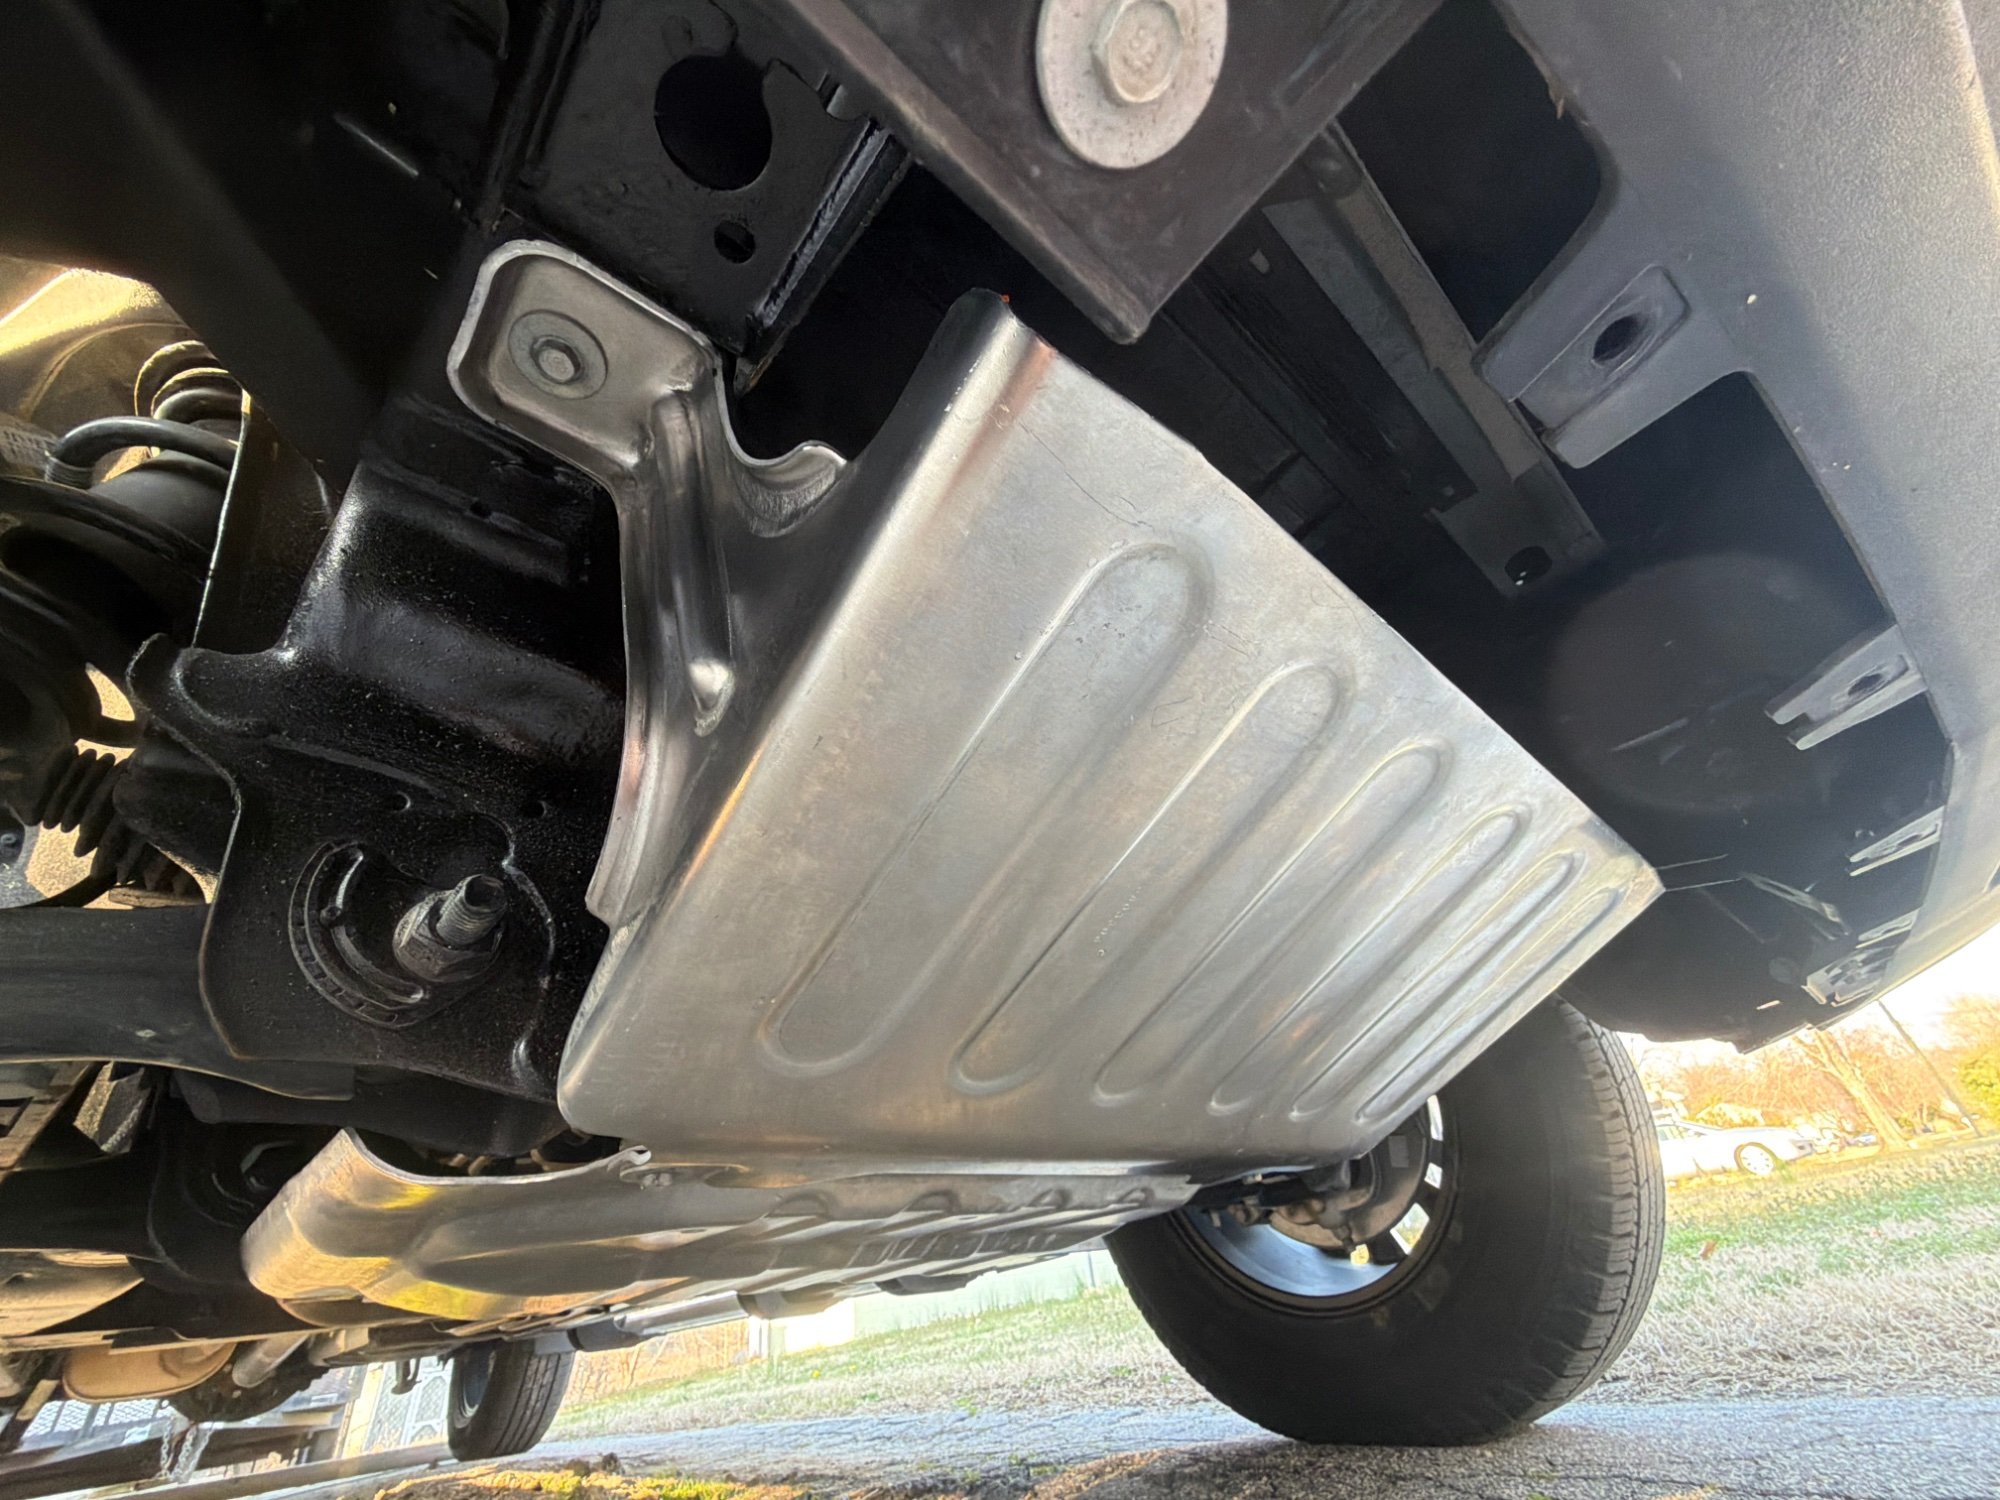
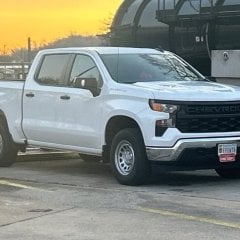 *SEE BELOW FOR UPDATE* So, after hunting on the internet with a rhetorical shotgun for skid plates, I decided to do some research into OE parts. Here is what I found. for the metal skid plate (splash guard) from the bumper to the first crossmember, the part number is 86803306. Can confirm through ACDelco’s website that it is metal. I’m not sure what kind. When shopping through GM dealers, DO NOT INPUT YOUR VIN. I’m currently battling it out with Chevy Parts Pros and told them to pound sand if they won’t send me my part. Does NOT FIT DURAMAX OR 2.7L MODELS UNLESS YOUR ORIGINAL PLATE IS p/n 84125967. This plate is factory on vehicles with “enhanced tow”. for the steering gear plate, part number is 23385004. It is 1/8” steel, I believe. for the transfer case, part number is 84699480. This shield spans the gap between the trans crossmember, and another behind the transfer case, uses (4) m8 x 1.25 x34mm bolts and u-nuts to secure into place. Fits 2019-2025 models, 4x4 only. It’s powdercoated 1/8” steel. you can get the steering gear shield and the transfer case shield in a set through GM accessories under “off-road skid plates set”, but I found it cheaper to order some off-brand bolts/u-nuts and get the parts individually. cheers! ******************************************** My parts finally arrived. 86803306 does in fact fit in place of the plastic shield, and is made of the same material as the trail boss skid right behind it covering the steering gear. I do believe it’s either aluminum or mild steel. I took the air deflector off the bottom of the bumper to mimic a trail boss. The plate bolted right up and I had zero issues with install. Took 10 minutes with a ratchet, extension, and socket.
-
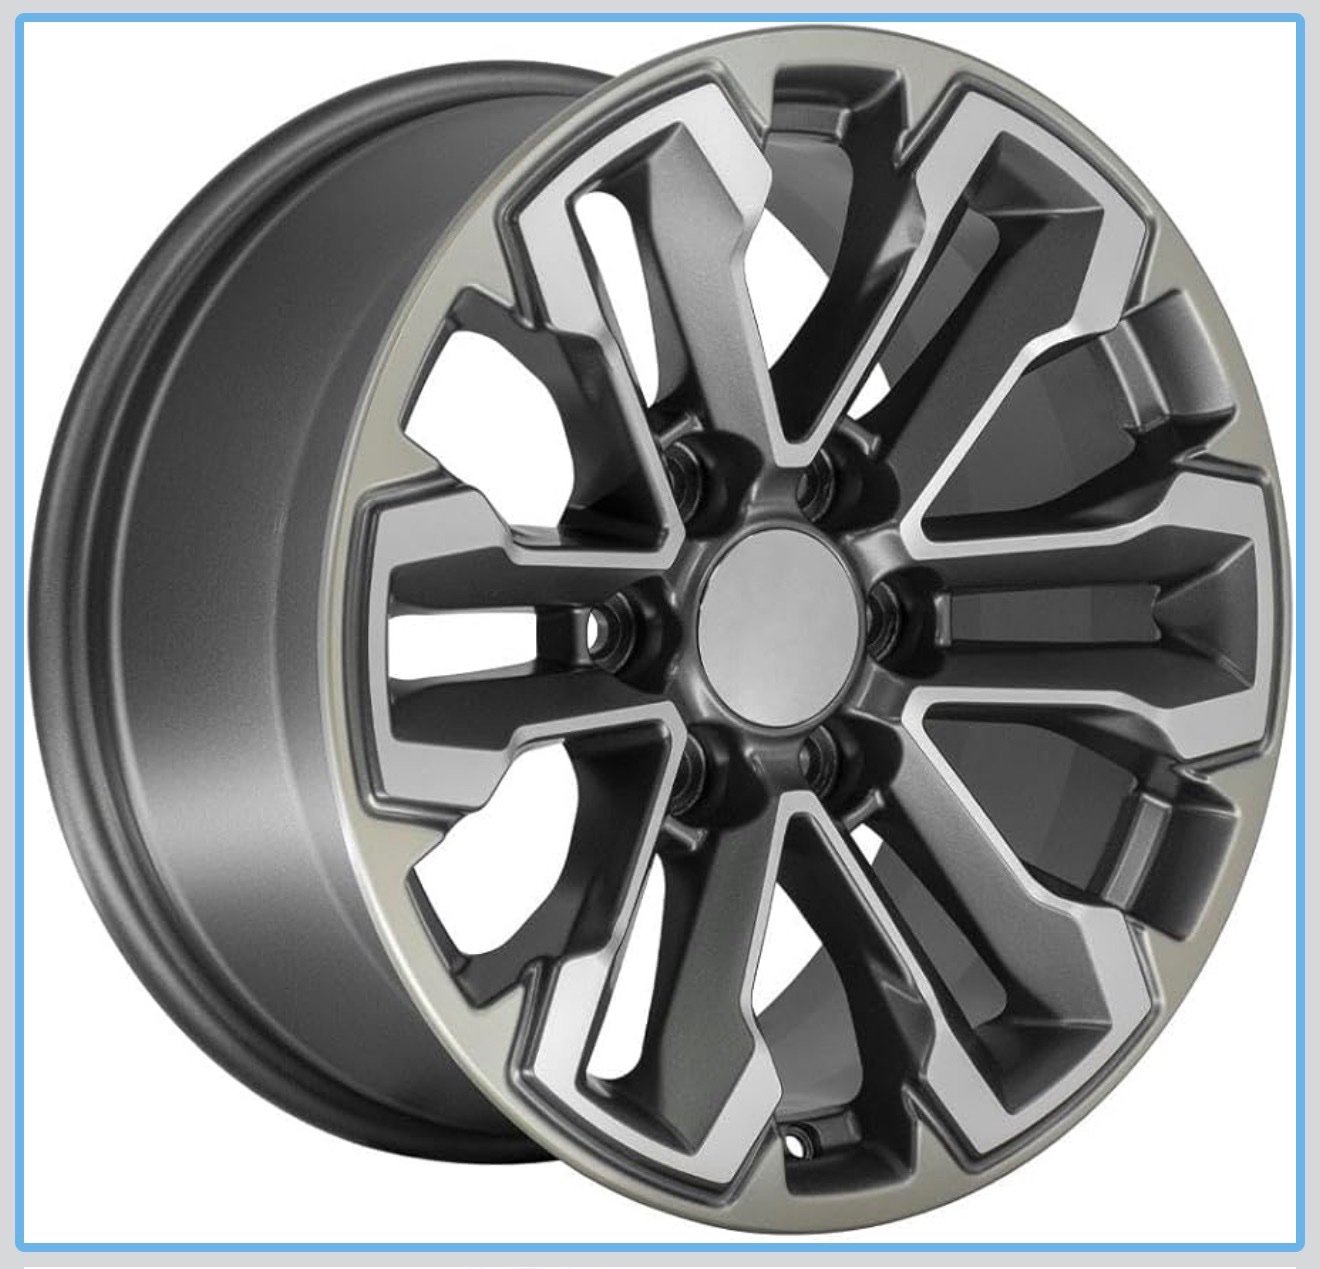
Hey guys. i plan on doing a bit of overlanding this summer and fall in my 2024 5.3 crew cab during my camping trips in the Shenandoahs out here in Virginia. I’m getting a matching set of five 275/70R18 tires (stock size for a ZR2). Either Mickey Thompson Baja Boss A/T’s, or Falken Wildpeak AT4Ws. The closest tire shop will be miles away; and and I’d need to make it some distance in case of a puncture. I have two questions, the first of which is most important: 1.) with a stock aluminum rim, 18” x 8.5”, will the spare carrier need to be assisted with a y-strap, or would it be alright to hang it up and forget it? Picture of the rim will be posted below. 2.) Will this tire/wheel combo fit under the truck without any issues? I'm not doing any high speed driving, except on the highway, and I won’t be doing any Baja or stump jumping with it. At most, the trails will be a little sketchy and I’ll be taking it slow.
-
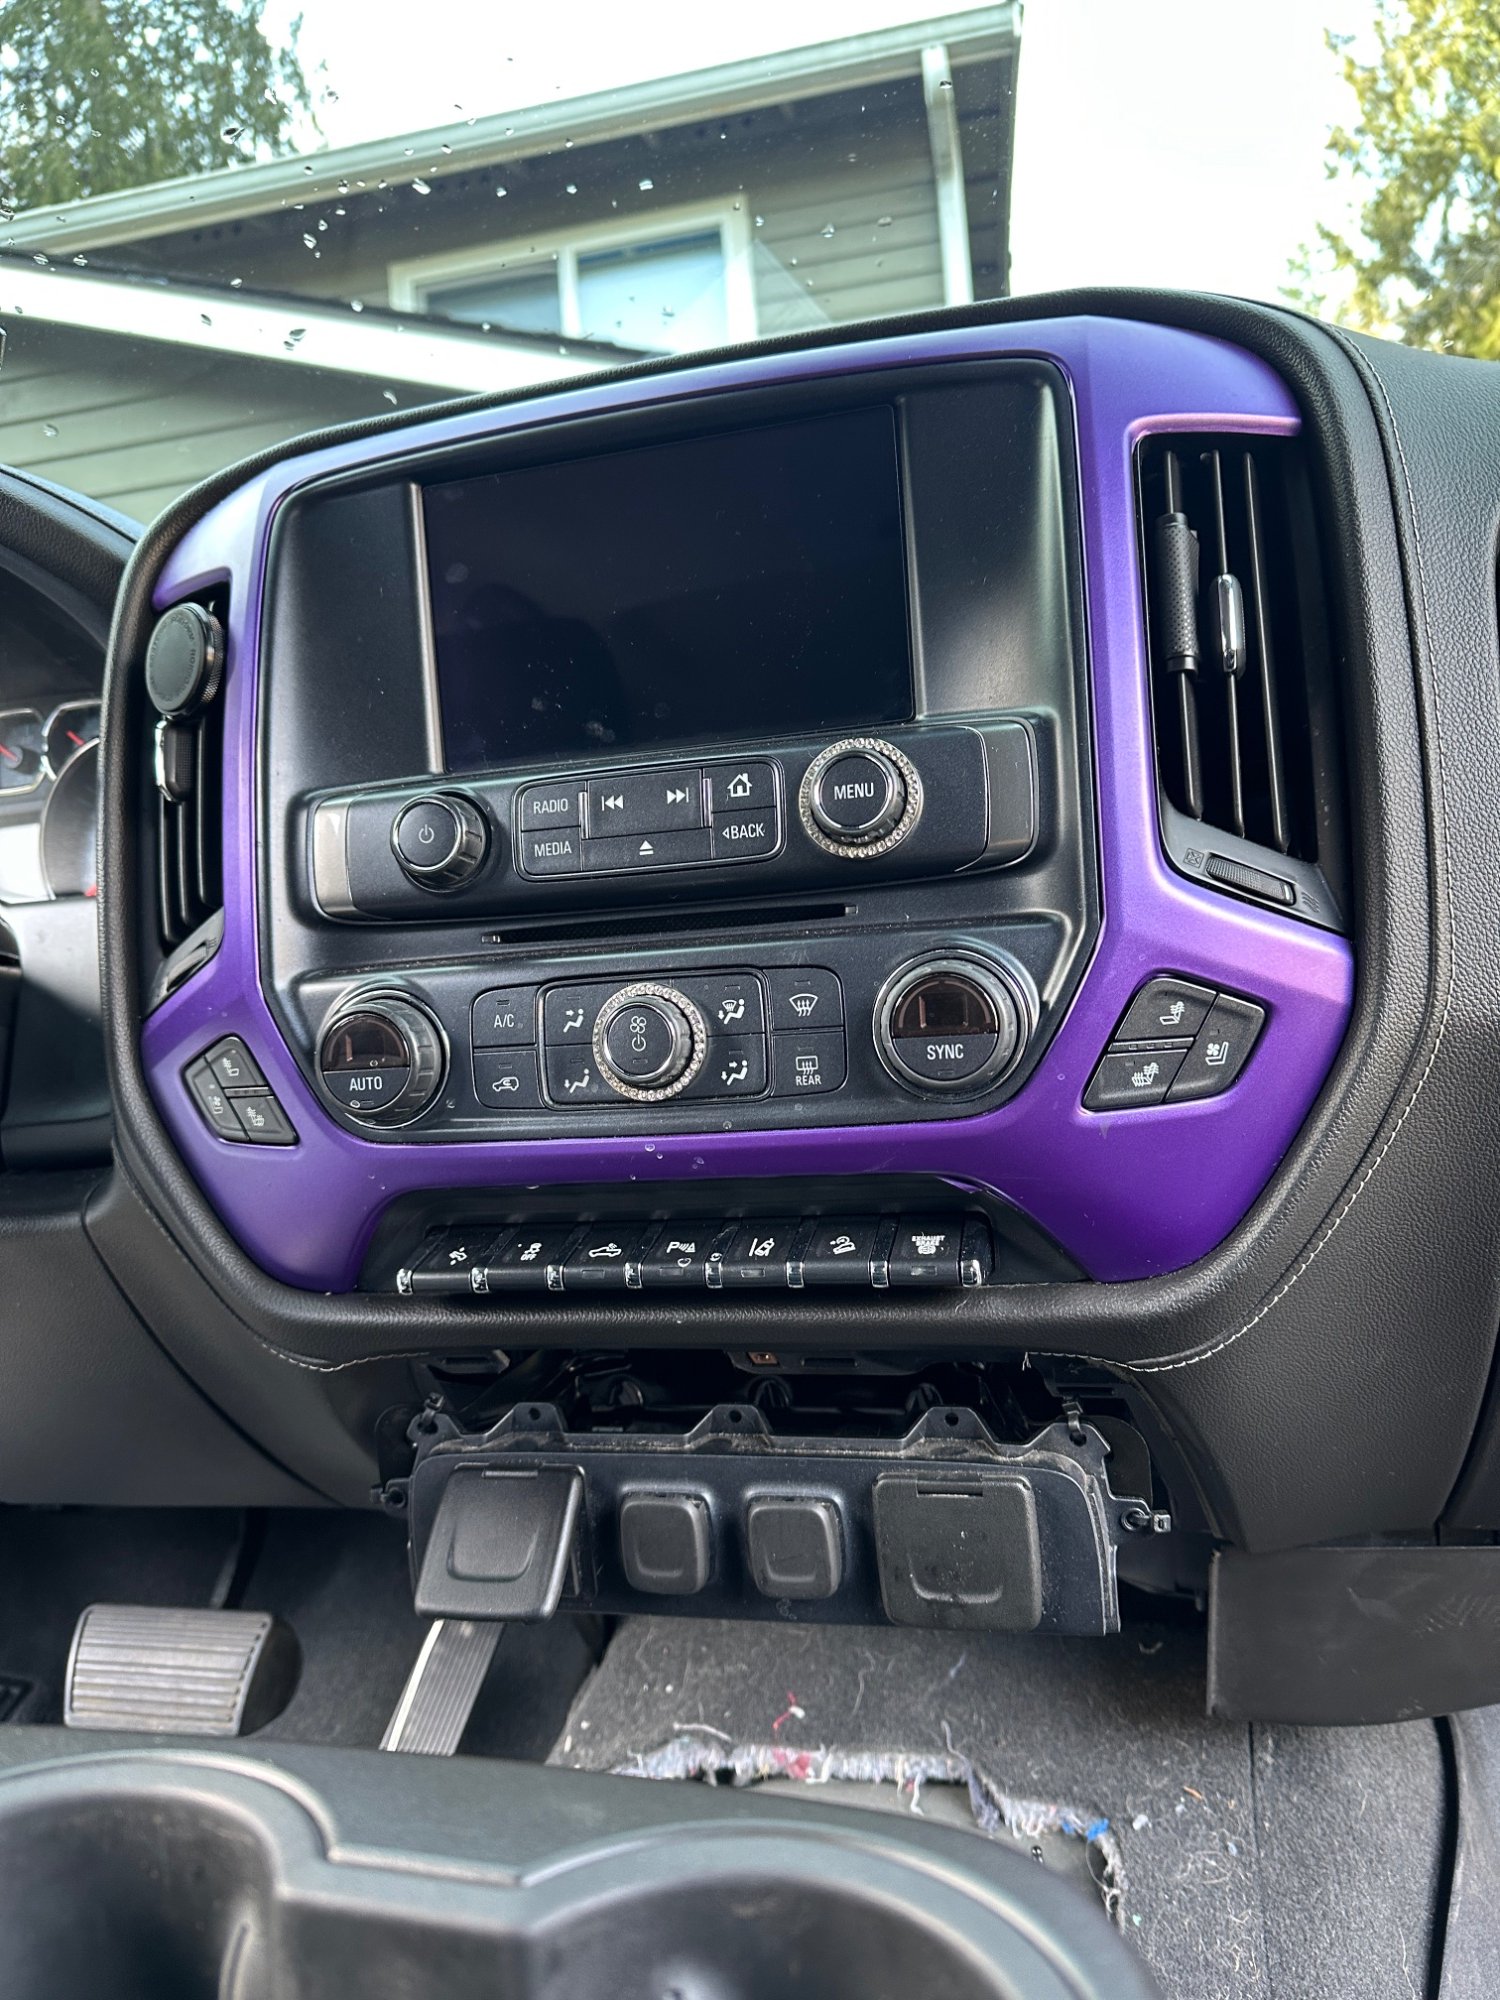
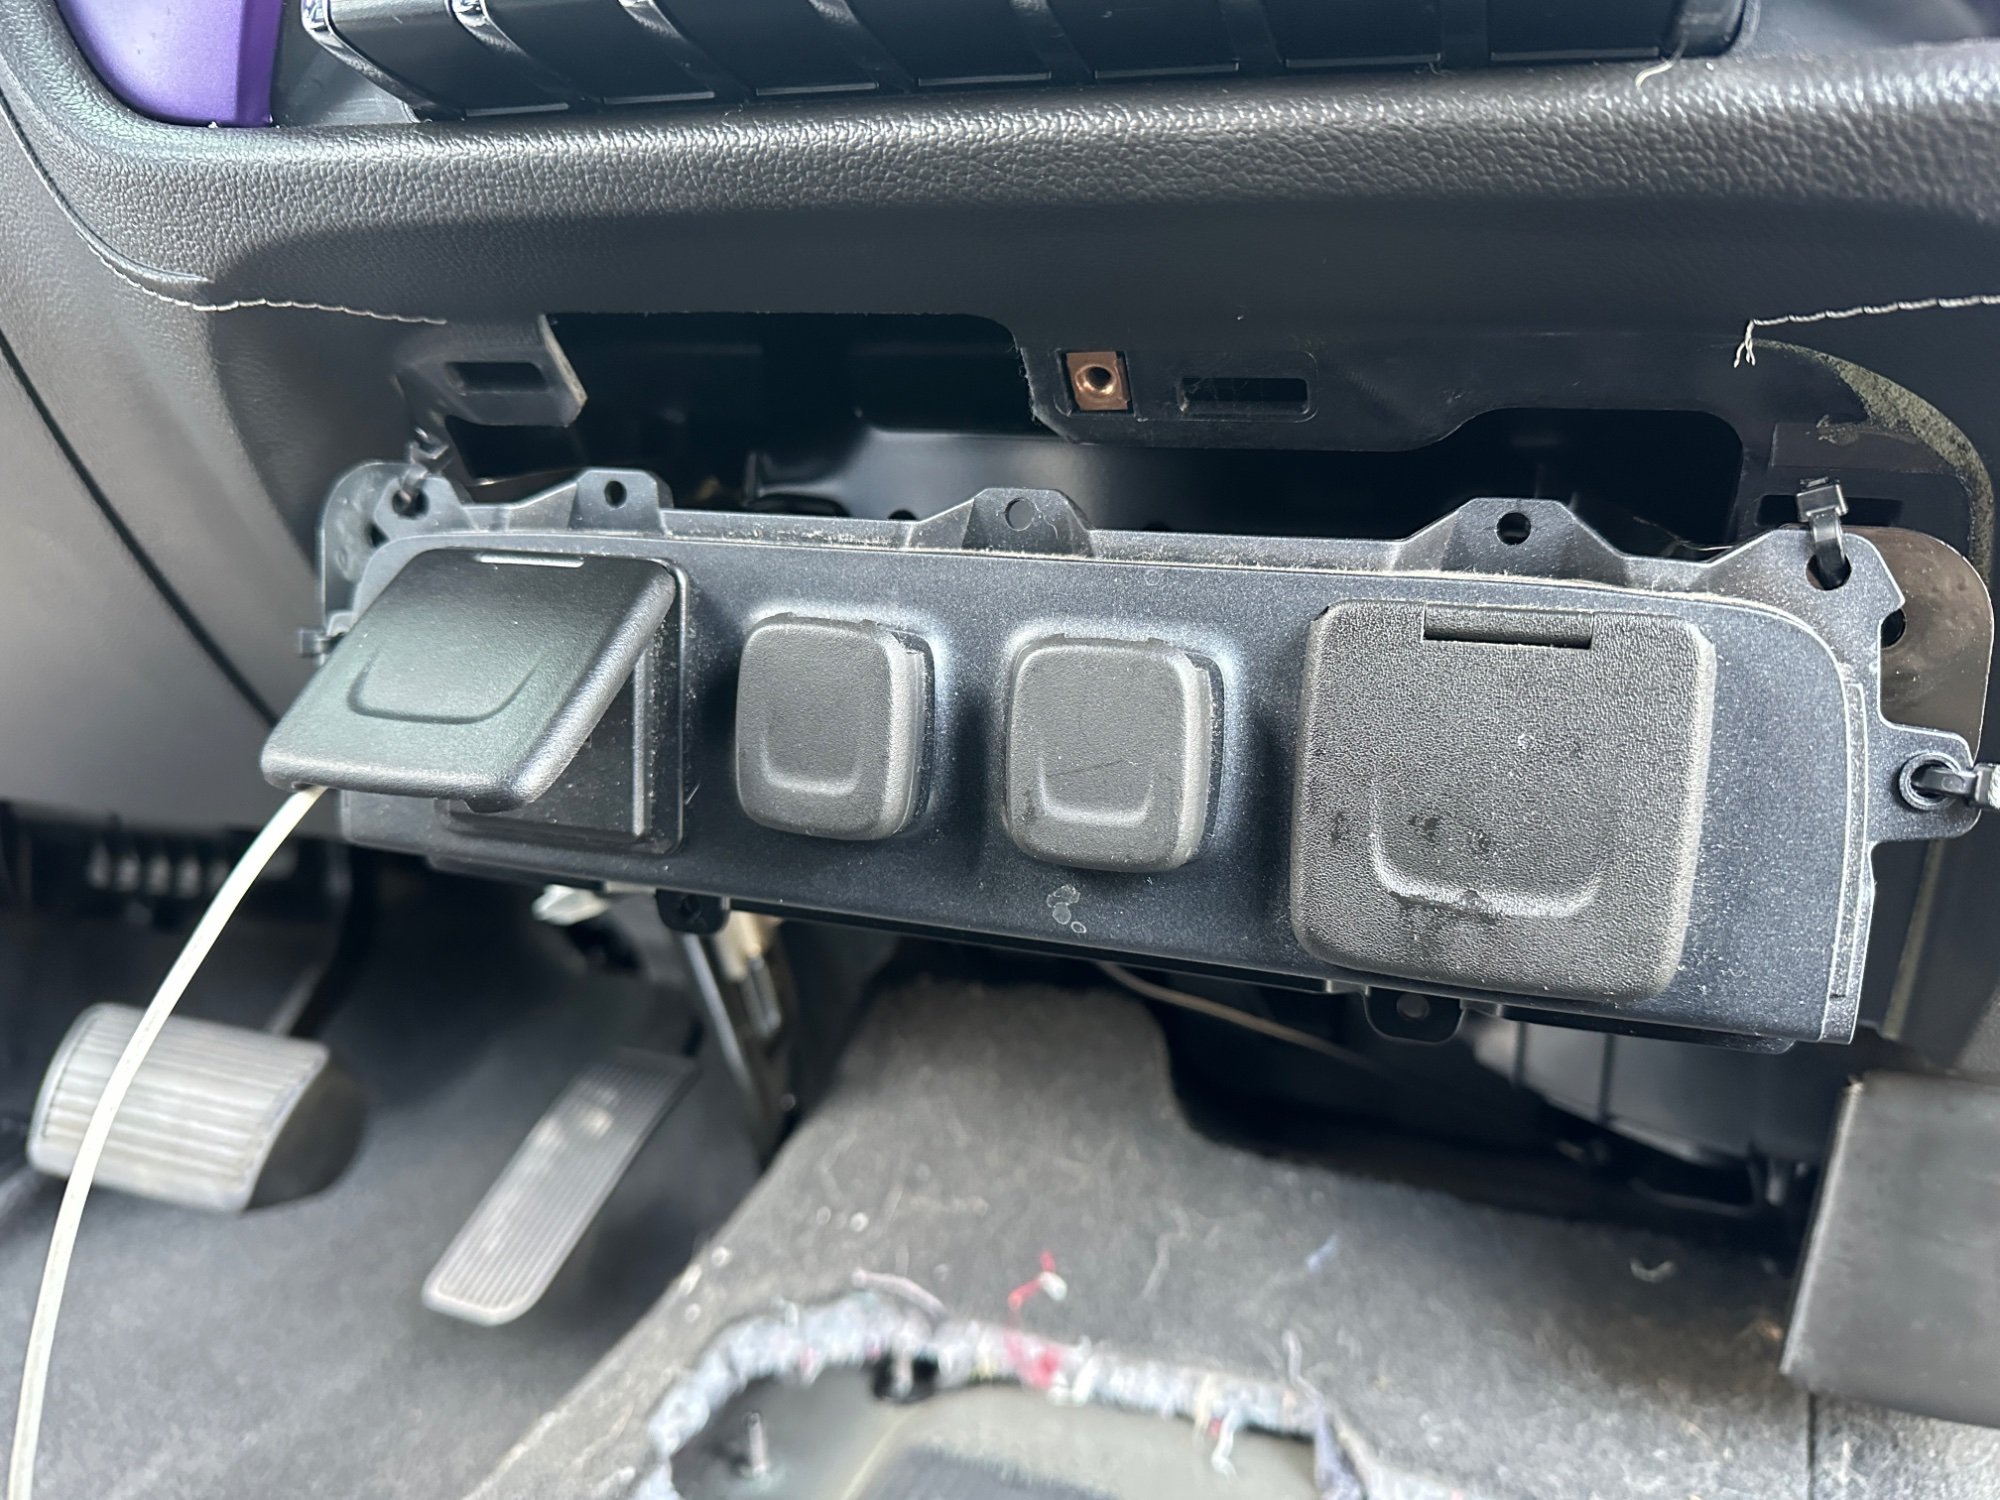
Just wondering if anyone can point me in the right direction finishing my downgrade. I have a 2019 Silverado 2500 HD Z71 LTZ 4x4. I took the center console out and replaced it with a jump seat per wife’s request. I need the bezels for the USB, cigarette light (x2), and 115v(?) plug to fit like a LT to have a bezel that will make it stock. I want it to look stock. but I am having issues finding the correct bezels that will fit. As for the carpet that’s missing from the subwoofer, I will just cover it with a floor mat. Provided are pictures of what I’ve done for the time being and hopefully it will make my post make more sense, for the direction I want to go. for you all. any help would be much appreciated.
-
So my problem started with my right rear door staying ajar, it would happen every now and then and then go away. When it would happen I'm unable to power the rear right window with both switches. Then it started with both rear doors staying ajar and loosing all power to the switches. Then it stayed like that. Recently I've done work on the truck causing me to unplug the battery. now The ajar light is gone but the door switch doesn't register when the both rear doors are open or closed. Not sure what's wrong but I checked each boot and it all seems good. What should I do next?
-
***UPDATE*** Engine tick was diagnosed as potential wrist pin or retaining clip failure. Severe scoring found on wall of cylinder number two. Engine is being replaced and should be up and running by the middle of next week. The rattle was diagnosed as torque converter engagement at low vehicle speed, lock-up with DFM engaged. About 5th gear. They have another 2024, 5.3/10-speed (4,000 miles) that rattles in the same fashion. They’re thinking a software update to disable DFM at low speeds would be a likely fix (does not do it when all 8 cylinders are engaged). Further info will be provided when engine is replaced; a GM engineer is going to pay the dealer a visit for my truck to see if adjustments to the programming is necessary. ***uploaded this linked video for TCC sound*** Truck has 570 miles on it. It’s a 2024, 5.3, MHT 10 speed, crew cab short bed work truck. The other day, I was coasting (between 15 and 25 mph) and heard this loud, repetitive metal knock or tap sound under very light throttle. Sounded like it was coming from the engine bay, through the floor, approximately center or slightly to the right from driver seat POV. It came and went when I was very lightly engaging/disengaging the throttle pedal. It does not happen when I’m accelerating or when the drivetrain is under load. This morning, on start up, I hear this unusual metal “clack” that seems random in interval, but consistent nonetheless, at idle. My coworker drove beside me, and through the usual DFM noise, he heard the metal “knock” or “tap”, very loud, from the engine bay, while cruising and very light throttle. When I got to the dealer to drop it off, I couldn’t replicate any of the issues. Of course. I sent these videos to the service advisor, because he was stumped like I was.
-
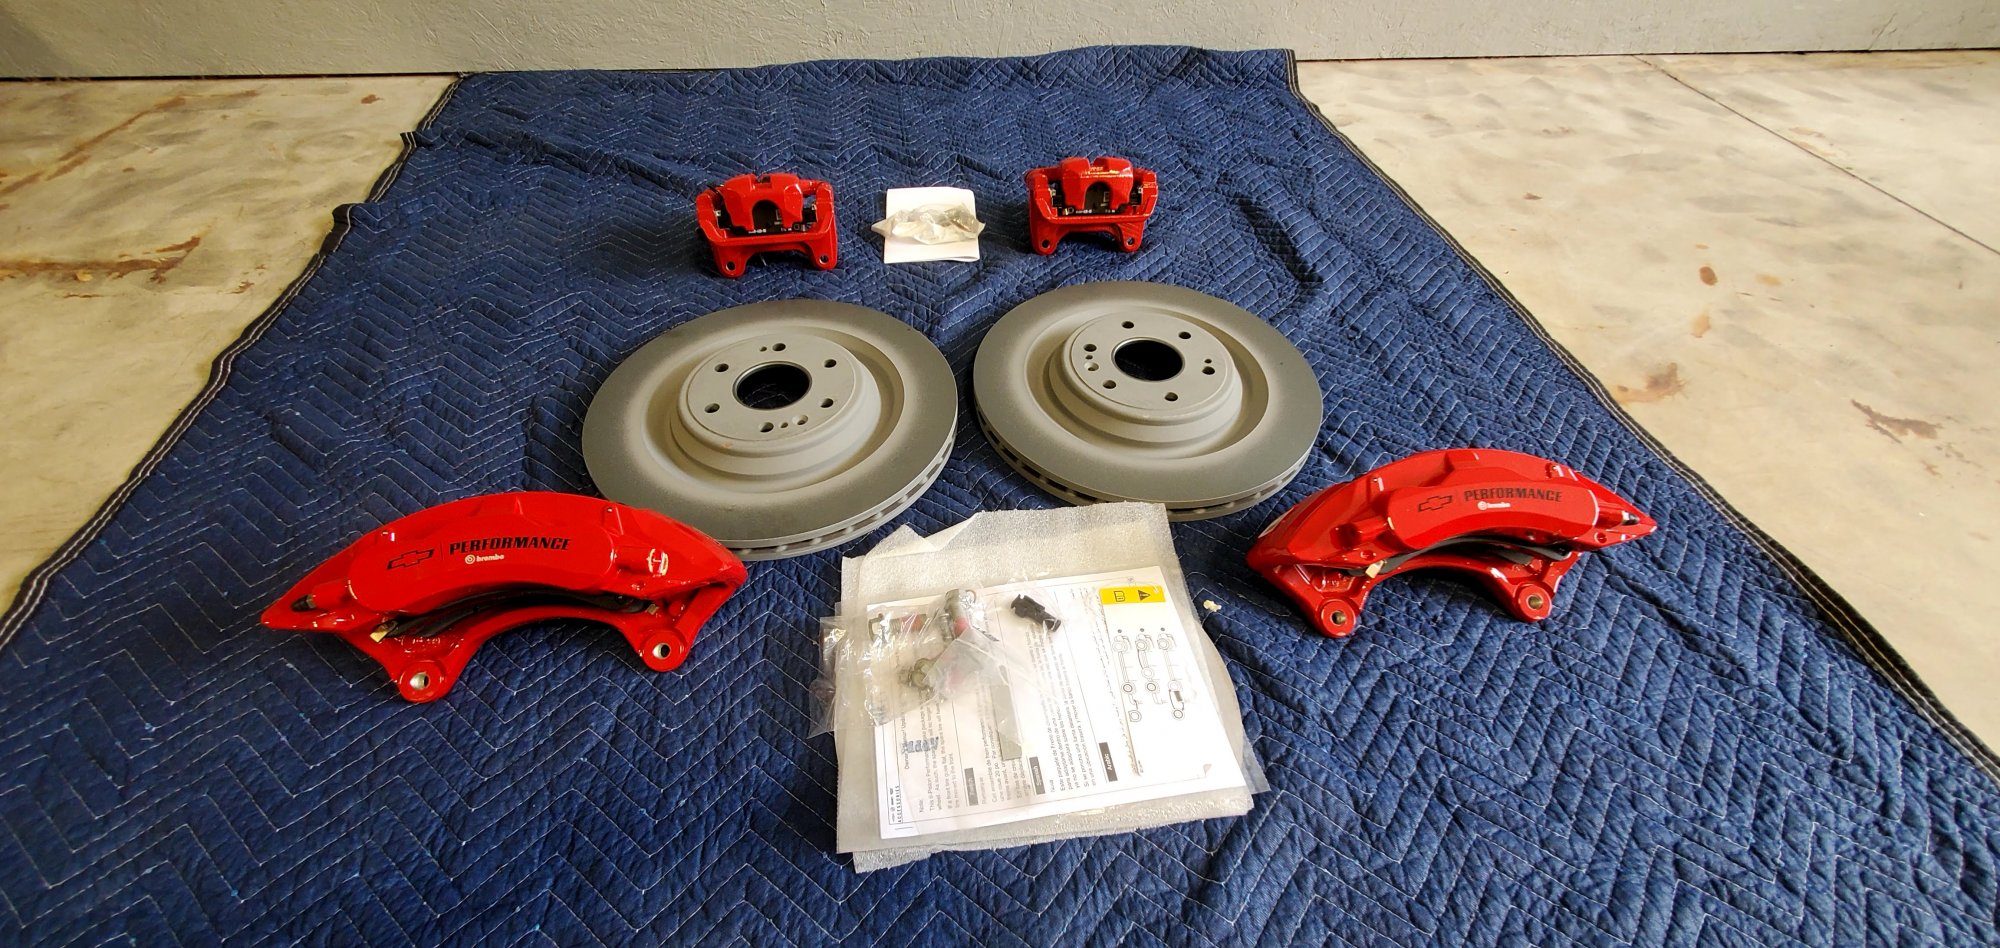
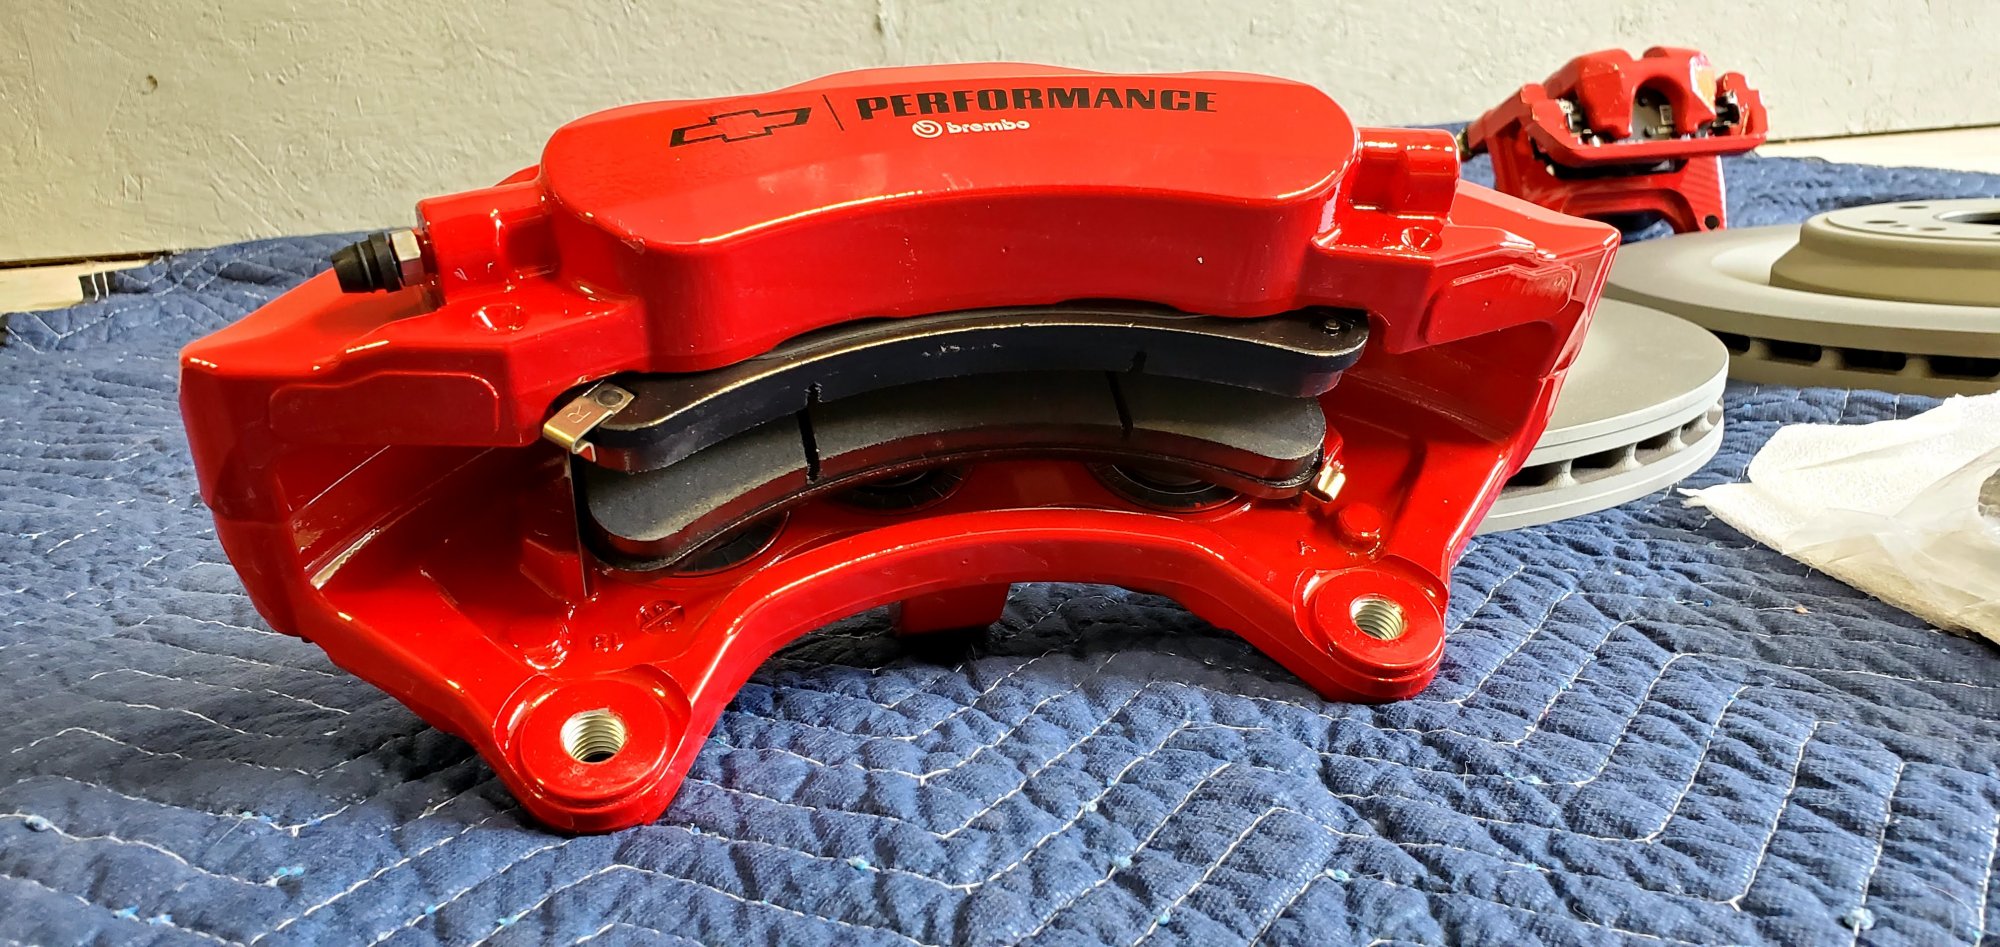
I'm about to install the Chevy Performance Brembo Brake Upgrade on our Silverado. Has anyone else installed this kit? Anyone thinking about it? At first glance, it seems pretty straightforward. After reading the manual, however, I'm realizing I need to take the front wheel bearings off to access the dust shield. Other than that, it seems to be a easy rotor/caliper replacement. Big thanks to @RyanbabZ71 for recommending a great brake bleeding tool! The front set is a true six-piston caliper. The rear calipers are stock calipers painted red to match the fronts. The size increase on the front rotors is significant. I'm gathering the tools I'll need right now. Hopefully I can tear into it next week. I expect the entire process to take me at least a whole day and maybe two days depending on how it goes. Why so long? I'll be photographing and taking video of the entire process. Can't wait to share that with you all. Check back in this thread for progress updates.
-
Hey guys. 2001 Silverado 2500HD Sounds like a bad bearing or something. 97k miles. NV4500 Hear it most prominent in 4th/5th gear but can hear faintly coasting in neutral. Also, it does the noise in every forward gear. Gets most noticeable at 40 mph + and 5th gear REALLY picks up the noise way worse than any gear. I threw it in neutral going about 50. Still heard it. And then pressed the clutch in at 50 in neutral. Still heard it. Could this be an issue with the driveshaft or something ? However, 5th gear amplifies the noise and it sounds like it is coming directly from the shifter. So I think it would have to be trans related. I’m stumped Link to video:
-
 I have a 2020 silverado z71 with 62,000 miles and when I drive on the hwy I'm going 80 with cruise control on, I noticed the engine light flashing. It would flash for a little bit, Cruise control still on, and then it would stop and go away completely. When it happens the truck feels and drives the same, No engine struggle or noise. It drives the same before, during and after the flashing light. It also has happen with the cruise control off.
 -
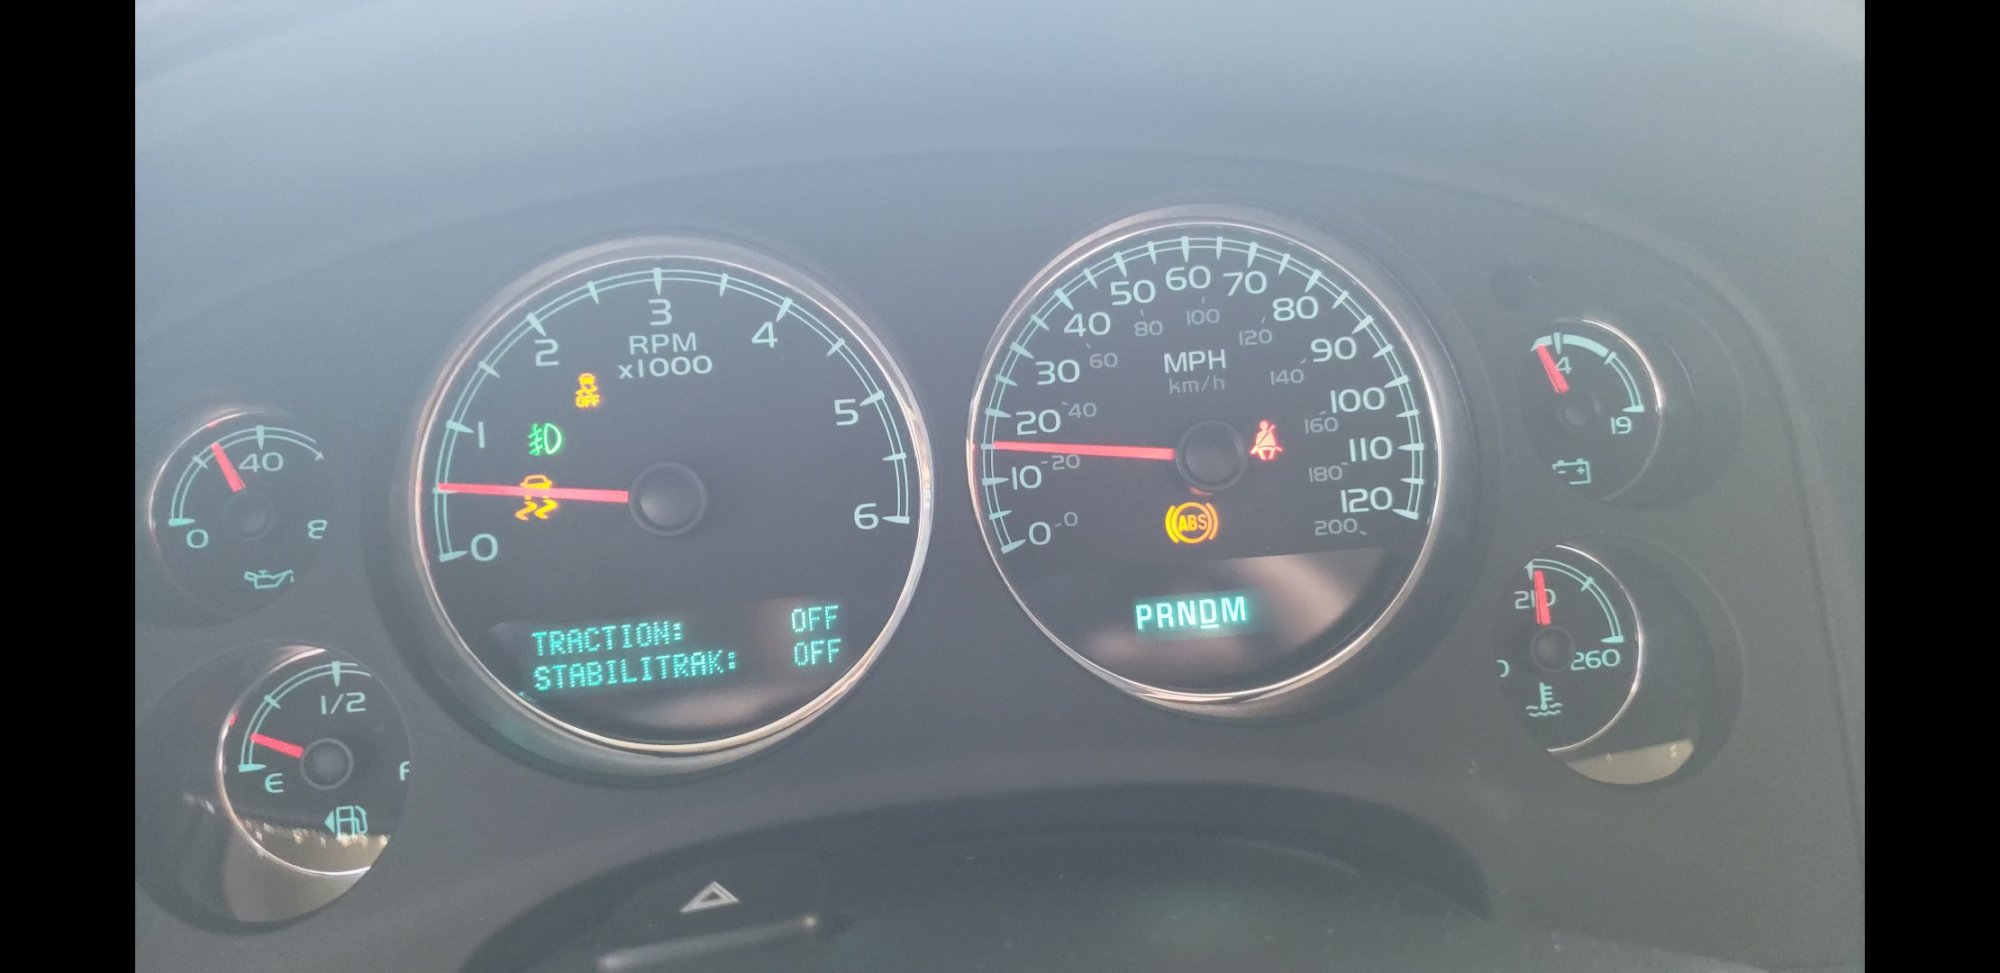
 I am new to the forums and hoping someone may have seen this or run into this before. I own a 2012 Silverado LTZ Crew Cab, 5.3L, 2WD, 102K miles, Factory radio with a harness plug for a an amp for subs. Electric drop down side steps. LED headlights & fogs. K&N Nighthawk Intake. Battery is less than a year old but i'm in Arizona so batteries get wrecked yearly. I recently took my truck to my local DIY car wash place where I always go. I washed my truck like normal and dried it off like normal. I did not spray engine bay, just the front grill area inward but not heavy. I don't usually use my AC but I'm in Arizona and it was about 109* outside. When I was leaving the car wash I kicked my AC on so I wouldn't mess up the clean windows from rolling them down. I proceeded to leave and as I was coming to the stop sign before making my turn and my truck's idle started to drop, truck kinda sputtered, the battery voltage dropped, the stabilitrak light, traction light, ABS light, all kicked on. The radio shutoff and turned back on. The AC shut off and turned back on, but switched from recirc to fresh. I turned the AC off and then back on again and continued to drive home. It did it a few more times so I swung into the gas station to park and see if it would do it while i was sitting there. Nothing. So back on the road again, turned my AC on and hit the next light, and it did it again. I changed my oil today (6/13), I cleaned my K&N air filter last weekend. I took a trip to Lowes this morning to see if it was still doing it, and sure enough it was. The photos are attached of it doing it in the lowes parking lot before I left. I rolled the windows down, turned the AC off and cruised home. It didnt do it again. So I am thinking the AC is drawing a huge amount of power from the system when I run it, or my battery is done for. Any helpful feedback would be appreciated.
-
 I went from 31” to 33” tires last June and in Sept I started to overheat a bit but since replacing the thermostat it hasn’t been overheating. Now that it’s a bit warmer it starts to move the gauge to like 215 when normal is just below 210. Is this something I should be concerned about? I also have a cold air intake so could the tires being bigger and causing more heat cause the temps to go up a bit? Thanks in advance!
 -
 (2019 Silverado 1500 LTZ) It is intermittent but as soon as I plug my phone into the truck via USB-C cable and connect to CarPlay, eventually during my drive when I try to adjust my volume it is super delayed to register the volume change. After a couple minutes the entire dash goes black and restarts. Almost like the infotainment system freezes. No idea what could be causing this and there isn’t anything out there regarding my issue. Any ideas?
 -
 A little background just bought this truck 2 months ago, last week I went camping with a friend in the bed of the truck. After 2 days, I pulled the truck out of the parking spot in reverse and there was an extremely loud grinding and very loud clunking from the rear end. The noise was so loud people in a cabin 20 yards away came outside because they thought I had hit something. Check engine light came on, pulled code P25A2 and U0146. Now whenever I use the brake in reverse, there is a loud grinding sound from the rear drivers side wheel. The truck did not make this sound before these codes showed up. It's usually louder in the morning/when it's cold. I've had it at 2 dealerships who say they can't reproduce the noise (by the time they get around to examining the vehicle it has quieted significantly) But the next morning when I back out of my driveway the loud grinding and squealing has returned.
 -
Hey all, I'm new to this forum so if I'm not in the correct section or have done something in the wrong, just point me in the right direction. I have a 2015 Silverado 1500 and I've seen a few topics on here regarding a front end swap between the 14-15 body style and the 16-19 body style but none have really helped that much. I was hoping to get a new topic going for people wanting to do this in the future that contained more helpful information on the whole process. Now, I have done some research to see what would need to be done, and I've found that it in fact IS possible HOWEVER, if you want to do this, you have to replace the whole front end including bumper, grille, headlights, and hood. You can't just do it piece by piece because the lines wont match up. For those who have done this, is my though process correct and is it pretty much a seamless transition when swapping everything out? Meaning all bolt holes, etc. line up when switching a 14-15 front end with a 16-19 front end? If anyone has done this swap, please share your process!
-
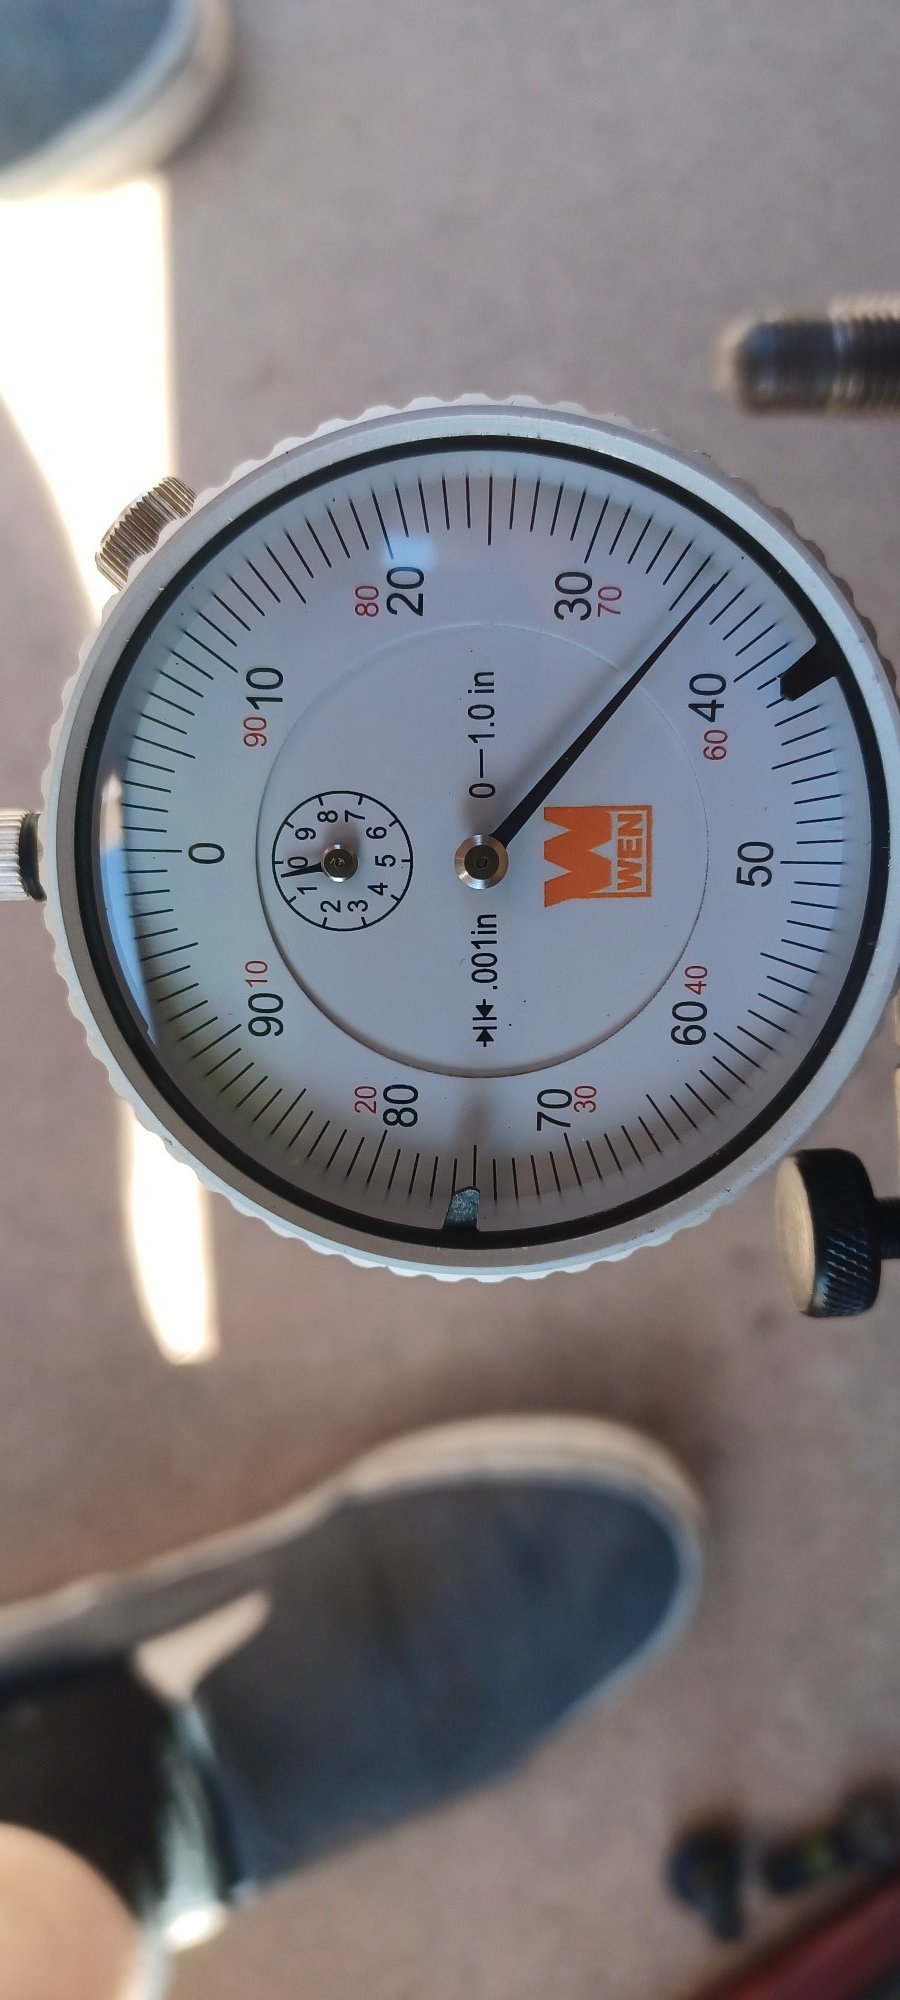
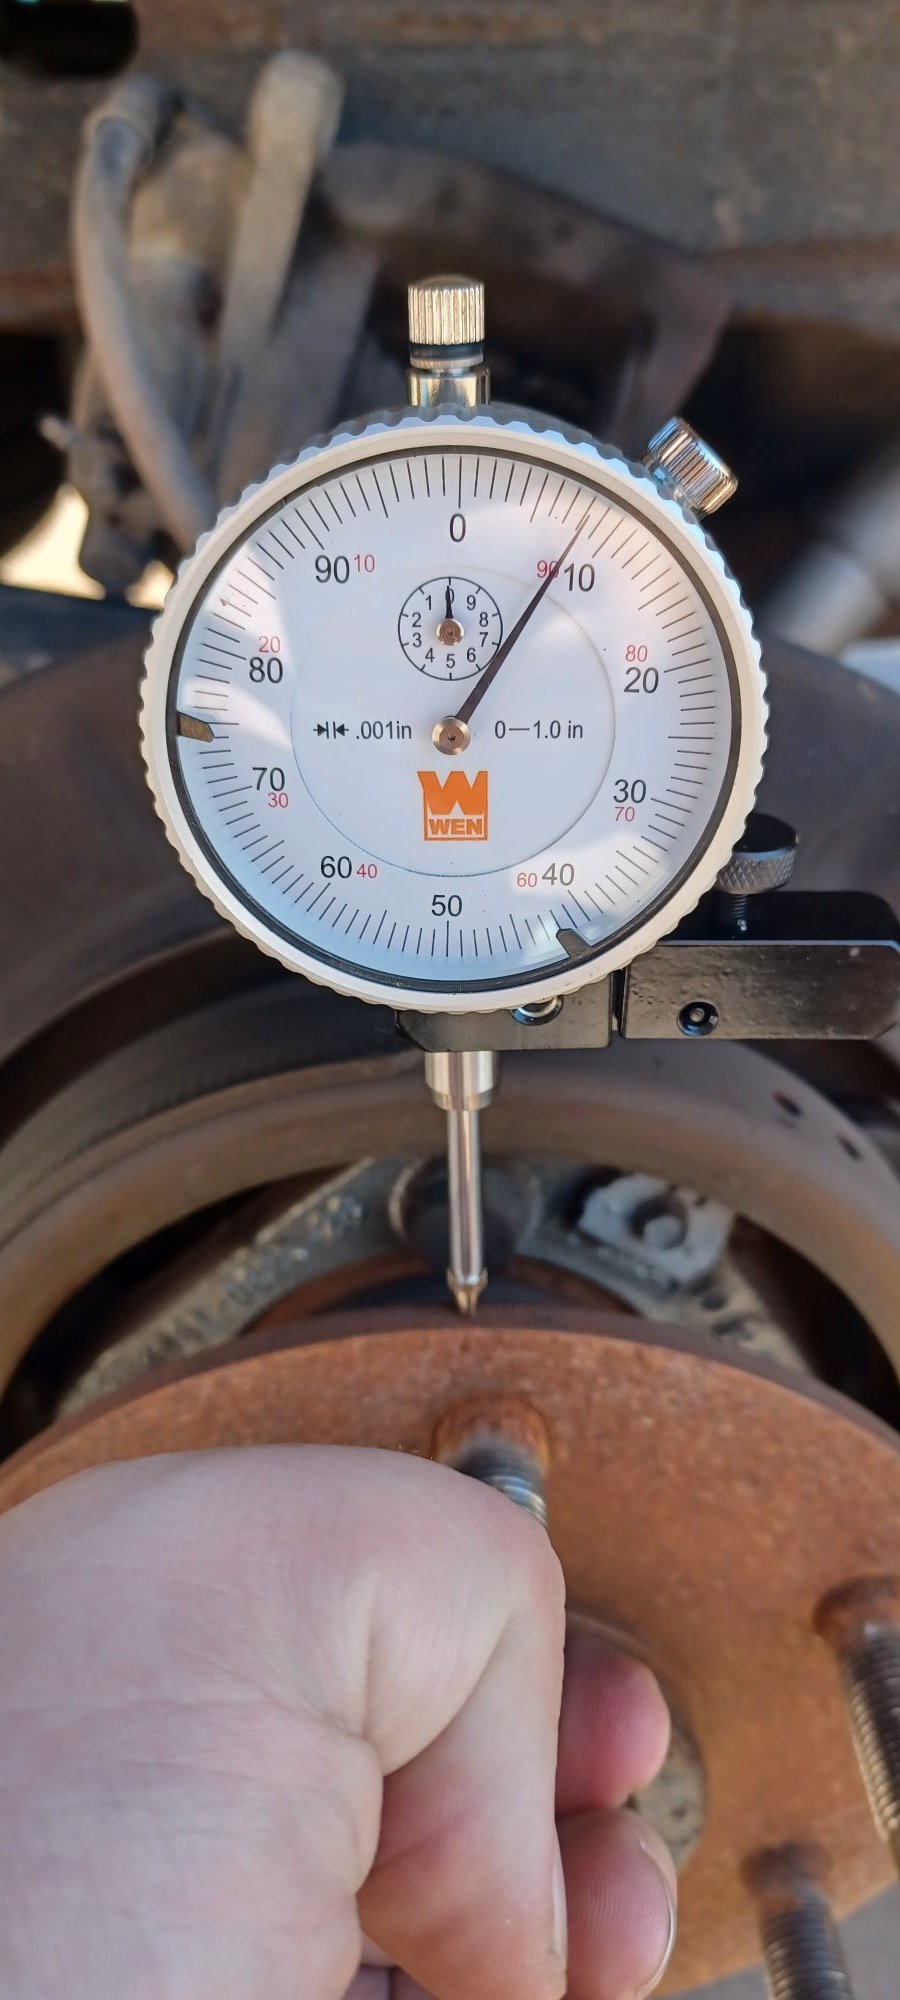
Got some questions about differential specs. My passanger side rear has been making some noise going over bumps lately and i found that i have around .036 of endplay and about .008 of up and down movement. curious if anyone knows if there is a callout in a service manual from gm about maximum wear. Thanks. Gm 10 bolt g80
-
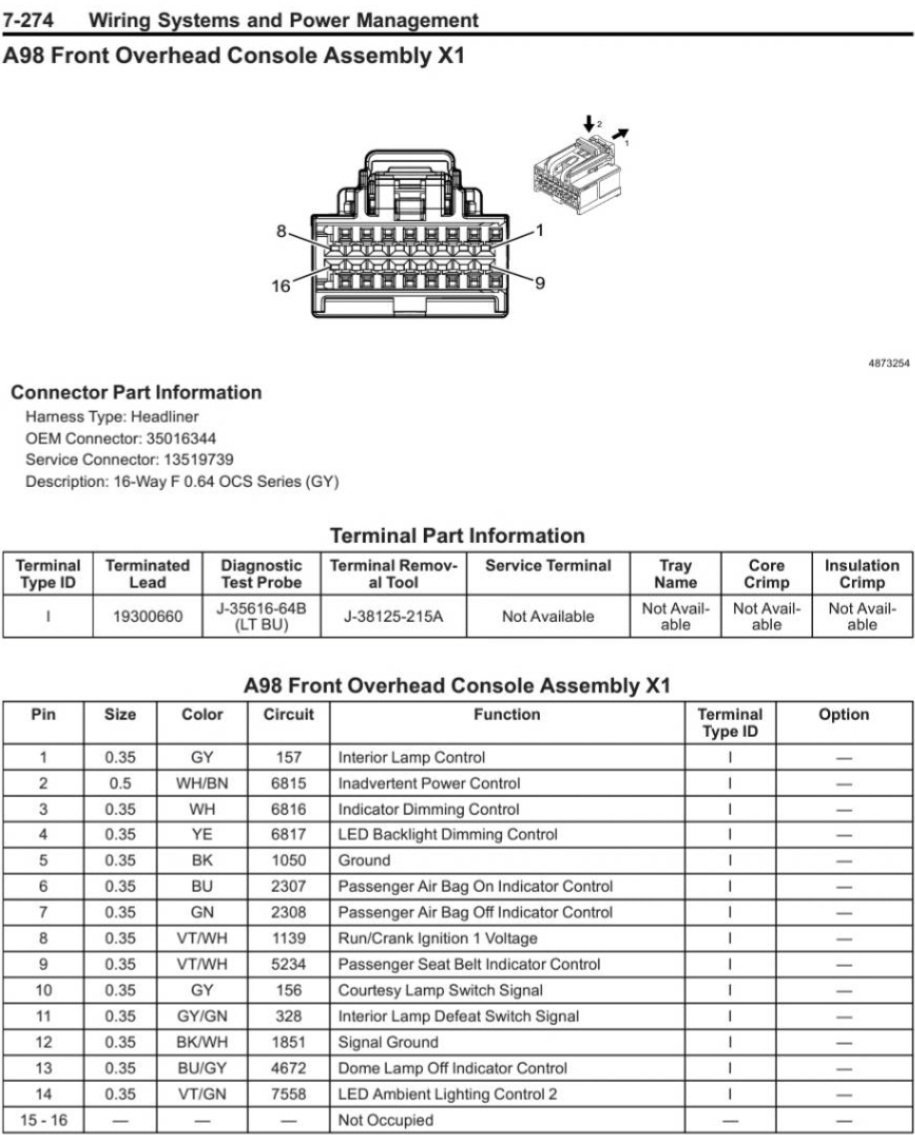
Only joined to spread the word. Like most of you I've been frustrated with the horrible interior lighting without easy fix. I also wasn't willing to have holes drilled in my trim pieces, or lose any functionality of my switches or courtesy lights. If that's of interest to you, I'll try to include screenshot of item since links die, and hopefully enough pictures to get you through so you don't have to spend multiple hours testing circuits to figure it out. The good news is the rear dome lights are so easy to do. Take the rear dome assembly down and take it apart. It's only held up with clips and a small pry tool to get it apart. Remove the 2 fresnel lenses out and put it back together. That's it. Probably 3X the usable light from the rear domes with a nice even spread. The front assembly is quite a bit harder. I'm not going to explain how to remove the assembly and take it apart, there's plenty of videos online. For this mod I ordered some neutral white 3/4inch clearance lights from Tecniq. They have a real nice pattern to them and plenty bright. I needed a way to power them so I used some mosfet trigger modules. Probably 10 bucks in parts if I didn't over order for another projects. I needed some diodes to prevent feedback and keep the bcm safe. I had some on hand. DONT FORGET THE DIODES. I removed the fresnel lenses from the front as well. I took everything apart and with a Drexel 'gently' made the leds fit roughly in the same position as the factory holes. It doesn't take much. I had to trim a bit from the bulbs as well. There's a tiny spot on the pcb board that produces 4 volts on either side corresponding to the lights. If your not comfortable soldering, it's pretty small. Next I routed the wires from the led through the holes directly behind them. I did have to cut some of the rubber out, but be careful not to take too much. Once the pcb was back in, I ran the wires towards the rear and again used the Drexel to make room on the back piece for them to come out. Then I wired them to the mosfet modules. You might have to knock the tiny led off of the module. It's a tiny power draw but these module are meant for 5 volts and we're working with 4V. Mosfet module Requires Vin, Gin, Vout, Gout, trigger, and trigger ground. I place the diodes in the the Vout. Make sure the orientation is correct. Module power out to led. Pigtailed Gin to trigger ground. And made some quick disconnect leads for the power in. I connected to power and ground directly to the wiring harness via t-taps. I know people have said you can mess up the bcm that way, but considering the leds only draw 40 mA @12V each I wasn't worried about it. Connected ground to number 5 pin on the grey harness. I'll have to apologize, I don't remember which wire I connected in the harness for power. It was late and I was very frustrated. I initially connected to number 14 but I lost some functionality. There was another wire that hade 12v power at all times and I hooked it up there. I believe it was pin number 10. Anyways I hope this helps. I know gm dropped the ball on these truck for interior lighting. Mine are so bright now I have zero issues. Have full view and it's bright enough to see everything. The lights up front don't shine at my eyes, and they light up the floor. I'm not even going to do the floor lamps now! 10/10 upgrade! P.S. I'm going to throw some pictures of the interior up here so you can see the bightness. Don't judge, she's a work truck! Lol ANMBEST 10PCS DC 5V-36V 15A(Max 30A) 400W Dual High-Power MOSFET Trigger Switch Drive Module 0-20KHz PWM Adjustment Electronic Switch Control Board Motor Speed Control Lamp Brightness Control https://a.co/d/19L4oGi https://www.ebay.com/itm/292380373219
-
 Hi there. Have a leak under my truck (2019 LT V8 with less than 35000 miles on it).. Last couple of weeks I have been smelling gas. Finally decided to look.. long story short is I found it. But there is a Plastic Protective Cover in front of it to get a clear view and see what is going on. Used my phone to show there is a pin hole leak shooting gas out the lower hose (by the yellow tag). How do I remove the cover to access so I can repair or replace the hose? What type hose? part number? Appreciate any help. Added pics and vid. Thanks FR VID-20250118-WA0009 compressed.mp4 VID-20250118-WA0009 compressed.mp4
-
 I’m planning on upgrading my gear ratio from 3.42 to 4.10 on my 2019 custom trail boss. I want to put a 4-6 lift on my truck from BDS with fox shock coilovers With 35 inch tires maybe 37’s but before that I want to regear my truck so that I don’t lose any power. Do y’all think 4.10 gears are good enough for should I go for like 4.55’s? If anyone has re geared there 2019’s and up please let me know the prices and gear shifting experiences.
 -
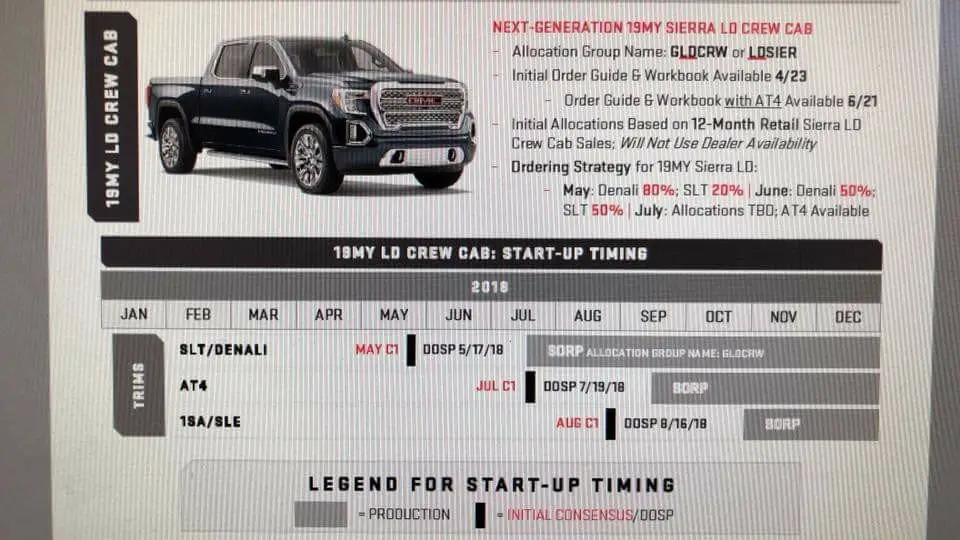
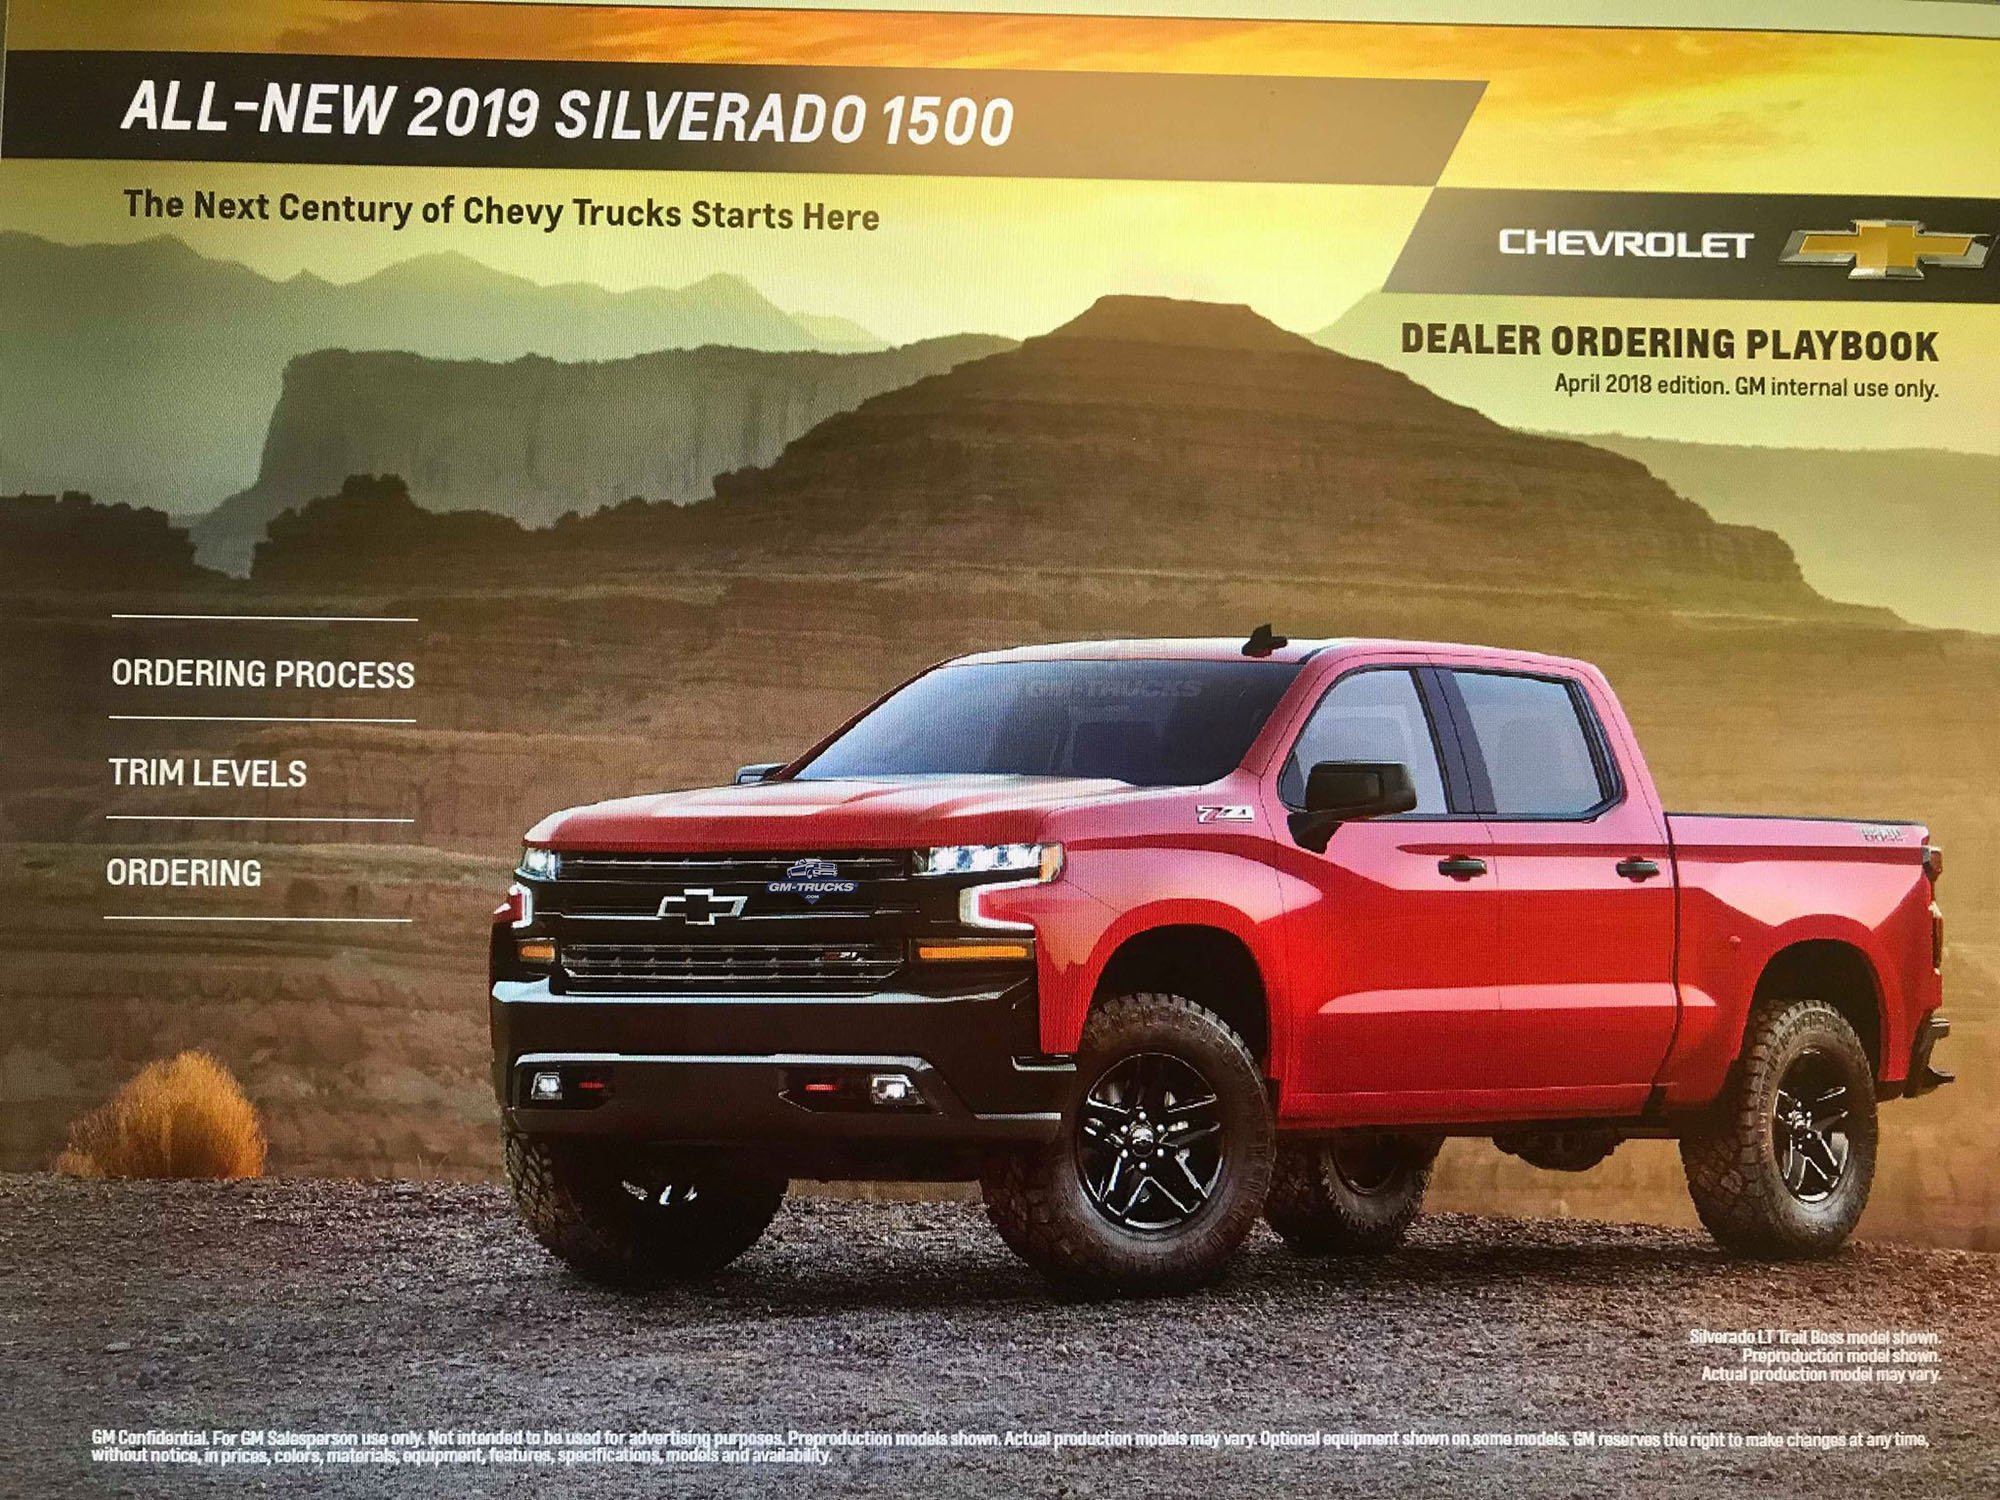
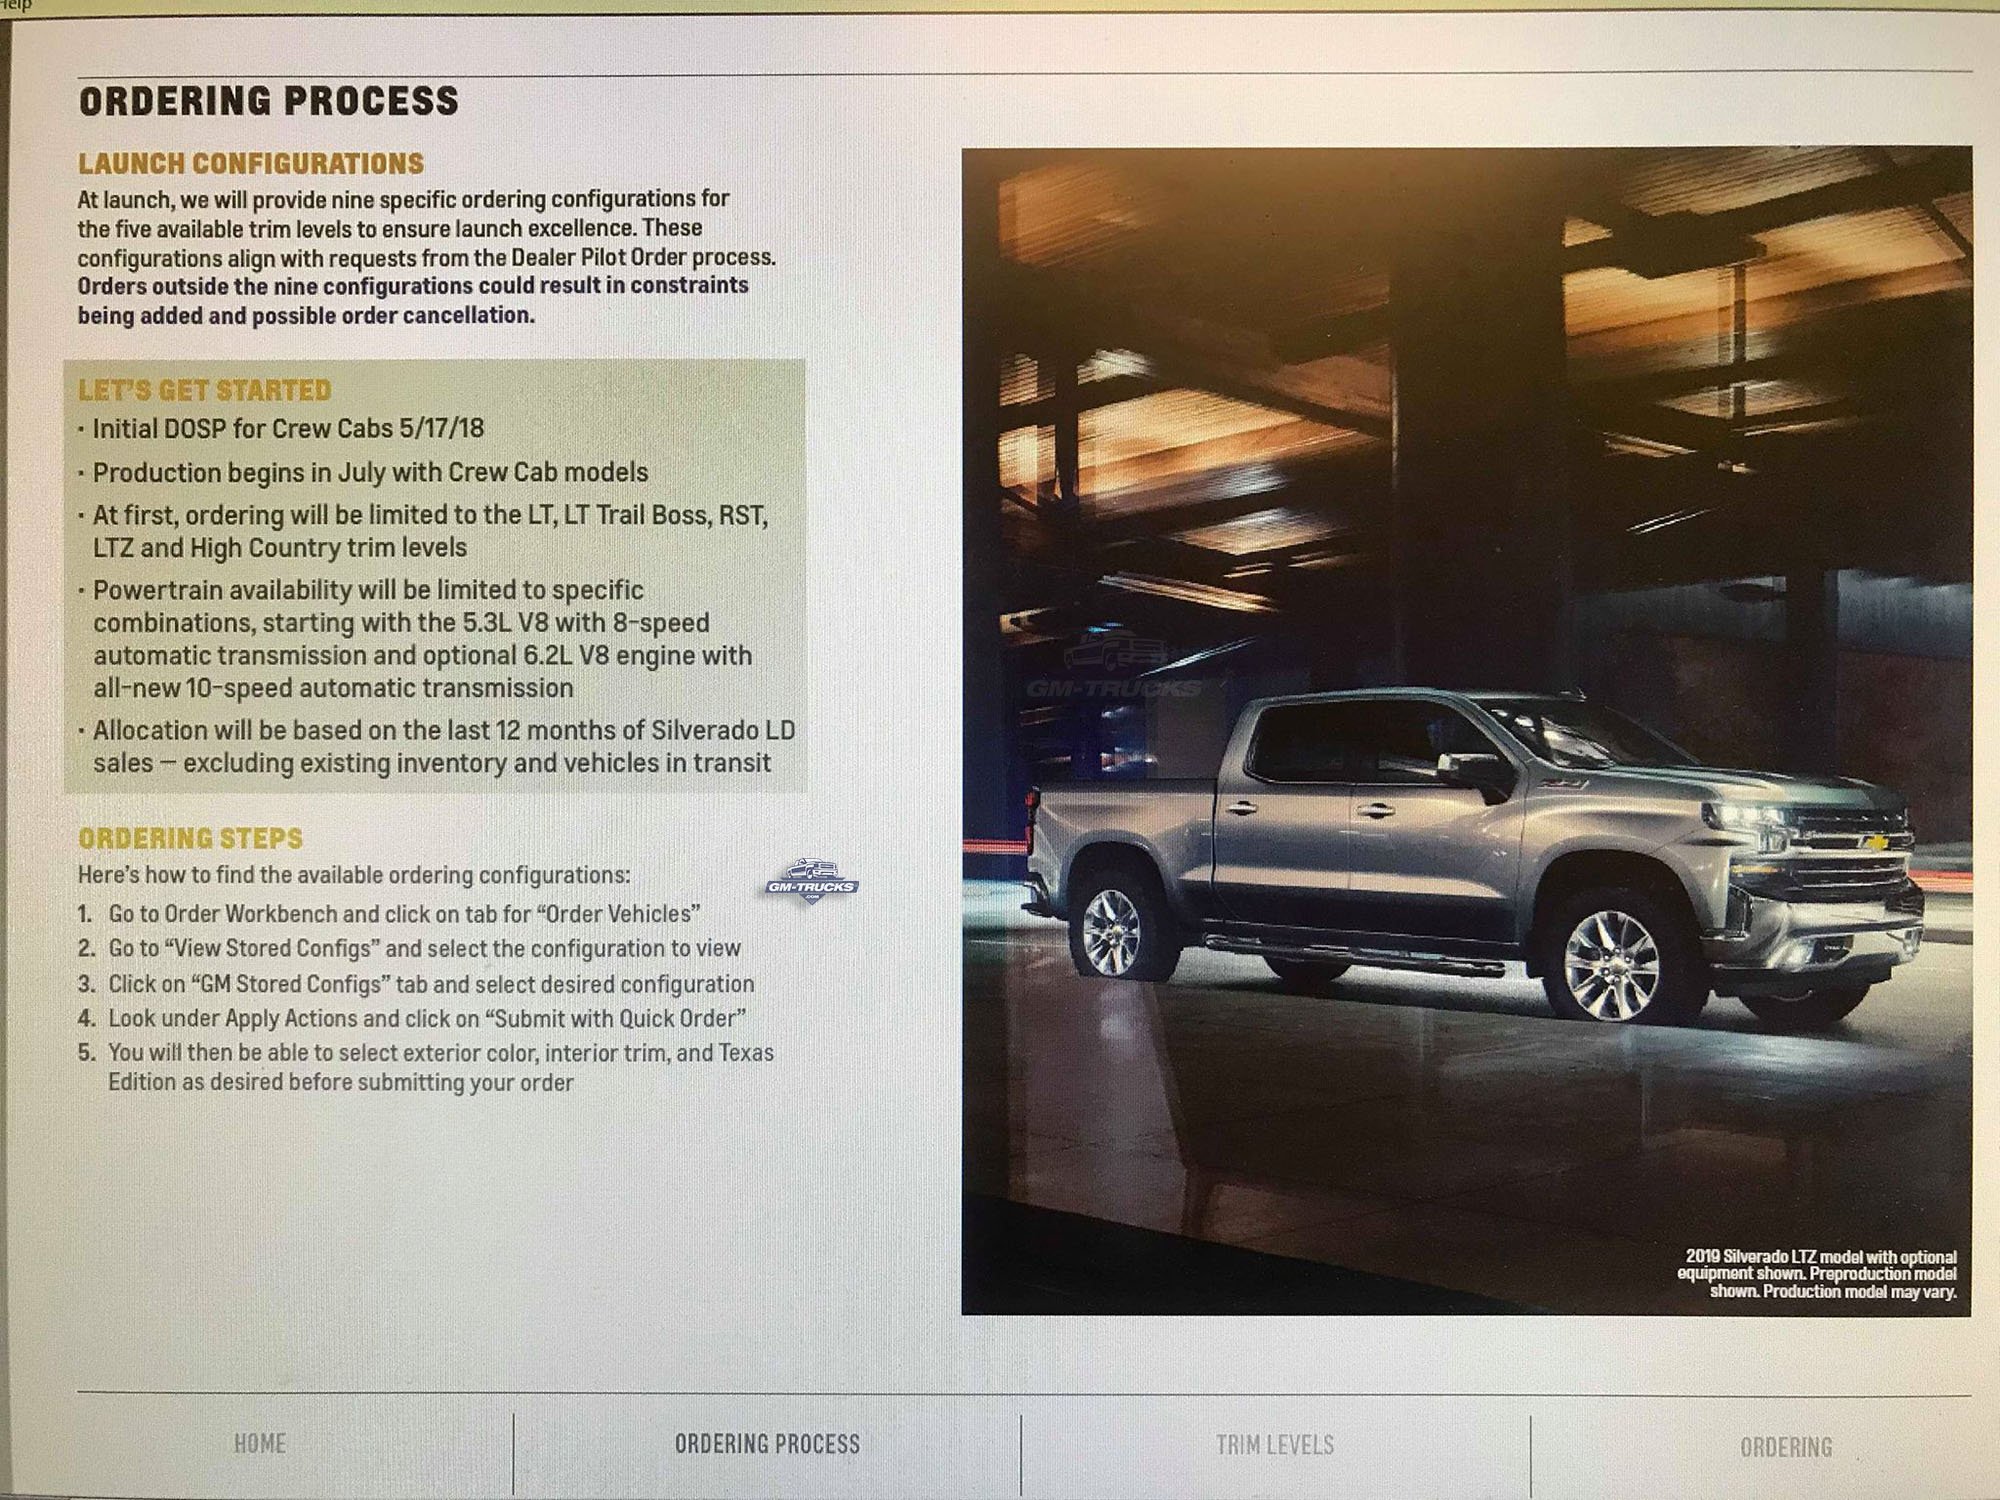
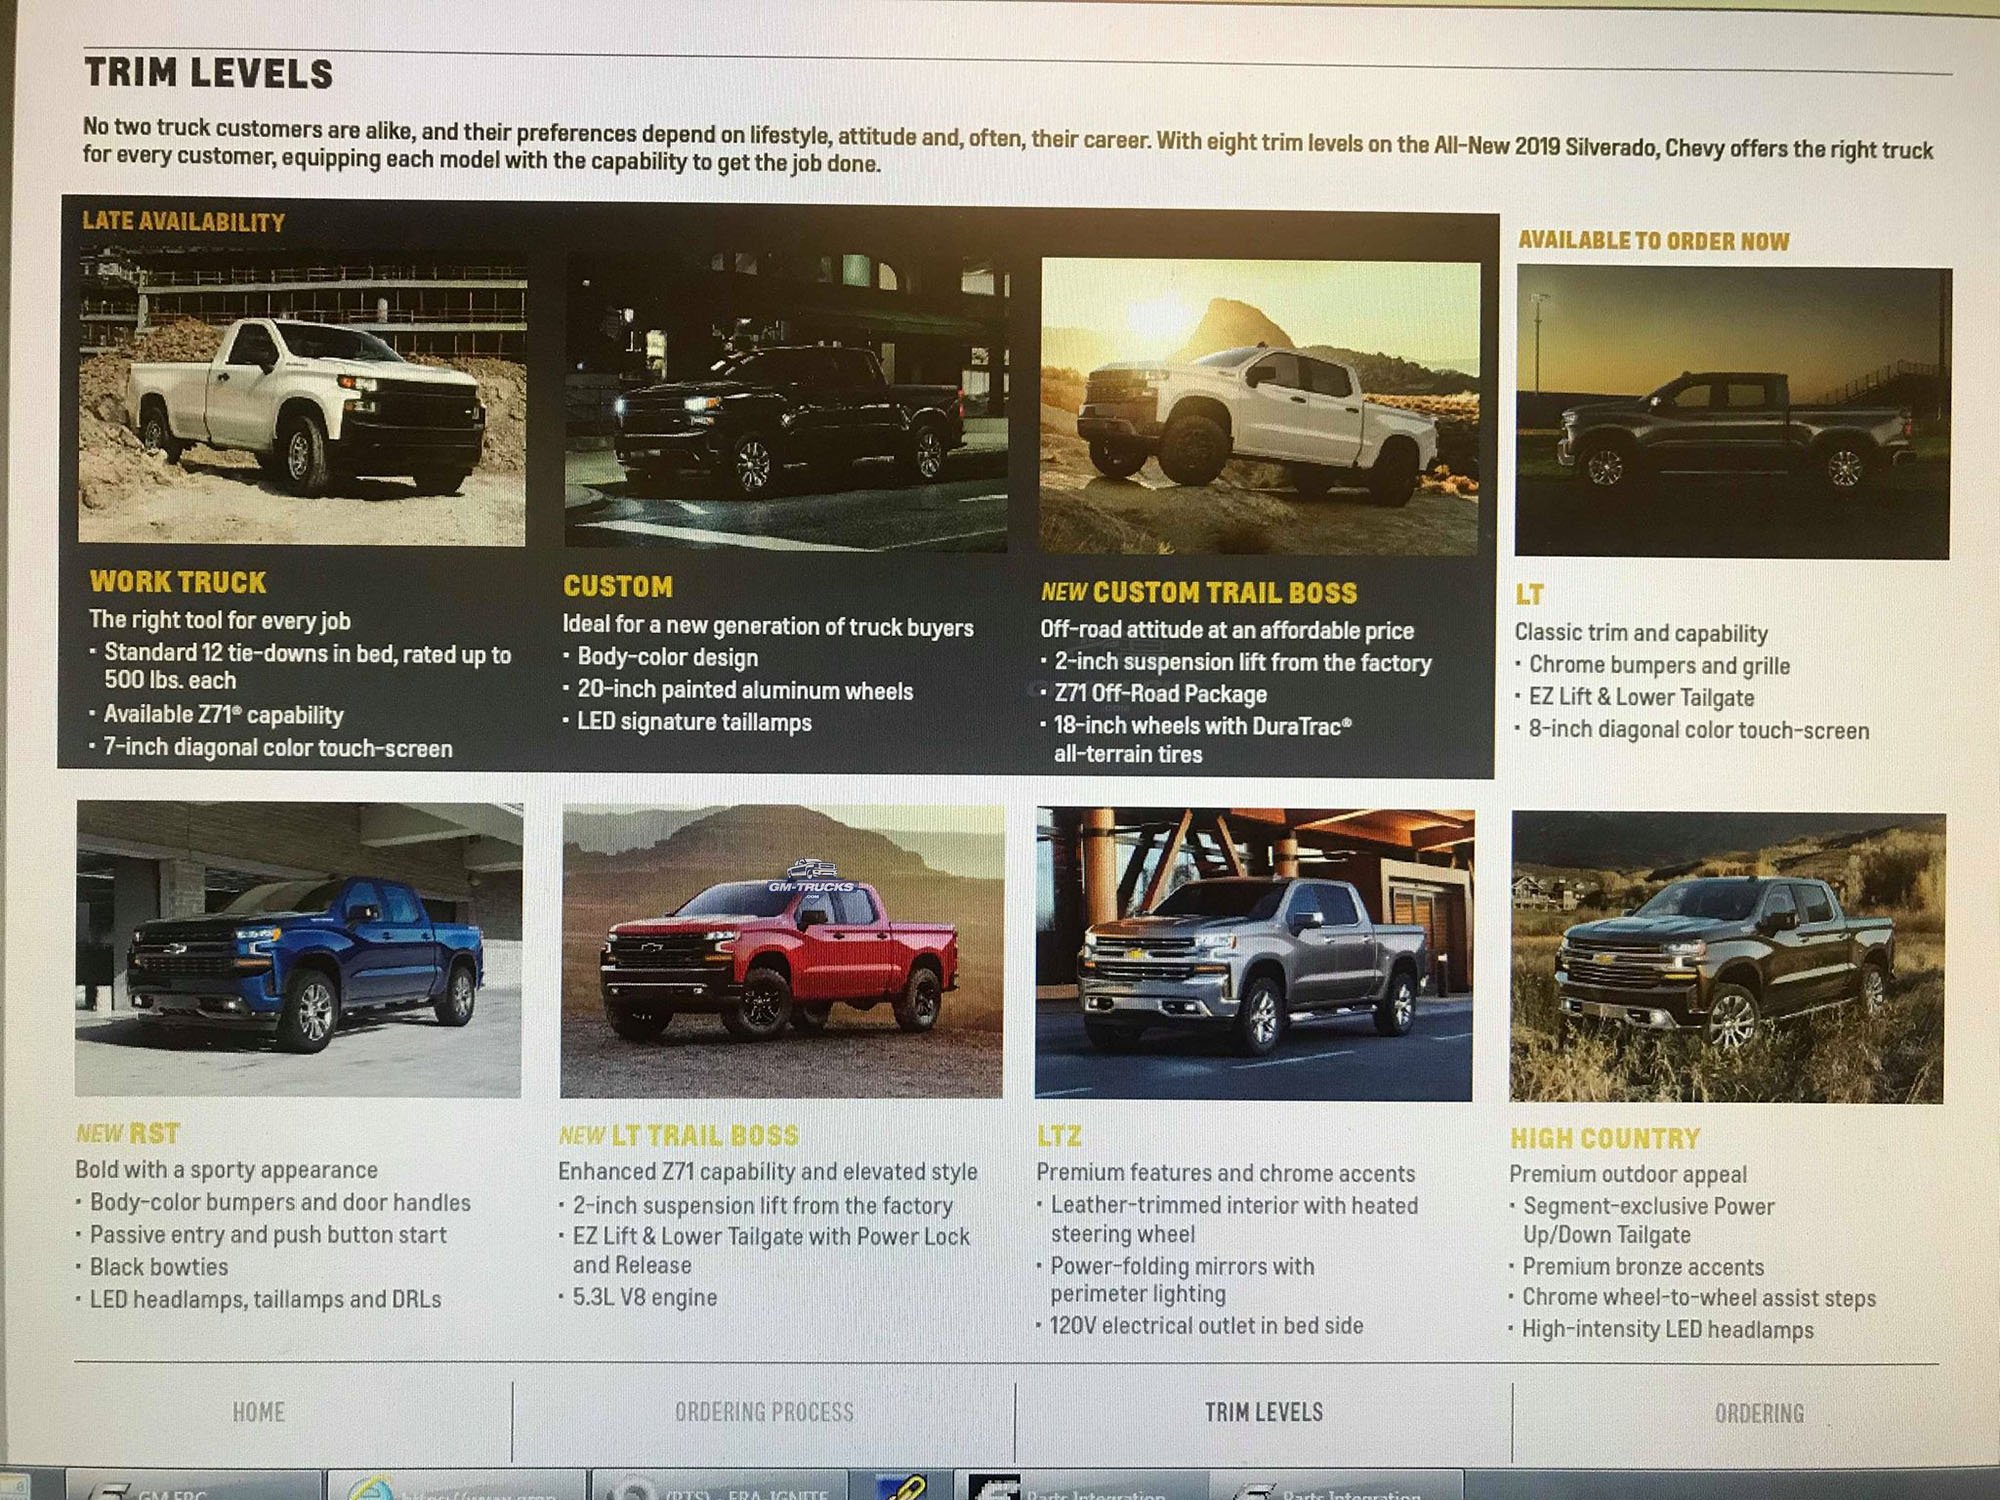
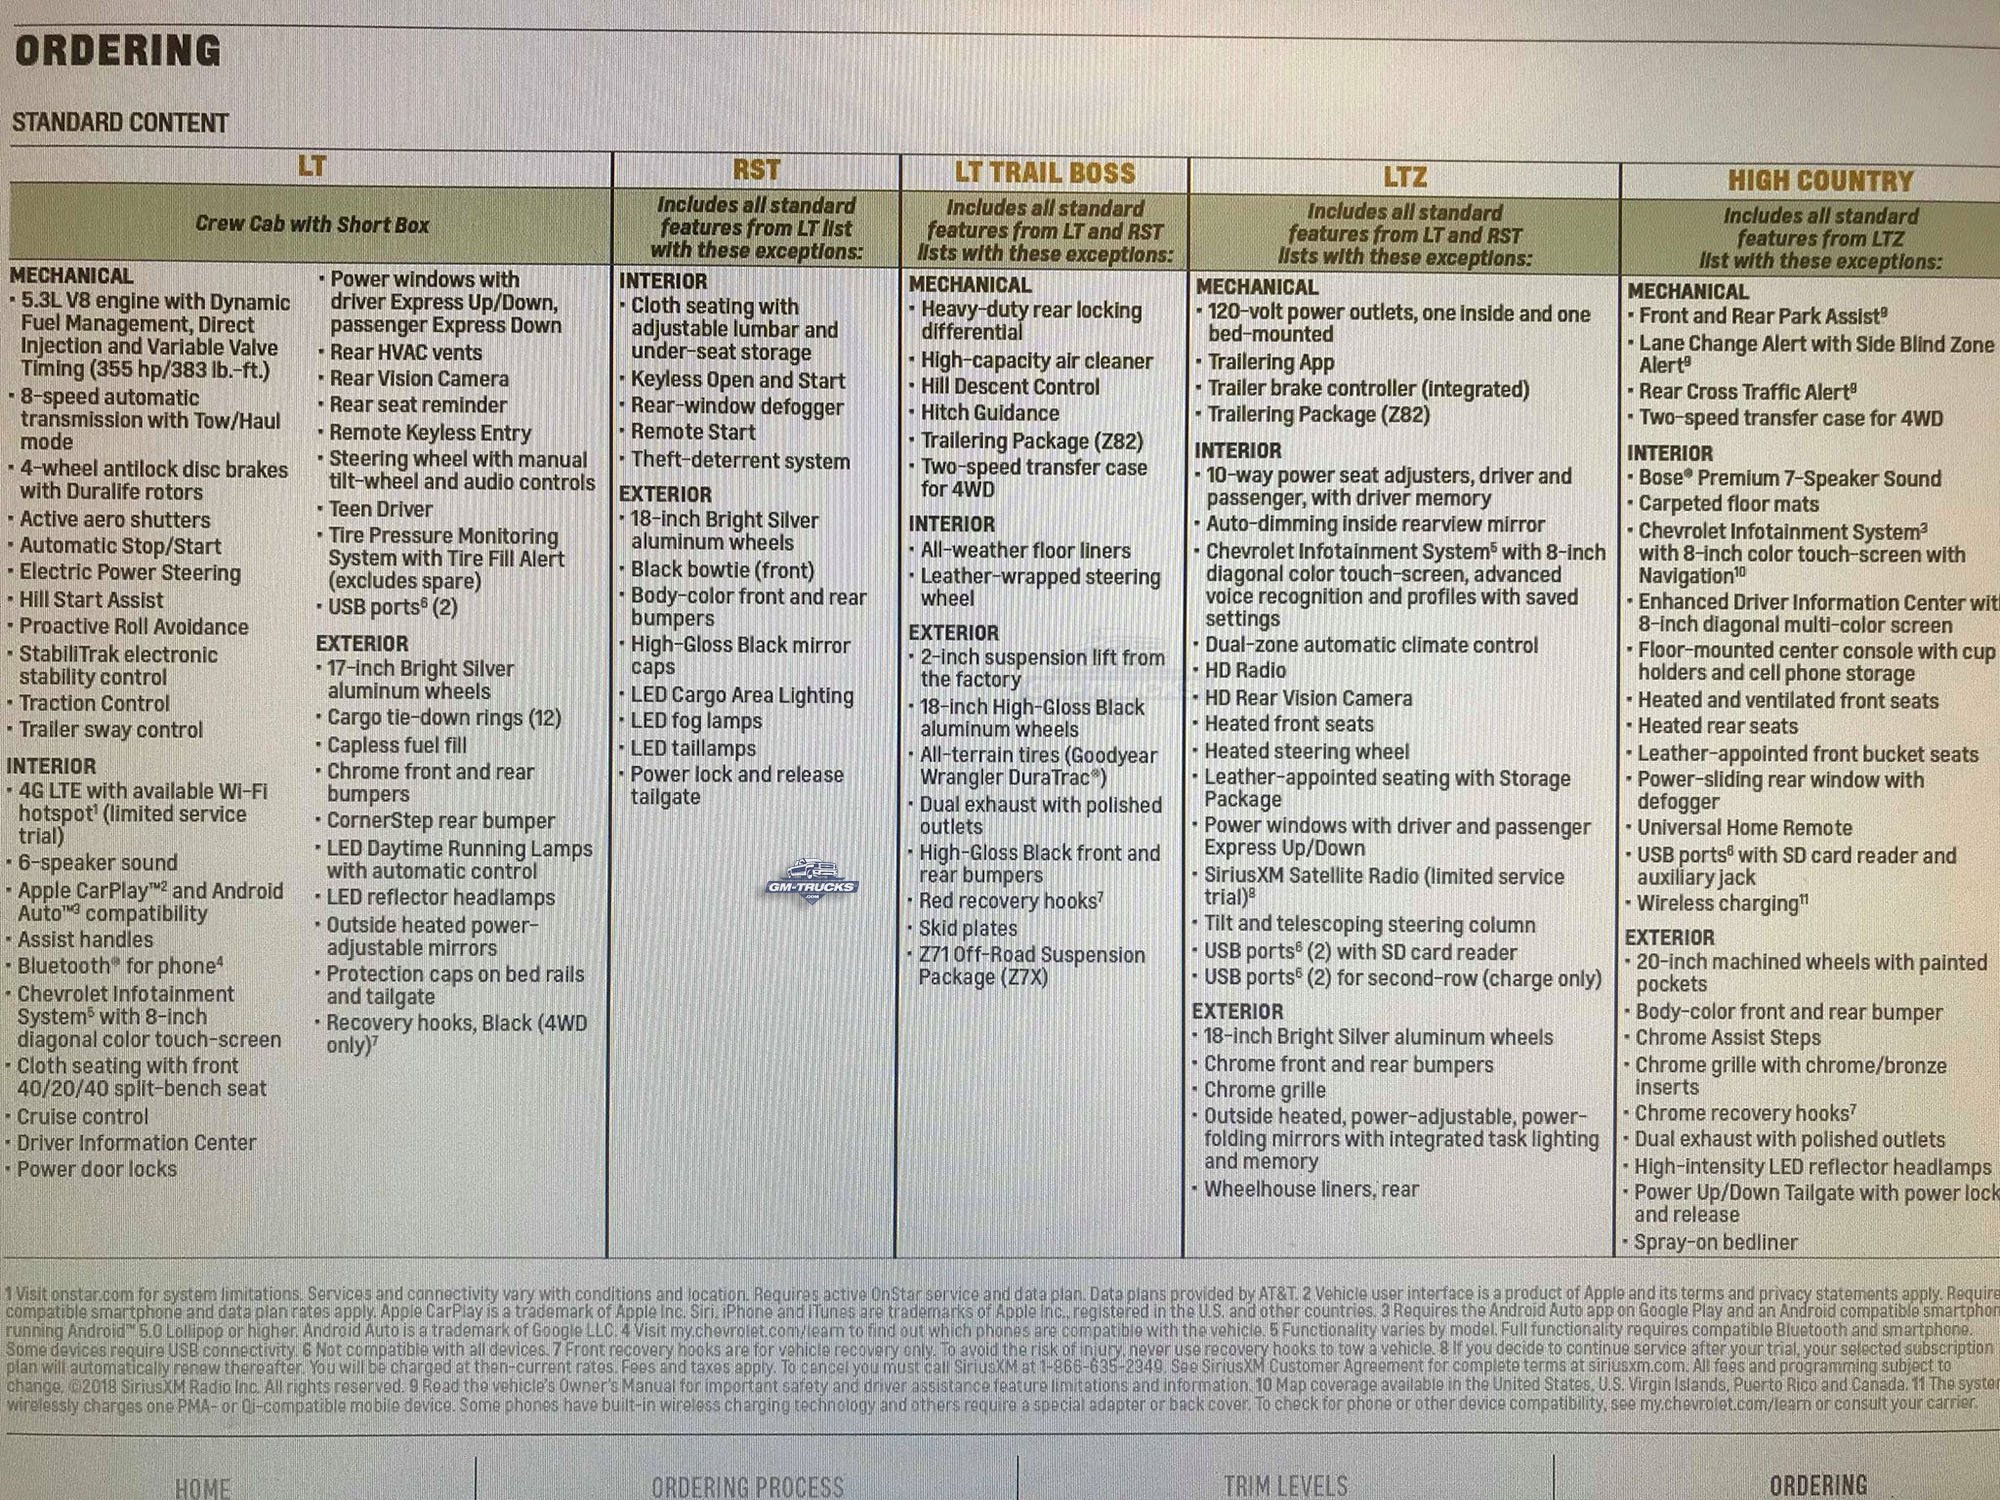
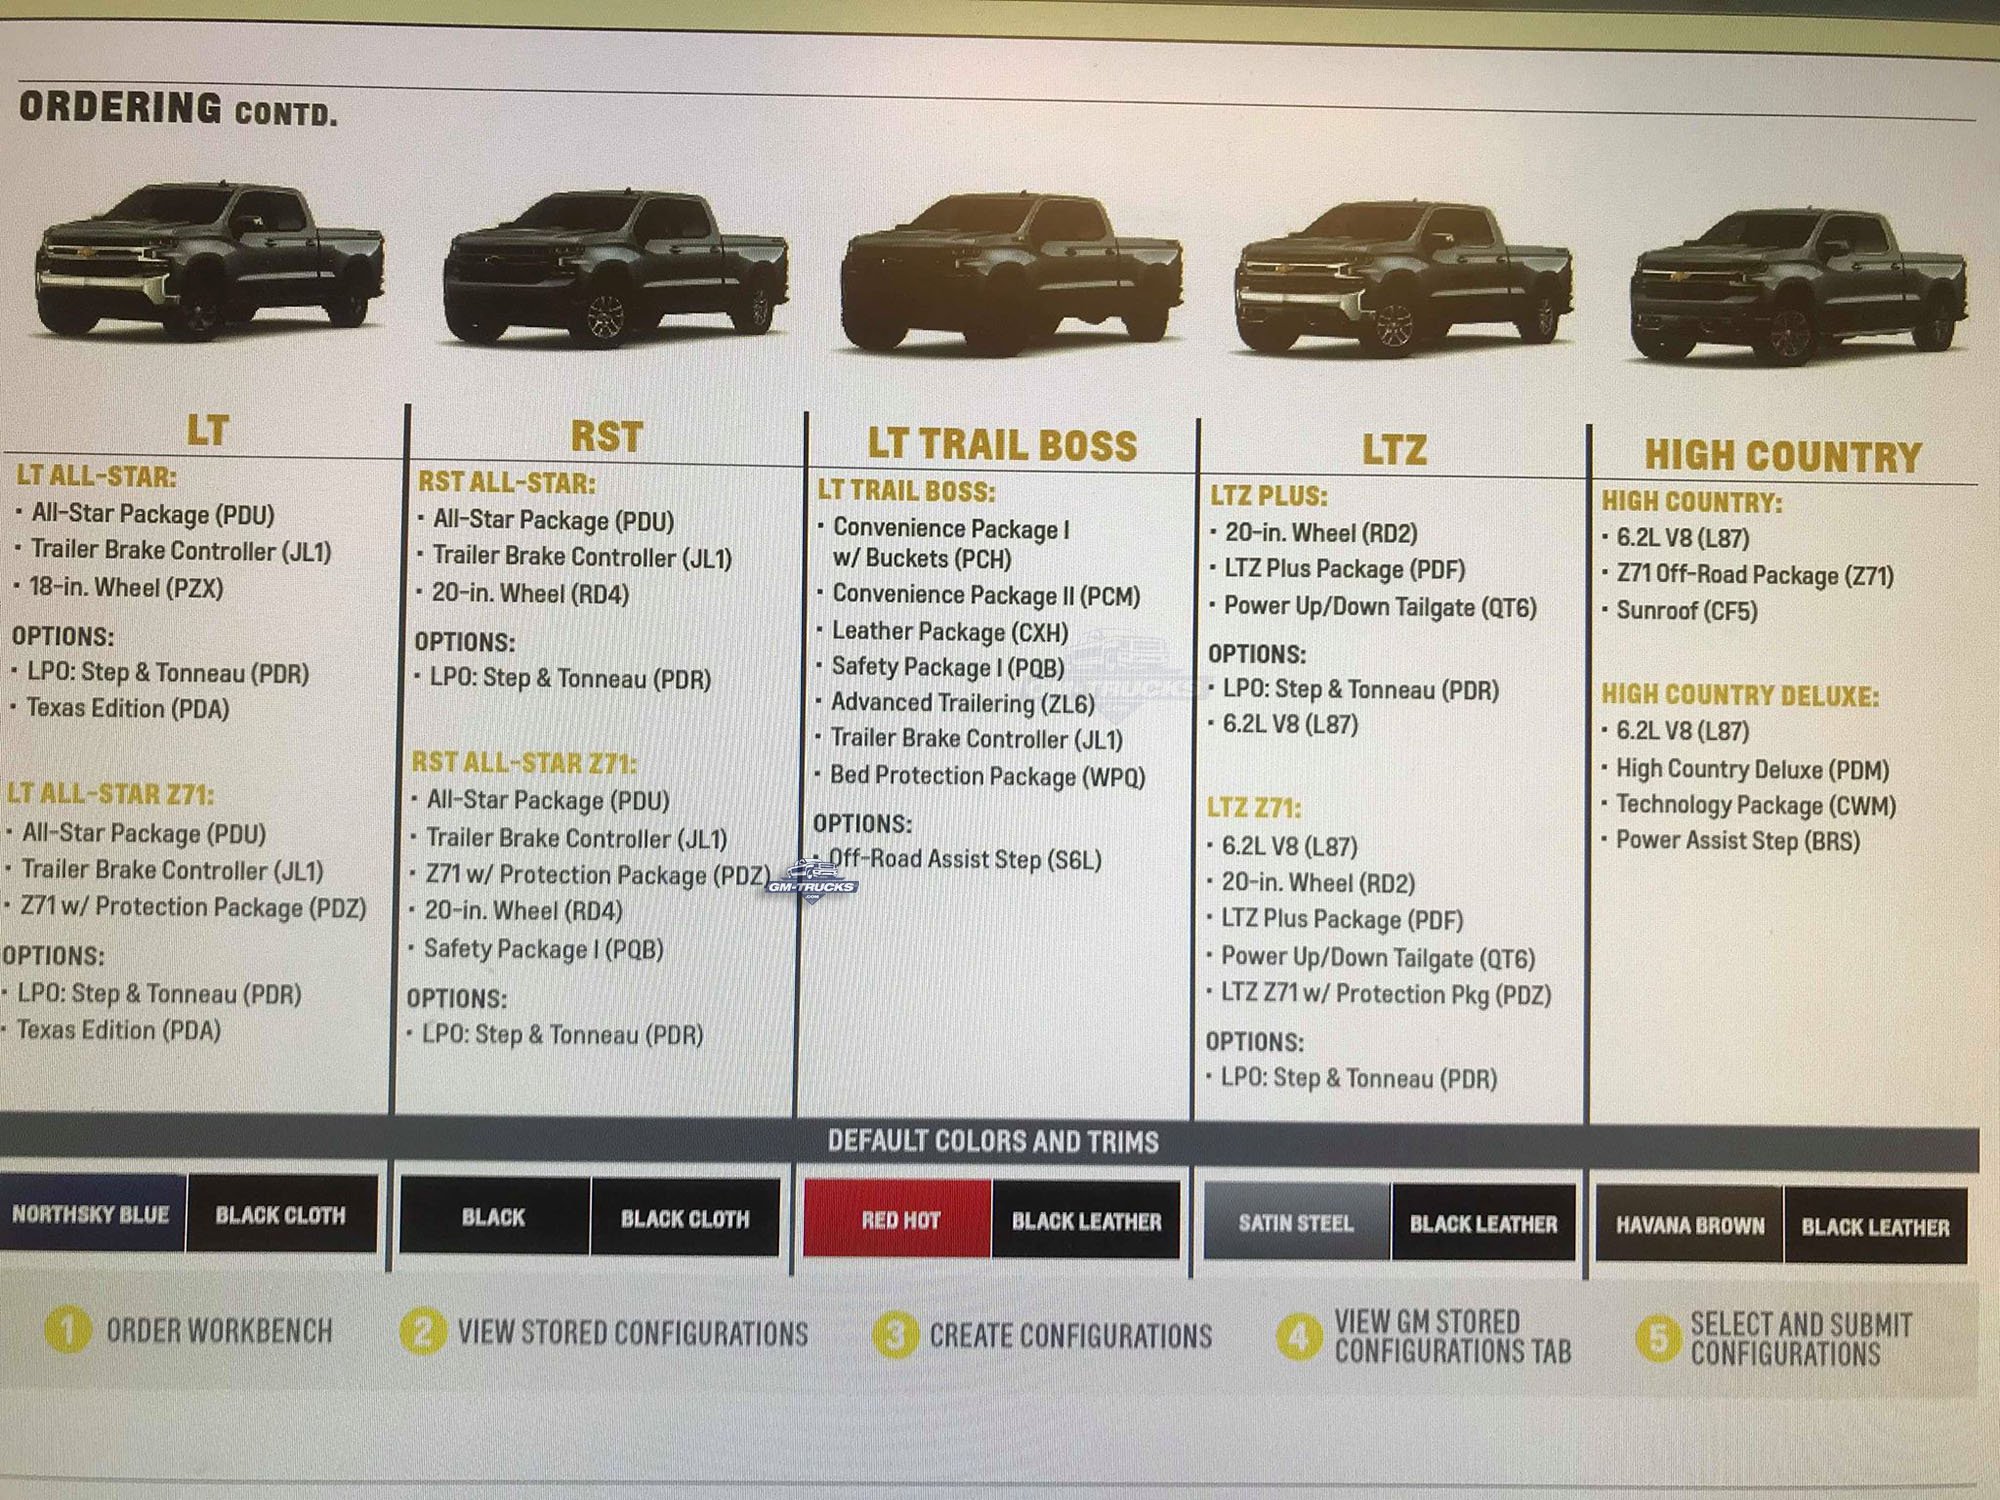
 It's never too early to start talking about the process of shopping around for a dealer, pricing, the ordering process, deposits, and production delivery times. Although we're still months away from orders being accepted, this thread is meant to be a place where everyone can check in and share their experiences as they go through the process. I'm also going to document as many important dates in this initial post as I can. I'll attempt to keep everyone up to date on start of production, any ordering limitations, and when the ordering system will go live. NEW UPDATES AS OF: April 25th, 2018 T1XX- 2019 Chevrolet Silverado and 2019 GMC Sierra - Important Ordering / Production Dates Pre-Production: NOW - Captured Test Fleet Production Confirmed as of March 31st. Fleet Order Entry Avaliable On Crew Cab: 4/26/18 Double Cab: 6/21/18 Regular Cab: TBD Retail Initial Consensus Month Crew Cab: May 1st Double Cab: August 1st Regular Cab: TBD Initial Dealer Order Submission Process (DOSP) Crew Cab: 5/17/18 Double Cab: 8/16/18 Regular Cab: TBD Production Start Up For Dealer Delivery Crew Cab: Quarter 3 - July/August/September Double Cab: Quarter 4 - October November December Regular Cab: TBD 2019 Chevrolet Silverado Start Up Schedule 2019 GMC Sierra Start Up Schedule This post will be updated whenever new information becomes available. Please contact me if you can help clarify any of these dates.
- 1,676 replies
-
- 2
-
-
- dealership
- 2019
- (and 9 more)
-
 I have a 2018 Chevy Silverado that I put a Grille Guard on last year. Since then, I've dealt with the front parking sensors constantly going off due to them sensing an obstruction. I used to just turn the parking assist off whenever I got into the truck (I don't need no damn assist). Anywhos, I recently decided to relocate the middle two parking sensors onto the bar to navigate this problem. It fixed the middle sensor issue, but now the two outside sensors on the bumper are still sensing the grille guard. I've attached some pictures. Has anyone had any luck relocating the outer front parking sensors and/or knows if there's a kit for those? I'm thinking about just rigging something up that looks legit.
-
okay you guys i know this might sound odd but i am trying to find some led lights to replace the park sensors on my new bumper. the reason is it is a bumper replacement bumper and it is only made with the holes pre-drilled and my pickup is NOT equipped with the park sensor feature. i have looked every where trying to find the size of the holes so that i can kinda narrow down my search but i am not having any luck. i am hope maybe yall have some knowledge to lend me. thank you in advanced!!






.jpeg.70149312195a3af6ed4cf66b82bcc561.jpeg)