Search the Community
Showing results for tags 'chevrolet'.
-
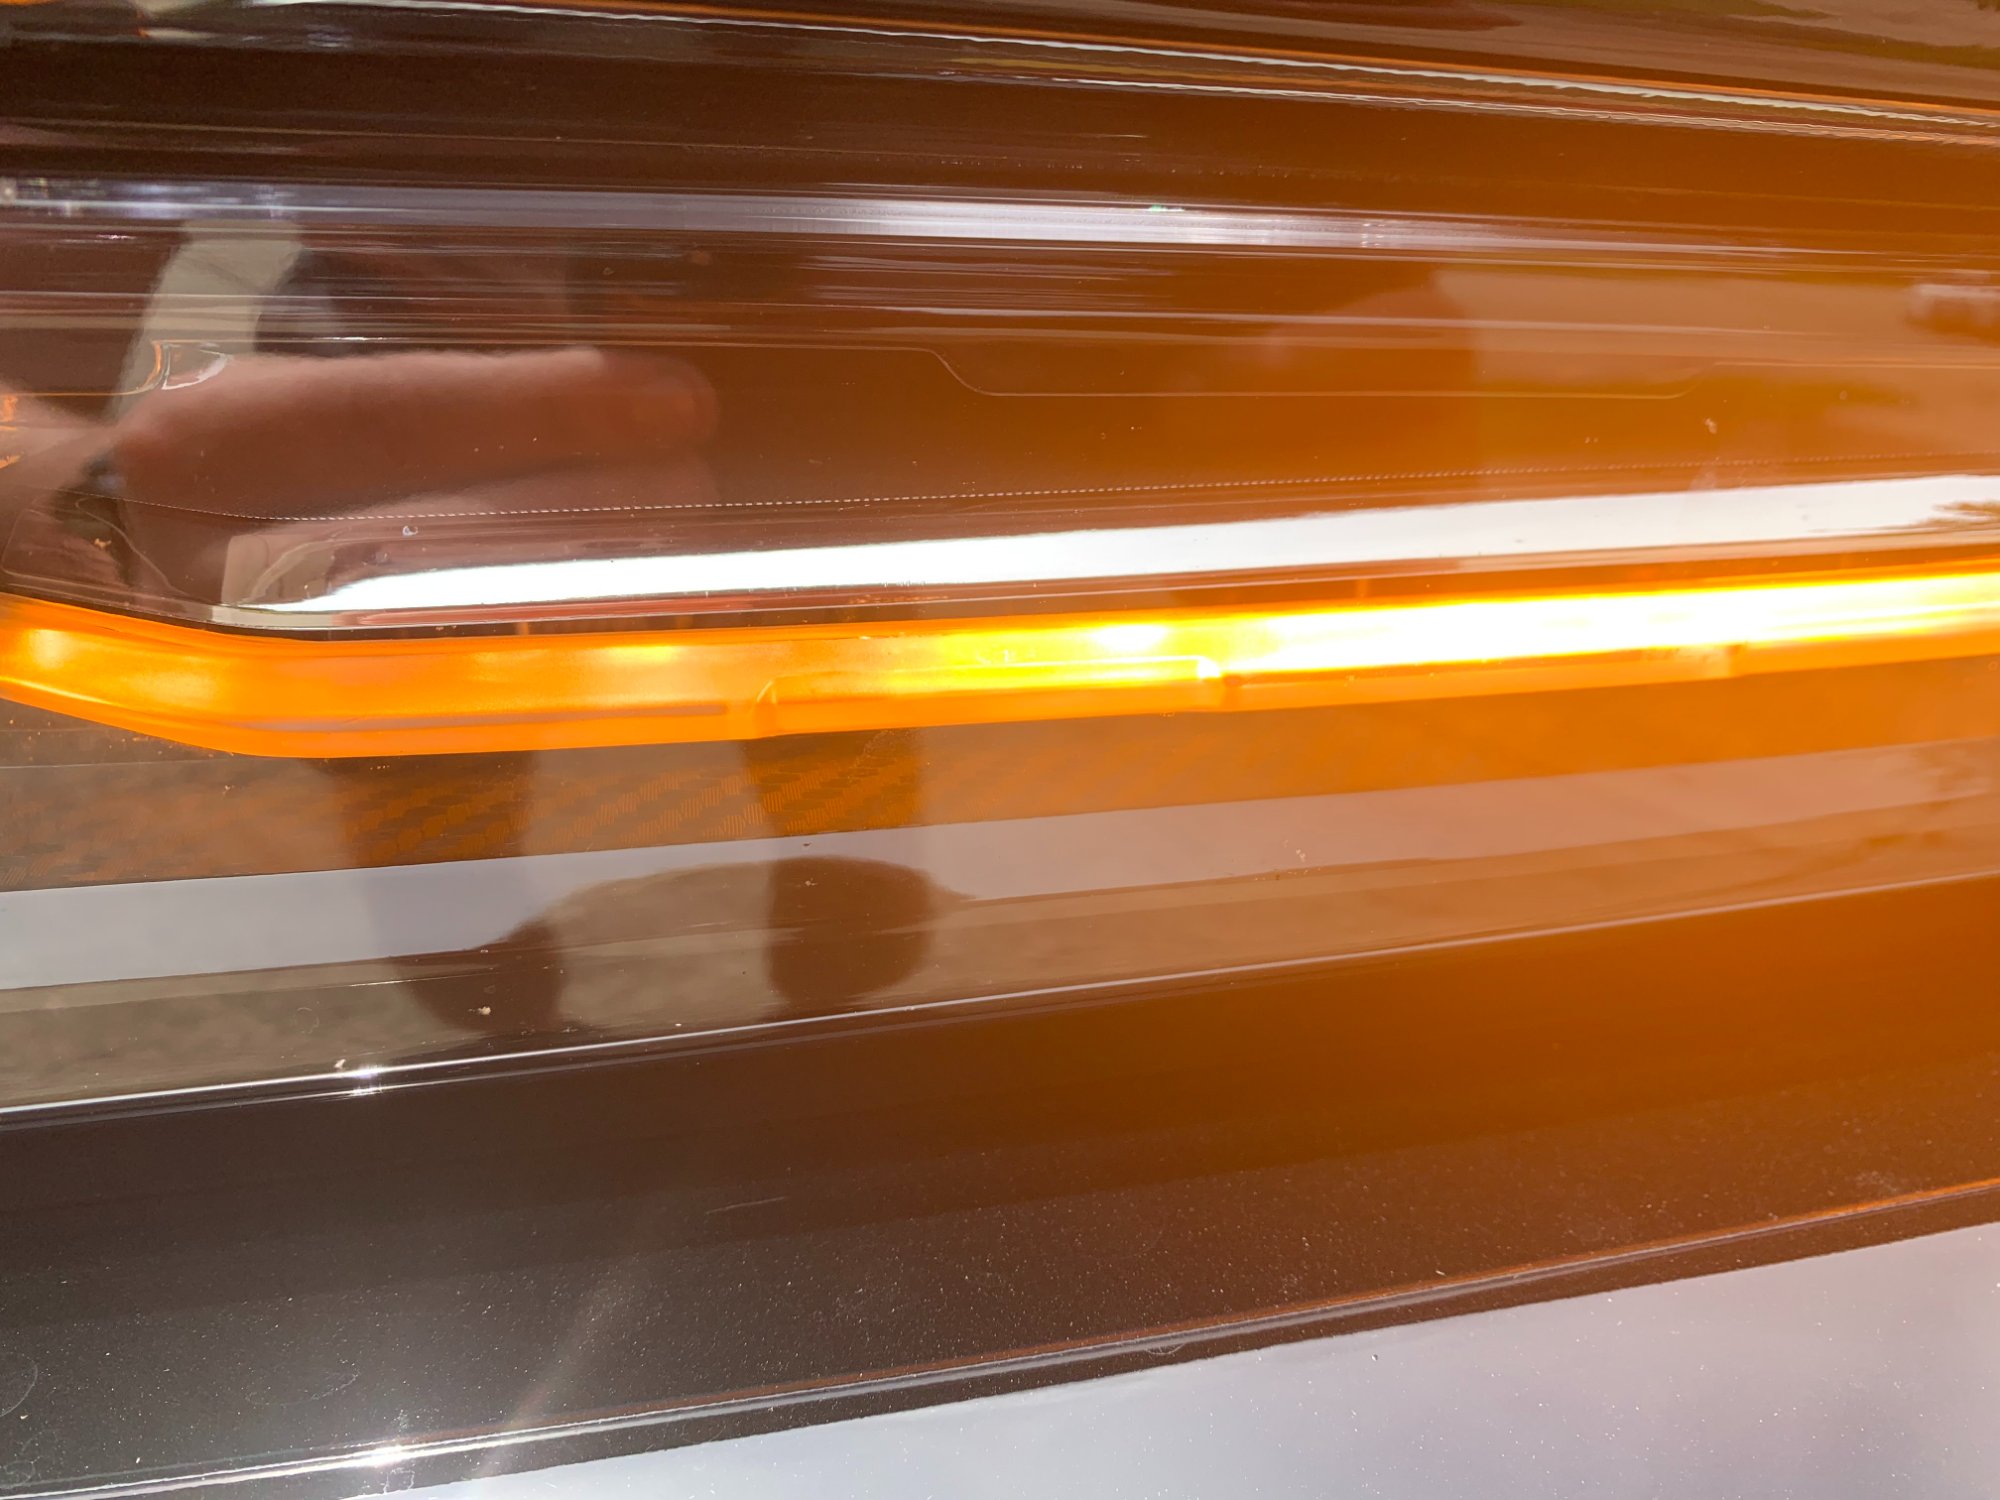
So I have recently purchased new head lights from Amazon on my 2014 SLT GMC sierra, after installation i have noticed all 4 of my blinkers stay solid and after turning on the left/right blinker all 4 flash….what should i do????
-
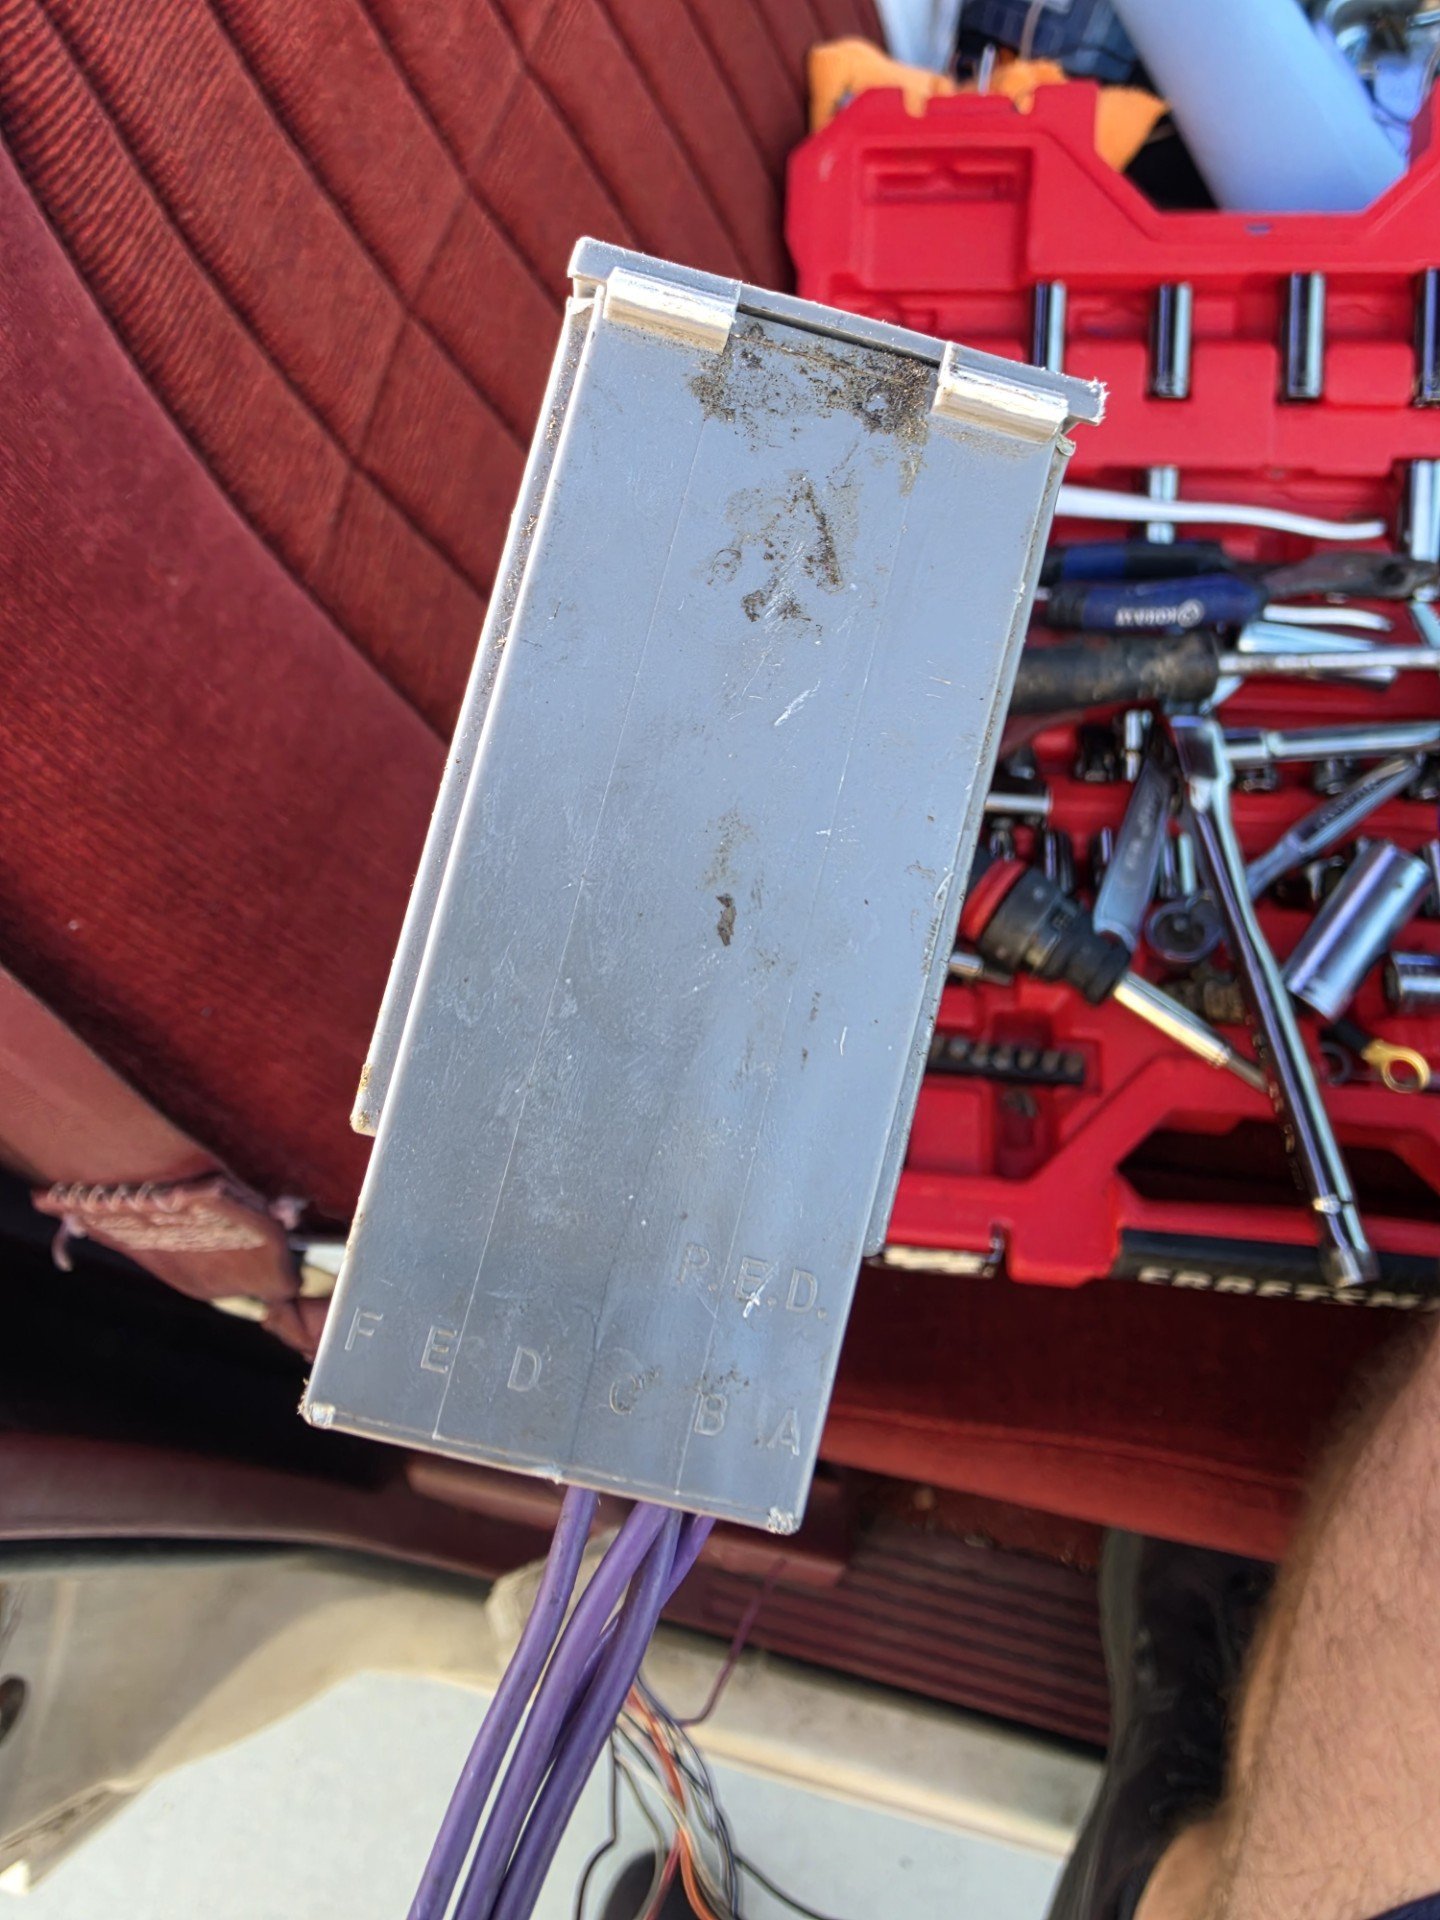
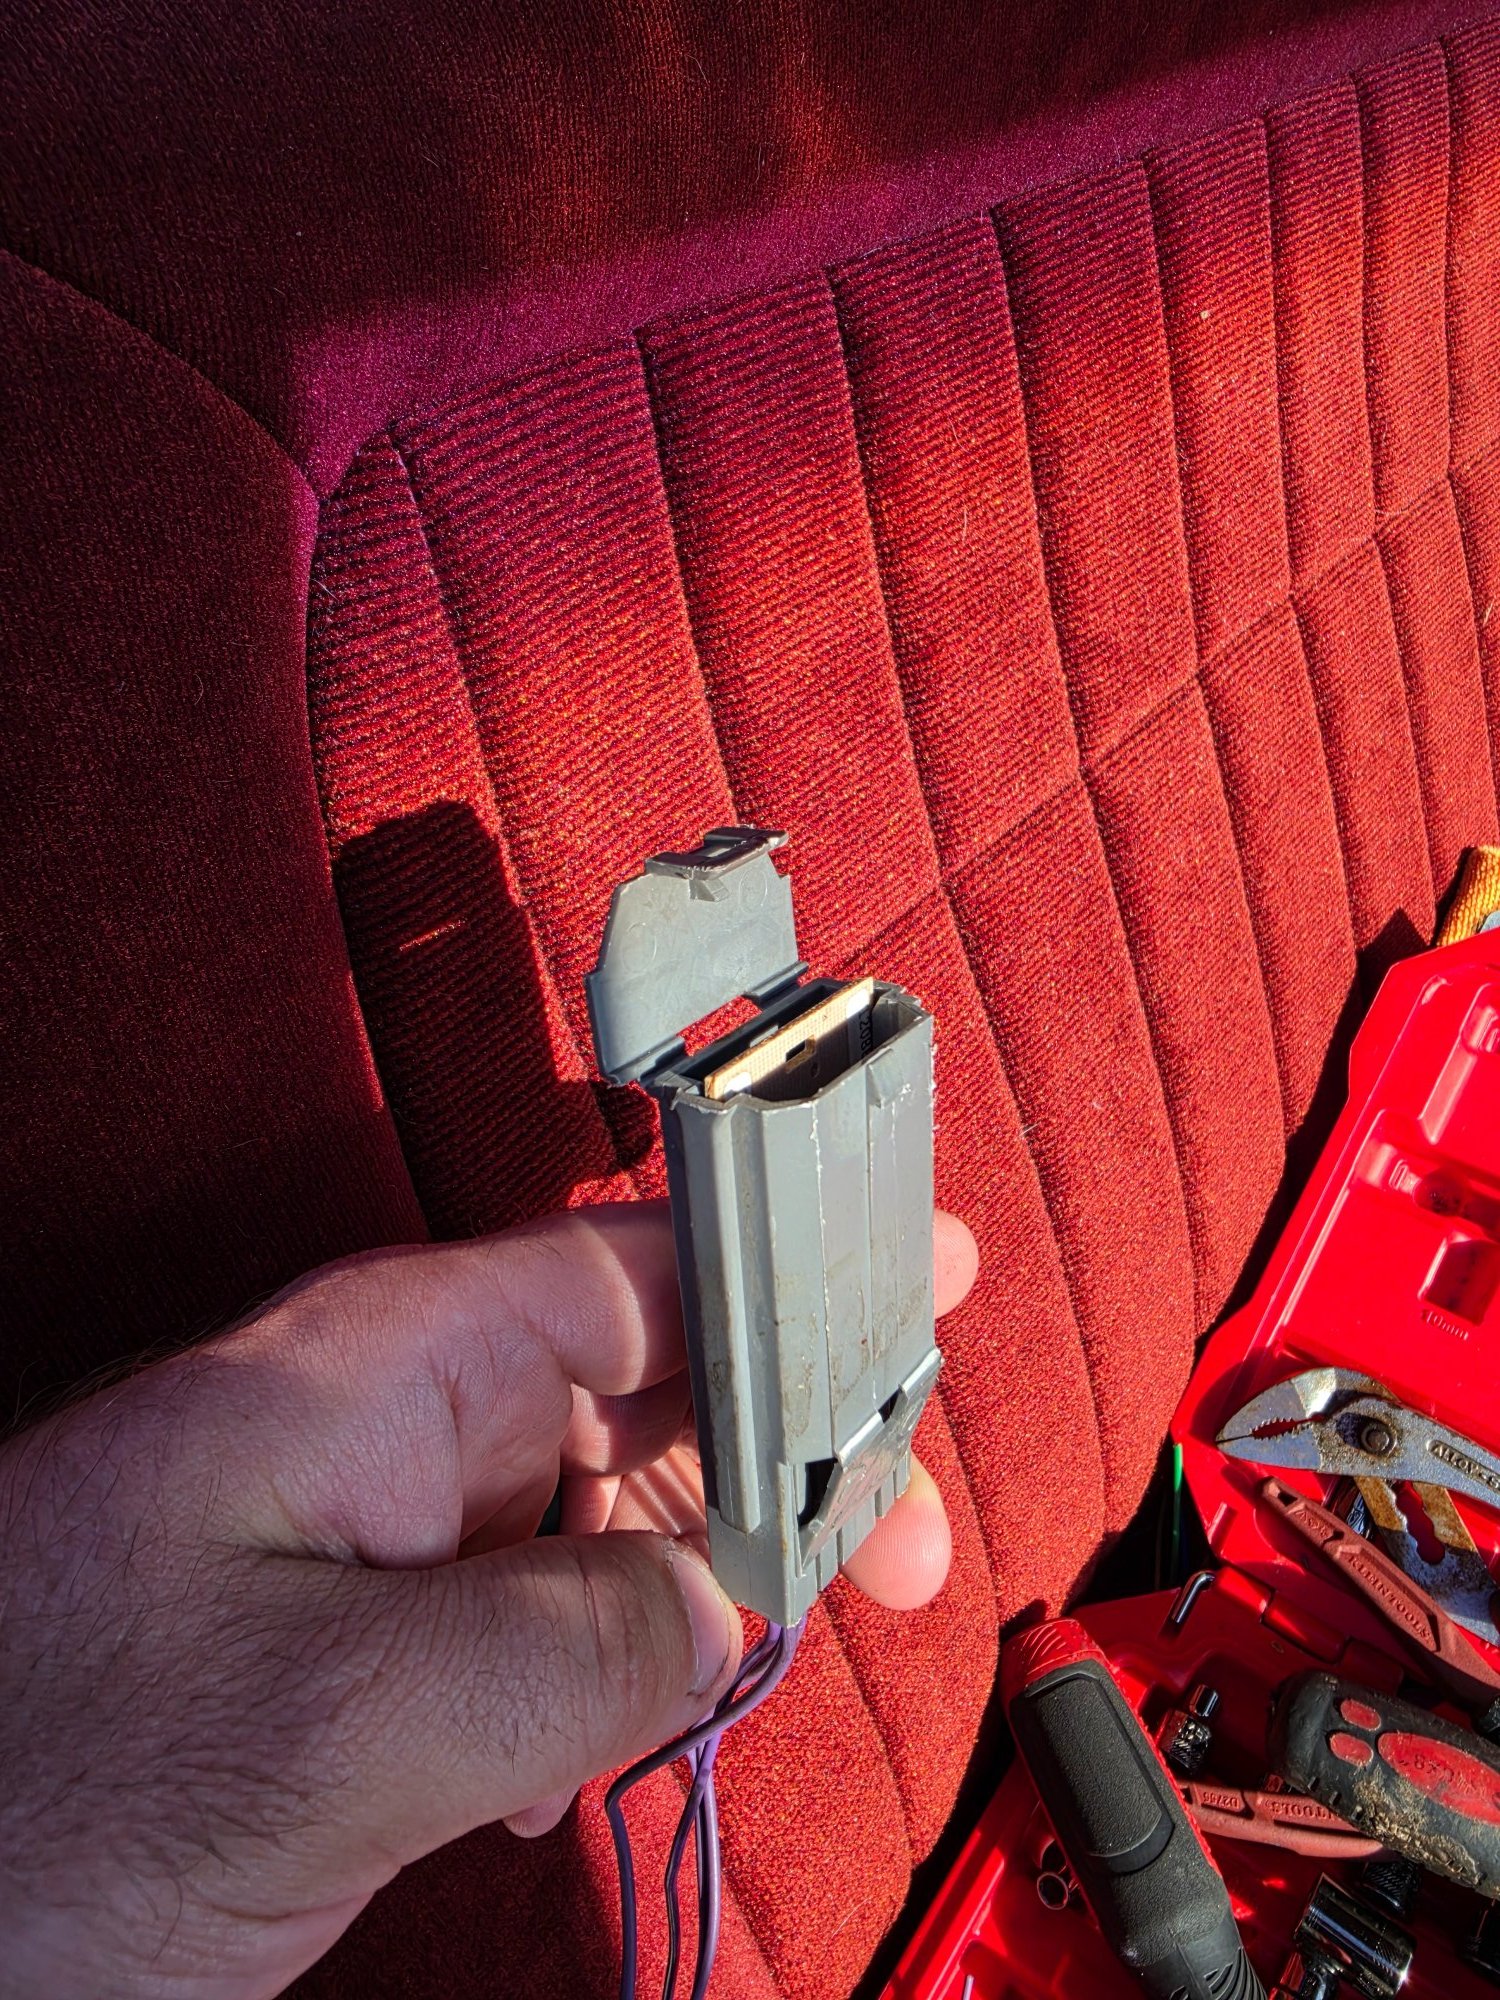
 I am currently in the process of rewiring my old truck, I purchased a wiring harness but there was no place to wire in this small board. It was originally wired into the original harness, under the dash, next to the ECM. Can anyone help me identify what this is? Would it cause my truck to crank but not spark? A wiring diagram would be awesome as well.
-
2021 Silverado 1500 RST with 6.2, Push button start/stop. I had one key fob, tried to program a second one. First locksmith could not get a fob to program. Got to the message that says ready to learn remote 1. Placed new fob in pocket between the cup holders. Press start/ stop button and nothing happened. Drove home and then the original fob stopped working. The original fob would not do anything. DIC kept saying no remote detected. Could not start the truck, etc. called mobile locksmith, they worked for like two hours, using programmers, their fobs, the gm computer, etc. No Luck! Had trucked towed to dealership. Now five days later, the dealership can’t get anything fobs to program or work. Was able to get truck started once they said but nothing else. Have had GM engineers investigating as well. Anyone have this happen? Any ideas? Bout ready to just wire a key type ignition in, lol.. Quote
-
I just purchased a Readylift sst 2” lift for my trail boss and then came across forums about the cv angle this particular kit causes. I want to know if the kit in the link below will work to drop the diff enough to correct the bad angles, or if anyone has a link to a different kit! Thanks in advance! https://www.ebay.com/itm/283619576133?hash=item42090b4945%3Ag%3ABYQAAOSw4Rdj0nLM&amdata=enc%3AAQAIAAABAJGUZfoNyzgvlZe3ei30yhZXR27Wi9kfz7BB%2B6nWsgr0NpRdhPXlwl6SI8KTdrclCHdN2a7zGMK9FtXzzPUbYZzMdTMQL3loBX19toU3jhRcuUepMpb3OeMVkcNT2OE6T7joTVf2riRKkip6M4EtK1%2F7qgQGtC9W%2F72v7Bpc8RiHD1WtGmqFACROHepH6zRqgnV%2Bfs%2FtvaVd4VH0PHlCZhr%2FsqEw8xZaYvCqegf1ptZ66hhSXqrEfVr2R9jNVqI64NoIED5kmdHaVC%2FR2v0iXmhomqAMUbGUtkMjGtmCXjGtmgO74%2B9dGCHRx%2F%2BKk0PRSVgYrd5edQGZVHPxby9lZHo%3D|tkp%3ABFBMyOeFt_5h&fits=Submodel%3ALT+Trail+Boss|Year%3A2020|Engine+-+Liter_Display%3A5.3L|Model%3ASilverado+1500|Make%3AChevrolet|Trim%3ALT+Trail+Boss+Crew+Cab+Pickup+4-Door|Engine%3A5.3L+5328CC+325Cu.+In.+V8+GAS+OHV+Naturally+Aspirated
-
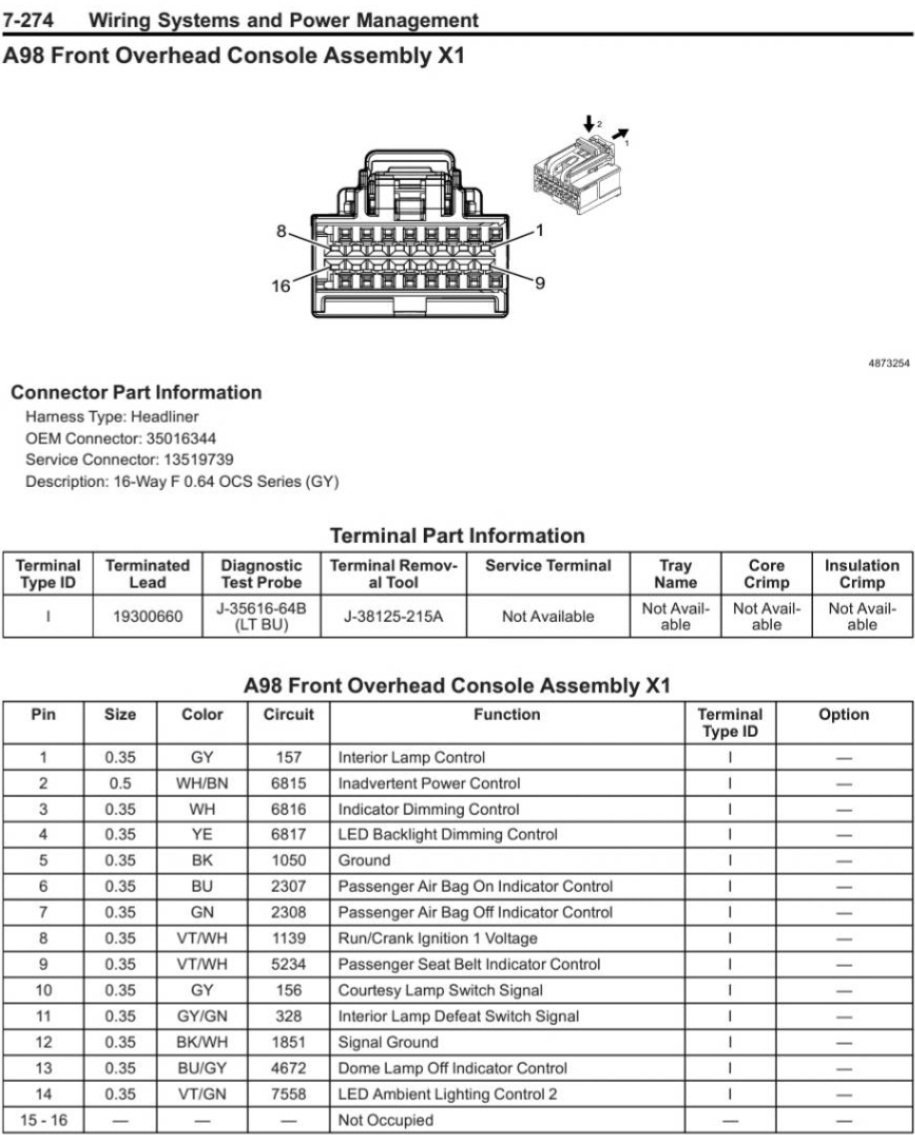
Only joined to spread the word. Like most of you I've been frustrated with the horrible interior lighting without easy fix. I also wasn't willing to have holes drilled in my trim pieces, or lose any functionality of my switches or courtesy lights. If that's of interest to you, I'll try to include screenshot of item since links die, and hopefully enough pictures to get you through so you don't have to spend multiple hours testing circuits to figure it out. The good news is the rear dome lights are so easy to do. Take the rear dome assembly down and take it apart. It's only held up with clips and a small pry tool to get it apart. Remove the 2 fresnel lenses out and put it back together. That's it. Probably 3X the usable light from the rear domes with a nice even spread. The front assembly is quite a bit harder. I'm not going to explain how to remove the assembly and take it apart, there's plenty of videos online. For this mod I ordered some neutral white 3/4inch clearance lights from Tecniq. They have a real nice pattern to them and plenty bright. I needed a way to power them so I used some mosfet trigger modules. Probably 10 bucks in parts if I didn't over order for another projects. I needed some diodes to prevent feedback and keep the bcm safe. I had some on hand. DONT FORGET THE DIODES. I removed the fresnel lenses from the front as well. I took everything apart and with a Drexel 'gently' made the leds fit roughly in the same position as the factory holes. It doesn't take much. I had to trim a bit from the bulbs as well. There's a tiny spot on the pcb board that produces 4 volts on either side corresponding to the lights. If your not comfortable soldering, it's pretty small. Next I routed the wires from the led through the holes directly behind them. I did have to cut some of the rubber out, but be careful not to take too much. Once the pcb was back in, I ran the wires towards the rear and again used the Drexel to make room on the back piece for them to come out. Then I wired them to the mosfet modules. You might have to knock the tiny led off of the module. It's a tiny power draw but these module are meant for 5 volts and we're working with 4V. Mosfet module Requires Vin, Gin, Vout, Gout, trigger, and trigger ground. I place the diodes in the the Vout. Make sure the orientation is correct. Module power out to led. Pigtailed Gin to trigger ground. And made some quick disconnect leads for the power in. I connected to power and ground directly to the wiring harness via t-taps. I know people have said you can mess up the bcm that way, but considering the leds only draw 40 mA @12V each I wasn't worried about it. Connected ground to number 5 pin on the grey harness. I'll have to apologize, I don't remember which wire I connected in the harness for power. It was late and I was very frustrated. I initially connected to number 14 but I lost some functionality. There was another wire that hade 12v power at all times and I hooked it up there. I believe it was pin number 10. Anyways I hope this helps. I know gm dropped the ball on these truck for interior lighting. Mine are so bright now I have zero issues. Have full view and it's bright enough to see everything. The lights up front don't shine at my eyes, and they light up the floor. I'm not even going to do the floor lamps now! 10/10 upgrade! P.S. I'm going to throw some pictures of the interior up here so you can see the bightness. Don't judge, she's a work truck! Lol ANMBEST 10PCS DC 5V-36V 15A(Max 30A) 400W Dual High-Power MOSFET Trigger Switch Drive Module 0-20KHz PWM Adjustment Electronic Switch Control Board Motor Speed Control Lamp Brightness Control https://a.co/d/19L4oGi https://www.ebay.com/itm/292380373219
-
 I’m planning on upgrading my gear ratio from 3.42 to 4.10 on my 2019 custom trail boss. I want to put a 4-6 lift on my truck from BDS with fox shock coilovers With 35 inch tires maybe 37’s but before that I want to regear my truck so that I don’t lose any power. Do y’all think 4.10 gears are good enough for should I go for like 4.55’s? If anyone has re geared there 2019’s and up please let me know the prices and gear shifting experiences.
 -
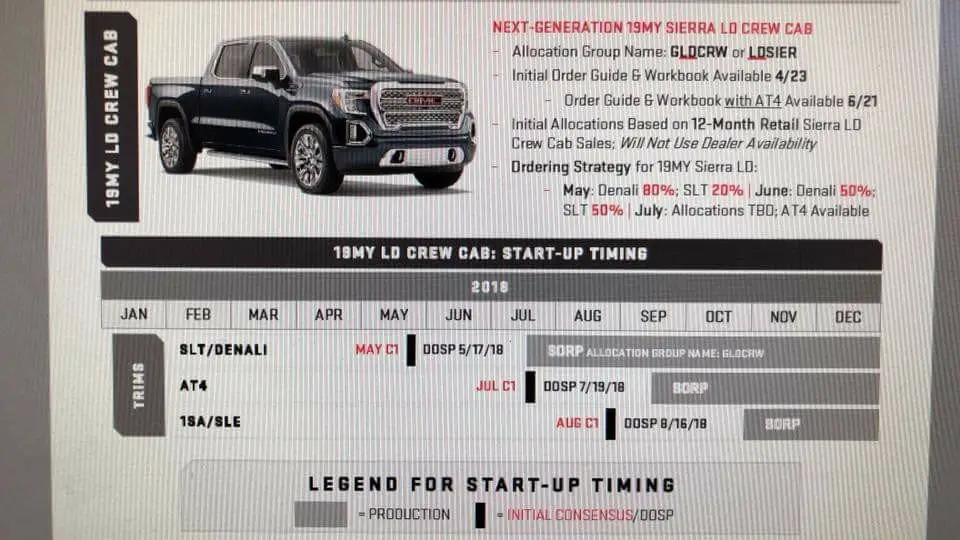
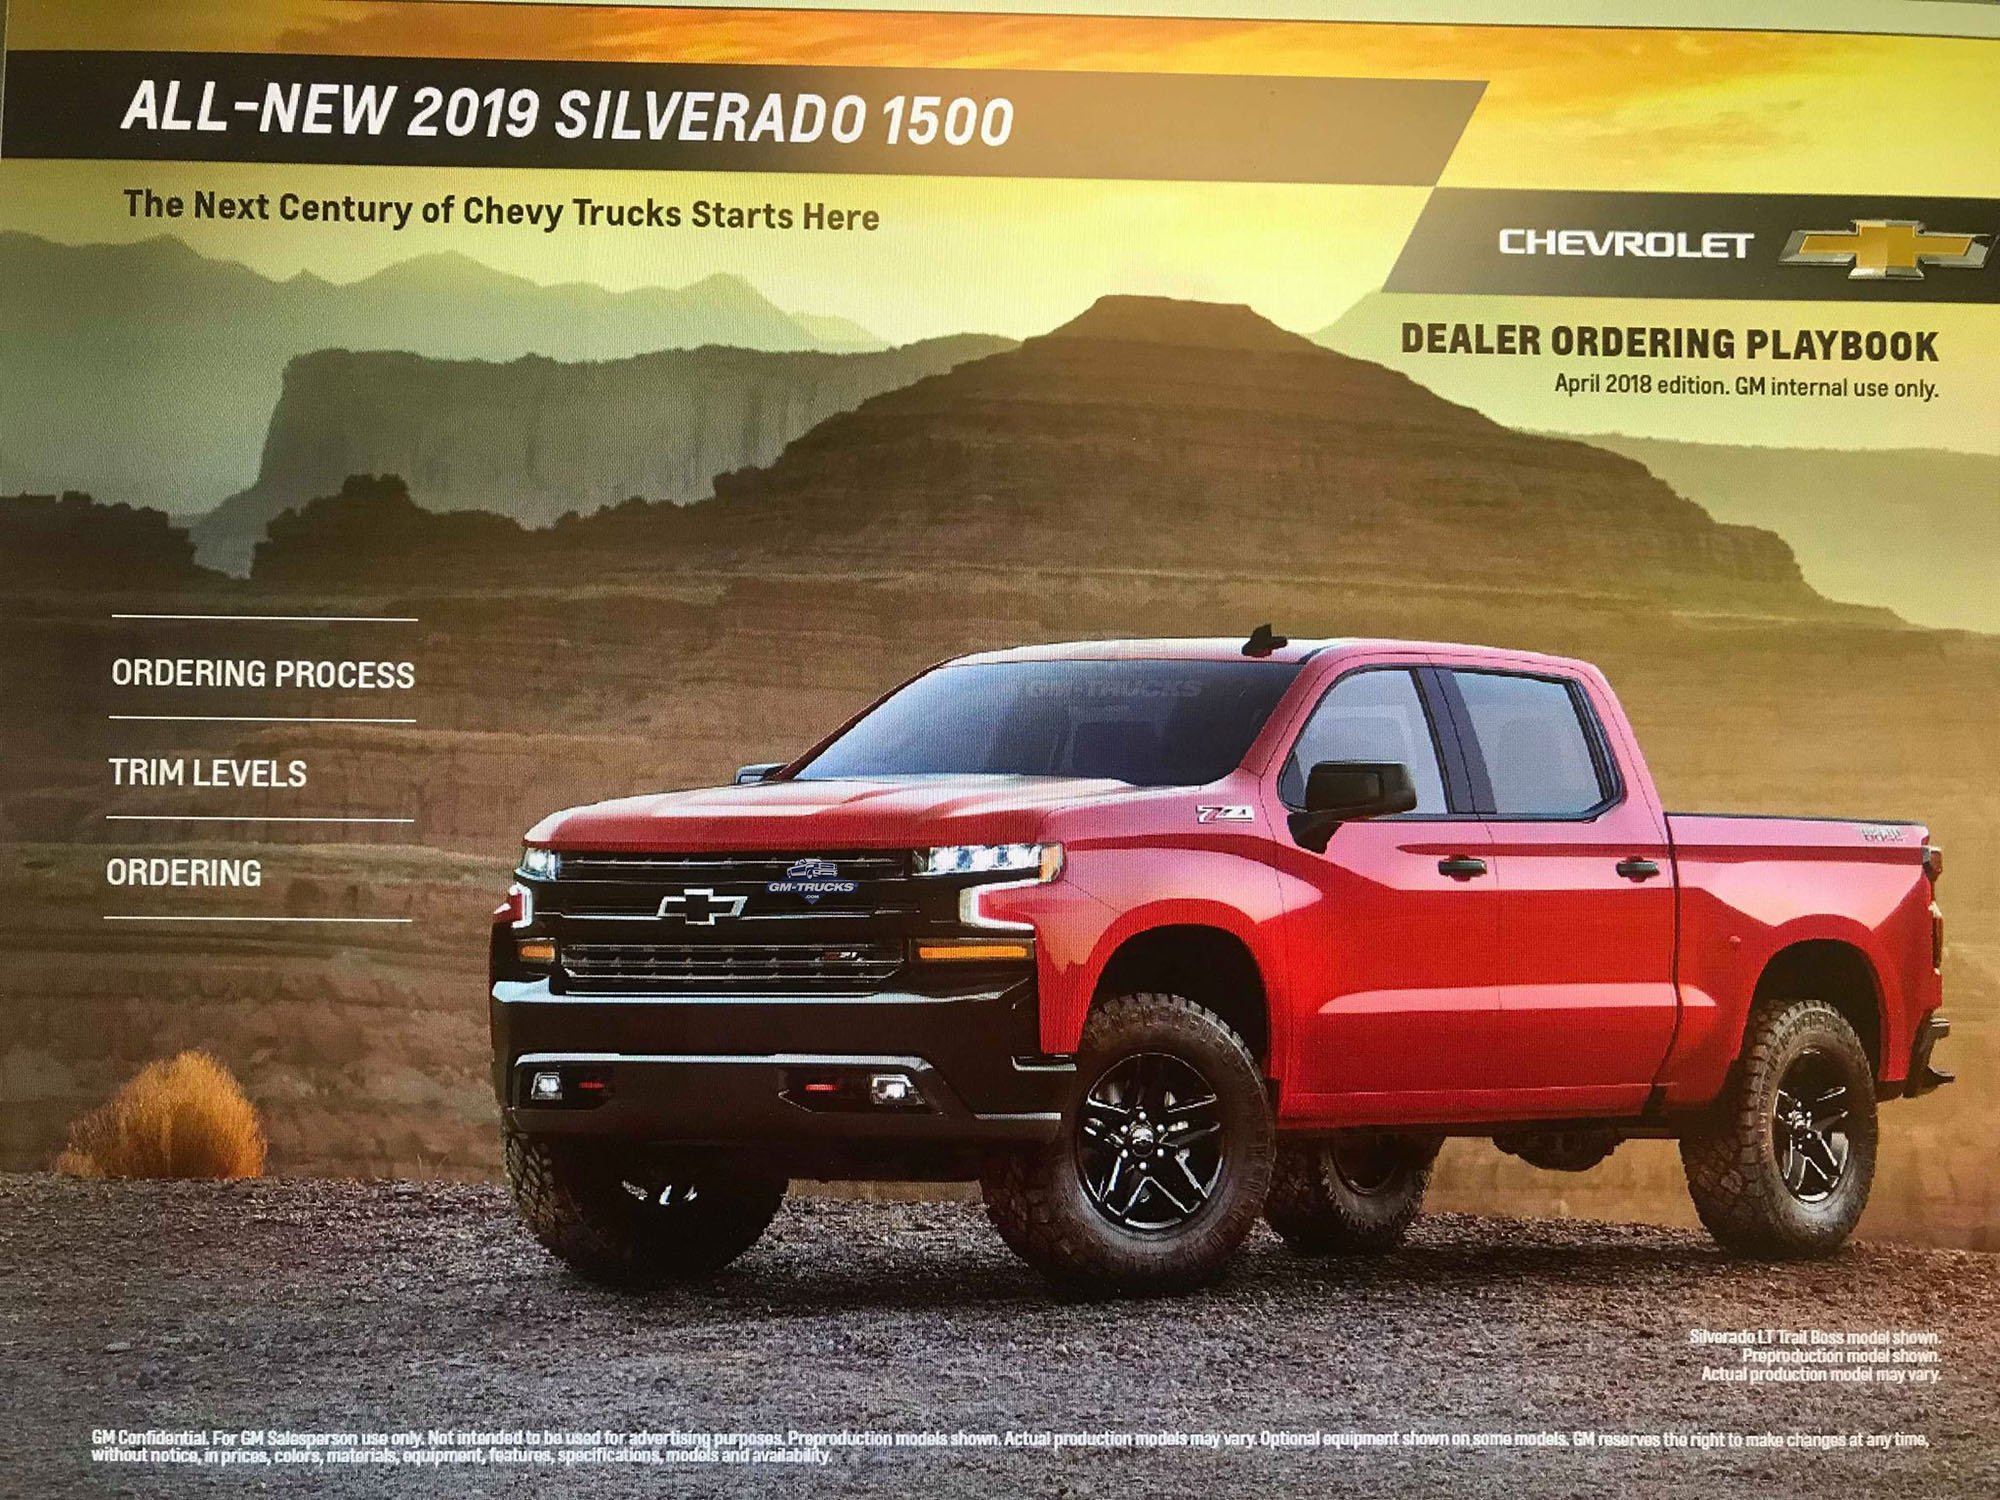
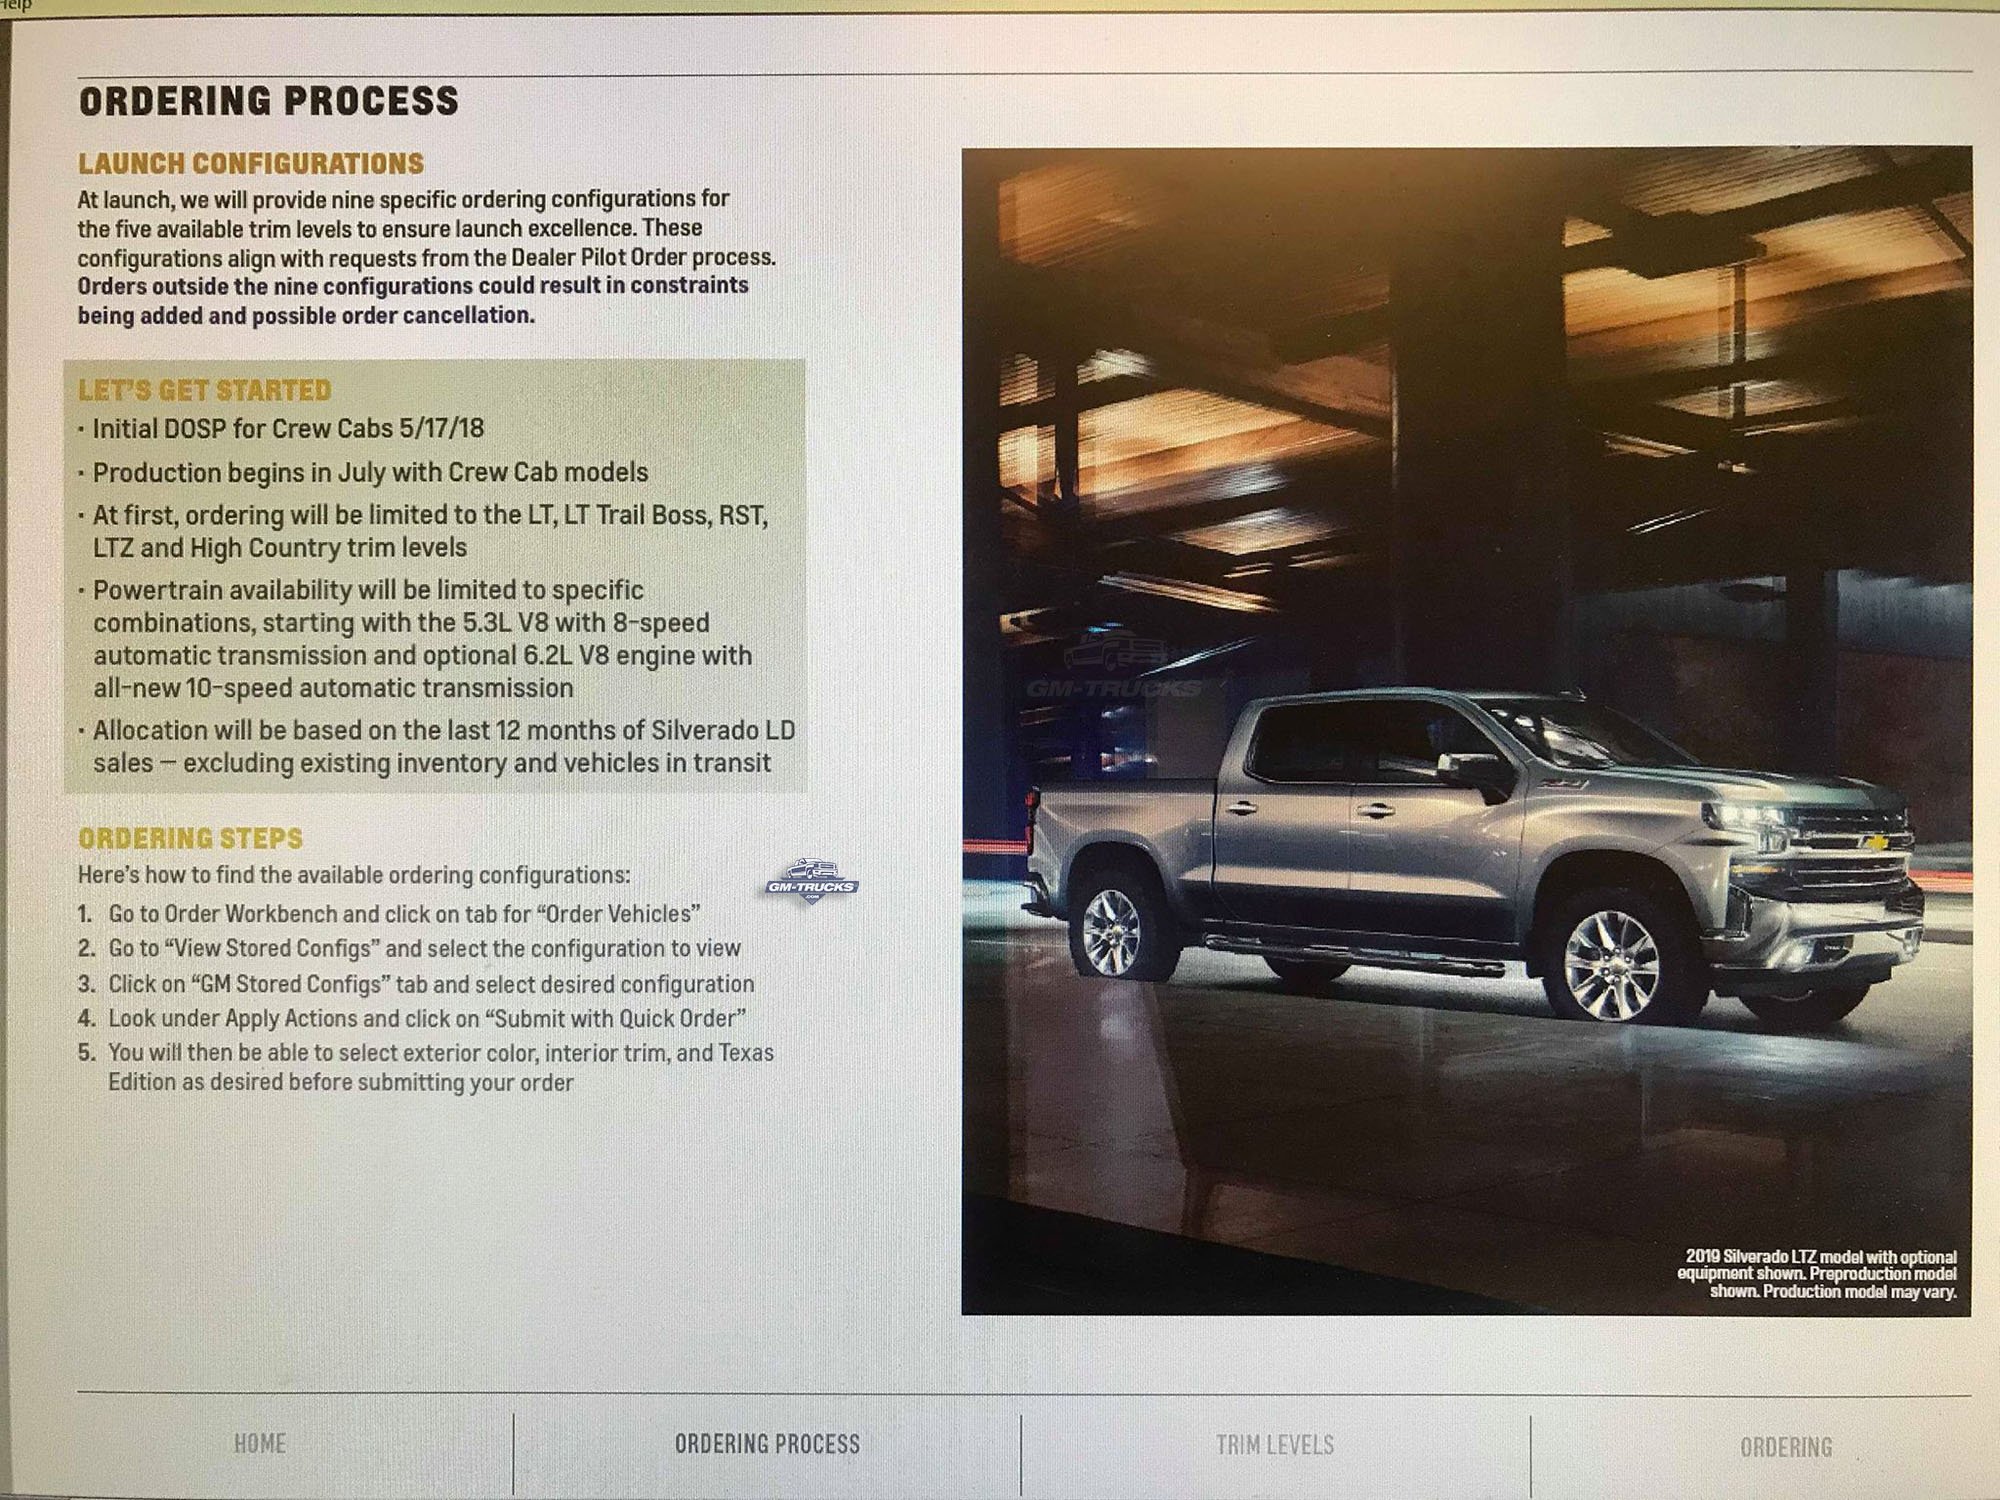
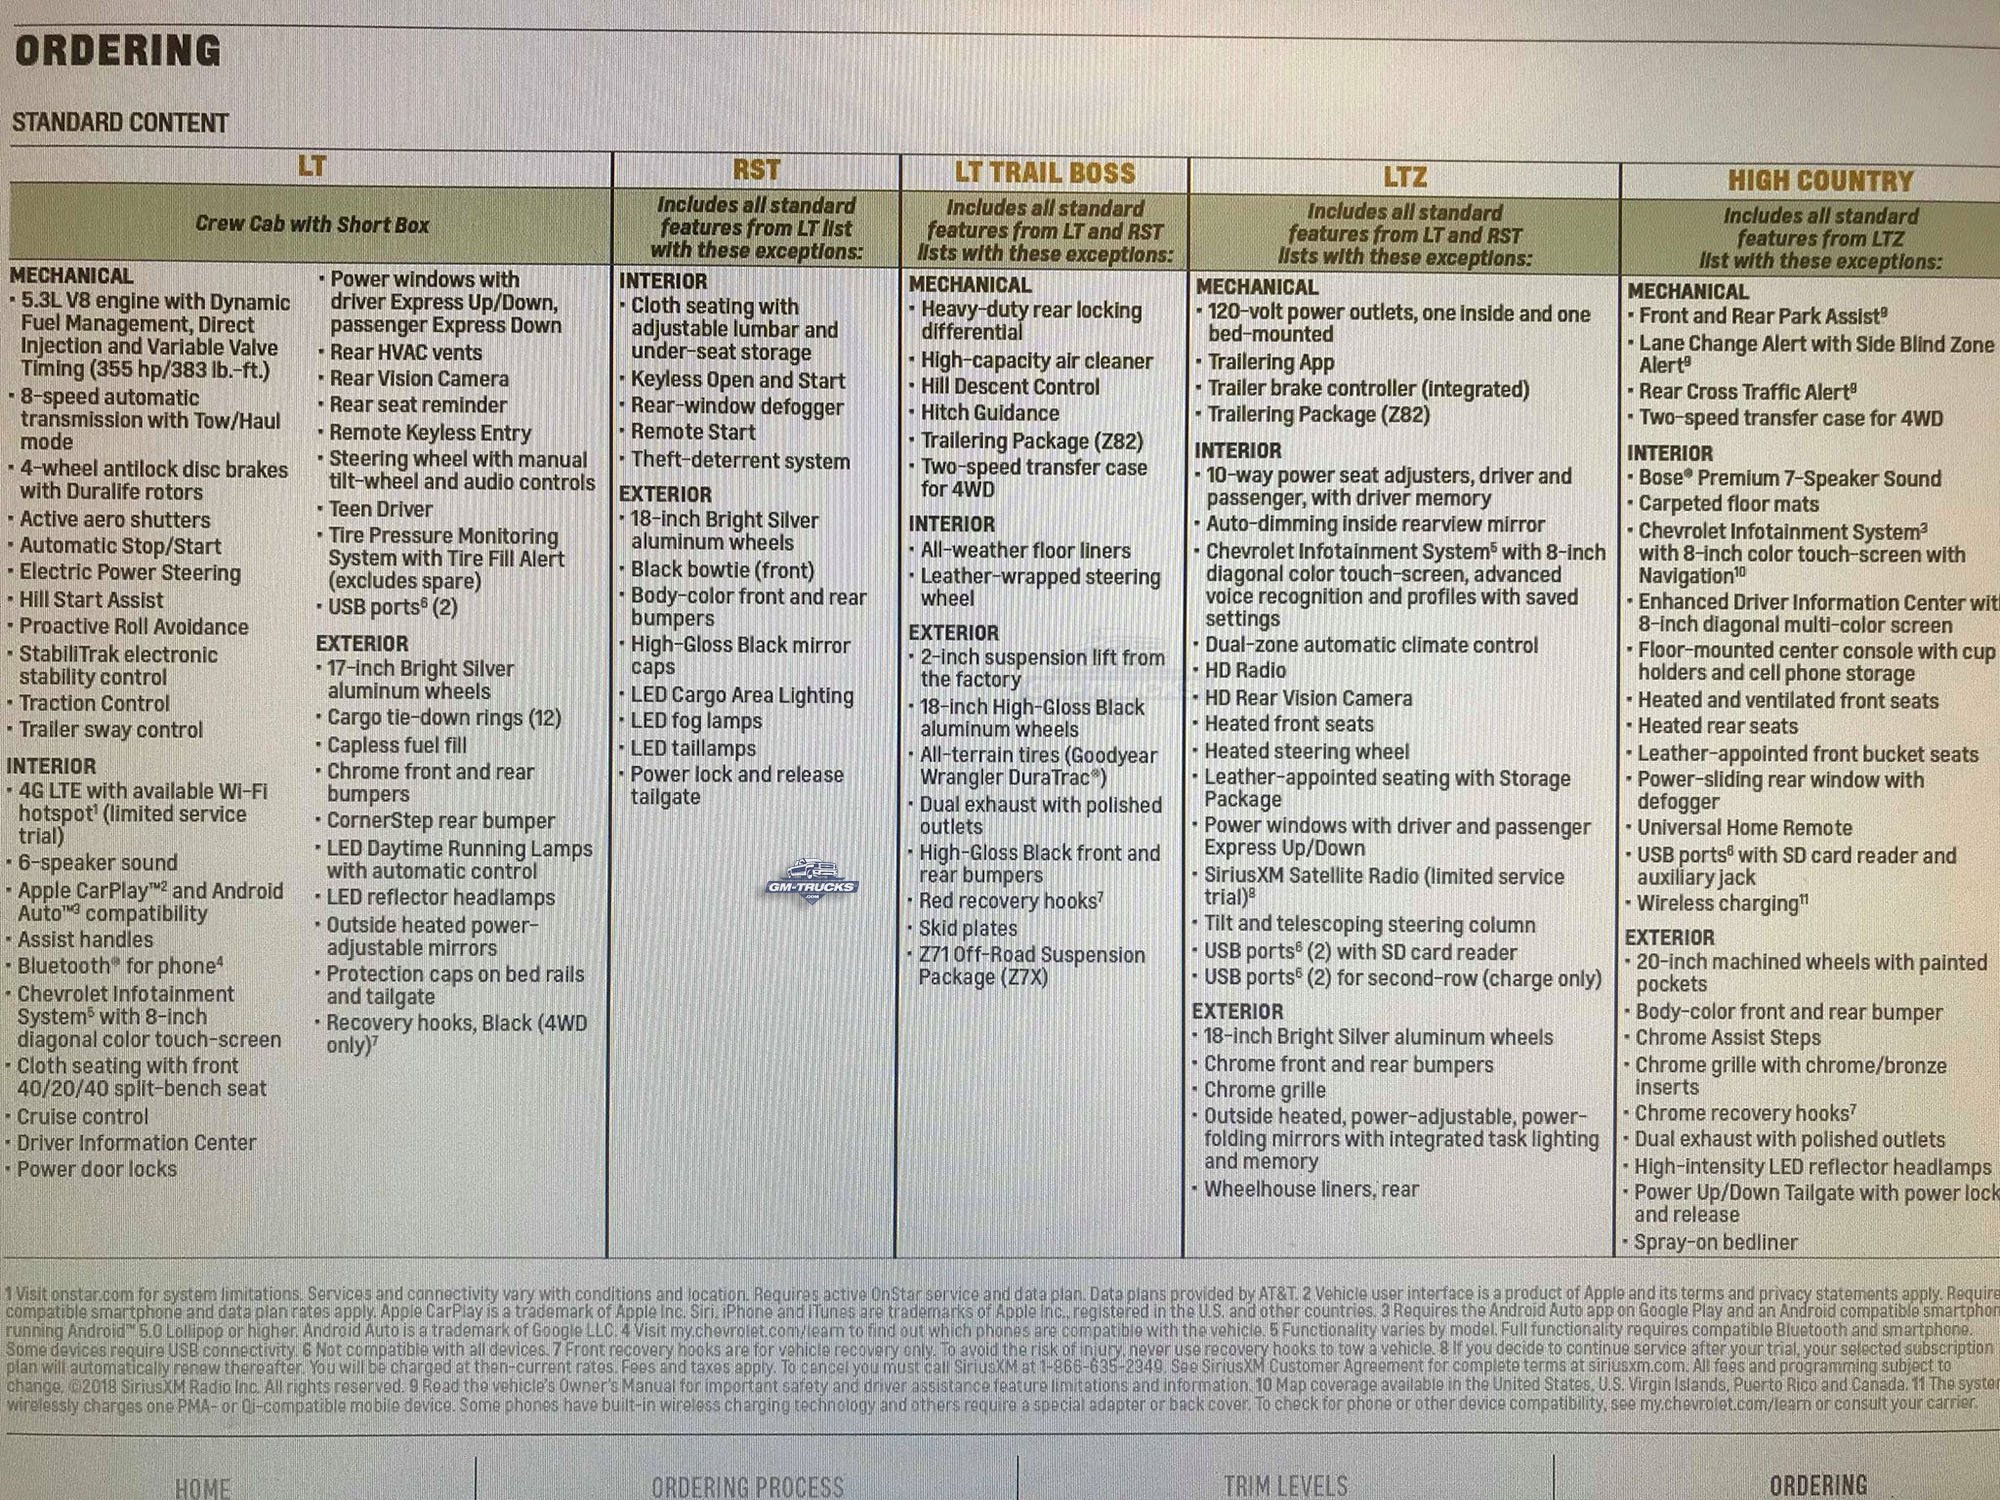
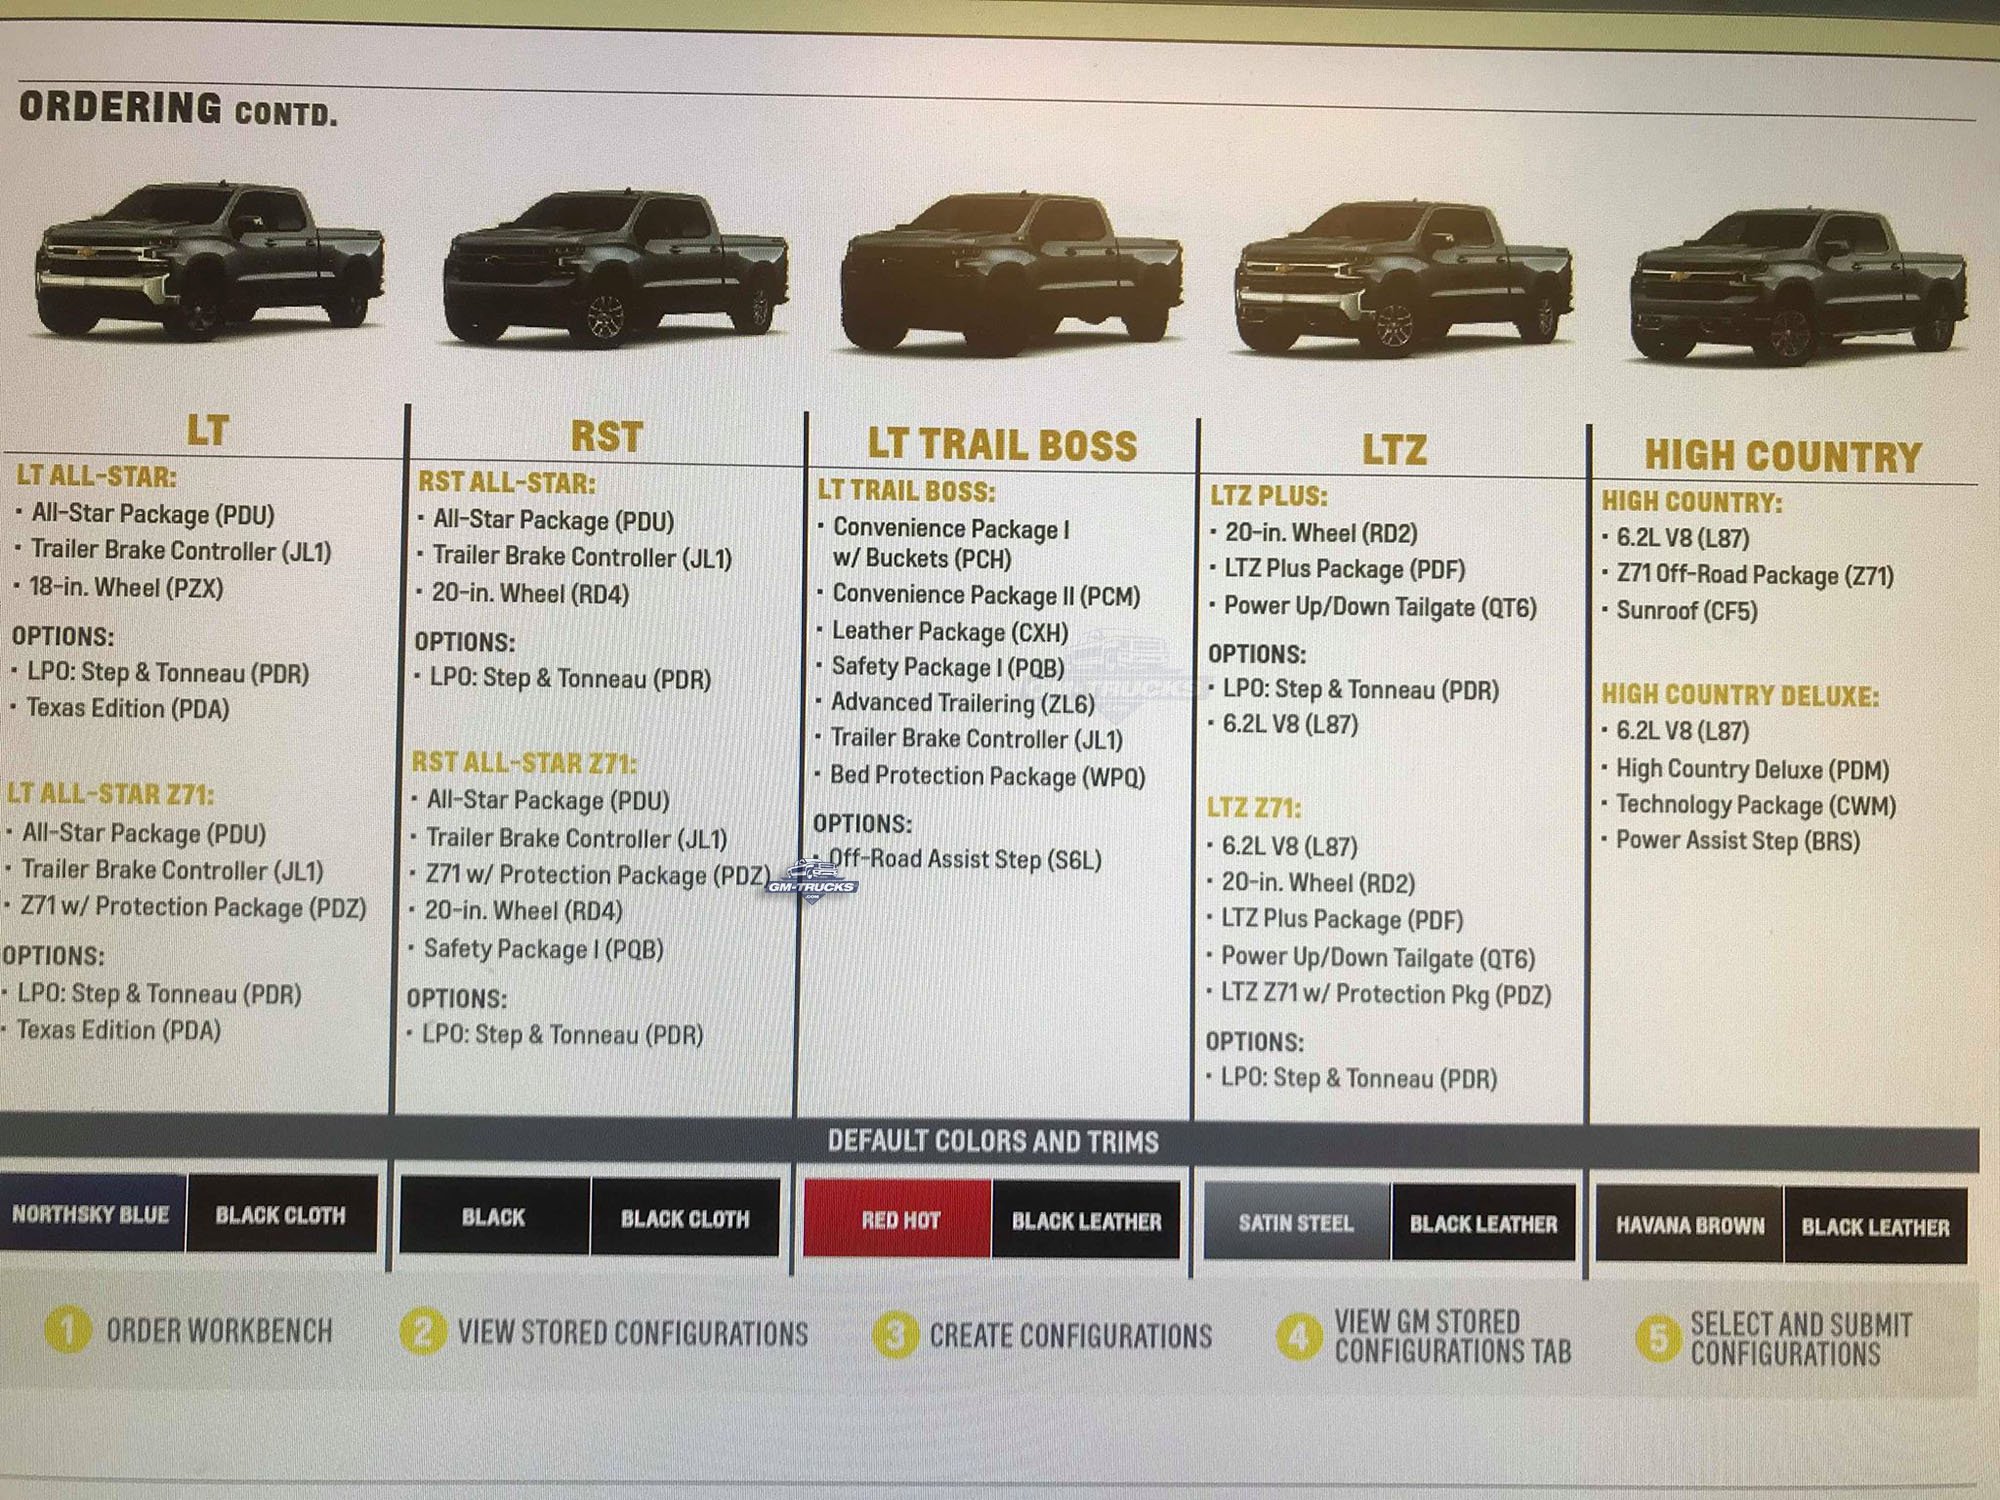
 It's never too early to start talking about the process of shopping around for a dealer, pricing, the ordering process, deposits, and production delivery times. Although we're still months away from orders being accepted, this thread is meant to be a place where everyone can check in and share their experiences as they go through the process. I'm also going to document as many important dates in this initial post as I can. I'll attempt to keep everyone up to date on start of production, any ordering limitations, and when the ordering system will go live. NEW UPDATES AS OF: April 25th, 2018 T1XX- 2019 Chevrolet Silverado and 2019 GMC Sierra - Important Ordering / Production Dates Pre-Production: NOW - Captured Test Fleet Production Confirmed as of March 31st. Fleet Order Entry Avaliable On Crew Cab: 4/26/18 Double Cab: 6/21/18 Regular Cab: TBD Retail Initial Consensus Month Crew Cab: May 1st Double Cab: August 1st Regular Cab: TBD Initial Dealer Order Submission Process (DOSP) Crew Cab: 5/17/18 Double Cab: 8/16/18 Regular Cab: TBD Production Start Up For Dealer Delivery Crew Cab: Quarter 3 - July/August/September Double Cab: Quarter 4 - October November December Regular Cab: TBD 2019 Chevrolet Silverado Start Up Schedule 2019 GMC Sierra Start Up Schedule This post will be updated whenever new information becomes available. Please contact me if you can help clarify any of these dates.
- 1,676 replies
-
- 2
-

-
- dealership
- 2019
- (and 9 more)
-
 I have a 1987 Chevy R10 squarebody short bed VIN # 1GCDR14H4HJ127580. Can anyone tell me where to get new lower control arms for this truck without breaking the bank?
 -
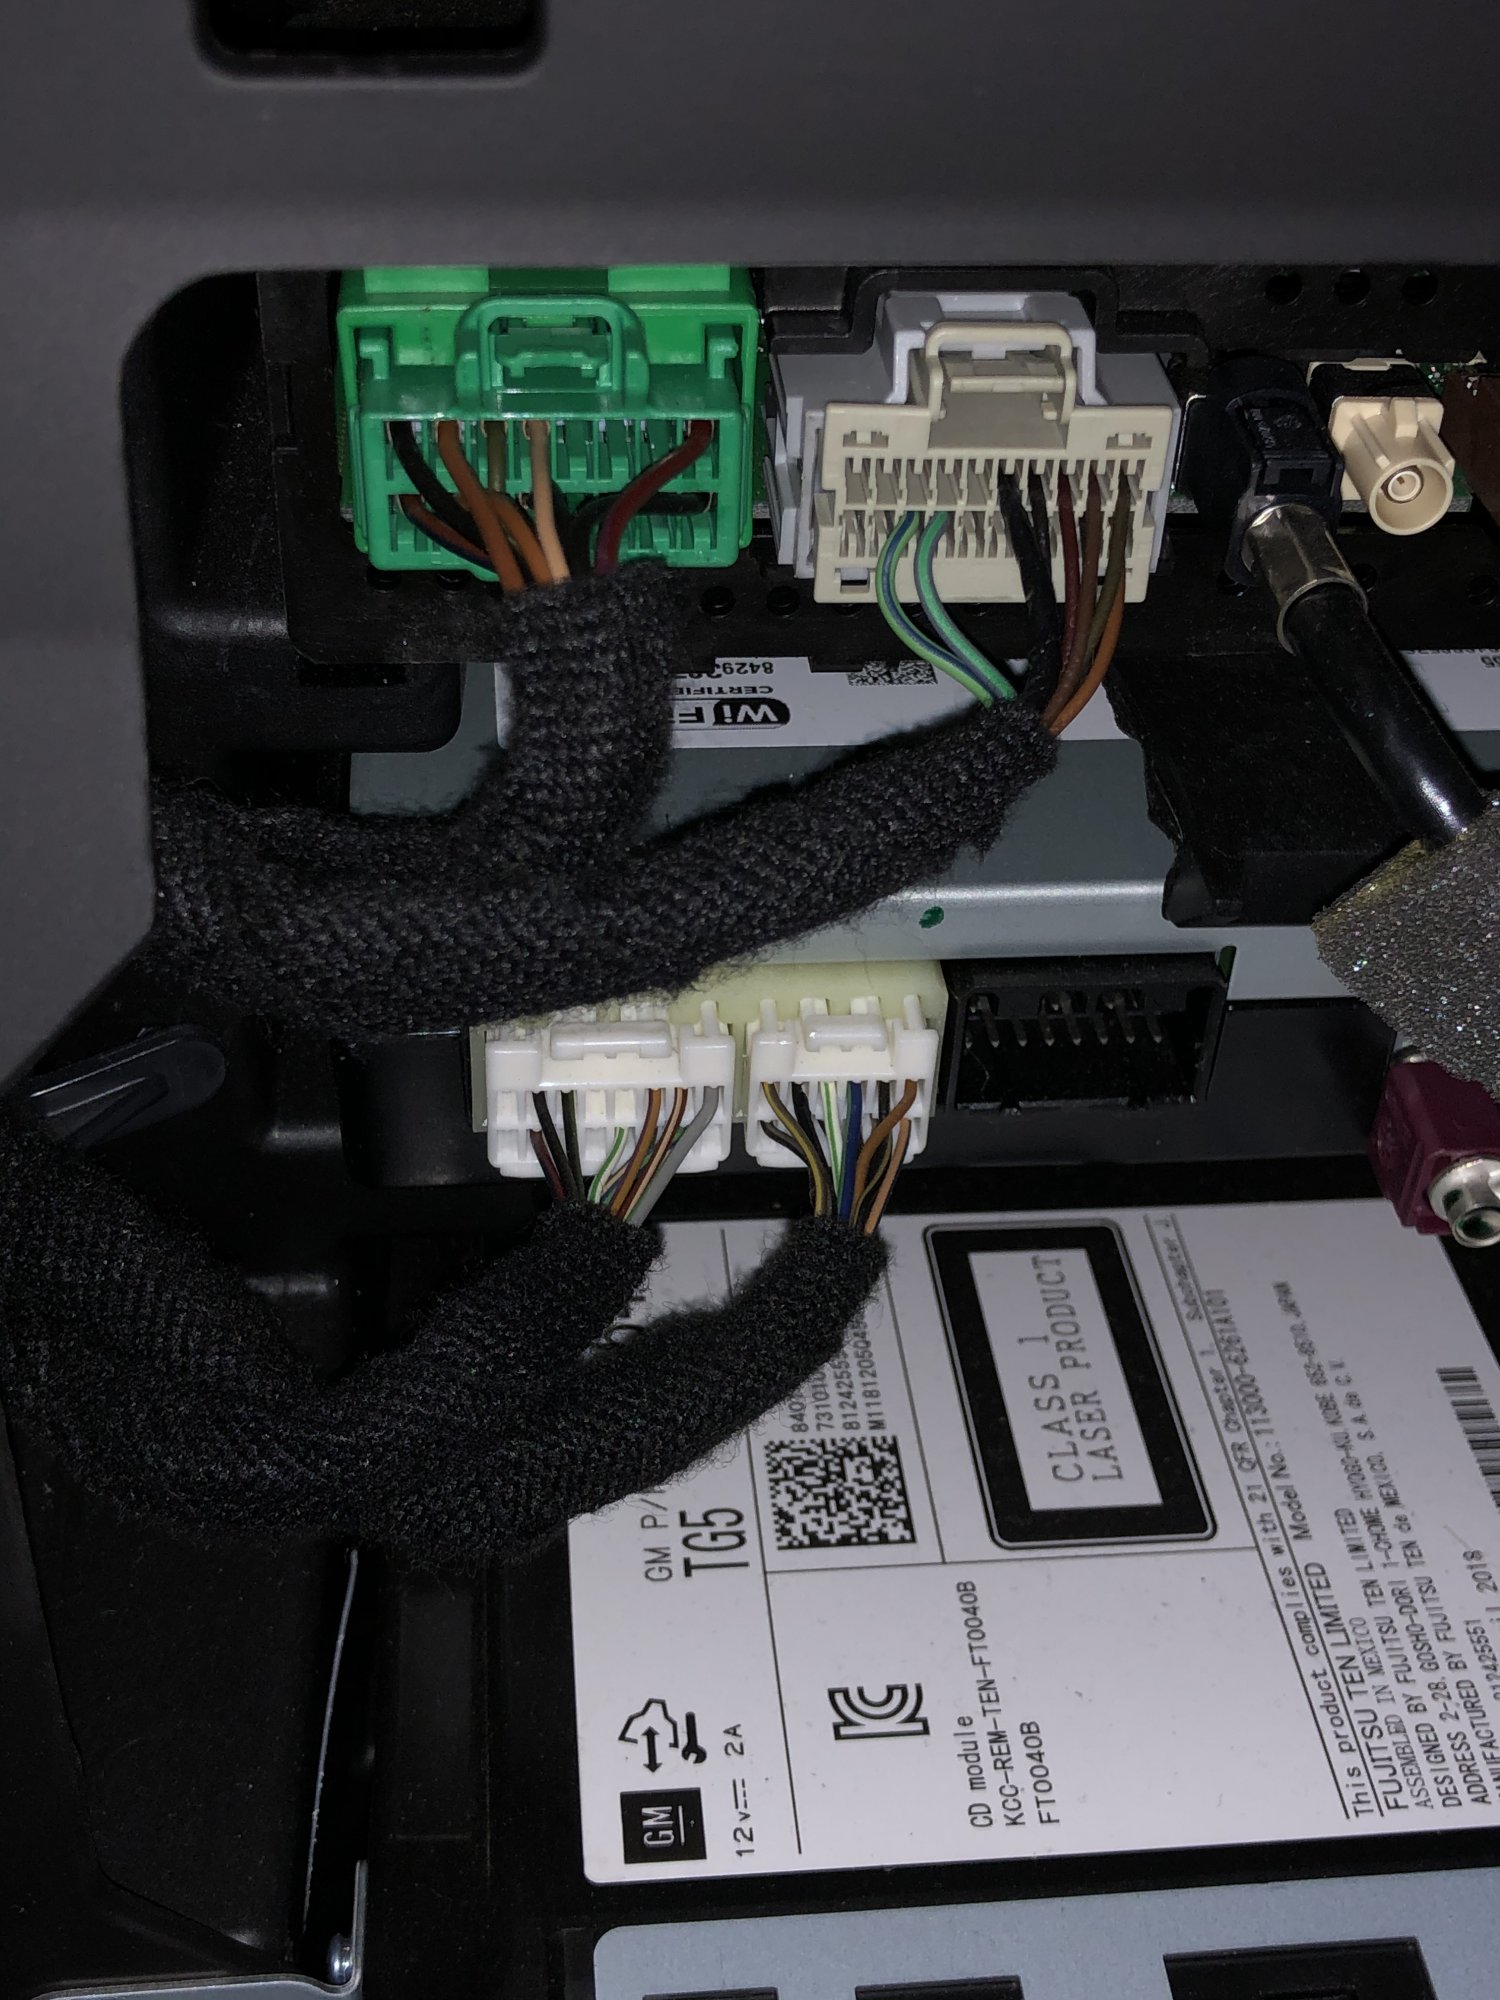
Can any give some insight on which wires are connected to which speakers on the green plug. I have attached a picture. There are a total of 10 wires and I’m assuming they are (LF+/-)(RF+/-), (RR+/-), (LR+/-) 12V and ground but do not know which goes to where. Any help would be appreciated! Thank you!
-
 I’m having this issue with my truck. So both fans turn on automatically when I start the truck, also I don’t have no A/C. I replaced my thermostat and temp sensor. That didn’t seem to fix it. I should also include that I did a DOD Delete with a stock non dod cam, it’s tuned and engine works fine. It’s driveable but it’s annoying have no A/C and both fans when I start the truck. Please help!
 -
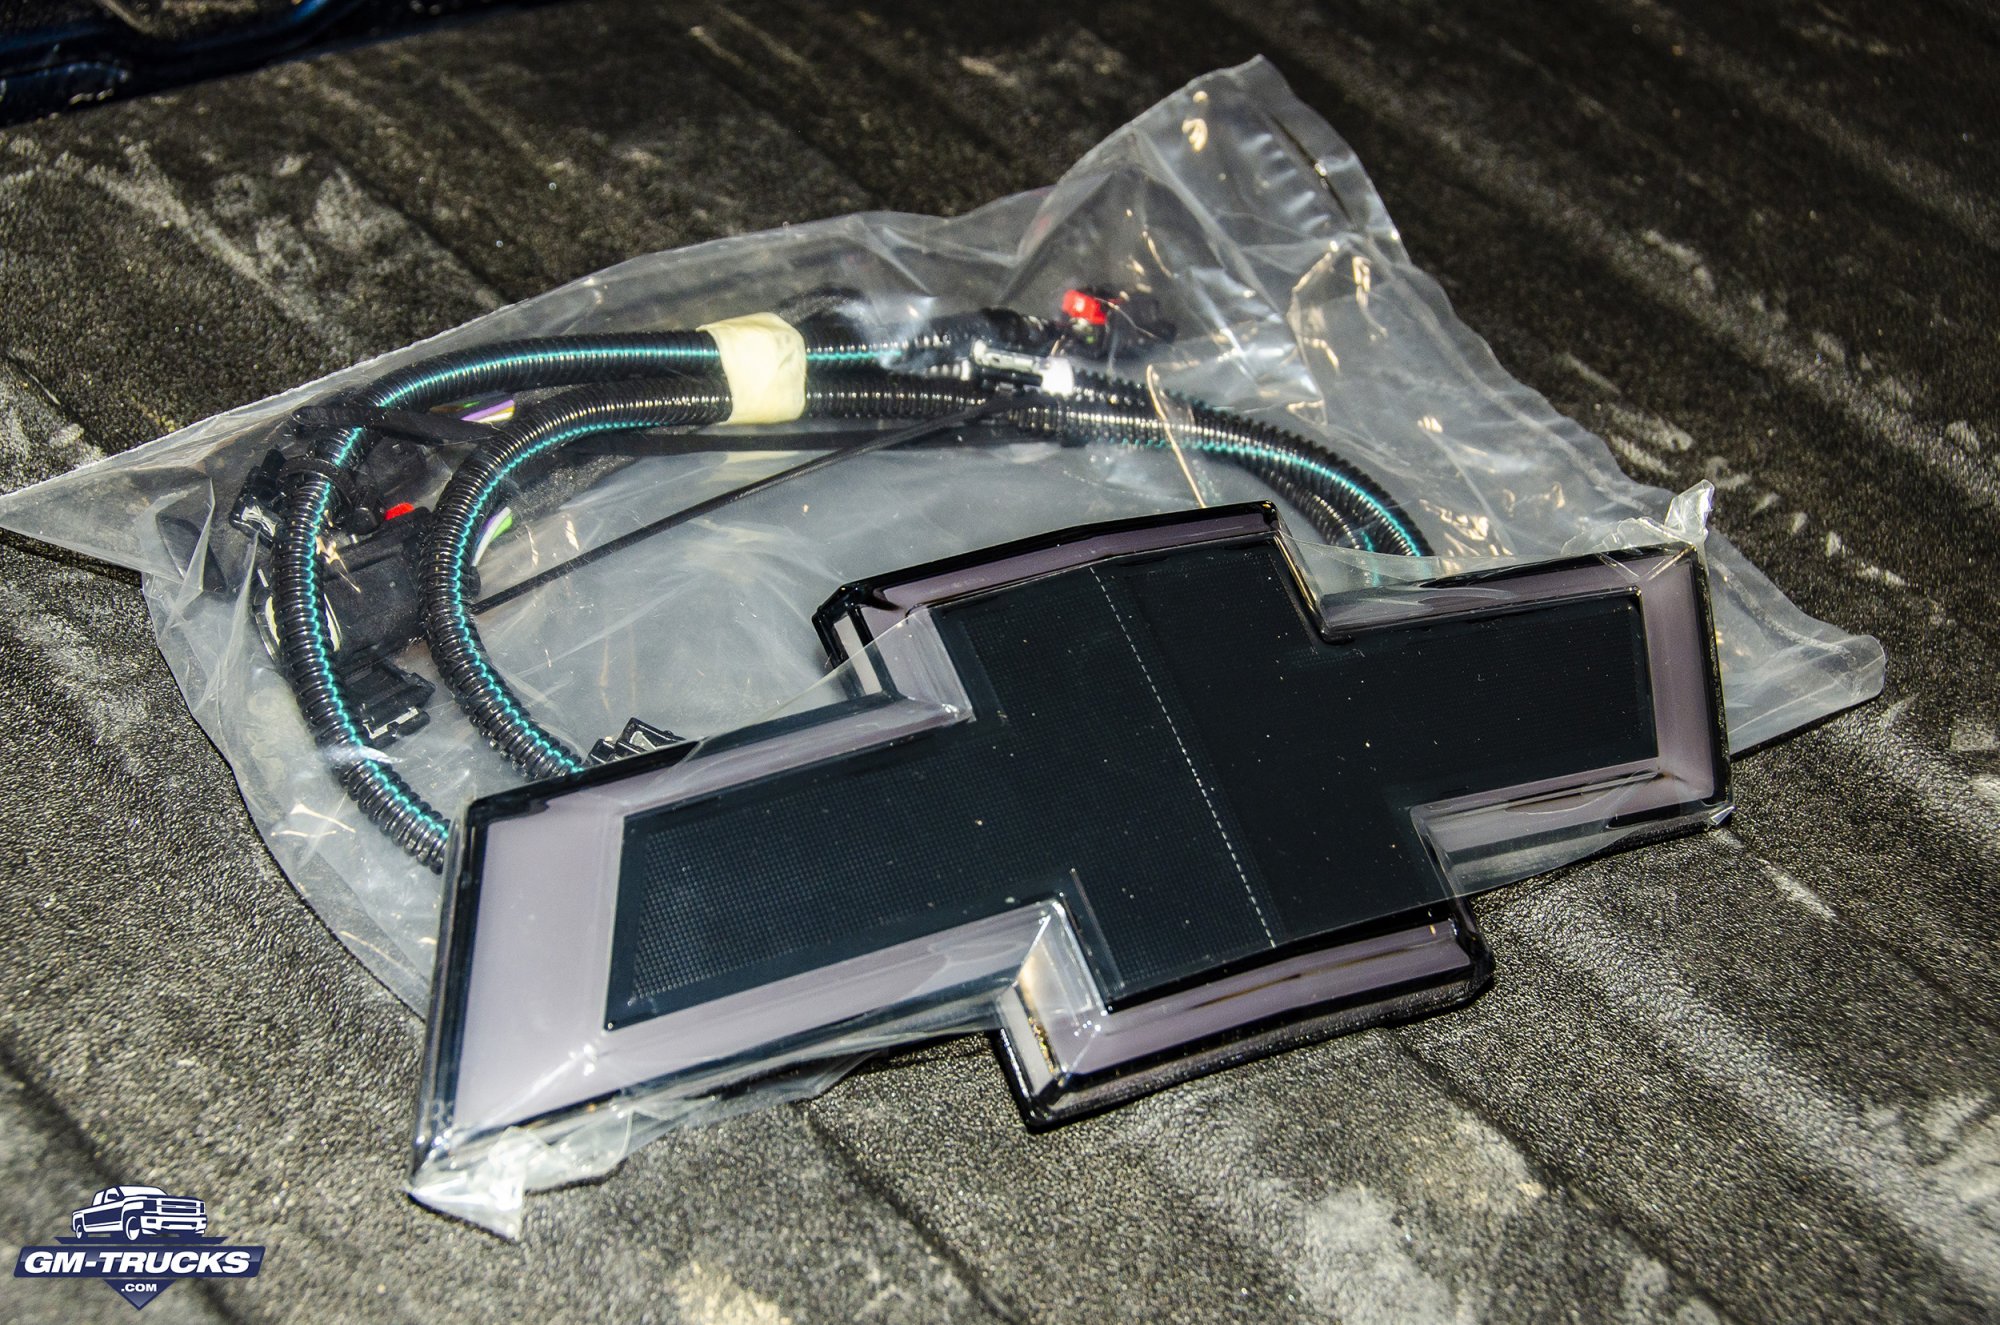
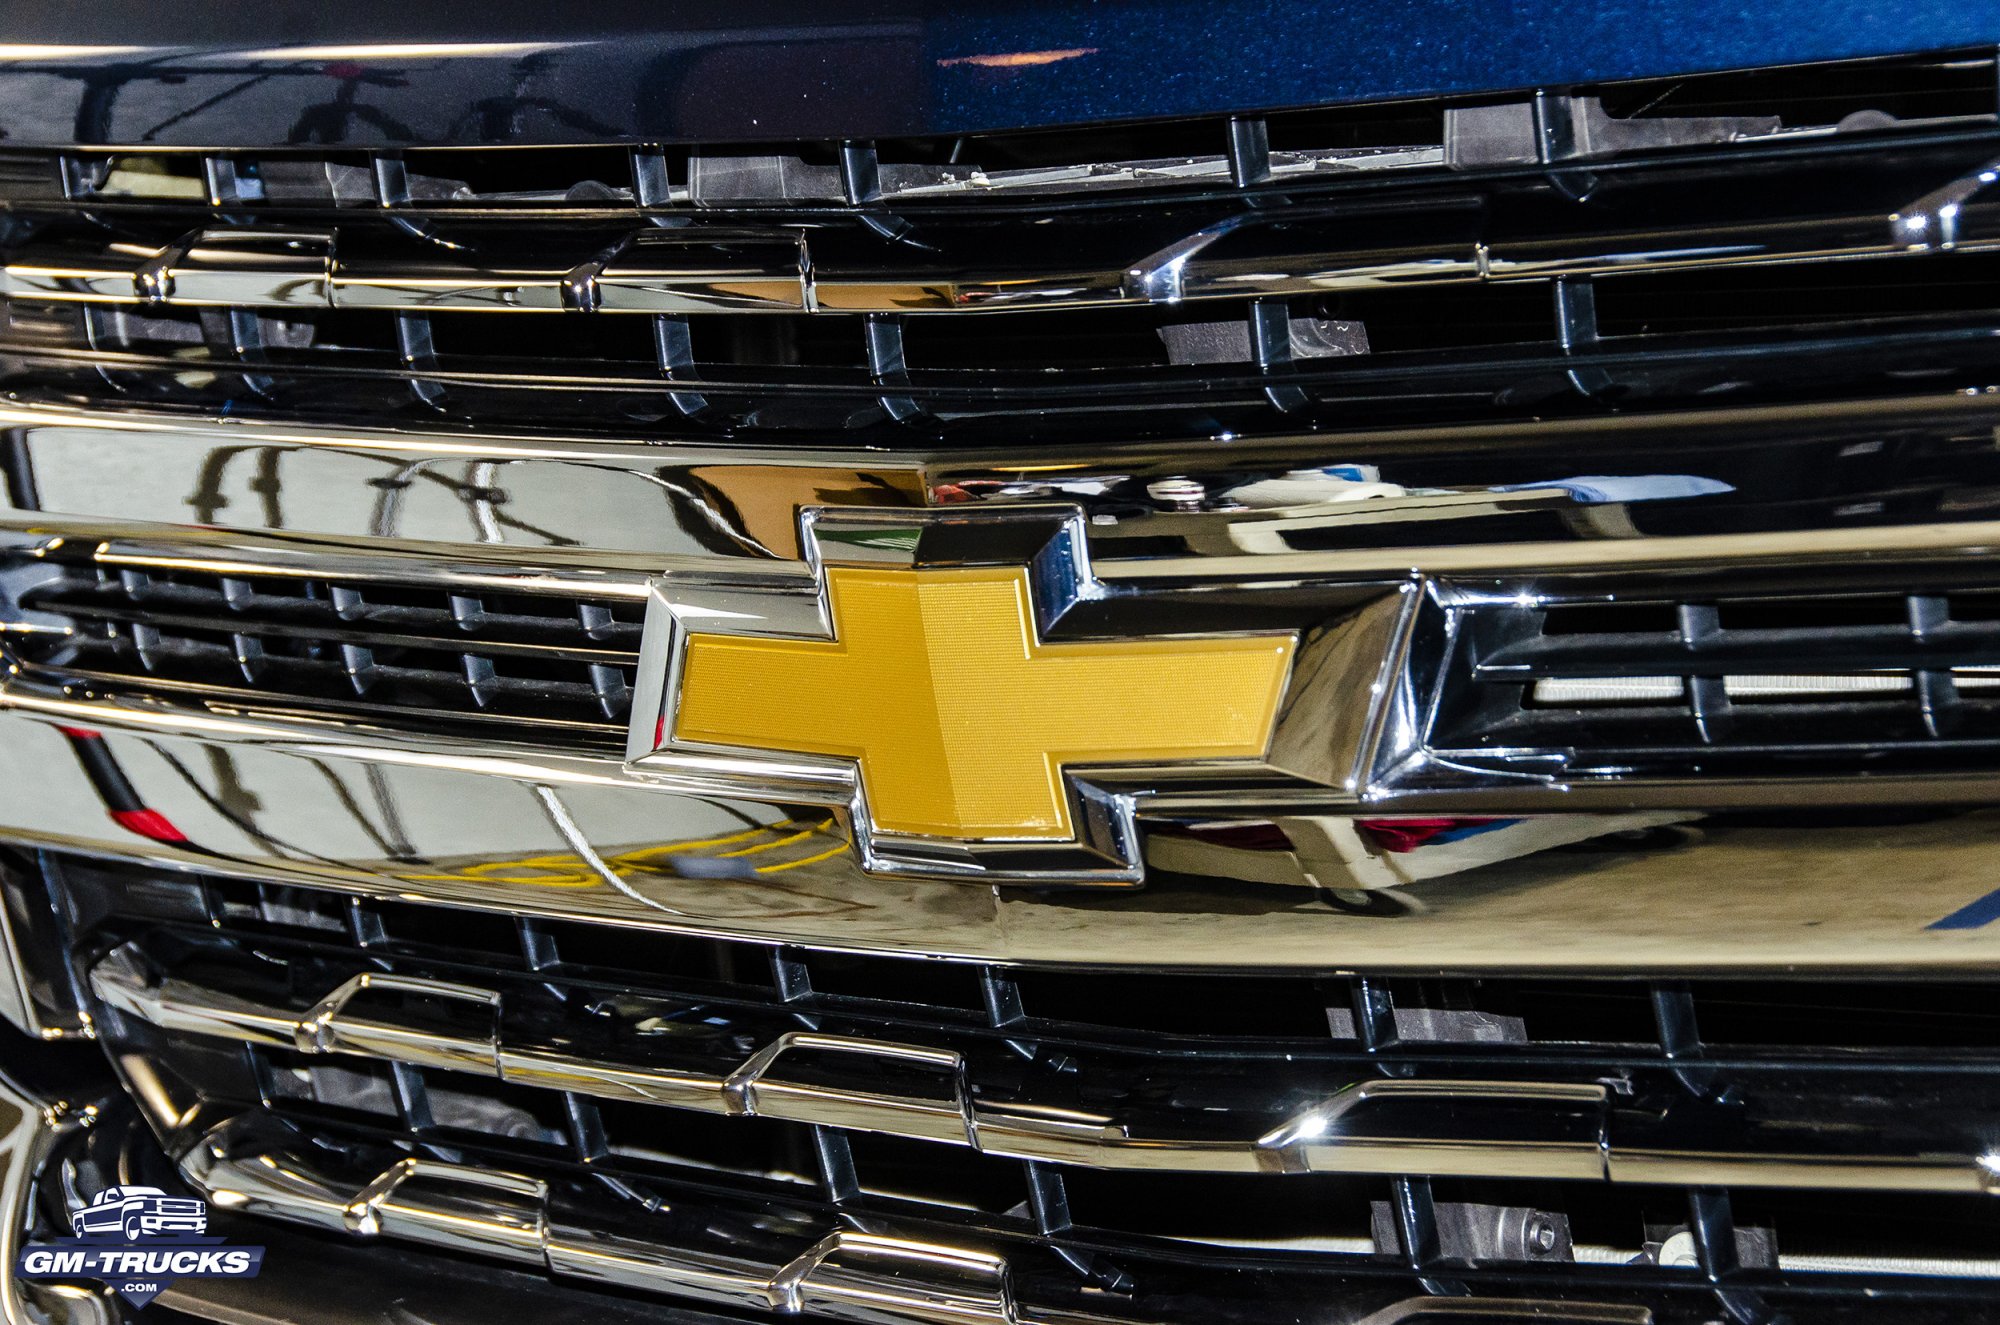
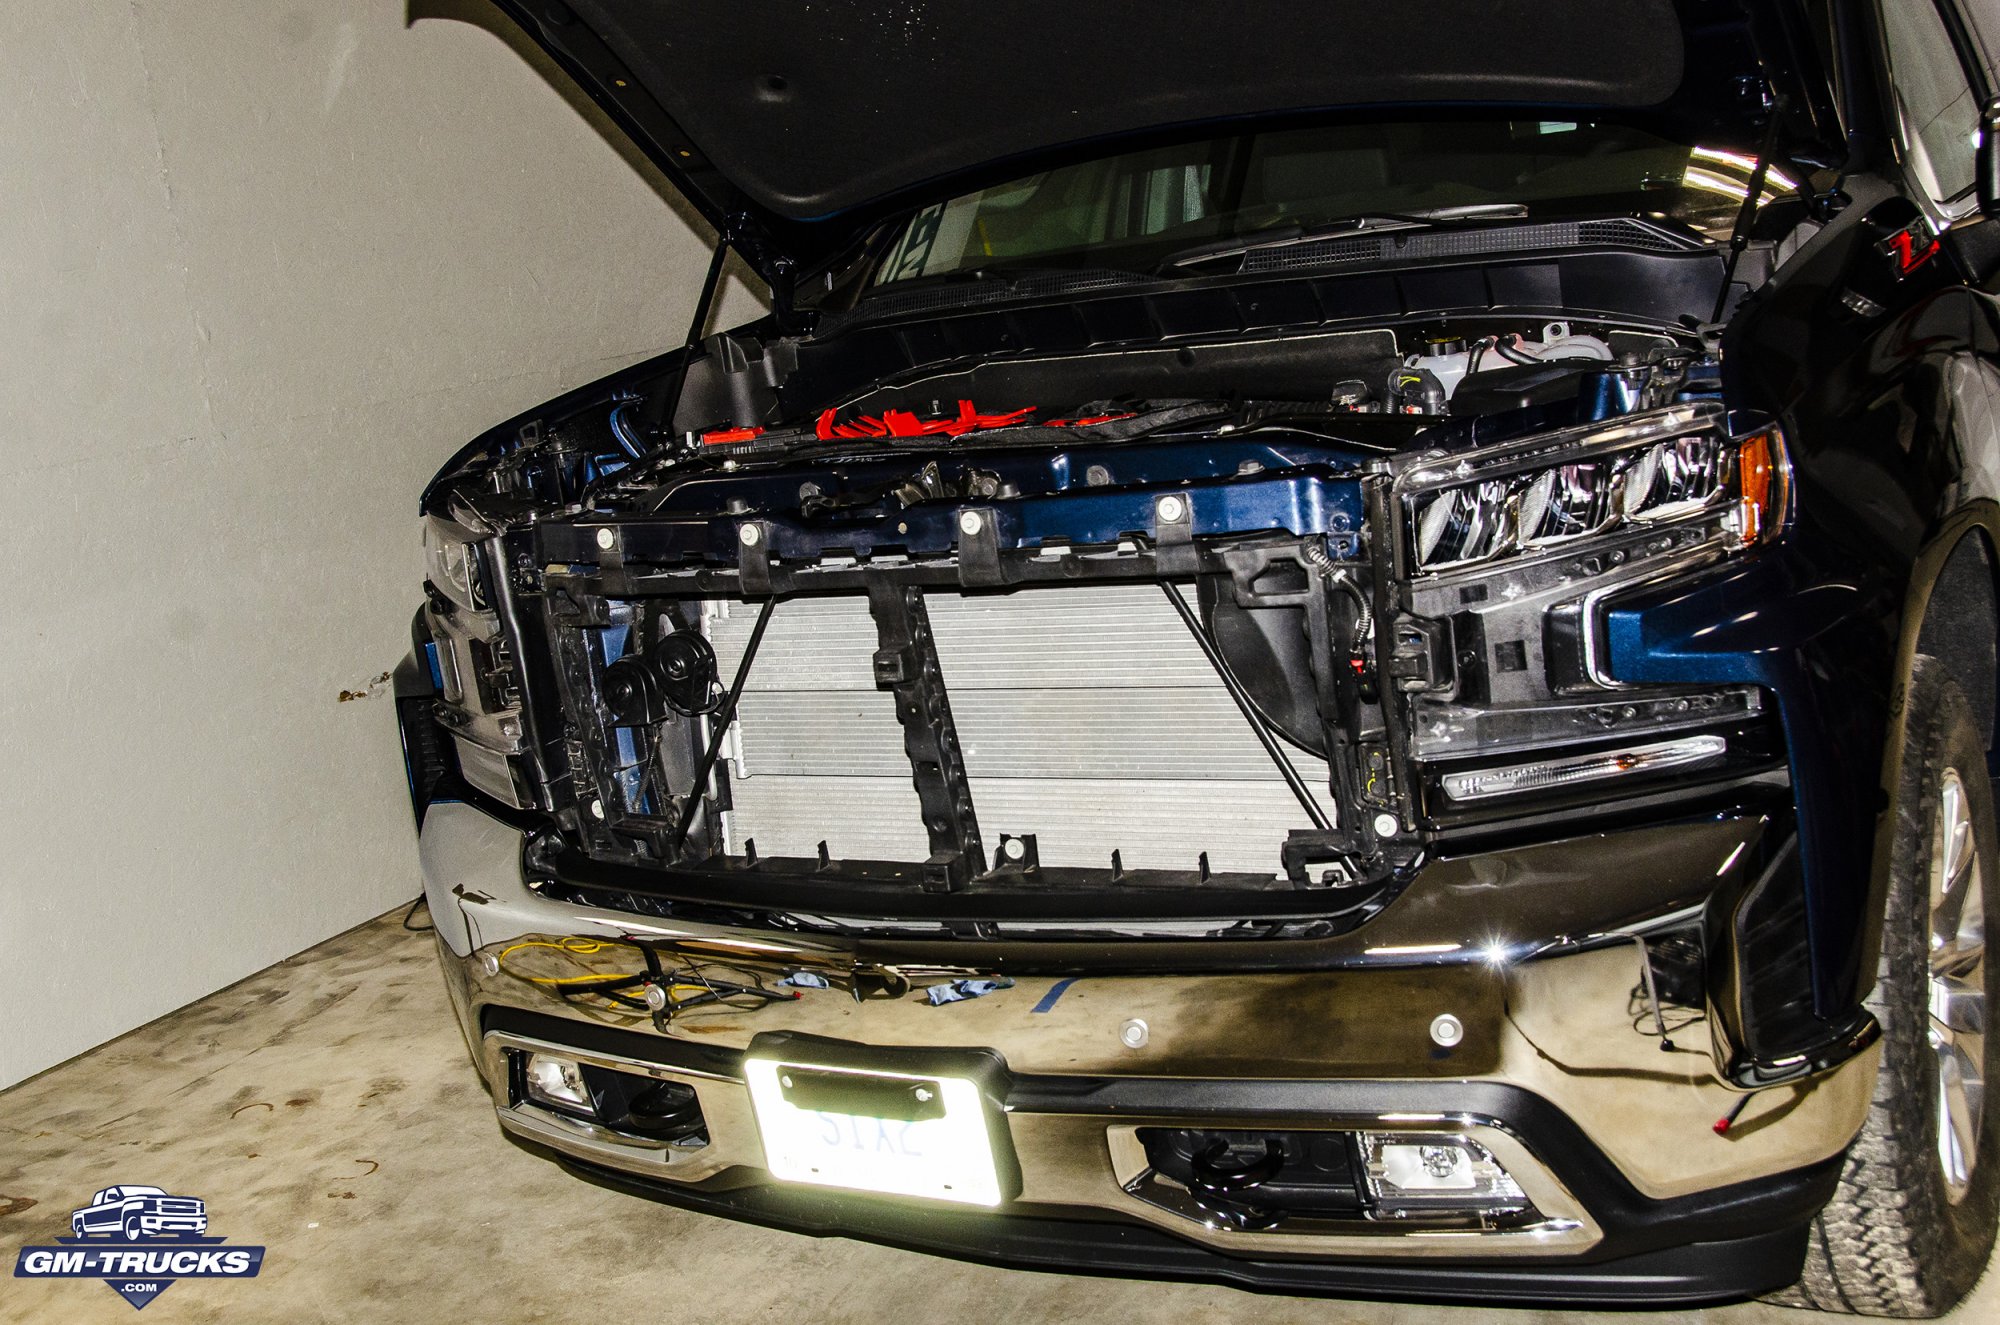
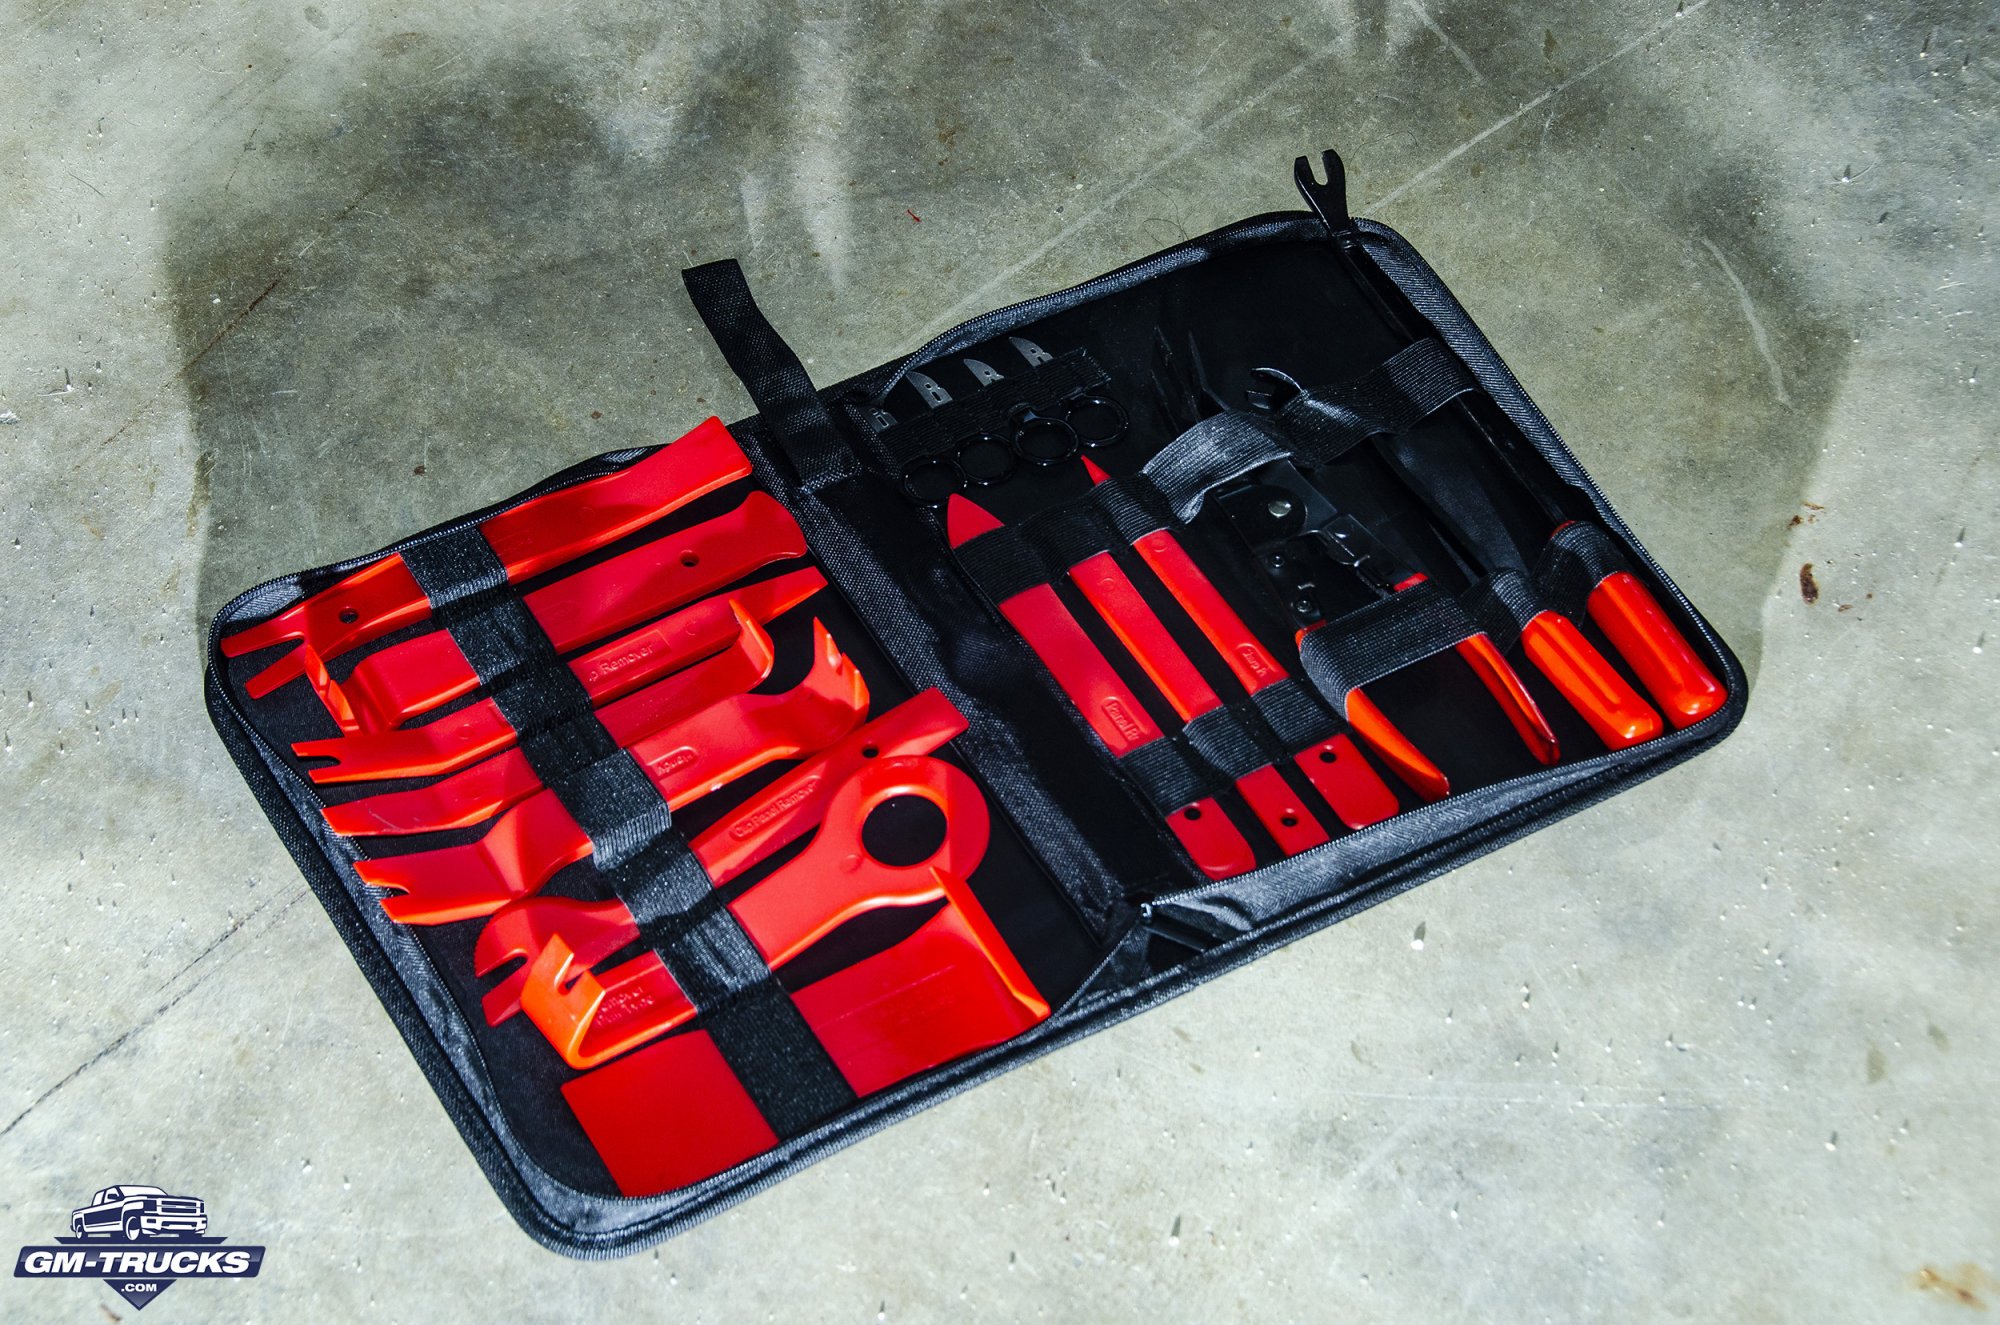
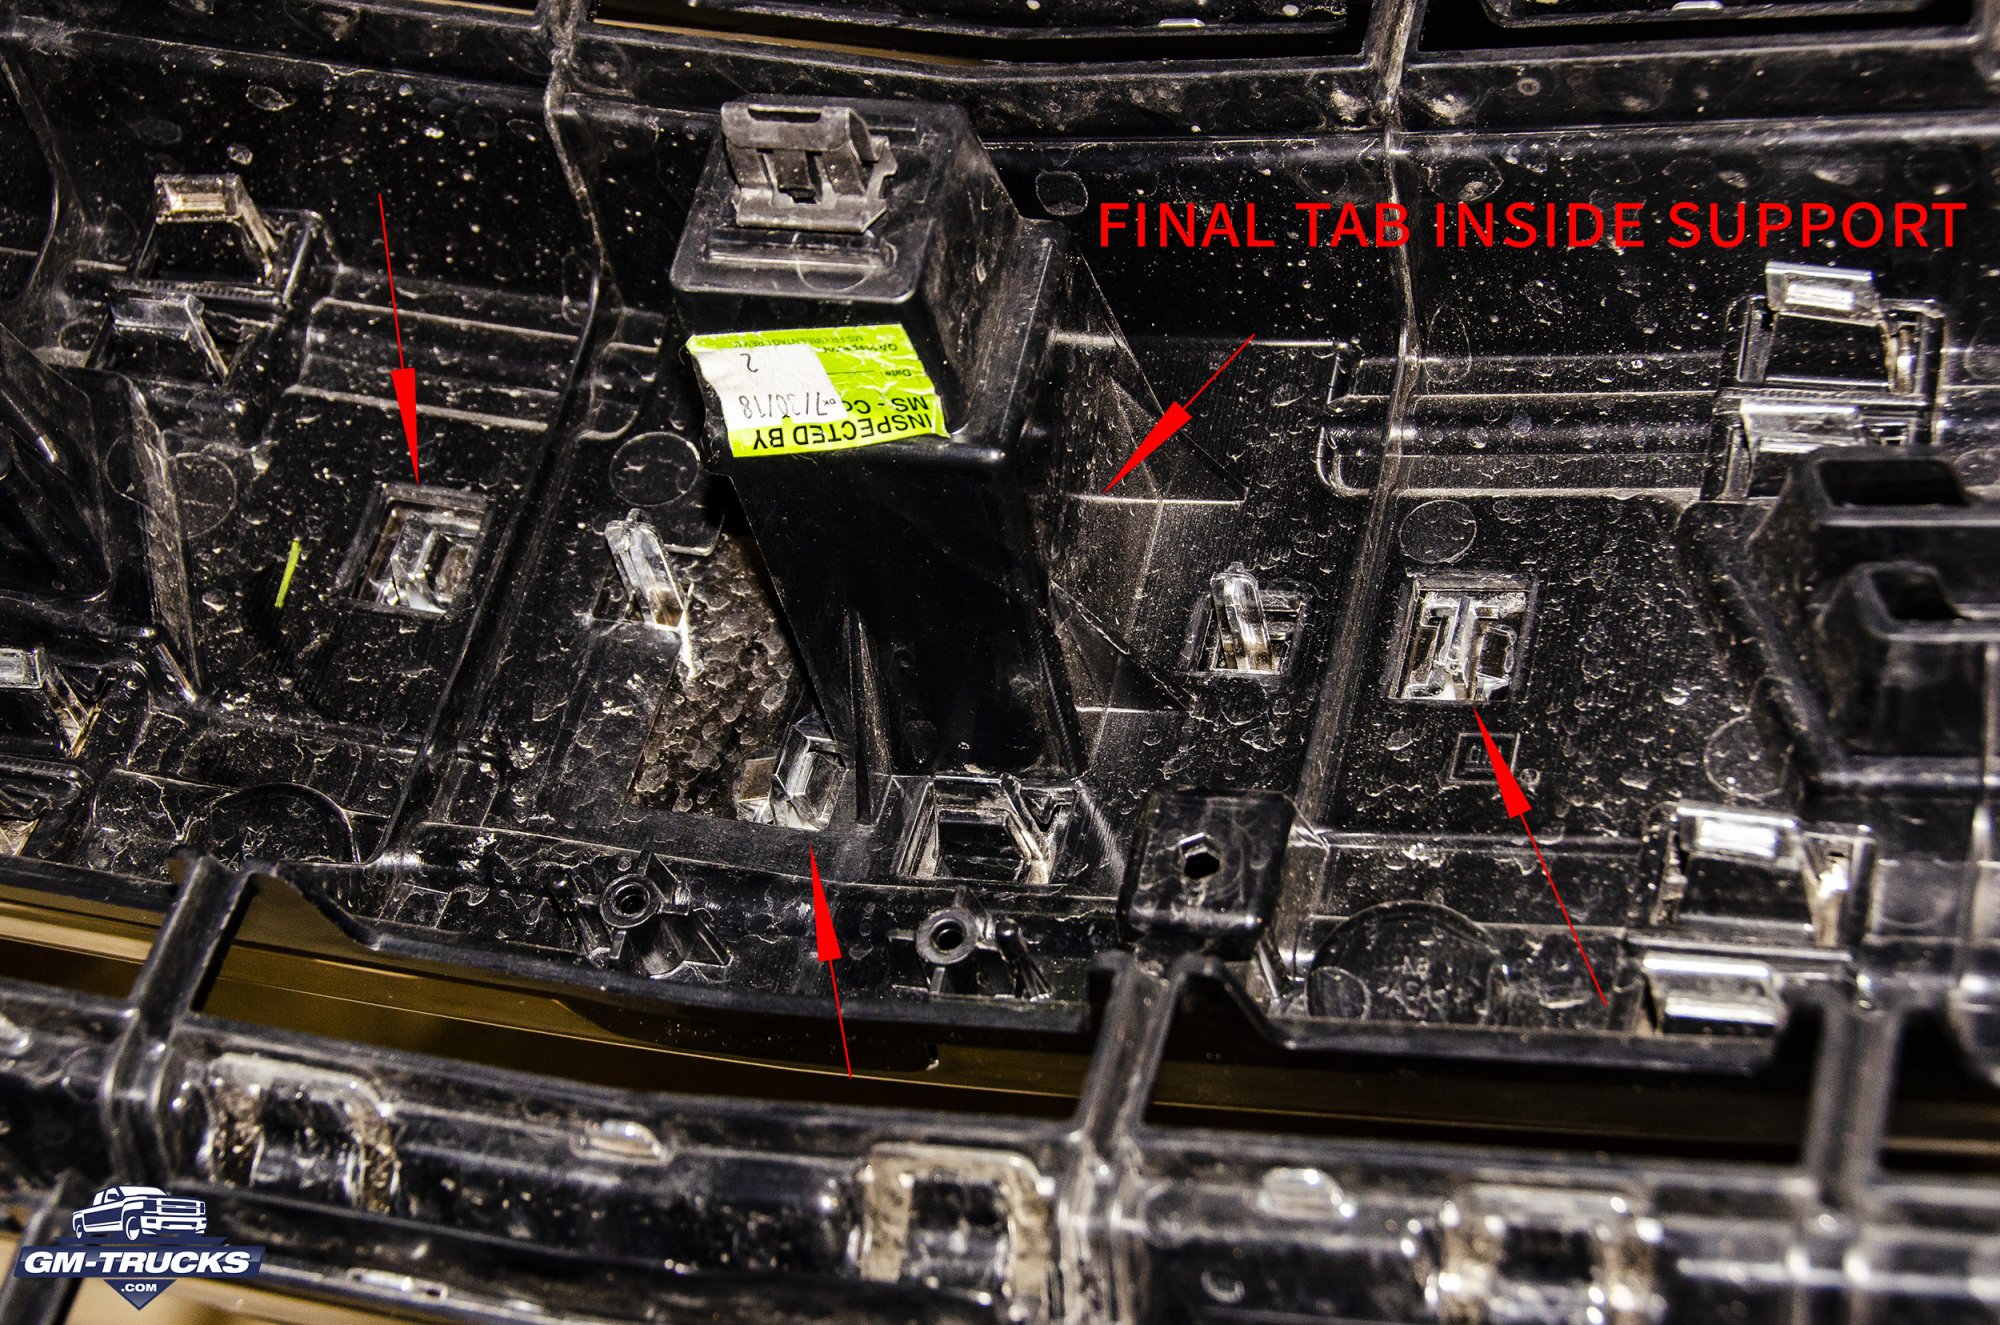
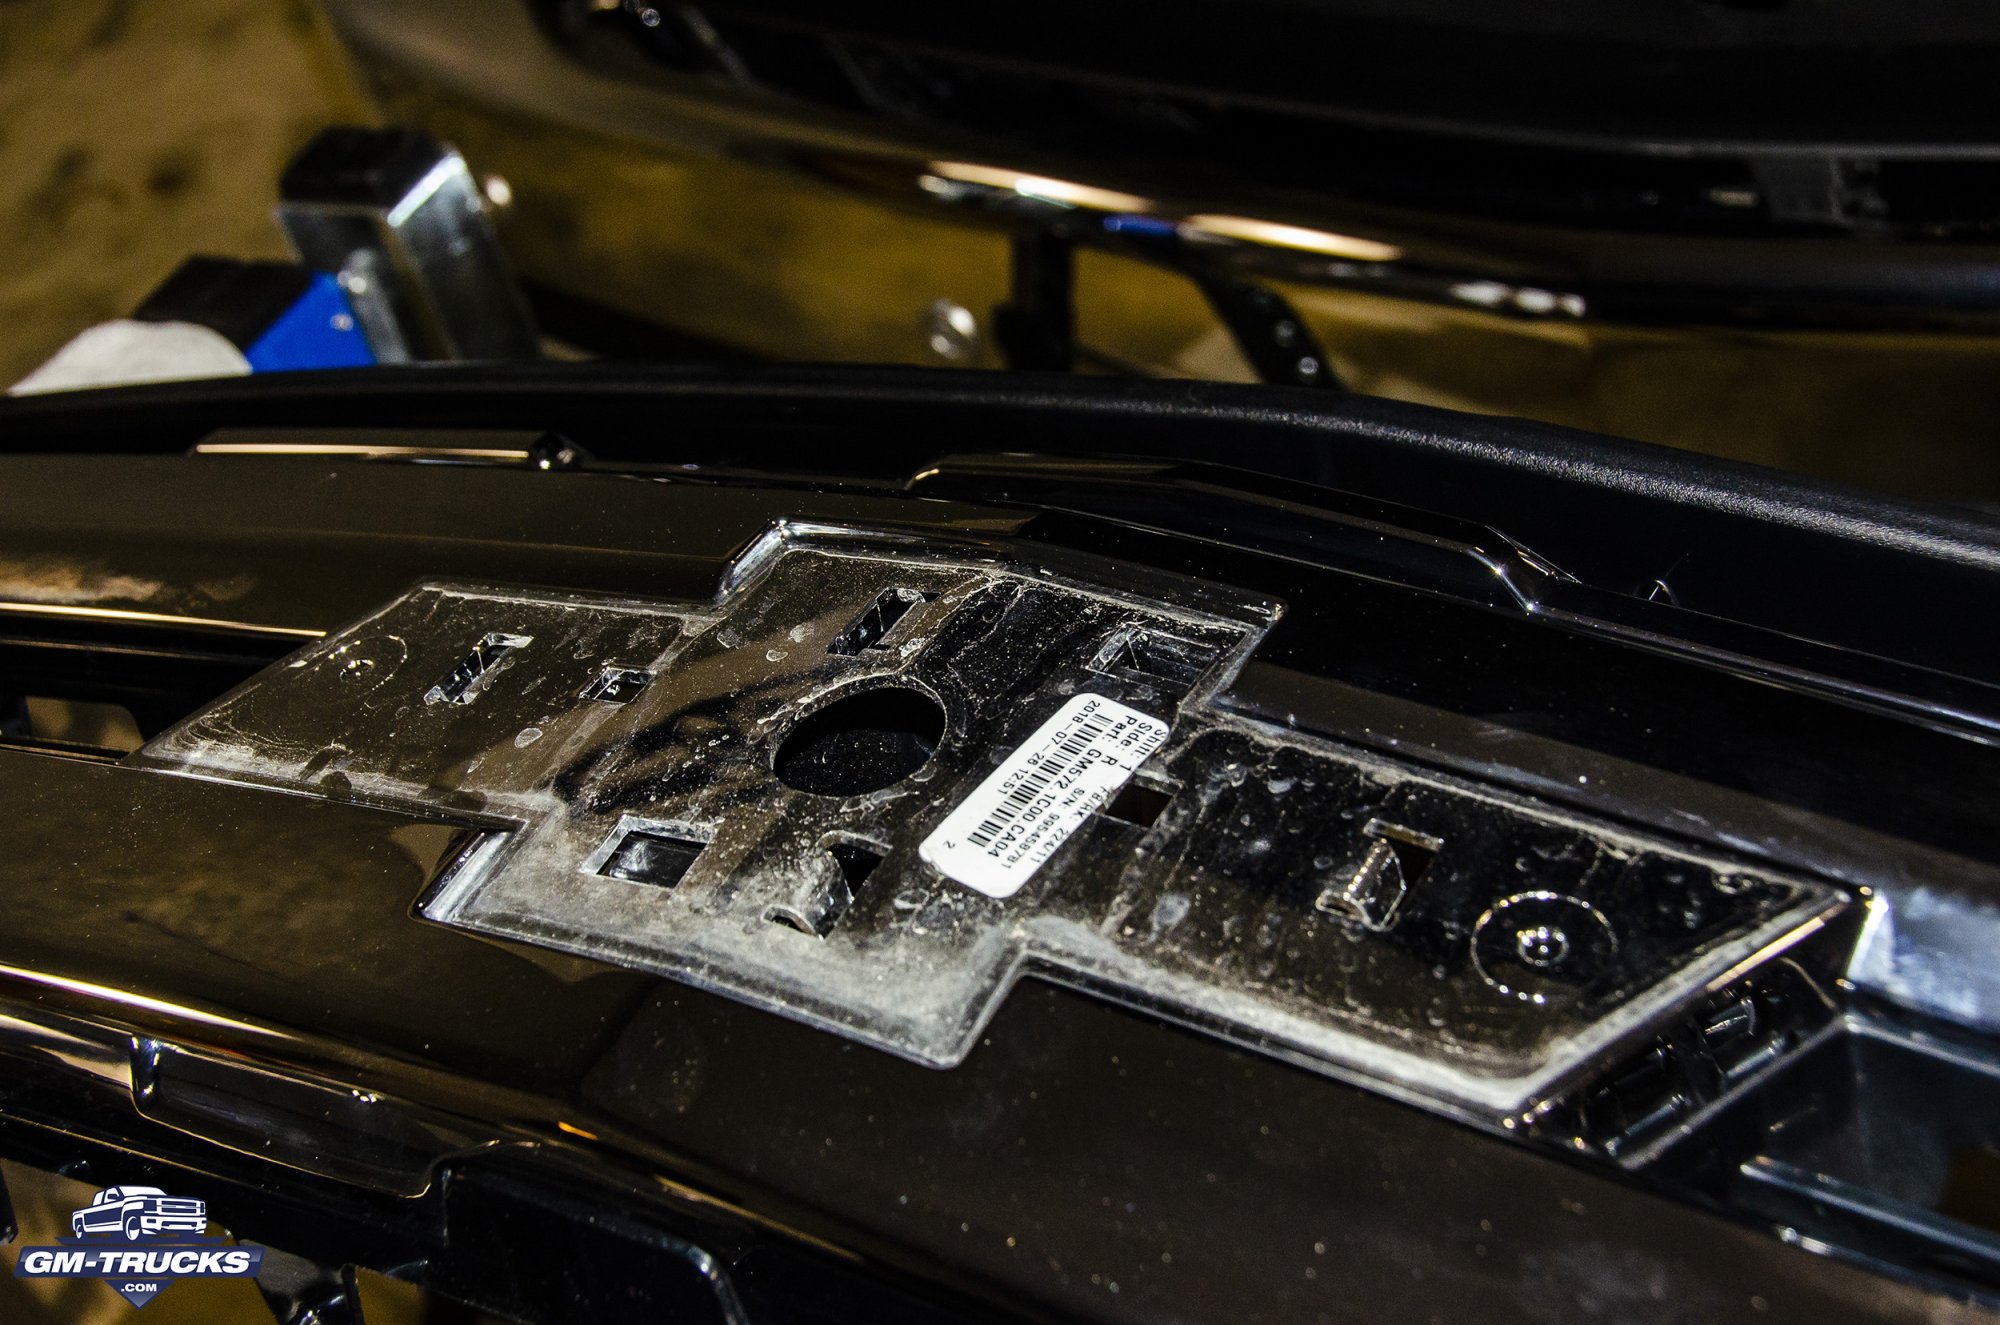
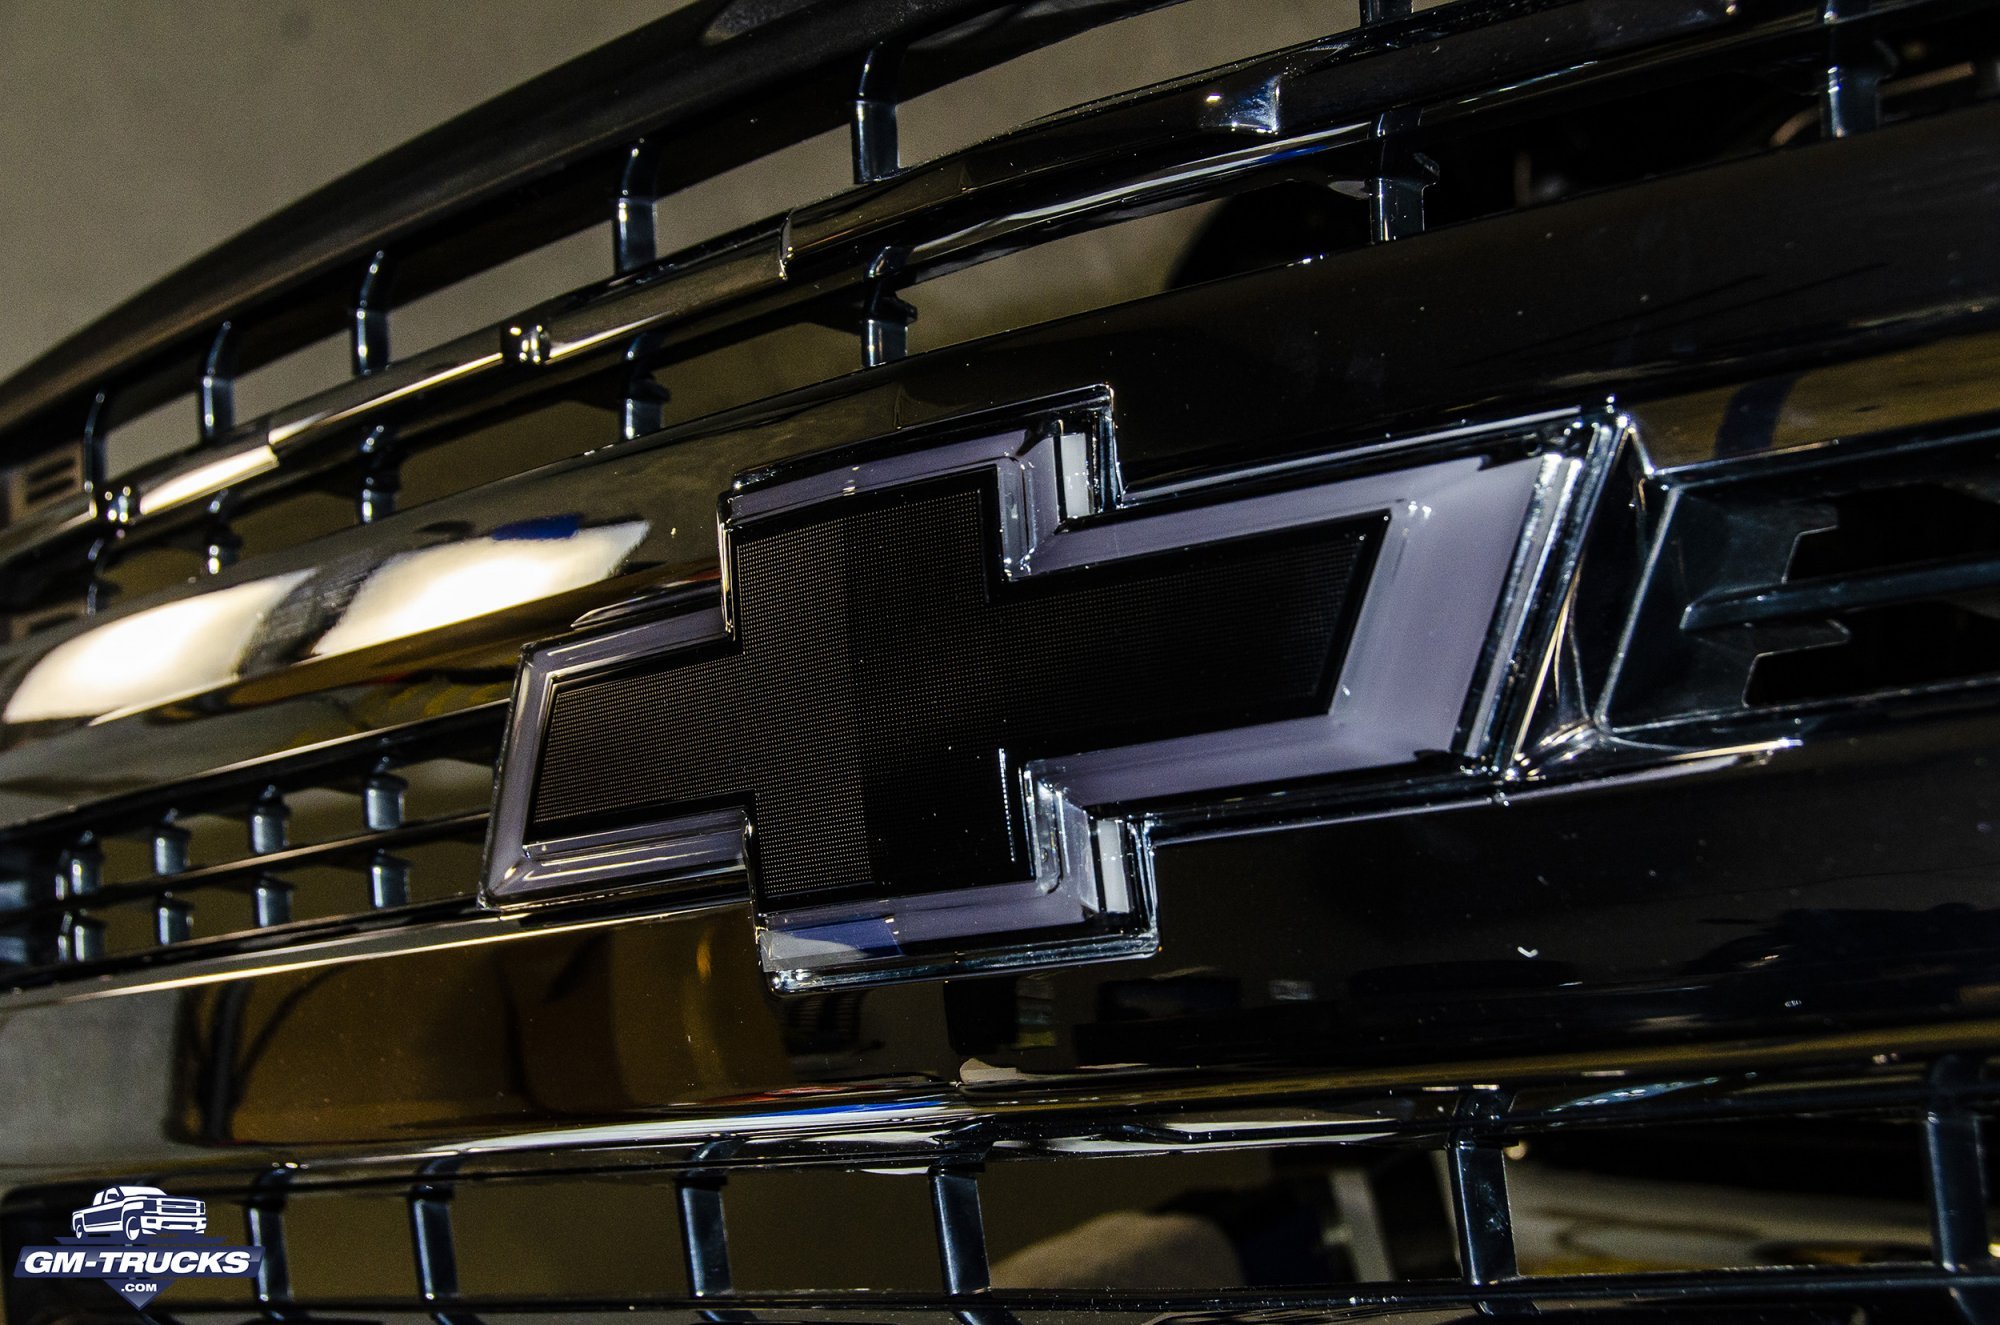
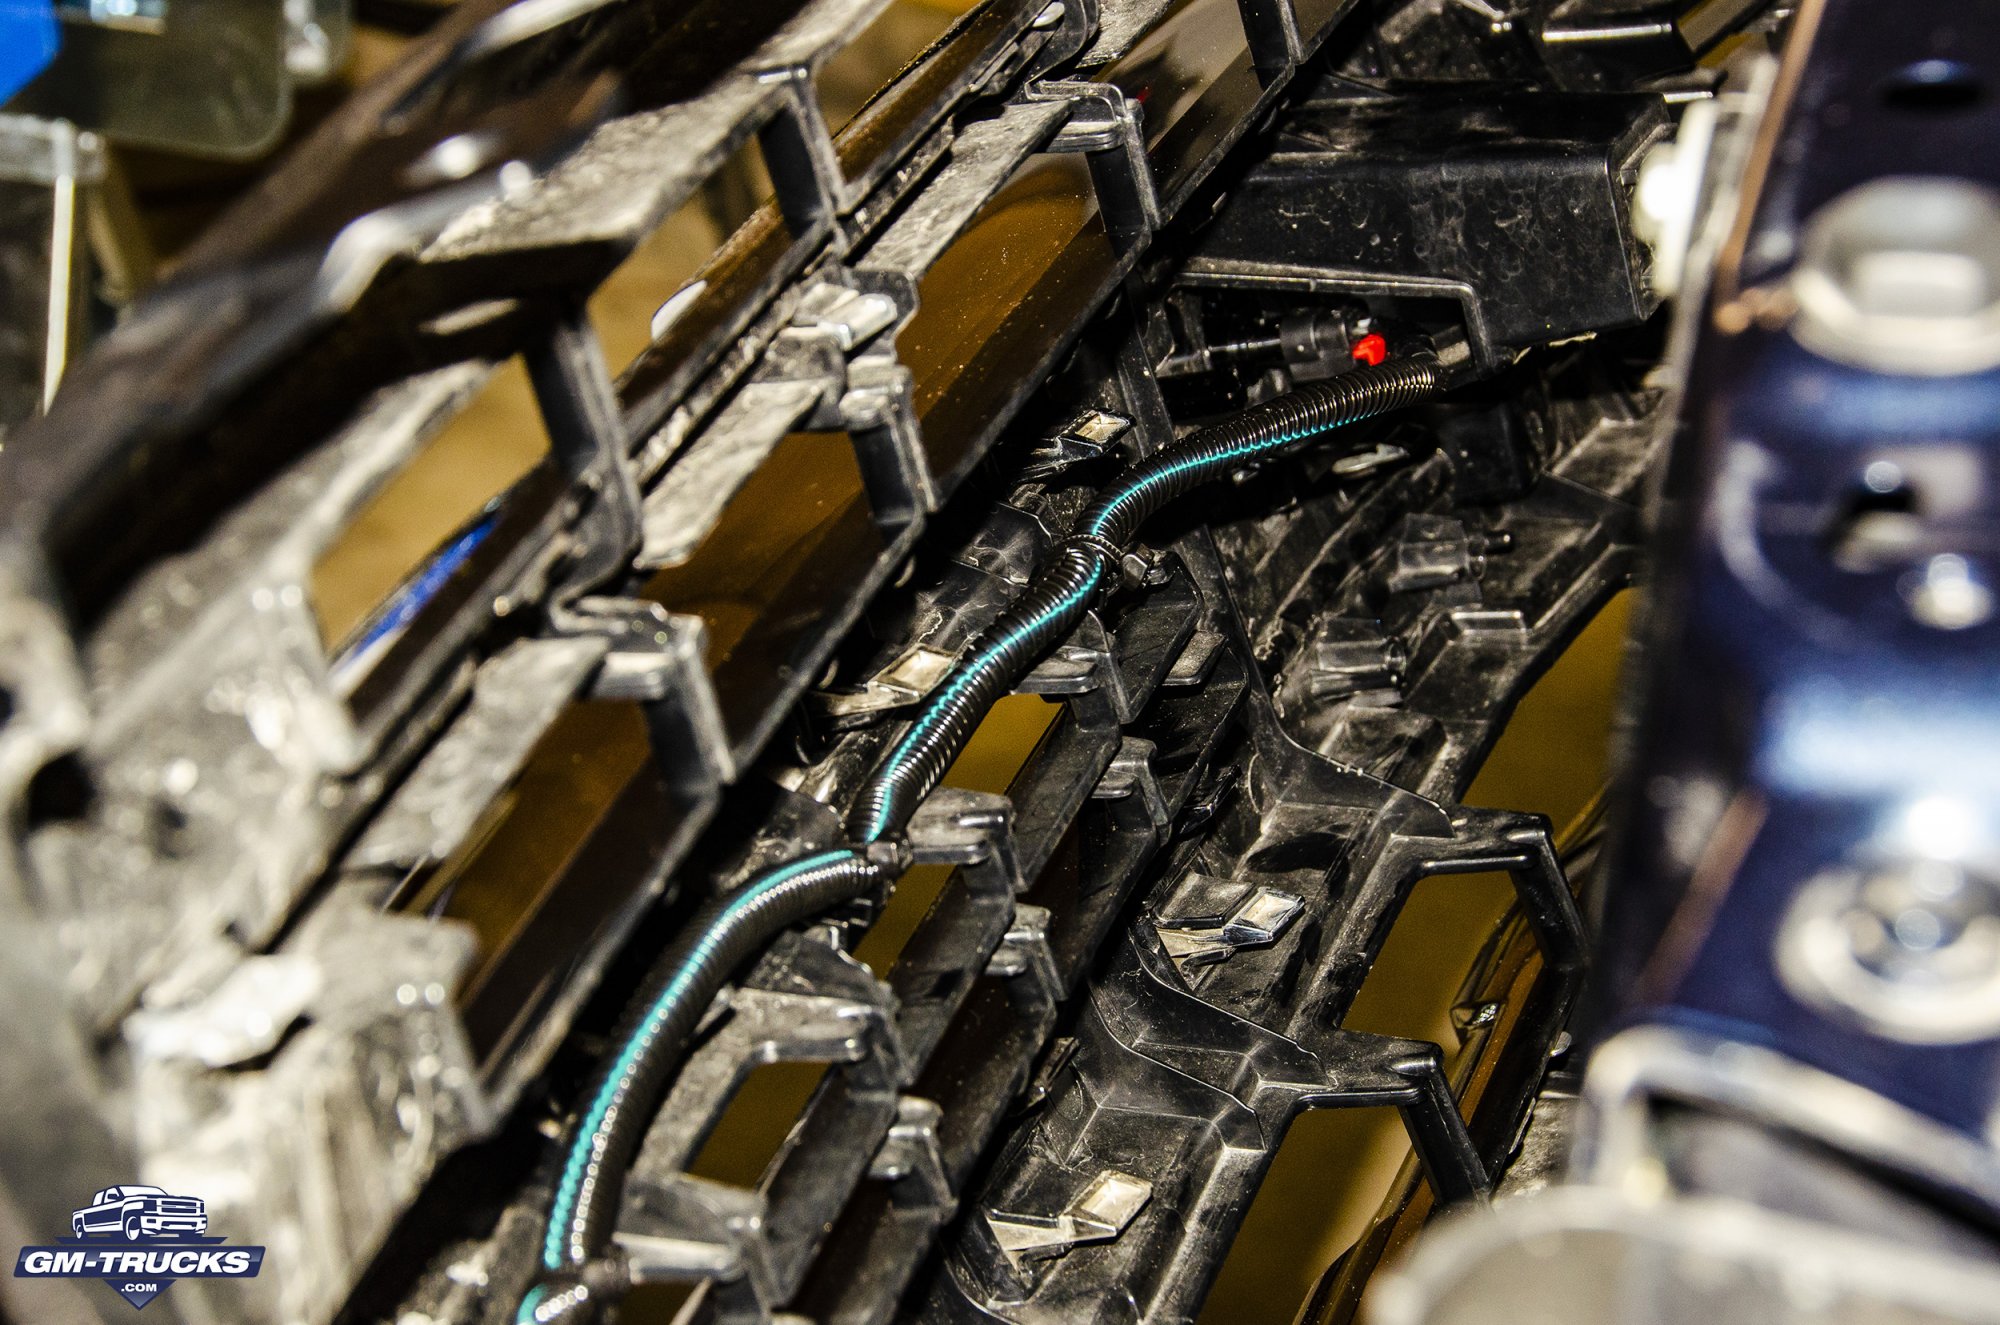
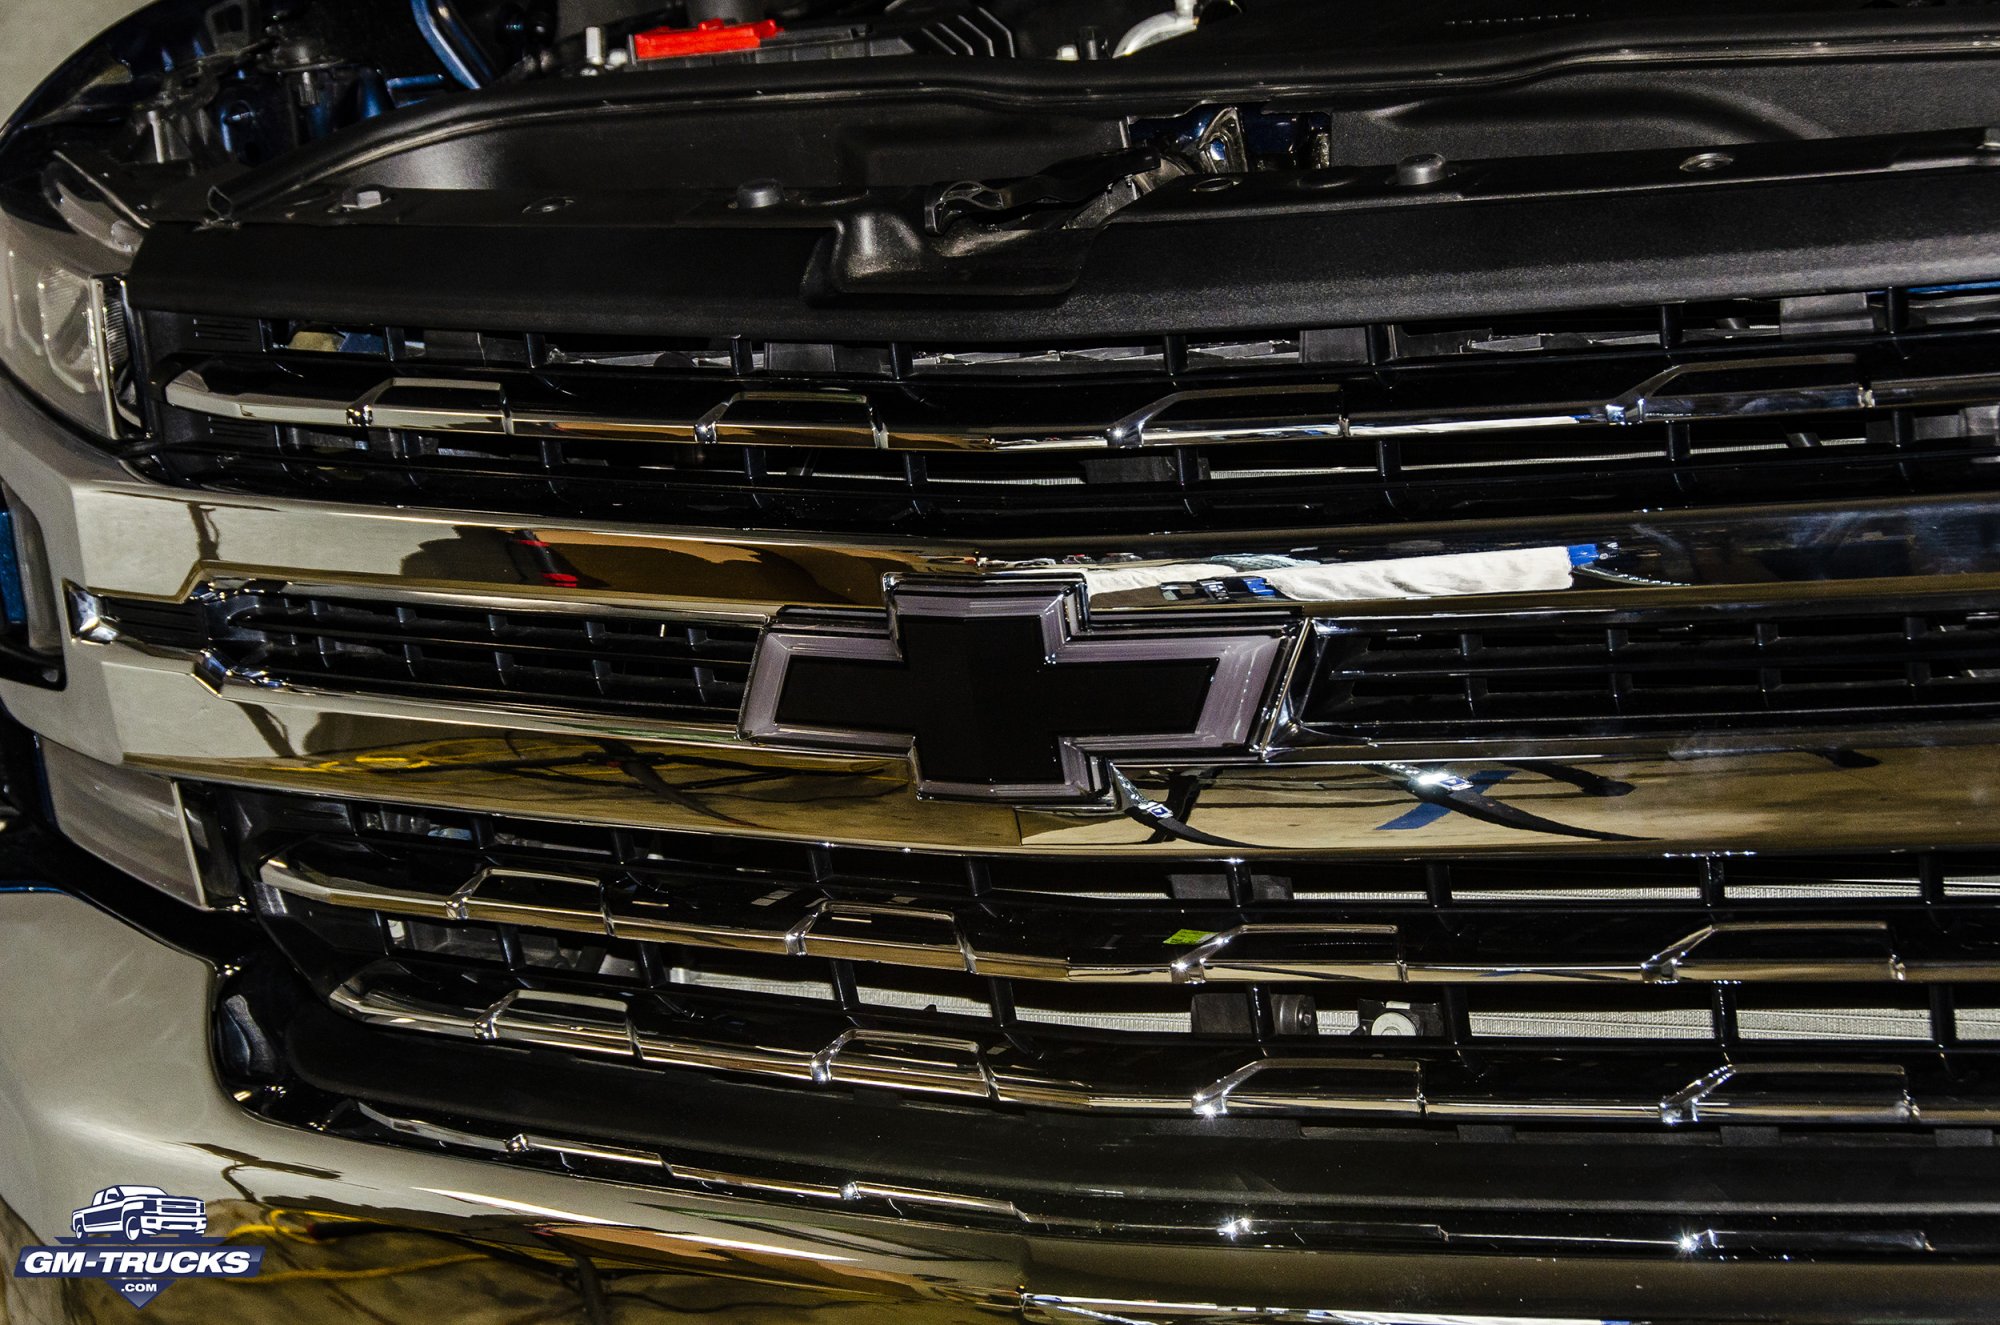
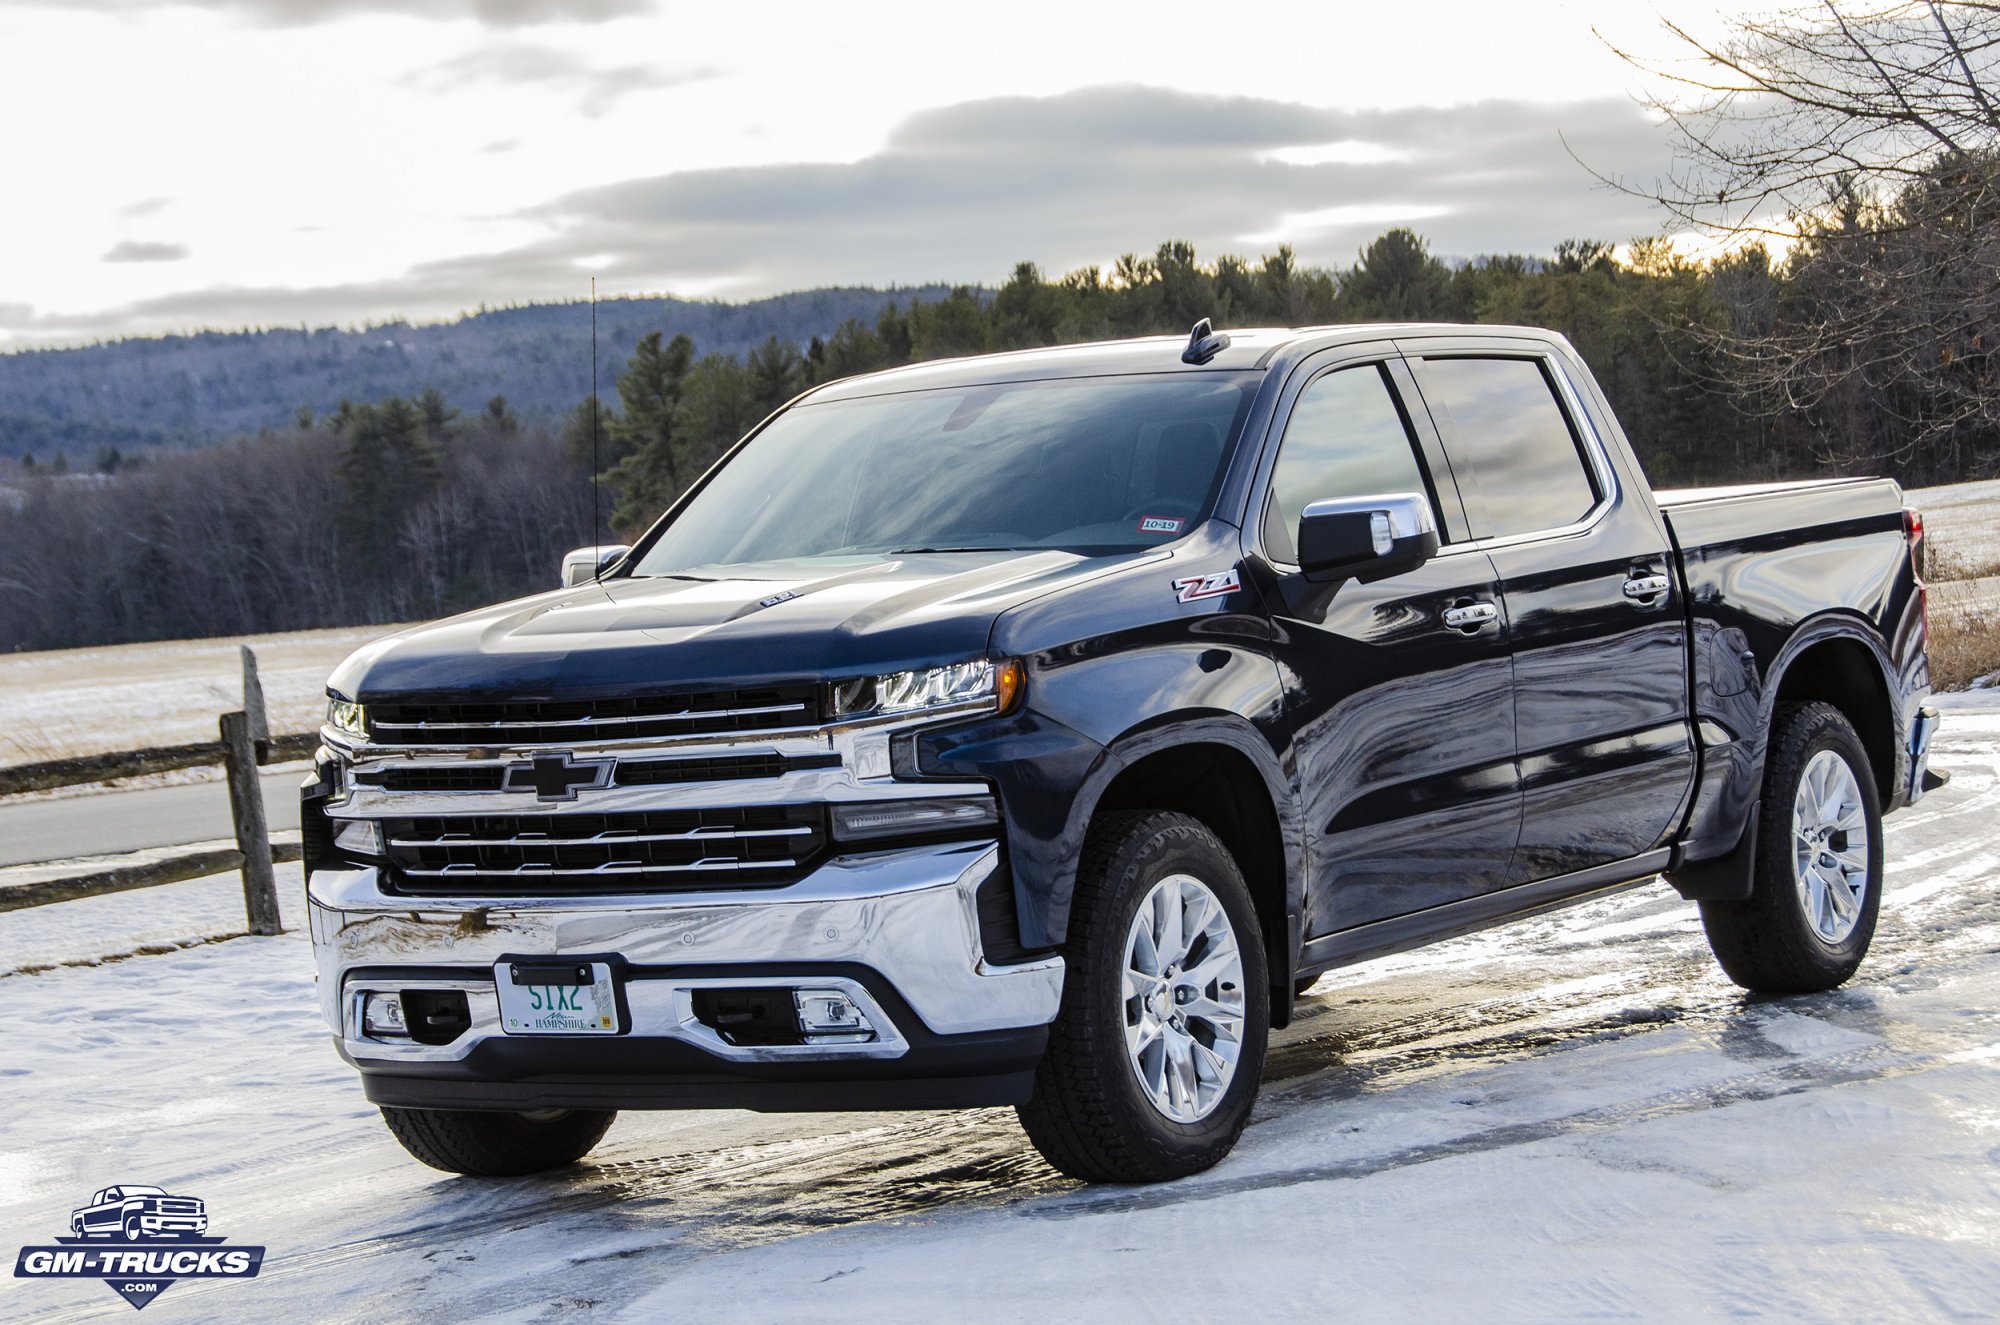
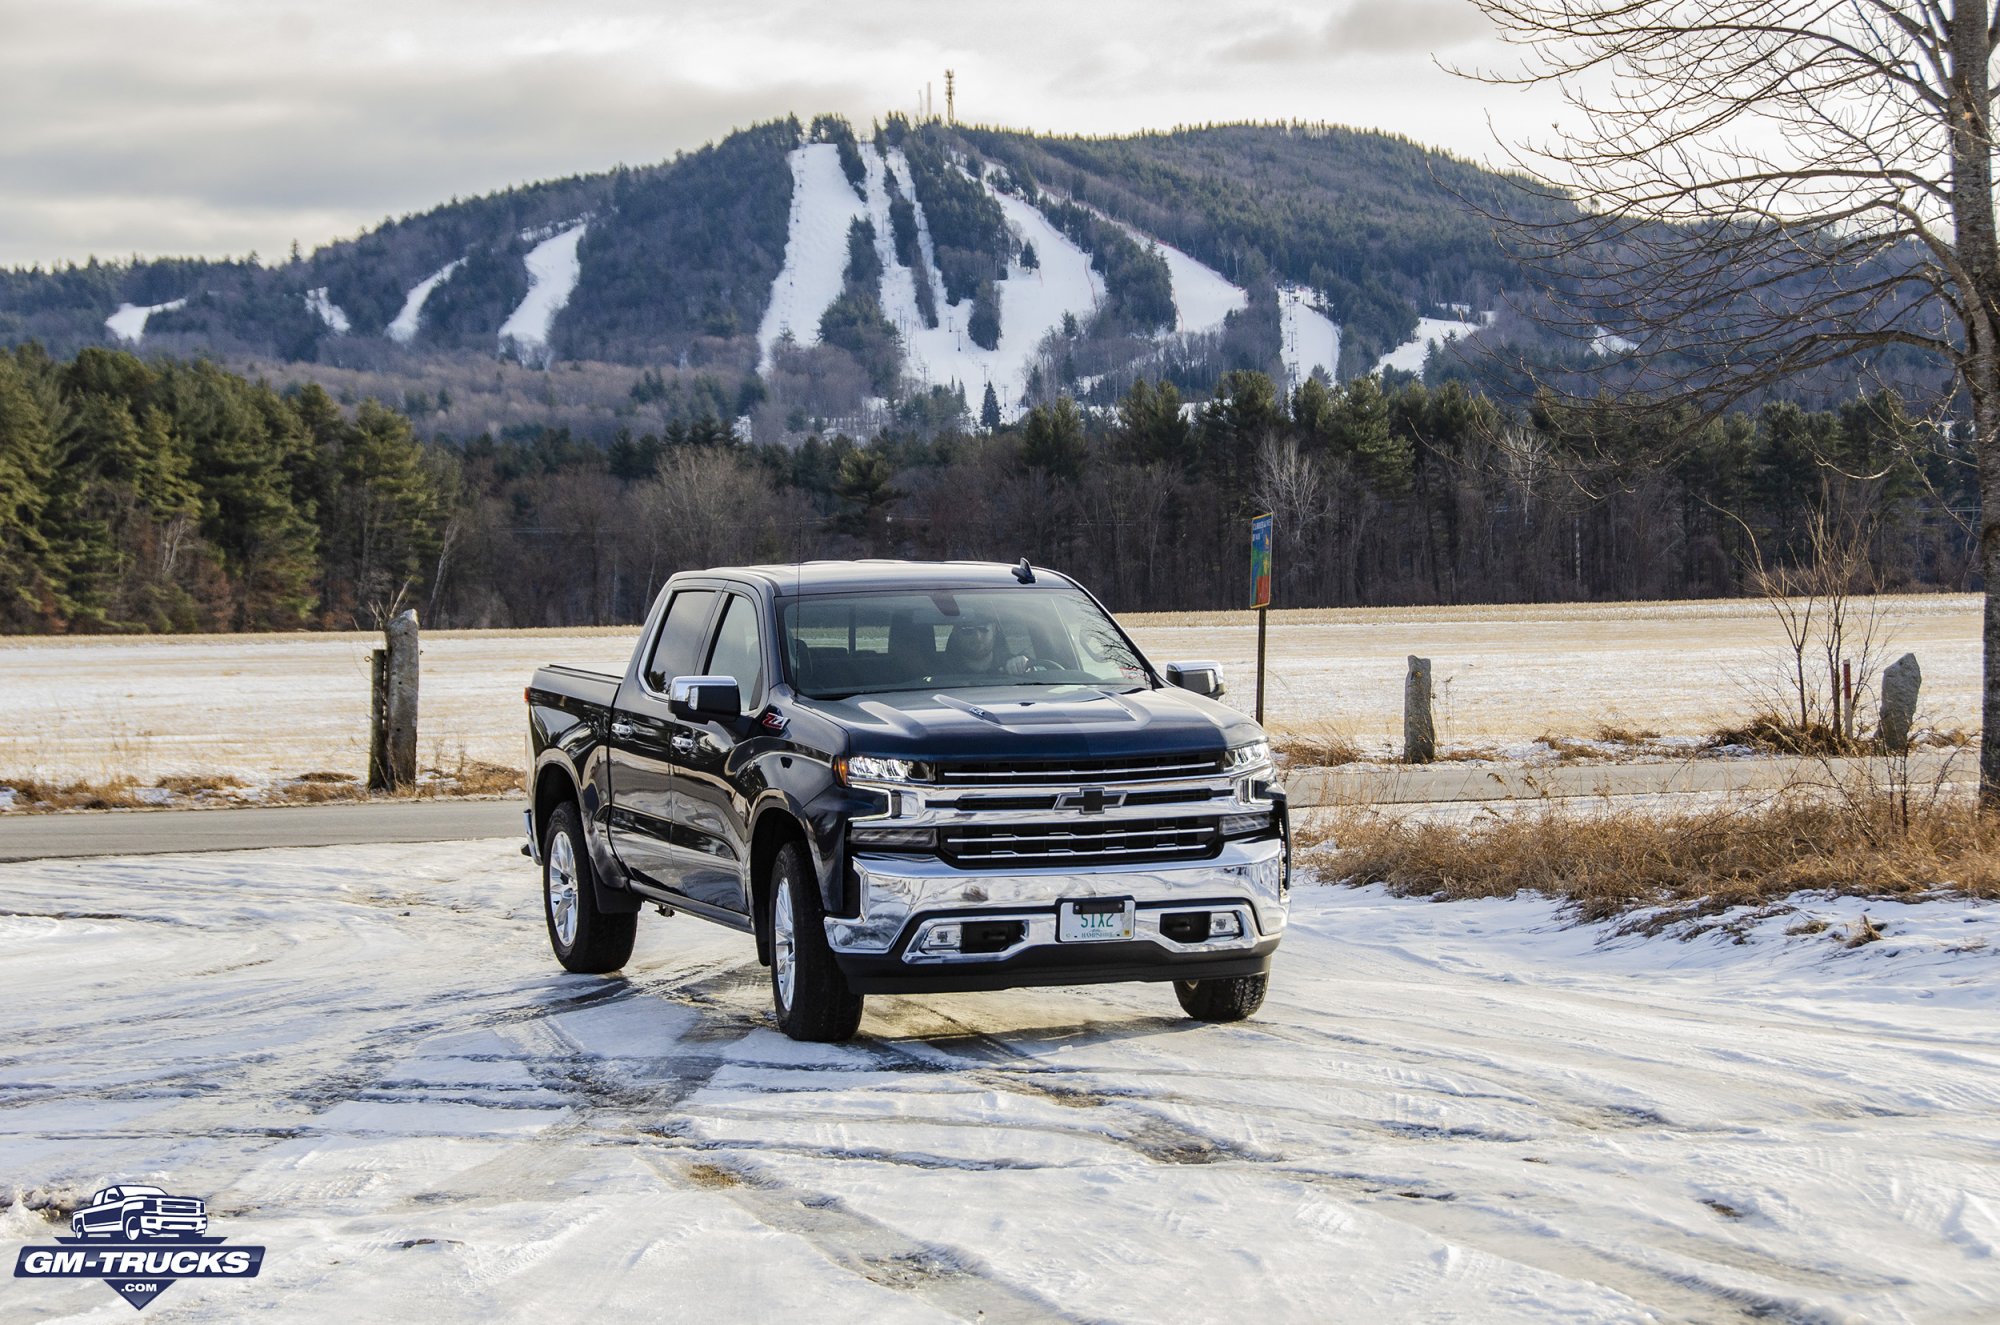
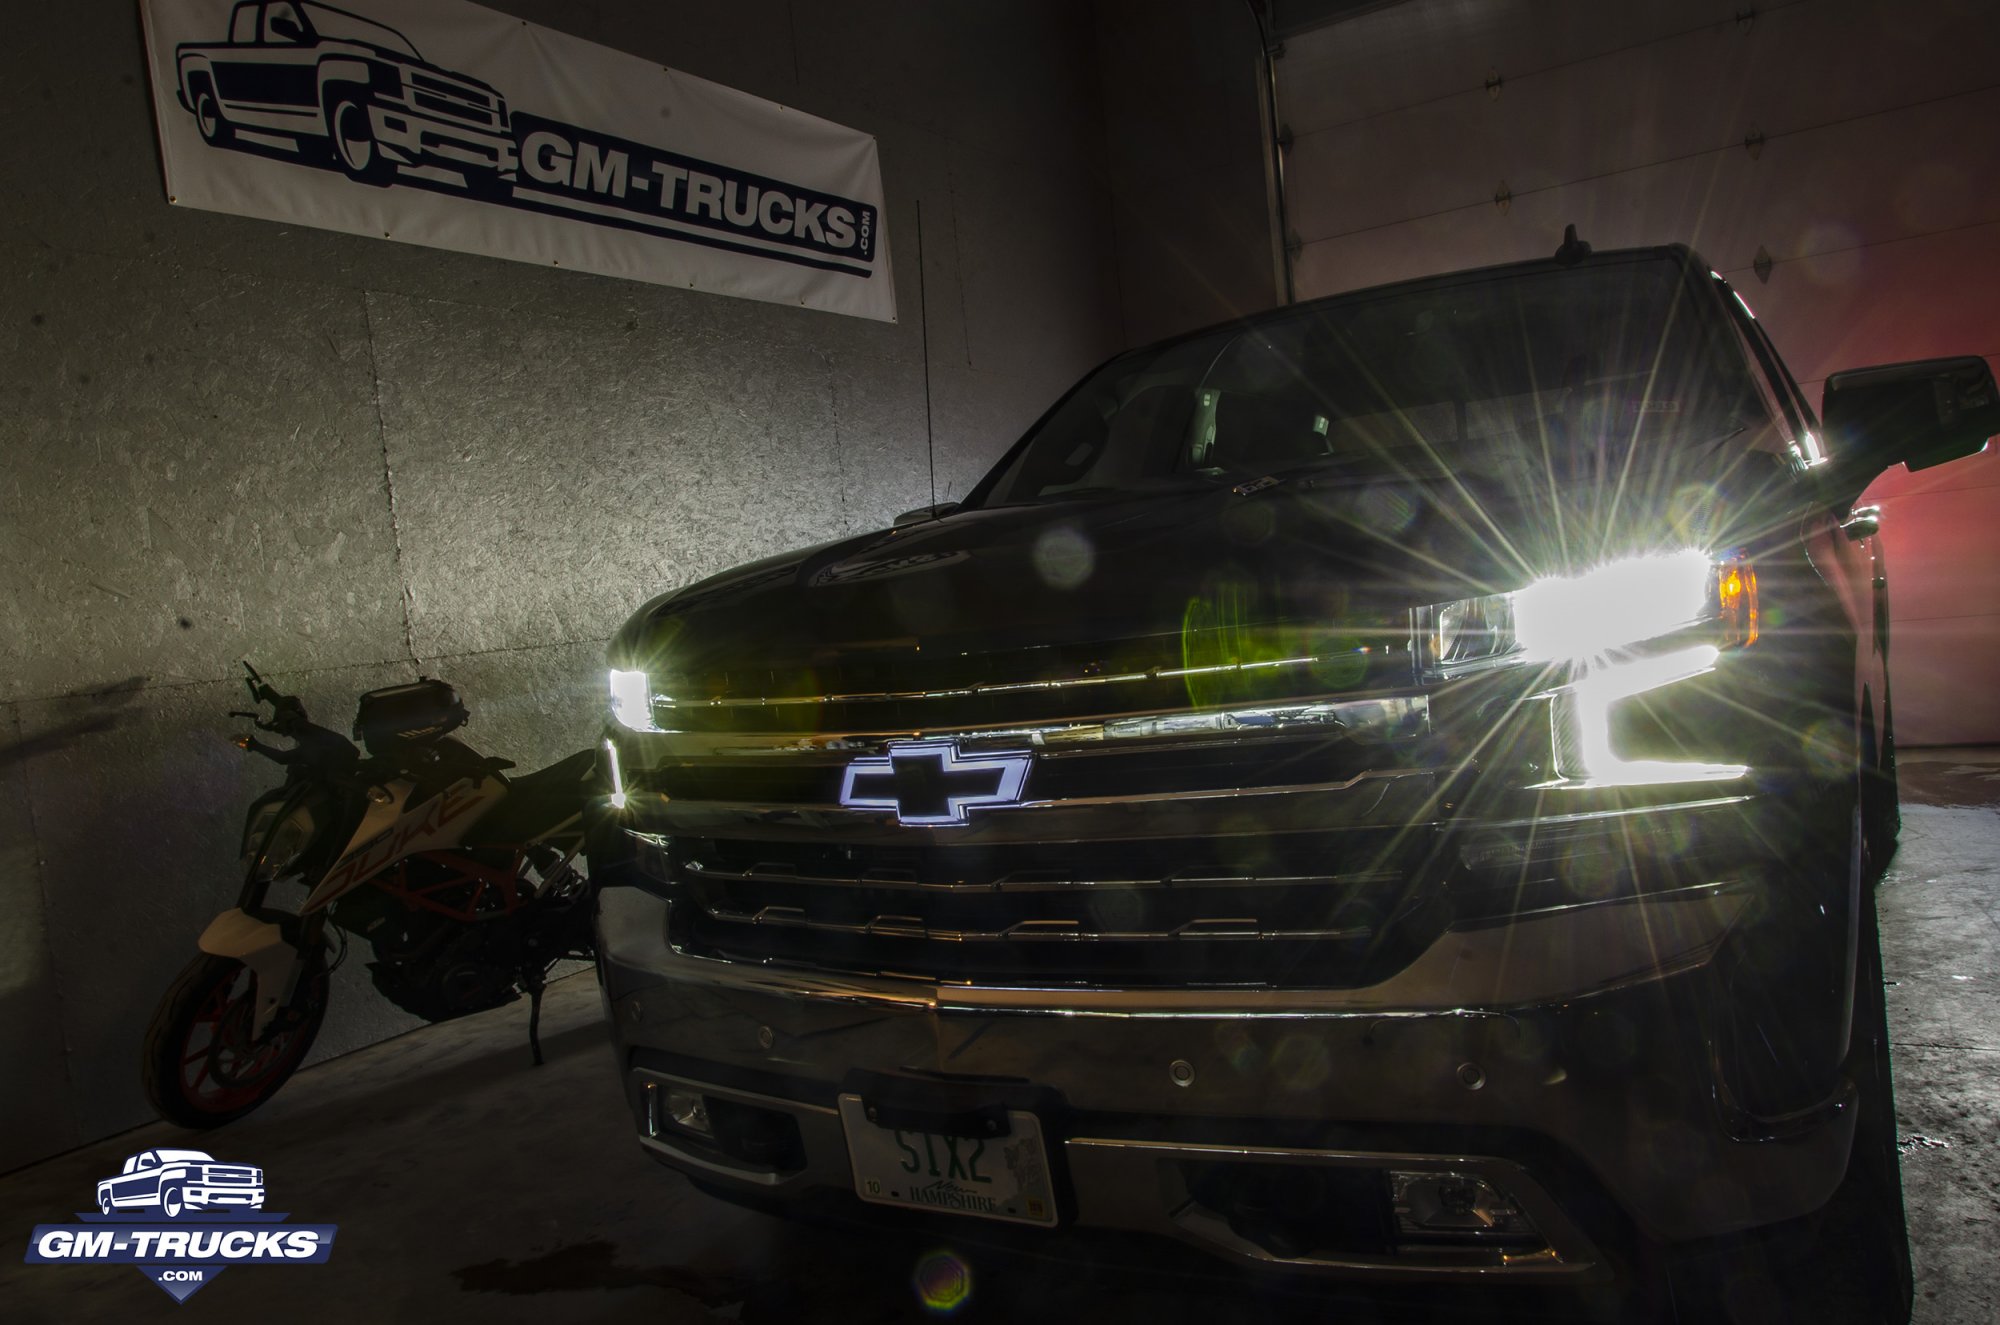
The Merva Brothers Founders, GM-Trucks.com February 27th, 2019 When you take delivery of a brand new 2019 Silverado, you'll be faced with a few choices beyond which trim level or options you want. You'll also be asked which accessories you want to be installed on your truck before it rolls off the sales floor. Most GM accessories can even be factored into the sale price and financed. So, we're setting off to try out some of these certified accessories that are available for the 2019 Chevrolet Silverado. Our goal is to let you know if they are worth the cash or if you should take a pass. We've always loved the look of a blacked out bowtie and the idea of one that lights up seemed too cool to pass up. So we headed to our local dealership and ordered the 2019+ Illuminated & Blacked out front bowtie. Here's how it went and what we think. What is it? Chevrolet Illuminated Grille Bowtie Emblem in Black Part Number: 84069488 MSRP: $275.00 Manufacturer Website: https://accessories.chevrolet.com/ Main Features Doesn't effect your factory warranty Direct replacement for the standard gold bowtie Same quality as original parts Wiring harness is plug & play and matches factory wiring Here's the bowtie and grille as it came from the factory. Installation The first step to install the illuminated bowtie (or the non-illuminated black bowtie) is to remove the front grille. The grille on our LTZ was easy to take once we understood how it was fastened to the body. The entire process runs around 30 mintues We'll be covering how to remove the grille on the 2019 Silverado in detail soon. A plastic trim removal set makes this process much easier. After a little bit of pulling and careful prying, the entire front grille section comes off. Note the grille can be removed without having to take off any body panels or reach under the vehicle. This is a huge improvement over past Silverado generations, which required more disassembly to access the grille mounting hardware. The grille is a solid unit. Switching it out with another trim level's grille would be easy at this stage. This is also a good time to clean up the grille. To remove the factory bowtie, release four tab clips on the backside of the grille. One is inside of the support post where you will also run the bowtie's wiring harness. We popped out the bowtie and cleaned behind it before installing the new one. It was filthy underneath! The included wiring harness plugs into the driver's side headlight harness. It then snakes through the radiator opening and clips to the bumper. We found it easier to run the wire through the grille and connect it to bowtie, THEN snap the bowtie to the grille afterwards. Attempting to plug the harness into the bowtie after it is mounted on the grille turns out to be extremely difficult. We tested the bowtie to make sure it lit up properly before we attached the grille back onto the truck. Our Impressions Installation of the illuminated bowtie turned out to be pretty easy provided we used the right tools. Our plastic trim kit was invaluable during the process, allowing us to pry and remove pieces without scratching them. The kit also didn't come with instructions, so make sure to ask your dealer for a set of them when you buy it. They can print it out for you. The quality of the bowtie is on par with other factory parts and matches accordingly. The wiring harness looks similar to those already running under the hood giving the final fit a factory feel. So while the look and feel of the product is excellent the actual performance of the illuminated bowtie left us wanting more. We expected an illumination effect with a similar brightness to our DRL lighting. Instead, the bowtie glows a dull white at light. During the day or bright sunlight the illumination effect disappears completely. We do appreciate that the color temperature of the bowtie matches the headlights and DRLs. The MSRP of $275 is steep for the eventual lackluster performance. Excellent build quality, plug and play performance, a factory look, and no warranty interference offset the price to an extent. If you want a quality replacement for your gold bowtie that adds a little more flare to your 2019 Silverado, the Illuminated Black Bowtie could be right for you. If you're looking for a bright centerpiece that stands out with the same intensity as your other lighting, this may not fit your bill.
- 7 replies
-
- 3
-
-
- project trail beast
- trail beast
- (and 6 more)
-
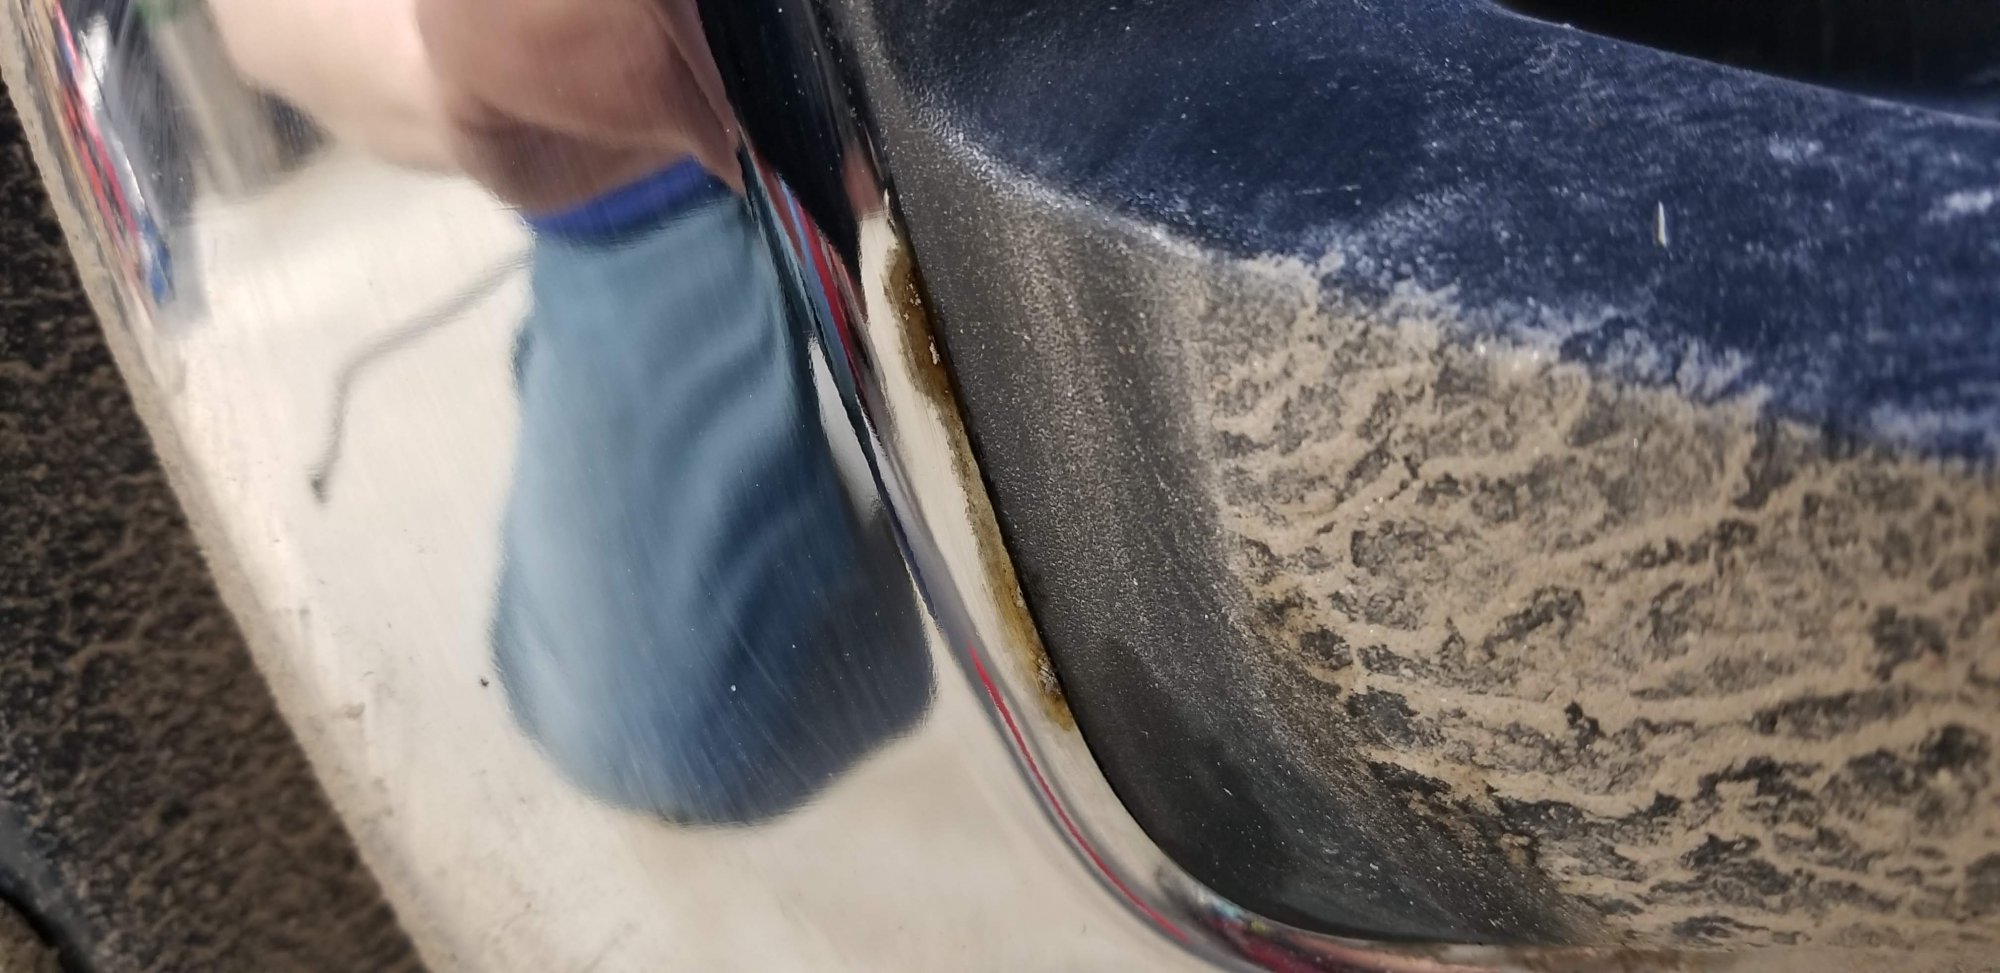
Zane Merva Executive Editor / Publisher, GM-Trucks.com April 12th, 2019 A few months ago we started to notice something on our 2019 Silverado that no owner of a brand new vehicle wants to see. Rust. Specifically on our rear bumper, just around the plastic step. It wasn't huge and didn't spread very far from the edge... but we couldn't stop noticing it. There was no excuse for rust on a 8 month old vehicle with less than 10,000 miles. The photo above shows the minimal but noticeable rust patch. It was even happening on both sides and in the same place. The issue seemed odd. Unfortunately, we've just been too busy to bring it by to our local dealership for them to look at. Lucky for us, our procrastination has paid off, because in the time between us first noticing the problem and getting off our lazy asses to drive to our dealer, GM has released a TSB about this very issue. It appears that on most of the early trucks, production of the bumper was completed incorrectly. The steel assemblies should be bent into shape then chrome plated. But that didn't happen in a small part of the early bumpers. The supplier bent the area around the side step after the bumper was chromed. The new folds in the steel damaged the chrome, cracking it and making the truck susceptible to rusting. What's the fix? If your bumper is rusting already, Chevy and GMC will replace it. If it has not yet started to rust, they will apply an automotive grade wax/sealant to prevent rust in the future. If you're unsure if your 2019 has this issue we suggest doing the following: 1. Give your truck a bath for heavens sake! 2. Clean the rear bumper step area with a hose or pressure washer. Front and back! We find lots of dirt collects behind our step in the bumper assembly. 3. Inspect around the foot step area and behind the foot step area. We found rust in both areas! 4. If in doubt, wait for it to rust and kindly ask for a new rear bumper. Our dealership, Banks Chevrolet in Concord, NH has been great getting our rust issue fixed. Our service adviser Justin has kept us in the loop during the repair and gave us a loaner Silverado LT while they have our truck. He even made sure any other outstanding service updates are also applied to our LTZ while it was in the shop. As it turned out, there were six open issues that needed addressed. Here's the official Service Update you can print out and bring to your dealer when you take your Silverado or Sierra in for service.
- 6 replies
-
- 1
-

-
- 2019 silverado
- 2019 sierra
- (and 9 more)
-
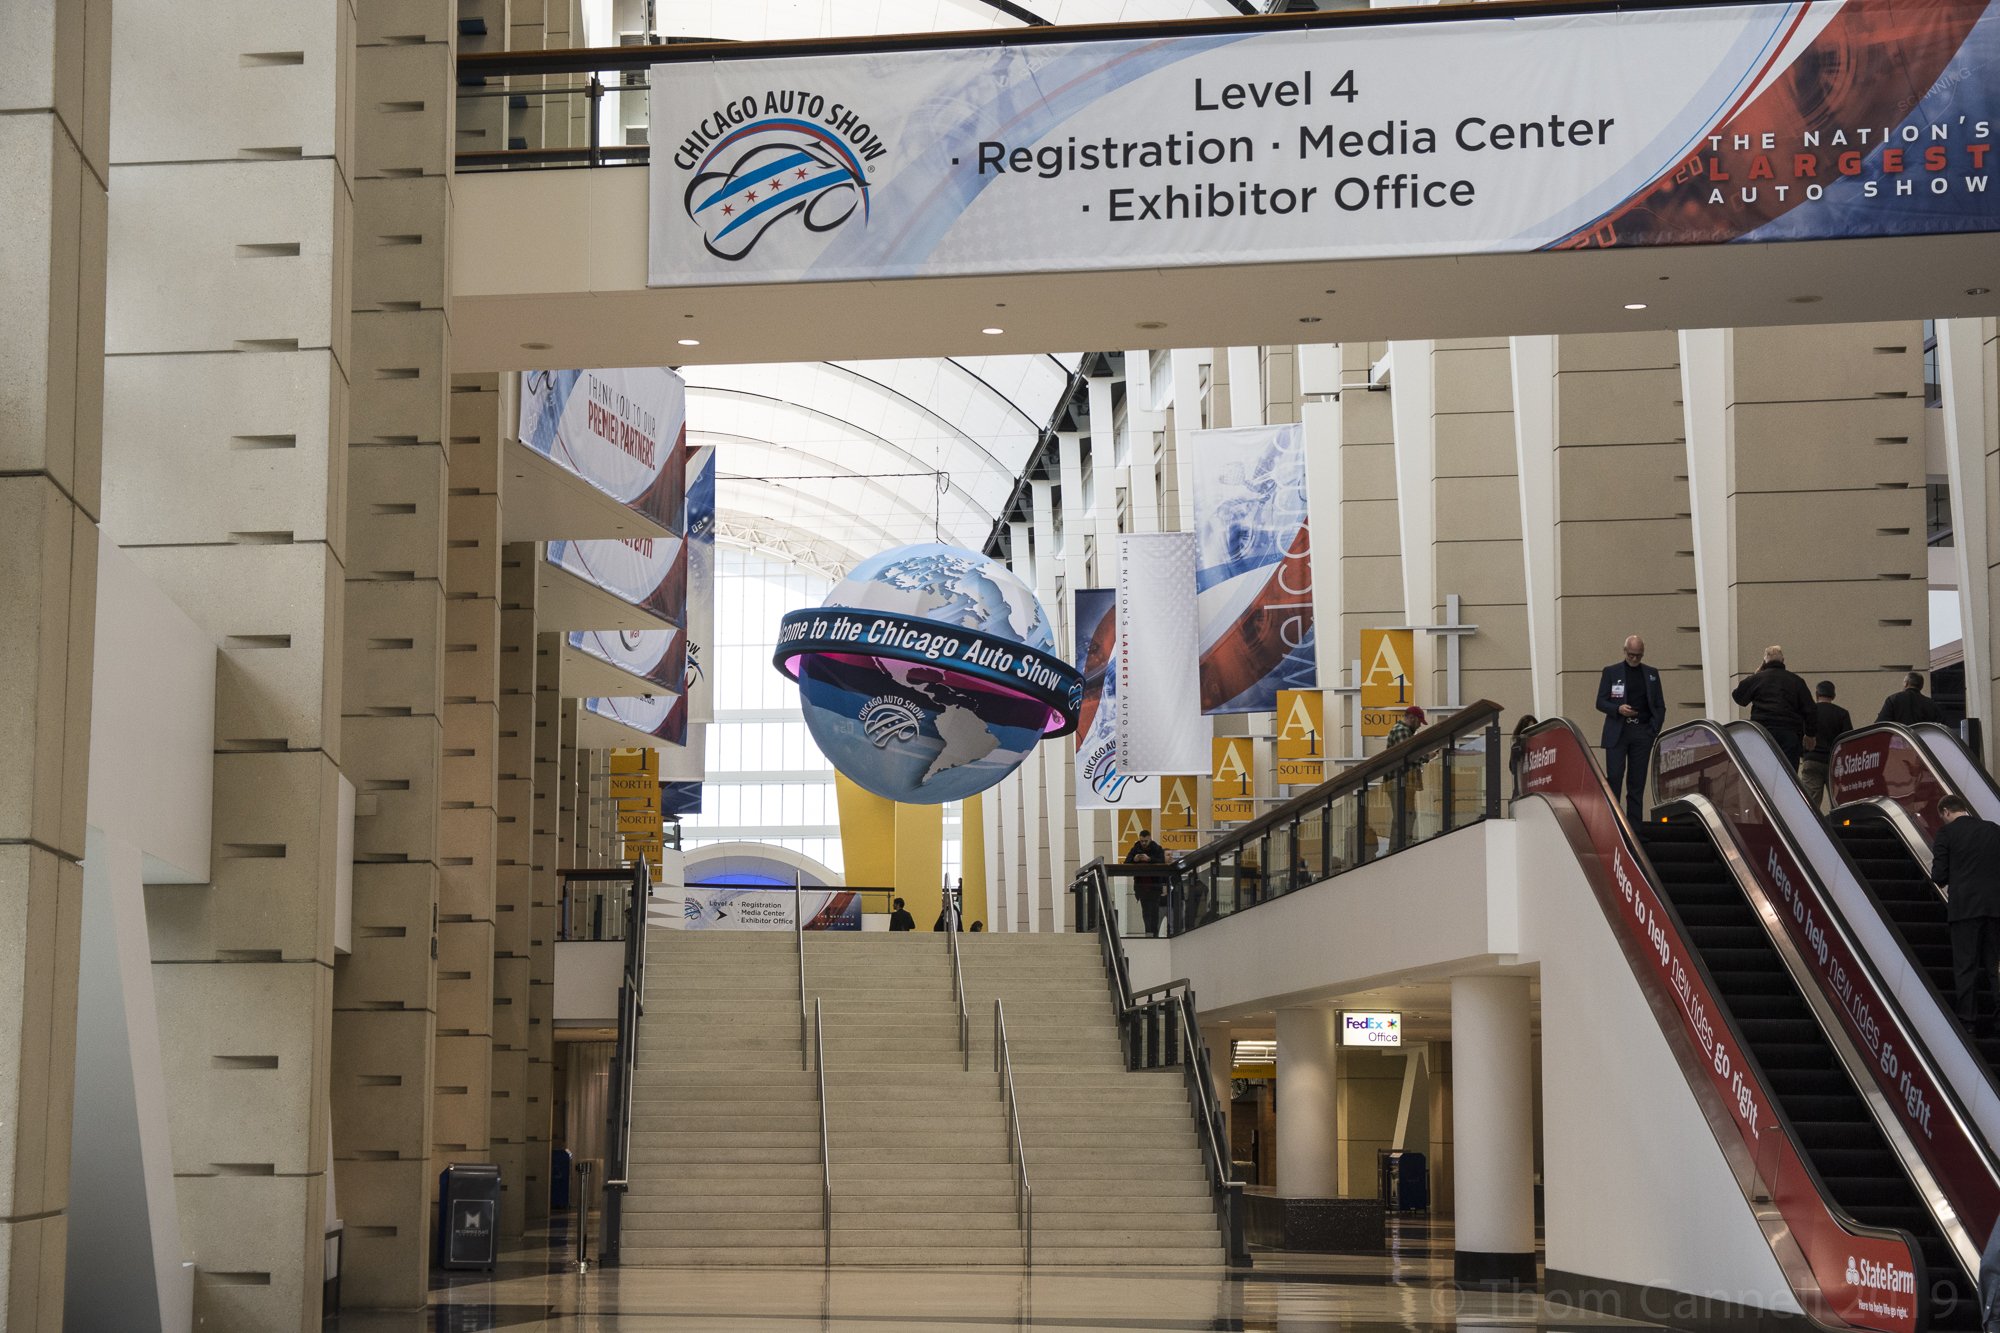
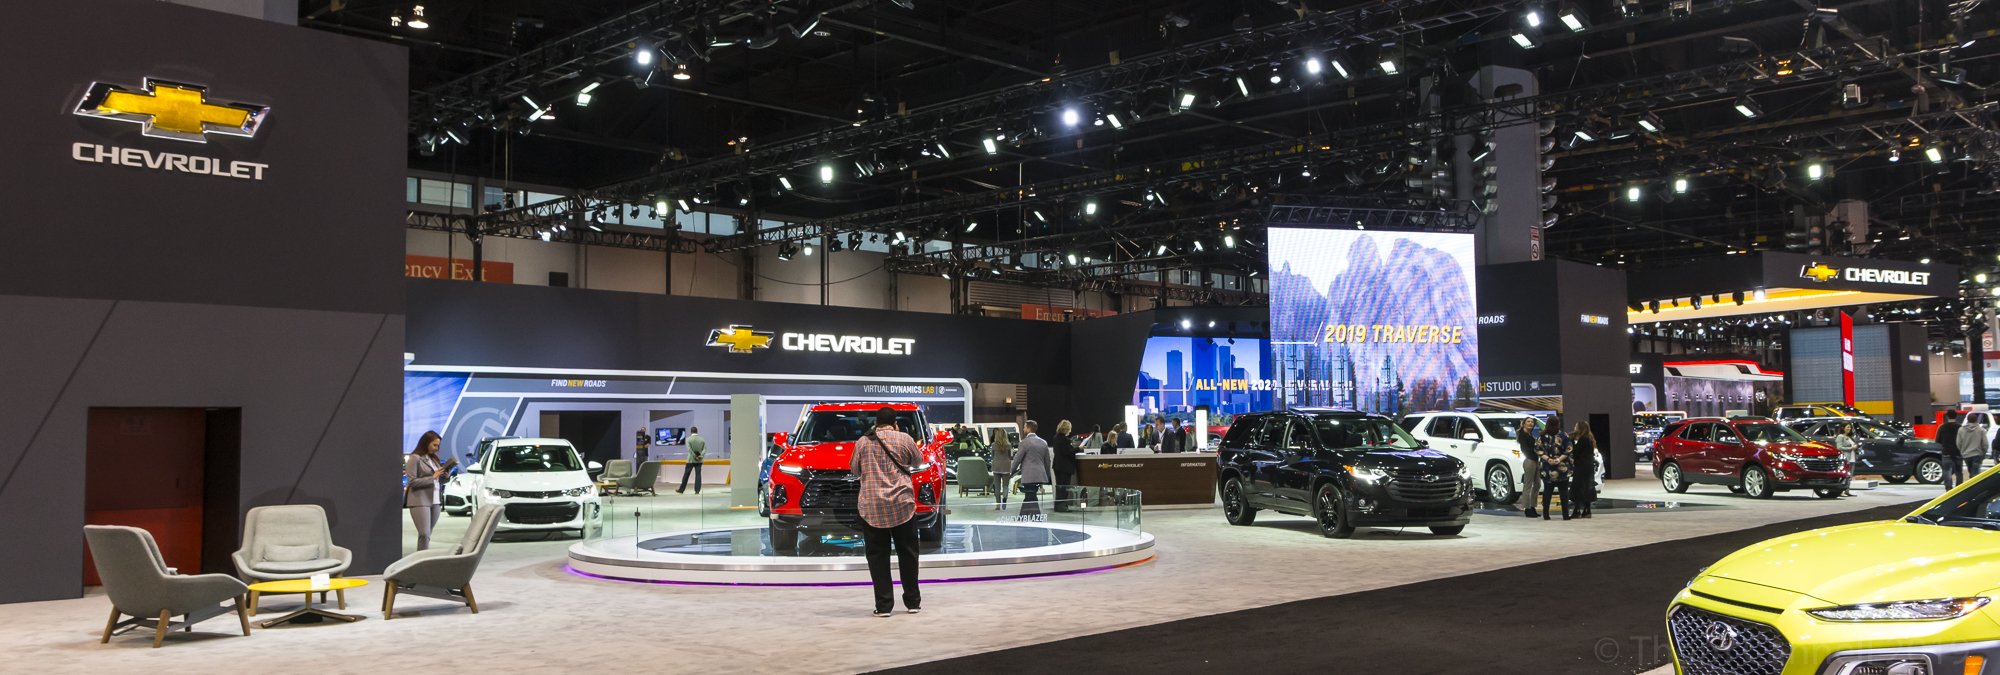
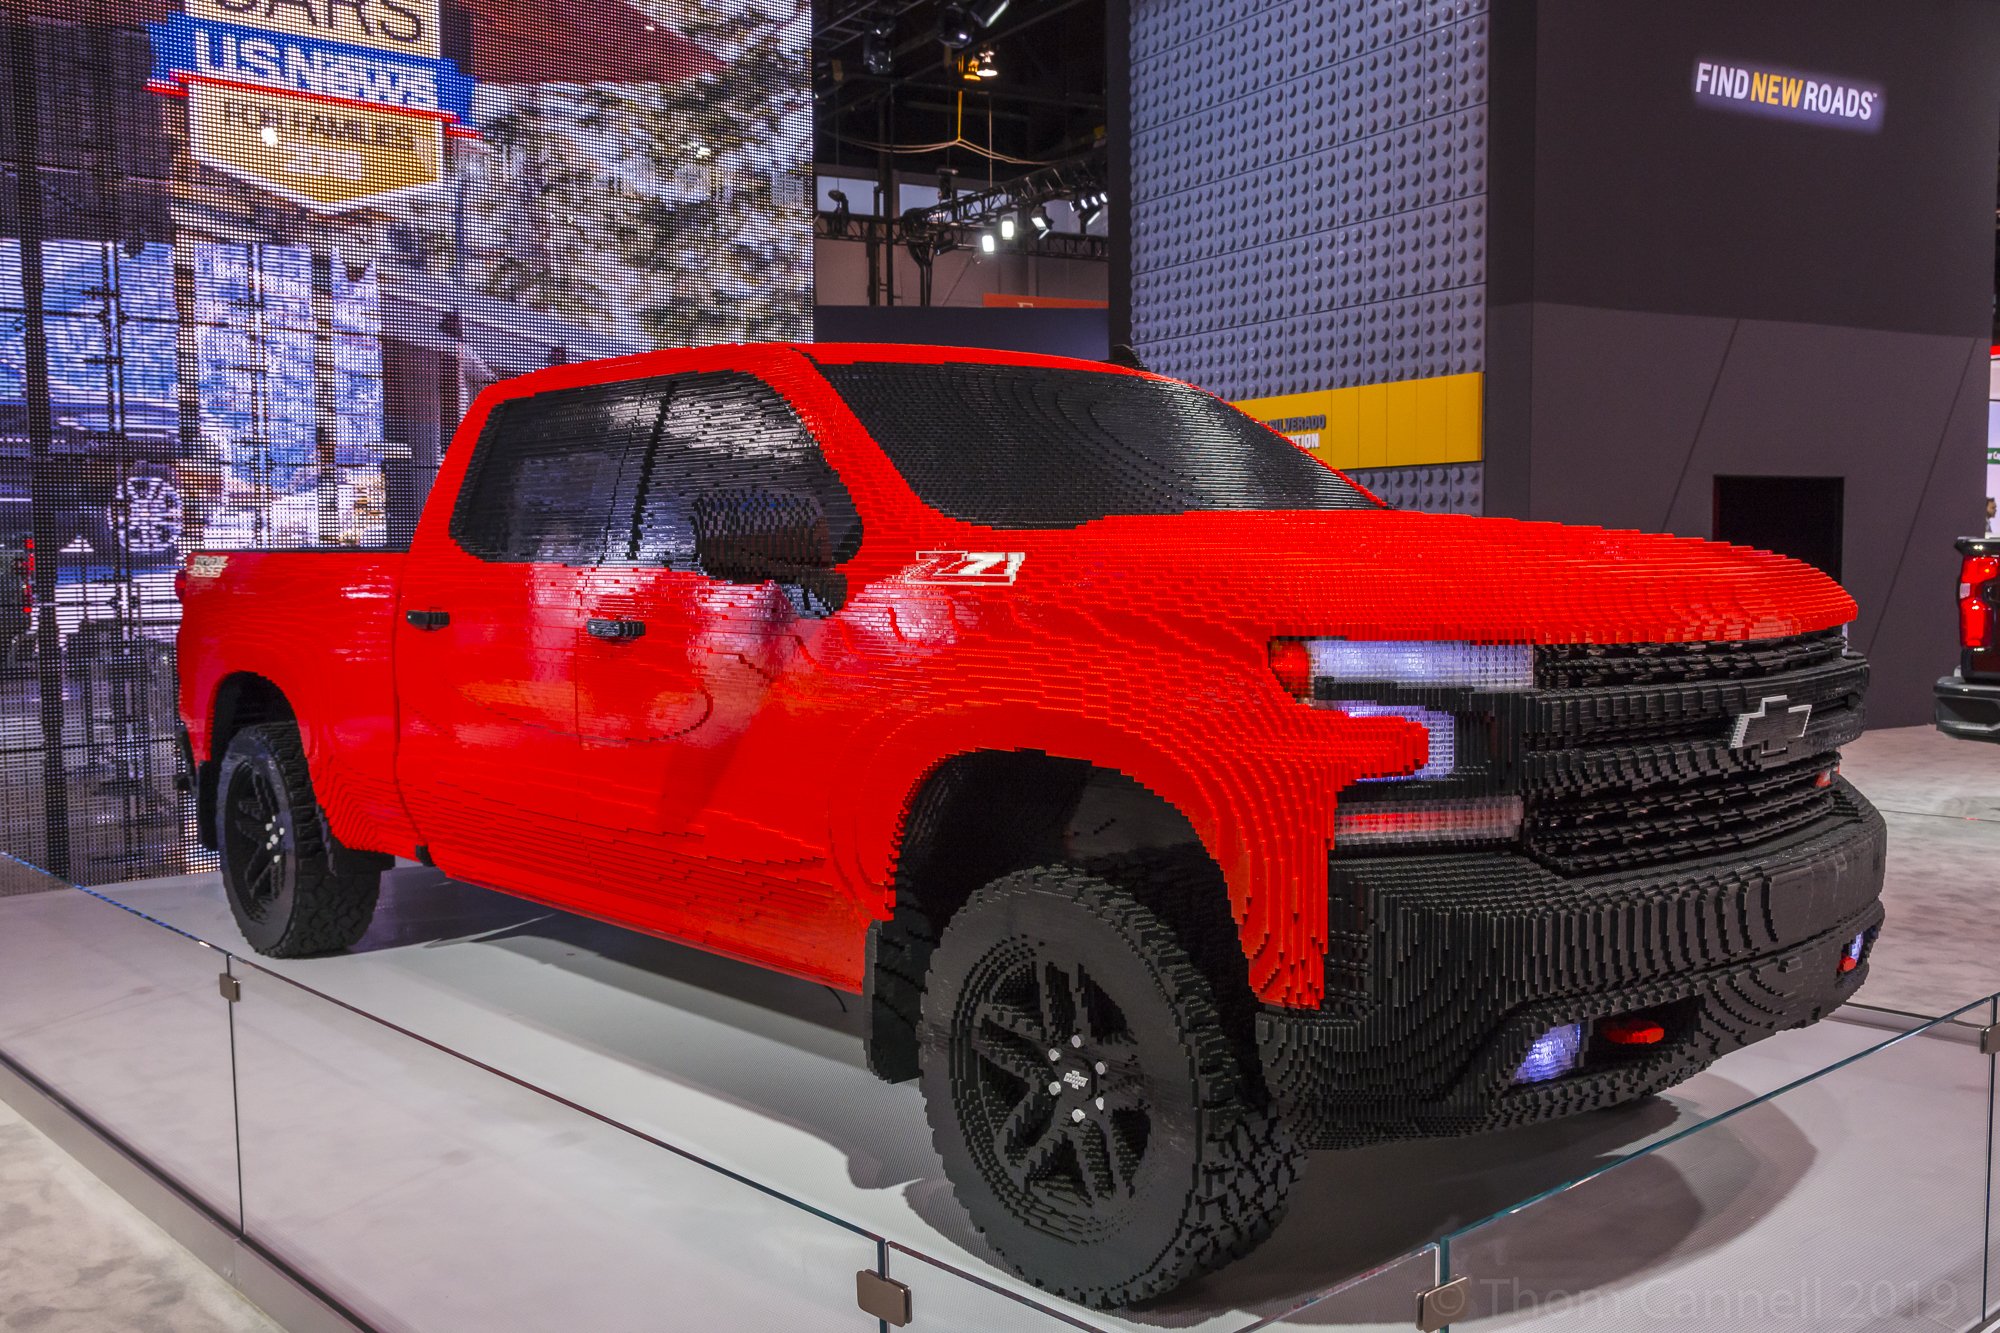
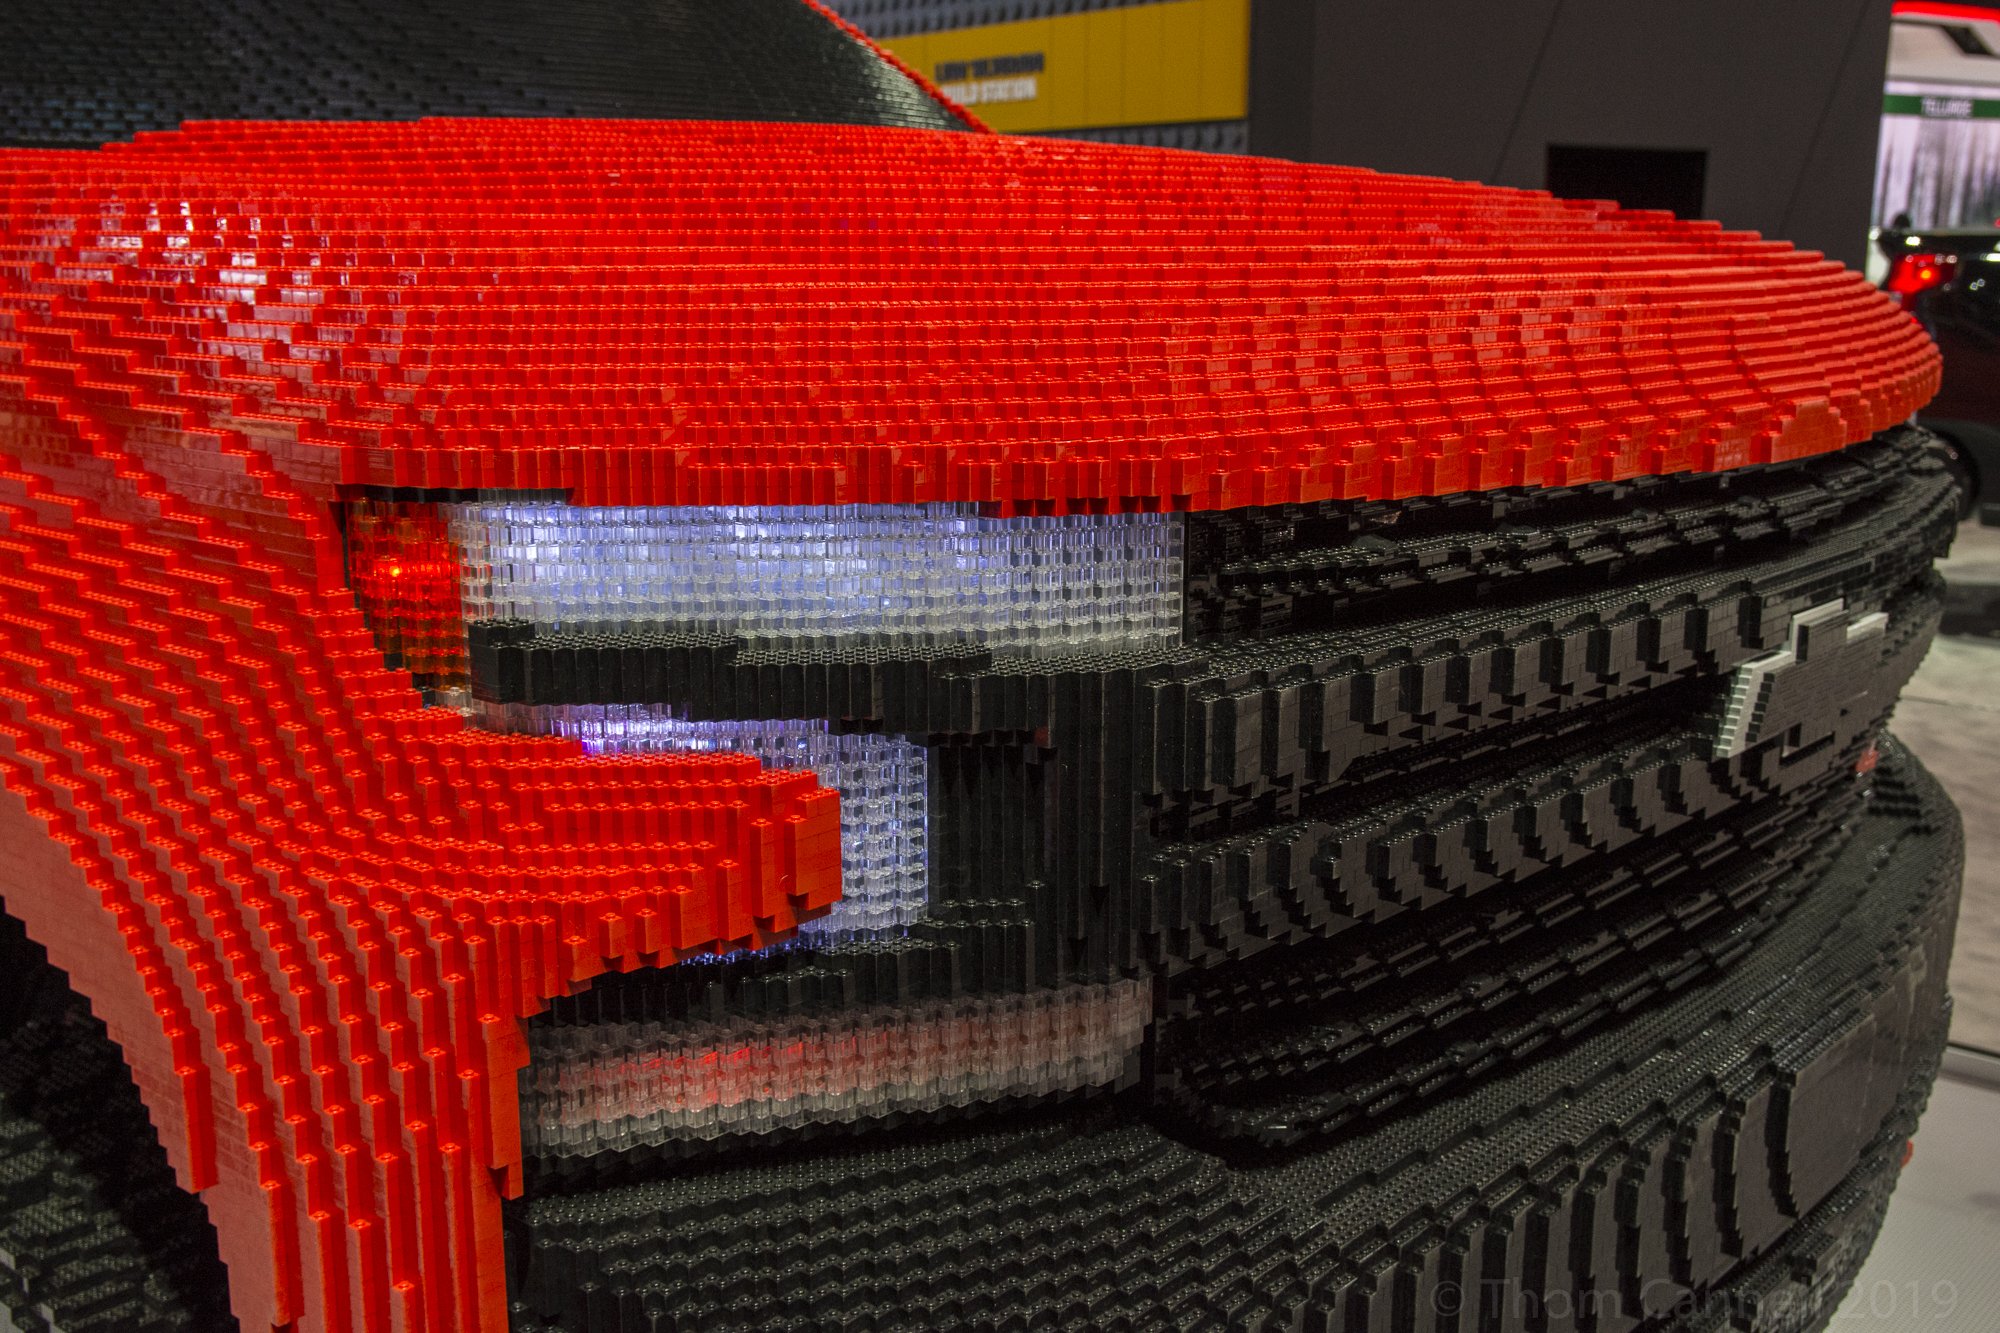
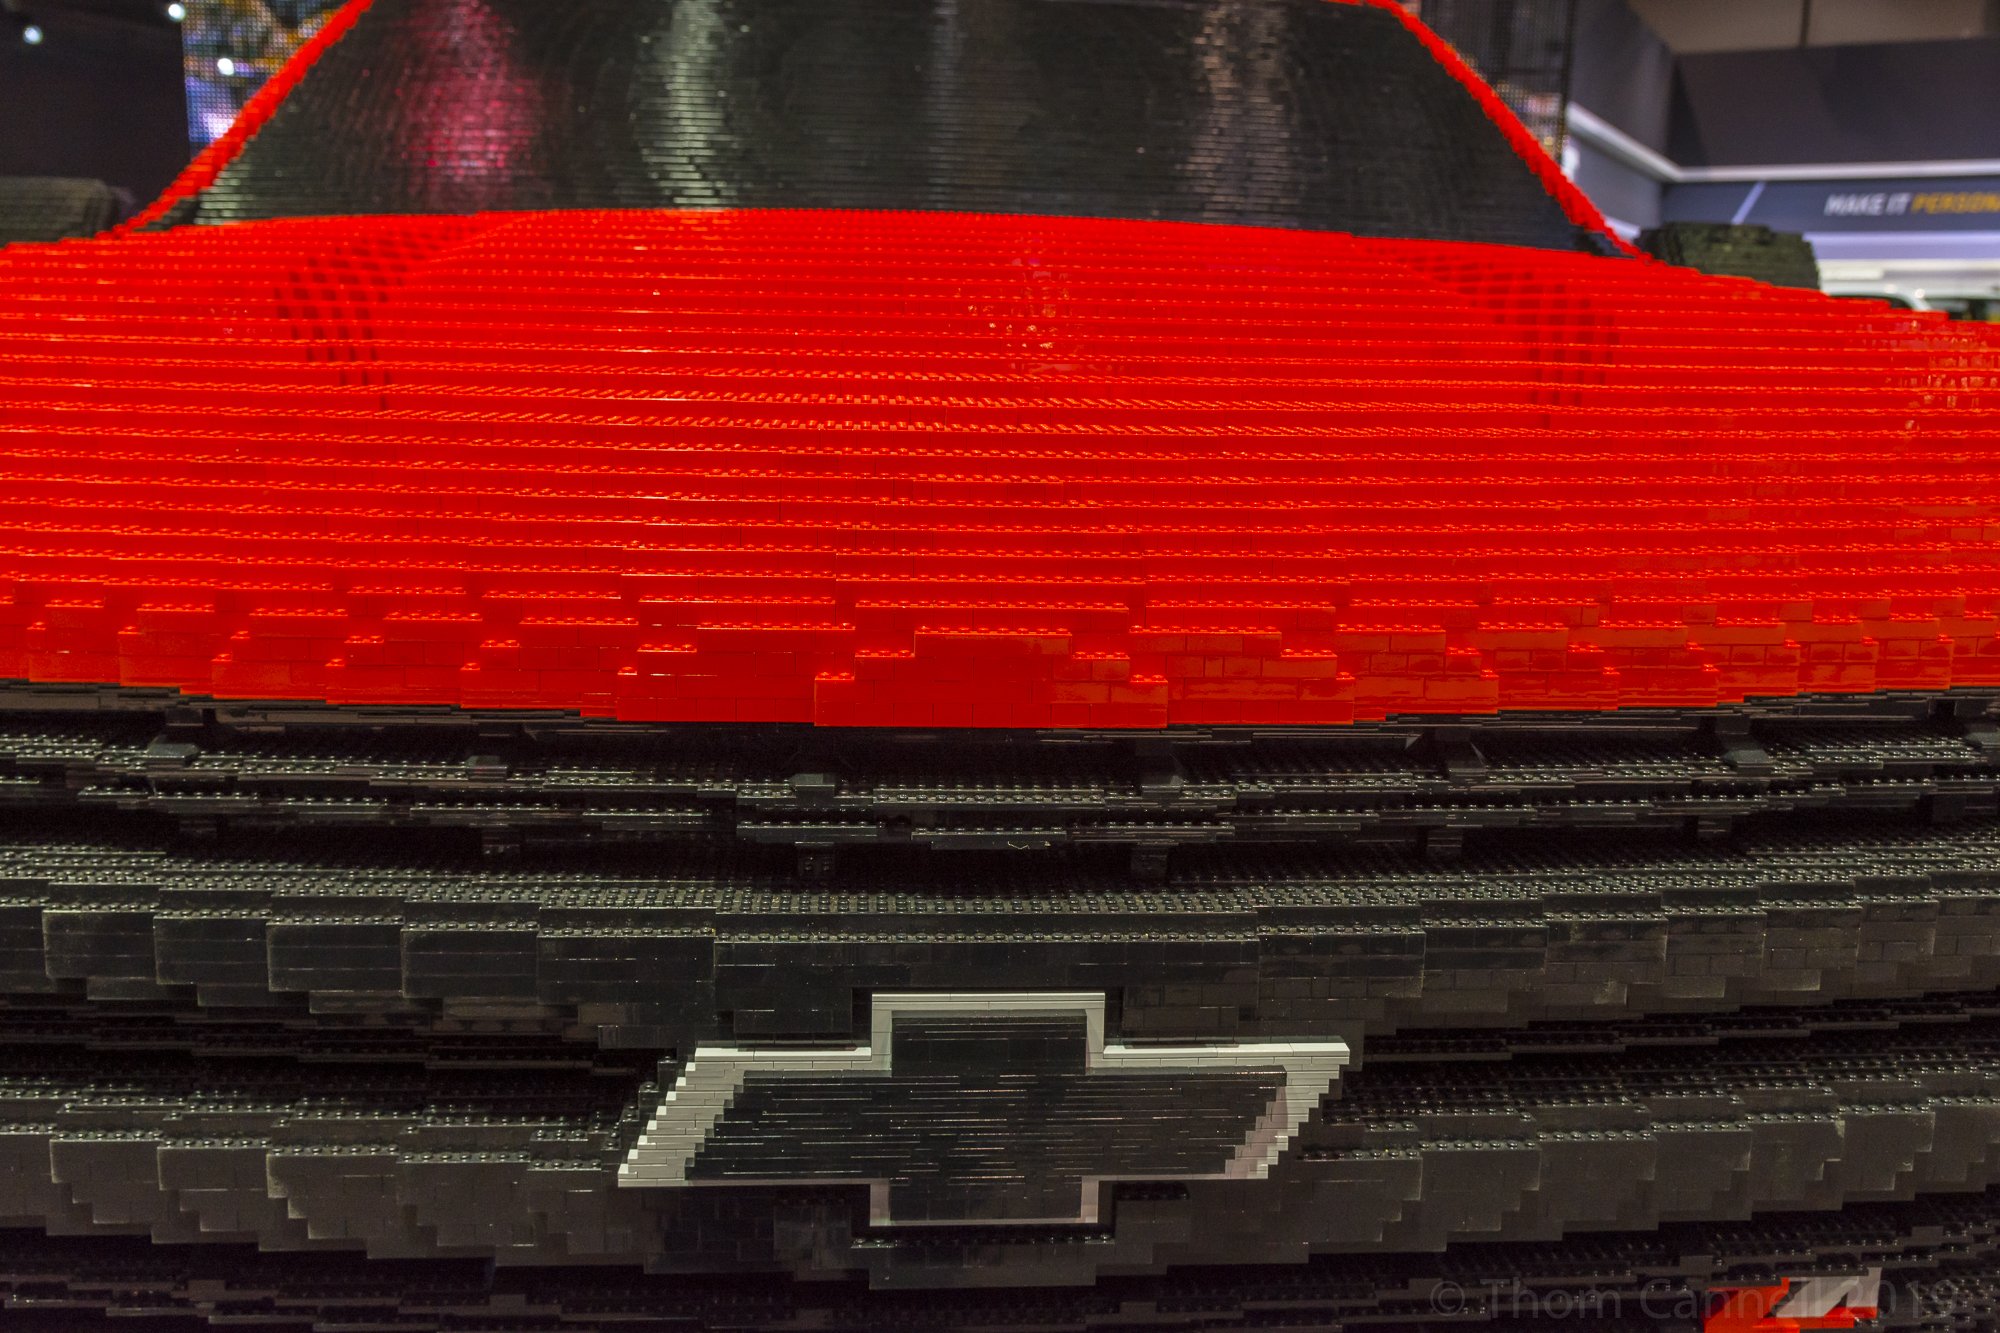
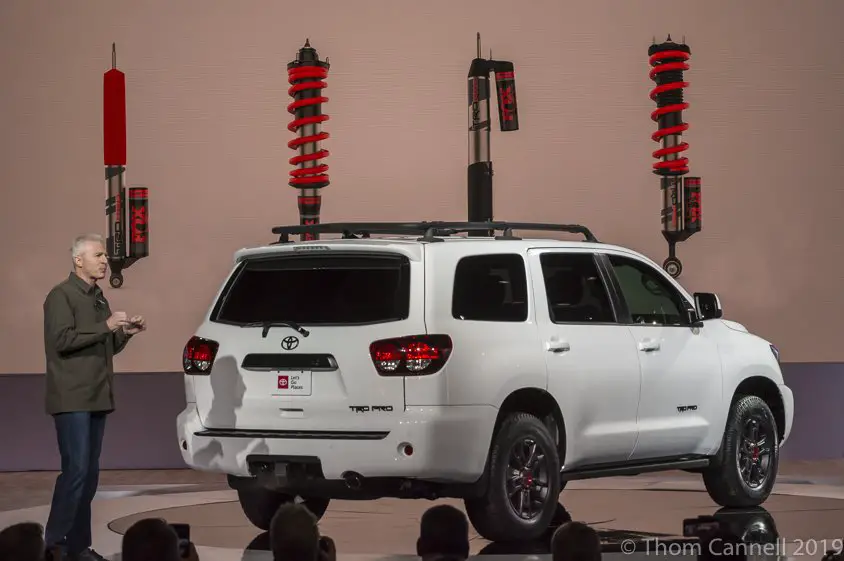
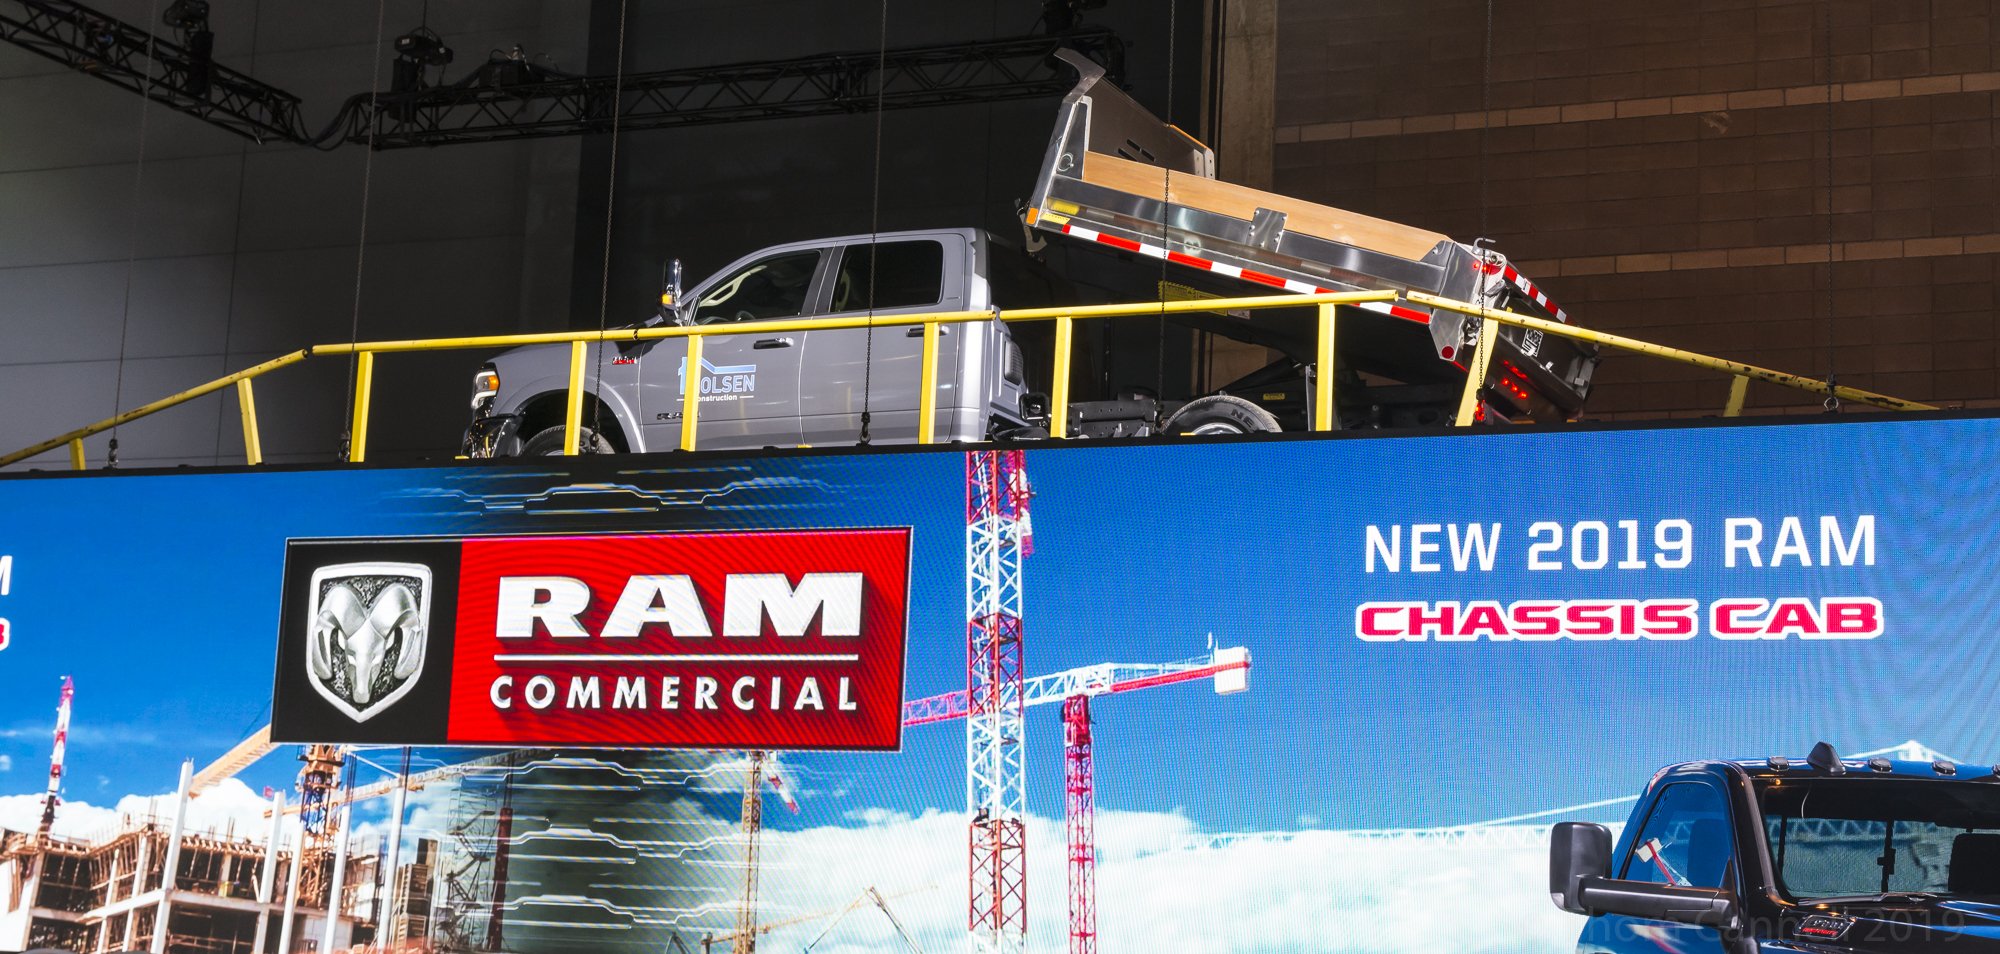
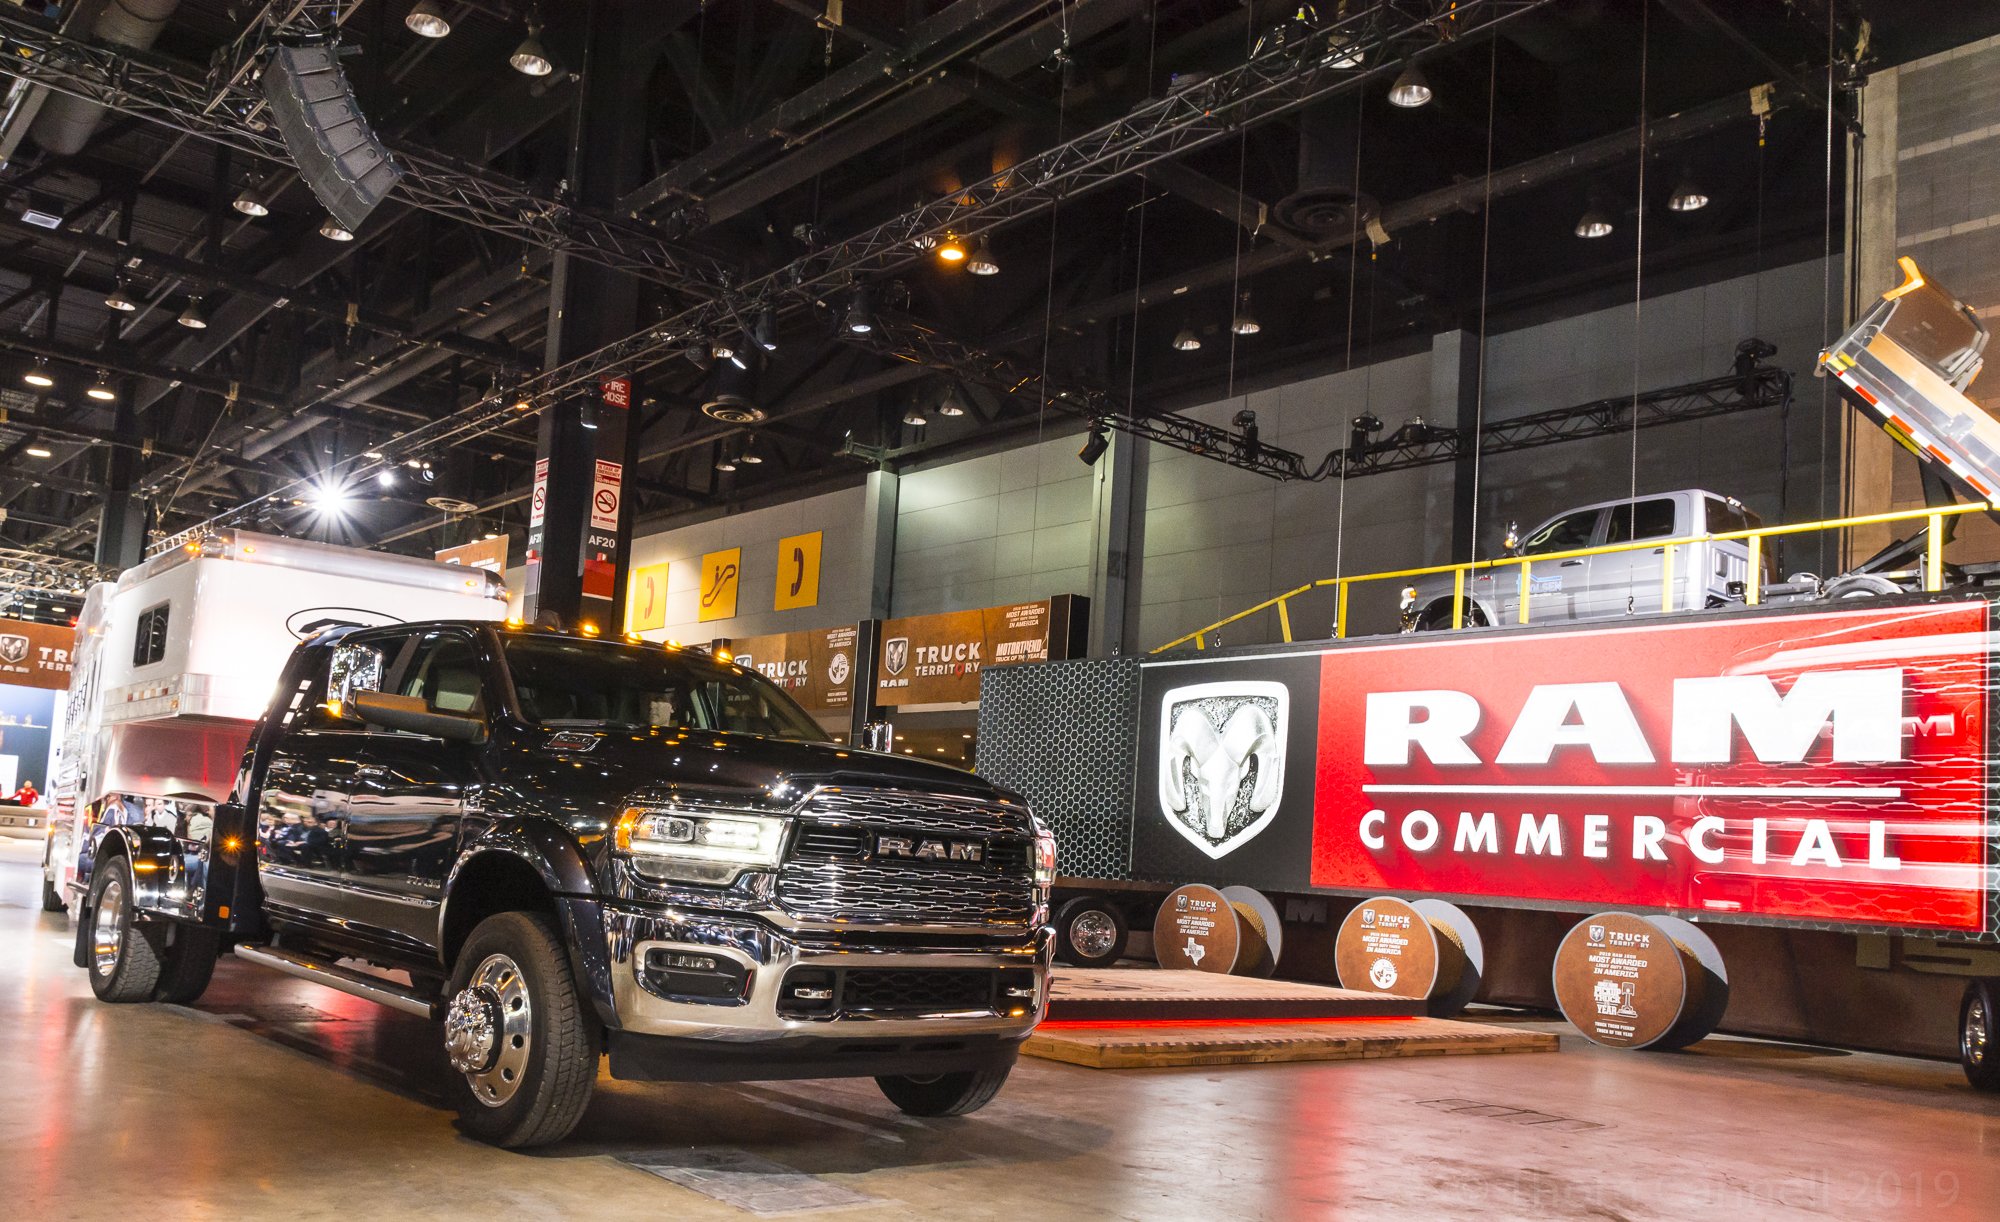
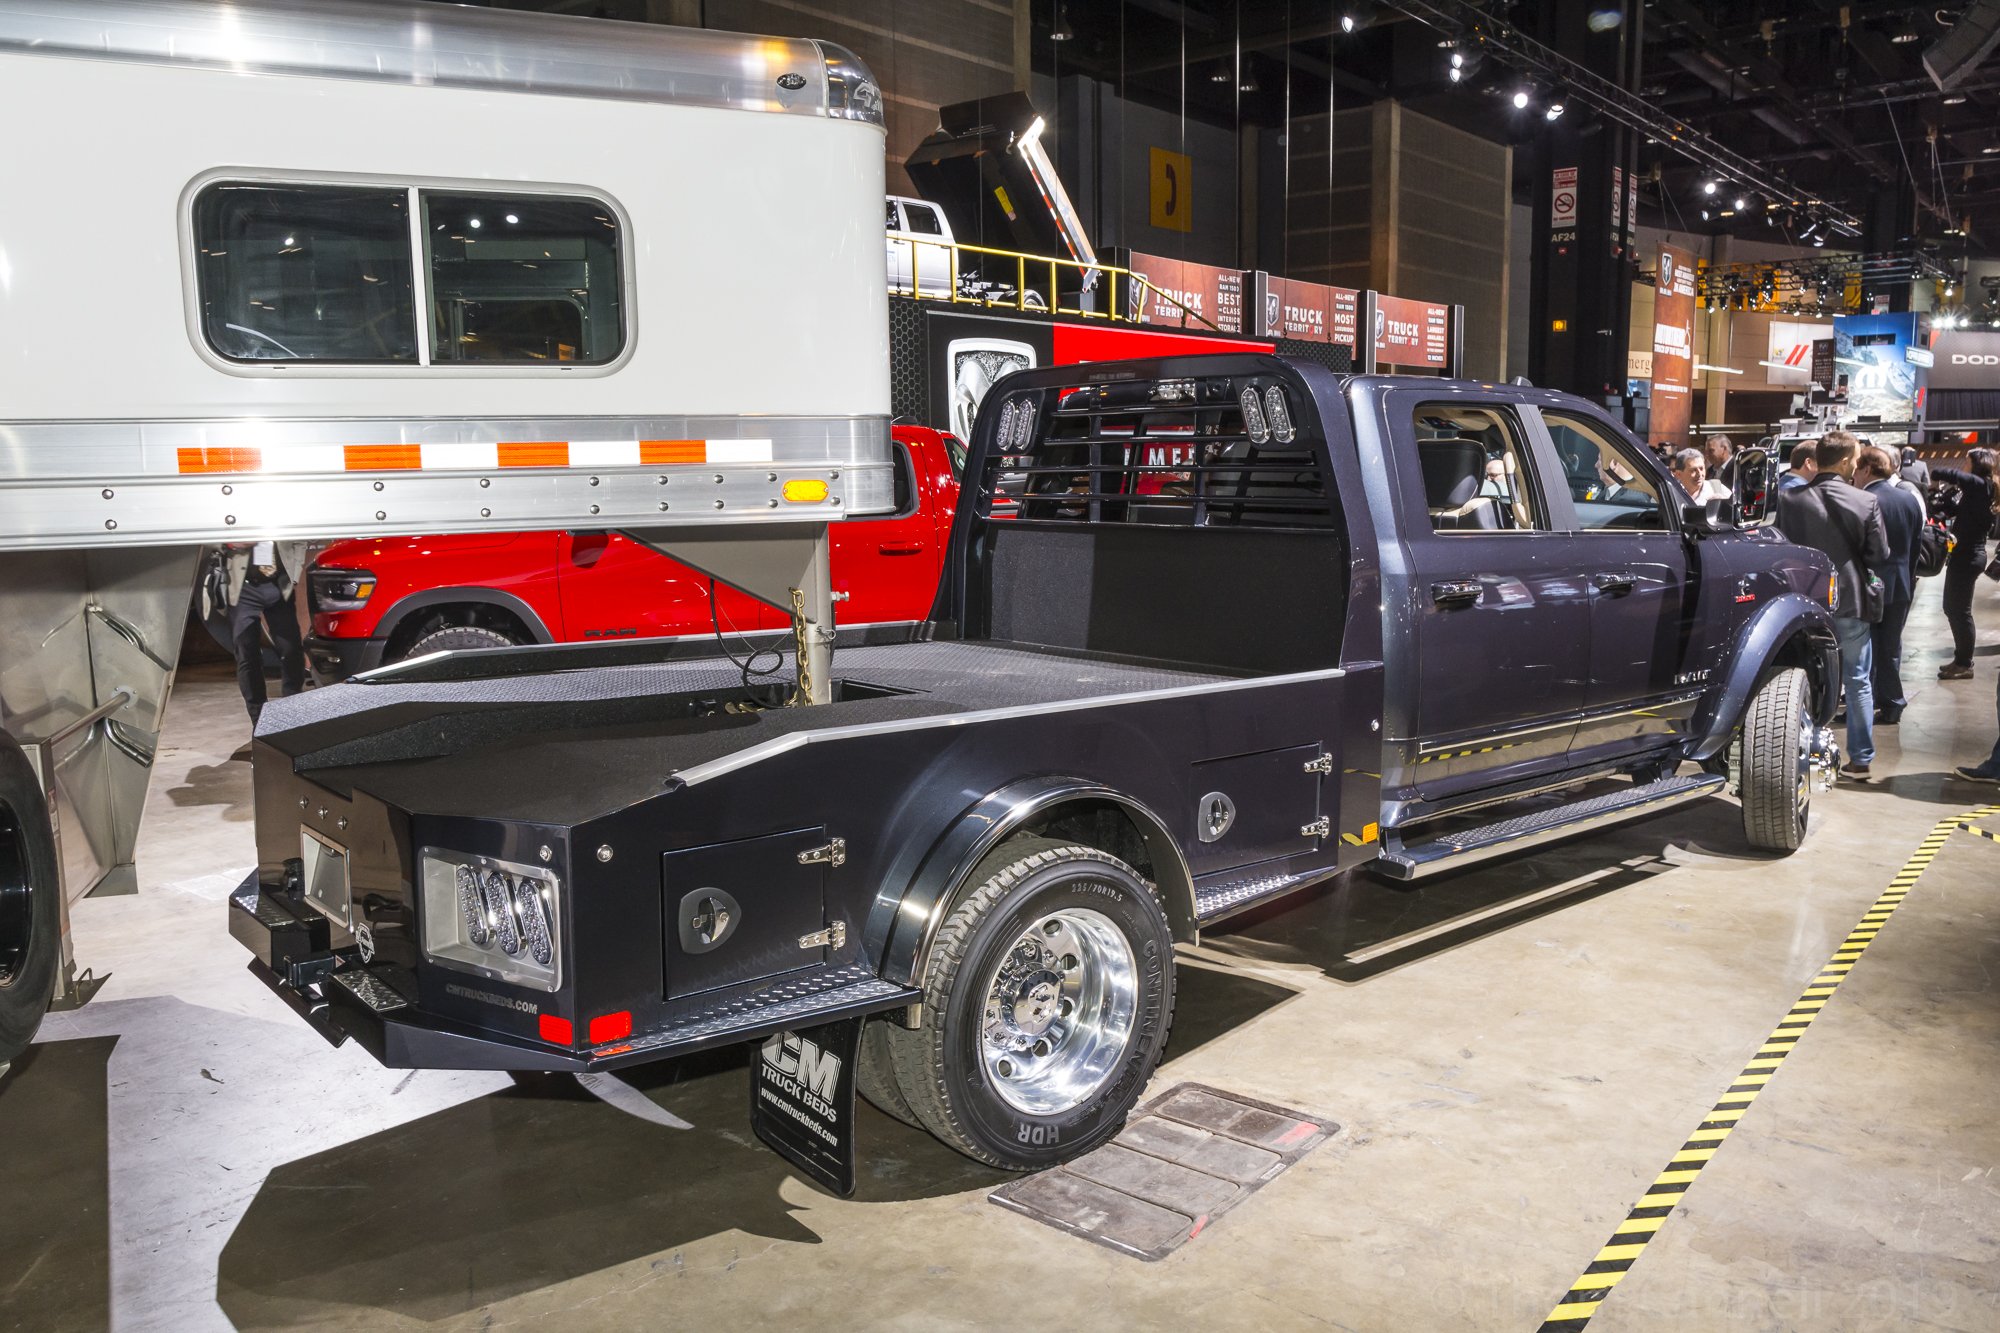
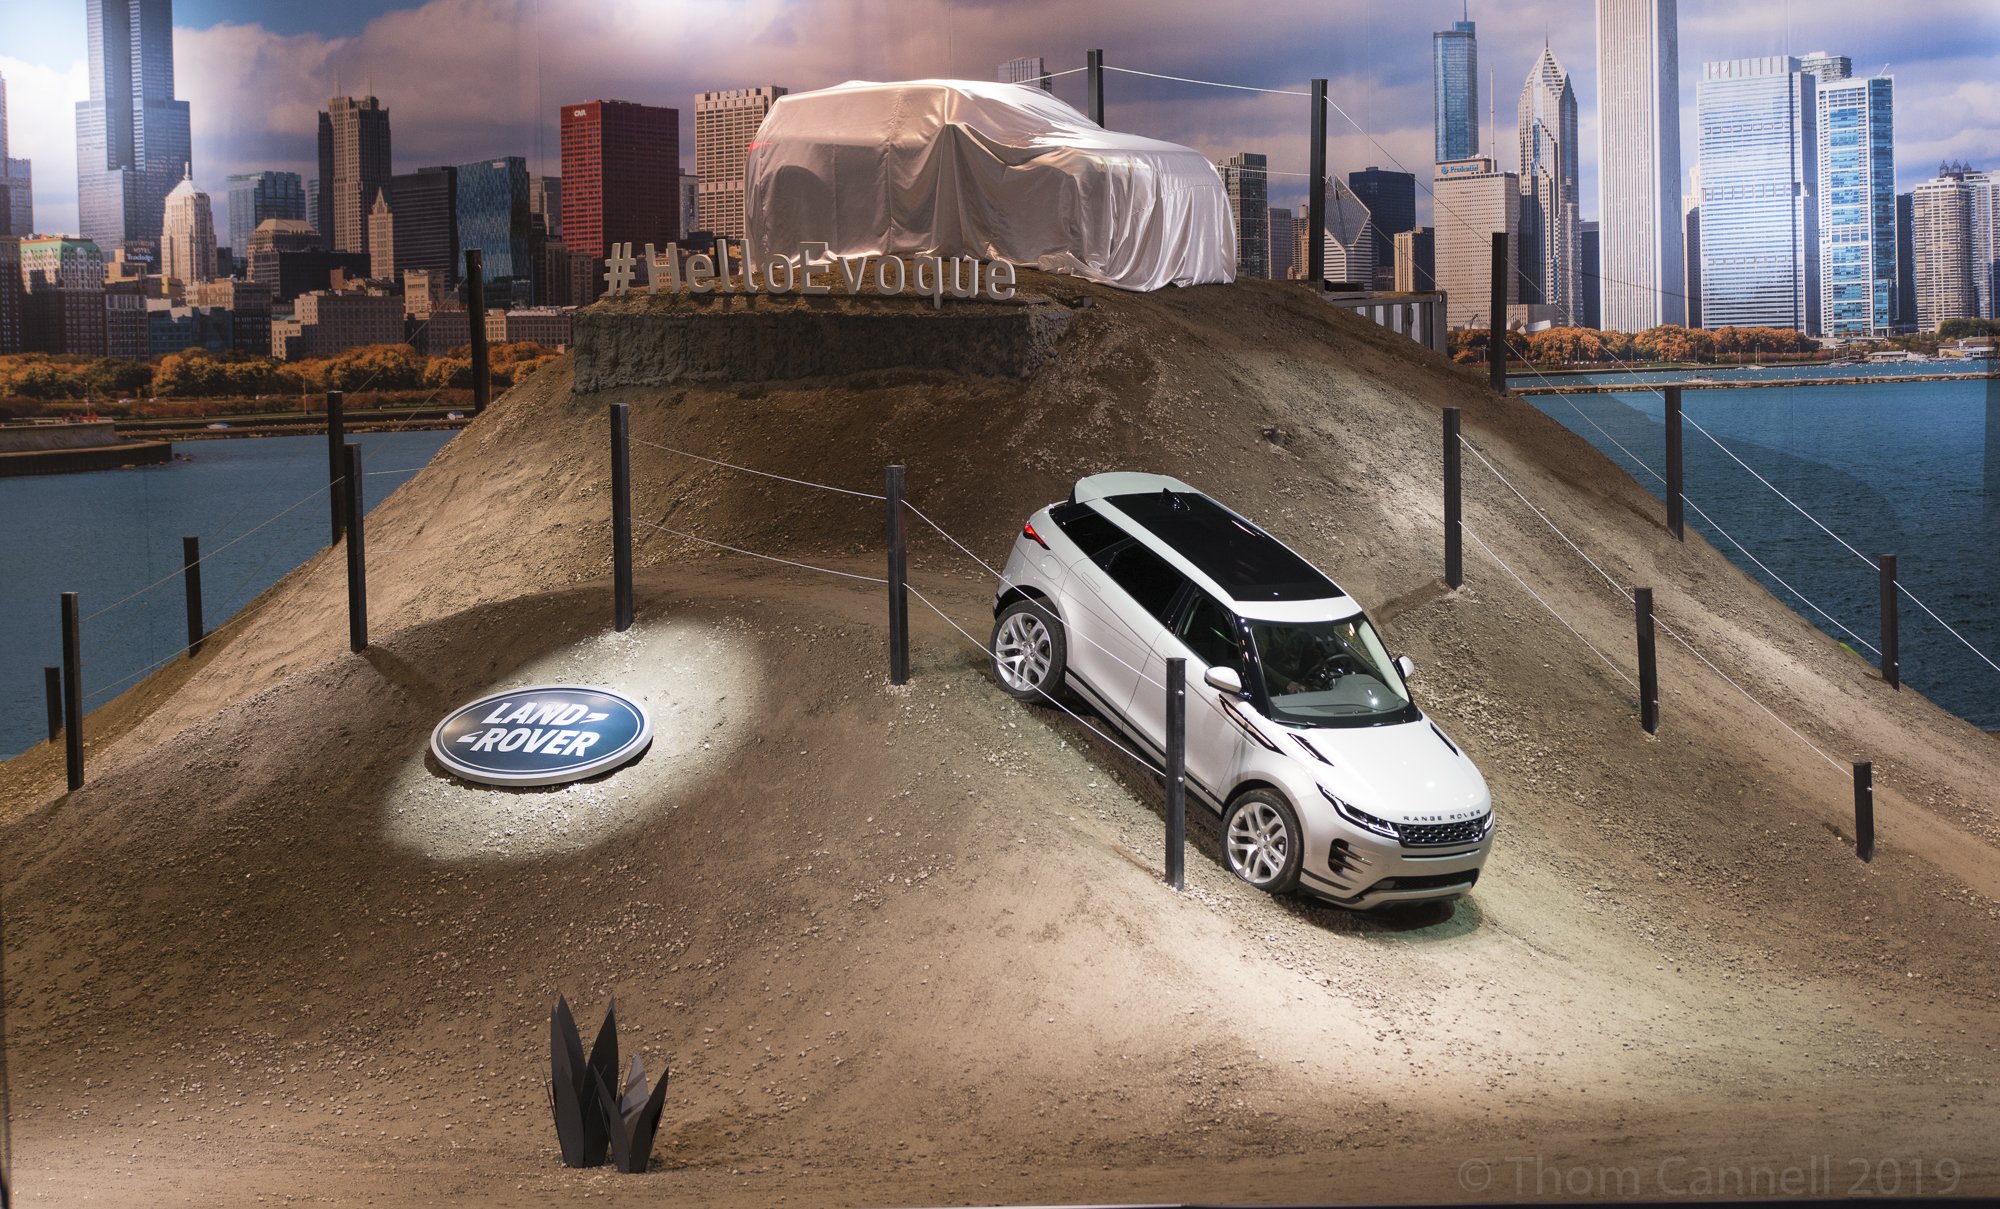
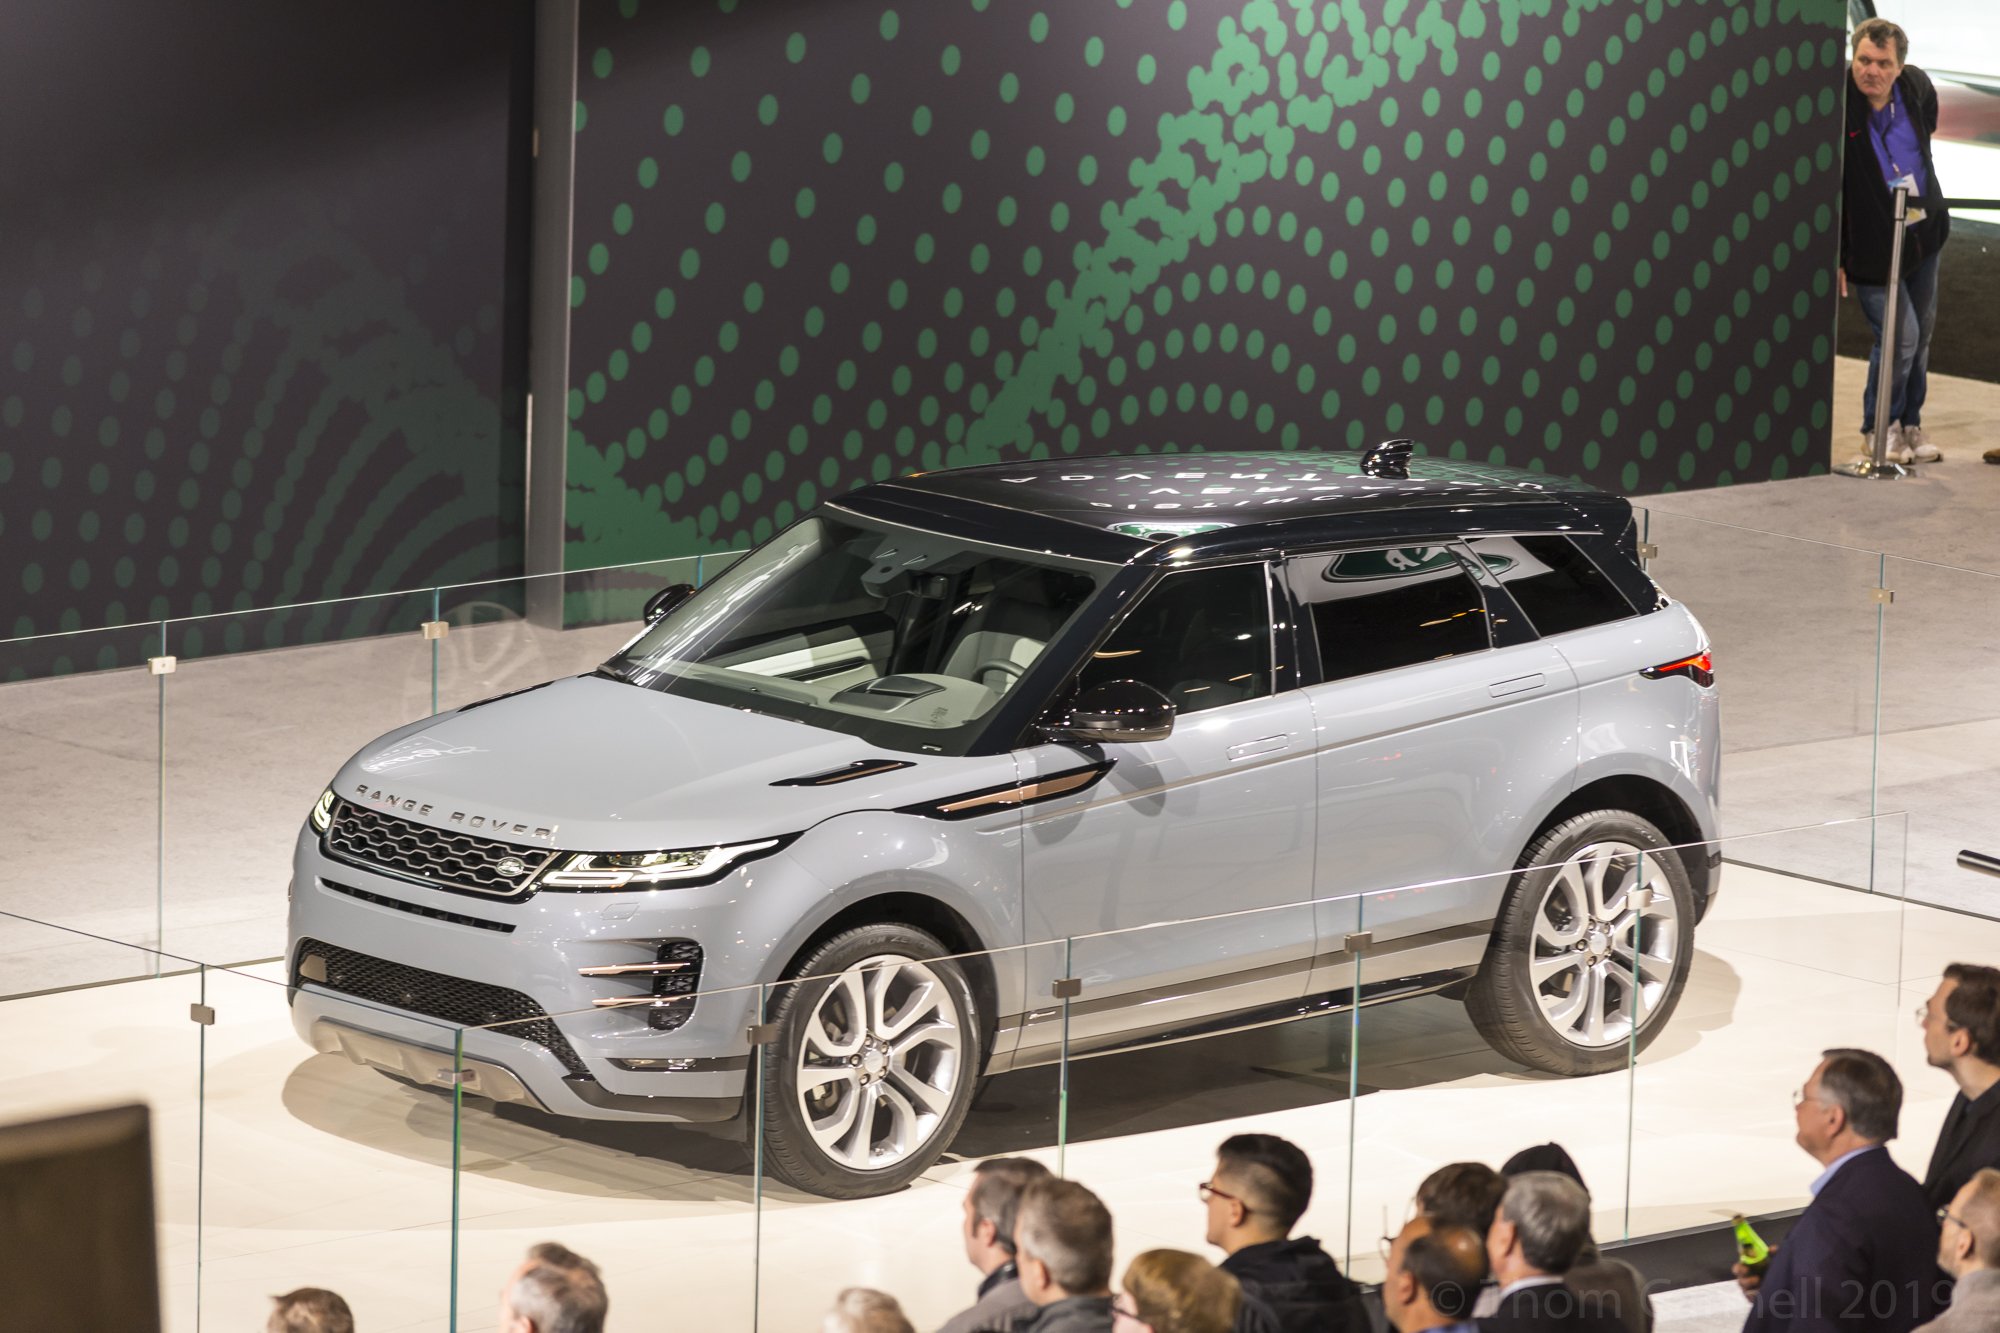
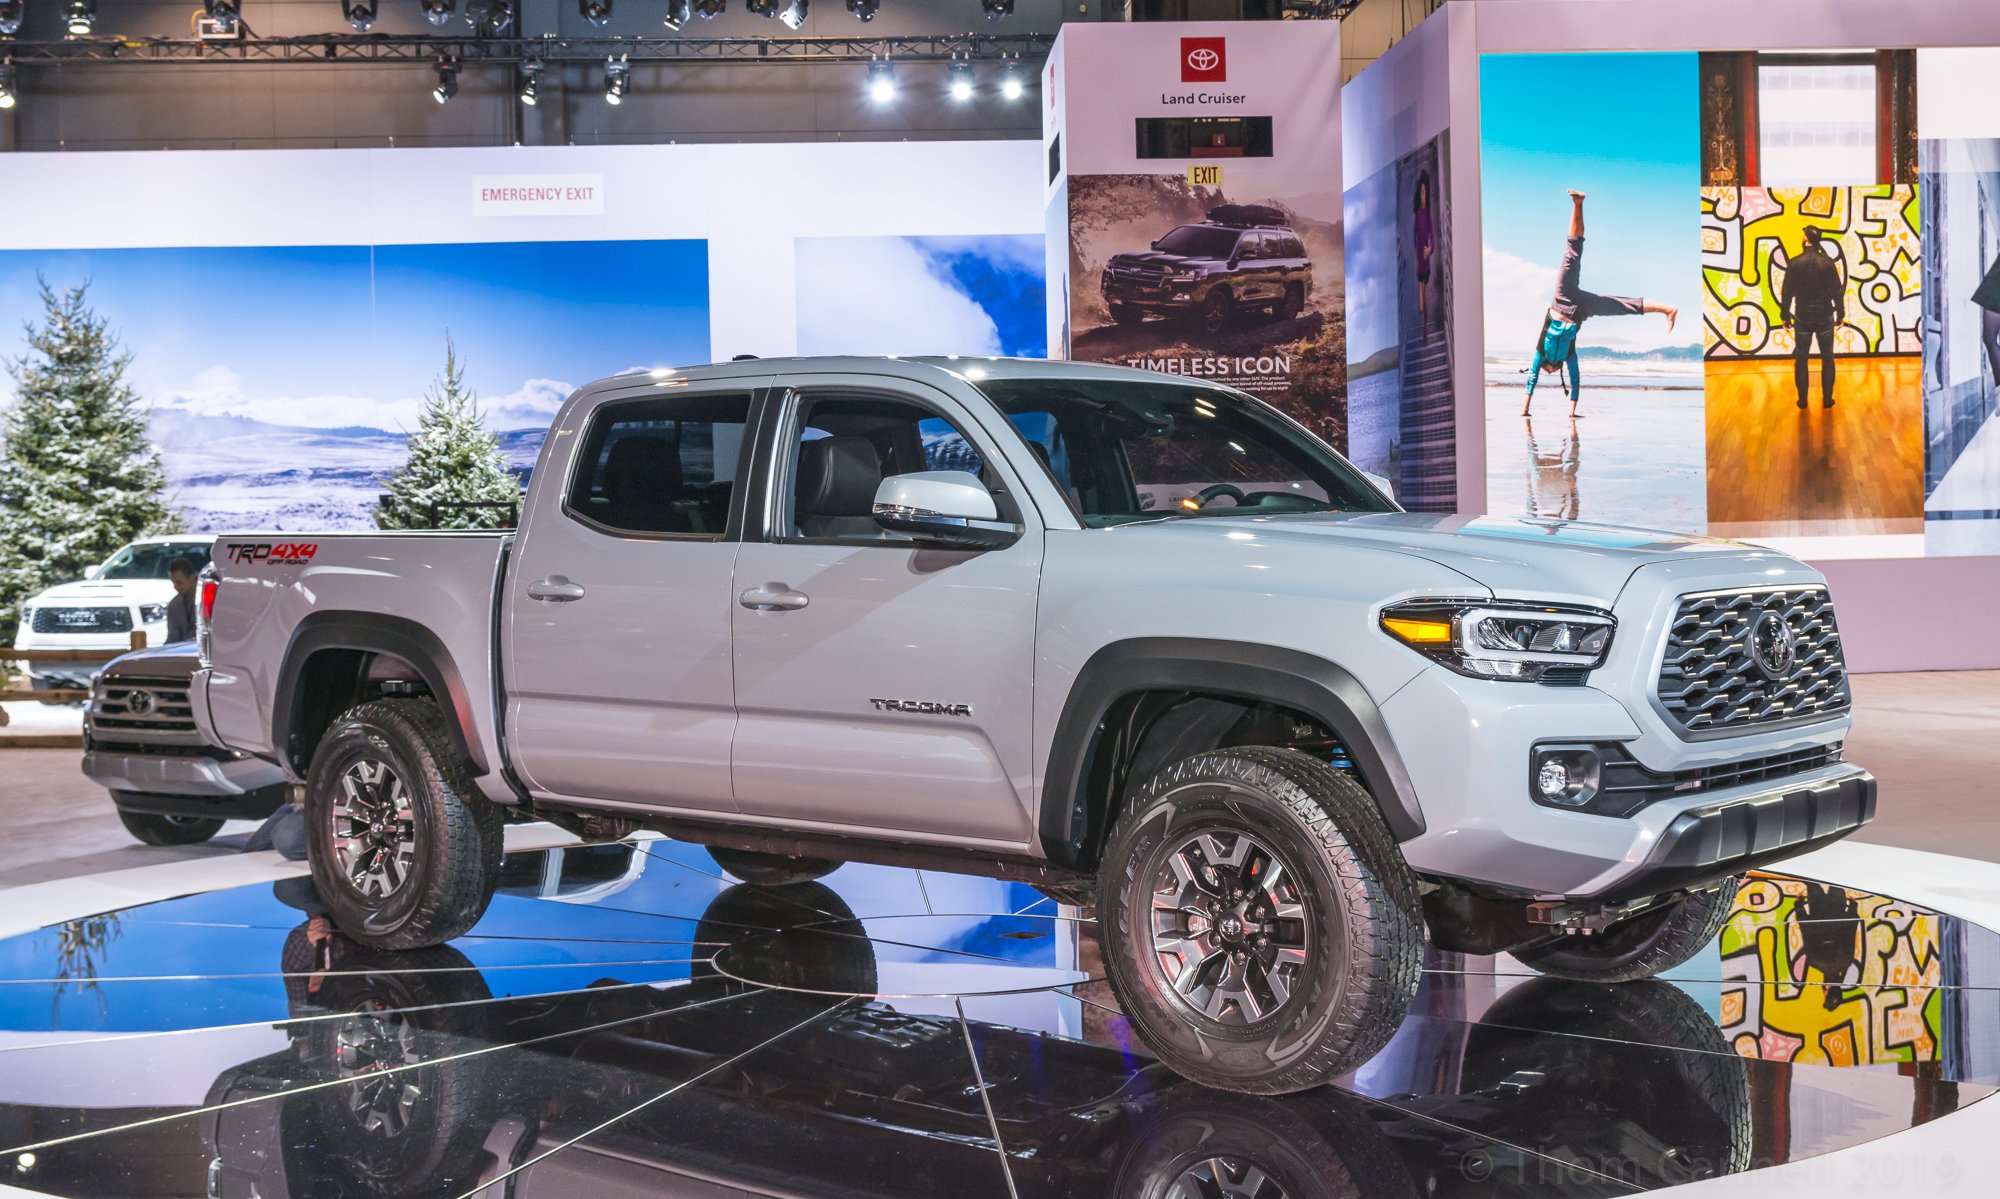
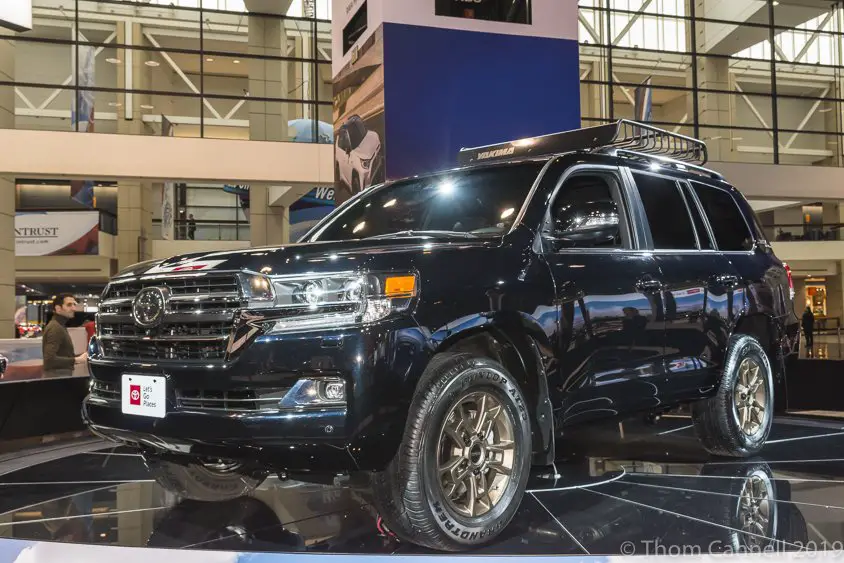
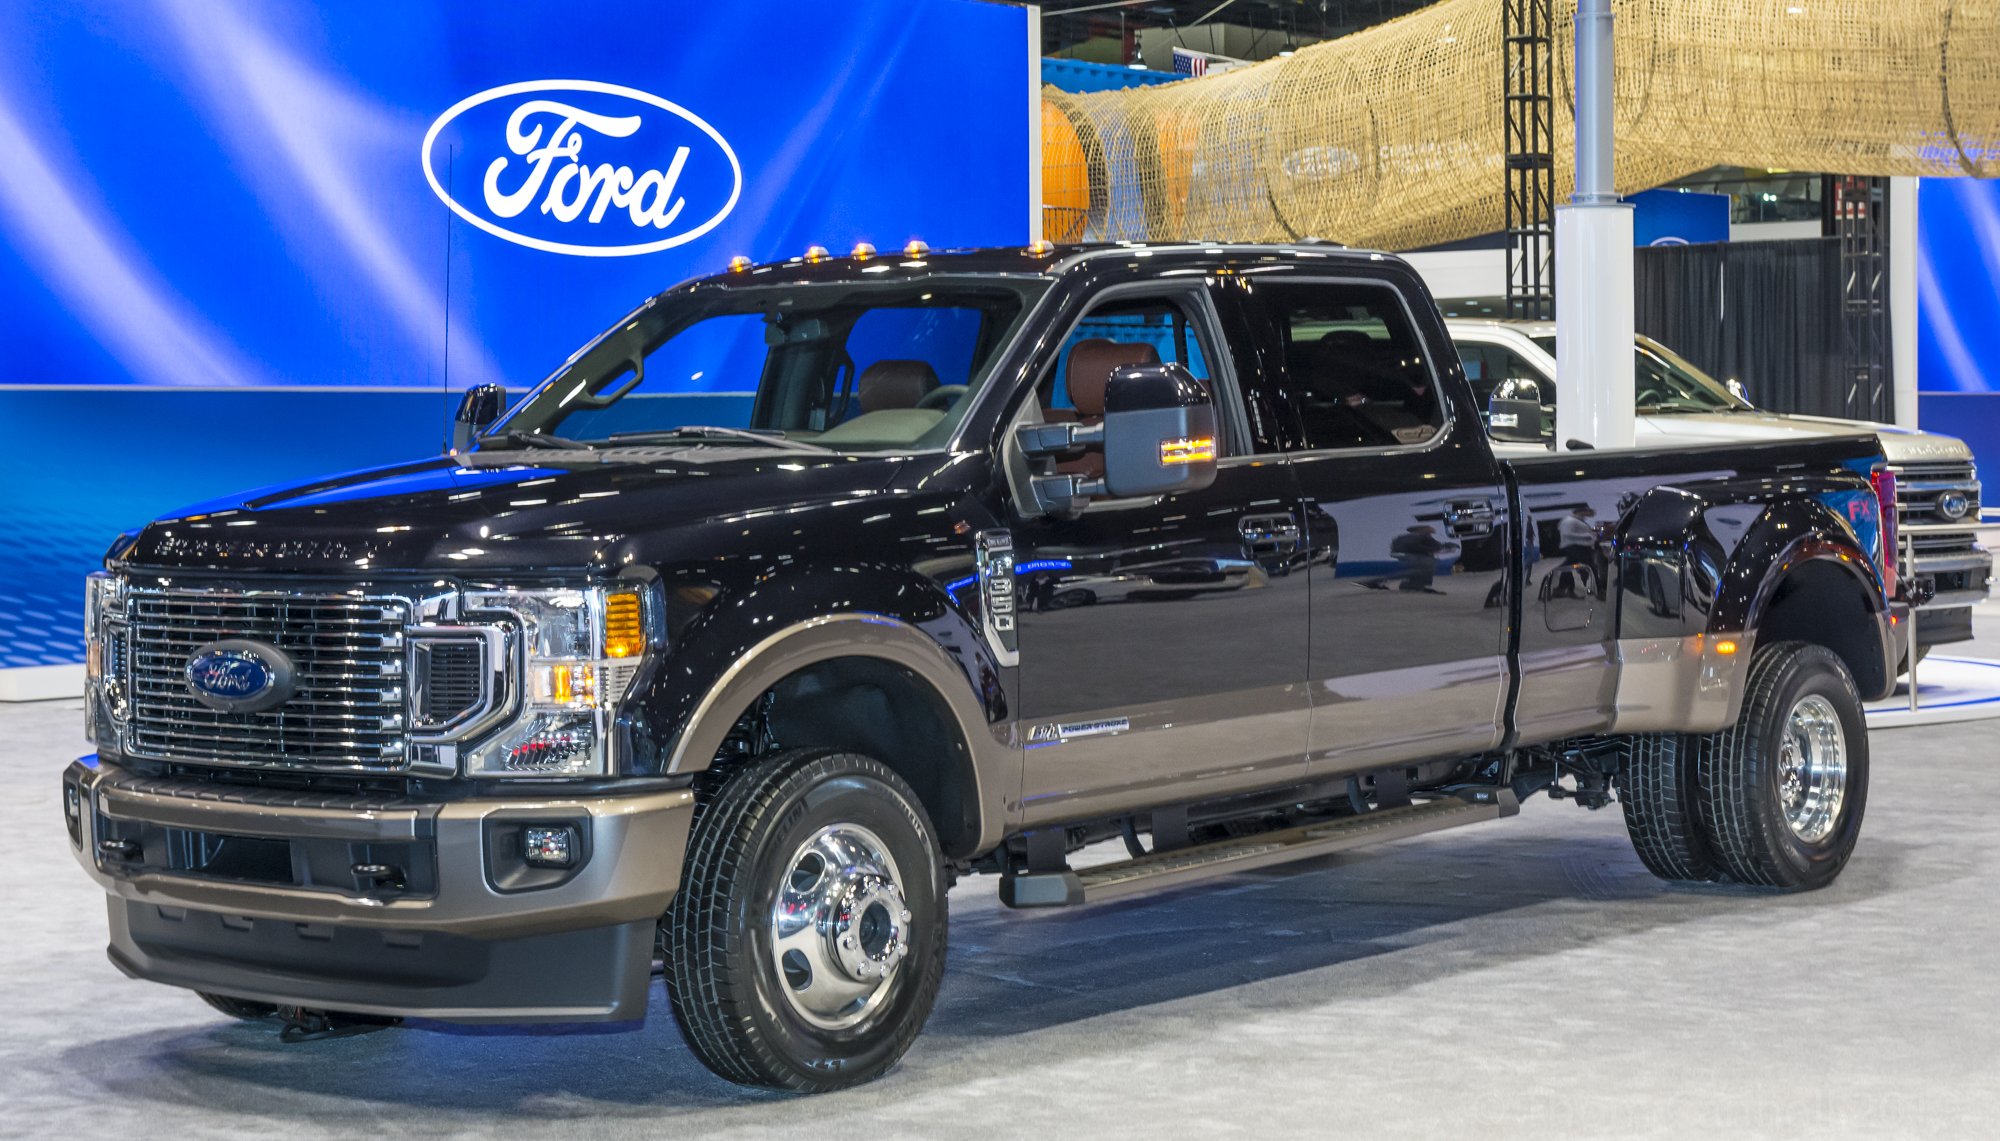
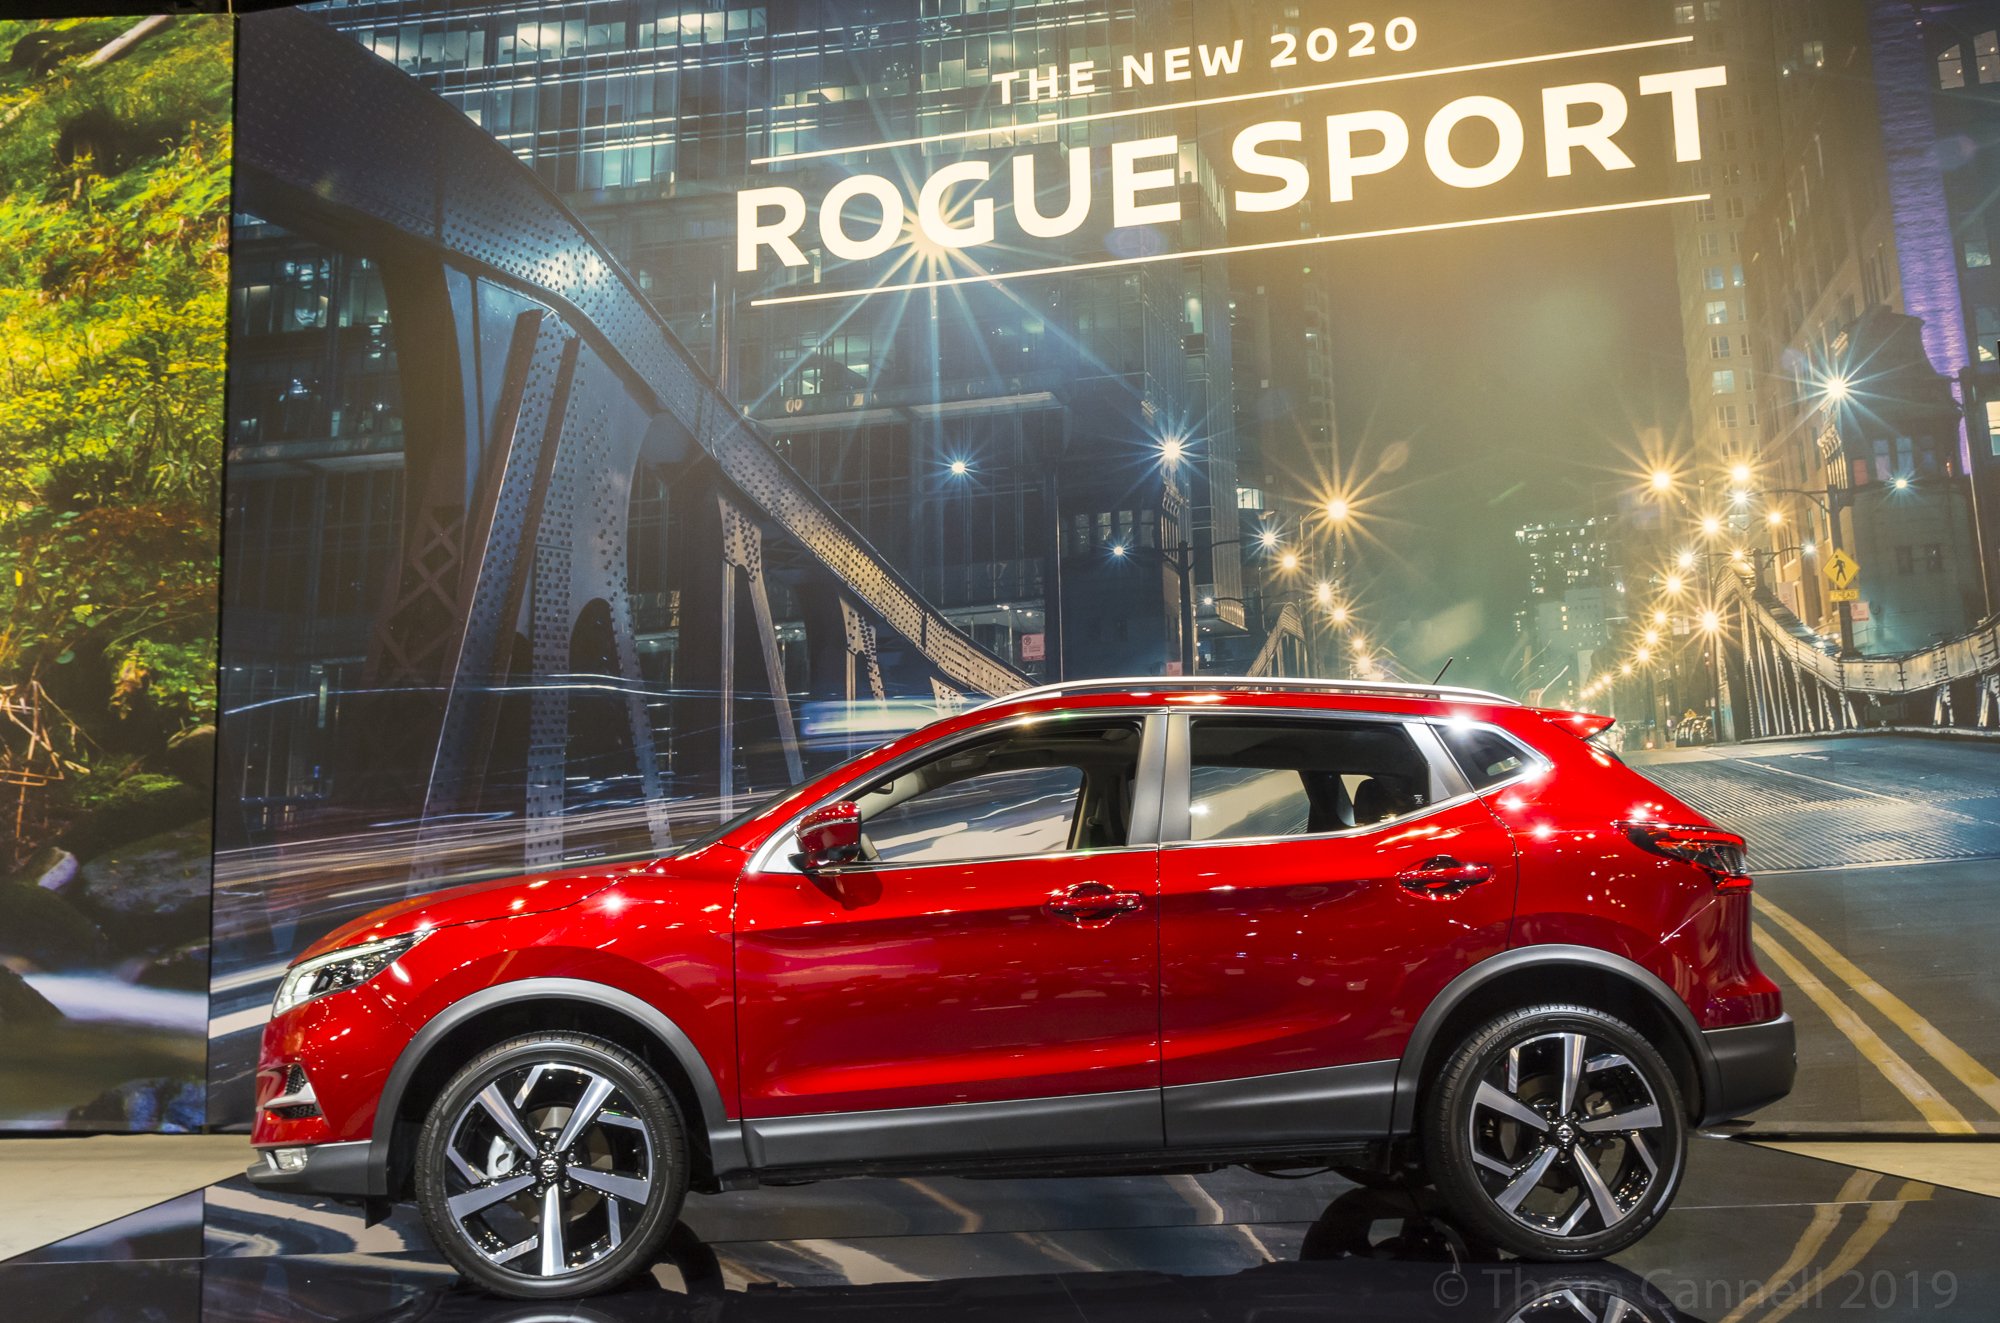
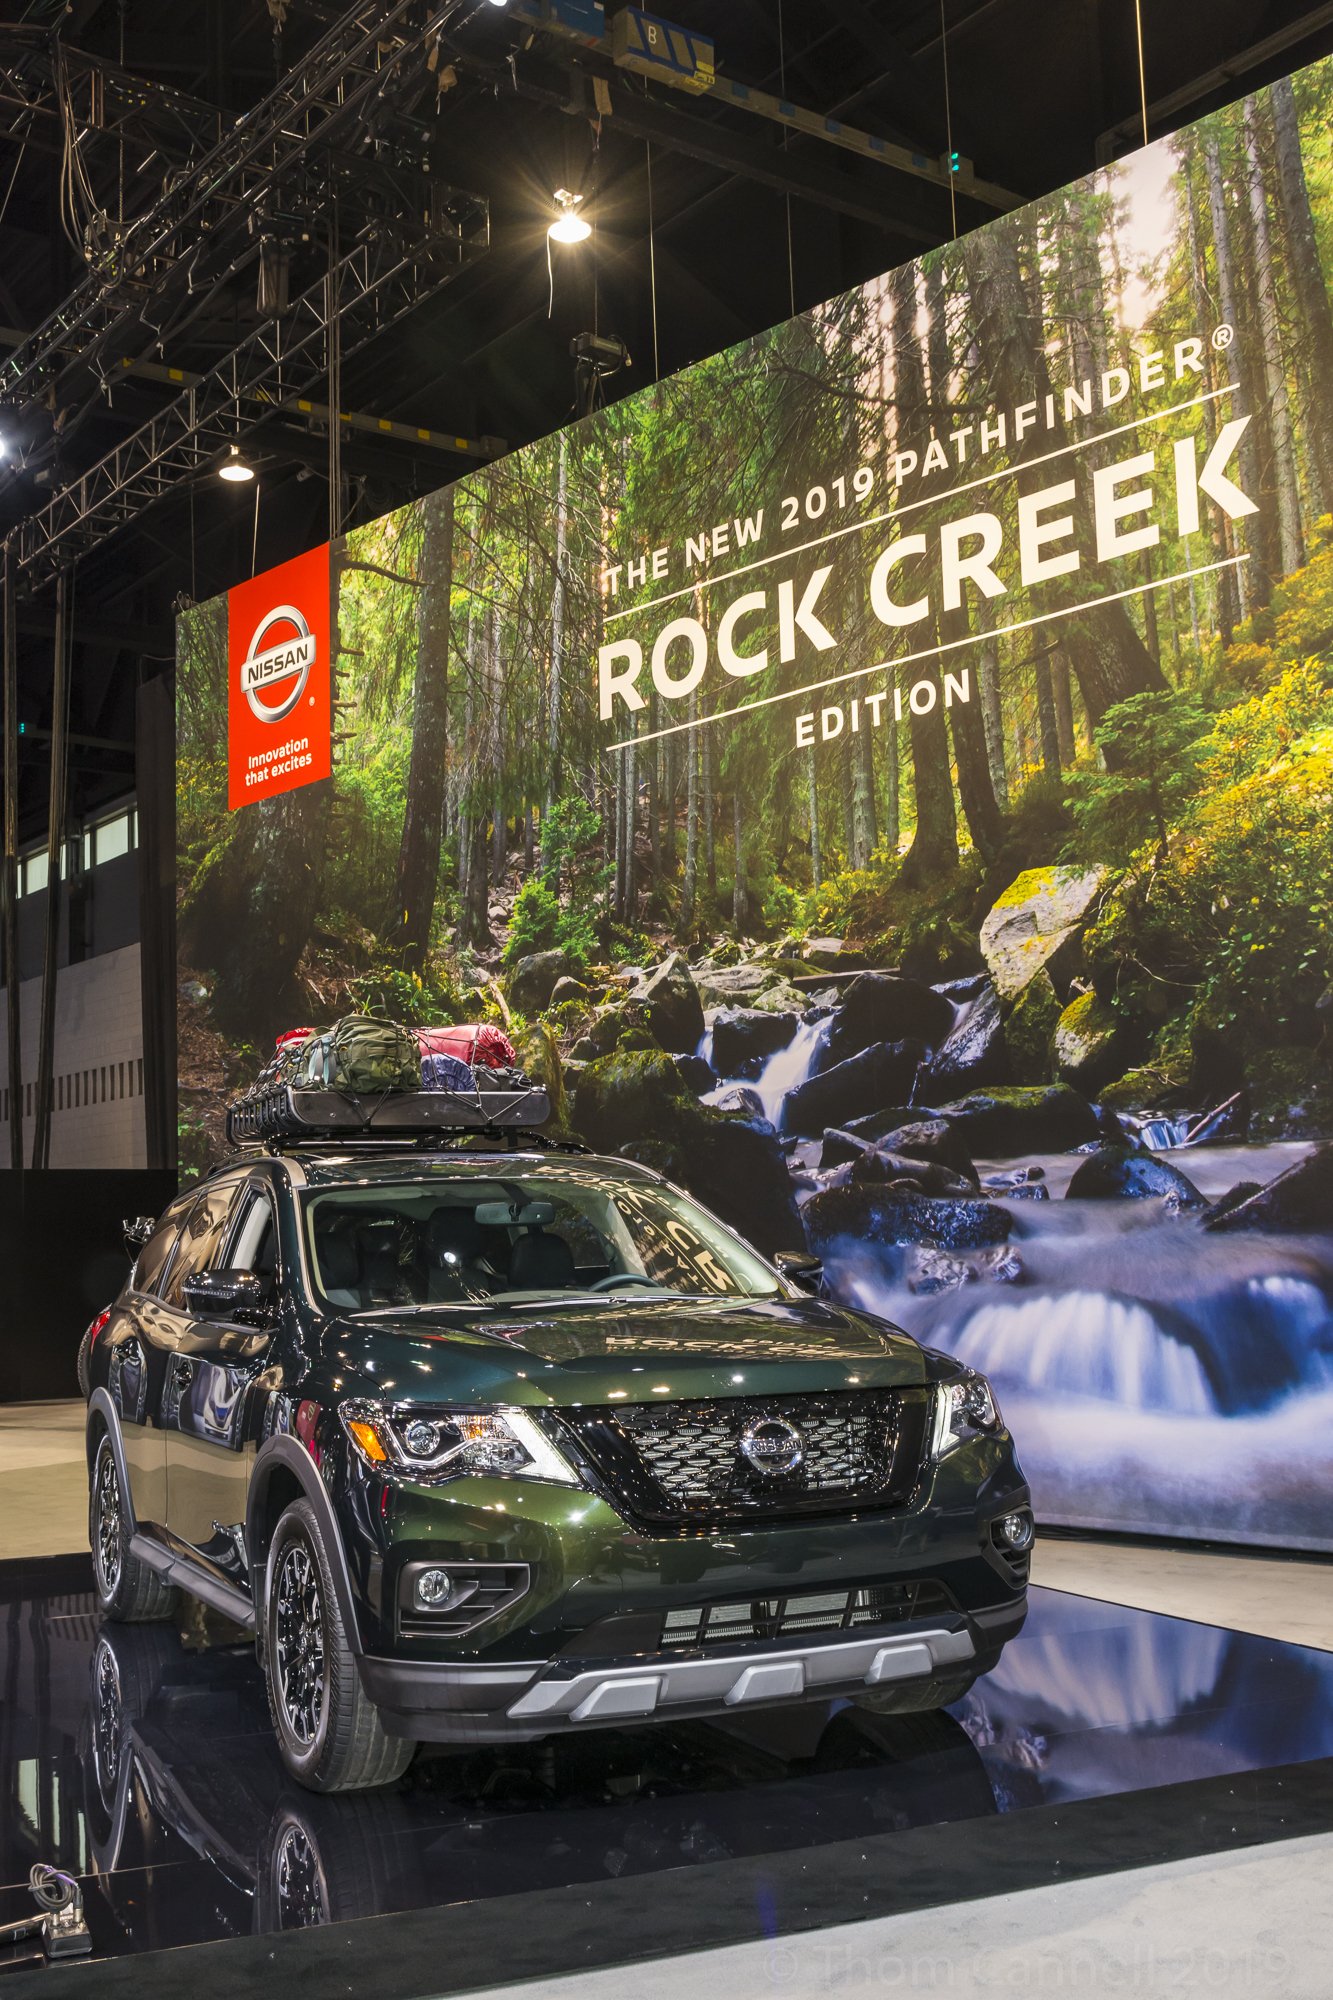
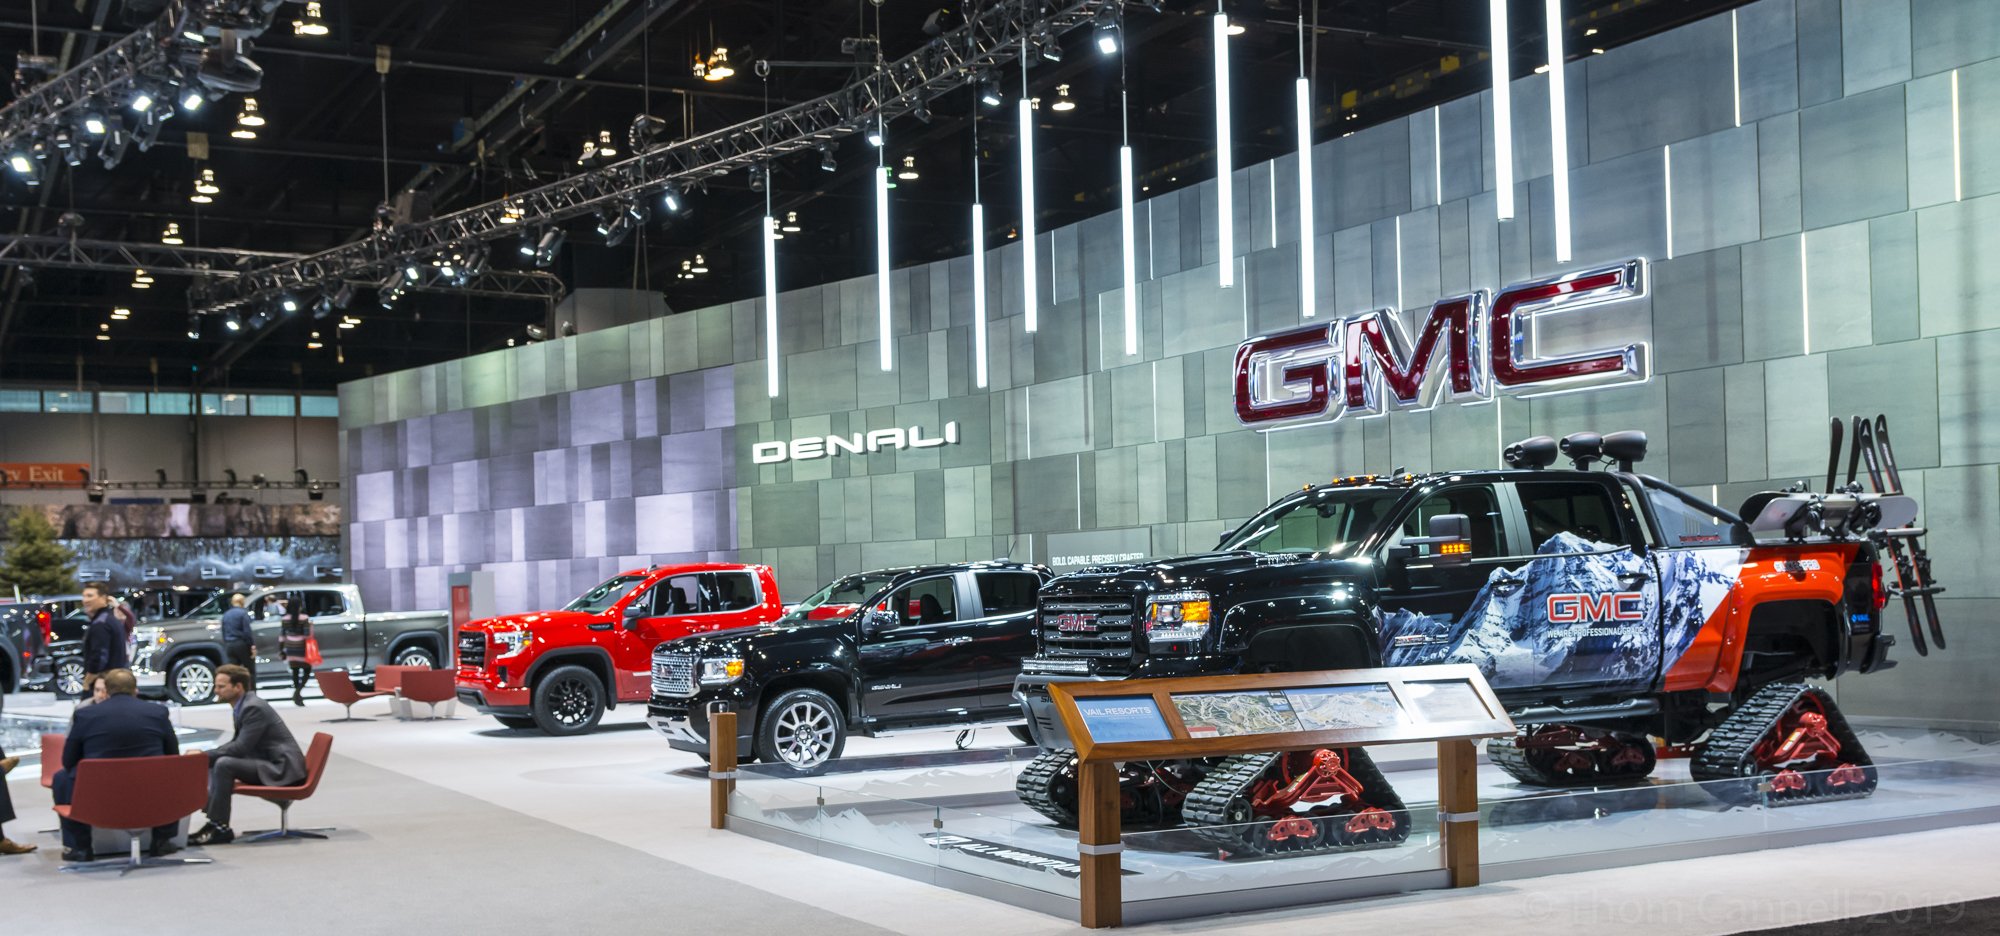
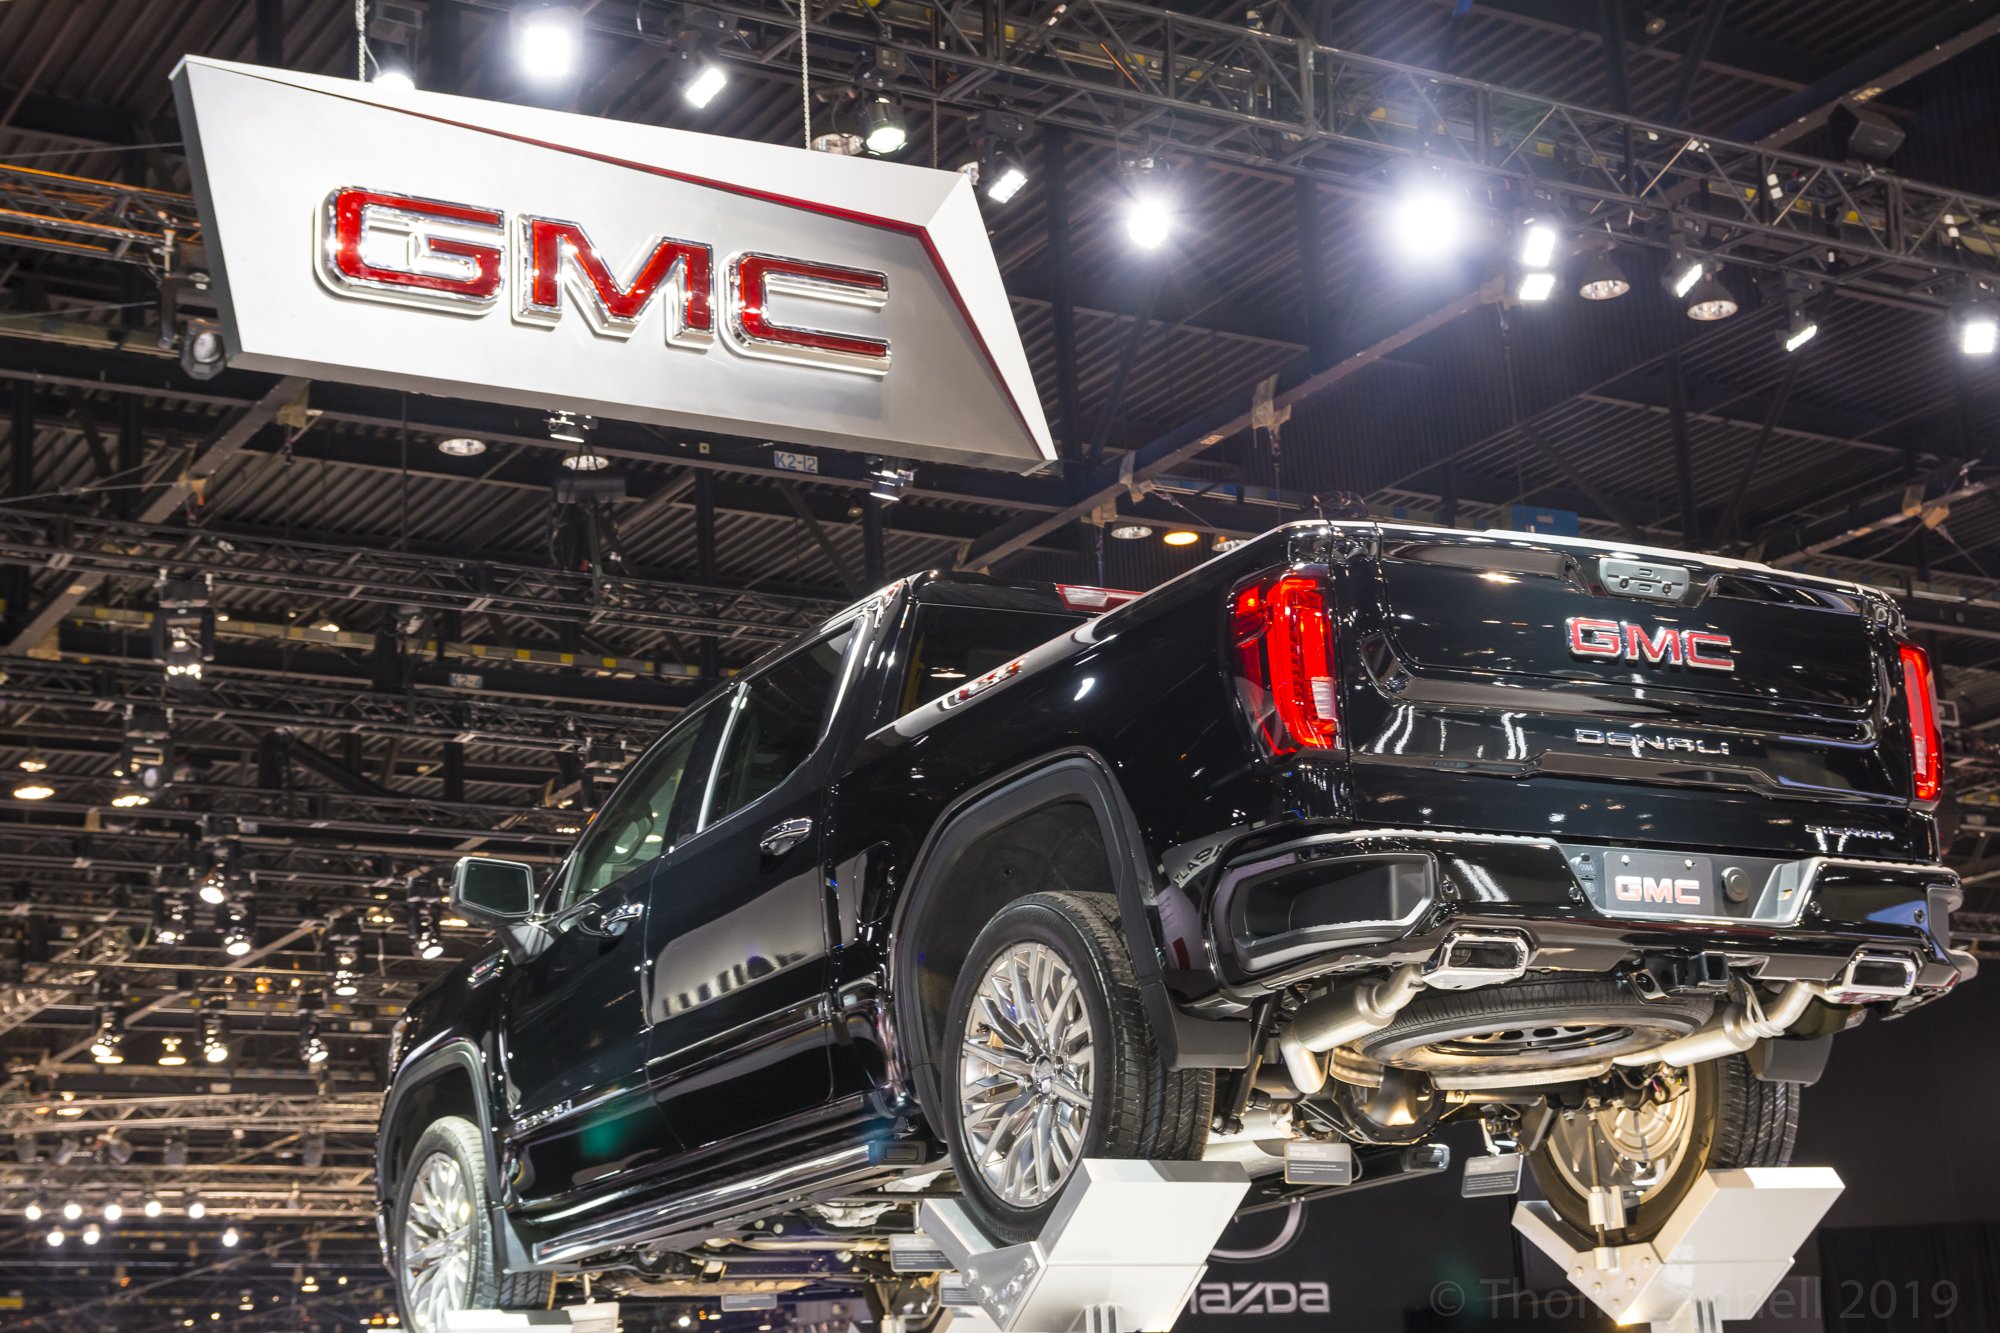
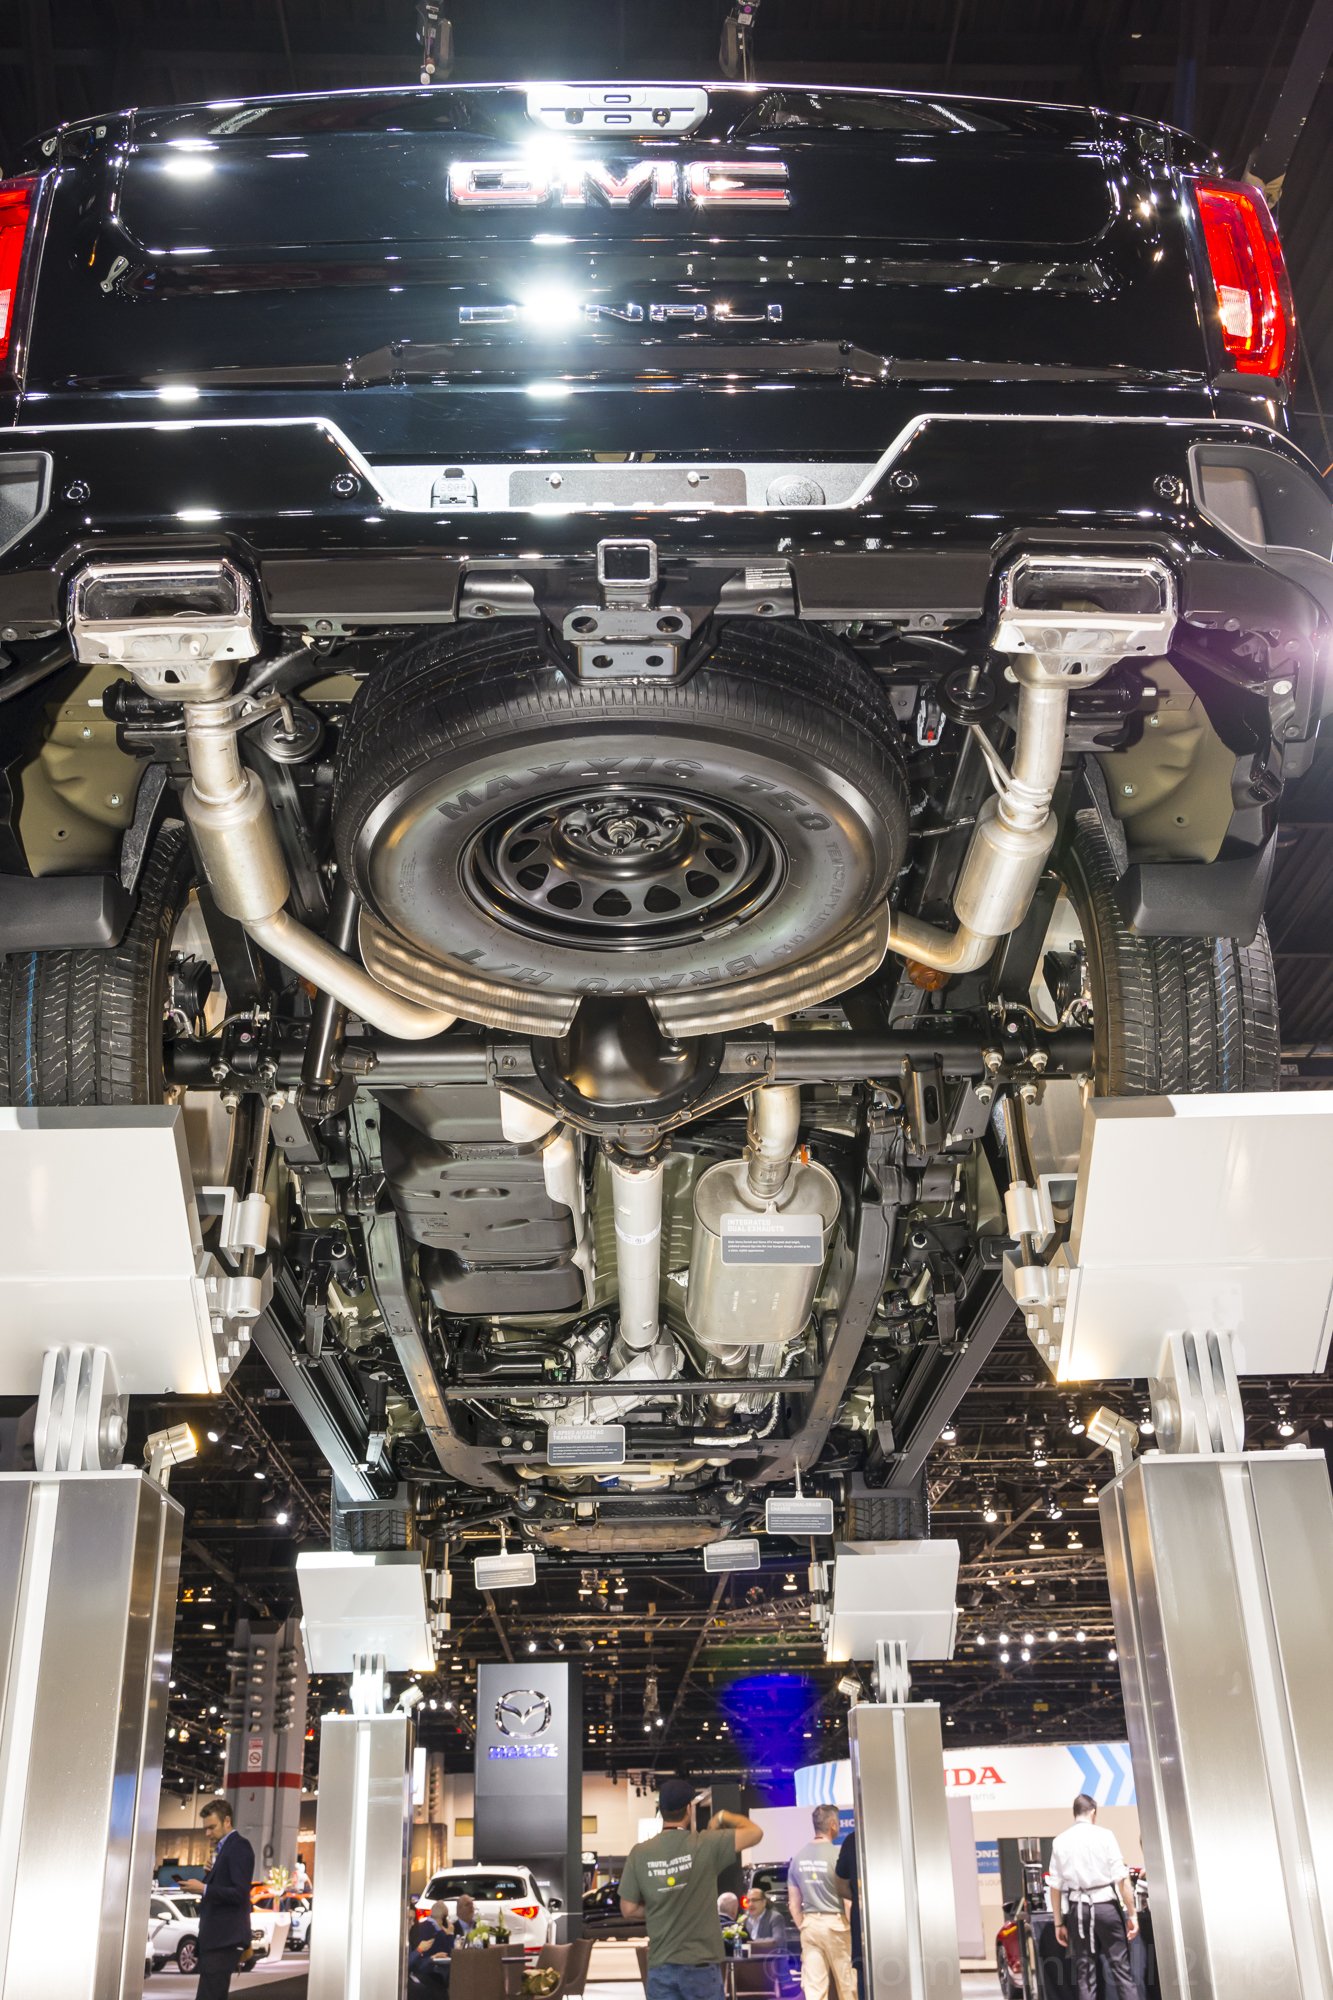
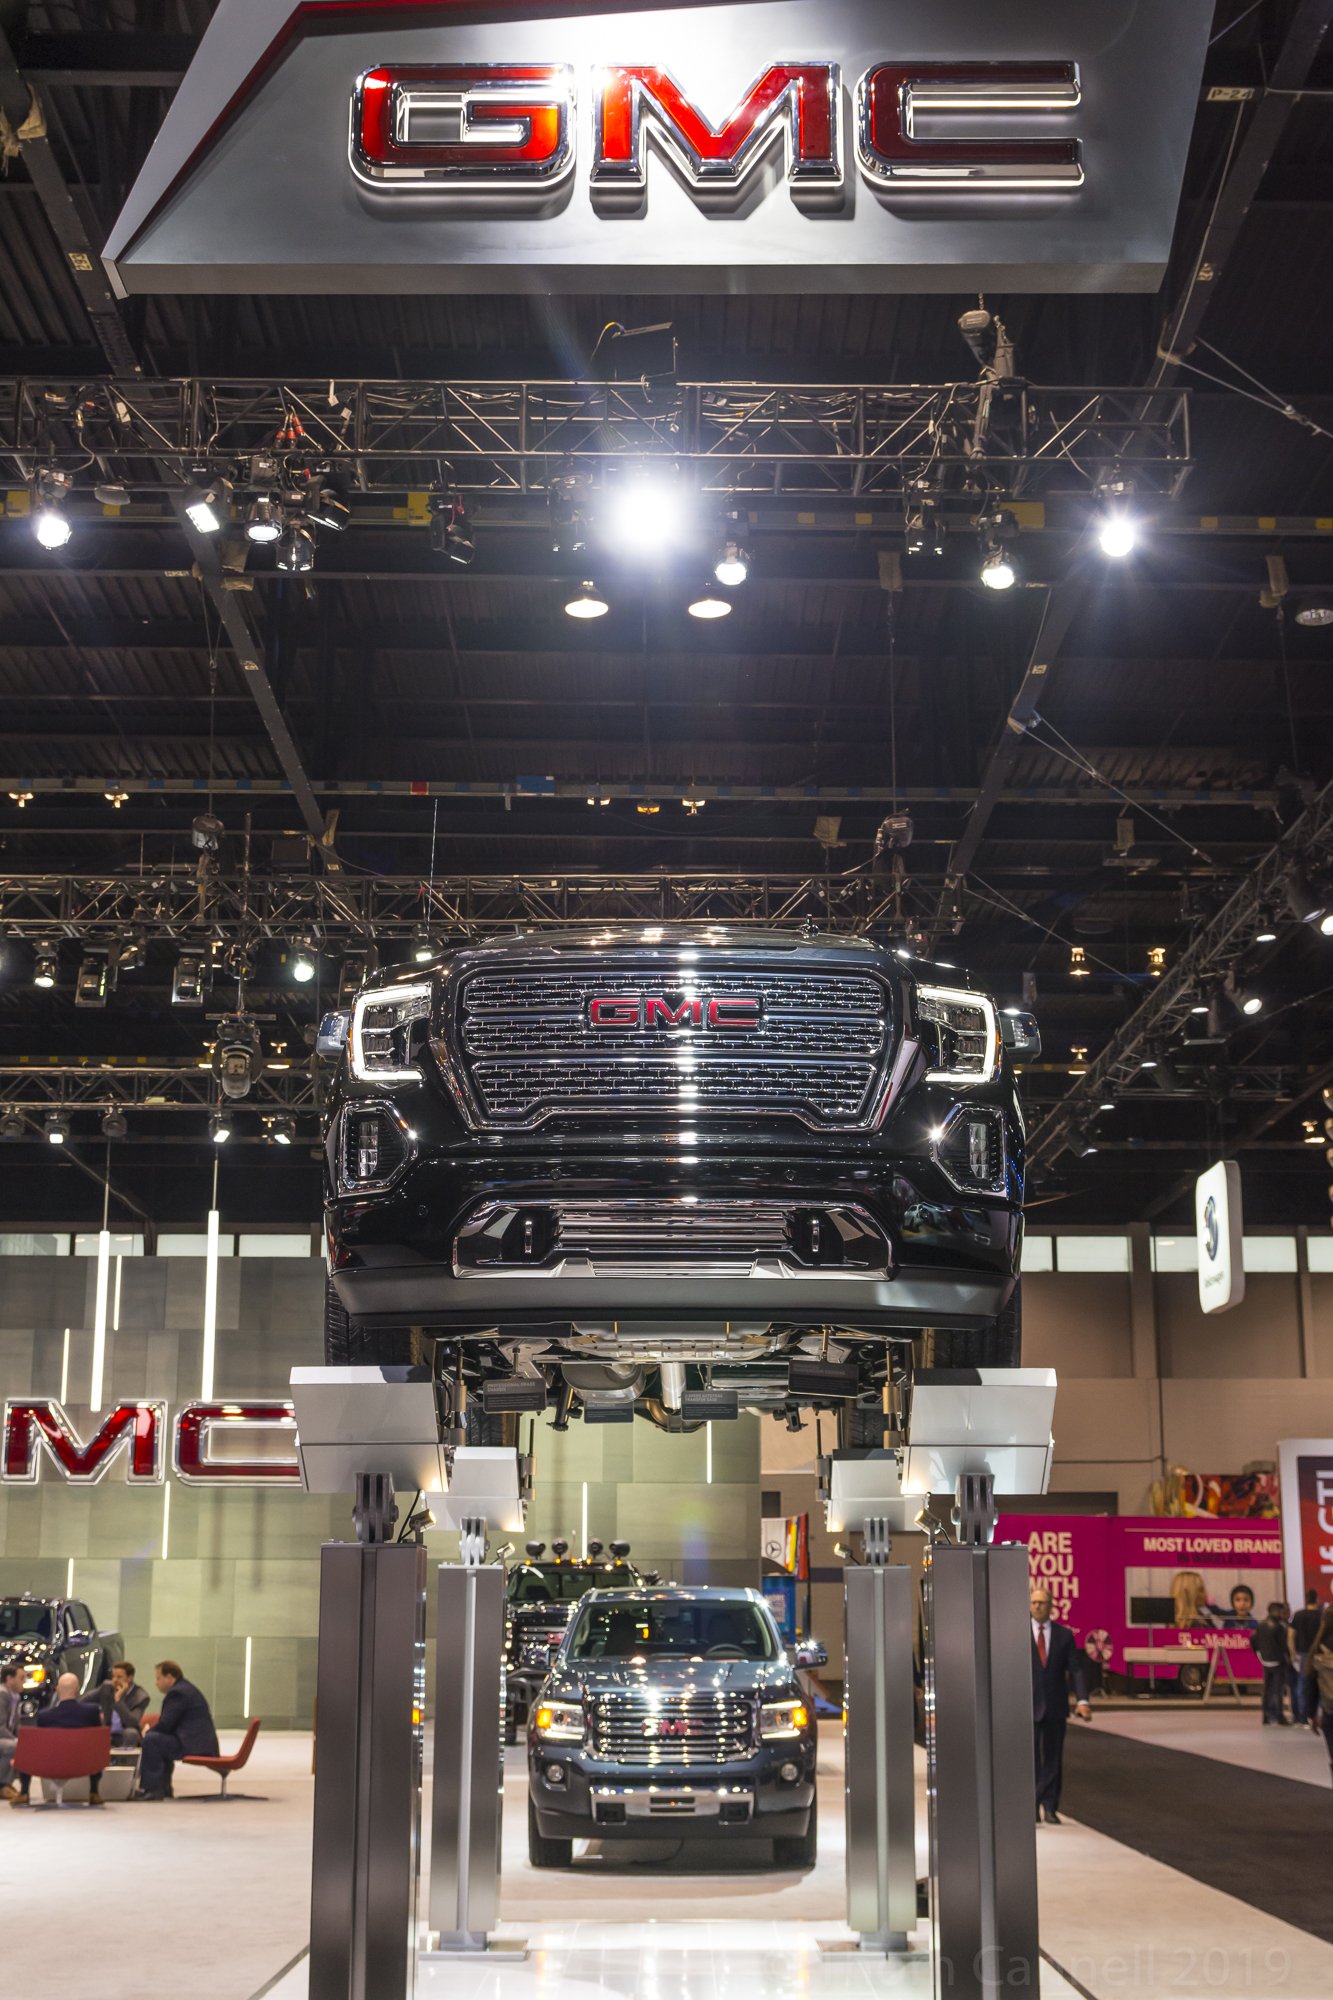
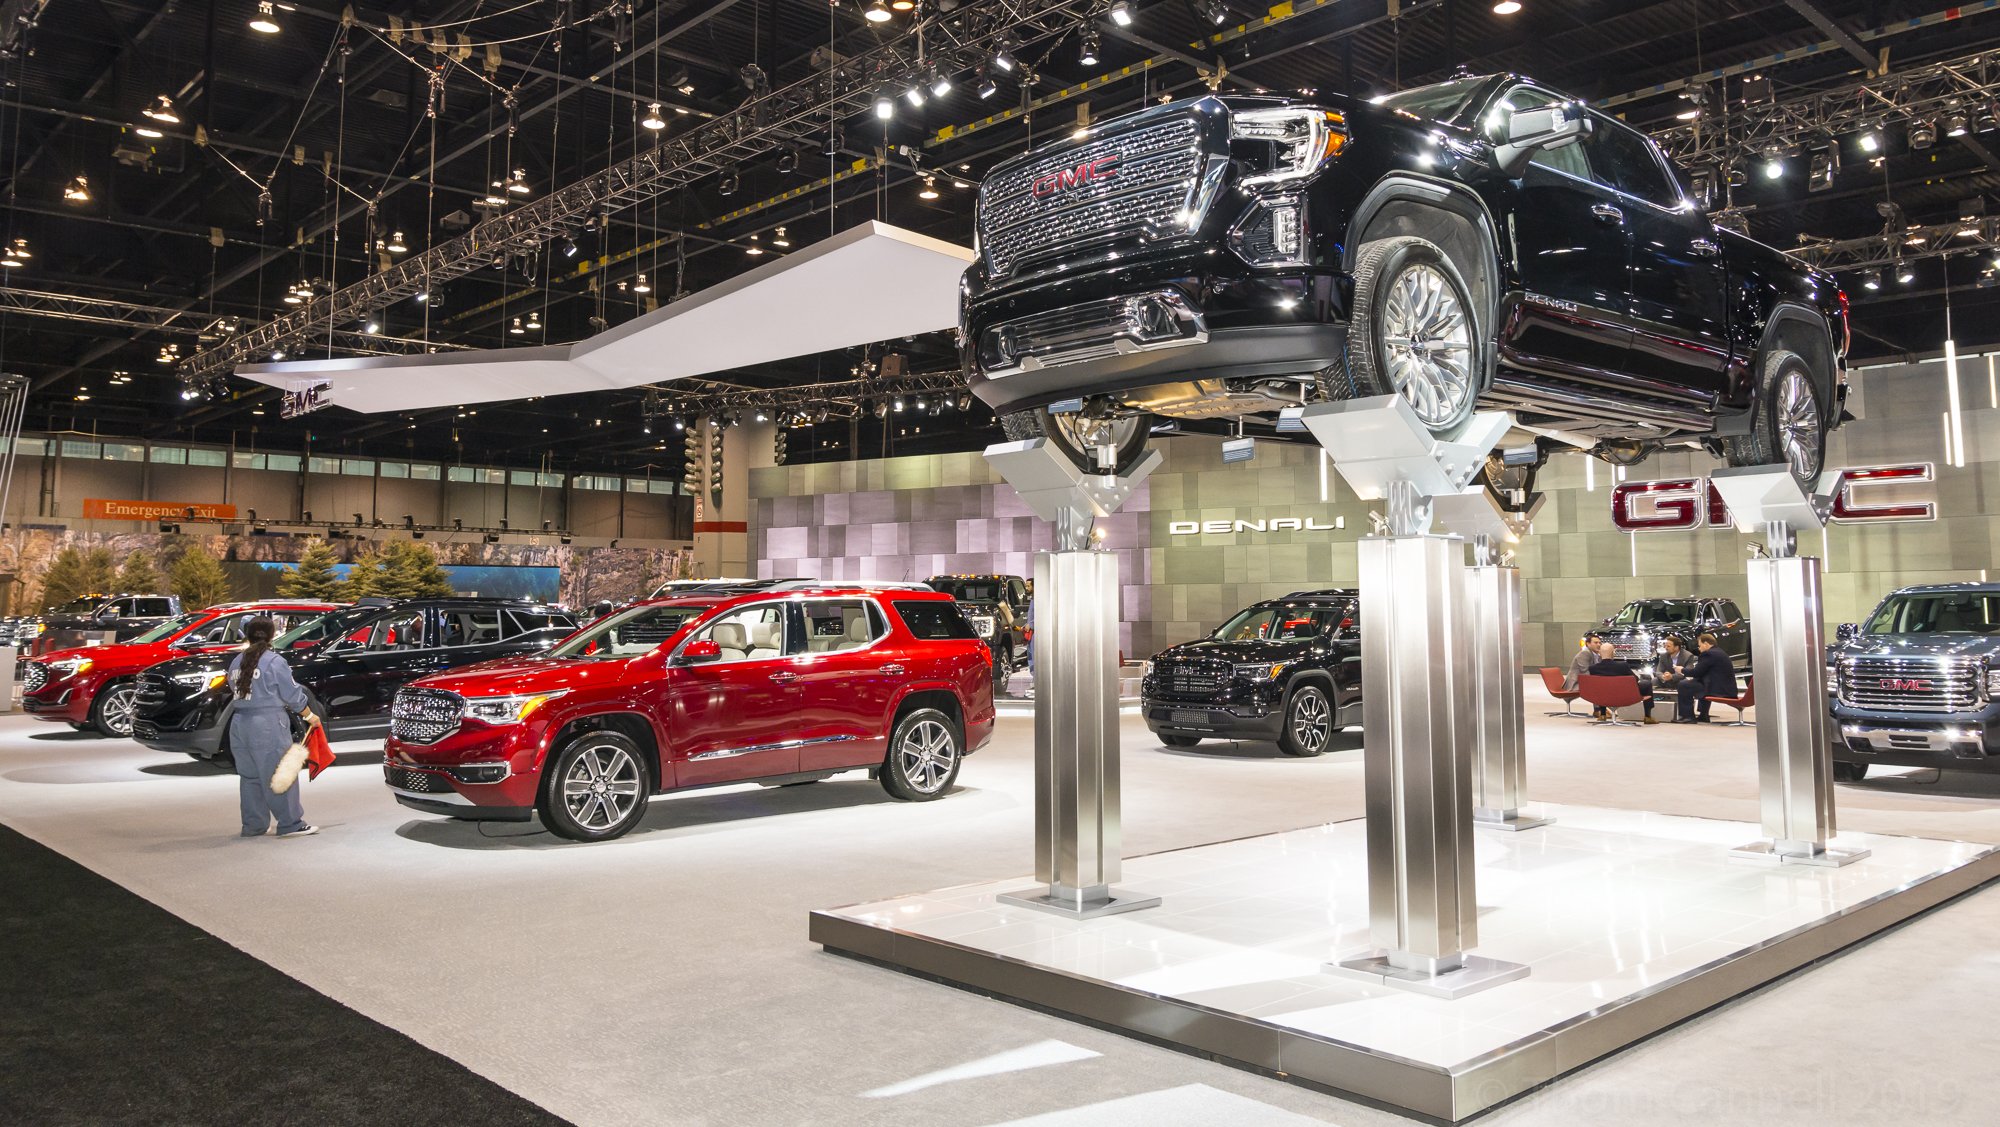
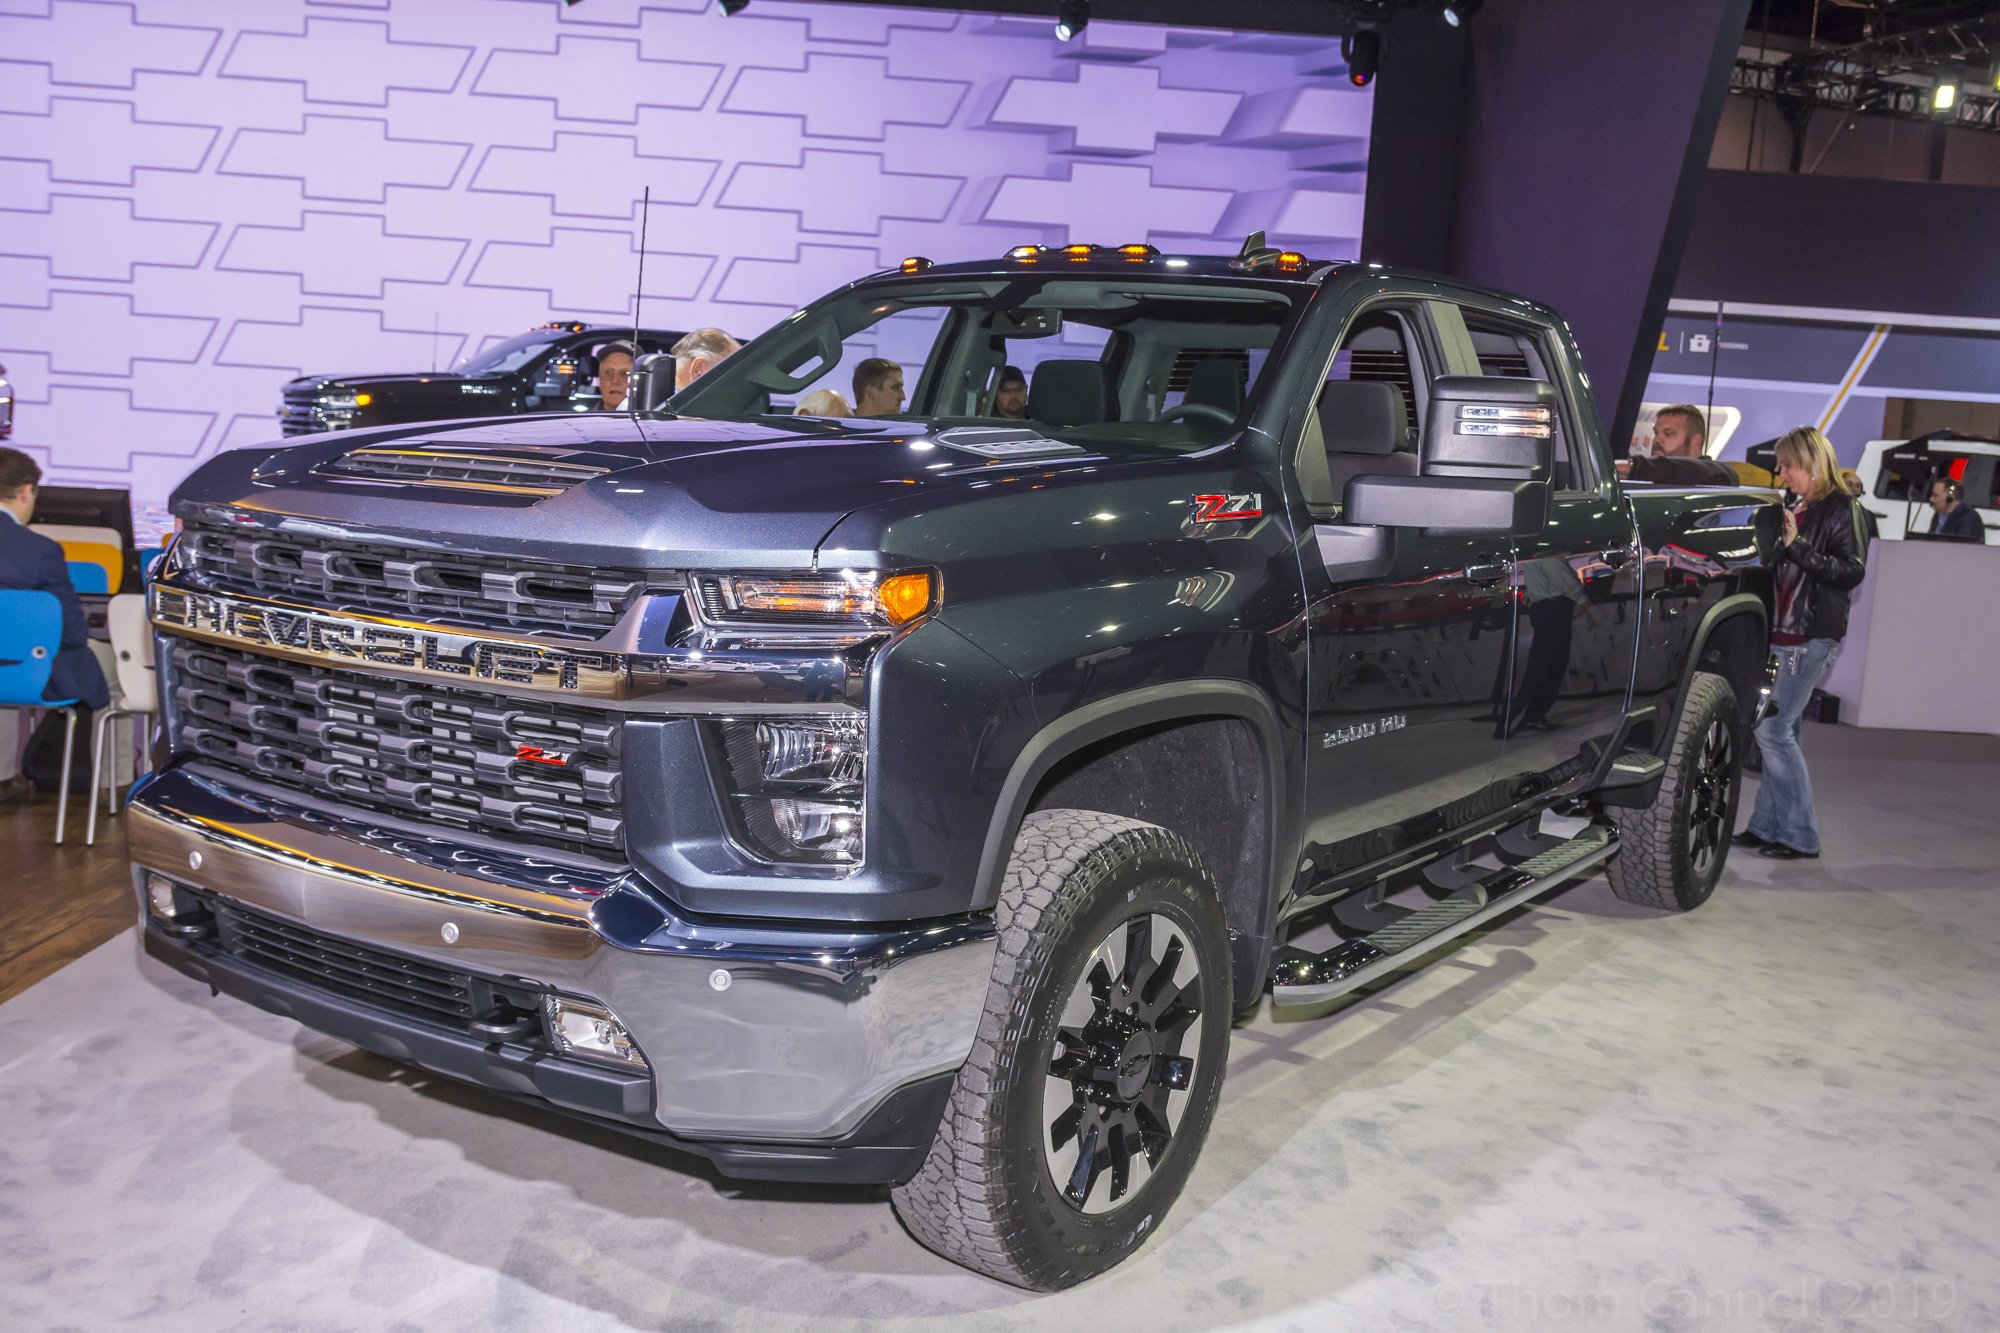
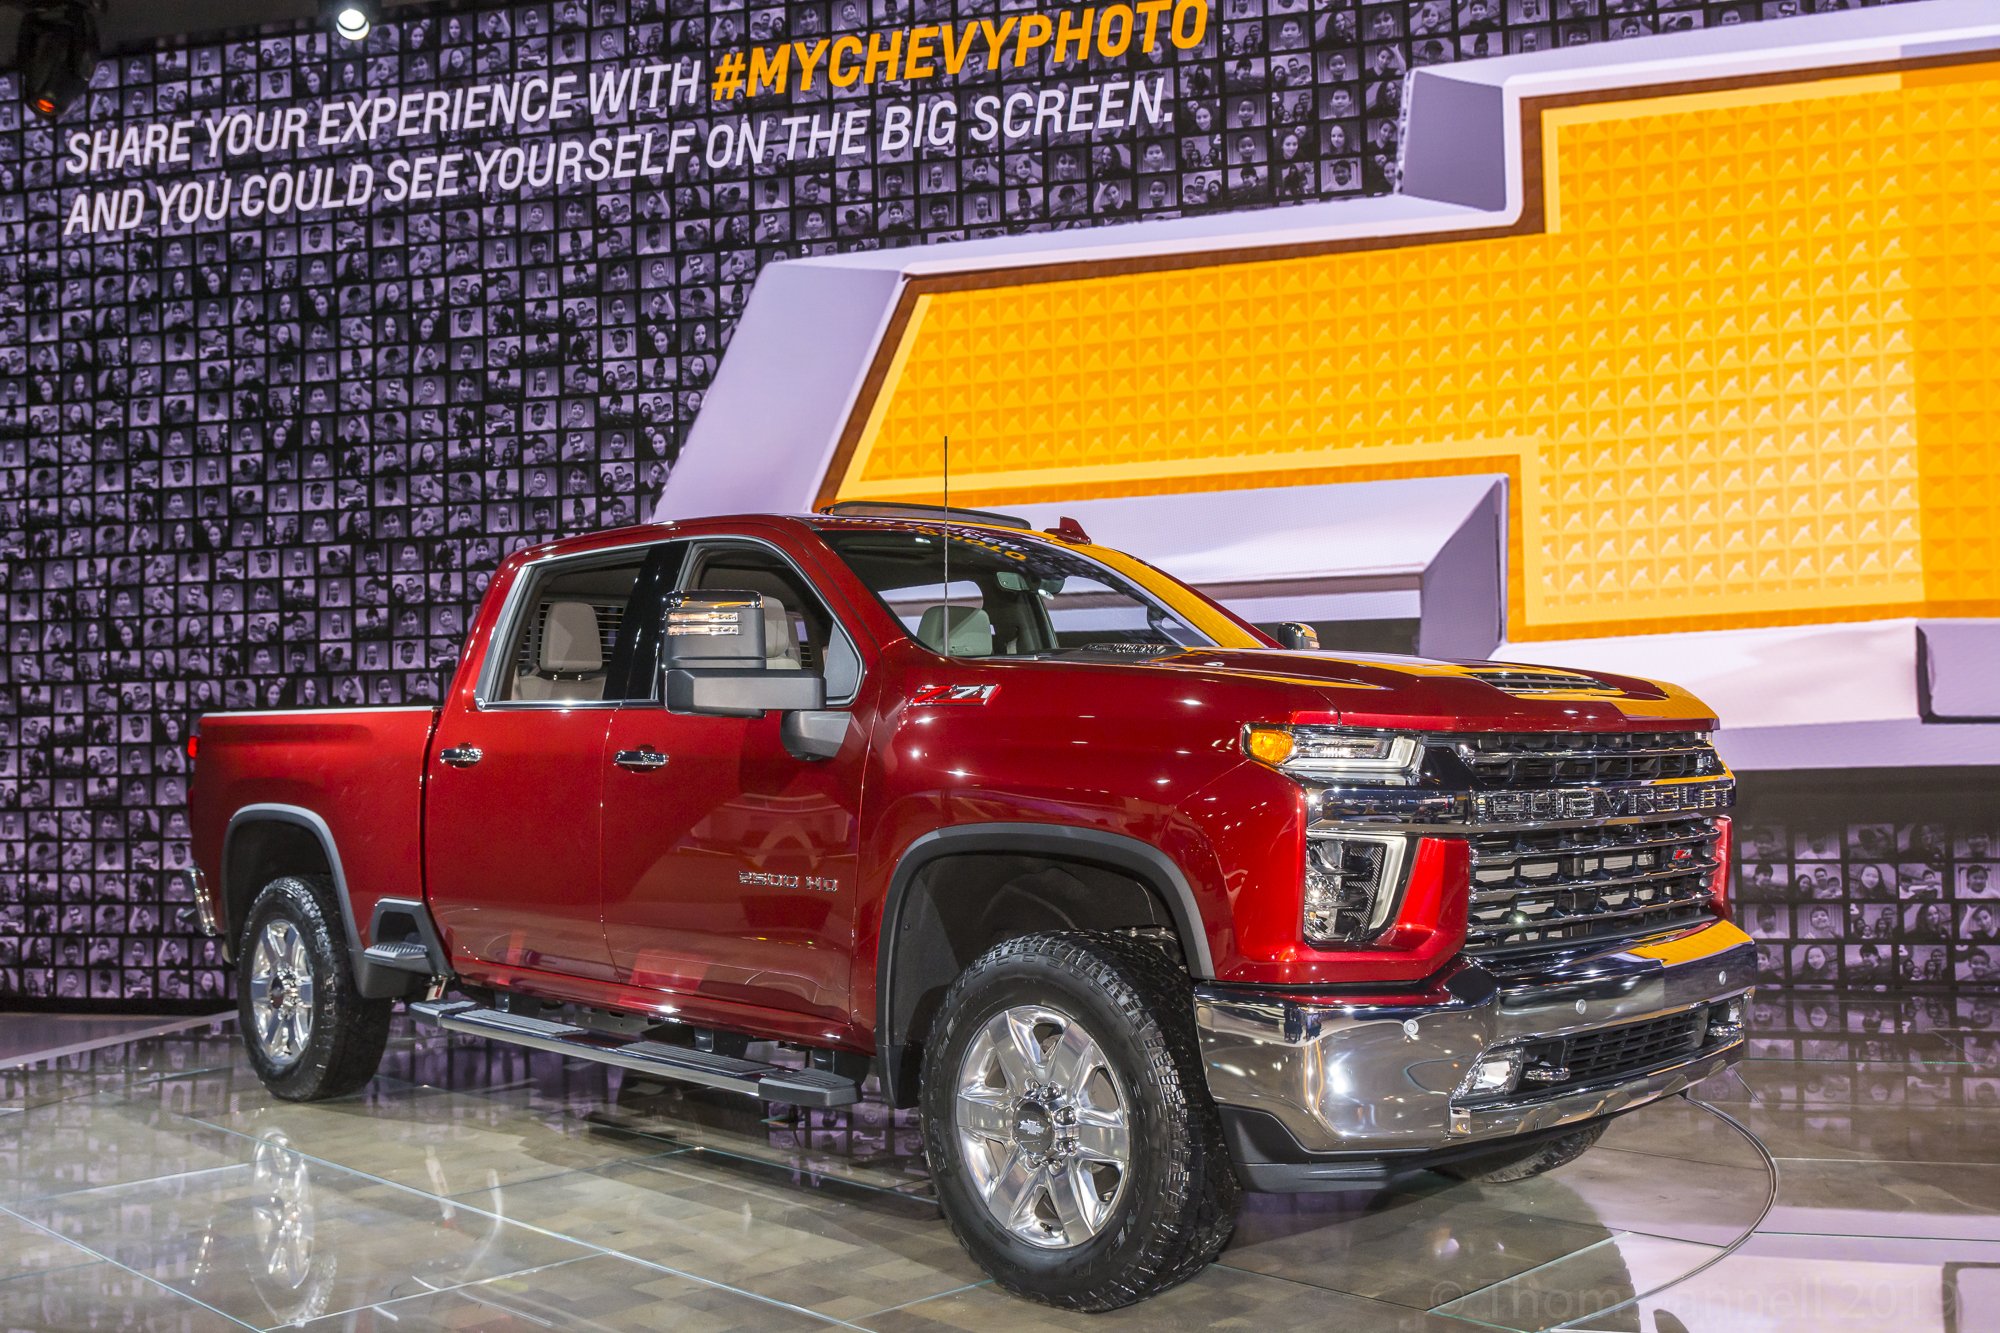
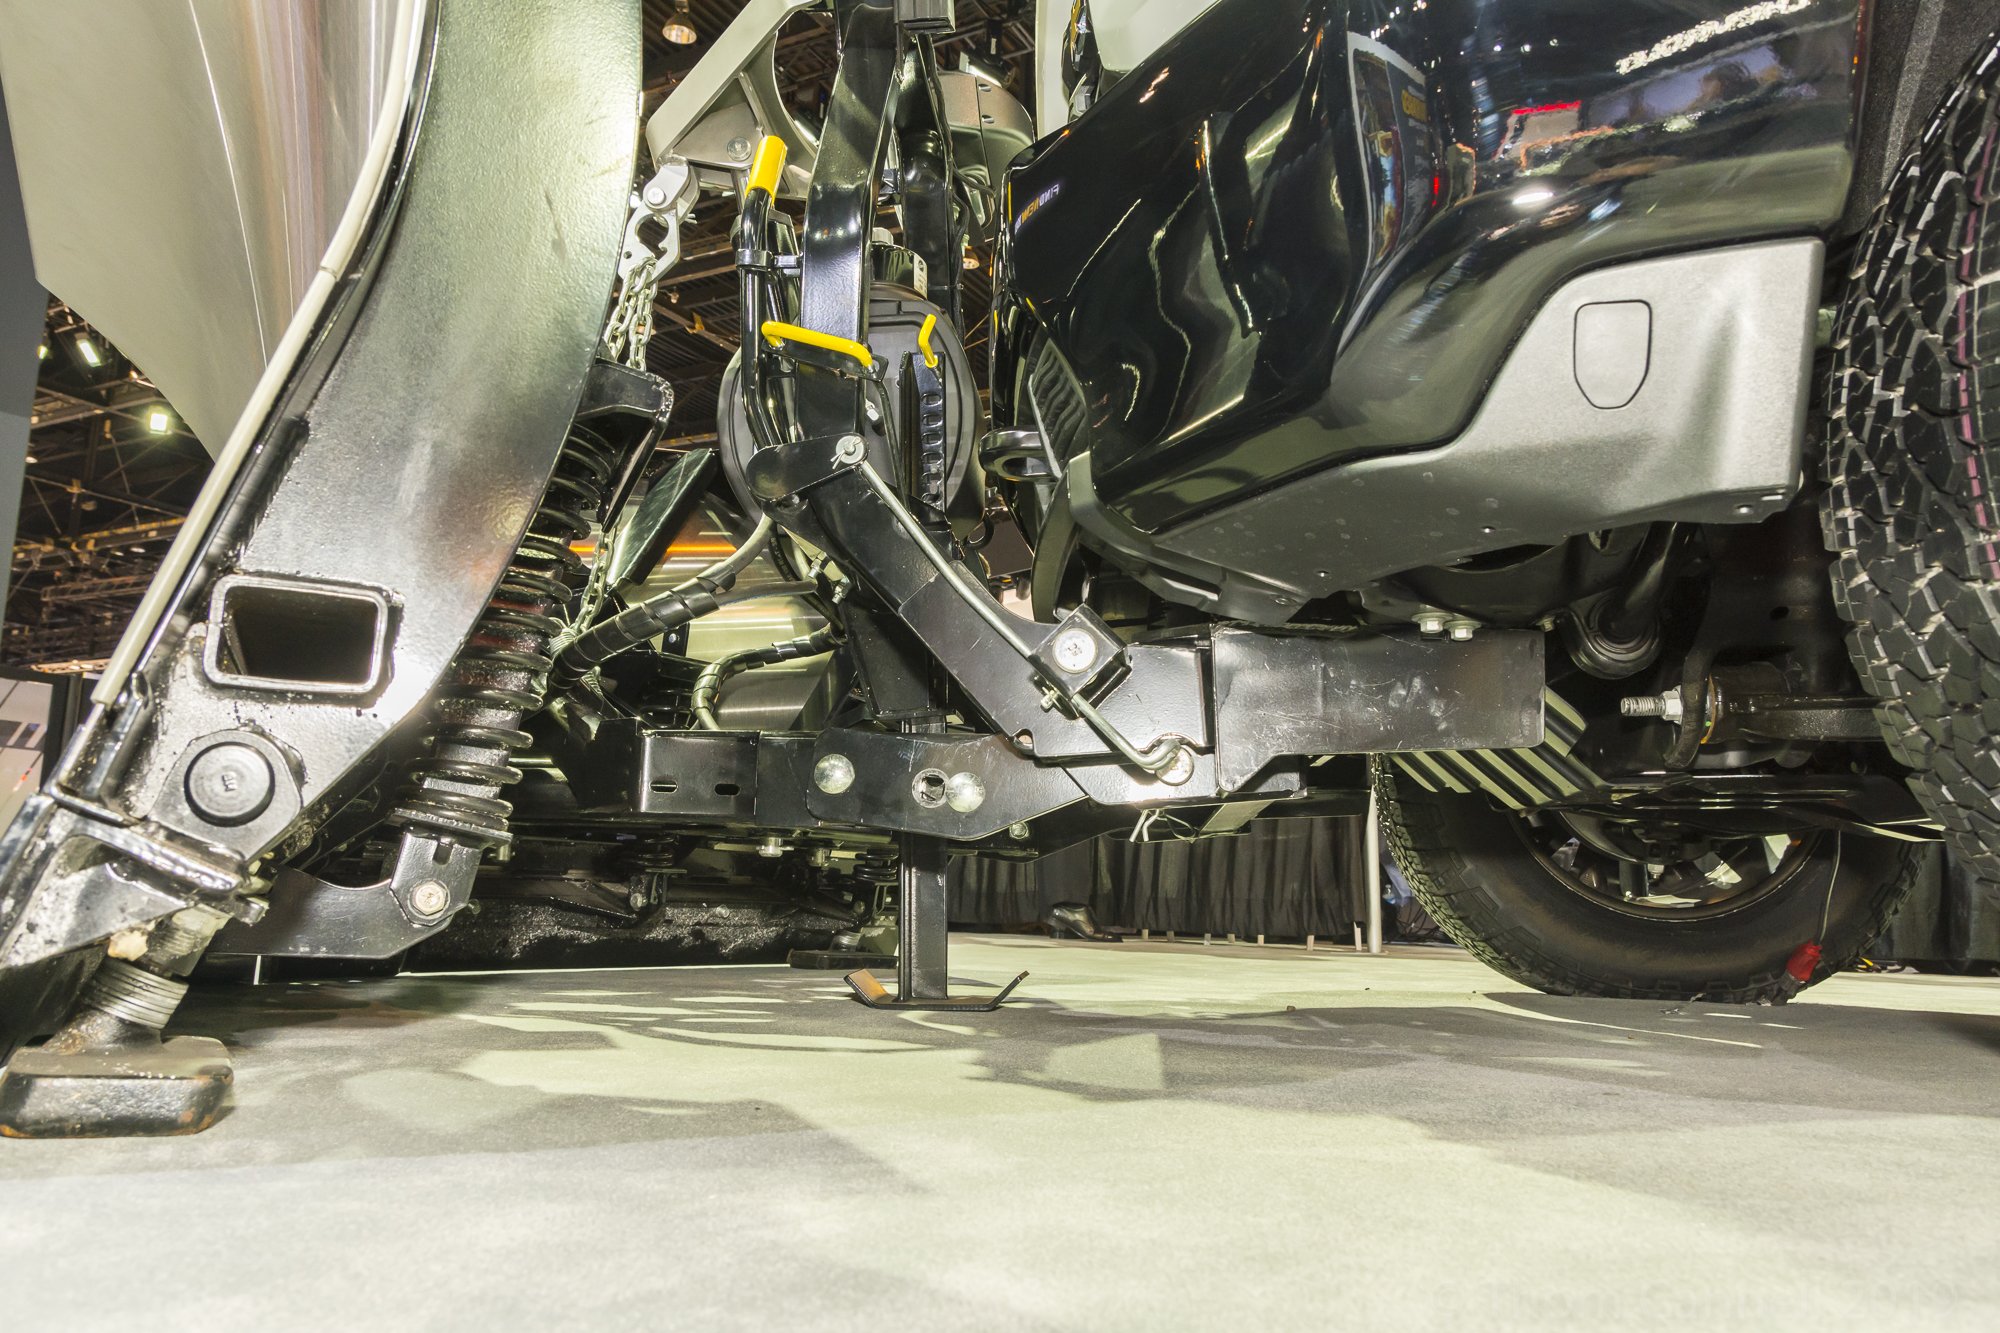
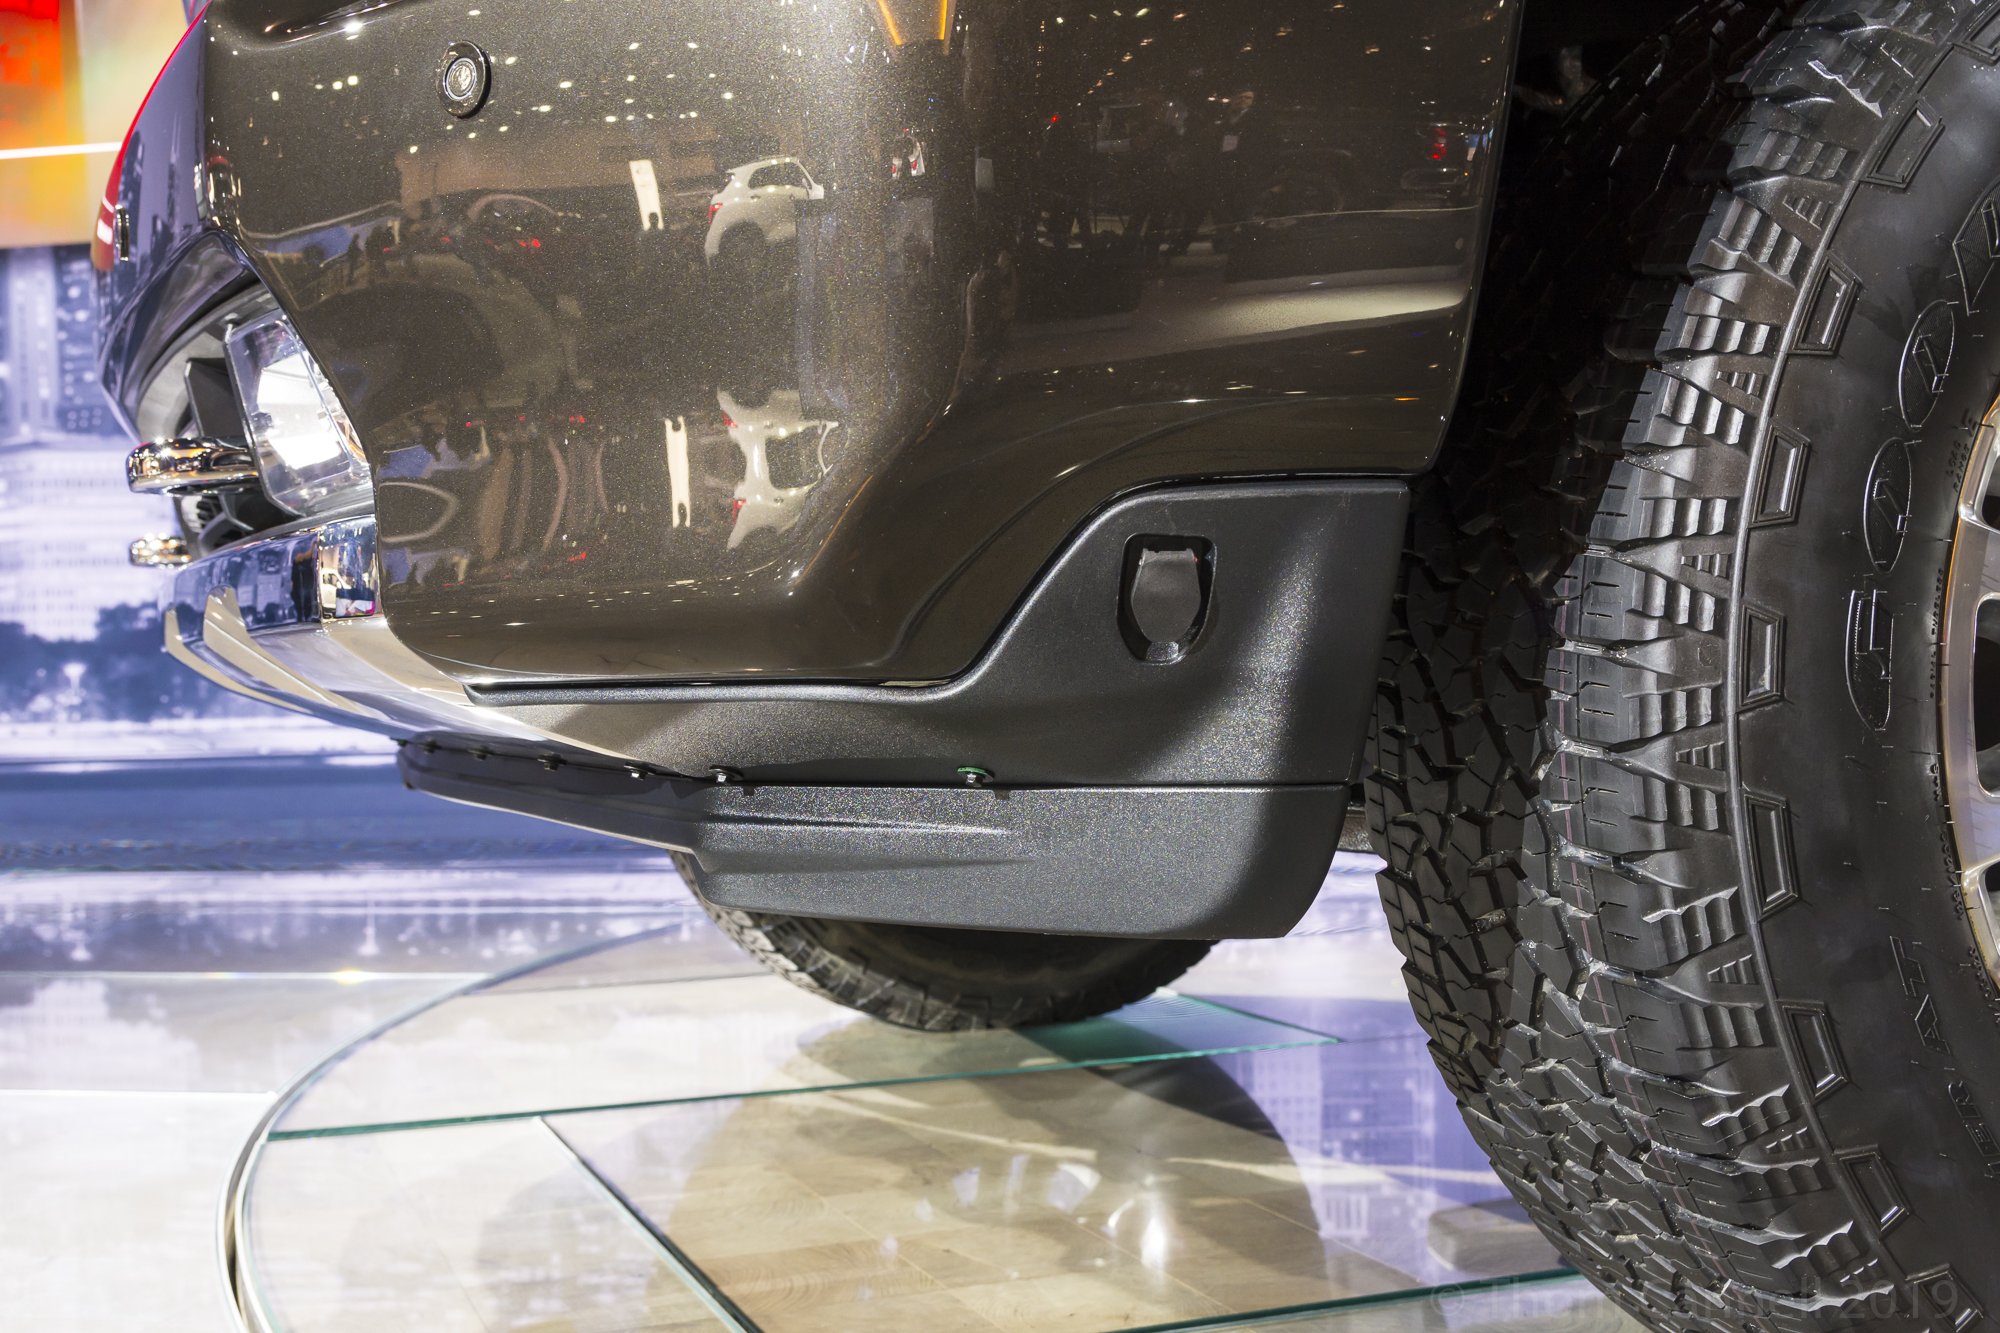
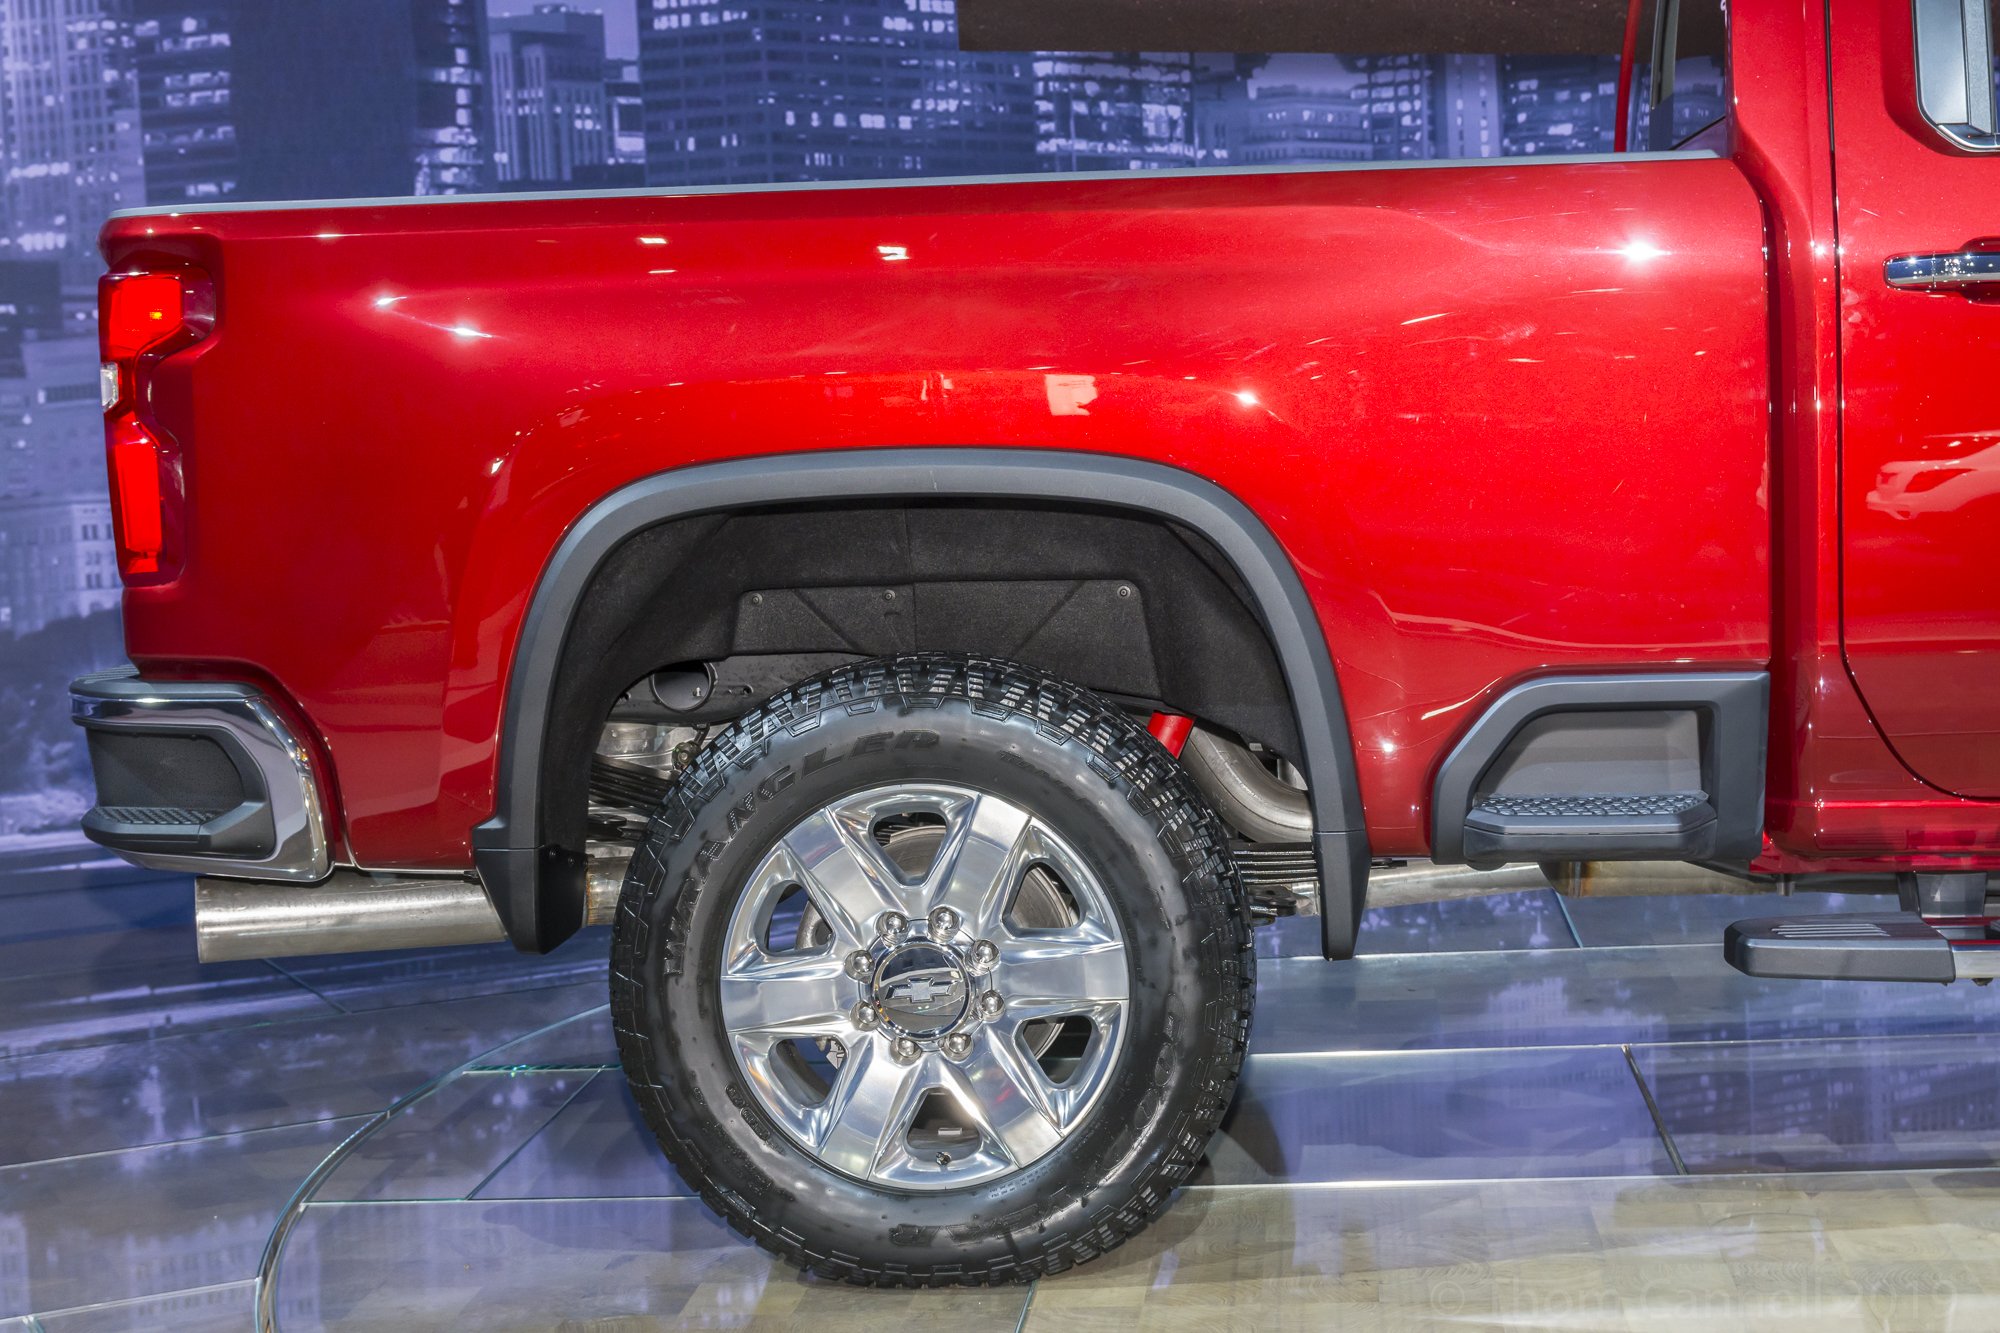
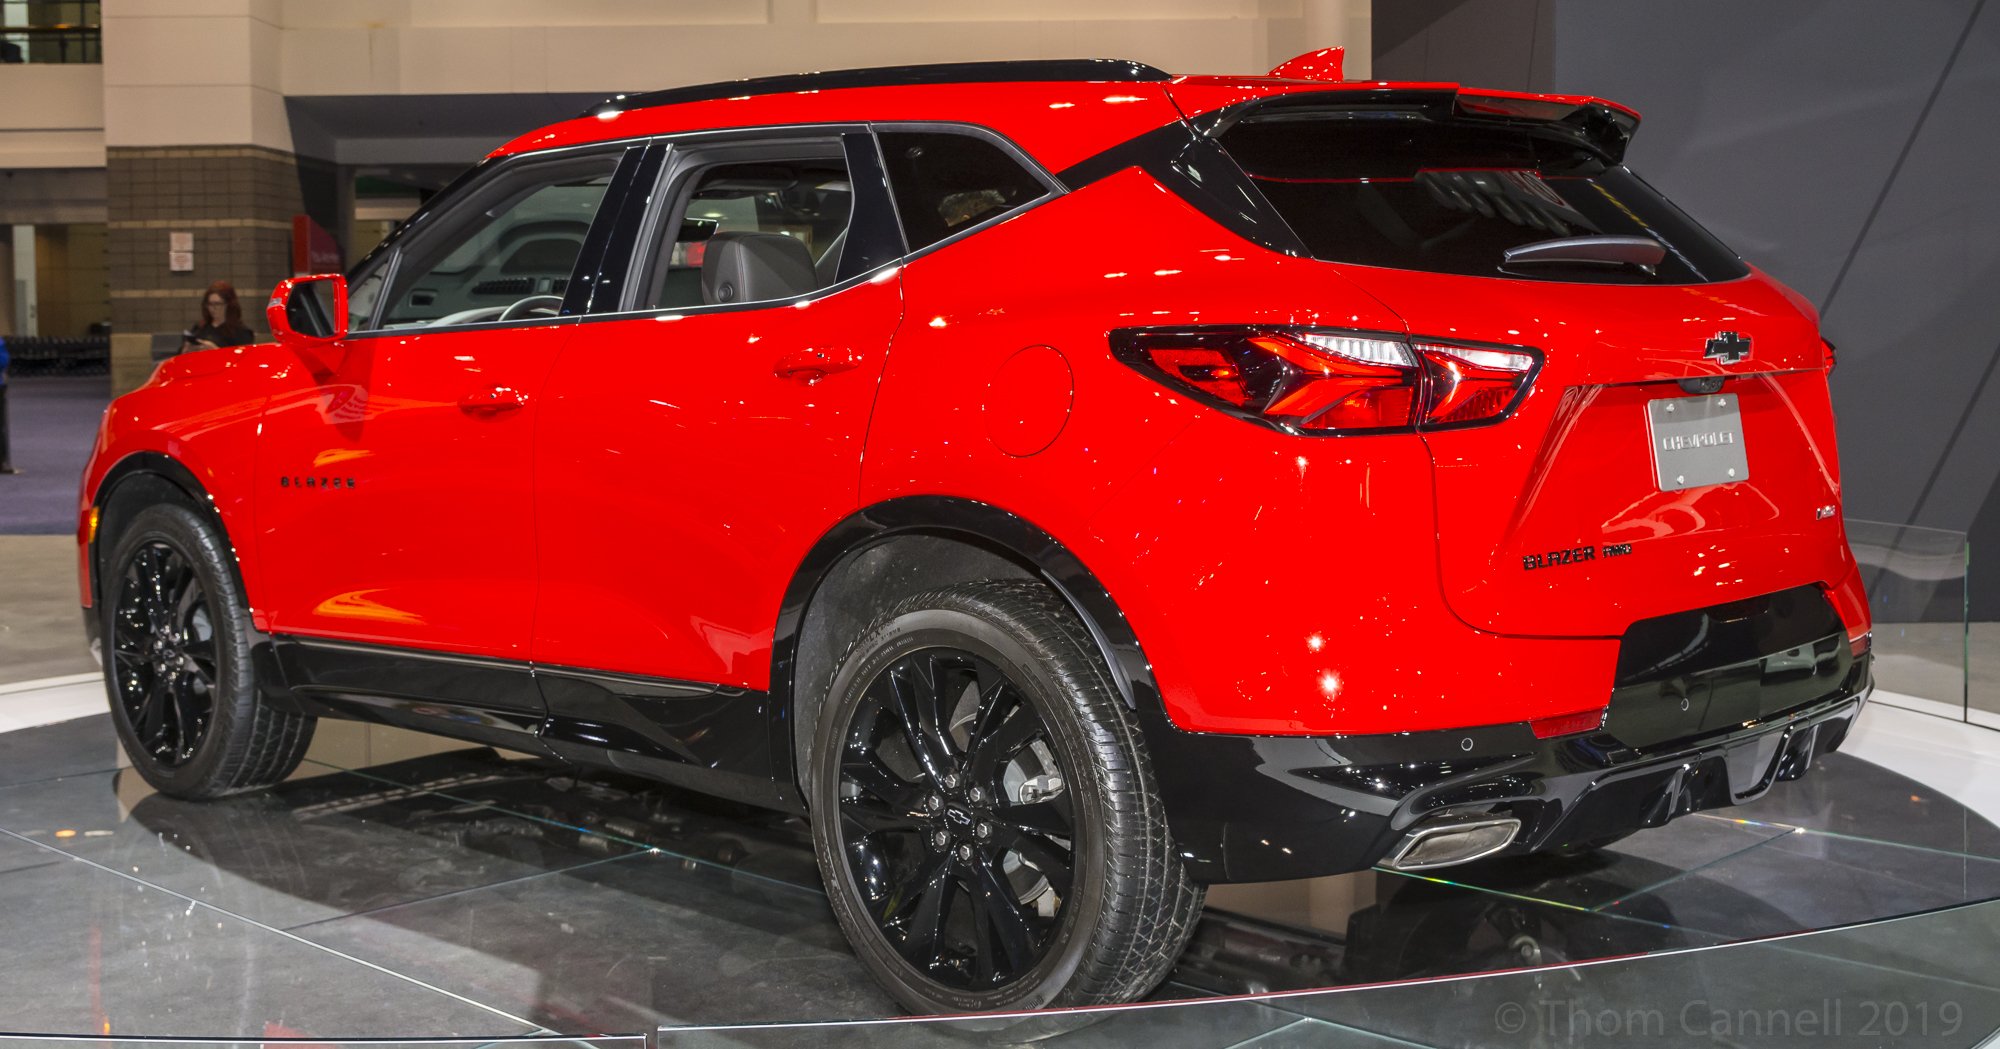
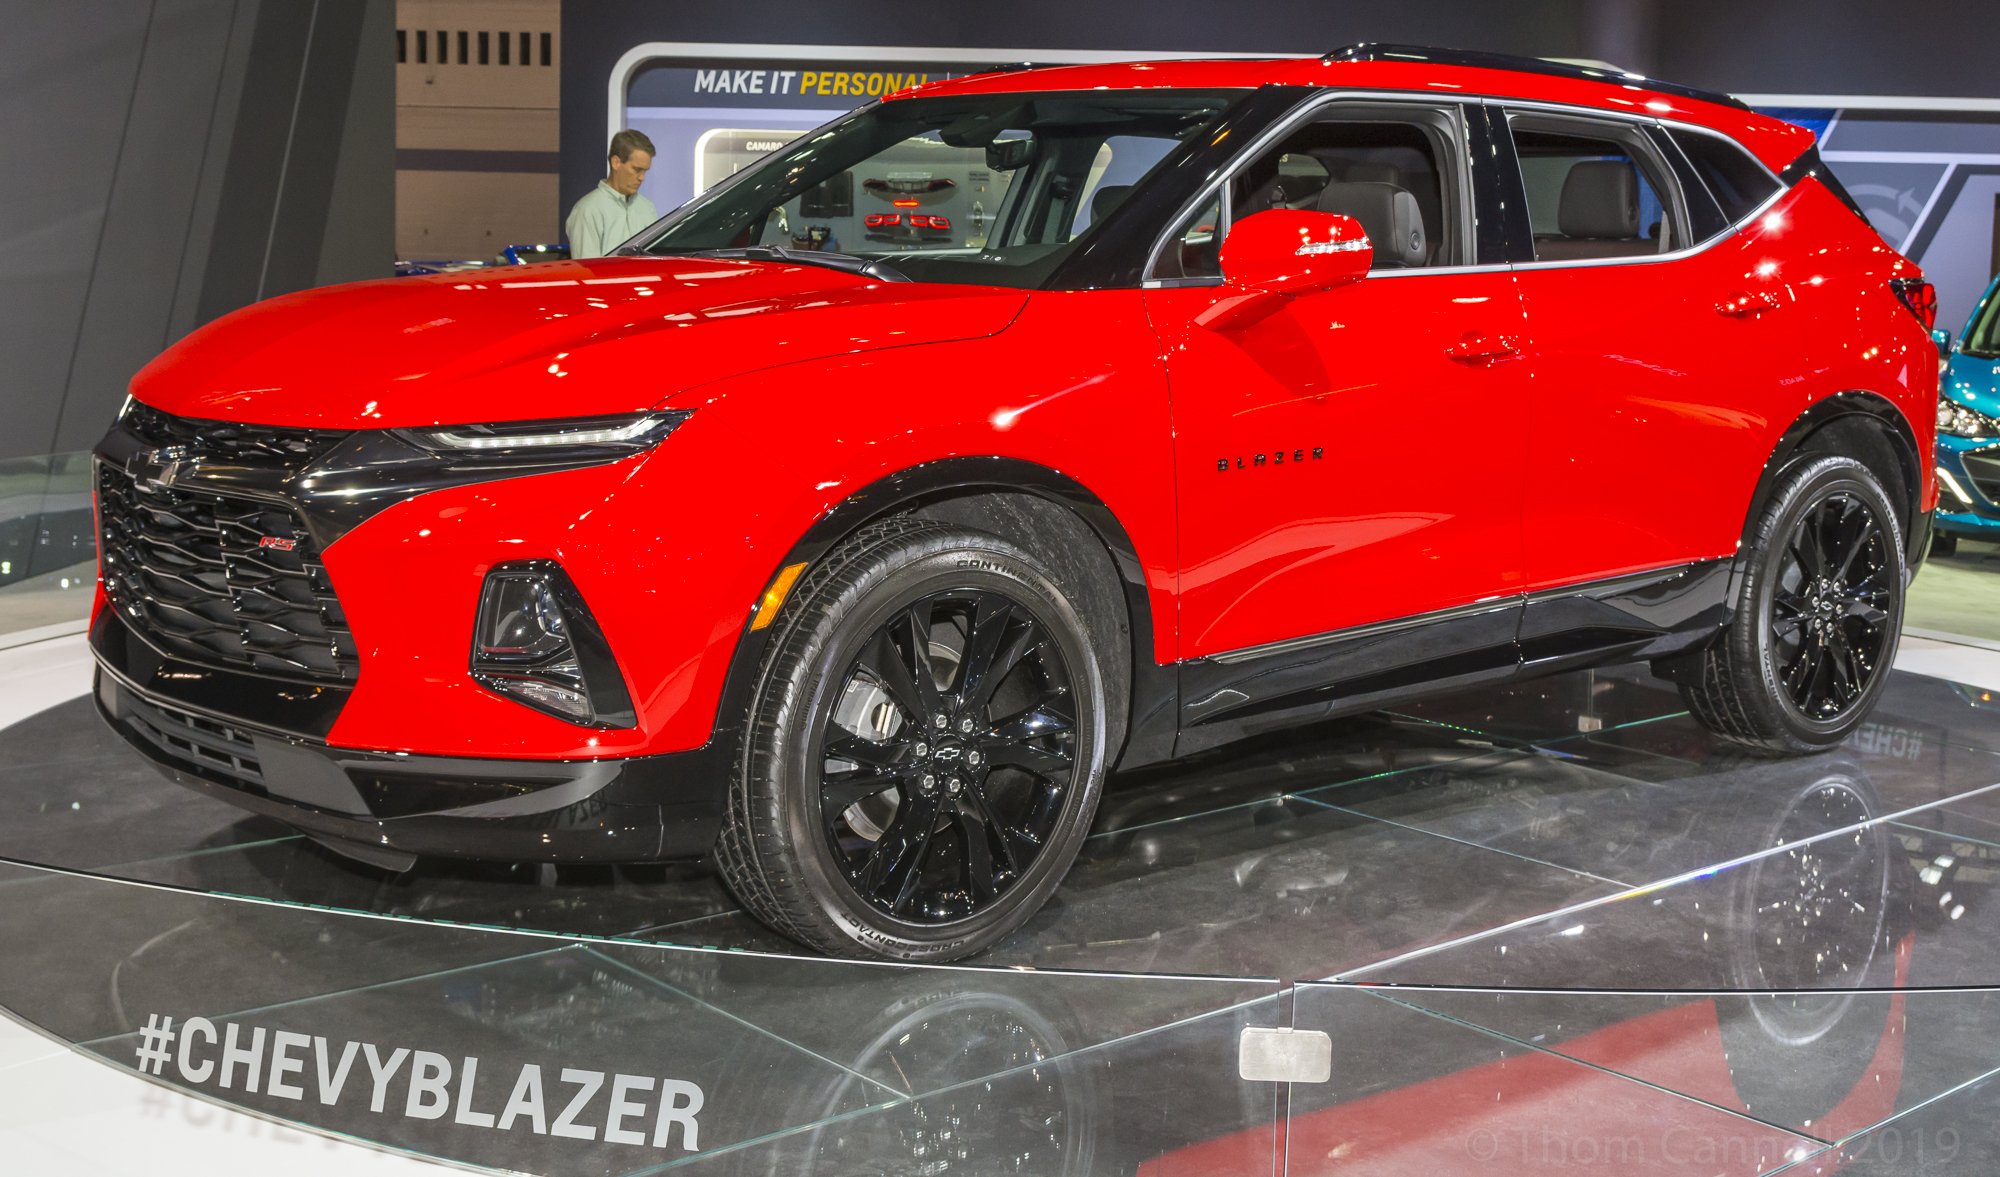
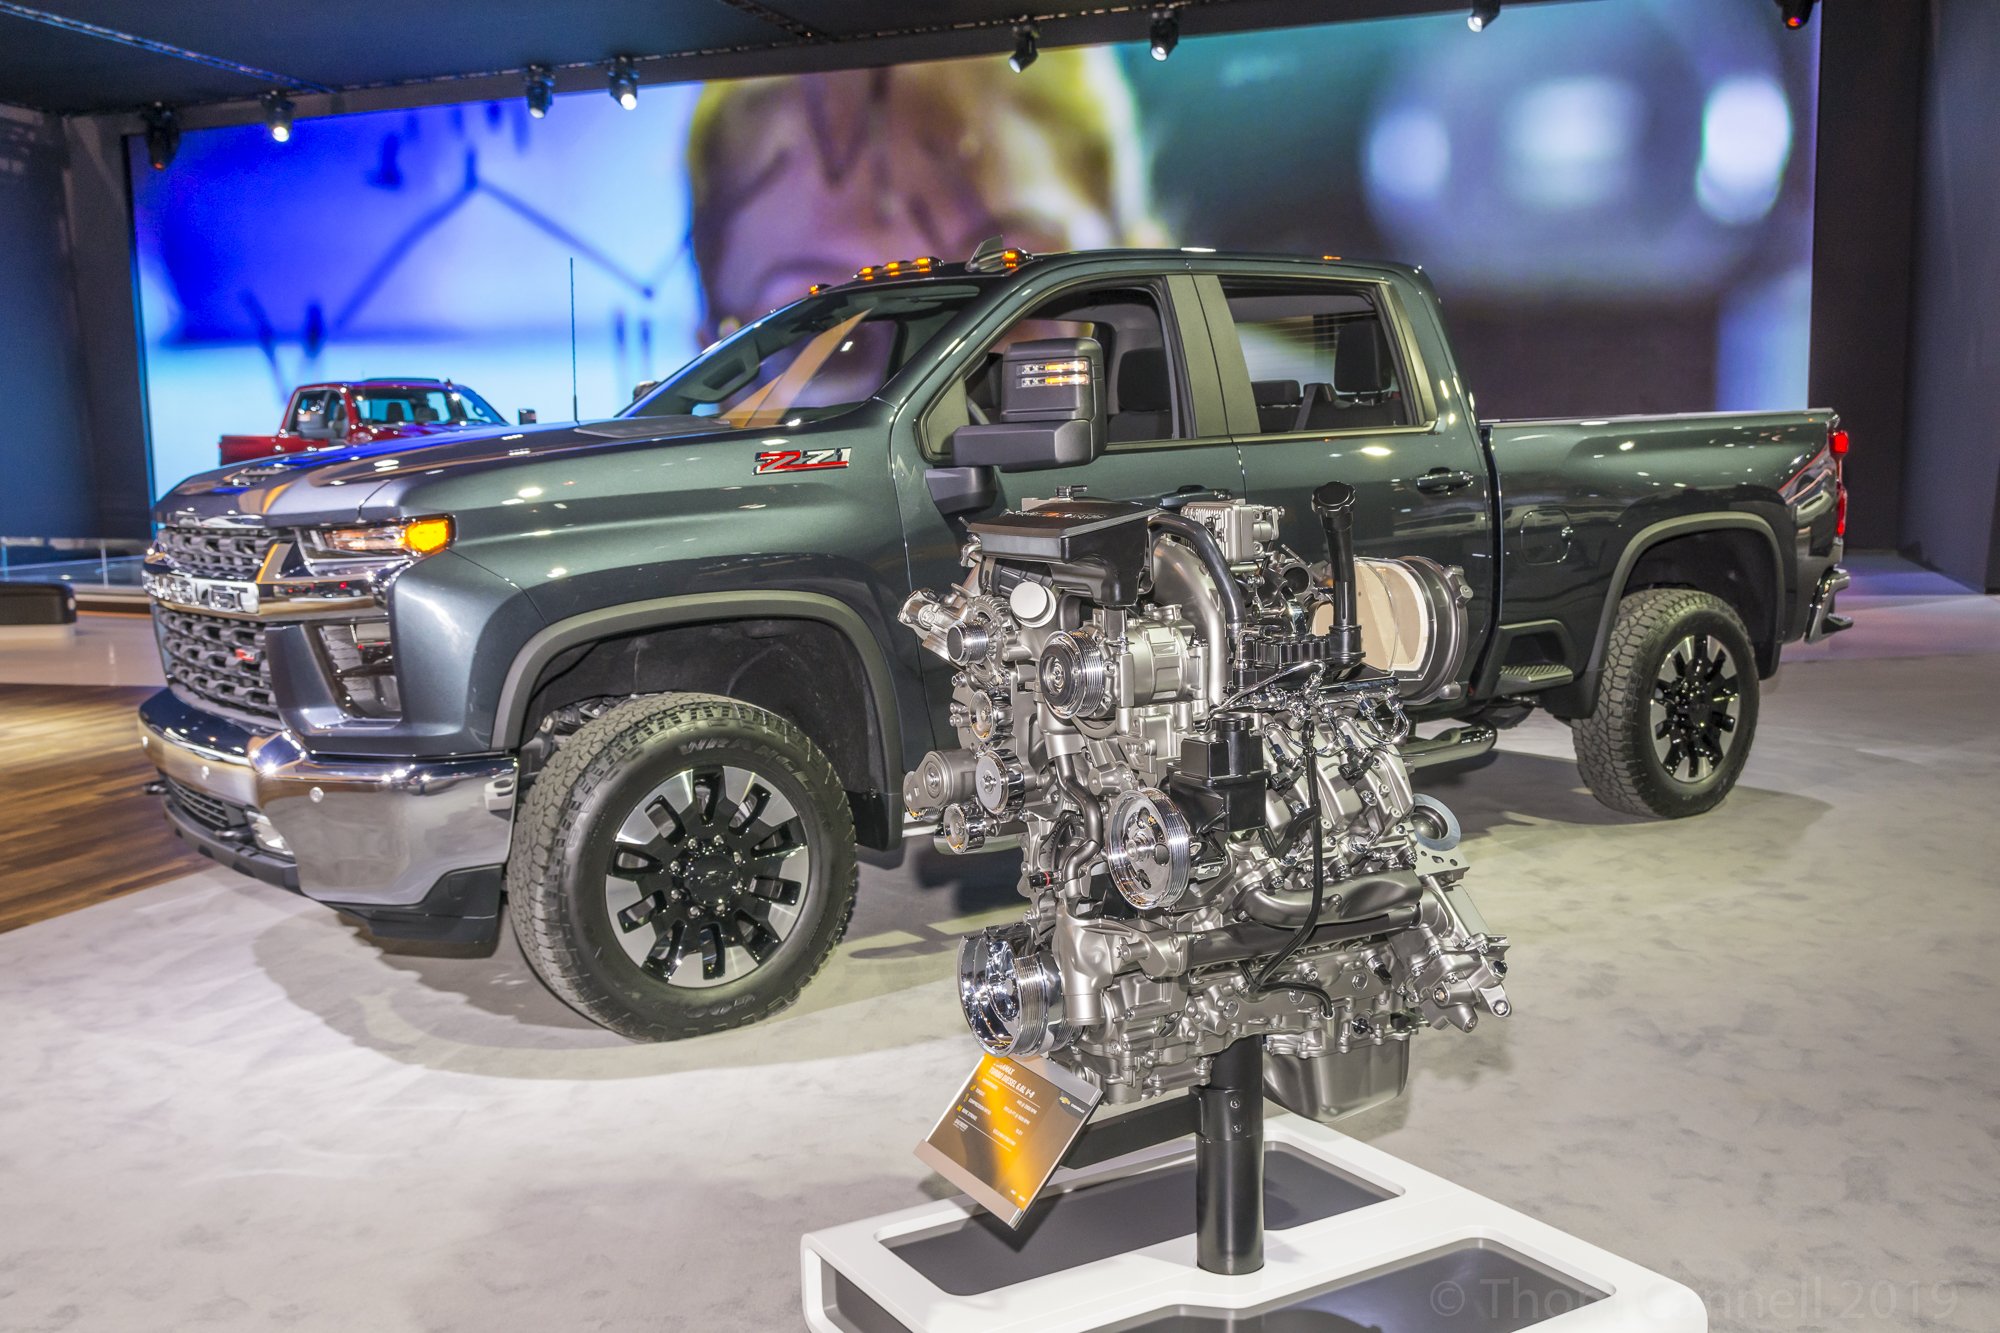
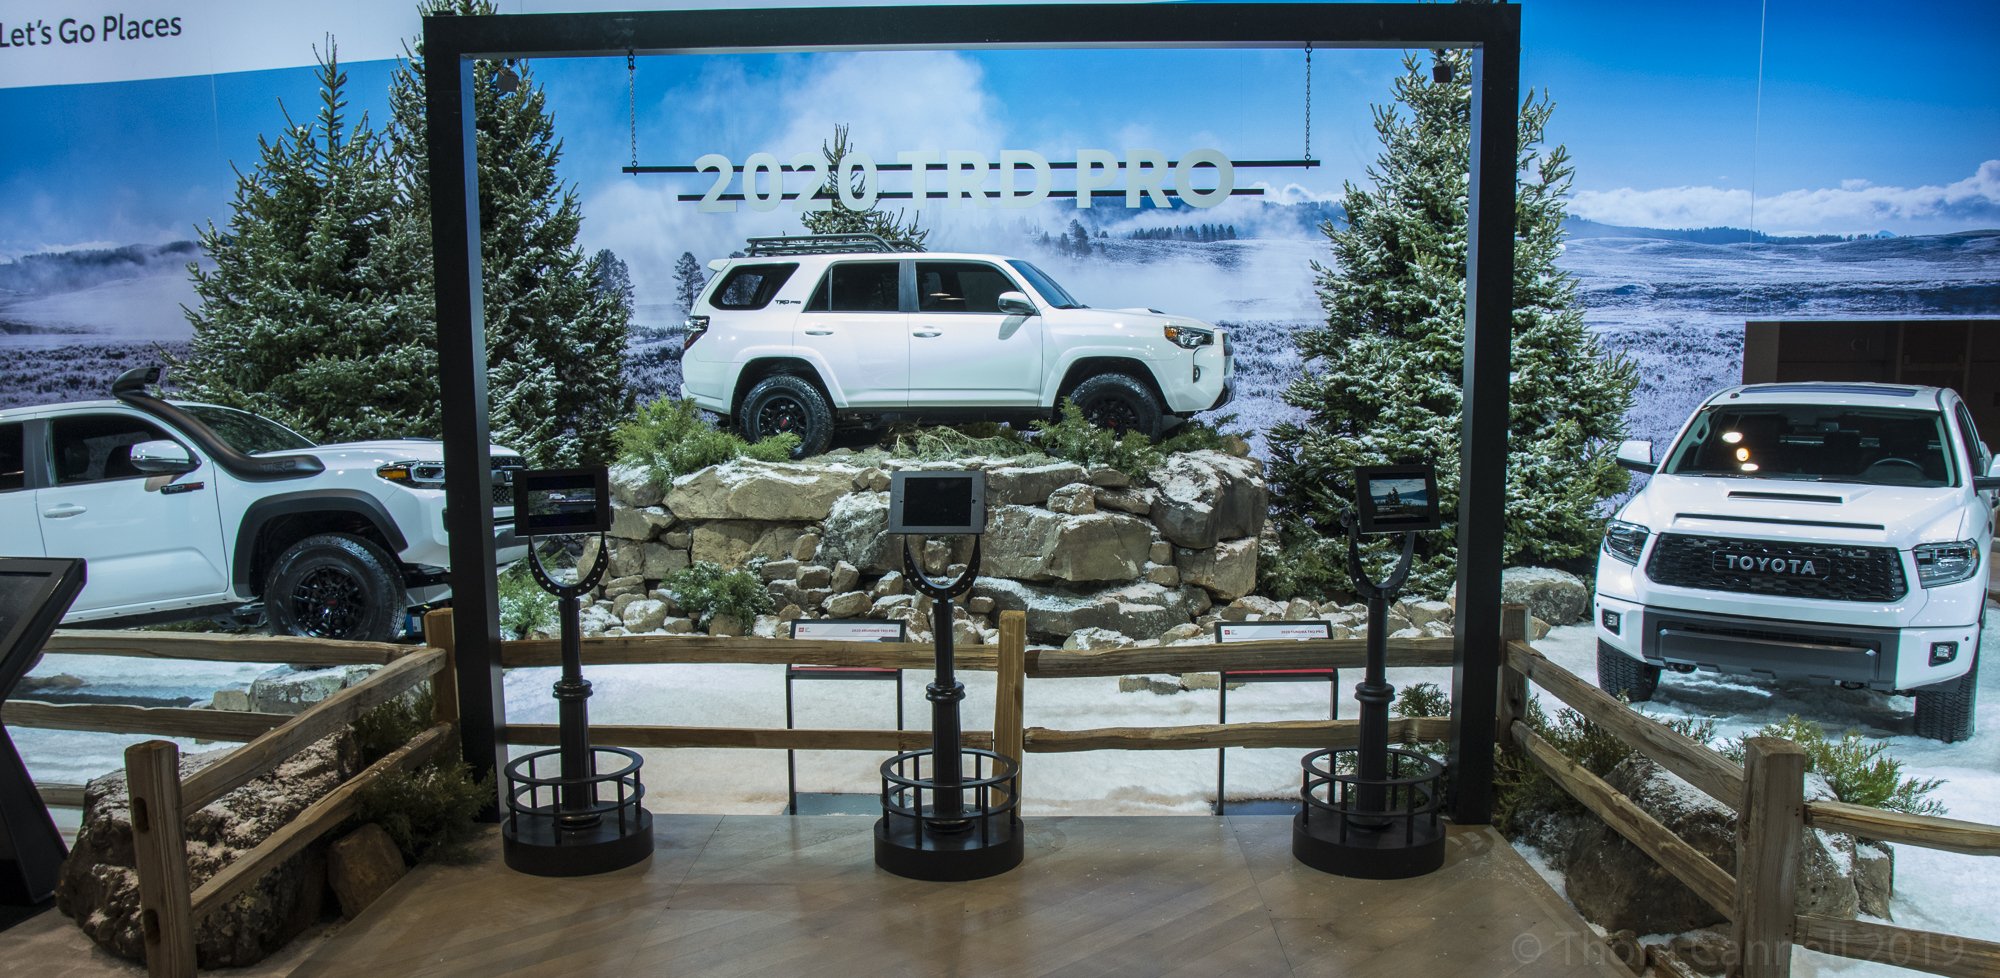
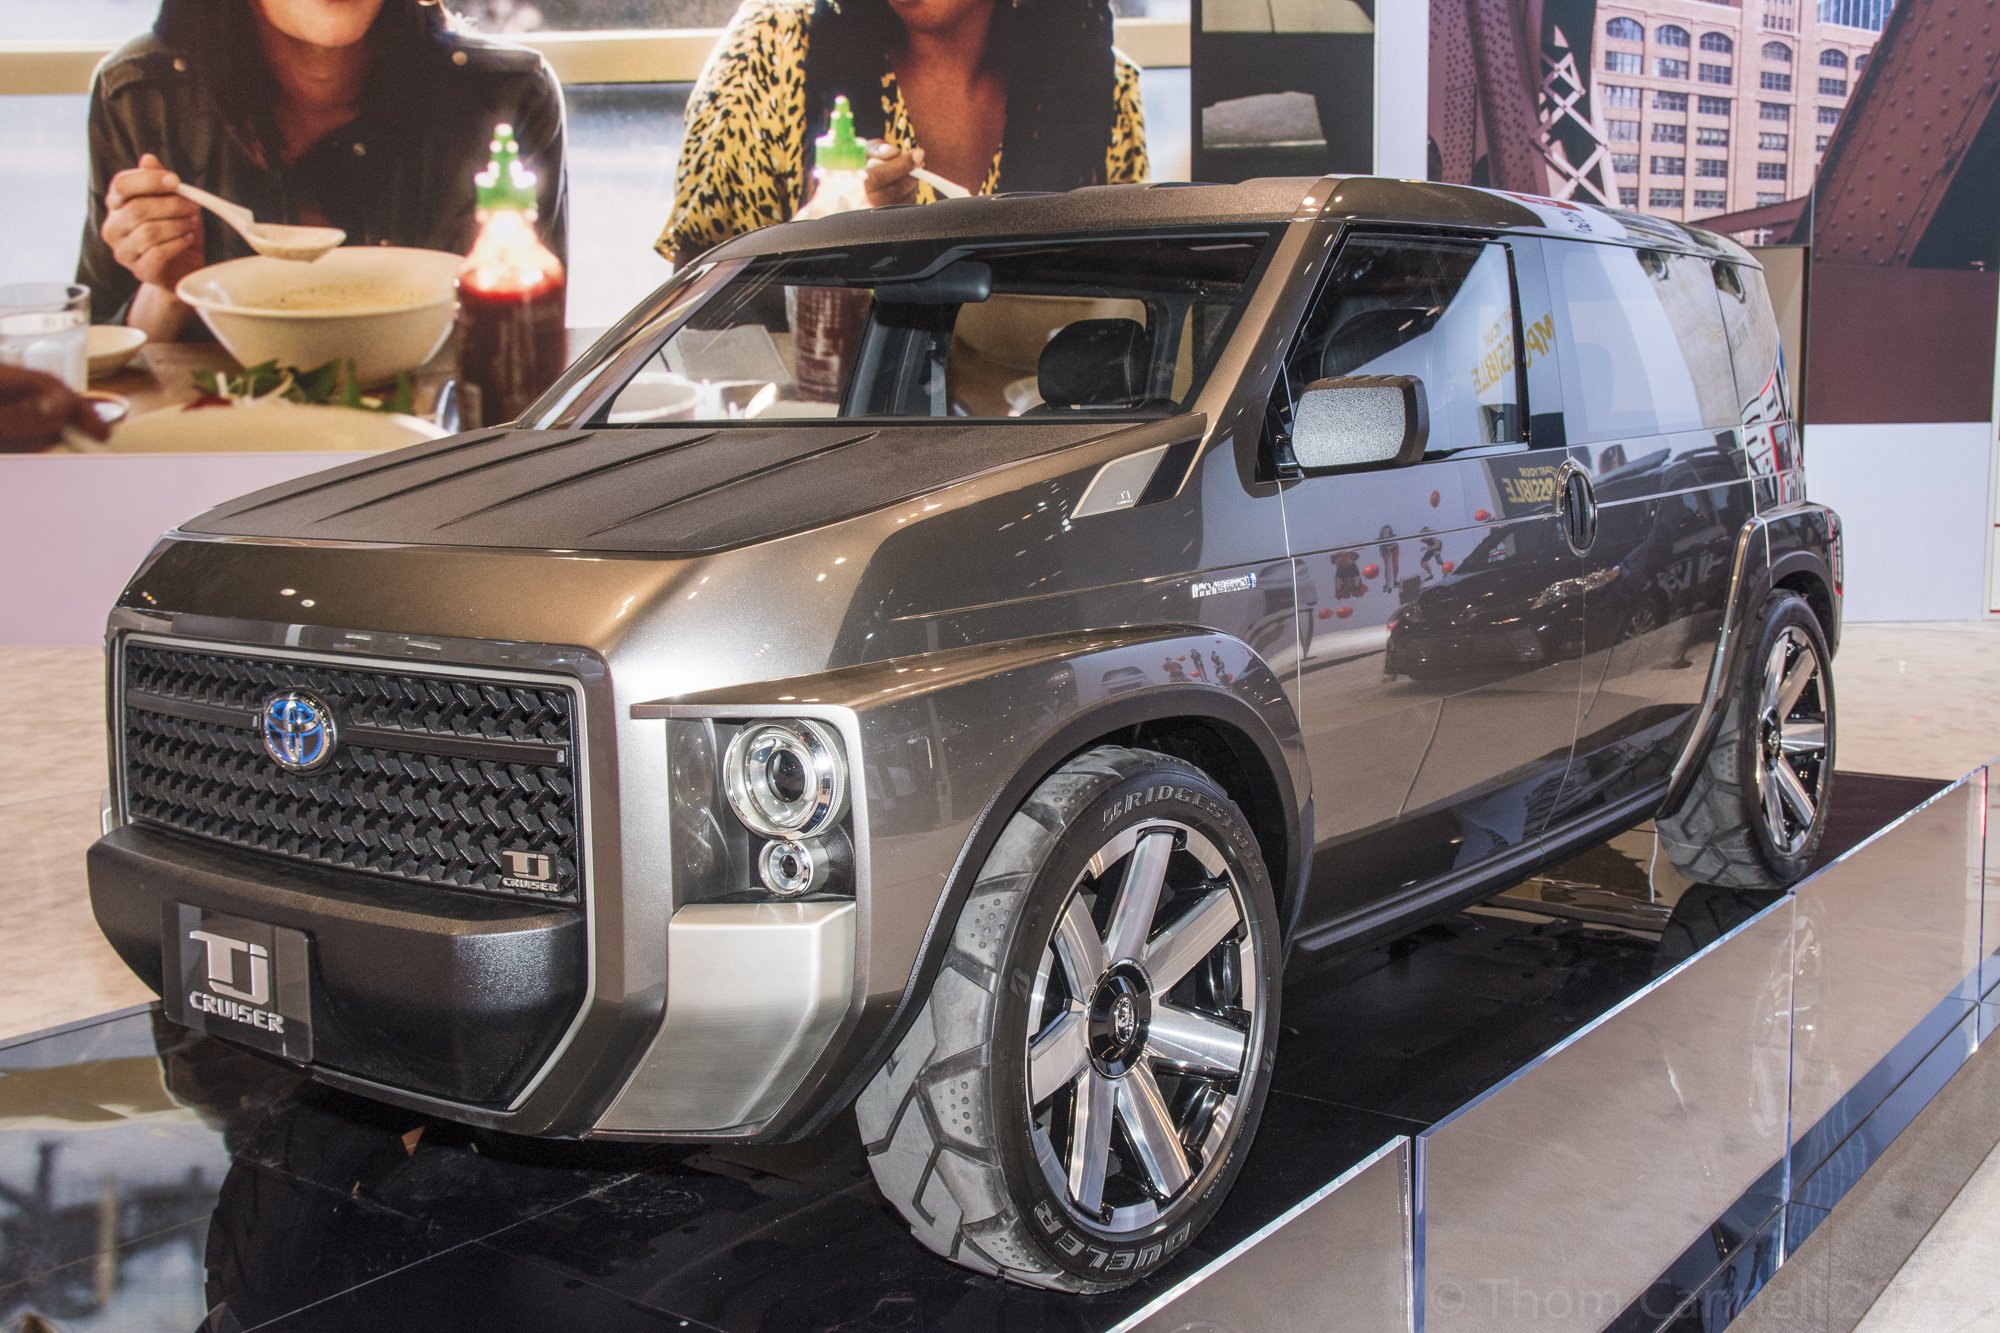
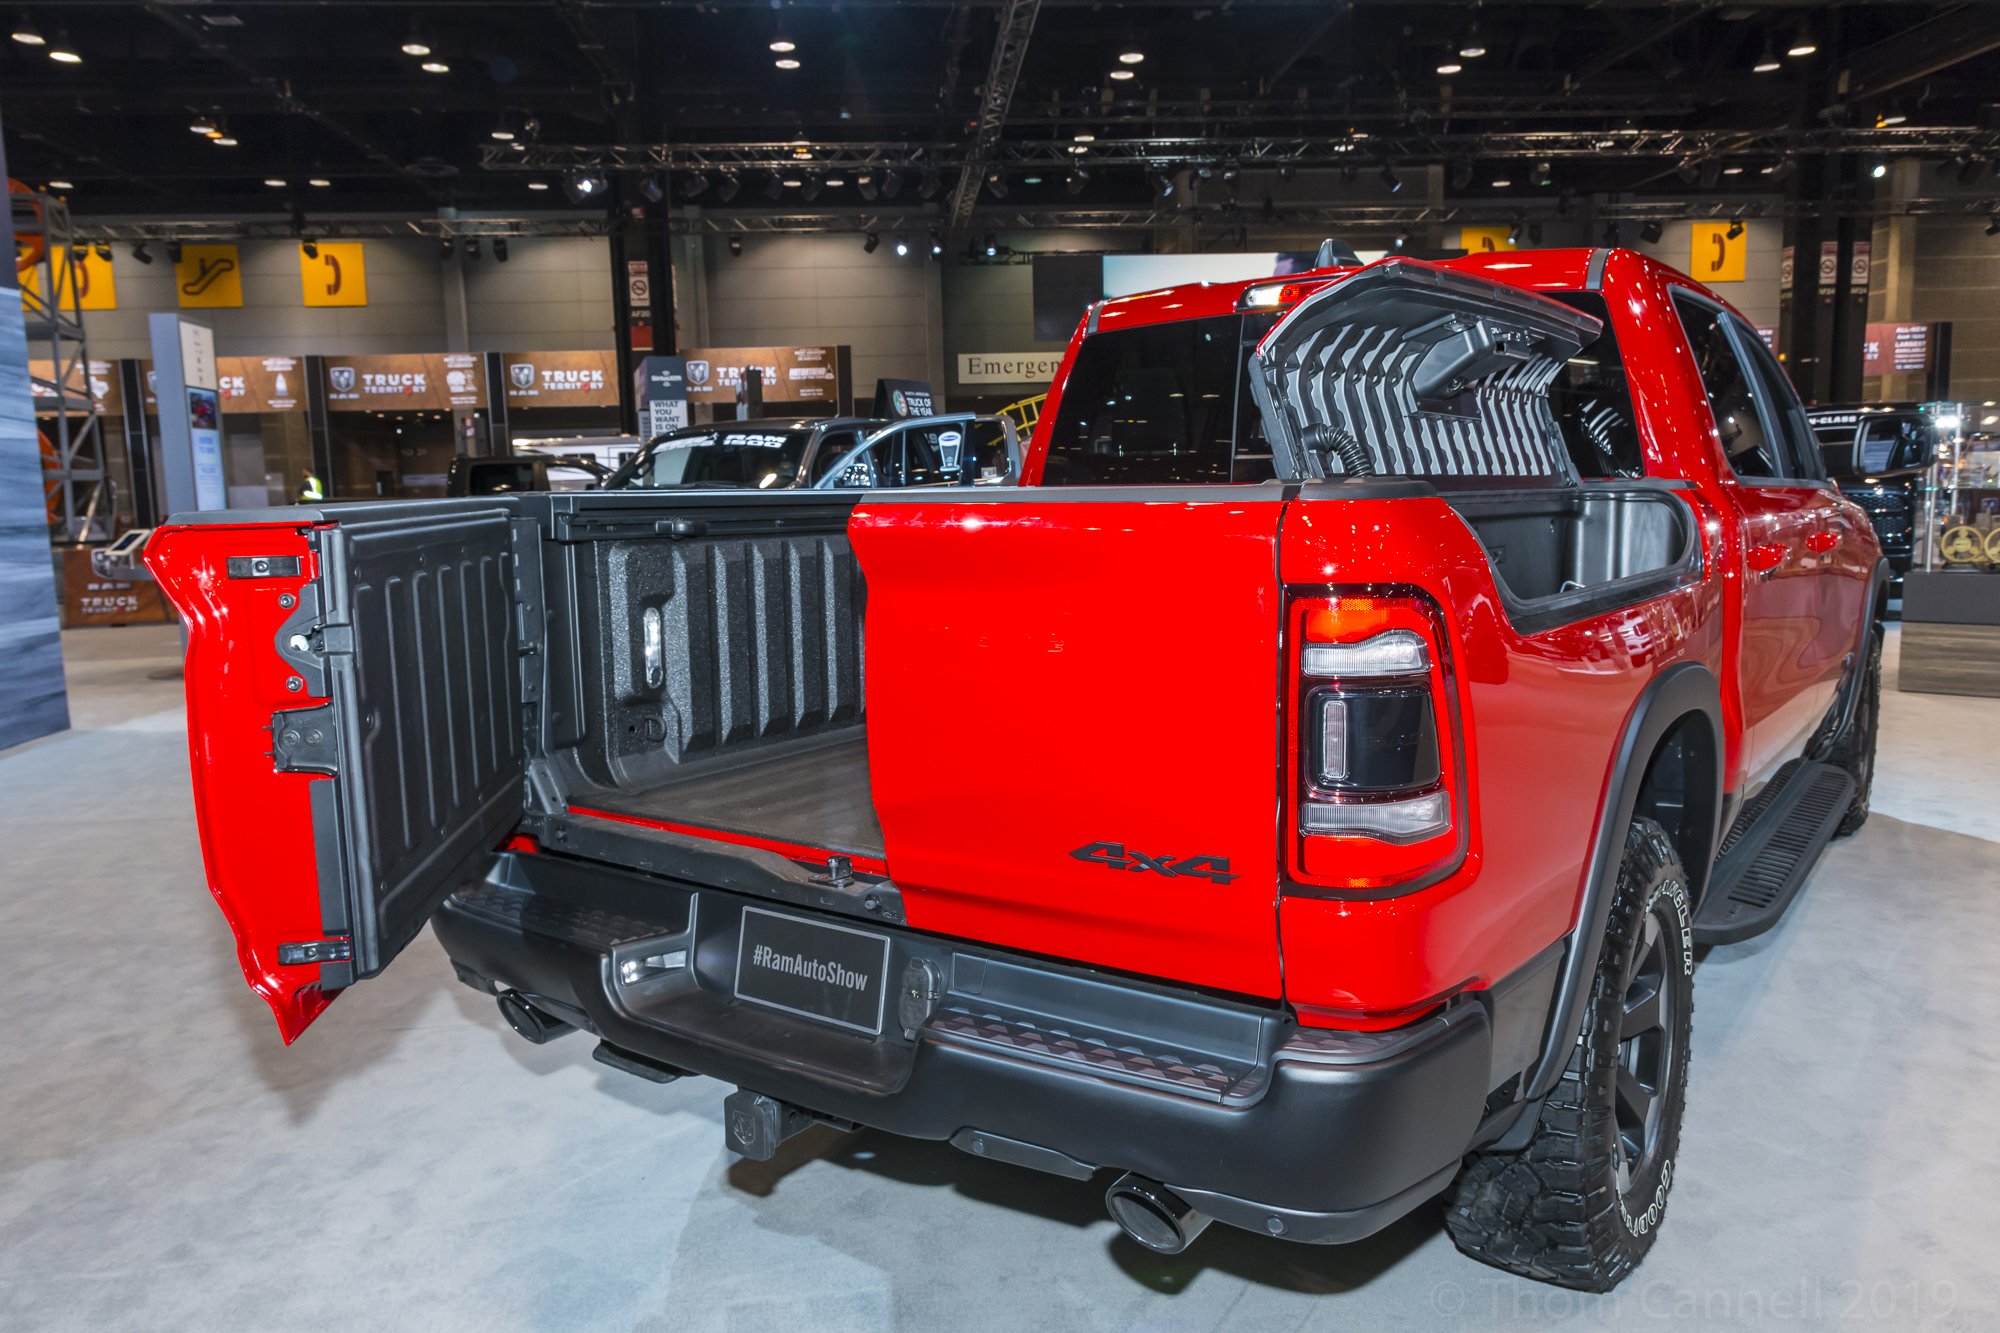
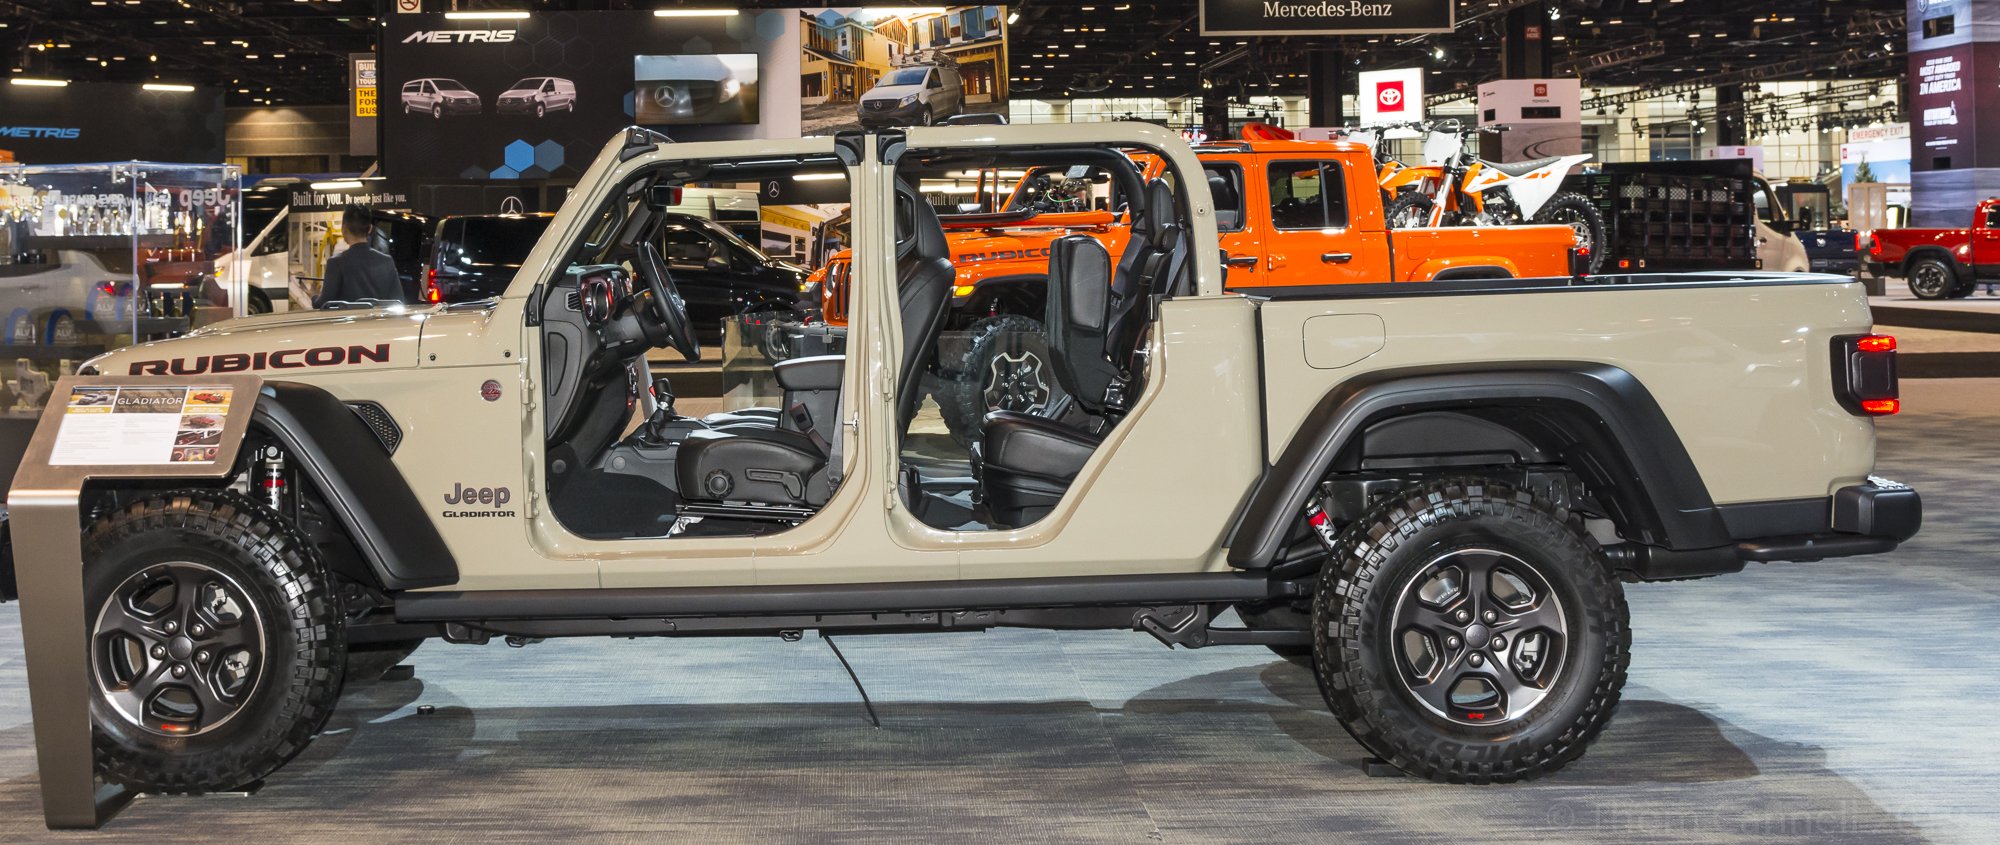
 Thom Cannell Contributor, GM-Trucks.com February 26th, 2019 General Motors had no news in Chicago, but delivered crowd-pleasing displays from Chevrolet and GMC, as well as Cadillac and their crossovers and SUVs. Of interest to truck enthusiasts were Heavy Duty Chassis Cabs from Ram, facelifts and equipment improvements from Toyota, face-lifts for some Nissan CUVs, a new Range Rover Evoke and more. The Chicago show is immensely different from Detroit, and that is a pun. With 2.3 million square feet of display space, the result is wide-spread (and often poorly lit) displays, indoor off-roading tracks, and worn boot-leather. These are the highlights. Alphabetically, Chevrolet brought its cars, well; they must have been there somewhere, and its new Heavy Duty Silverados, which were abundant in every powertrain and trim. And they brought the Lego Silverado, which is amazing in detail and execution. GMC “stood tall” with its Heavy Duty Sierra walk-under display and great lineup. Cadillac replaced their militaristic all-new XT6 with a gray one; it was better. They do have emotional colors available? Chevrolet Chevrolet spanned much of the North Hall, filling it primarily with trucks, crossovers like the fiercely red Blazer to lead your eyeballs into the display and nearby SUVs, but the focus was on Super Duty. Silverado had pride of position, though the new Traverse was mentioned, as well. From fifty-feet, you’re not convinced this Lego truck isn’t a real Silverado Z71. Even closer, it still fools the eye. Among the Silverados on display was this High Country. The Z71 Heavy Duty proved popular to the dealer, potential buyer, and social media crowd. Green is nice, Red is better, and note the difference in wheels and running boards per model. This is a great juxtaposition, the new Silverado Heavy Duty and its upgraded diesel engine. A perfect pair. We again saw the snow plow in Chicago, this time close enough to crawl beneath for a photo of the no-cutting-required blade attachment system. A pair of close-ups, first the dedicated, and covered, block heater that’s available and a better representation of the two bed steps designed for easy steel-toe boot access. At first glance, in Detroit, the new Blazer didn’t move our emotional needle the way we hoped. Much better in Chicago, with better lighting and blazing red color. It surely fills a needed niche in Chevrolet crossovers; it’s based on a global platform that carries Cadillac’s XT5. GMC GMC brought no new product to Chicago, only a clean, bright and entertaining display. Of note, their walk-under Sierra and the tracked Aspen special we mentioned as debuting in Detroit. Everyone Else Trucks, regardless their size, battle on GVWR, tow ratings, tire size, infotainment screen size (and bigger is always better), and now tailgates. Ram has a split gate that opens larger-left, then right, or folds. Ram offers a pullout entry step for easy entry, signature Ram box, and collapsible internal storage barrier. Ram’s big news—excuse the pun—was its 2019 Ram Chassis Cab; they brought several upfitter modified models as demonstrations, including a luxury fifth-wheel version. With so many ultra-lux 1500s, 2500s and 3500s, why there haven’t been more full-on interiors aimed at horse owners and racecar haulers, is retrospectively a mystery. Ram now offers its most modern interior to Class 3/4/5 upfitters. The chassis is 97-percent High Strength Steel, the diesel engine is an up-rated Cummins 6.7-liter knocking out 800 lb.-ft. of torque and mated to an 8-speed transmission. Not to be left out, Jeep brought a Rubicon version of the new Gladiator. Looks pretty rad to us. You? Land Rover’s latest small SUV/crossover Evoque is externally similar, though the platform is all-new and a bit longer with improved cargo space. Off road technology, which the brand is known for, is improved and the 246-hp Ingenium engine is now mated to a 48-Volt mild hybrid power assist to make 296 eco-friendly horsepower. Toyota debuted TRD Pro upgrades to its Tacoma, RAV4 and Sequoia. RAV4 has barely arrived in dealer showrooms, yet received welcome off road chops thanks to a dedicated suspension, all-terrain tires, all wheel drive, and standard torque vectoring for this RAV4 TRD Off-Road model. Tacoma, the perennial best-selling mid-sized pickup in North America, adds power-adjustable seats in most grades and has improved infotainment systems with 8-inch touchscreens that are smart phone savvy. Performance and glitter items like new grille and wheel designs, sequential LED headlights for the Tacoma TRD Pro model are balanced by new exterior cameras that deliver surrounding terrain views for improved off road safety. Sequoia TRD Pro now offers TRD-tuned Fox Racing off road dampers, plus other greasy-side items and an upgraded leather seat interior. The Land Cruiser Heritage Edition, a USA-specific version, goes the opposite way, shedding its chrome, third-row seats and running boards in favor of bronzed BBS wheels and a clean, subtly badged exterior. Without fanfare, Toyota put what may be future crossover product, the TJ Cruiser, on display to gauge reaction. Feel free to let them know what you think. Ford introduced its Super Duty trucks the week before GM’s similar launch. Their new Super Duty features three engines, the venerable 6.2-liter gas engine, now joined by an all-new 7.3-liter V-8 and third-generation 6.7-liter Power Stroke diesel. The newer motors are paired with a Ford-designed and built 10-speed automatic with optional PTO. Features include a new high-flow grille, Pro Trailer Backup Assist, LED headlamps, and improved trailer tow and payload capacity. Nissan’s 2020 Rogue Sport, not available for several months, offers new grille, refreshed exterior styling, and adds high-level safety features: Nissan ProPILOT and Nissan Safety Shield. Together, that provides owners with automatic emergency braking (AEB) with pedestrian detection, rear AEB, lane departure and rear cross traffic alert, radar-based smart cruise control and high beam assist. ProPILOT tech ““is a single-lane “hands-on” driving assistance technology that eases driver workload by reducing the amount of driver acceleration, steering and braking input under certain driving conditions, such as single-lane highway driving,” or semi-autonomy”, the company says. The Nissan Pathfinder Rock Creek Edition adds 18-inch wheels and some interesting, and functional cosmetics like black over-fenders, black-mesh grille and black roof rails, door handles and exterior mirrors. Inside they’ve added two-tone seating with contrast stitching; functionality includes a Best-In-Class 6,000-pound tow rating.
-
 I have a 2016 Chevy Tahoe 105,000 miles. Twice last week a few days apart my check engine light began flashing about 15-20 minutes into my commute and turned off within about 1-2 minutes both times. My spark plugs were replaced at 97,576 miles last October at the dealership and the coils, boots, etc, were inspected . I’ve been told that putting a tank of high quality supreme grade gas could help the problem. Has anyone else had this issue?
 -
 So I'm trying to do the heated/cooled seat retrofit in my 2017 silverado 1500 and I've found a lot of stuff online about how it would be a whole lot of work because of all the extra wiring that the system has, & that it would be almost impossible if you didn't have heated seats to begin with, but I don't accept that & I am determined to make it happen. I've already bought every bit of interior out of this high country which came with the heated/cooled seats, but now that it comes time to actually do the swap I realize that I probably should have done a little more research before spending this much money on this stuff because If pgamboa is correct that means I just wasted $1500, but I'm determined to prove him wrong(no offense if you happen to see this lol). So I guess My main question is, has anyone been able to do this retrofit successfully, to where the heating, cooling, and power all work as designed & so there aren't any airbag lights or other warning lights/messages on the dash? I'm a technician at a gm dealership so I have access to all the wiring diagrams and oem information that I could possibly need, but I'm a little confused as to the hard parts that I will 100% actually need,& I haven't heard of anybody actually doing this successfully with everything working as it should, so I want to make sure it's possible without wasting a whole bunch of time on it to figure it out. The other main concern that I know will need to be done for it to function properly, and the thing I'm most concerned about figuring out, is the programming aspect of it. Obviously the truck will need to be programmed in order for the system to function, but im not quite sure on how to go about doing that, especially since I'm going to be adding new modules entirely since my truck didn't have heated seats to begin with, but would there not be a way to avoid having to do that & just running power and ground to the heated/cooled seats, but still using thd factory buttons to retain the oem look? I mean their pretty much just toggle switches, so really in theory, for for the low setting heat I would think I could just install a resistor between the switch & seats, and could do away with the need for all the modules , I just wouldn't have the memory features or comfort/convince settings that I would if it were programmed correct? That is obvi a worse case scenario type situation if there's just no way to make it work with an aftermarket programmer or something. Which everyone always says something about how if you go that route & end up taking it to a dealership or something & they reprogram the bcm then it would take away all the other features, but since I work at a dealership I can make sure it never has an mdi hooked up to it. It'd be nice if gm would let you program any module to your vehicle if all the appropriate hardware was there & whatnot I really don't understand why they don't allow that, but apparently it's above my pay grade lol. But if anyone has any info om this, or better yet if angone has actually SUCCESSFULLY done this, please help ya boy out with some info! Please & thanks In advance!
 -
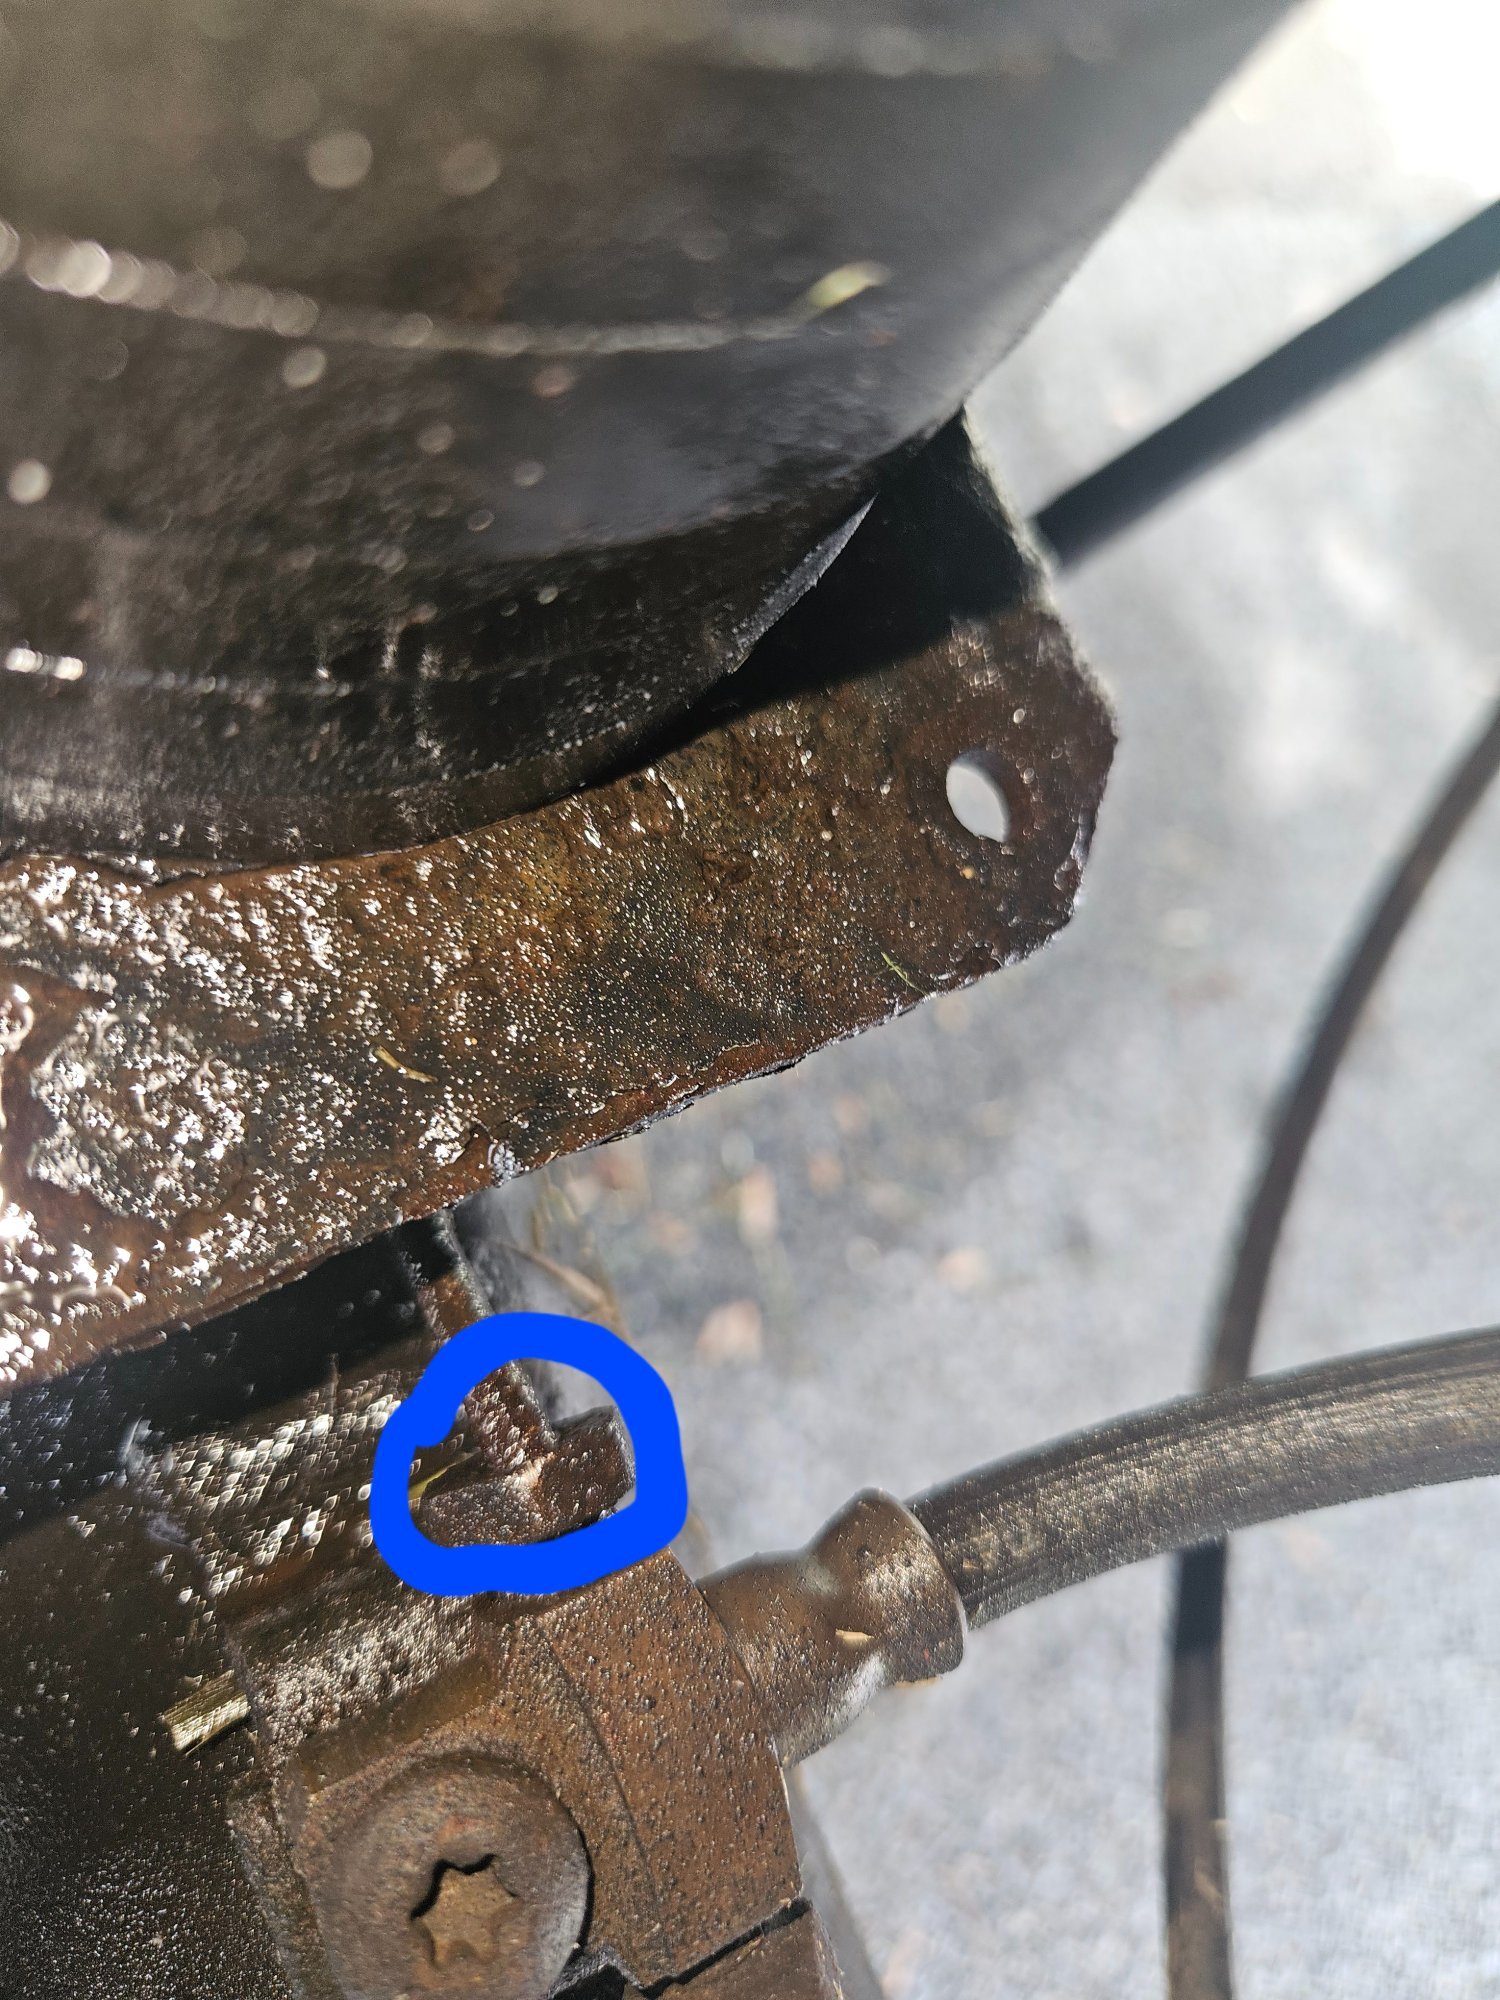
Need to find this part
-
Check it out :
- 3 replies
-
- 1
-
-
- GM first Modern EV was Corvair
- EV
- (and 2 more)
-
How long are tires lasting y’all? I run 35” KO2’s and I have 70K miles on them and still have 11/32 of tread left. These tires see 200+ miles of pavement a day and go to extreme off road areas.
-
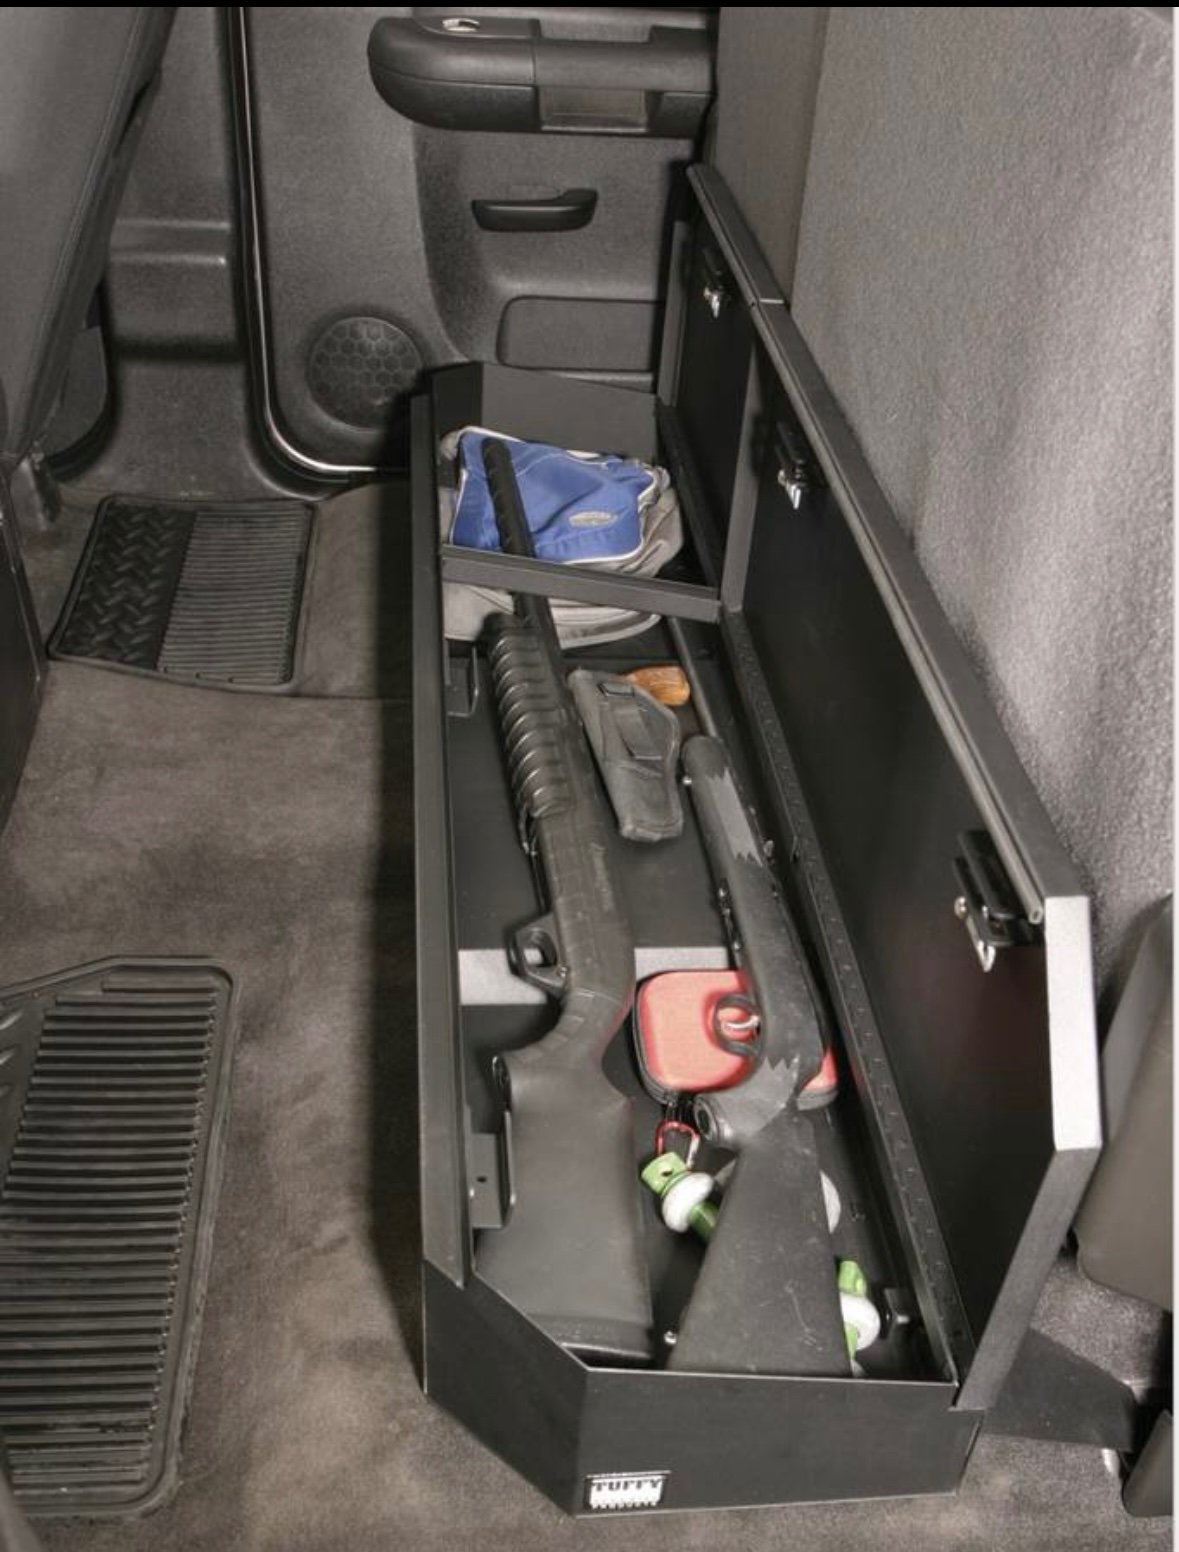
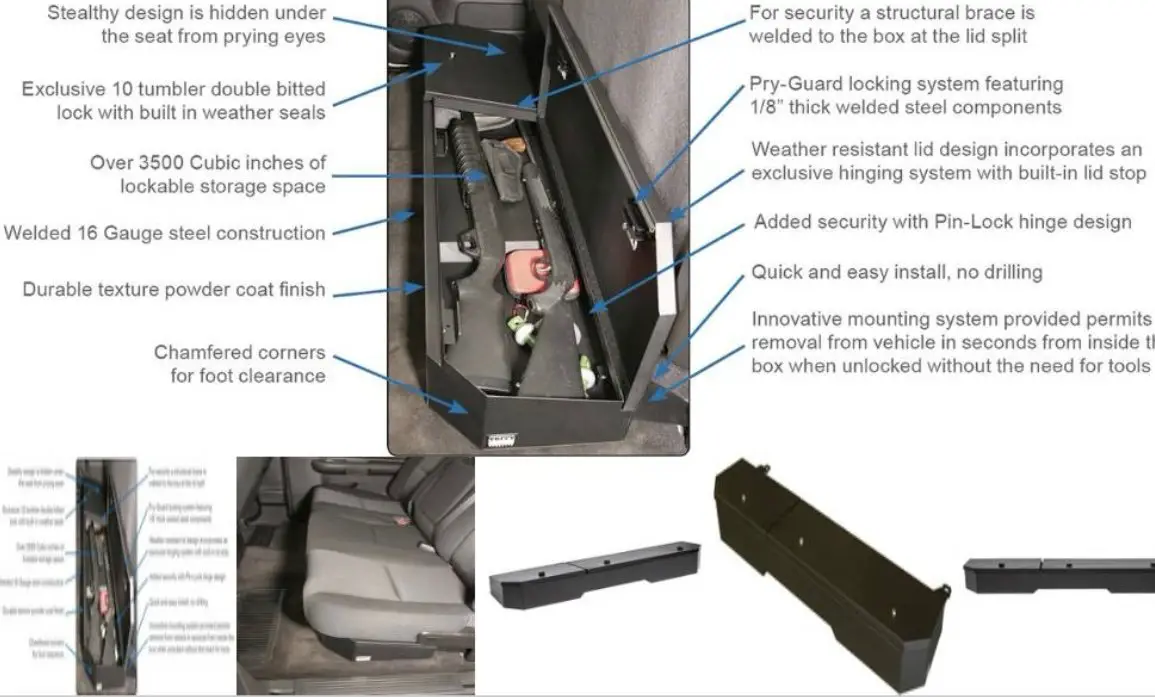
 Brand new Tuffy CHEVY/GMC REAR FULL UNDERSEAT LOCKBOX, with combination locks. Never been installed, does not require any drilling - attaches with OEM hardware. $400 obo, $65 for shipping due to weight/size. Retail is $609 for this unit, before shipping ($60-$174 from Tuffy depending on shipping speed you choose), and tax. This high security 16 gauge steel security lockbox mounts under the rear seat in a GM Crew Cab Truck. The full width formfitting design of the Tuffy lockbox has over 3500 cubic inches of lockable storage. It’s secured contents are easily accessed by flipping either or both of the rear seat(s) up and opening the corresponding lid(s). The unique design allows the full width to be used to stow firearms or other long items. Featuring Tuffy’s Pry-Guard Locking System with a 10 tumbler double bitted security lock with built in weather seals. Chamfered corners are incorporated into the design for easier passenger access. The innovative mounting system is only accessed from inside the box. When additional floor space is needed the entire lockbox can be removed in seconds without the need for any tools. Over 3500 Cubic inches of lockable storage space Exclusive 10 tumbler double bitted lock with built in weather seals Pry-Guard locking system featuring 1/8 inch thick welded steel components Stealthy design is hidden under the seat from prying eyes Welded 16 Gauge steel construction Weather resistant lid design incorporates an exclusive hinging system with built-in lid stop Added security with Pin-Lock hinge design Innovative mounting system permits removal from vehicle in seconds from inside the box when unlocked without the need for tools Durable texture powder coat finish Mounting hardware provided Quick and easy install, no drilling Weather and dust seal
-
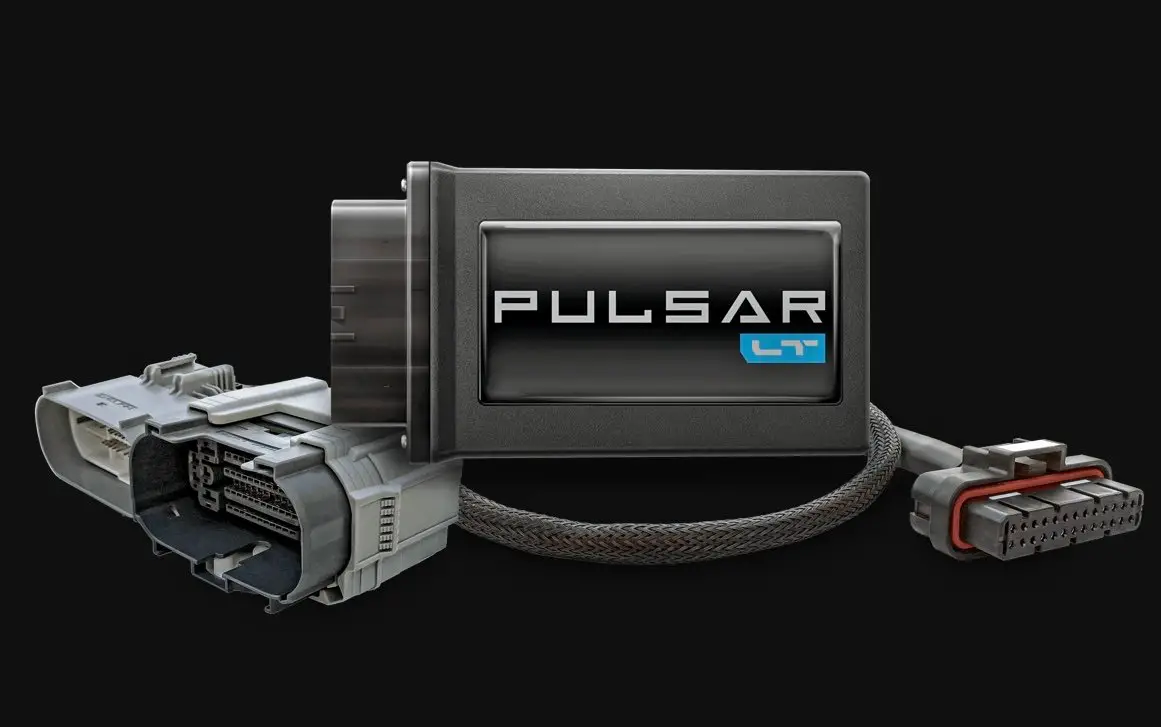
I have a new EDGE PULSAR LT chip/performance module that fits 2019-2022 Chevrolet Silverado and GMC Sierra 5.3L and 6.2L engines. Product has never been used. All original components, zip ties, velcro, box, instructions included. Current retail price on the Edge Products website is $532.95 + tax. Get it here today for $350 OVERVIEW The Pulsar LT is a new in-line module for 2019-2022 Chevrolet Silverado 1500 and GMC Sierra 1500 that offers complete adjustability of many features, all from your steering wheel controls. Without modifying your truck's ECM, Pulsar LT offers you the ability to adjust throttle response, tire size, gear ratio, TPMS, and your top speed limiter. Pulsar LT can also be used to disable Auto Start/Stop and Dynamic Fuel Management. It connects directly to the vehicle computer system, making installation a breeze and leaving your factory warranty intact. And yes, it does work on 6.2 10-speed models! *Note - 2022 refreshed models are not supported. The 12th digit of the VIN will verify this, if it is 5 or higher, the Pulsar LT will not work. 4 and lower are supported for the 2022 model year. *When physically changing ring and pinion gears in the late model GM trucks, the factory cruise control will be disabled. While the Pulsar will allow you to recalibrate the speedometer for that gear change, it will not re-activate the disabled cruise control system. GM has this feature laced into the engine calibration files and would require full ECM tuning to enable cruise again. Features: Toggle Auto Start/Stop Disable Dynamic Fuel Management Calibrate Tire Size (29" - 50.9") Adjust Throttle Response Modify Gear Ratio (2.00 - 6.99) Change Top Speed Limiter (82 - 140 MPH) Clear Diagnostic Trouble Codes Reprogram TPMS Threshold (1 - 99 PSI) Simple Installation Process Does Not Modify ECM Leaves Factory Warranty Intact The Premier DFM Solution for 6.2L 10-Speed Trucks! *Note – 2022 refreshed models are not supported. The 12th digit of the VIN will verify this, if it is 5 or higher, the Pulsar LT will not work. 4 and lower are supported for the 2022 model year.
-
I am looking to add an elevated idle feature to my 2018 Chevy sliverado 3500 duramax Dually. My truck is currently not set up with the pto feature. I currently idle my truck for about an hour a day and I am wanting to add an elevated idle to get my truck to operating temp faster to prolong the life of my truck. What are y’all adding to the truck for aftermarket parts to achieve this since the dealer is saying it’s not possible with gm parts. What else are y’all running for tuners to increase mpg that will work great with a fully deleted truck.
-
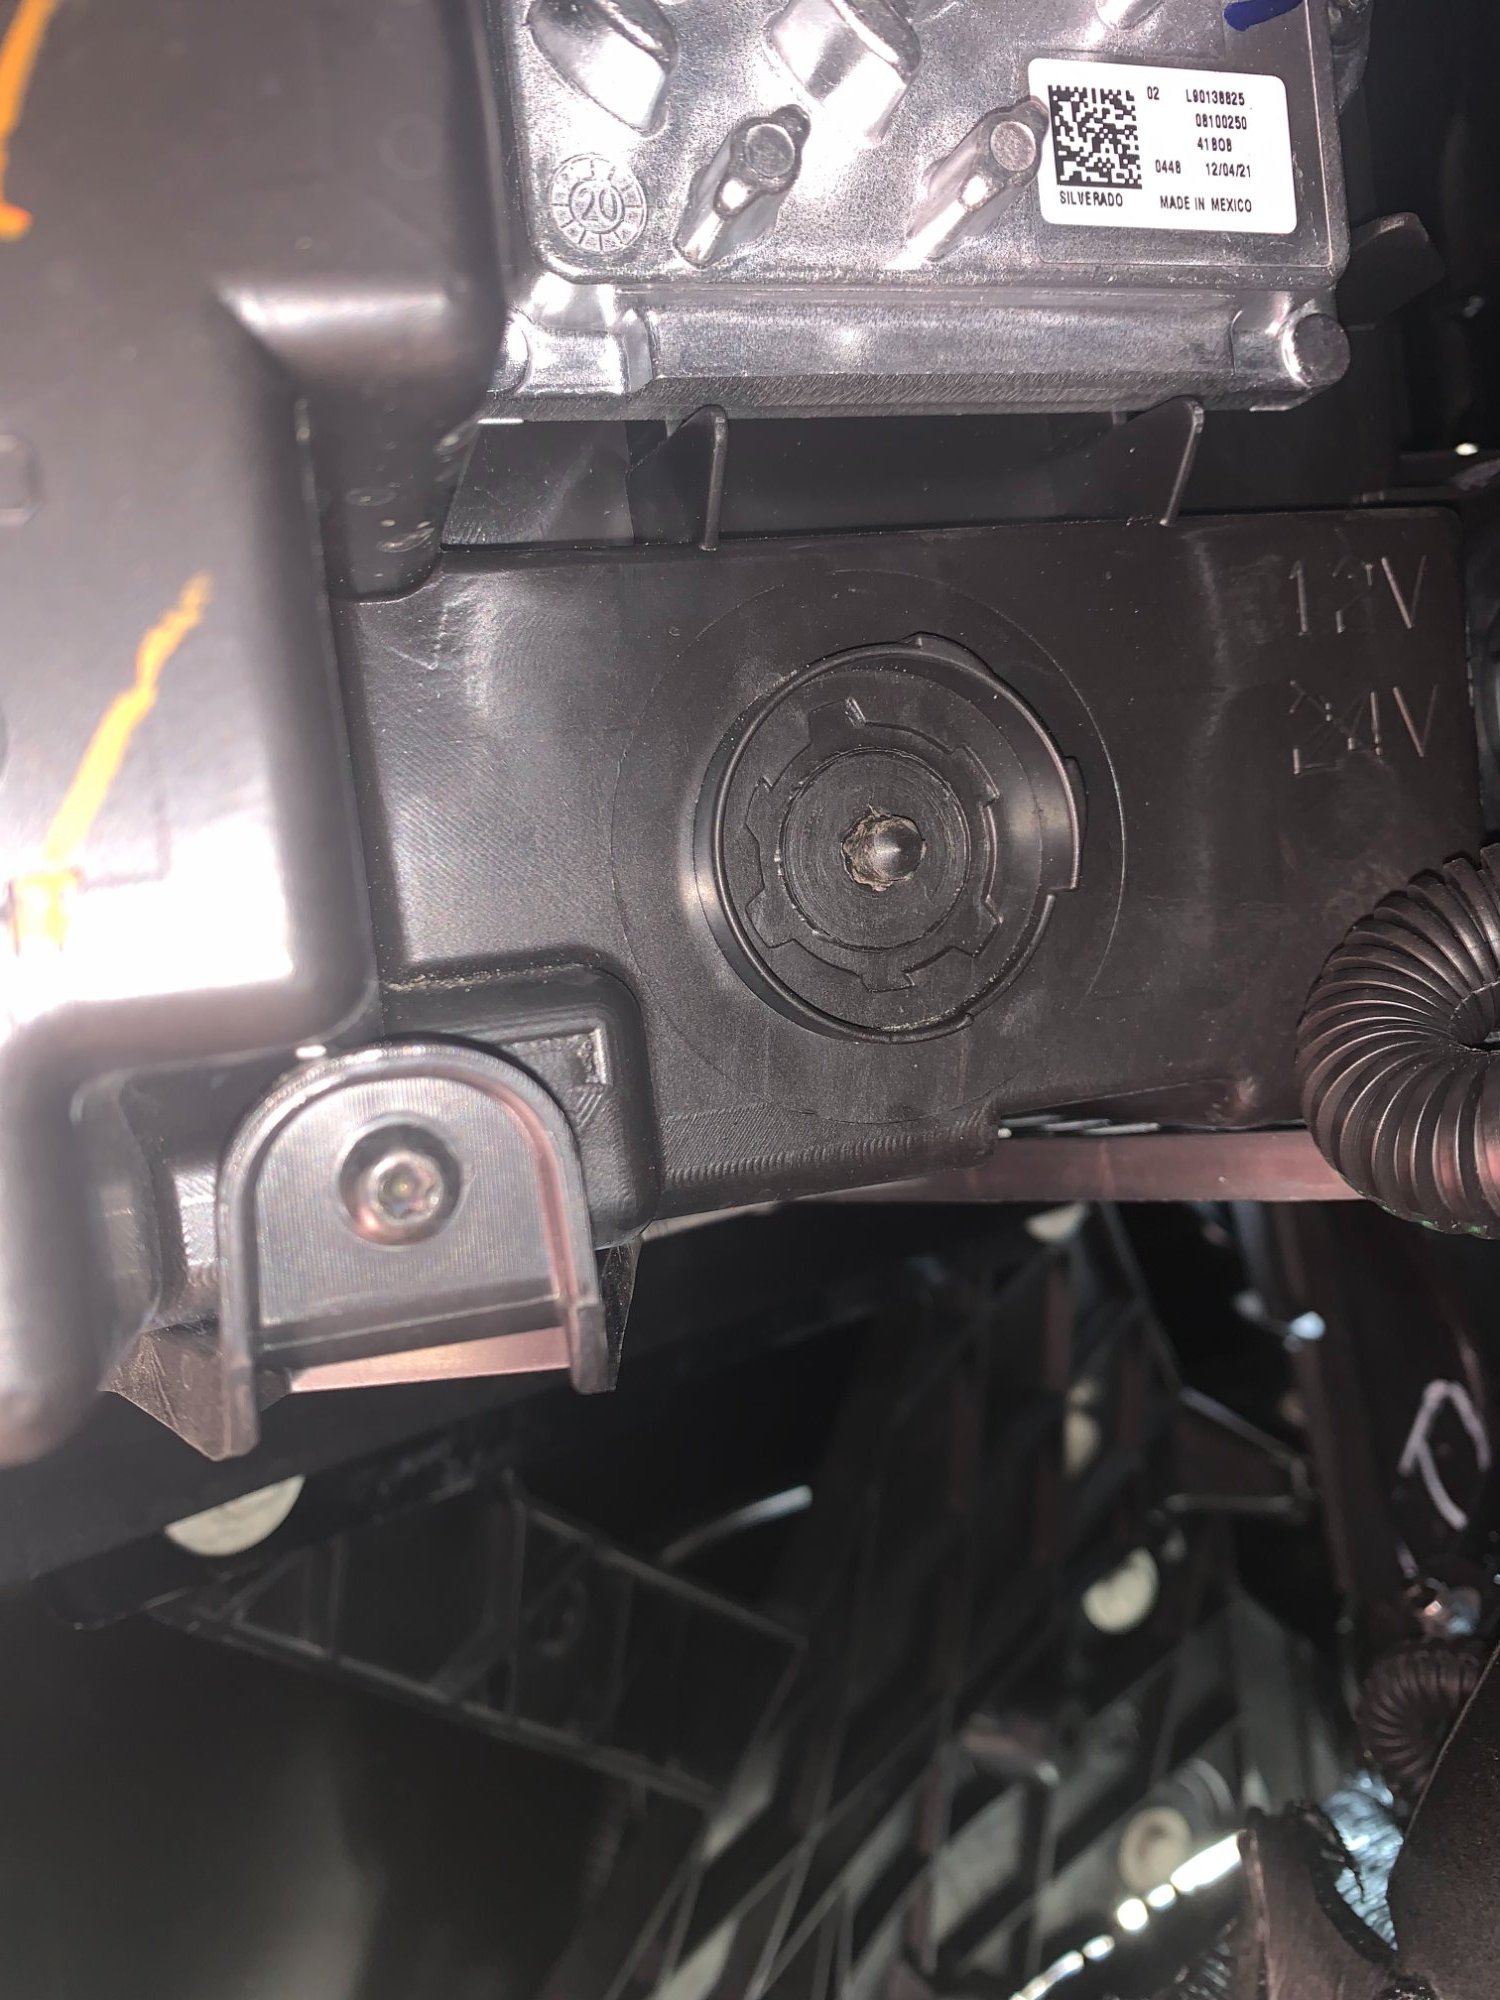
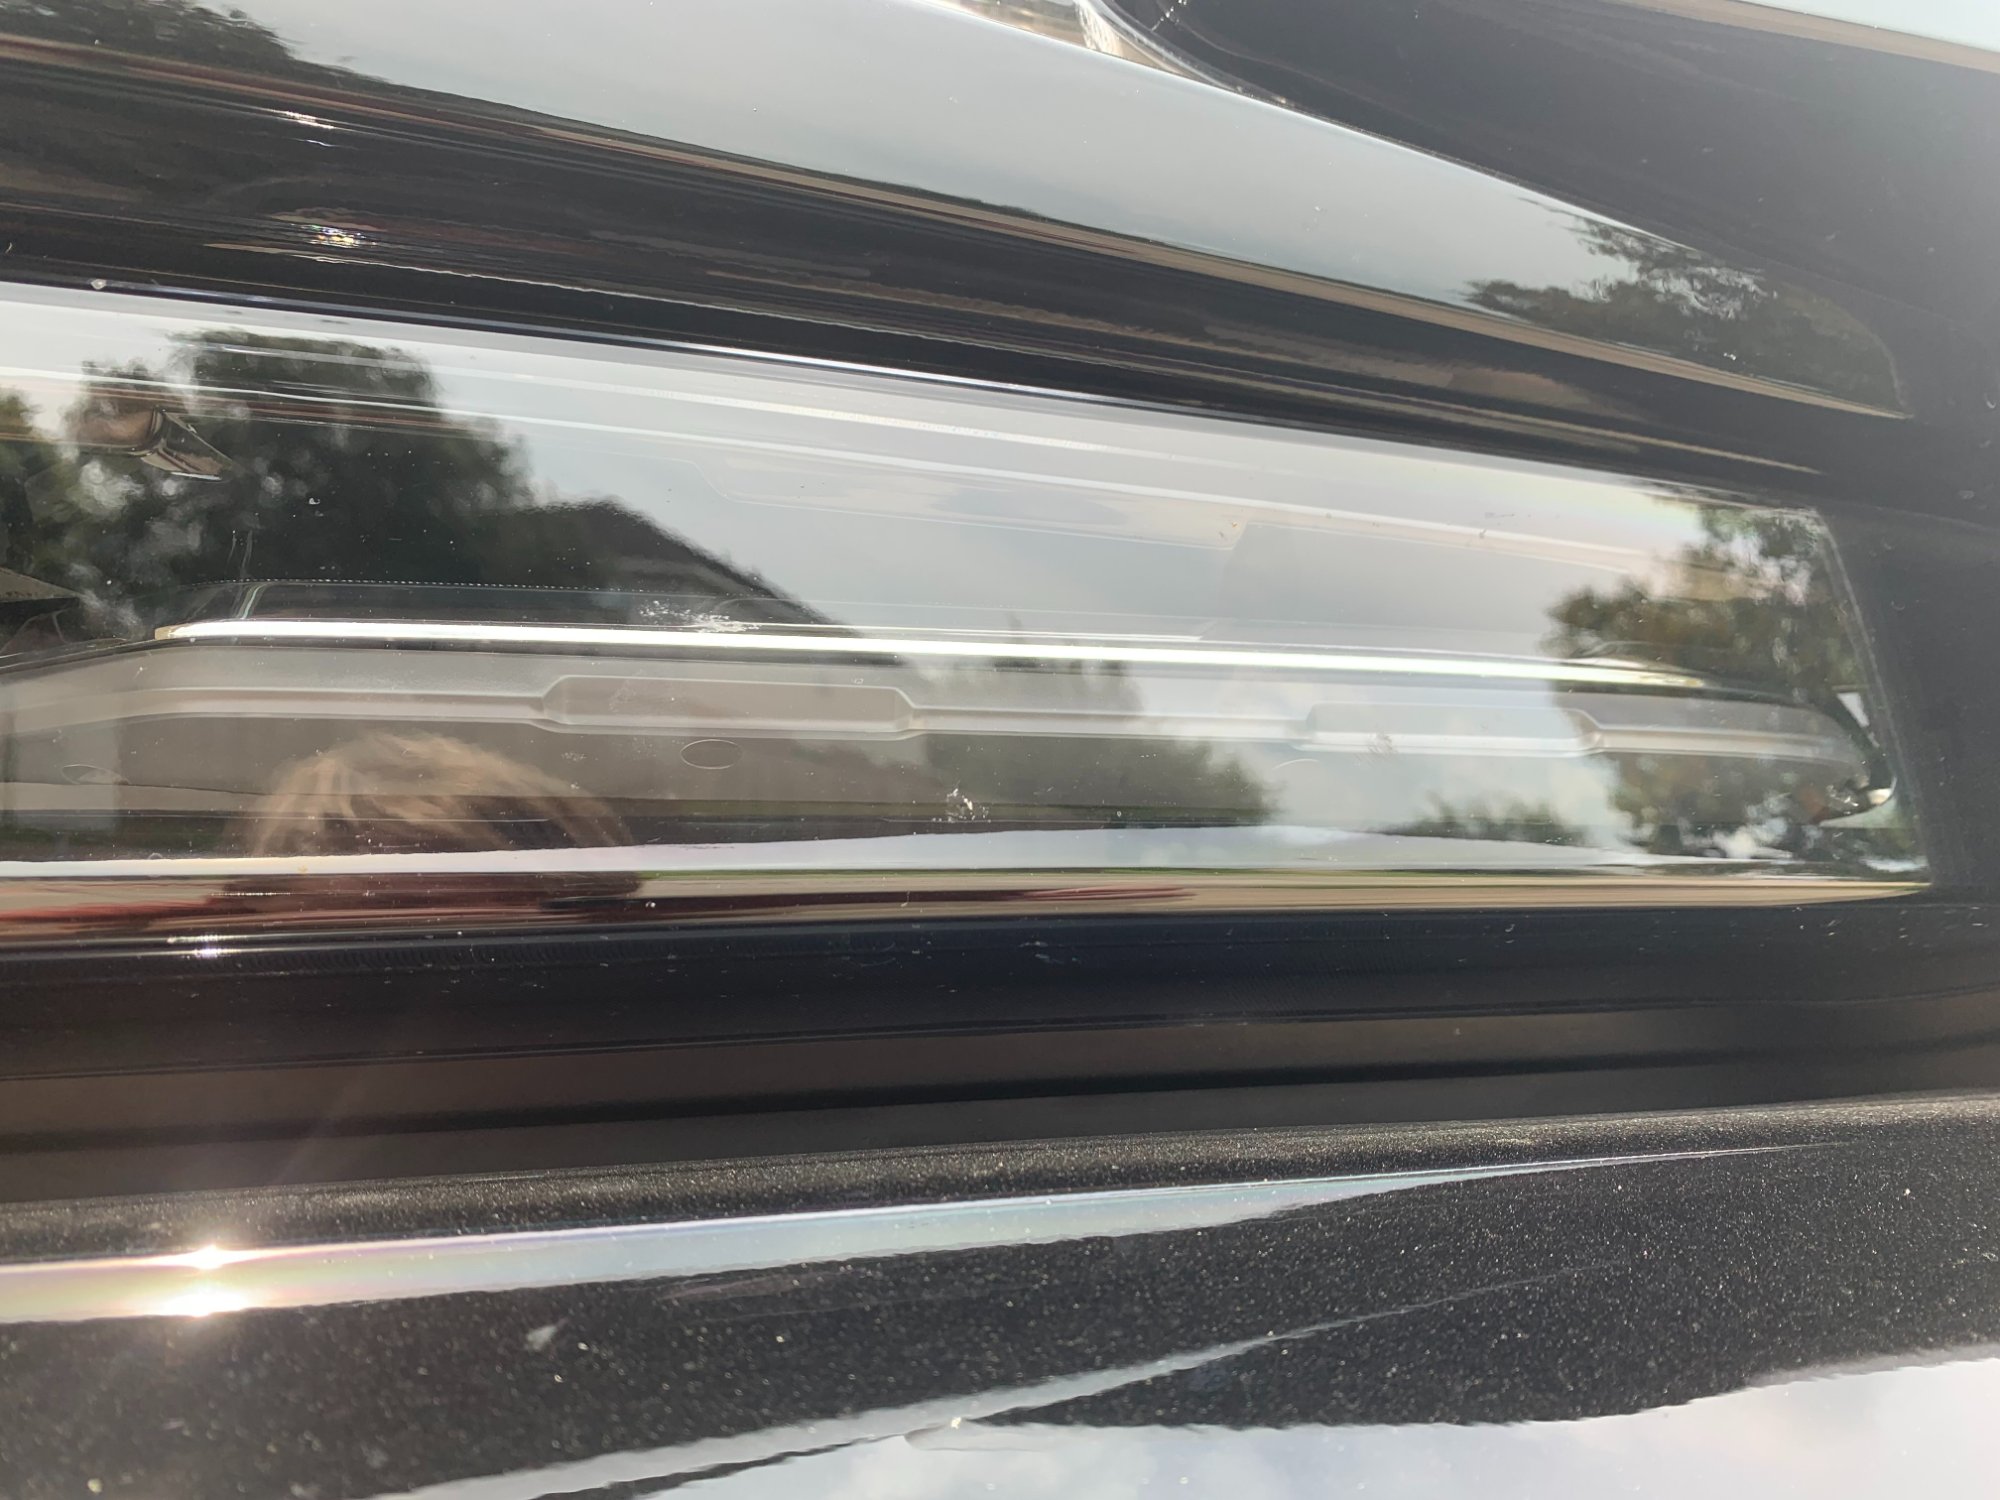
 Hello All, New to this site, just bought a new 2021 Silverado LT Trail Boss a few weeks ago. One of the first things I am doing to this truck is upgrading the few halogen bulbs that GM decided to keep on it. The Rear backup and license plate lights all went super smooth, no issue. But when I went to remove the front blinker bulb from the housing I was faced with a different configuration than what I've seen. The place where you would normally find the circular grip for twisting out the bulb has a small hex head there in place, and it does not look to actually come apart (Please see attached picture). I think that I might have a different blinker than what normally comes with this trim (and I think it may already be LED) but I am unable to find anything online that resembles or mentions this configuration. I am only able to find the typical bulb backing which does not match mine. Does anyone have insight to this or possibly know what kind of blinker I have? I have included a picture of the back of the blinker as well as the light housing itself as I think it too looks slightly different than others I have seen. Thanks in advance!
-
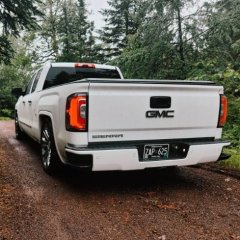 I have done a lot of research in preparation for this mod, and there are not any how to guides on this so I figured I would make one! First things first is the parts list. Below is what is required for this mod. Window (includes regulator): 84819603 GM list is $735. I found mine new on Facebook Marketplace for $150 so do some shopping around or they can be found used on car-part.com for much less but make sure it includes the regulator. Motor and mount assembly (they are sold together): 23490454 GM List is $89.13. Perhaps can be found used cheaper but not a bad price from GM. I got mine from Ebay. Overhead Console with switch: I recommend finding this used because often junkyards leave the harness intact which you will need. I got mine on Ebay. Side benefit the Homelink is plug and play so if your truck didn't come with it like mine you now have it. Rear Window Lower Garnish Molding (Main longer piece): 22817432 Right Rear Window Garnish Molding: 22817430 *These are not required if you are handy with a Dremel Next is the harness and fuse tap I used. This is an aftermarket harness that I modified to extend the length I needed. Universal Power Window Harness: https://amzn.to/3Kz1qyK Micro Fuse Tap: https://amzn.to/47ls08b Once you have gathered your parts contact a local shop to install your window. Next you will need to figure out your trim. There are 2 ways to do this. You can buy the trim from GM or just trim a little off your factory ones. This is the route I took. Just line it up where is should fit, put some painters tape on mark it and with a carful hand just trim it and it looks just like stock. Next you’ll need to mount your motor and regulator assembly. Below are some pics I found online of a factory truck. Once that is all mounted up its time for wiring. Using the Universal Harness and factory switch is fairly easy. Here is a diagram. The GM switch is pinned out just like the aftermarket harness I linked. The factory switch and pigtail should come with the overhead panel just cut off the connector and splice it in. I routed the grounds together and self-tapped them into the truck by the fuse box. The power is ran to the fuse box (with an inline fuse) and tapped into key on power. Depending on your truck you may or may not have some of the options used to tap into. Below is a link to a great website you can poke around and figure out what fuse works best for your truck. https://www.startmycar.com/us/chevrolet/silverado-1500/info/fusebox Finally run 2 wires back to the motor. I ran mine through the headline and down the passenger rear trim. Once everything is connected you should have a working power rear window! [img]https://i.imgur.com/6dQKvXy.mp4[/img]
 -
NEW BILL SO WE CAN REPAIR OUR TRUCKS
-
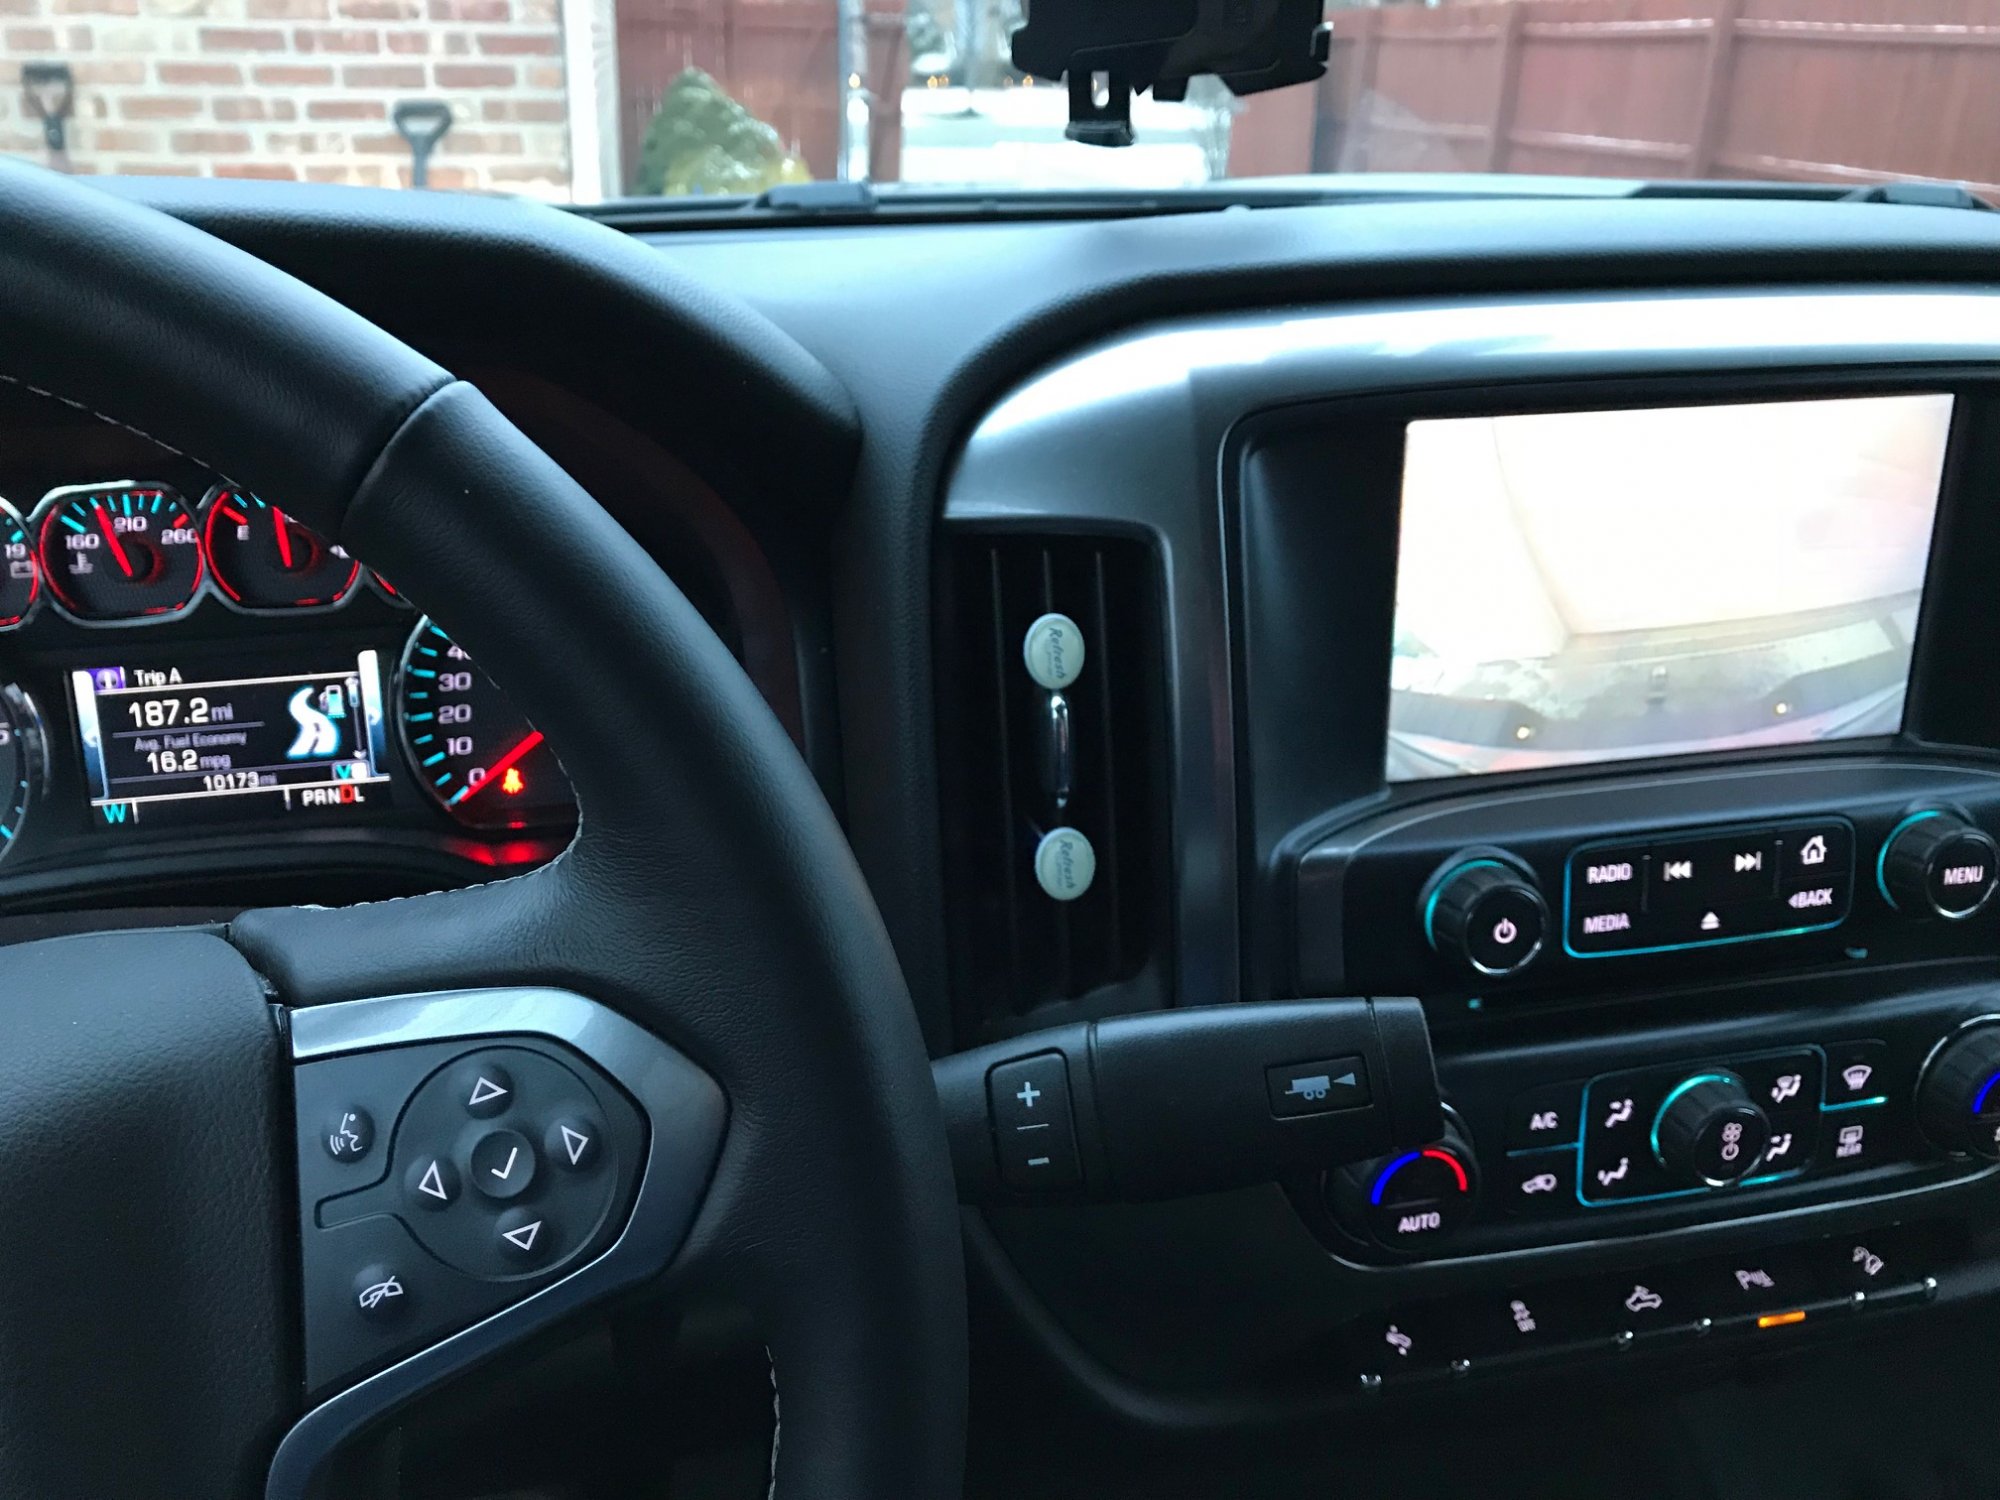
HI, I have purchased 2017 Chevy Silverado 1500 in September of last year, everything seem to be fine until yesterday. while standing at the light with the break pressed, the rear camera picture appeared on the display. it does not have the the guide lines, just the picture, every time I press the break the camera comes on. When i come to the stop and take my time to put in reverse, the picture stays without the guidelines even though it is in reverse. If i Put in reverse quickly, the camera comes on as it should with the guide lines. I have switched bulbs to LED bulbs with resistors for breaks and reverse no resistors as they do not blink, but it was back in September without any issues so far until now. not sure if that can cause the malfunction or not, but i would think that LEDs have nothing to do with the camera. I'm assuming that water got somewhere and its shorting out/powering up camera. its cold here so I did not get the chance to look at it yet. if anyone can point me to where the camera gets the signal from i can probably figure it out before i go back to the dealer to get that fixed. Notice below what gear the truck is in including "R" no guide lines.. thanks a lot..