
markusarealuis
-
Posts
24 -
Joined
-
Last visited
1 Follower

Recent Profile Visitors
1,136 profile views


markusarealuis's Achievements
")
Enthusiast (2/11)
9
Reputation
-
Finally got mine installed and I love it! Thanks to pgamboa for the harness and super advice/guidance.
-
Just thought I would give an update. Replaced condensor, replaced compressor, replaced expansion valve, replaced suspect line, flushed system, vacuumed system down to -30lbs overnight, checked for leaks, charged system with proper amount. After all that AC not blowing cold. Checked high and low-side pressures were equalized in the system around 110 each. Compressor engaging but not creating pressure on high side or decreasing pressure on the lowside. Brought several experienced friends over to take a look and one Chevrolet retired mechanic to help diagnosis the issue - all side it was likely a bad compressor (luck of the draw). I then replaced new compressor with a brand new AC delco compressor did the same entire process again and had the same problem. I gave up and took chevy to local new dealership and explained what I did. They were helpful and found the issue after 3.5 hours of tracing an electrical issue to the ECM. They replaced the faulty wire at no charge (excluding labor or course) and now she is blowing cold. I have never seen a functioning compressor clutch engage and not build pressure; turns out there is some code written into the ECM telling the compressor not to build pressure unless that faulty wire sends all clear code. I now suspect my original compressor was just fine and did not need replacing lol....live and learn.
-
I apologize snoringbear. You are correct I am being sensitive. Thank you for your service btw. Sometimes I get frustrated and it comes off as negative and whinny. Anyways, I really love the truck and I will figure the issues out with the AC. I have given up the fight and I believe it is something electrical although I have test each fuse by hand. I have had several very experienced AC technicians come to my house off duty and cannot figure the issue. I have resolved to living without truck AC. Going to focus on completing the new console swap project with Pgamboa awesome wiring harness. Thanks everyone - sorry for all the bitching on my end.
-
Yes snoringbear, it seems it is very much "as is" that is very helpful for you to point out. Thank you. I will be advised for future purchases. I would not concern yourself with how much money I have dropped on my little project and if you do not have something constructive or helpful to add please do not reply to my messages. I would like to give everyone else and update on the status, but I think I am may be sounding like a cry baby so I will just keep it to myself.
-
Well update: I replaced condenser, compressor, troubled compressor line(prone to leaking), expansion valve, flushed the system, put vacuum on the system to negative 30 lbs and let sit all night long and while at work the next day. Got off work last night and checked pressure and still holding 30lbs negative pressure. I then connect R-134 can to gauges and input can.........wait for it, low side increases and compressor clutch kicks on, high side is about the same pressure. It appears that my new compressor is not pumping pressure? This is not my first attempt at fixing a car AC. My understanding is when the compressor clutch kicks on the lowside should drop in pressure on the gauges and the highside should increase in pressure. I am so frustrated with this stupid truck I could puke!!!! I believe I am going to take it to local shop and see if there isn't something electronically going on with this Big pile of poopoo!!! Oh also, replaced all gaskets/seals....
-
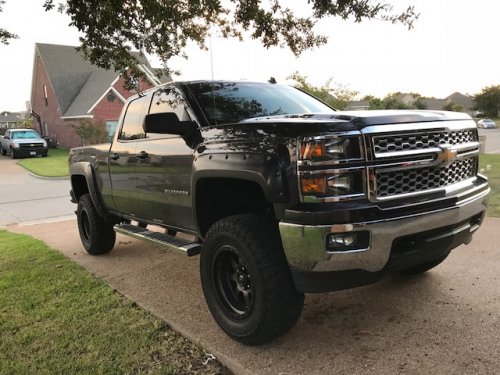
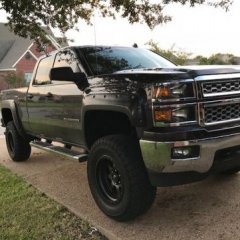
Sad to say I am on this list as well. I bought a 2014 silverado LT 4X4 5.3 double cab used with 83k on the clock. A/C went out at 83,450 miles - local used car salesmen probably just recharged the system and figured by the time I figured out it was leaking I would be long gone. Bought it this last fall and only used it once while test driving it since it was cold outside. Been out since the first time I ran it during the spring. Long story short; I have looked all around forums and found this to be a very troublesome issue for Chevy. First time chevy owner btw. This weekend I pulled the trigger on new condensor, new compressor, new line (troubled line from compressor to condensor), new expansion valve and all new gaskets/rubber seals. I pulled the old condensor first and installed the new one from autozone. Then I moved on to pulling the old compressor and the corresponding line to condensor. Stupid stretchy belt was a bitch to remove - had to cut belt and have no idea how to replace it since the stretch belt tool I have doesn't seem to fit on either pulley to roll around crankshaft pulley or compressor pulley. I will deal with that this evening when I get new belt. After compressor replacement I moved to the expansion valve replacement - probably the simplest part of A/C overall. BTW; I did not see one rubber o-ring when removing all the OEM parts. I did however replace all the silver/black rubber seals that I found at each line connection including inside the expansion valve female connection on the evaporation core side. Today I will rent/borrow the gauges and pump from autozone and pump down the system and check it for any air leaks. Along with getting a replacement belt and some guidance on how to get stretch belt back on the compressor. Hopefully there will be no leaks and then I can recharge and I finally will have a truck with A/C. To be frank this truck has been the biggest piece of $h!t i have ever owned. I have a laundry list of crap that has failed on it since I owned it and I will never buy another chevy despite loving the way it looks. Not bashing chevy, but I will stay away from this model in the future. If anyone can find something else I missed during the replacement please let me know. Thanks,
-
Pulled jump seat and removed harness. Sent to Pgamboa for new plug & play harness.

-
Really nice looking truck and great job on installing console! Did you get everything connected and working? I am waiting on my light bar to come in before I contact pgamboa again for help on install. I want to utilize a couple of the power outlets up front for front LED lights and rear spot lights on mine. I even thought about swapping out the new console front plate with a CB head unit, but I don't do many trails so will just utilize that area for LED light switches and USB ports/110 outlet.
-
Post Pics of Your 2014+
markusarealuis replied to jomuehlbauer's topic in 2014-2018 Silverado 1500 & Sierra 1500
Very nice truck! Can I ask how much that front bumper was? Did you install it yourself or have them do it for you? -
Phil, First, thank you very much for sharing this information and doing this for us. I hate to be the one to throw a monkey wrench into the mix, but my truck seems a bit different. It is a 2014 Silverado LT 4x4 with the jump seat from factory. It has an audio port, two USBs, SD Card slot, and one 12v cig inside the jump seat console. The rear of the jump seat console has another 12v cig outlet facing the rear seats. The dash, next to the ash tray, has another 12v cig outlet and a 110 three hole plug. There is NOT a USB port anywhere in the glove box upper or lower sections. The new console i have sitting in my dining room does not have the SD Card slot - not that I have ever used this anyways. If you are located in Dallas, I would love to come up there from Waco and let you supervise my console install. If this isn't possible then I will give it a try solo this weekend using the splice method. Thanks,
-
I think this is the black tab they are referencing.
-
From what I understand it is not plug and play, you will need to create a wiring harness by using the jump seat harness and splicing into the console harness. I am by no means an authority but these guys on here can give you the specifics. Try reading through pages 74-76 and you will see the splice method. I will be attempting this this weekend. I think the black tab they are referencing is directly in front of the read slide securement? But I am not sure since I have yet to pull my jump seat out :). Don't get frustrated you can do it bro! Be patient and take a break when you feel like destroying the connector :).
-
Okay thank you! I will keep reading and try to eliminate any stupid questions I have. I have to wait until the bracket comes in anyways before I begin the process. You guys are a tremendous help!!
-
Thank you very much b18cx. I will pull the jumb seat out this weekend and give it a shot as long as my front bracket comes in by then. I will reread your posts on 74-76 again.
-
Pgamboa, you really know your stuff. I would love to do the plug and play method you are describing but I think that may be beyond my capabilities. If I do it the splice method will I need to remove both wiring harnesses (jump seat wiring harness and new console wiring harness) - to create one that will plug directly into the under the seat connector? Also, where did you get the 42-pin female connector?


-
Forum Statistics
250.5k
Total Topics2.7m
Total Posts -
Member Statistics
342,892
Total Members8,960
Most Online
-
Who's Online 2 Members, 0 Anonymous, 658 Guests (See full list)