

Deanjo
-
Posts
144 -
Joined
-
Last visited
Recent Profile Visitors

Deanjo's Achievements
")
Enthusiast (4/11)
67
Reputation
-
CORSA EXHAUST Problem... Calling all corsa trucks!
Deanjo replied to Nicholas La Croix's topic in Engines & Drivetrain
Can't say I've ever heard that whistle. Here is mine with the windows up. -
What have you done to your K2 today?
Deanjo replied to block8head's topic in Modifications & Accessories
Yup they will, same box on the 2014-2016. They do just stick on with 3m tape. I used 3m adhesion promoter as they recommend as well since I had some laying around. Just be sure to line it up put it on right the first time. That 3M tape with the adhesion promoter sticks hard and you do not get a second chance. -
What have you done to your K2 today?
Deanjo replied to block8head's topic in Modifications & Accessories
Oh probably if you book it in as a service. I just didn't want to book yet another appointment with the dealer for something that cost $30 and takes 10 minutes to put on. My time is more valuable to me than to wait around for hours to have something like this done. -
What have you done to your K2 today?
Deanjo replied to block8head's topic in Modifications & Accessories
They do not go on the door, they go on the truck box corner and you get them from GM. -
What have you done to your K2 today?
Deanjo replied to block8head's topic in Modifications & Accessories
There is a GM service bulletin on it BTW #PIT5454 - Paint Chipping on Front Lower Bed Corners Subject: Paint Chipping on Front Lower Bed Corners Models: 2014 Chevrolet Silverado 1500 2015 Chevrolet Silverado 2014 GMC Sierra 1500 2015 GMC Sierra The following diagnosis might be helpful if the vehicle exhibits the symptom(s) described in this PI. Condition/Concern Some customers may comment about excessive paint chipping on the front lower bed corners of their trucks, as shown below. Many of these trucks spend a majority of their time on dirt roads or gravel roads Recommendation/Instructions To better protect this area, a bed corner shield has been developed to protect this area. The shield is held on with double back tape. The part numbers are 23469126 23469127 -
What have you done to your K2 today?
Deanjo replied to block8head's topic in Modifications & Accessories
Ya, they started putting them on the 2016's after multiple complaints. My dealer wound up fixing the chips and then I put them on to keep them in good shape going forward. -
What have you done to your K2 today?
Deanjo replied to block8head's topic in Modifications & Accessories
Simple add on but needed on these trucks. Added the corner guards to the box corners right behind the cab. Should have been something that was standard. -
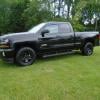
Nope, you are not the only one. I personally do not like the levelled look as the top of the truck box is lower than the hood on this body style. Put a bit of weight in the back and it looks like a dog dragging it's *** on the ground. If I were to do anything it would be a lift and level with a 2.25" in front and a 3" in back.
-
Engine bay got you down...Clean it up with a new cover.
Deanjo replied to rxnotec's topic in Modifications & Accessories
I've looked at many of those, all are too big to fit in the tray. The idea is to use the tray, not to replace it. The closest solution that would fit that I can find is from China and the shipping cost makes it prohibitive. http://www.aliexpress.com/item/Tool-case-toolbox-suitcase-Impact-resistant-sealed-waterproof-ABS-case-260-200-143mm-camera-case-Equipment/32608612314.html?spm=2114.13010308.0.50.Y2Yh6E -
Engine bay got you down...Clean it up with a new cover.
Deanjo replied to rxnotec's topic in Modifications & Accessories
I liked that idea but I've been having one heck of a time finding one that would actually fit in the tray. Even small plastic tool boxes that would fit (and are reasonably close to battery size) are hard to find. If someone ever made a toolbox using a battery casing, they probably would make a killing as a GM accessory. -
What have you done to your K2 today?
Deanjo replied to block8head's topic in Modifications & Accessories
OK thanks, I was wondering someone came out with a premade box that allowed it all the way back. Guess I'll keep my custom one and redo it to match the interior. -
What have you done to your K2 today?
Deanjo replied to block8head's topic in Modifications & Accessories
Are you still able to move your seat all the way back with those subs in place? -
Ya, I was pretty pleased, even found a place for my DQ-61's controller (that's what the knob and LED's are under the 12-volt outlets are). My biggest concern was to have to redesign a sub-box if it was too long but that turned out just perfect as it allows just enough space for full sub cone excursion. May still redo the box as this one was supposed to be just a temp one and do a bit of conturing of the box edges, then get it wrapped in matching vinyl to give it a factory look. May even move the sound processor into the large bin with a false floor over top of it to protect it since it is so huge. I may just wait on that mod as AudioControl's new DM-608 processor should be out soon.
-
Squeezed it in.
-
Pretty sure you will not need the rear trim plate.

-
Forum Statistics
250.4k
Total Topics2.7m
Total Posts -
Member Statistics
342,822
Total Members8,960
Most Online
-
Who's Online 9 Members, 1 Anonymous, 686 Guests (See full list)