
Thomas Arias
-
Posts
4 -
Joined
Thomas Arias's Achievements
New Member (1/11)
14
Reputation
-
Secondary Cargo Switch in the bed
Thomas Arias replied to RedLT's topic in Modifications, Wheels & Tires
Nothing is stopping you from doing that as long as the frame/bolt is clean, bare, and free of paint. The 7-way splitter was the most convenient method for me. I do remember seeing a bolt or two behind the taillight so that may be your best option. -
Secondary Cargo Switch in the bed
Thomas Arias replied to RedLT's topic in Modifications, Wheels & Tires
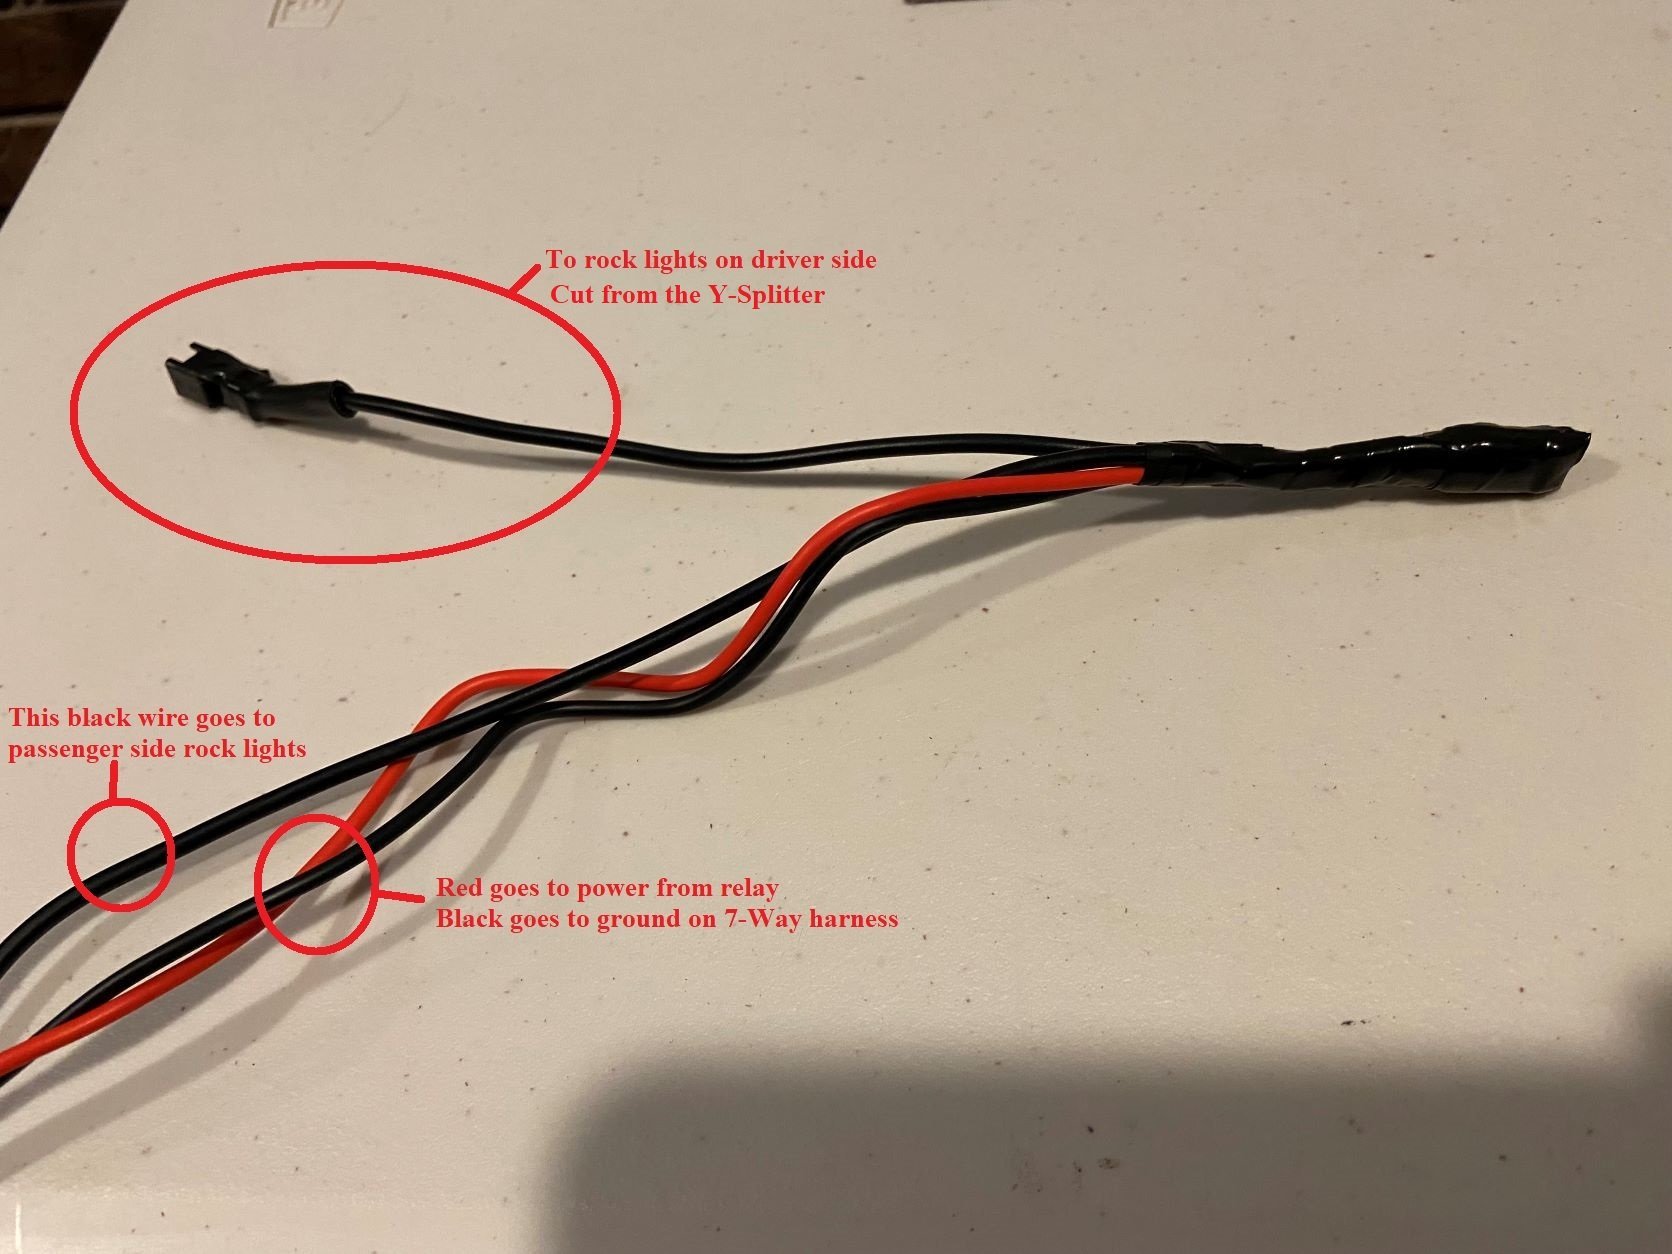
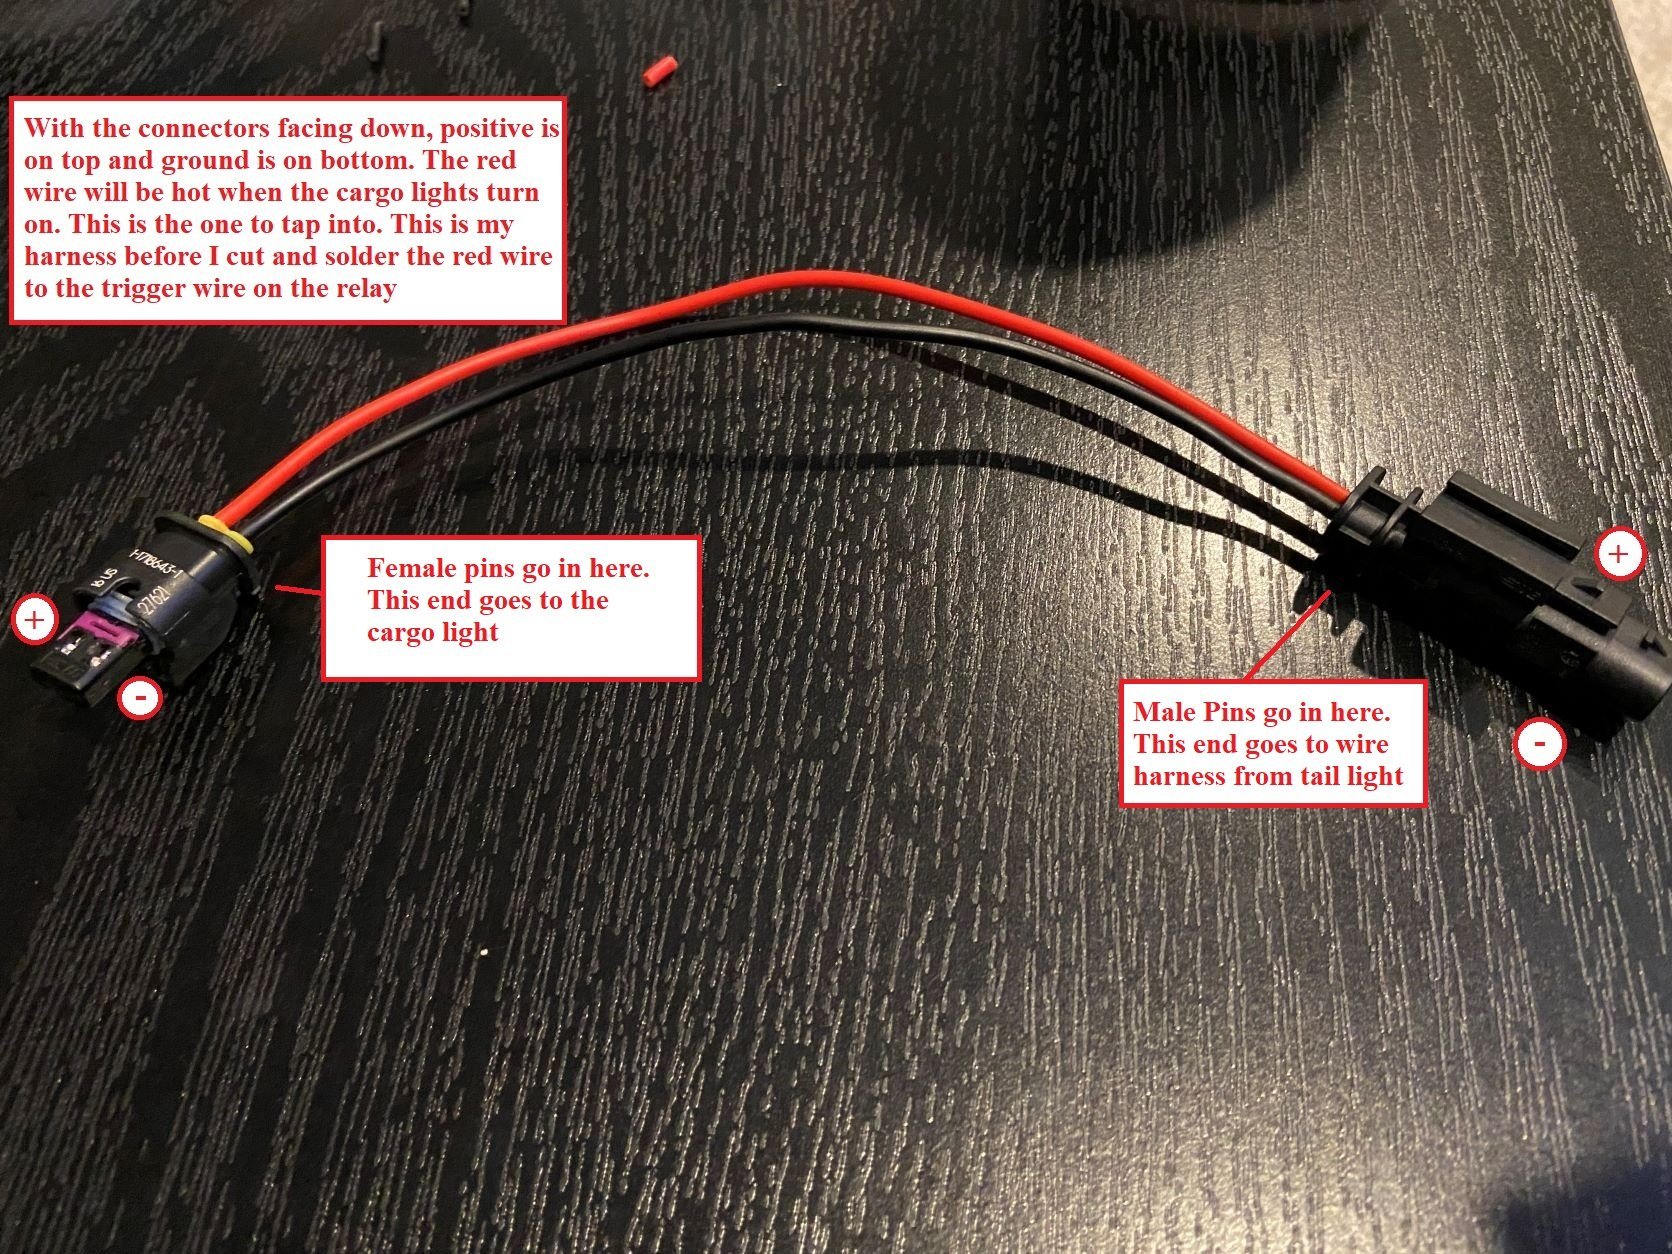
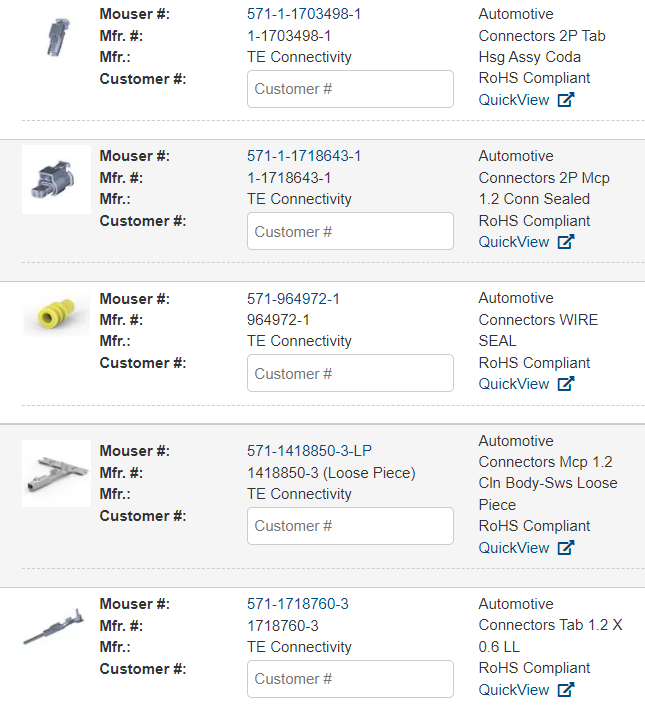
Part 2 is a success! I tapped into the existing cargo light and used it as the trigger for the relay. When the cargo lights turn on, it will trigger the relay to send power to the additional bed lights. Pardon my frustration but the bed lights I mentioned in the previous post, Xprite lights, are awesome from a lighting perspective... but garbage from a wiring perspective. I decided to cut and re-solder the Xprite wiring harness because the Y-splitter where the lights connect to are way too short. I think these lights are meant to be wired from the front of the bed and then ran towards the back. I'm not set up for that because my power and ground from the 7-way harness are tucked behind the driver side tail light. So I cut the adapter off from the Y-Splitter and re-soldered it to the other end. That way, one adapter is on the passenger tail light and then the wire would run down and under the tailgate to get to the driver side tail light. I also cut off the included switch, not needed since these will be triggered with the cargo lights. For the passenger side tail light: For the driver side tail light: Then I moved on to the MCON 1.2 parts to tap into the bed lights. I made an extension harness to make sure I wired it properly. The GM cargo light has a '+' and '-' sign on the male plug. I tested out the fitment of the connectors to the cargo light and marked where the positive end is and made a note of it so I wire it correctly. It's also a good idea to order extra parts, like two of each for experimental reasons. Thankfully that's what I did. I had some trouble figuring out how to insert the pins into the housing. I hope the picture shows you hot wire and ground clearly. It's hard to put it into words but I tried. And the end result... ta da. A huge bundle of wires behind the driver tail light. I miscalculated the amount of wire I needed and ended up with so much hanging out after I soldered everything together. Rather than shortening/redoing everything, I just zip tied the extra back there. No harm really. If you crawl under the rear bumper, you can see a straight shot up to the back end of the tail light. I shoved my arm up there and added a few more zip ties to make sure everything stays put. I zip tied everything to other harnesses back there and to the frame, and to each other. That's not going anywhere! Here's another updated video of the end result: https://photos.app.goo.gl/b3K6PHustdKGtcGV7. Enjoy the super clean bed! It hasn't been this clean EVER. Now I wait for some adhesive clips I ordered so I can tuck and hide the rock light wires under the bed rail. This was fun and thanks to a ton of other forums that motivated me to do this mod. Before I started, I slowly gathered a ton of info from the site for each step. Took me hours, and a lot of materials. I need to restock my heat shrink, wires, zip ties, solder, and my sanity/patience. But it is totally worth it and puts a smile on my face. I hope this helps anyone else trying to do the same thing.
-
Secondary Cargo Switch in the bed
Thomas Arias replied to RedLT's topic in Modifications, Wheels & Tires
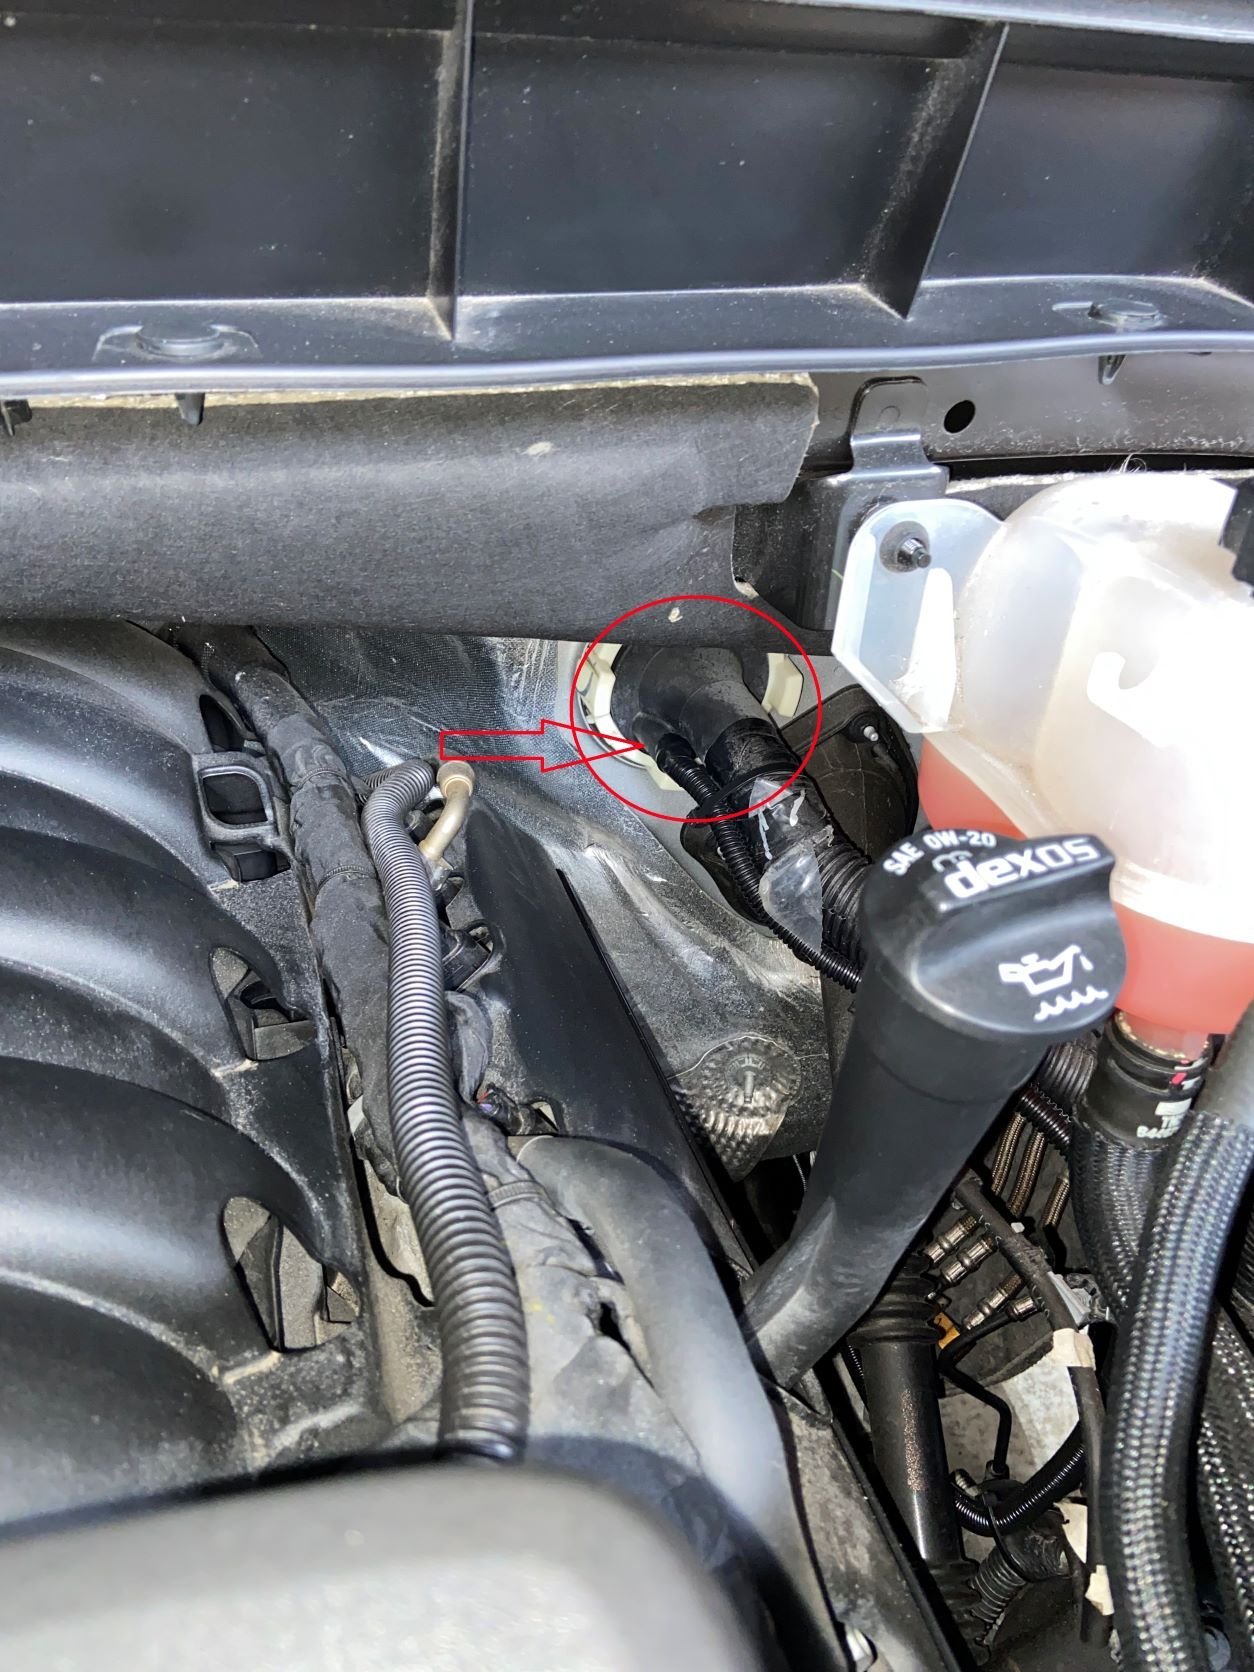
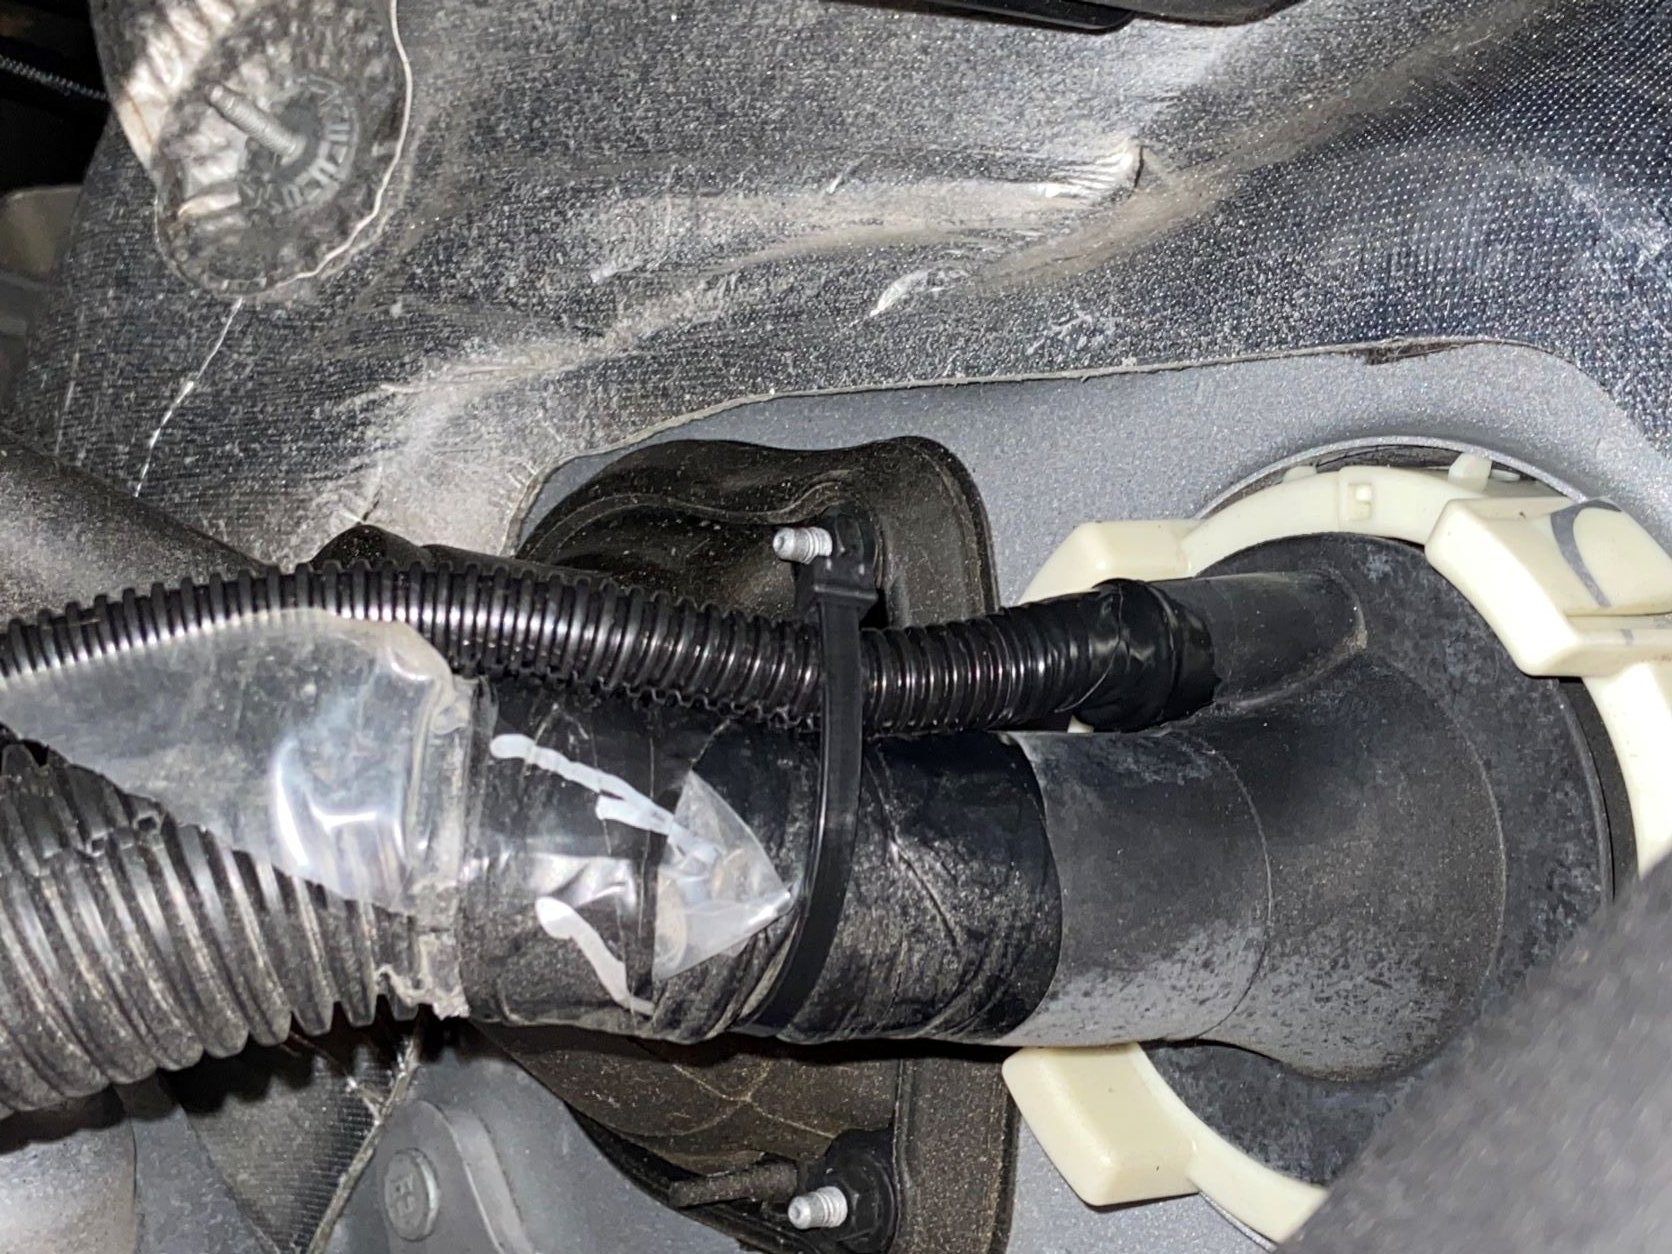
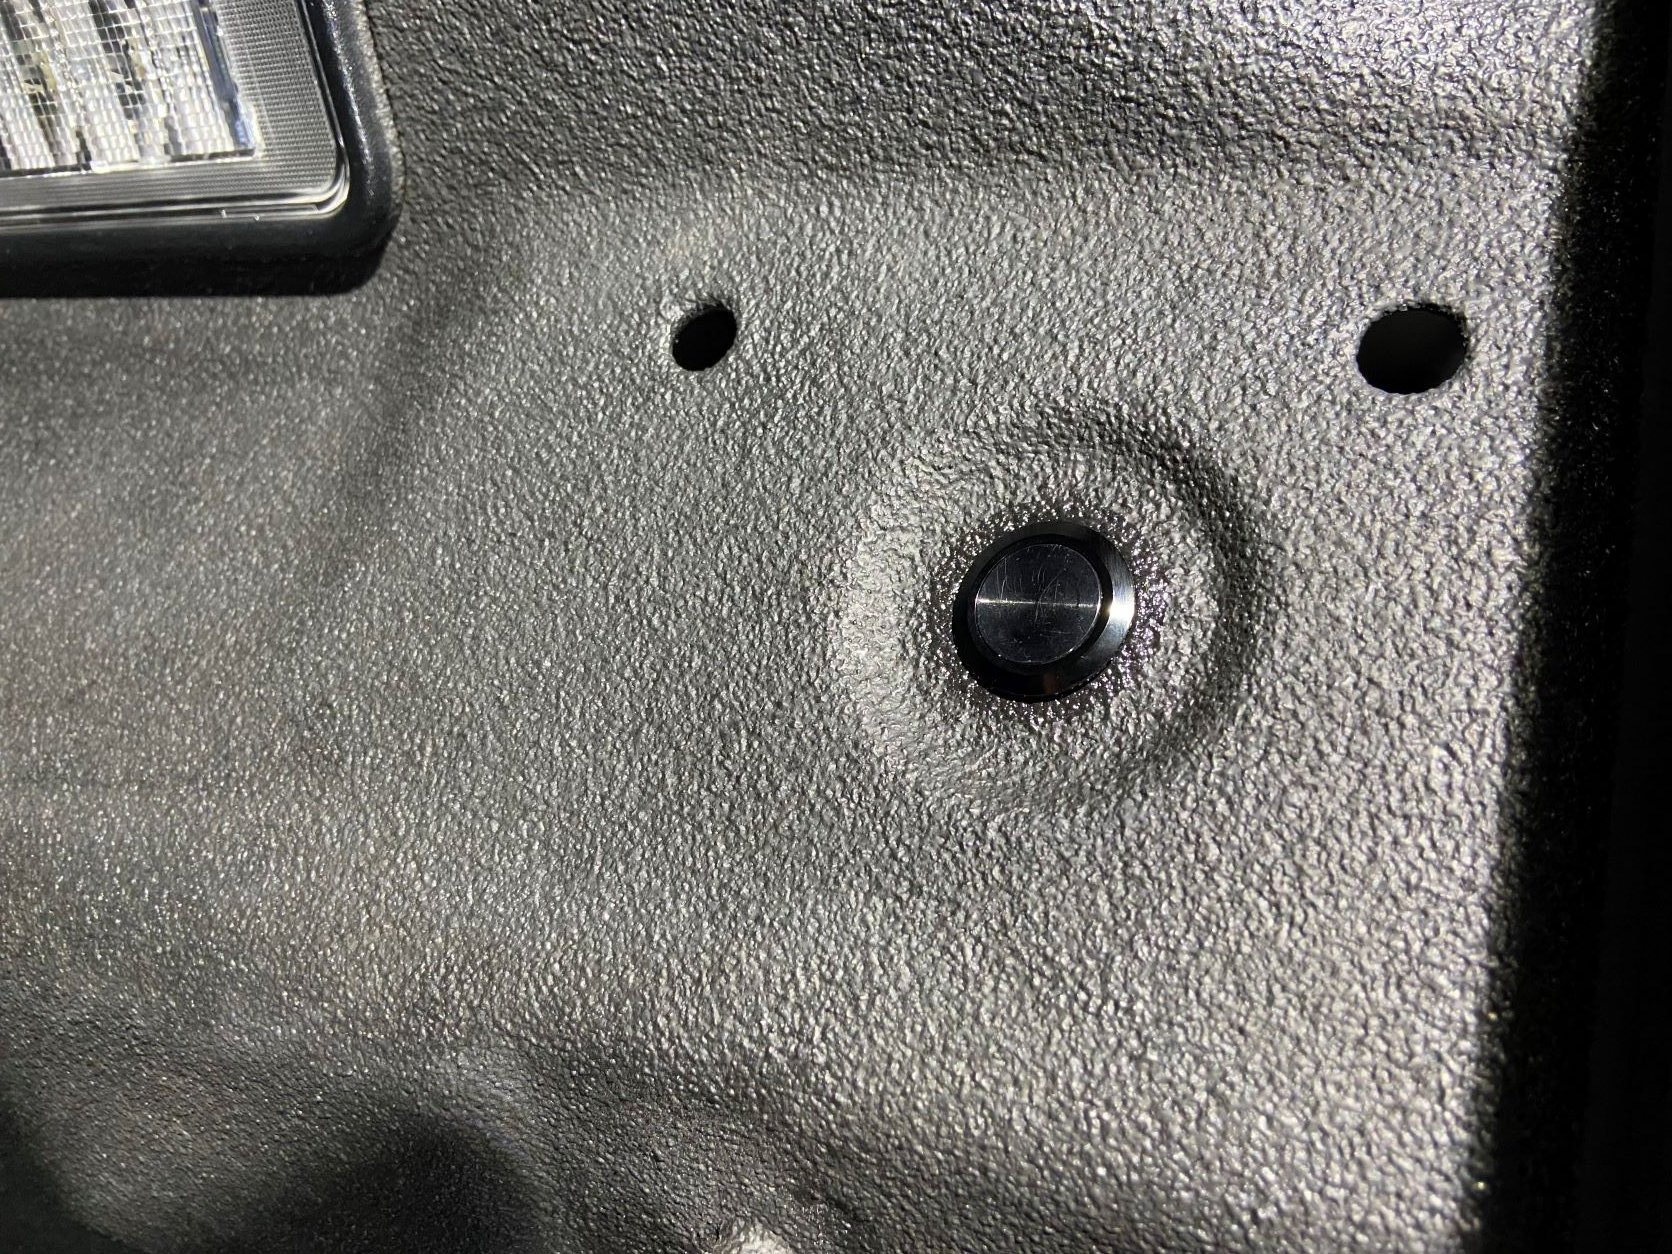
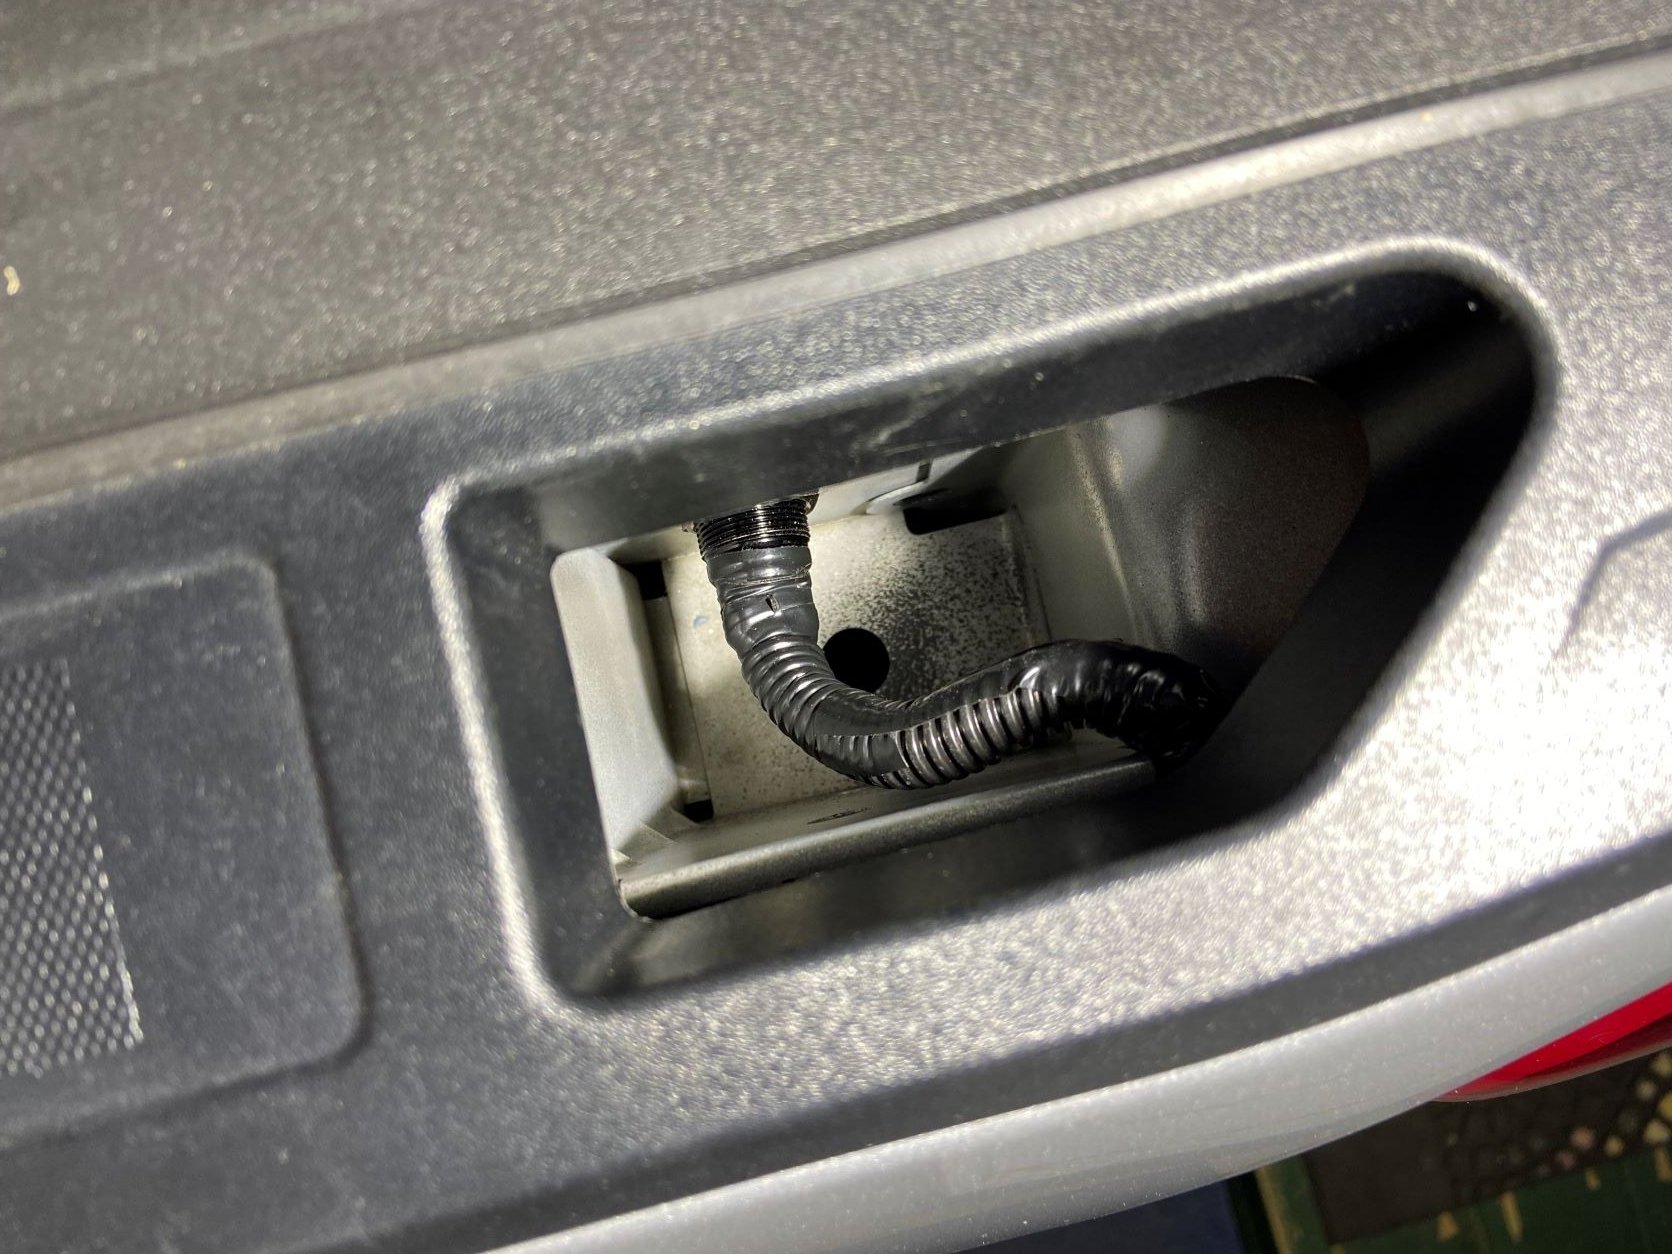
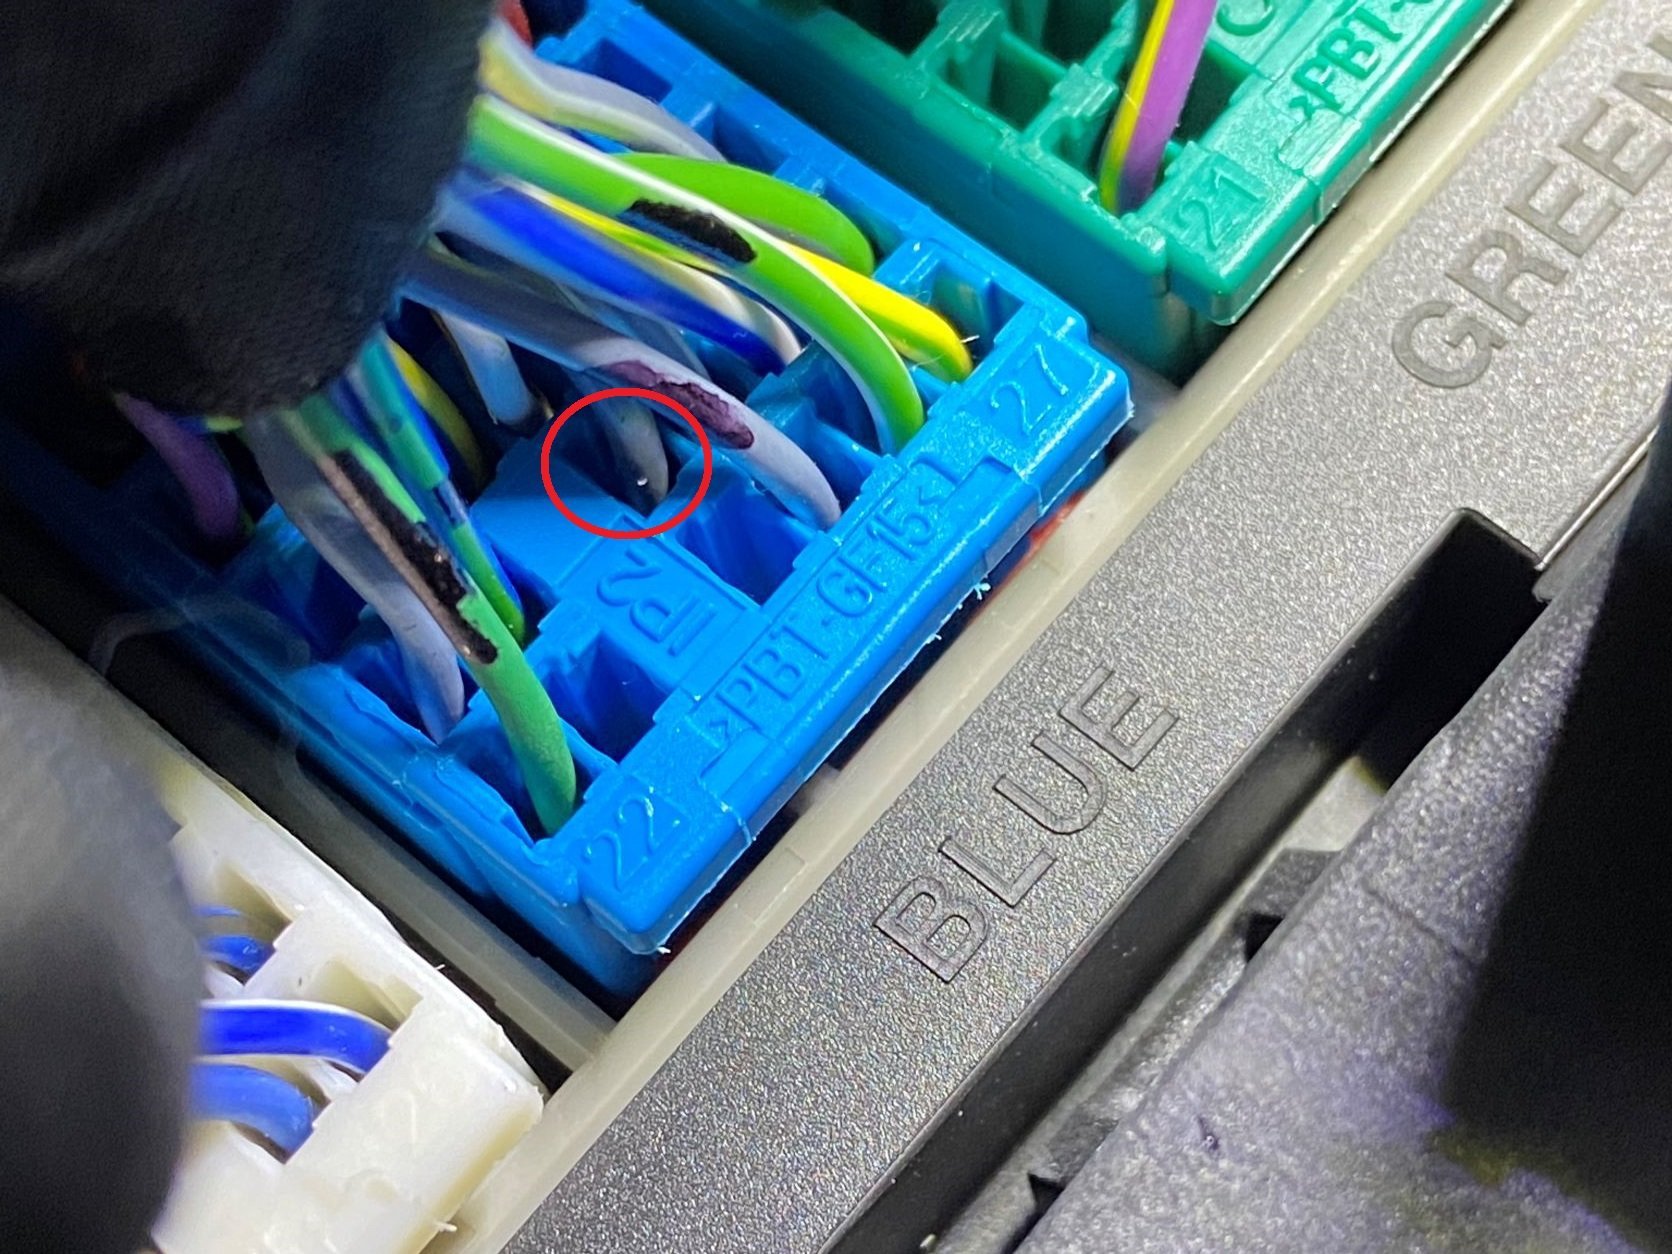
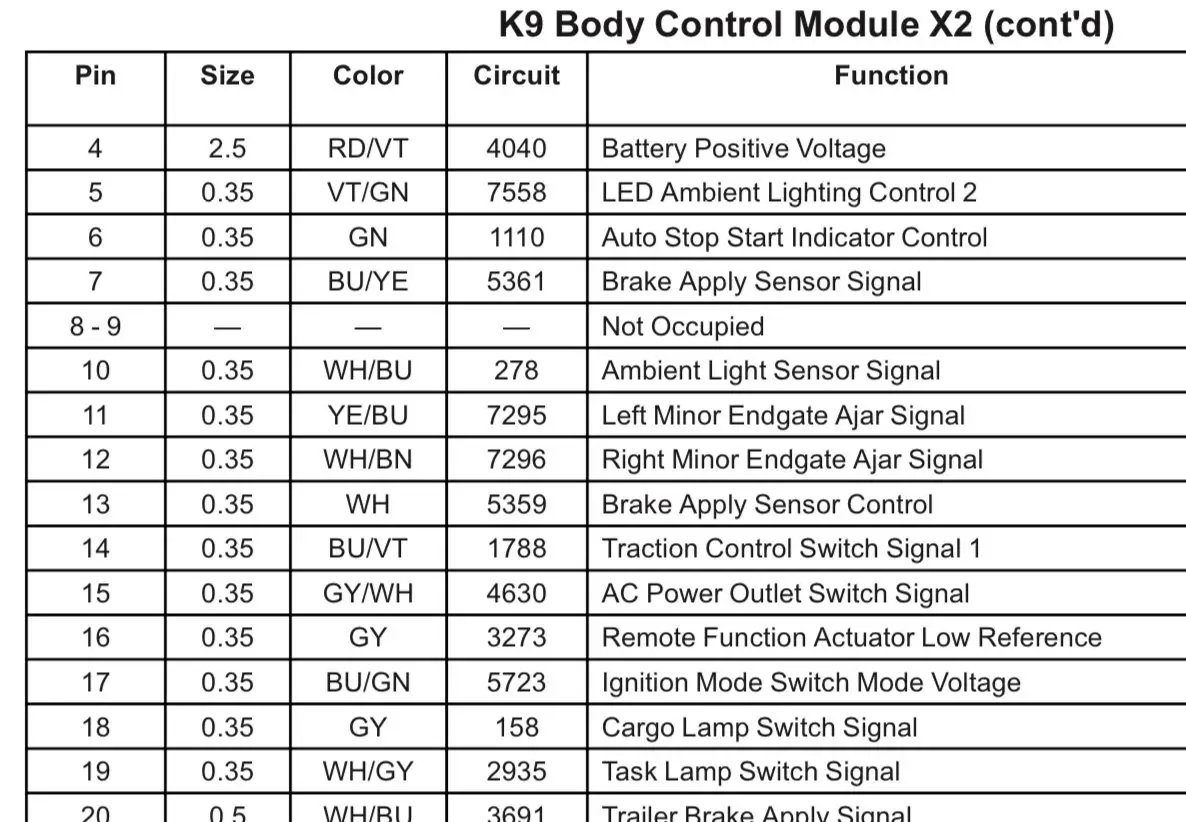
@RedLT @TA^Guy - Yes! The dash is a momentary switch sending ground to the BCM. And great news, all the info I found in the docs is correct and I was able to get it to work I got way ahead of my self and ordered all my stuff before even testing it out, but it was worth it in the end. I hate splicing oem wires so I went a little over board. Here's what I used: 7-way Harness splitter to tap into the trailer 12v power and Ground https://www.amazon.com/dp/B09BMNLX6S/ref=cm_sw_em_r_mt_dp_9T8ZKHTT2KFH8JA21CHK?_encoding=UTF8&psc=1 Momentary Button for the bed https://www.amazon.com/dp/B07P6TY9JD/ref=cm_sw_em_r_mt_dp_AWRDX4FK7HCXT66F1DBF?_encoding=UTF8&psc=1 Spool of wire, and I used it all https://www.amazon.com/gp/product/B000NV0FGU/ref=ppx_yo_dt_b_asin_title_o06_s00?ie=UTF8&psc=1 Wire loom to protect the wire. Almost used it all. Still have about 1-2 feet left https://www.amazon.com/gp/product/B001GN6QCG/ref=ppx_yo_dt_b_asin_title_o05_s00?ie=UTF8&psc=1 And some extra stuff I had laying around Electrical tape 22 gauge solid wire heat shrink I'd love to give credit to a post about running wire through the firewall but I can't seem to find it anymore. I went through the the rubber grommet on the driver side. I used my smallest drill bit to manually hand drill a hole. Then shoved a clothes hanger with the wire taped to it. I found it inside under the steering wheel behind a thick foam pad. The clothes hanger helped me find it quick since it was poking out and pushing on the foam piece. I then ran the wire loom (with wire already in it) from the engine bay down to the frame then to the back. This took the longest and there's a few paths to take. I spent too much time making it pretty and zip ties. I avoided hot parts and exhaust. I should have jacked up the rear end or something, but I crawled underneath instead and man am I sore today. It's a very tight squeeze (for me). And make sure to underbody wash before you start. I live where the roads are salted white and I had a lot of salt falling on my face. Not pleasant. So I ran wires down, hugging the frame and zip tied to another harness already going towards the bed. I got to the rear fender and ran wires up behind the tail light and continued to the hand grab and wired up my switch. I removed the rubber plug (19mm) and put my switch in there. A little ugly in plain view looking into the hand grab... but no one looks down there. The rubber grommet picture is the passenger side, but the same grommet is on the driver side. Then I zip tied the 7-way splitter under the hitch and ran the wires behind the driver tail light. The 12V from the 7-way is hot so I didn't plug in the harness until I finished all my connections. The 7-way harness is bit pricey since it's a full kit to add a 5th wheel connection to the bed, but I rather cut that than my factory harness. So at the tail light, I cut the end off of the 7-way to expose the 7 wires: Black is hot and White is ground. Part 2 for me will be adding more lights to the bed so that hot lead will come in handy later. I taped and heat shrink all wires. But took the white wire from the 7-way and connected that to the other side of the new momentary switch. The switch now has the one wire going to the cab and the second wire connected to the 7-way white wire for Ground. Sorry no pictures I was tired and frustrated after crawling under the truck for a few hours trying to get my hand in tight places for the zip ties... and forgot to document it all. Lastly, I found my X2 plug. It's blue and pins increment from left to right. I counted backwards from pin 22 and arrived at the grey pin 18 as mentioned in the GM upfitter PDF. More credit to another post that said to solder the wire to a smaller solid wire so I soldered the 16 gauge stranded to 22 solid and shoved it into Pin 18. WORKS GREAT Here is the end result: https://photos.app.goo.gl/3r3LZts9s6UP97NW6. And I'm very happy I now ordered some lights, a relay, and some connector pieces for part 2. Yes, I hate splicing into factory wires so I had to figure out the bed light connectors/adapters so I can cut into my own wires and not the trucks. This will be for another day, hopefully warm and sunny so I can work outside... with no salt falling on my face Lights https://www.amazon.com/gp/product/B09KKR6DZK/ref=ppx_yo_dt_b_asin_title_o00_s00?ie=UTF8&psc=1 Relay https://www.amazon.com/gp/product/B08D8TSMFV/ref=ppx_yo_dt_b_asin_title_o00_s01?ie=UTF8&psc=1 MCON 1.2 parts to tap into cargo bed lights
-
Thomas Arias changed their profile photo
-
Secondary Cargo Switch in the bed
Thomas Arias replied to RedLT's topic in Modifications, Wheels & Tires
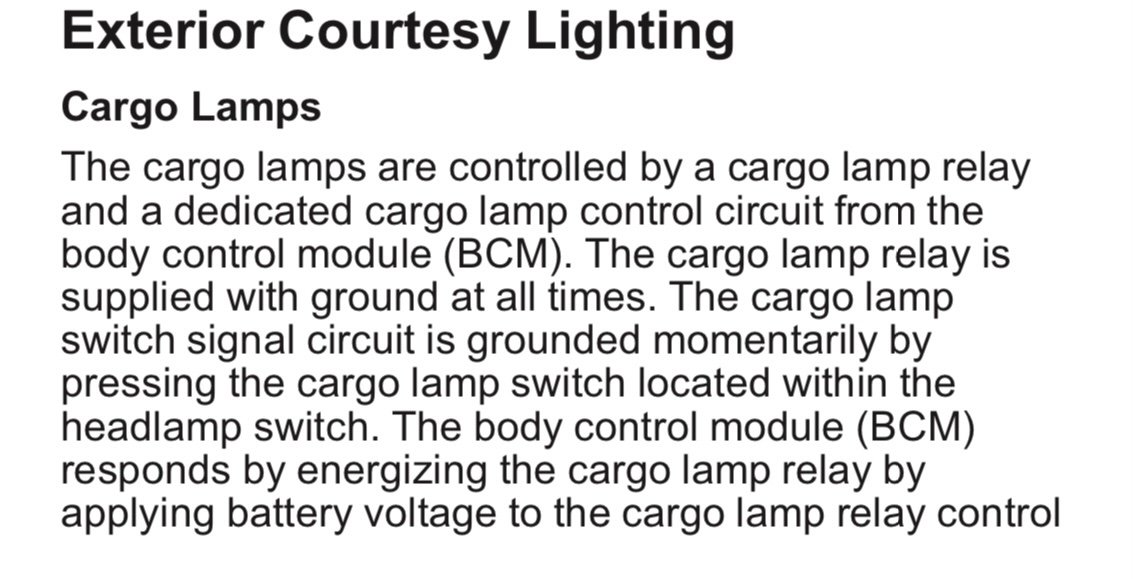
I’ve been wanting to add lights to the bed and having it all hooked up to the factory cargo switch with a second switch in the bed would be a dream. So I’ve been doing a lot of research with the help of other posts on this site. This was mentioned a few times and it contains the newer body 2019+ Silverado schematics: https://www.gmupfitter.com/ Navigating through the site isn’t too tricky, so go “Body Builder Manual” -> “Light Duty vehicles” -> select your year (mine is 2020) -> “Chevrolet Silverado/GMC Sierra Pick Up and Chassis Cab Applications” -> “Chevrolet Silverado LD (1500) Pick Up ELECTRICAL Section (NEW Body Style) Following that path, this link is for the 2020 Silverado 1500: https://www.gmupfitter.com/wp-content/uploads/2021/05/20_Sierra_1500_Electrical_Body_Builder_2019JUN20.pdf. It’s a huge PDF so I searched “cargo” to help me find what I needed. In the 2020 pdf, page 2-47 states that the cargo lamp switch signal is momentarily grounded to turn on the cargo lights. And on page 7-250 and 7-251, the cargo lamp switch signal is on K9 BCM X2 pin 18 grey wire (same pin as the referenced post for the older Silverado, but unsure of color plug). I’m getting my parts ready for this project. Should be a fun one. I’ll be the guinea pig and attempt to ground that pin to make sure it all works. Also have to confirm which plug is the x2 connector. I’ll try that out this weekend when I have a chance. Crossing fingers that it works… and I don’t fry anything important. I hope this info helps!


-
Forum Statistics
250.4k
Total Topics2.7m
Total Posts -
Member Statistics
342,850
Total Members8,960
Most Online
-
Who's Online 3 Members, 0 Anonymous, 532 Guests (See full list)