

Kintnerboyredoubt
-
Posts
43 -
Joined
-
Last visited
Content Type
Profiles
Forums
Gallery
Events
Articles
RPO
Store
Blogs
Everything posted by Kintnerboyredoubt
-
Upper control arms 2019 Trail Boss leveled
Kintnerboyredoubt replied to Kevin Grogan's topic in Modifications, Wheels & Tires
That must be what they meant. I can’t imagine a chunk of metal the size of their uniballs wearing to the point of replacement so quickly. Do yours make much noise? I live in the Pacific Northwest so it’s wet fairly often which makes me shy away from designs with the ball completely exposed. Also I’m not exactly running Baja in my truck, the most off-road it gets is forest service roads and shuttle roads to access fishing and mountain biking. -
Wheels and Tires on '19 GMC Sierra
Kintnerboyredoubt replied to GMC19Sierra's topic in Modifications, Wheels & Tires
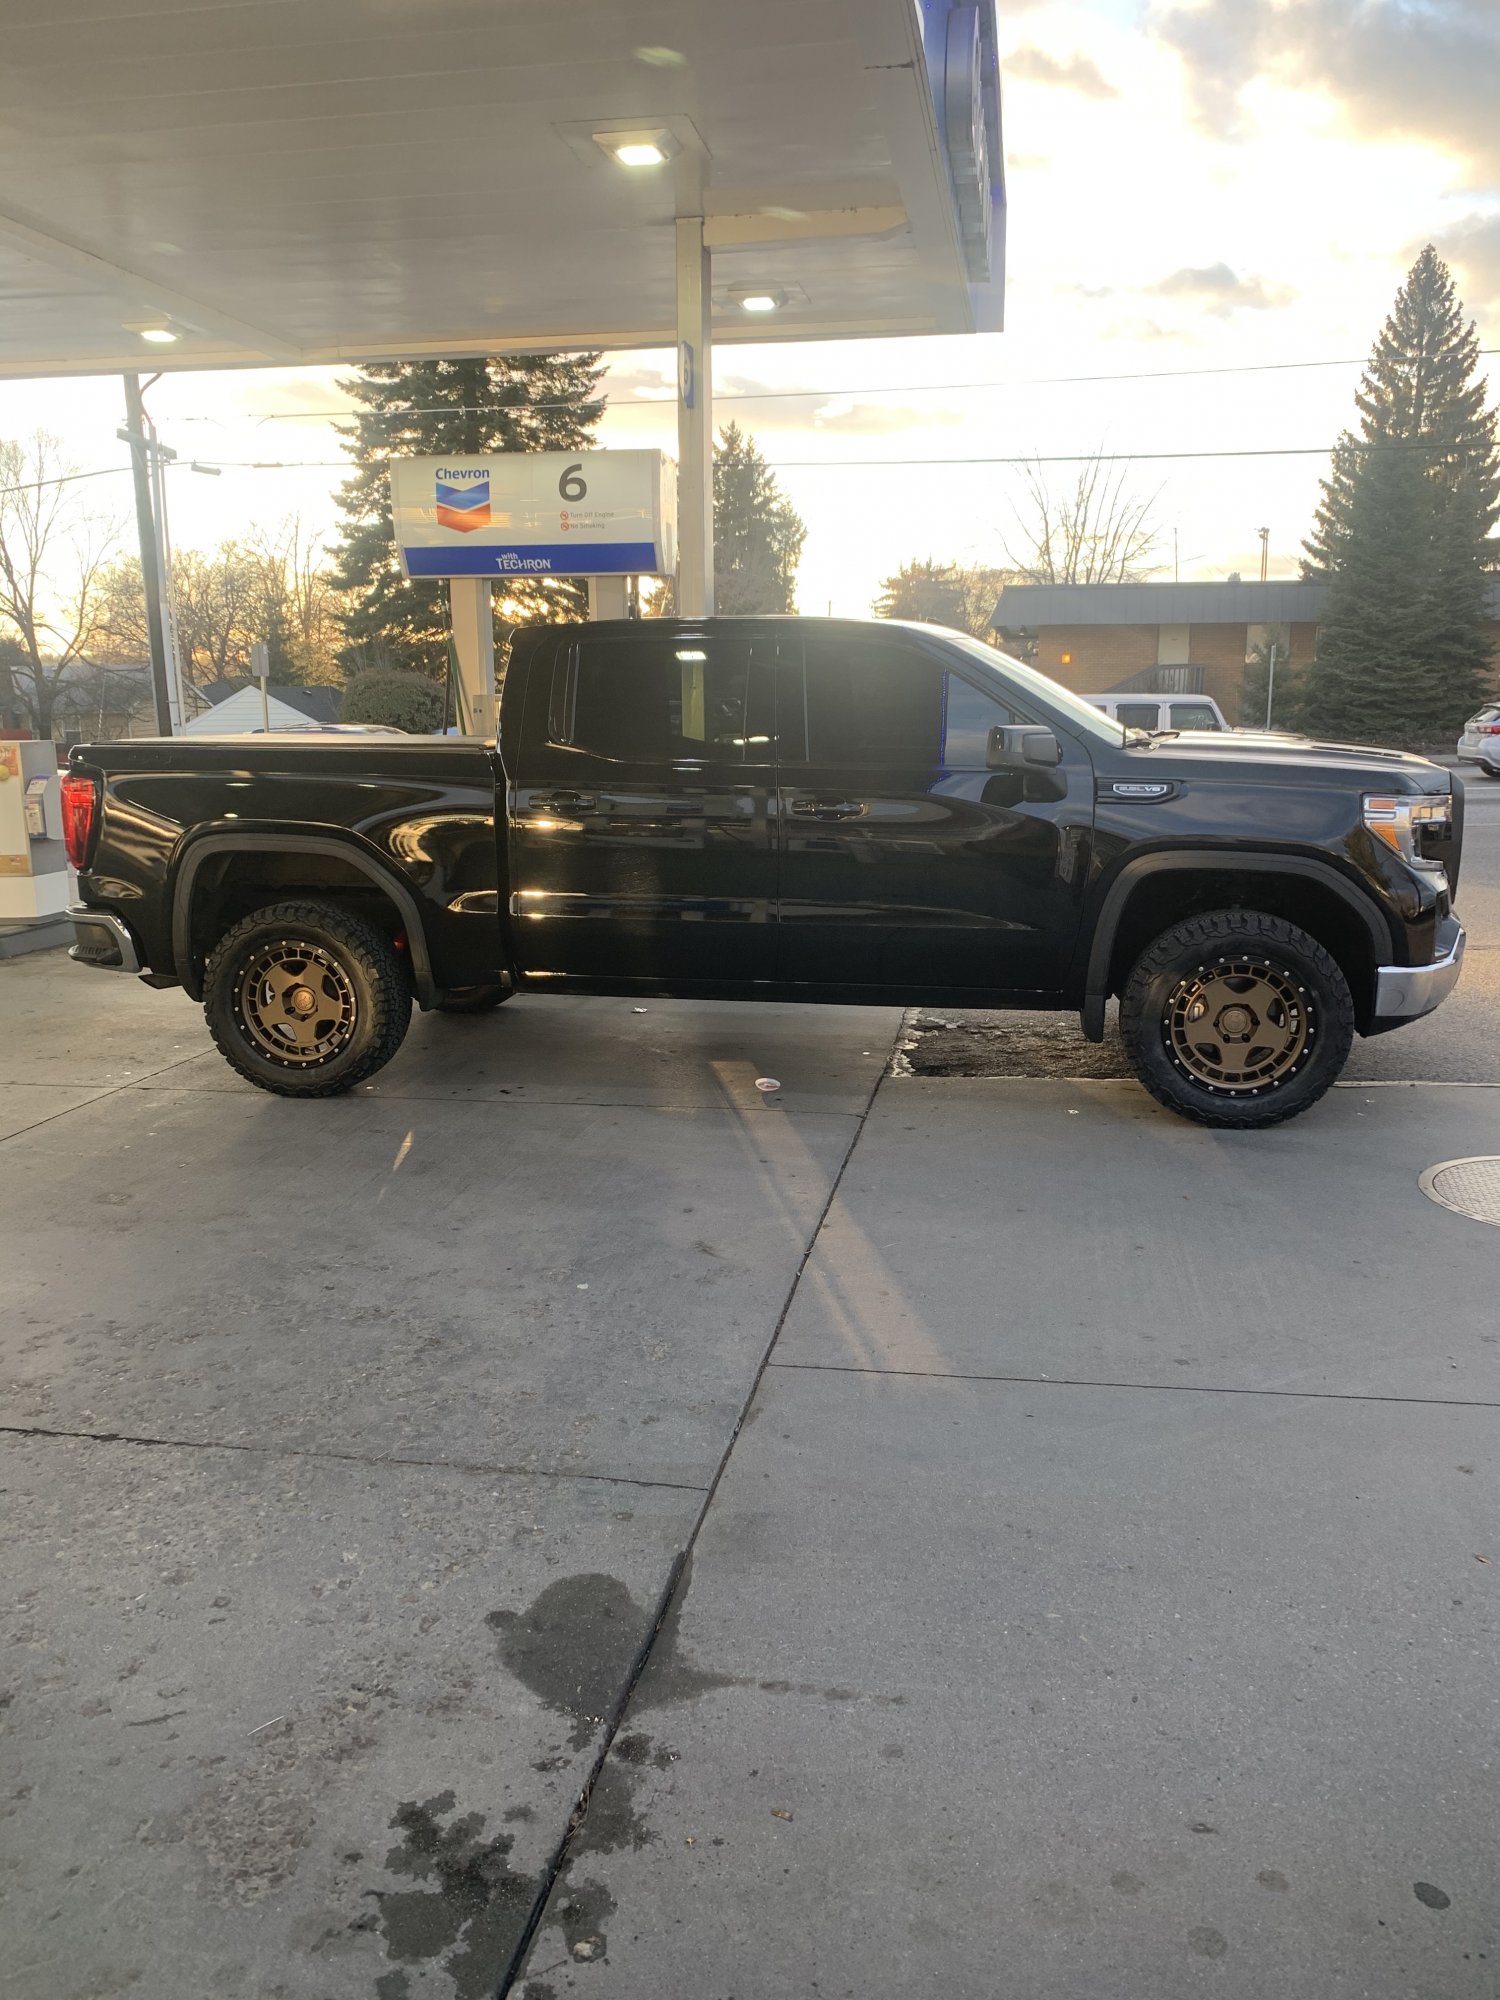
I would venture to guess you “might” be able to get a 35 on a stock(ish) offset wheel with 4” of lift (GM 2” lift + 2” rough country level)... if you’re looking to do any sort of offset 33x11.5 or maybe 33x12.5 and up to around -18 offset could work depending on the tire. I’m running 295/55/20 (BFG K02)on a -12 with 4” of lift and I get a hint of rub in reverse on occasion. There are so many variables that it’s hard to say for sure what is going to work. The GMC T1 has a smaller wheel well than its Chevy brother so you can’t stuff as much tire with the same amount of lift.
-
Upper control arms 2019 Trail Boss leveled
Kintnerboyredoubt replied to Kevin Grogan's topic in Modifications, Wheels & Tires
Interesting. The odd thing is that you don’t see the onslaught of rust on vehicles over here (eastern Washington state) that you see on vehicles coming from the north east. -
Upper control arms 2019 Trail Boss leveled
Kintnerboyredoubt replied to Kevin Grogan's topic in Modifications, Wheels & Tires
Yea absolutely they will last longer with any amount of lift the factory UCA is at its limit. I get analysis paralysis anytime I try to pick out a part, think I know exactly the one I want and then end up second guessing myself. I live up north and although they don’t use salt on the roads (yet) the chemical they do use (magnesium chloride) is pretty hard on any raw metal so I don’t think uniball UCA’s are a good option. -
Upper control arms 2019 Trail Boss leveled
Kintnerboyredoubt replied to Kevin Grogan's topic in Modifications, Wheels & Tires
I emailed Camburg regarding the longevity of uniballs and the possibility of a ball joint UCA. This was the response I received. “That is something we're looking into right now to offer. We’re designing and developing the ball-joints. It will be months before we have them available though. Uniballs last longer than 10k miles, but do require a little added maintenance of keeping them clean. A ball-joint with a boot and encased in grease holds up to harsher wet environments better than a uniball. Which one to go with depends on where you live, the conditions you're using the truck and how you're using it. They both have pro's and con's to one another” -
You should be good to go with a 0 offset wheel. Yea some of the fitments on custom broffsets gallery crack me up “running 22x12 -60mm with a 35x12.50 1 inch leveling kit no rubbing no trimming” lol.
-
Look at my post on the “factory gm 2” lift installed” thread for a step by step, basically there is a bracket that the mud flap mounts to under the felt wheel liner that can be removed to gain clearance on the backside of the wheel well (side closest to the drivers door) it gains roughly an inch or so of additional clearance. Without it done I could barely turn the wheel, after that I was able to get near full lock. Only having rub in reverse on the front lower valence. You remove the 3 torque screws on the front side of the mudflap, then remove a 10 mm bolt on the back side. The mudflap can then be pulled away from the truck body and pushed towards the engine bay. There will be another torque screw holding the carpet wheel liner to the bracket, remove this and pull the wheel liner up and away as much as you can. This will give you access to the bracket behind it. The bracket has 4 bolts that have 13 or 14 mm heads. Remove those and the bracket comes off. Then put everything back in reverse order. The final step is to drill a small hole on the back side of the carpeted wheel liner near where it attaches to the rear front mudflap and insert and zip tie it into that new hole and an existing hole on the body near it to pull the flap back. Do not drill thru the mudflap, just the carpet. Repeat for the other side. The whole process took me about 30-45 total for both side and I wasnt in a rush lol here is the post. Someone else did the write up I’m not trying to steal it as my own just sharing it as it is very valuable when trying to gain a few inches of clearance. The directions aren’t super clear I’ll admit but peel back your fender liner a bit and you will see exactly what it is referring to.
-
I saw a bunch of people claiming they weren’t rubbing running some big offsets on just a level on there as well. After seeing first hand on my own truck there is absolutely no way they didn’t trim or do anything to get those to fit unless they somehow drive without ever making a turn...
-
I have a similar setup to you, 20x9 -12 with 295/55/20. I had done the mudflap mod originally which got rid of a great deal of rub. My setup was a Sierra Sle with factory 2” lift. It rubbed badly before the mud flap mod after that it rubbed mostly in reverse and on the front lower bumper valance. Recently I installed a 2” rough country leveling kit (basically the same setup @lapoolboy is running) it doesn’t rub at all now. Our sierras have smaller wheel wells than silverados so fitment issues are common and frustrating. Your tire is a bit taller than mine (60 vs 55 but with the width difference it should be negligible) fwiw I’m running bfg k02 which are known to run small. Try the mudflap mod first ( I know you said your truck doesn’t have mud flaps but likely it still has the bracket for them behind the wheel liner) after that a small trim on the lower valance should alleviate your issue. If you don’t want to trim you’re going to have to add moar lift. Good luck.
-
Headlight Tint..??
Kintnerboyredoubt replied to HuskersSilverado's topic in Modifications, Wheels & Tires
It’s a forum. Not everyone is going to share your rose colored enthusiasm for making the biggest safety feature of night time driving less effective, but to each their own. Good luck on your quest. -
Headlight Tint..??
Kintnerboyredoubt replied to HuskersSilverado's topic in Modifications, Wheels & Tires
Call me old fashioned but this ranks right up there with tinting your windshield as far as pointless arguably unsafe modifications. Let’s make our headlights less effective, great idea. -
Upper control arms 2019 Trail Boss leveled
Kintnerboyredoubt replied to Kevin Grogan's topic in Modifications, Wheels & Tires
I saw those. To be perfectly honest after seeing a cutaway of the design, I’m not convinced there is any real benefit over the Moog problems solvers ball joint but I’m no engineer. The SPC ones look really nice but they don’t have one for our trucks yet. Skip to 17:54 for cut aways of the Moog and icon for your viewing pleasure. -
Upper control arms 2019 Trail Boss leveled
Kintnerboyredoubt replied to Kevin Grogan's topic in Modifications, Wheels & Tires
Was just reading up on these. The guys at Filthy Motorsports claim that uniballs need to be replaced every 3-4 oil changes which is way too much maintenance for me. They also say that those billet designs while they look awesome create a much more jarring ride as there is no bushing to smooth things out, the benefit is improved feedback in the steering wheel if you’re getting real sporty. Originally I was planning to go big with the Mazzulla ones but now I’m leaning towards the Camburg with Moog problem solvers ball joints... wish Camburg offered the tubular arm with ball joint like they do for Tacoma’s for our trucks... -
What Have You Done With Your T1 Today ?????
Kintnerboyredoubt replied to Sierra Dan's topic in Modifications, Wheels & Tires
Roll up. -
What Have You Done With Your T1 Today ?????
Kintnerboyredoubt replied to Sierra Dan's topic in Modifications, Wheels & Tires
@FWaT4 so far so good, driven a few hundred miles on the highway and it hasn’t moved much, it’s got Velcro running down the side of the rails and 2 reinforcements running across. It also has a tension adjustment system that is very easy to adjust for temp changes etc. for the price it seems pretty tough to beat. I’ll report back if my initial impression changes. For $200 it’s less than half the cost of a big brand name cover, and quality wise I’m impressed. I wanted something that would still allow use of the bed without totally removing it and this meets the criteria. I’ve had Undercover hard tonneau covers in the past and while they are great it’s a pain to take them off when you need to use the bed. -
What Have You Done With Your T1 Today ?????
Kintnerboyredoubt replied to Sierra Dan's topic in Modifications, Wheels & Tires
Thanks! I went with the Rough Country AT4 level. Plan on doing a King upgrade once my warranty is up so I’m just going to run the factory uca for a bit. Im a pavement princess anyway. -
What Have You Done With Your T1 Today ?????
Kintnerboyredoubt replied to Sierra Dan's topic in Modifications, Wheels & Tires
Pretty busy day for the old girl today. Picked it up from the dealer, they installed remote start, coded my factory fog lights and installed the gm 2” factory lift. Then I went straight to my tire shop to get my wheels and tires installed. At home I had factory GMC floor liners and the under seat rear storage box to install. I’ll post up some more pics tomorrow. Scheduled out to get my level installed on Friday (dealer wouldn’t do it) and getting the bumpers wrapped matte black. Pretty much done after that for a bit. Wallet needs a break.
-
Running Boards - need ground clearance!
Kintnerboyredoubt replied to Drew03Z's topic in Modifications, Wheels & Tires
Anyone running the NFAB RKR rails? I like the look of them (without the optional steps anyway) not sure how useful they would be without it though. Here they are on a tundra, they make them for T1 trucks but I can’t find any photos on Al Gores interweb.
-
What Have You Done With Your T1 Today ?????
Kintnerboyredoubt replied to Sierra Dan's topic in Modifications, Wheels & Tires
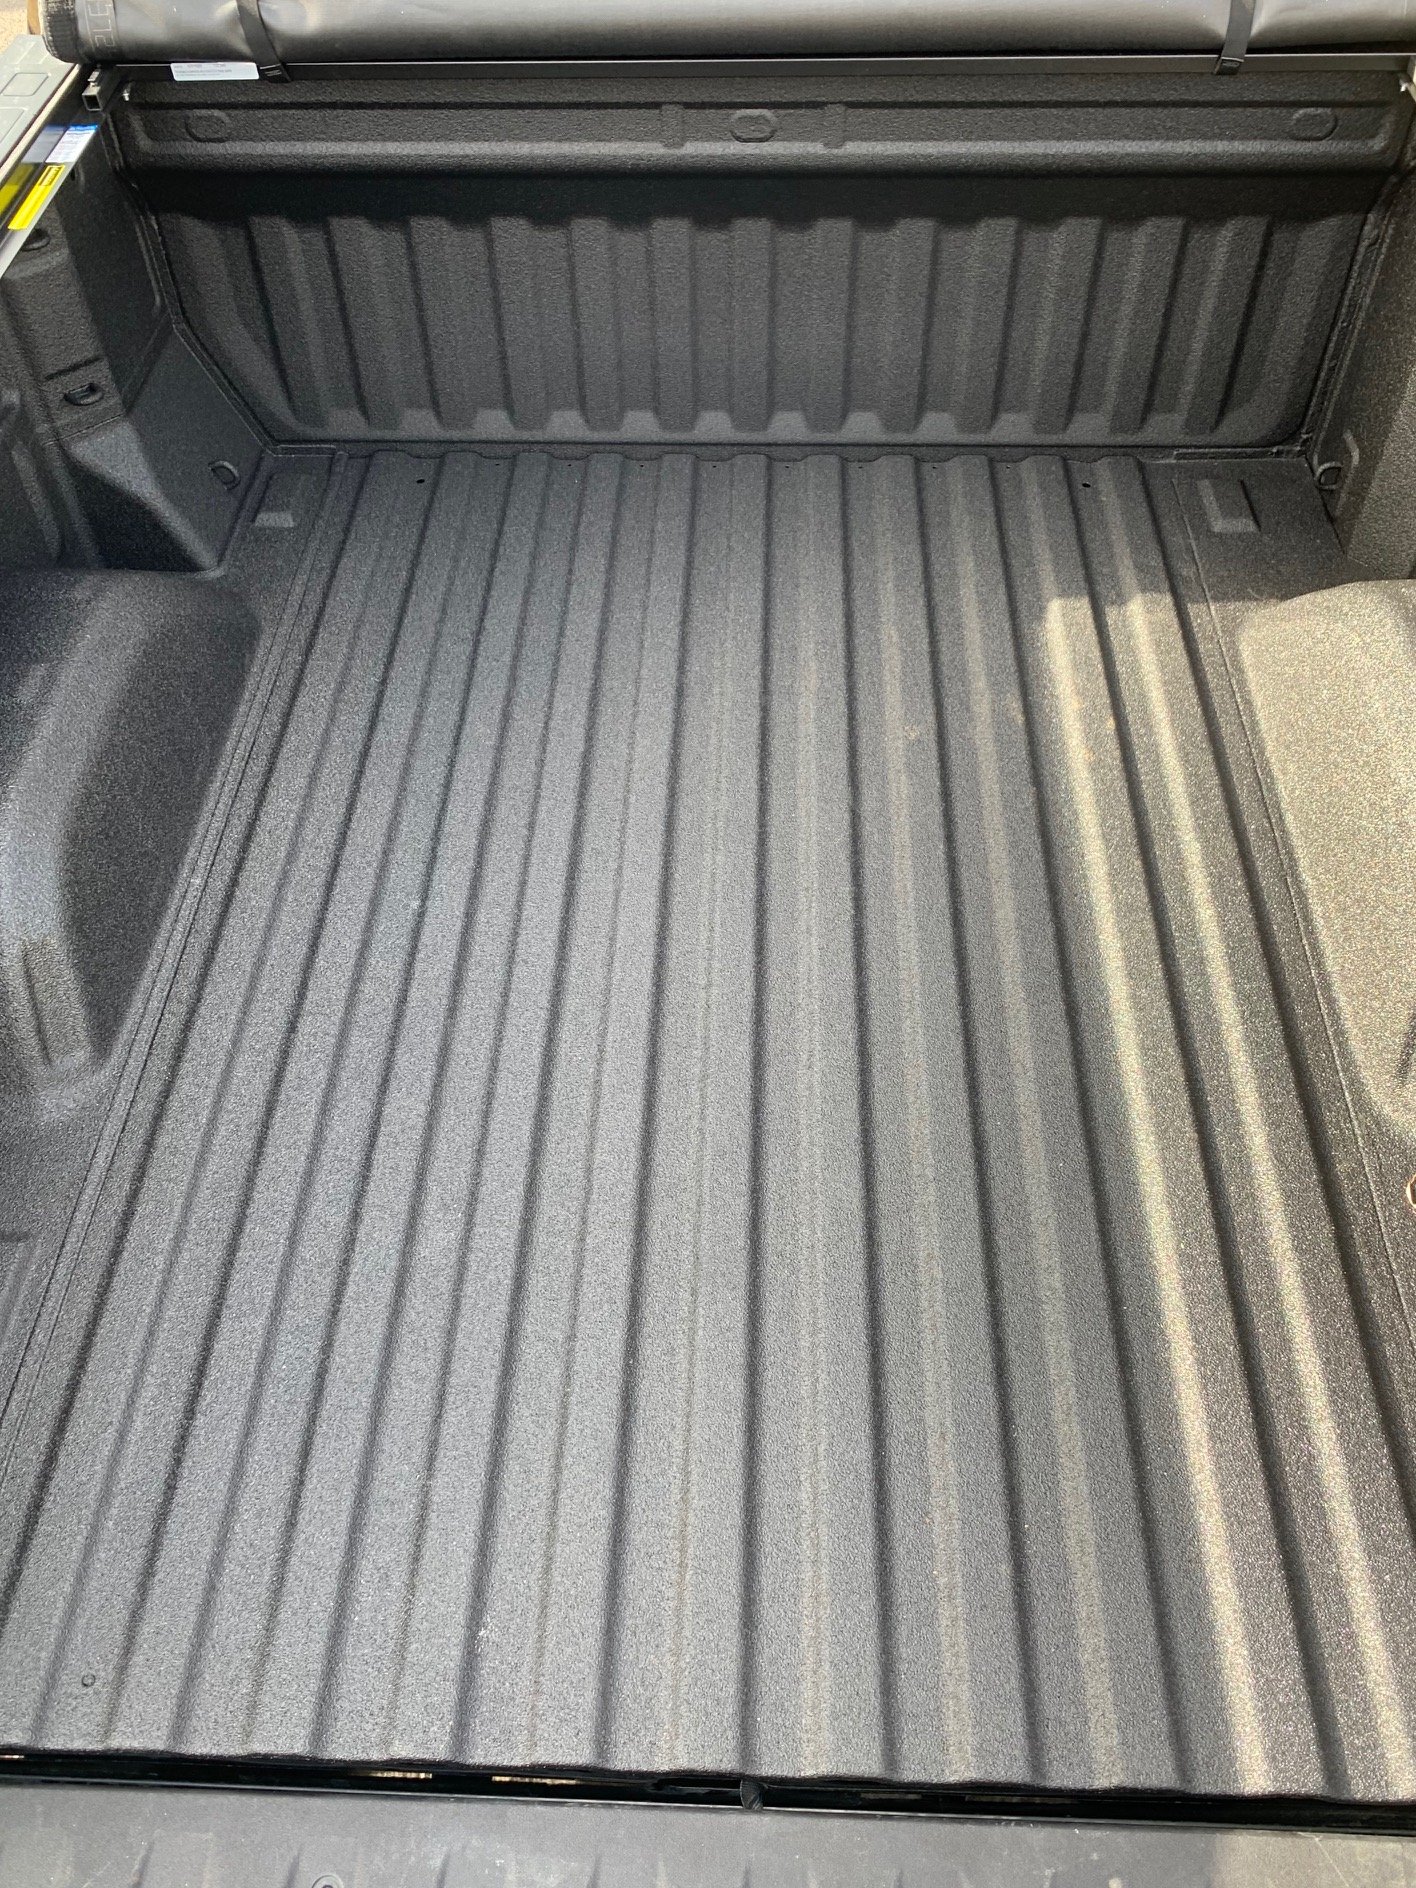
Still waiting on my lift to show up... in the meantime I tackled some other little stuff that I’ve been wanting to do. Changed out the license plate and reverse lights for leds. Got my bed liner sprayed yesterday, and installed a Gator Tonneau cover today as well. I also got some “stake block off plates” to close up those holes in the bed.
-
Grill replacement on T1 Sierra
Kintnerboyredoubt replied to Kintnerboyredoubt's topic in Modifications, Wheels & Tires
Sorry to rain on your parade but the gmc grill has 3 10mm bolts on the bottom of the grill that have to be removed. The only way to access them is to remove the entire front valance. Would be a piece of cake if it were the same as the Chevy for grill removal. Good luck. -
What Have You Done With Your T1 Today ?????
Kintnerboyredoubt replied to Sierra Dan's topic in Modifications, Wheels & Tires
Got my wheels test fit today, still waiting on the lift so my truck is stuck in grandpa mode until that arrives. Also had Sirius Xm Commander Installed, turned out ok... the shop installed the antenna on the dash and drilled a hole without asking me. I’m not exactly keen on it, the reception sucks with it in the cab and now there’s a freaking hole in the dash. Bad luck streak continues lol. after the lift getting a spray on bed liner, installing my tonneau cover, and getting the bumpers wrapped matte black. Bunch of other stuff in the works...
-
What Have You Done With Your T1 Today ?????
Kintnerboyredoubt replied to Sierra Dan's topic in Modifications, Wheels & Tires
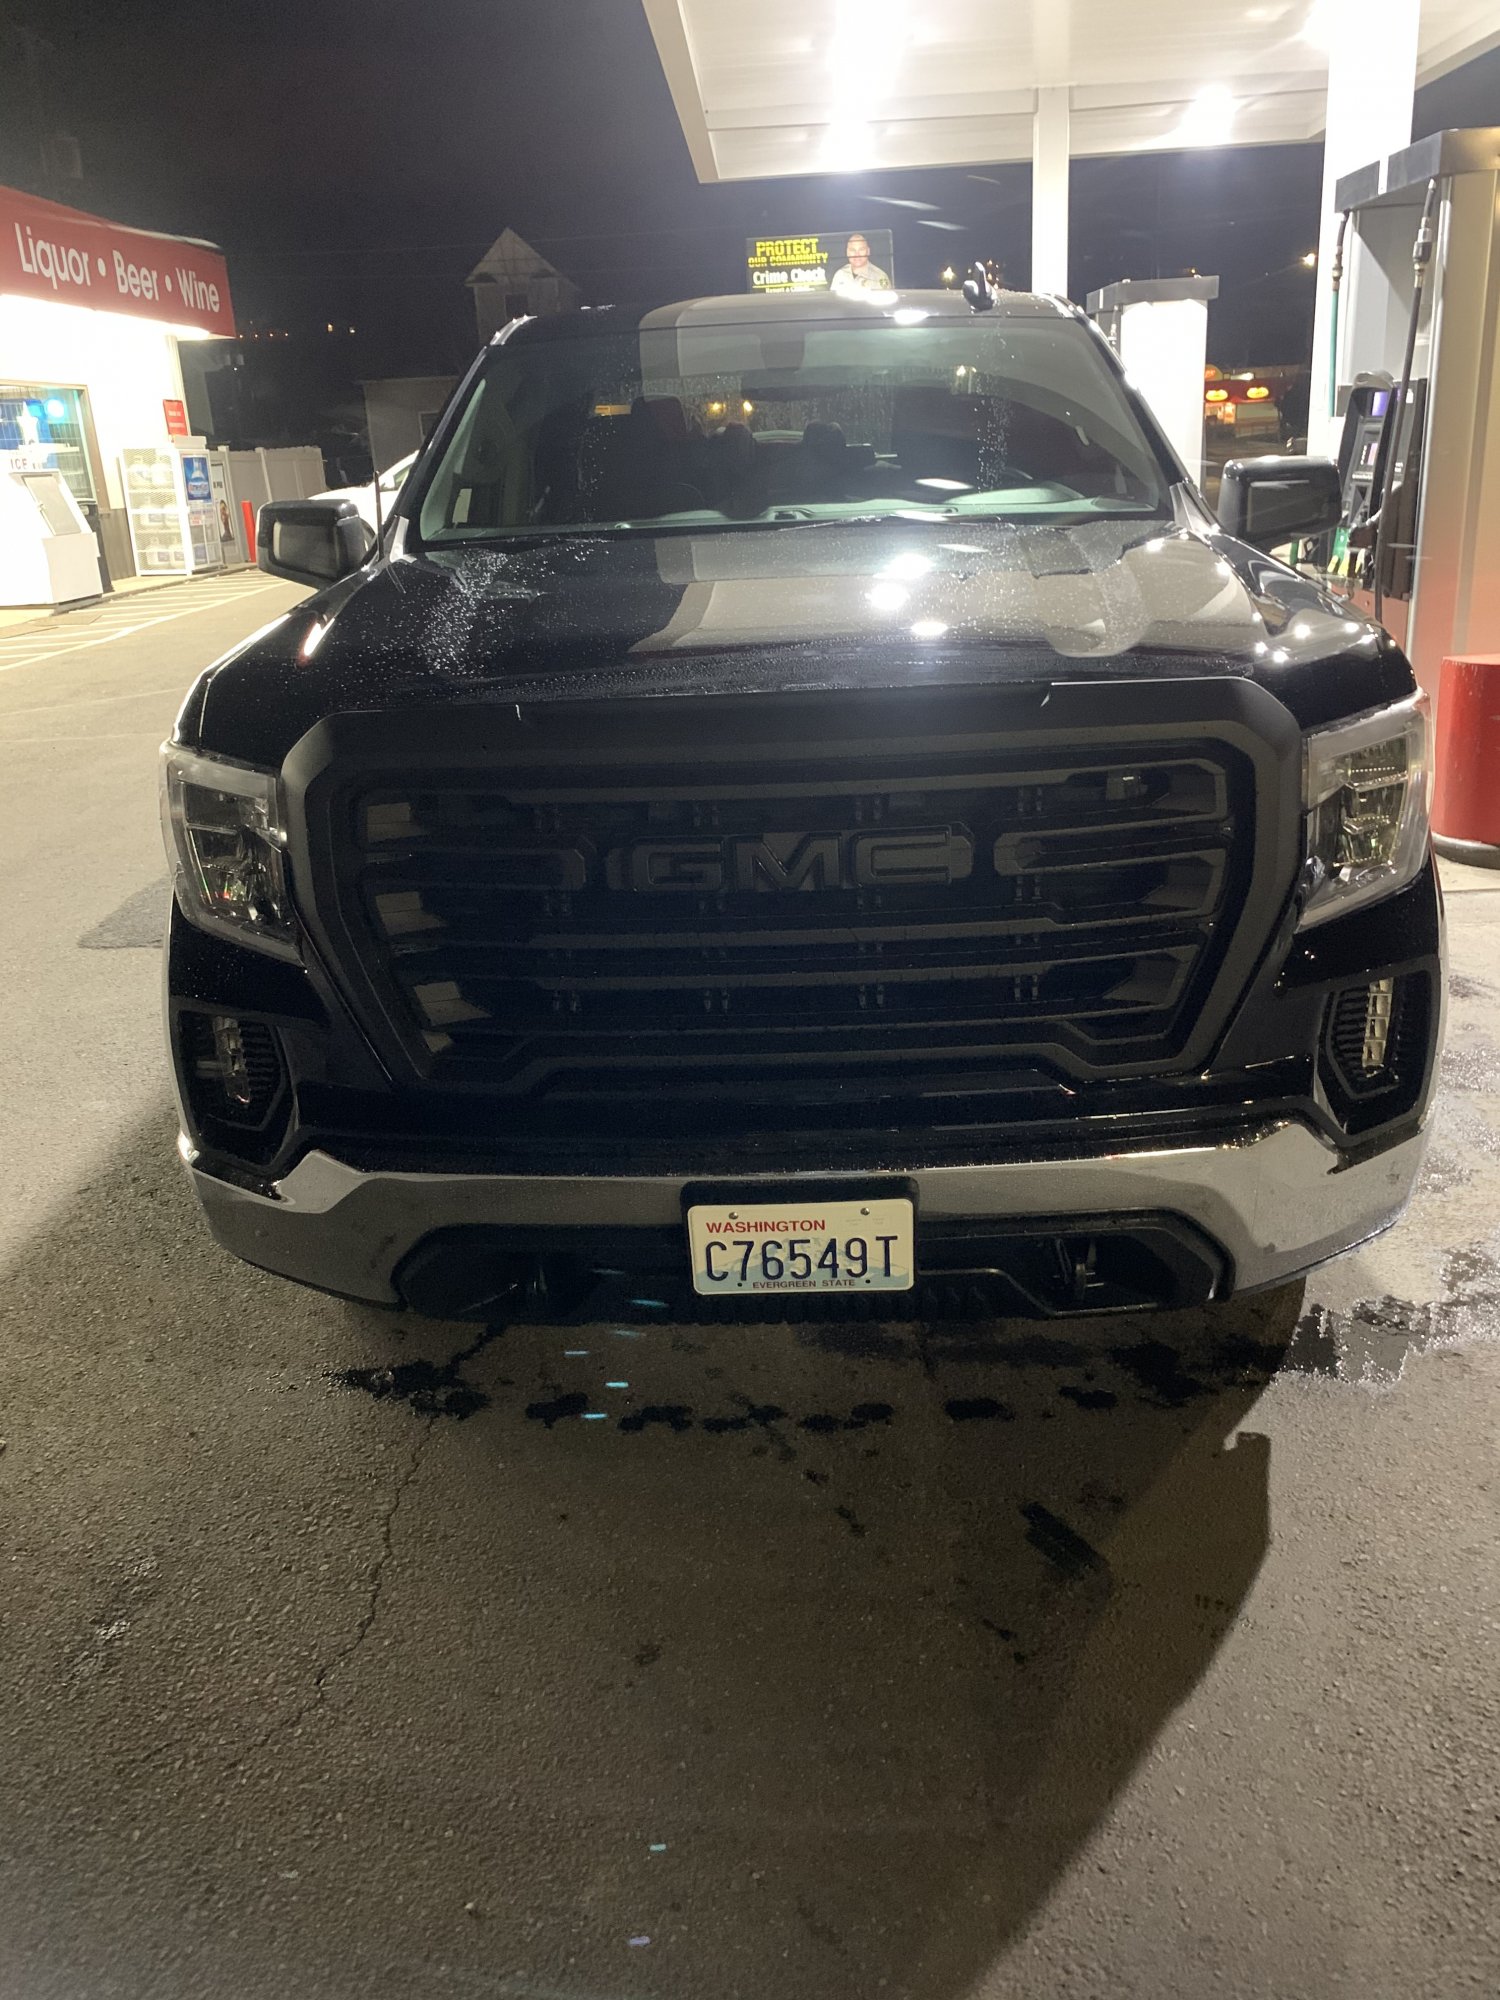
Installed a knockoff fleabay grill, went against my “buy once cry once” mantra and it bit me. Needless to say a factory one is now on order lol. Also installed factory fog lights, need to get the brain flashed at the dealer this week. Also pulled the lower air dam thing and put on a stubby antenna. Wheels tires and lift are ordered can’t wait to get them on. Also scheduled to get the bumpers wrapped matte black which will be the last of the chrome.
-
Grill replacement on T1 Sierra
Kintnerboyredoubt replied to Kintnerboyredoubt's topic in Modifications, Wheels & Tires
This bumper is god awful (from my perspective anyway...) anyhow the it includes clear and concise instructions for grill and valance removal for anyone interested https://www.carid.com/images/fab-fours/items/pdf/gr3900-1-installation-instructions.pdf Update, grill is installed, wasn’t too bad only managed to break one clip near the headlight. Cheap grill off of eBay was a bad idea, it was mis manufactured and missing the mounting tabs for the top 2 10mm bolts as well as half of the sleeve to install the weather striping. I went ahead and installed it but will order the genuine gmc one and install it for replacement. -
Grill replacement on T1 Sierra
Kintnerboyredoubt replied to Kintnerboyredoubt's topic in Modifications, Wheels & Tires
Perfect, that’s exactly what I needed to hear. Got as far as removing the upper tray top 4 bolts and felt liner on the passenger side before giving up. I’ll call around to some body shops on Monday and let them deal with it. -
I did a search and found one topic on the subject but was still not very clear... has anyone replaced their grill? I bought a blacked out one off of eBay and tried tearing into it today but couldn’t figure out how to remove the lower valence to gain access to the lower bolts on the grill. I could see 2 clips near the headlights but kept feeling like I was going to break it so I gave up and put it back together. Any tips would be appreciated.


-
Forum Statistics
250.4k
Total Topics2.7m
Total Posts -
Member Statistics
342,815
Total Members8,960
Most Online
-
Who's Online 7 Members, 0 Anonymous, 562 Guests (See full list)