

Aquanut3
-
Posts
3 -
Joined
-
Last visited
Aquanut3's Achievements
New Member (1/11)
1
Reputation
-
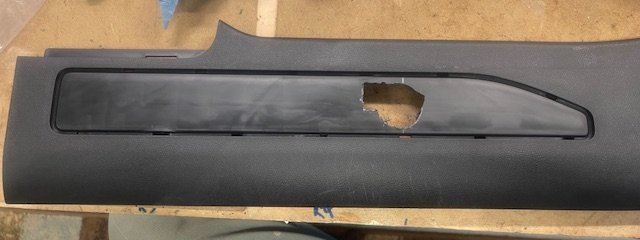
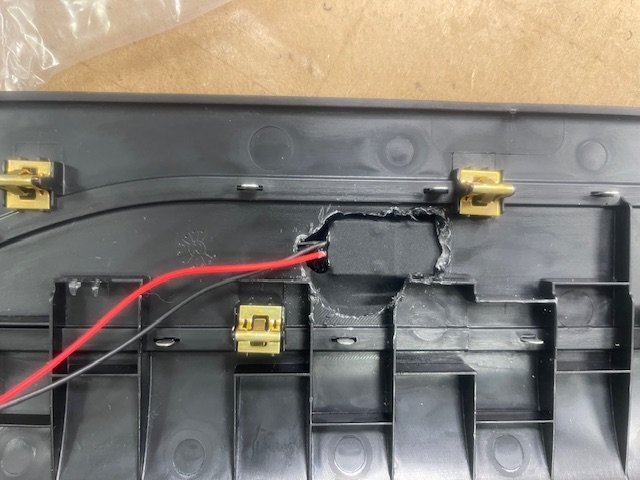
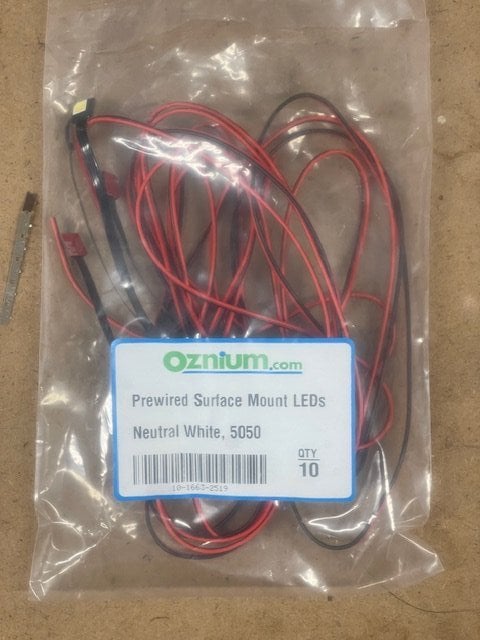
Ok Installation is done looks great after wasting 1/2 a day trying to get the pin to stay into position 1. Slept on it and reread details above to learn that the white retainer clip had to pop up first. As a bonus I spliced in foot well lights for the driver and passenger side while routing the cable. I used one of the Oznium surface mount prewired 12v LEDs 5050 SMD in neutral white which is super bright and matches the color temp of the rest of the vehicle's lighting. Oznium LED 5050 in Neutral White Here are a few tips for some of the steps 8. You don't have to remove the entire left and right console covers just pop out the forward half enough to snake the wire through. 14. Align the new illuminated sill and mark hole location with a pencil first be careful not to drill through or past the channel groove. Looks like the circuit board is smaller than original design I only needed one 1-1/4" hole then enlarged it a bit with a hot soldering tip to melt & remove some plastic. 15. Again fit pieces together and mark the sill protector first. I found the 1" hole should be at 170mm up not 155mm 23.- 25. Disengage the ISL FIRST! this is the white plastic clip in the 4th picture below don't pry it up from the end (I broke a tab) use a pin and pull up from the center. I fought to get the grey wire to seat without pulling ISL up and almost destroyed it. If you want to add floor lighting cut the insulation back at the appropriate location and connect up an LED, Grey wire is positive Black negative. I

-
Found this post very helpful about to dive in to this on my 2025 Denali will share any tips I run into. Here is a clean pdf of the install instructions i got from the parts department Document ID_ 5862954.pdf
-
Hi @Ageless I Just took delivery on a 2025 Sierra 2500HD and agree with the pathetic lighting and ordered the same Mosfets from Amzn and chose the 11mm flush lights from https://www.oznium.com/led-bolts-prewired-leds/led-bolt I am handy with electronics but have never wired a Mosfet could you explain where each connection goes? here are my assumptions to confirm Volt In = 12v source Tap See circle on photo below Grnd In = Ground tap See circle on photo below Volt out = Diode to 12v + on LED light Grnd out = to LED Ground ? trigger = J1 to the 4v spot you circled on the circuit board? See 2nd Photo circle trigger ground = Any Ground pig tail wire to ground in connection? Also does the local press to turn on still work? Does the ramp up/down in brightness still work? If I wanted to replace the back lamps assume would need to do the same as LEDs are 5v? Thanks a bunch


-
Forum Statistics
250.4k
Total Topics2.7m
Total Posts -
Member Statistics
342,855
Total Members8,960
Most Online
-
Who's Online 12 Members, 0 Anonymous, 858 Guests (See full list)