

ottawasierra
-
Posts
26 -
Joined
-
Last visited
Recent Profile Visitors
2,343 profile views
ottawasierra's Achievements
")
Enthusiast (2/11)
12
Reputation
-
What about Black Silverado/Sierra Photos?
ottawasierra replied to Chief Bob's topic in 2014-2018 Silverado 1500 & Sierra 1500
I like that the antenna hits, early warning Sent from my iPhone using Tapatalk -
What about Black Silverado/Sierra Photos?
ottawasierra replied to Chief Bob's topic in 2014-2018 Silverado 1500 & Sierra 1500
Rough country. I wanted to go higher, but didn't want to cut up the truck and also it still fits in most under ground parking. Sent from my iPhone using Tapatalk -
What about Black Silverado/Sierra Photos?
ottawasierra replied to Chief Bob's topic in 2014-2018 Silverado 1500 & Sierra 1500
I put the bigger blocks in the rear as well. No problem with the lights when towing the boat and stuff. Sent from my iPhone using Tapatalk -
What about Black Silverado/Sierra Photos?
ottawasierra replied to Chief Bob's topic in 2014-2018 Silverado 1500 & Sierra 1500
I also have a 2.5" levelling kit. Sent from my iPhone using Tapatalk -
What about Black Silverado/Sierra Photos?
ottawasierra replied to Chief Bob's topic in 2014-2018 Silverado 1500 & Sierra 1500
They rub a tiny bit at full lock (Control arm??) I think it's a width issue and not a hight issue. They don't rub the fender liner at all. With stock 18s I don't think you would get 305/65s without a bunch of rubbing. Sent from my iPhone using Tapatalk -
What about Black Silverado/Sierra Photos?
ottawasierra replied to Chief Bob's topic in 2014-2018 Silverado 1500 & Sierra 1500
They are 295/65/18 Goodyear Duratracs. I love them. They look great, aren't too noisy and are winter rated. Sent from my iPhone using Tapatalk -
What about Black Silverado/Sierra Photos?
ottawasierra replied to Chief Bob's topic in 2014-2018 Silverado 1500 & Sierra 1500
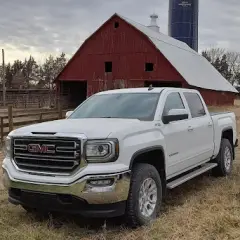
Got a bath and was looking somewhat clean...and then it snowed and freezing rain. Can't wait for summer. Sent from my iPhone using Tapatalk -
Here are some more pictures of the lights in pieces: Sent from my iPhone using Tapatalk
-
I used krylon fusion. I think it's all in the prep..I scuffed the surface and used adhesion promoter.
-
Haha, I probably would have stressed less about breaking them if I was baked...but you gotta move quick to get the lense off before it hardens. So probably wouldn't be a good idea.
-
The baking is just to soften the glue to be able to remove the headlight lense. Then you can paint the chrome housing inside. I did it cuz the chrome lights looked funny on my black truck. It was stricktly a cosmetic thing. As for light output, our trucks use projectors and do not use the housings to project the light. Therefor painting the housings does not change the light output. Removing the turn signal lense does reduce the turn signal output, but I bought REALLY bright LED bulbs and they can be seen just fine. Hope that answers your question.
-
Click on the pics and it will open them in imageshack. They were too big to upload. If you can't see them send me a PM with your email and I can send you the pics. I did not remove the previous sealant. Some of it came out when I was prying out the lense, but otherwise I didn't remove it. the retro rubber becomes super gooey and fills in all the gaps when you squish the lense back into the housing.
-
Here is the link: https://www.theretrofitsource.com/accessories/build-materials/morimoto-retrorubber-butyl-glue.html If you go on YouTube there are videos of how to use the stuff. What kinda pics are you looking for?
-
I didn't like the look of the clears, make it look cheap and "ricer" looking. But that's just my opinion. Plus they are crazy expensive.
-
I baked them at a bunch of different temperatures trying to find the best. It seems the length of time in the oven mattered more then the temperature. I found 18 mins at around 250 worked the best. I was really scared to crack the lense so I went slow and had to keep putting them back in the oven. You only get about 4 mins before the seal hardens again. I just used a flat head screw driver and went all the way around loosening the seal. Then once I had it loose I started to pry the lense off working my way around slowly. Then the silver part just unscrews from the lense. I also painted one side of the LED reflector. I painted the side where the LEDs poke through so that the black reflected on the chrome housings and made them look dark without affecting the light output. As for putting them back together I bought the moronic retro rubber from the retrofit source. You heat it up for a couple mins in the oven and then I just pressed it into the channel where the lense goes. Then I baked the bottom back half of the lights with the retro rubber in the oven for 10 mins without the lense. Got the retro rubber all mushy and I was able to squish the lense in and start the screws to hold it on the right spot. Then I baked the whole things for 15 mins to fully soften the stock sealant and then squished together and finished screwing in the screws and securing the clips. Hope that helps. Let me know if you have any other questions.

-
Forum Statistics
250.4k
Total Topics2.7m
Total Posts -
Member Statistics
342,860
Total Members8,960
Most Online
-
Who's Online 6 Members, 0 Anonymous, 1,029 Guests (See full list)