

1Bad16Silverado
-
Posts
12 -
Joined
-
Last visited


1Bad16Silverado's Achievements
")
Enthusiast (2/11)
14
Reputation
-
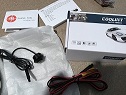
 This is the camera. It shows this particular one is currently unavailable, but there are others like it. So far, I think COOLINT brand is the best bang for the buck. https://www.amazon.com/gp/product/B00P914PMY/ref=oh_aui_detailpage_o00_s00?ie=UTF8&psc=1
- 45 replies
-
- 1
-

-
- gm intellihaul
- gmc intellihaul
- (and 6 more)
-
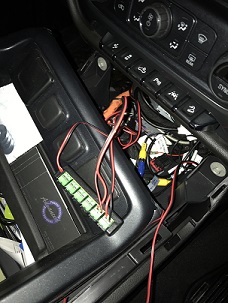
This is the coomatec 1ch mini dvr system. It is pretty solid. Motion activated, or full time record. Supports up to a 64gb memory card. Records on a cycle. And allows for video playback on the screen. I mainly use them on video dvr systems for motorcycles, but they work great in autos. Just cut the brick on the end of the power cable and wire it to a 12v source. I have a few, if you're interested, pm me. Or you can get them on amazon. I'll try to do a write up on the install to the compartment under the cup holders this weekend or when I have time. I was going to do the globe box, but didn't want it messed with by anyone.
- 45 replies
-
- 3
-
-
- gm intellihaul
- gmc intellihaul
- (and 6 more)
-
I have a dvr system set up on my front camera. It is tucked away and set on motion sensitivity.
- 45 replies
-
- 2
-
-
- gm intellihaul
- gmc intellihaul
- (and 6 more)
-
I don't, but I'm sure Anthony with MVI does. He is good people with a lot of contacts. Good luck to you.
-
Well Mr reyes, it depends on where you're located. Talk to Anthony about ordering the system and then find an installer in your area. Depending on what all you want determines time and cost. If you're in the Houston area, pm me, as I can install it all for you.
-
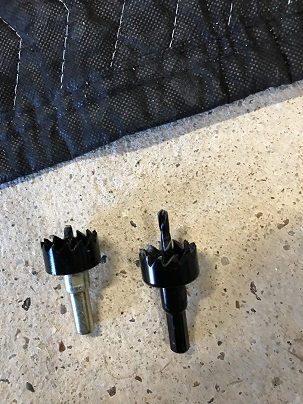
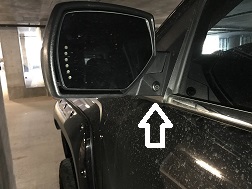
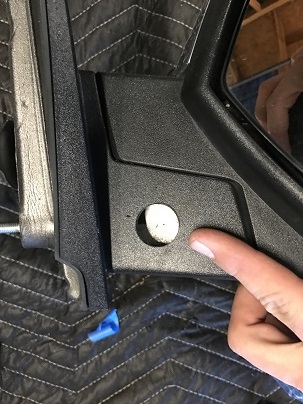
Yes. The cameras came with hole saws. 22.5mm. Each camera has one, and you need both. I went over 1" from the side that connects the mirror to the door, and up 1" from the bottom. The first saw is used to start the hole and scuff where the 22.5 hole will be. The second saw needs to be modified. Cut the drill part to be just longer than the hole. If you don't you will drill into the motor housing. I think clearance was about half an inch. Not a lot.
-
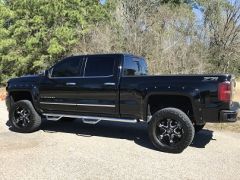
6" rough country lift. 35s on 20" wheels. N-Fab steps. Long tube headers. 6.2L. 360 camera system.
-
-
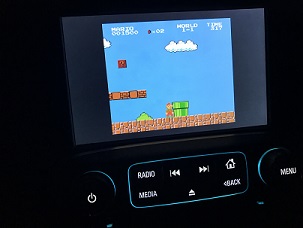
Thanks Tenscourt. I wish I was playing SMB on the NES classic, but they're impossible to find at a good price. I ended up building one. The bars are around it because I haven't changed the settings in the game system to fill the screen. One of those things that just isn't that important to me. Lol
- 45 replies
-
- 1
-
-
- gm intellihaul
- gmc intellihaul
- (and 6 more)
-
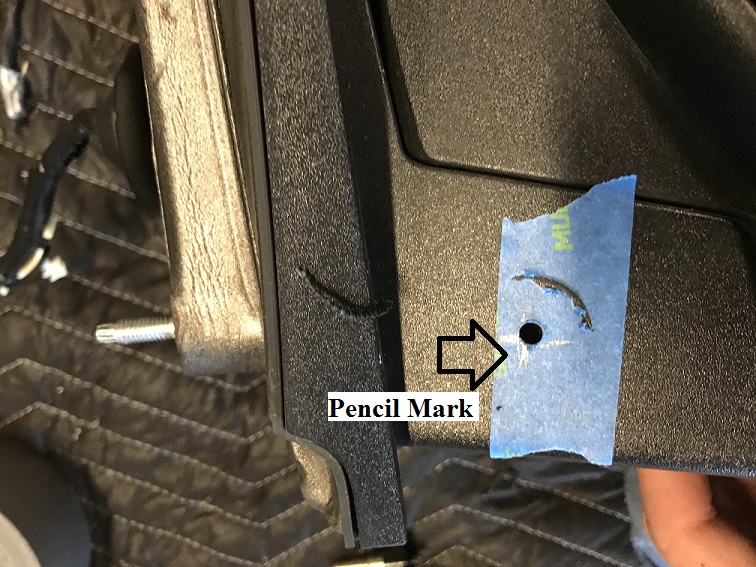
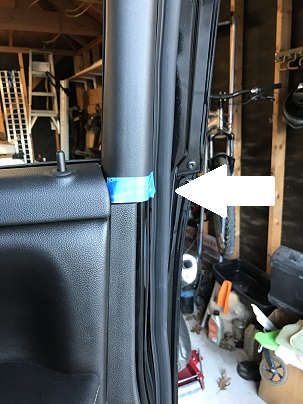
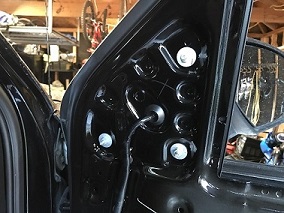
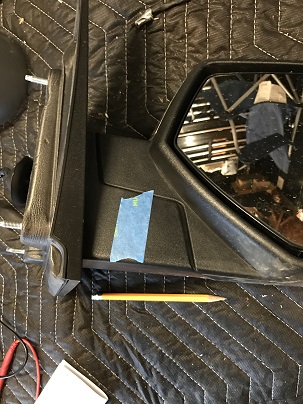
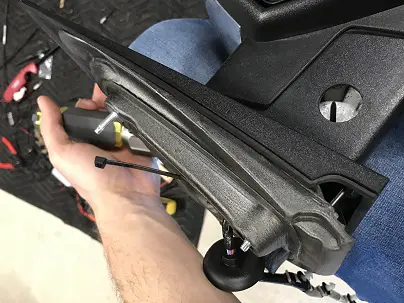
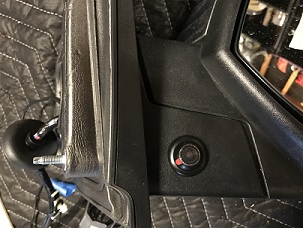
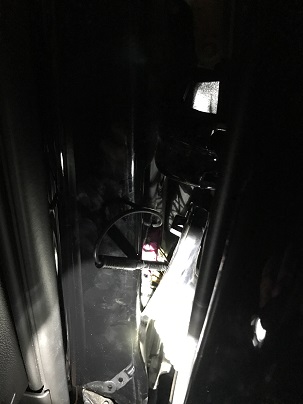
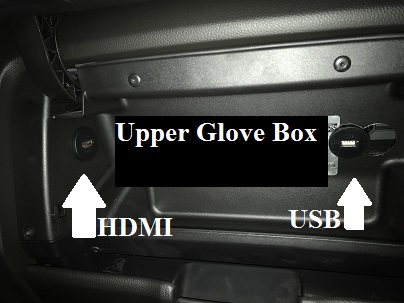
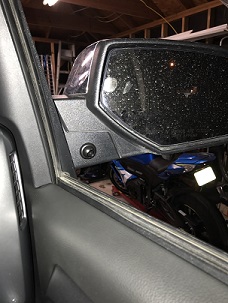
I have installed the 360 camera system that MVI offers. The system is amazing!! The system is relatively easy to install. I used cameras off of amazon for the side cameras. They provided me a cleaner looking end product. https://www.amazon.com/gp/product/B00P914W7C/ref=oh_aui_detailpage_o07_s00?ie=UTF8&psc=1 x2 This is the final outcome. All mirror functions were retained. The view from this placement is also comparable to the views of other cameras mounted on the outsides of the mirror housing. Disassembly of the door was an easy to do task. MVI provides a good instructional video on it. If you want stills, message me and I'll send them to you. One thing I did do to help reduce the risk of scratching the door's upper trim while removing the lower trim is I added tape. This is right above where the two pieces meet, as it required some jimmying. Taking the mirror housing off of the door is required. Be sure to support the mirror while removing the 3 nuts. There is also a two pronged plastic clip that keeps the mirror on. Three nuts. Clip Once I had the mirror housing off and on a surface it can be worked on, I put a piece of tape to mark where I wanted to drill. 1" up and 1" over. I then used 2 hole saws that were the same size to drill into the housing. The first one was standard and was used to mark the hole. The second saw was modified to prevent me from drilling into the motor of the folding mechanism. At this point I ran a zip tie through the hole and housing. Taped my camera wire to the zip tie. Then fed it through the channel under the folding mechanism motor. I also went ahead and cut the wire on the camera that gave it parking lines (green wire). Then I wrapped that section with duck tape, as it is a weak point. And as you pull it through the door and everything, it may pull apart. Then you have tiny tiny wires to put back together. Push the camera in the hole. Extremely tight fit. At this point I put the mirror back on the truck, and ran the wire through all the grommets and everything inside the door to get it to the boot that connects the door electronics to the cab. I made the connections here in the boot. That way if the door ever needs to be removed, I'll be able to disconnect the camera at the same time without any fuss. (I know what you're thinking, "why would you ever have to remove the door?" Well, you just never know.) I then ran the video line and power wires through the dash and into the center console. I used a power block (from autozone, $14.99) and piggy backed my power off of a cigarette lighter. This way I could have all the cameras tie in at one place. Then I put everything back together, and viola!! On a side note, I also hid my HDMI and USB ports in my upper glove box. Then ended the day by playing a little Super Mario Brothers on an 8" screen. lol This is my first write up, so please be gentle with the criticism. Lol. If you need more info about a step or something, let me know through pm.
- 45 replies
-
- 7
-
-
- gm intellihaul
- gmc intellihaul
- (and 6 more)


-
Forum Statistics
246k
Total Topics2.6m
Total Posts -
Member Statistics
333,620
Total Members8,960
Most Online
-
Who's Online 18 Members, 0 Anonymous, 1,795 Guests (See full list)