Aubie_01
-
Posts
255 -
Joined
-
Last visited
Content Type
Profiles
Forums
Gallery
Events
Articles
RPO
Store
Blogs
Everything posted by Aubie_01
-
Black 2025 Denali 3500 scratched.
Aubie_01 replied to dlockwood26's topic in 2019-2026 Silverado 1500 & Sierra 1500
Sadly I highly doubt any dealer hand washes correctly to avoid swirls. A proper detail / paint correction should fix most of what you are seeing. -
Black 2025 Denali 3500 scratched.
Aubie_01 replied to dlockwood26's topic in 2019-2026 Silverado 1500 & Sierra 1500
I hand wash using the 2 bucket method, a foam gun, and other precautions on my black truck to avoid swirls. I also told my dealer not to wash it, and drove it home dirty the first time. -
I wish my truck didn’t have the spray in liner I really prefer the factory drop in plastic bedliner.
-
I used the white XKGlow minipods. https://store.xkglow.com/catalog/product/motorcycle/accessories/led-pod-single-color-add-on/ In the picture below you can also see the lit footwell mod that I completed using the same lights.

-
Full Screen Carplay on Refresh
Aubie_01 replied to EJS2015's topic in 2019-2026 Silverado 1500 & Sierra 1500
Here is a somewhat related question for anyone who can help: Can I remove the ‘Trailering’ view from the right side of the screen? I never use it. Thanks! -
Stabilizer Sway Bar Link
Aubie_01 replied to Tmoney22's topic in Troubleshooting, Warranty & Recalls
I know this is an older thread. These posts were incredibly helpful! -
Welp, the CV axle is leaking on my brand new 2024
Aubie_01 replied to Aubie_01's topic in Troubleshooting, Warranty & Recalls
Yesterday I was hearing noise on the replaced CV axle side when going over bumps. Climb under there and lo and behold the sway bar link is loose and not seated correctly. I’m guessing the dealership just ran the bolt up there with an impact while the truck was up in the air. Tightened it down properly myself using a torque wrench with the vehicle sitting on the ground. 74 ft/lbs -
Welp, the CV axle is leaking on my brand new 2024
Aubie_01 replied to Aubie_01's topic in Troubleshooting, Warranty & Recalls
Thanks everyone. Dealer did indeed replace the entire shaft yesterday. I used a small piece of duct tape in the interim to cover the crack and keep grease from slinging everywhere. Cheers! -
Good info. Thanks!
-
Looks it won’t work on my truck with a low 12th digit: ’check your VIN. The 12th digit in a 2022.5+ Refresh model must be a '5' or higher’
-
Thanks for posting this. One of the commenters on YT said this device stopped his Amp steps from working. Guy on the ZR2 forum said he was able to get his Amps working again.
-
Stick on magnets?
-
Welp, the CV axle is leaking on my brand new 2024
Aubie_01 replied to Aubie_01's topic in Troubleshooting, Warranty & Recalls
That’s a good point, I guess I was venting. So far I really like the T1 and the way it drives. Thanks -
Did the first oil change today at 1000 miles and found grease under the CV joint on the A-arm. After some investigation found this: Doesn’t instill confidence. Never had this problem on my old K2. The whole reason I didn’t use the free oil change was that I didn’t want a tech pawing on the truck. Awesome. I assume dealer will replace the entire assembly?
-
Passive Entry Rear Handle
Aubie_01 replied to drmilesbennell's topic in Modifications, Wheels & Tires
Bumping this thread. Do you happen to remember the door handle part numbers? Also, did you remove the center panel just for wire routing? I assume the wires were fished through the boot in the door jamb. How hard was it to remove the panel? Thanks! -
Thanks for the additional info!
-
2021 GMC Sierra AT4 6.2L Supercharger build
Aubie_01 replied to SierraStorm21's topic in Modifications, Wheels & Tires
I remember seeing that the aluminum driveshafts on the K2 trucks could come apart above a certain speed (and saw the pictures). Is that a concern with these trucks? -
I used Meguiars Quick Wax spray this past weekend and was happy with the results.
-
I’m not using this feature and would rather not have to scroll by it all the time. Is there a way to remove it from the display? Thanks in advance
-
Here are some pictures:
-
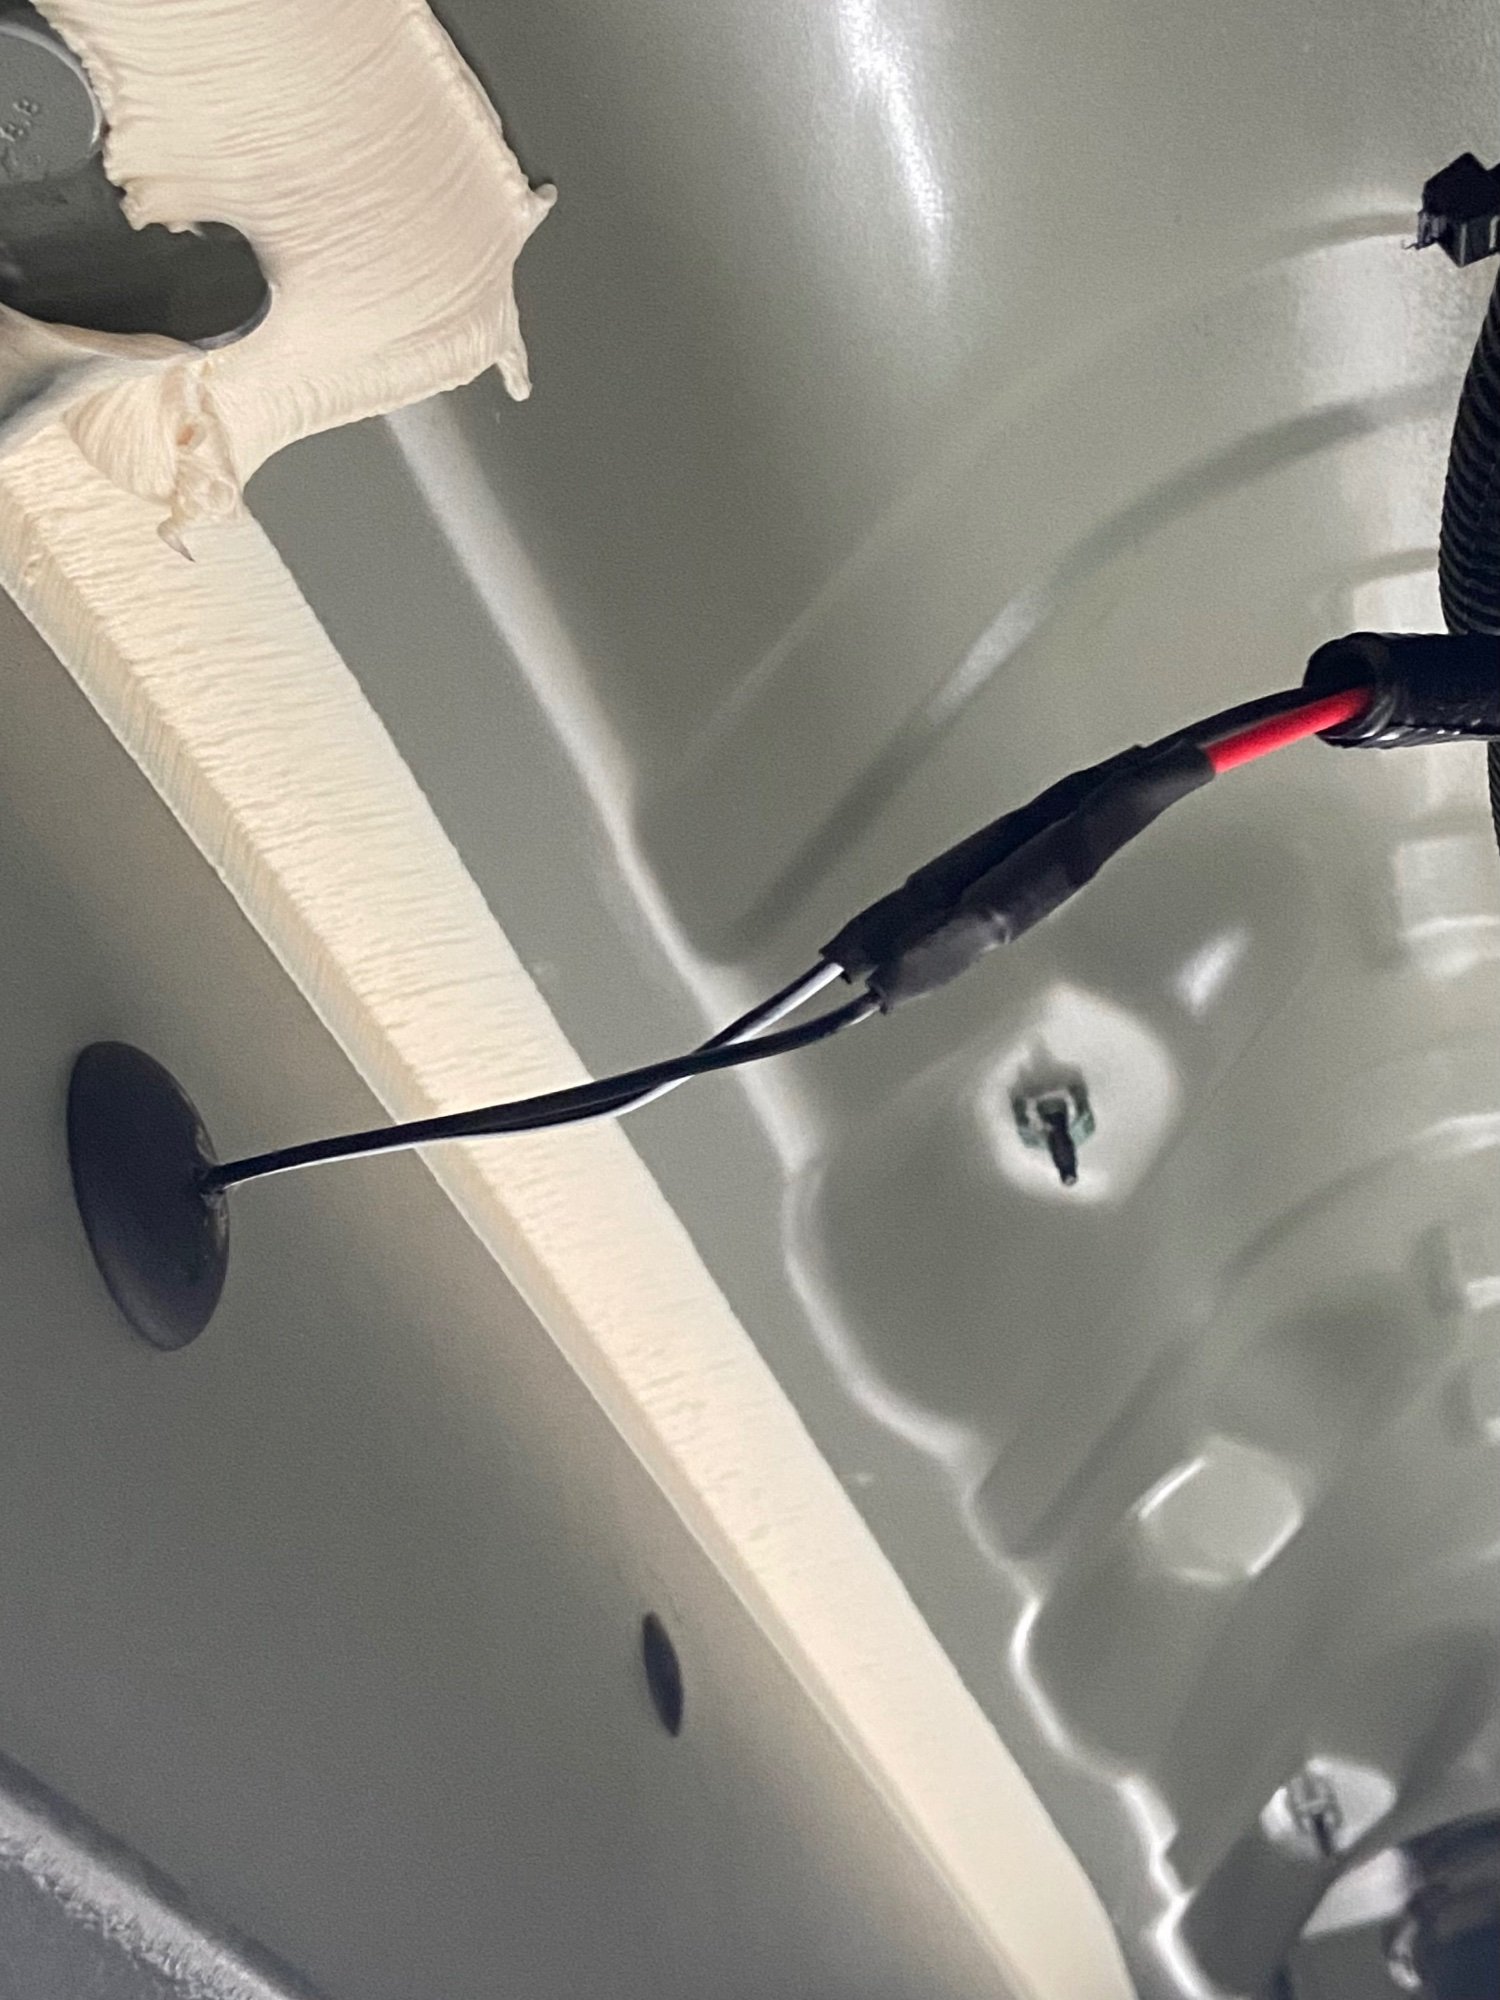
Finally done. 1 - You don’t have to drill holes in your truck for the lights. With long enough wires you can pull various body plugs and run the wires inside your rocker panels. I used a piece of small rubber hose with a metal wire inside (to keep it stiff) to fish the light wires through. Modify the body plugs to go back in place afterwards and you have a much cleaner installation (I notched the long ones and made holes on the centers of the rounds ones). Apply some clear sealer to the plugs and you are done. Speaking of lights, I used white pods from xlglow that matched the truck. Amp’s lights are purple Also, I used plugs for the lights instead of the crimp connectors from AMP. That way if a light goes out I can replace it easier. I covered the plugs in shrink wrap. 2 - Install the boards on the arms LAST. This will give you plenty of room to work under the truck during the install. Amp tells you to do them before wiring which is a mistake. 3 - To remove the BCM connectors: Pull the white tap up and then squeeze a 2nd tab under the white one while pulling the plug out. Once you get the hang of it they are easy to remove 4 - My kit had enough wiring harness to go over the coolant tank on the driver’s side. Amp tells you to go under the truck before the cooling tank which again is a bad idea IMO. 5 - Turn your front tires hard to one side before beginning. This will give you the needed room to remove the bolts from the front mudflaps and liner to allow you to snake the wires down under the truck. Don’t forget the liner bolt midways up towards the engine 6 - Pull off your negative battery cable to avoid codes when unplugging the BCM connectors 7 - Amp tells you to use the brake cable boot in the drive’s footwell to get the wires in the cab. Trucks with an electric parking brake don’t have this. I used a blank rubber plug near the doorsill under the carpet 8 - I don’t like how Amp tells you to mount the controller but couldn’t come up with a better idea. Give yourself plenty of time and buy lots and lots of tie wraps, especially the really long ones to go around the frame on the driver’s side. This was an all weekend project for me but I wanted everything done right. Properly routing all the wires takes a lot of time. Finally, prepare to get filthy from the dirty frame wax. Nasty stuff.
-
Very helpful as usual. Thanks! Great thread. I would never have known how to properly wire these footwell lights without your info.
-
Question if you are still around: Did you find a grounding location on the driver’s side? If so, where was it? Thanks!
-
Thanks! You can sorta see the leather wrap in this picture: But it might be for nought as I think there are also speakers installed which wouldn’t work on my trucj