

Waterfowler41
-
Posts
1,192 -
Joined
-
Last visited
-
Days Won
6
Content Type
Profiles
Forums
Gallery
Events
Articles
RPO
Store
Blogs
Everything posted by Waterfowler41
-

Front Suspension Clunking...help!
Waterfowler41 replied to Waterfowler41's topic in Troubleshooting & Recalls
Actually, I came across a video where the guy had a suspension knocking and it turned out to be a bad mount. I checked the exhaust and pretty much everything in the general vicinity of the front suspension, no obvious impact areas. Pulled the skid plate off and checked up there too. Haven't had an opportunity to dig too deep into the mounts, hopefully tonight. Brought the truck to Firestone twice this week for them to look it over. They confirmed UCA, tie rod ends, hubs, and CVs are in good shape and not cause of issue. They can hear the sound but say its not related to the usually suspects. I cannot replicate the sound by bouncing the truck, I have to drive and hit small sharp bumps to hear it. Also, have to drive less than 20 mph so I am wondering if its the strut. I put in a call to Dave Cortez at Eibach. I saw a brief post on a Colorado forum about a front end knock which sounds similar to mine. I joke with my wife that fic for this issue is trading in the truck because I am beyond frustrated trying to find this noise. Its so loud and obvious, I can't believe its taking me this long to find the source. -
What have you done to your K2 today?
Waterfowler41 replied to block8head's topic in Modifications & Accessories
Still chasing that knocking up front.... New sway bar end links New sway bushing New lower ball joint Lower ball joints suck... Waterfowler 41’s Youtube channel: https://www.youtube.com/user/brittmork -
Front Suspension Clunking...help!
Waterfowler41 replied to Waterfowler41's topic in Troubleshooting & Recalls
Spent the night fighting to get the stock lower ball joint out. Finished this morning, took it for a test drive and.....still have the knocking... on a plus side I have a new lower ball joint and was able to inspect everything including my wheel bearing and CV axles. Waterfowler 41’s Youtube channel: https://www.youtube.com/user/brittmork -
Front Suspension Clunking...help!
Waterfowler41 replied to Waterfowler41's topic in Troubleshooting & Recalls
Update: last night i removed the wheel and popped my UCA off. No slop in the UCA. They could probably benefit from replacement but I think I’ve isolated the issue to my lower ball joint. When I load the lower control arm (jack up truck from LCA) I can here a metal to metal noise every time I lift the hub assembly straight up. Had my wife keep moving it and saw the Lower ball joint boot moving a bit. Going to purchase some Moog ball joints (if i replace it on one side, I’m going to do both sides) and see if that solves the issue. I’ll keep the updates coming as I’m sure I won’t be the only one running into this issue. Waterfowler 41’s Youtube channel: https://www.youtube.com/user/brittmork -
Front Suspension Clunking...help!
Waterfowler41 replied to Waterfowler41's topic in Troubleshooting & Recalls
Welp, issue still unresolved.... Going to remove the wheel tonight and see if there’s anything else moving that shouldn’t. Not too long ago I was getting a high pitched squeak from the front left. Maybe my hub/bearing was going out. Squeak has gone away, knocking started shortly after. Waterfowler 41’s Youtube channel: https://www.youtube.com/user/brittmork -
Front Suspension Clunking...help!
Waterfowler41 replied to Waterfowler41's topic in Troubleshooting & Recalls
Well I got 3/4 of a turn out of my drivers side strut nut, zero turns out of my pass side nut which is promising. Took the truck for a test drive and didn’t hear the noise but in all honesty our roads were repaved last summer so not too rough. Real test will be tomorrow on my way into work. I jacked up my truck by the LCA and tried to pry the tire every which way but no movement. Crossing my fingers the strut nut was the culprit. If some I’ll remove it and replace it with a new one and some loctite. Waterfowler 41’s Youtube channel: https://www.youtube.com/user/brittmork -
Front Suspension Clunking...help!
Waterfowler41 replied to Waterfowler41's topic in Troubleshooting & Recalls
Thanks dude! This makes complete sense to me because of how hard it was to get any leverage when tightening the strut bolt on the floor. Praying to baby Jesus this is the culprit however I already jumped to conclusion twice on this clunk search so not getting my hopes up. Waterfowler 41’s Youtube channel: https://www.youtube.com/user/brittmork -
Front Suspension Clunking...help!
Waterfowler41 replied to Waterfowler41's topic in Troubleshooting & Recalls
Will try that if my crown nut work (see below) doesn't resolve the issue. Thansk!!!! I checked those yesterday. Cranked the hell out of them BUT I didn't check the crown nut. I saw some old posts on how Bilstein nuts would loosen up over time. Hoping this will resolve my issue because the sounds seems to come from the strut which is less than a year old. The spring were a bitch to install and I installed the crown nut on the ground with compressors holding on for dear life before installing back on truck so might be my issue. Going to run my drivers side up a ramp and tighten. -
Alright, currently have Eibach Pro Truck kit set at 2.5" up front and +1" rear blocks in the rear on my 2014 Sierra SLE using stock UCAs. Over the last week or so a knock has developed in the front driver side wheel well. I hear the knock inside my cab when I am driving at slow speeds and seems to correlate with road vibrations. Sounds like a thud every time I hit bumps no matter the size. Sound is clearly coming from the drivers side front wheel area. I hear it at high speeds as well but road noise makes it hard to hear. Truck has to be moving down the road to hear the noise. Work to date: Replaced sway bar end links and bushings. Inspected sway bar for bar to frame impacts. No dice. Re-torqued wheels. Visual inspection of everything under the truck. Everything checks out, no obvious issues. Removed wheels and pushed at 6/12 o clock and 3/9 o clock positions to see if I can feel play. No play noticed. Is there another way I can verify if my ball joints (upper and lower) are shot before going gung-ho on replacing everything. Anything else I should be looking at in the wheel area? The Eibach struts use a lot of the OEM strut parts, could something on there have failed? Would a wheel bearing cause this issue? Thanks folks!
-
What have you done to your K2 today?
Waterfowler41 replied to block8head's topic in Modifications & Accessories
Spent the evening chasing a front end knock. Replace sway bar end links and bushing with Moog problem solvers. While the end links weren’t the source of the noise, boy did I feel my sway bar come back to life. Source of the knocking.... wheel center cap was missing 2 screws.... Waterfowler 41’s Youtube channel: https://www.youtube.com/user/brittmork -
What have you done to your K2 today?
Waterfowler41 replied to block8head's topic in Modifications & Accessories
Looks awesome!!!!!! Waterfowler 41’s Youtube channel: https://www.youtube.com/user/brittmork -
What have you done to your K2 today?
Waterfowler41 replied to block8head's topic in Modifications & Accessories
Sounds like you guys should run a GM-trucks.com sale! Tons of guys waiting for those, they’ll go quick! Waterfowler 41’s Youtube channel: https://www.youtube.com/user/brittmork -
What have you done to your K2 today?
Waterfowler41 replied to block8head's topic in Modifications & Accessories
Sounds like you guys should run a GM-trucks.com sale! Tons of guys waiting for those, they’ll go quick! Waterfowler 41’s Youtube channel: https://www.youtube.com/user/brittmork -
What have you done to your K2 today?
Waterfowler41 replied to block8head's topic in Modifications & Accessories
SDHQ A-pillar install video posted up. Sort of shocked with the amount of grinding I needed to do to get these to fit right but once it’s all said and done, I’m happy with the brackets and where they locate my lights. Part 2 coming soon of my OZ led pods with amber DRL’s. Waterfowler 41’s Youtube channel: https://www.youtube.com/user/brittmork -
This is the right attitude to have when you replace your struts with lifted ones. If you have the coin its best to knock it all out at once.
-
Installing Wireless Cab Lights
Waterfowler41 replied to Waterfowler41's topic in DIY Guides & Reference Library
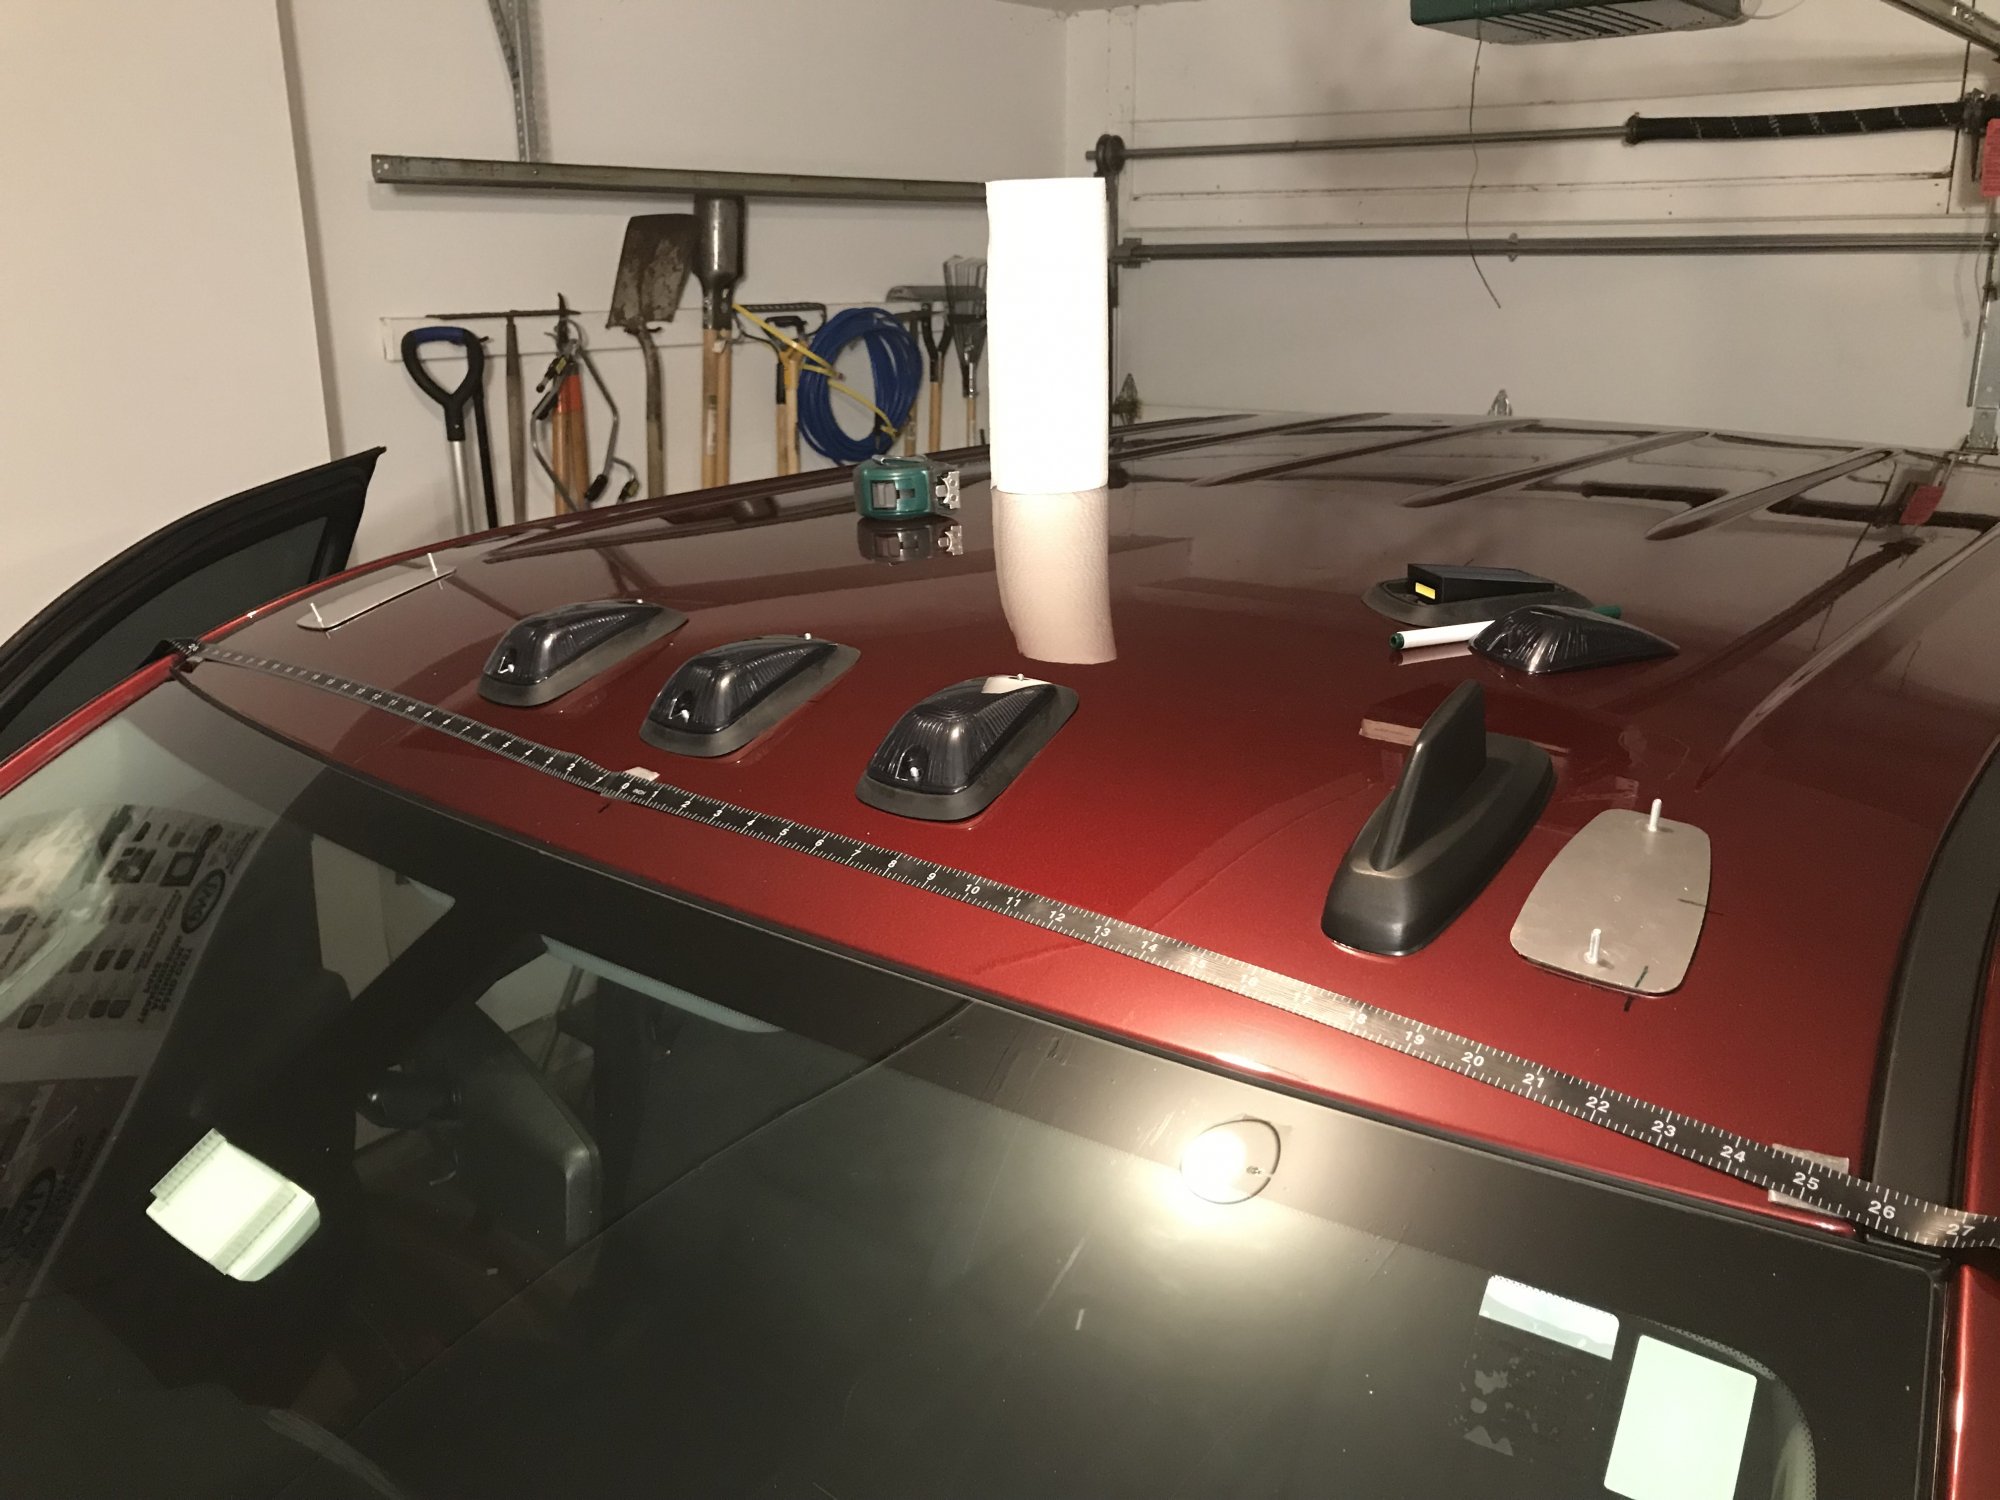
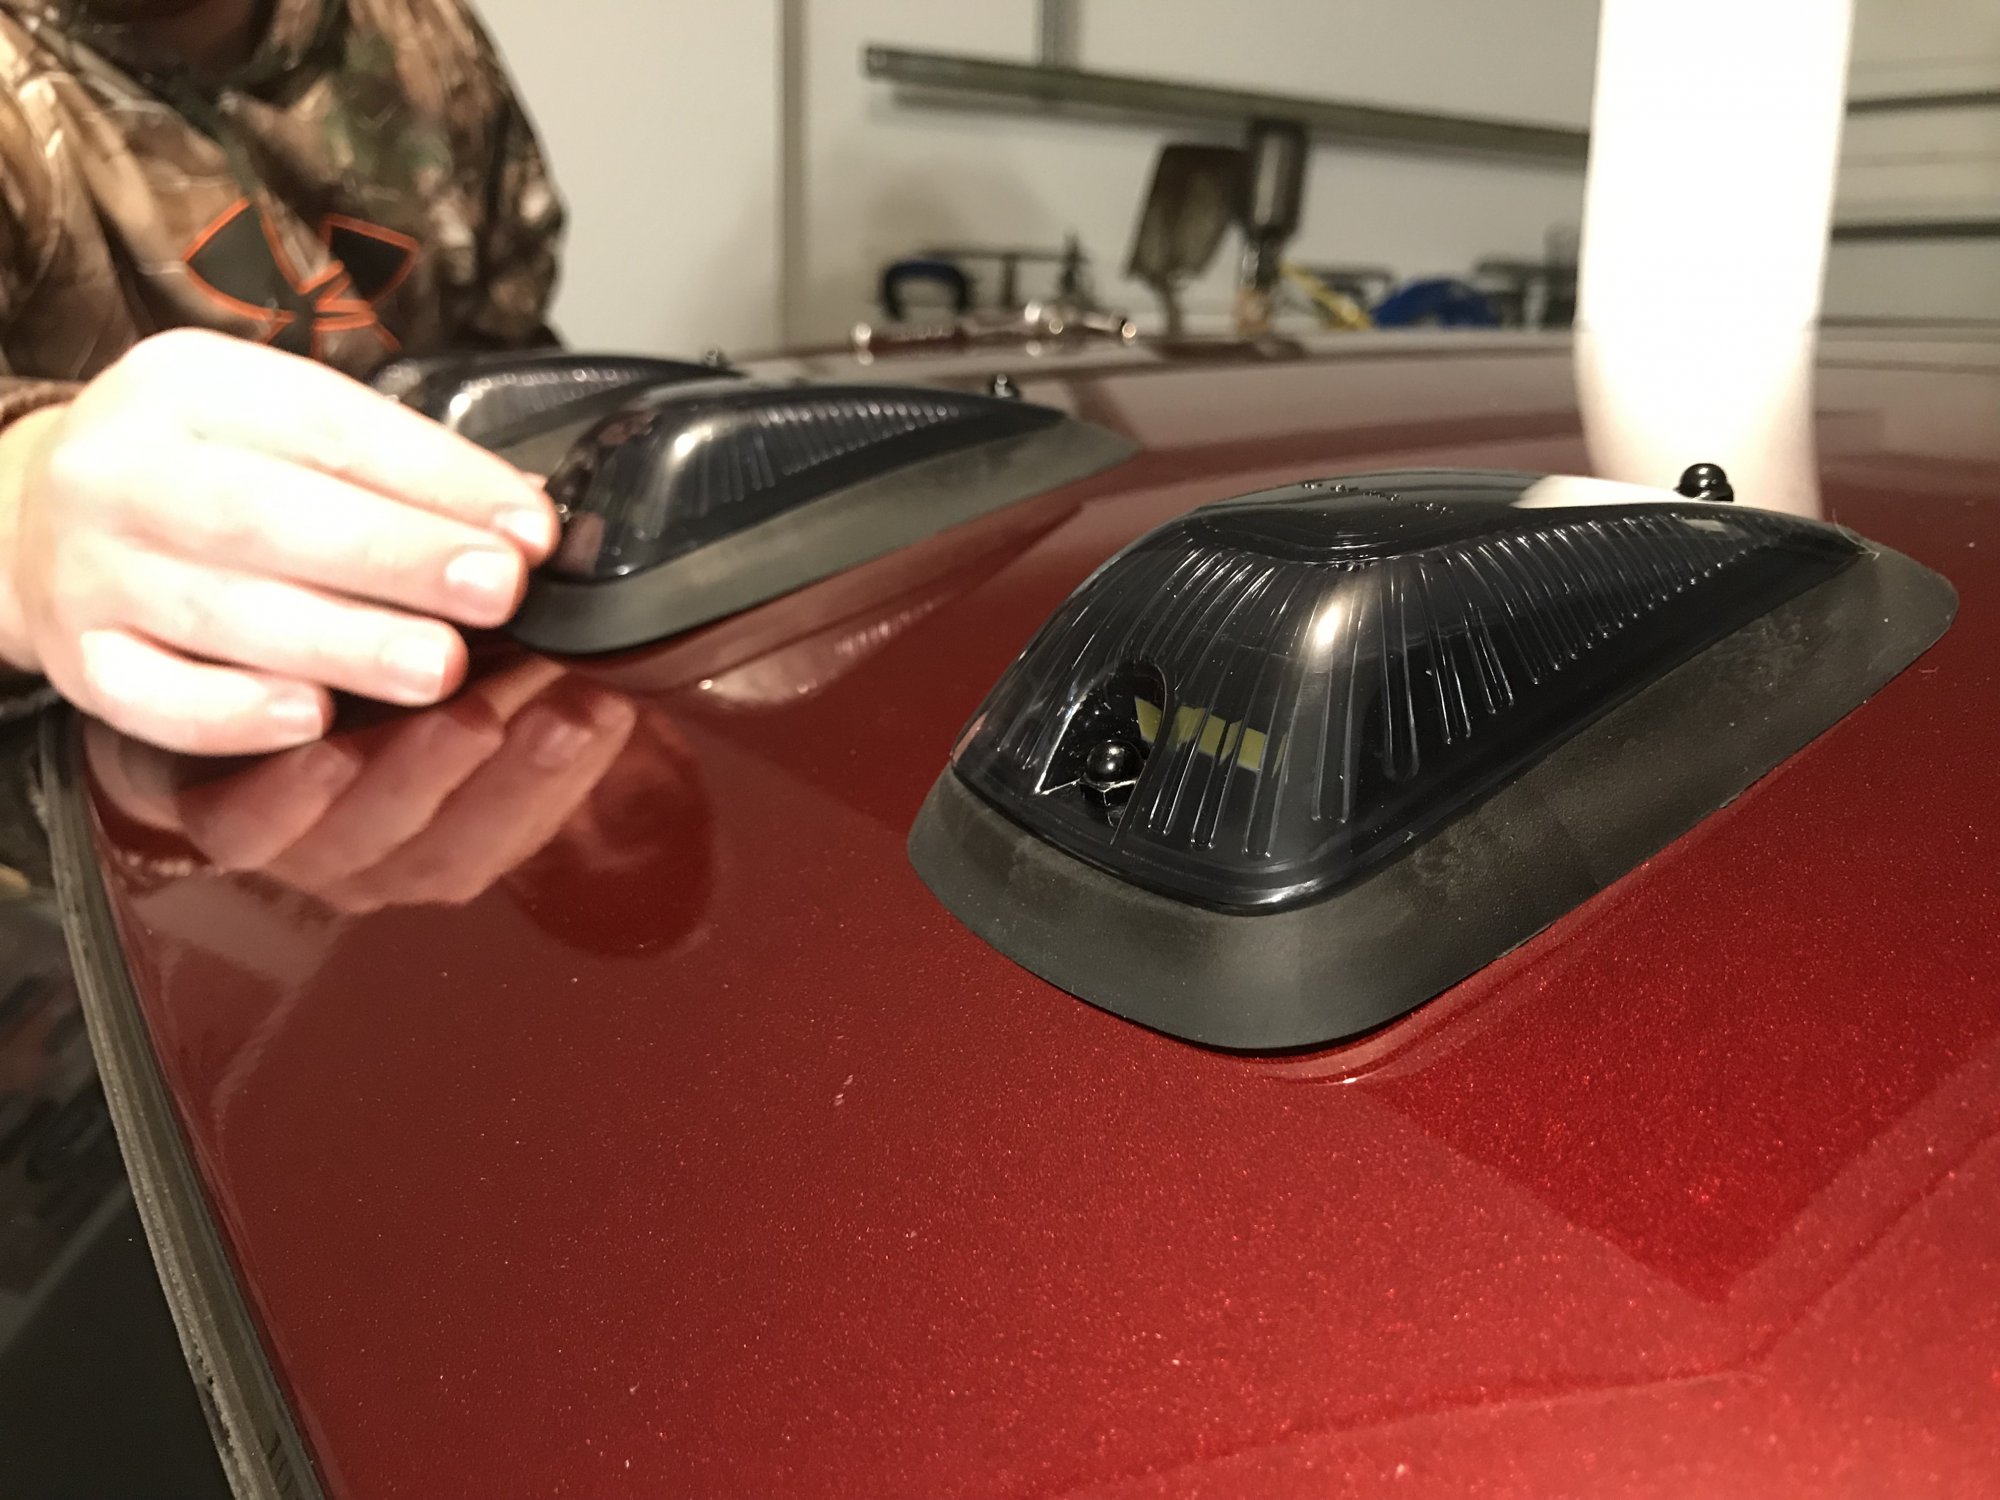
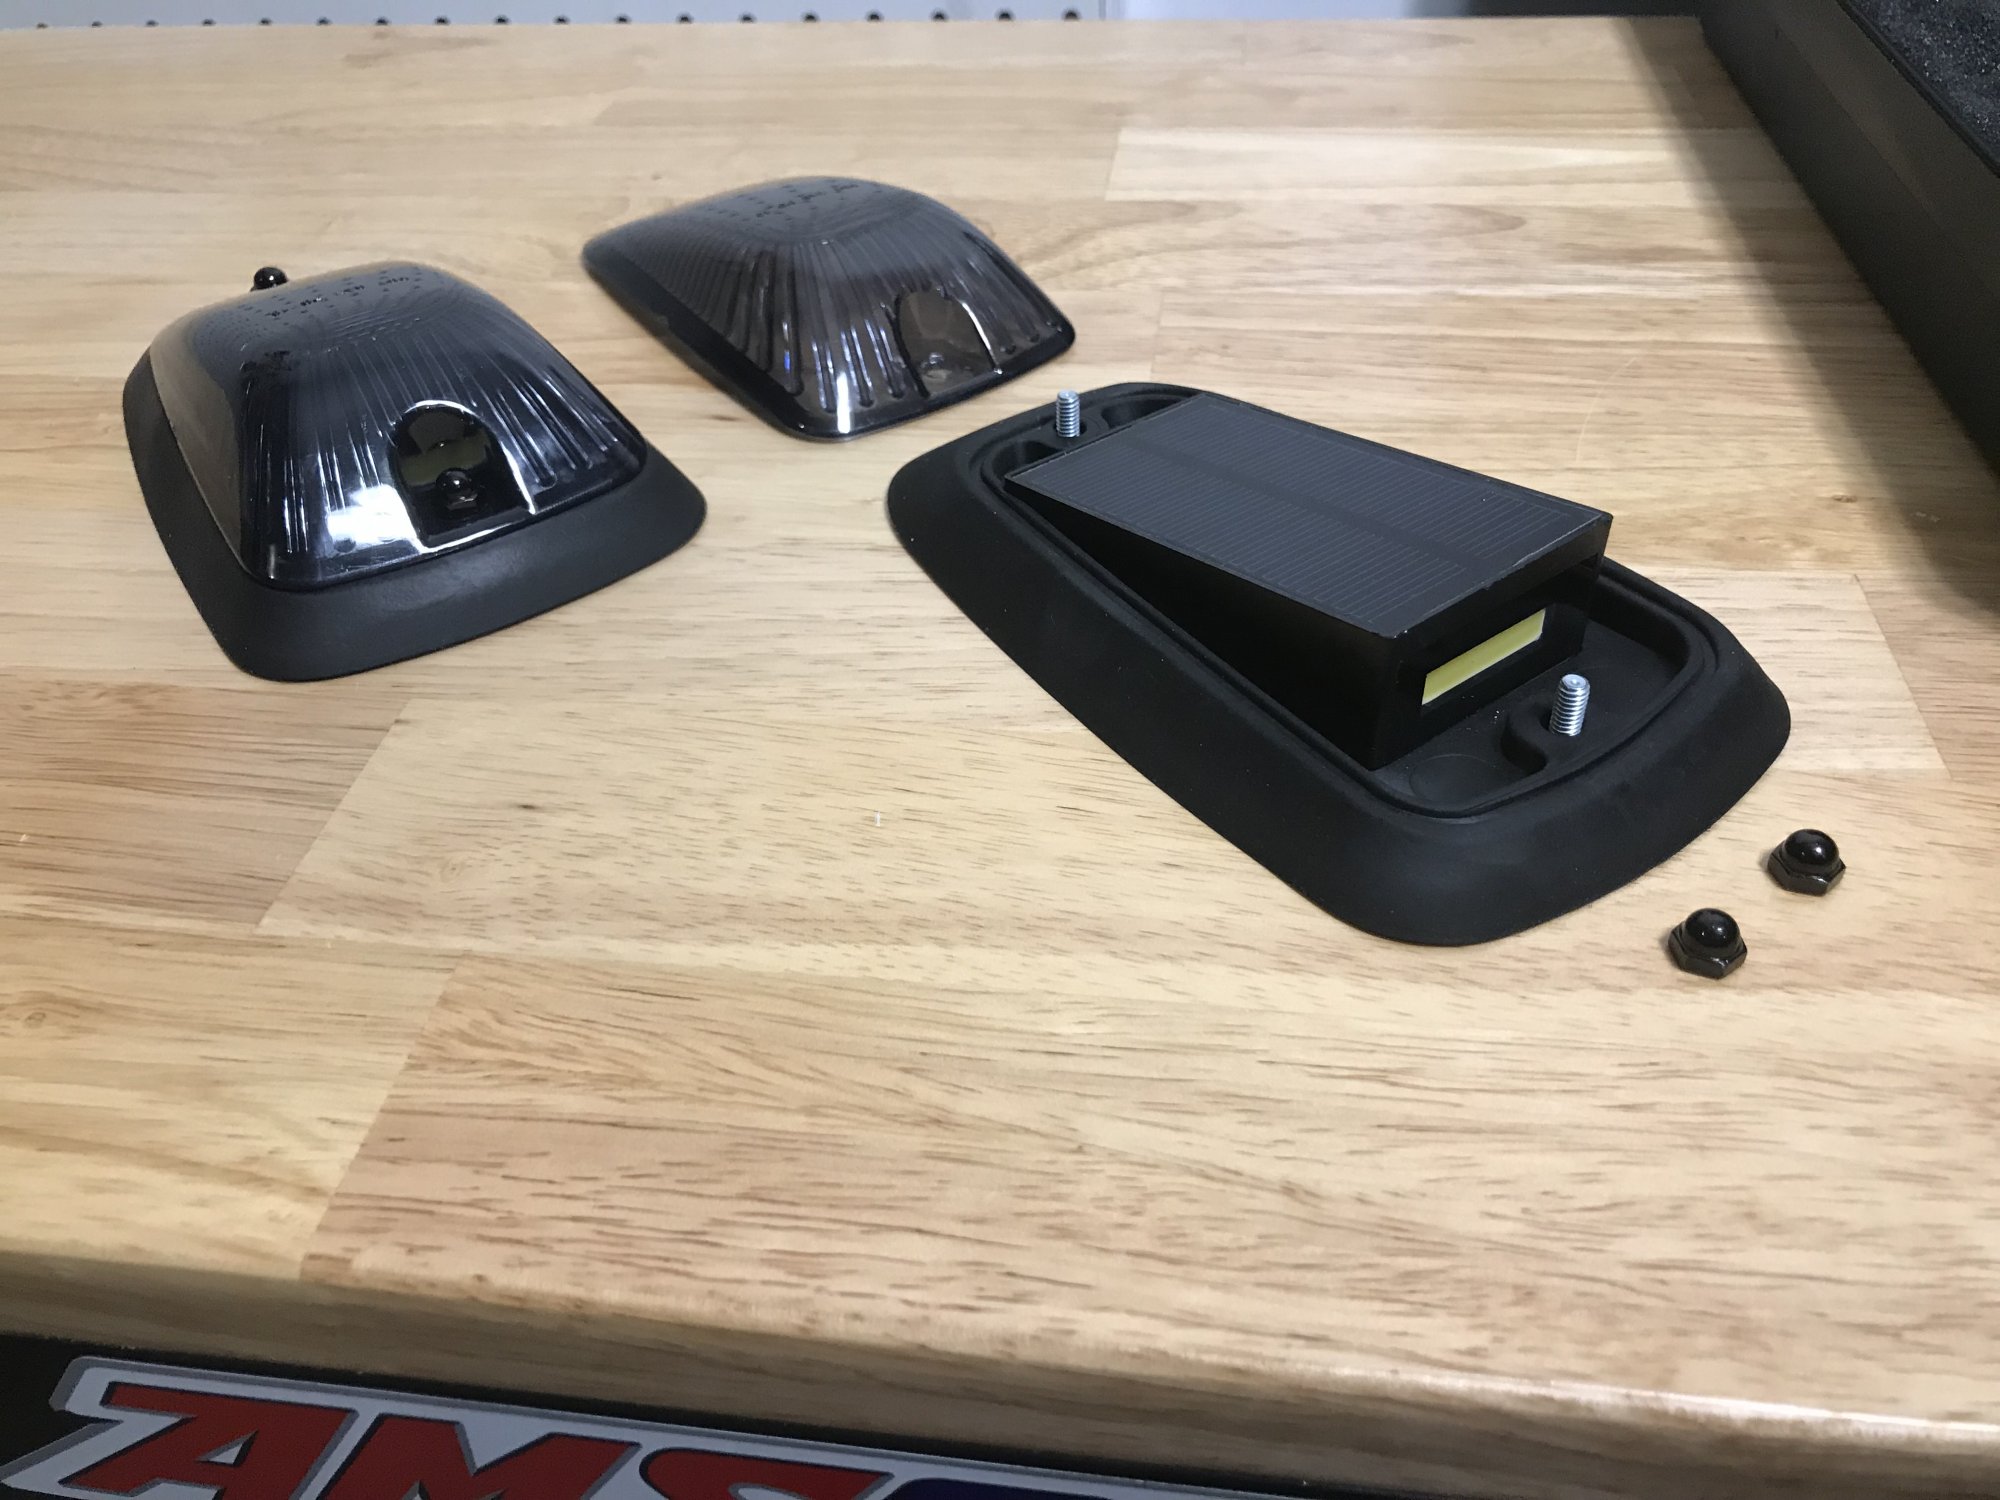
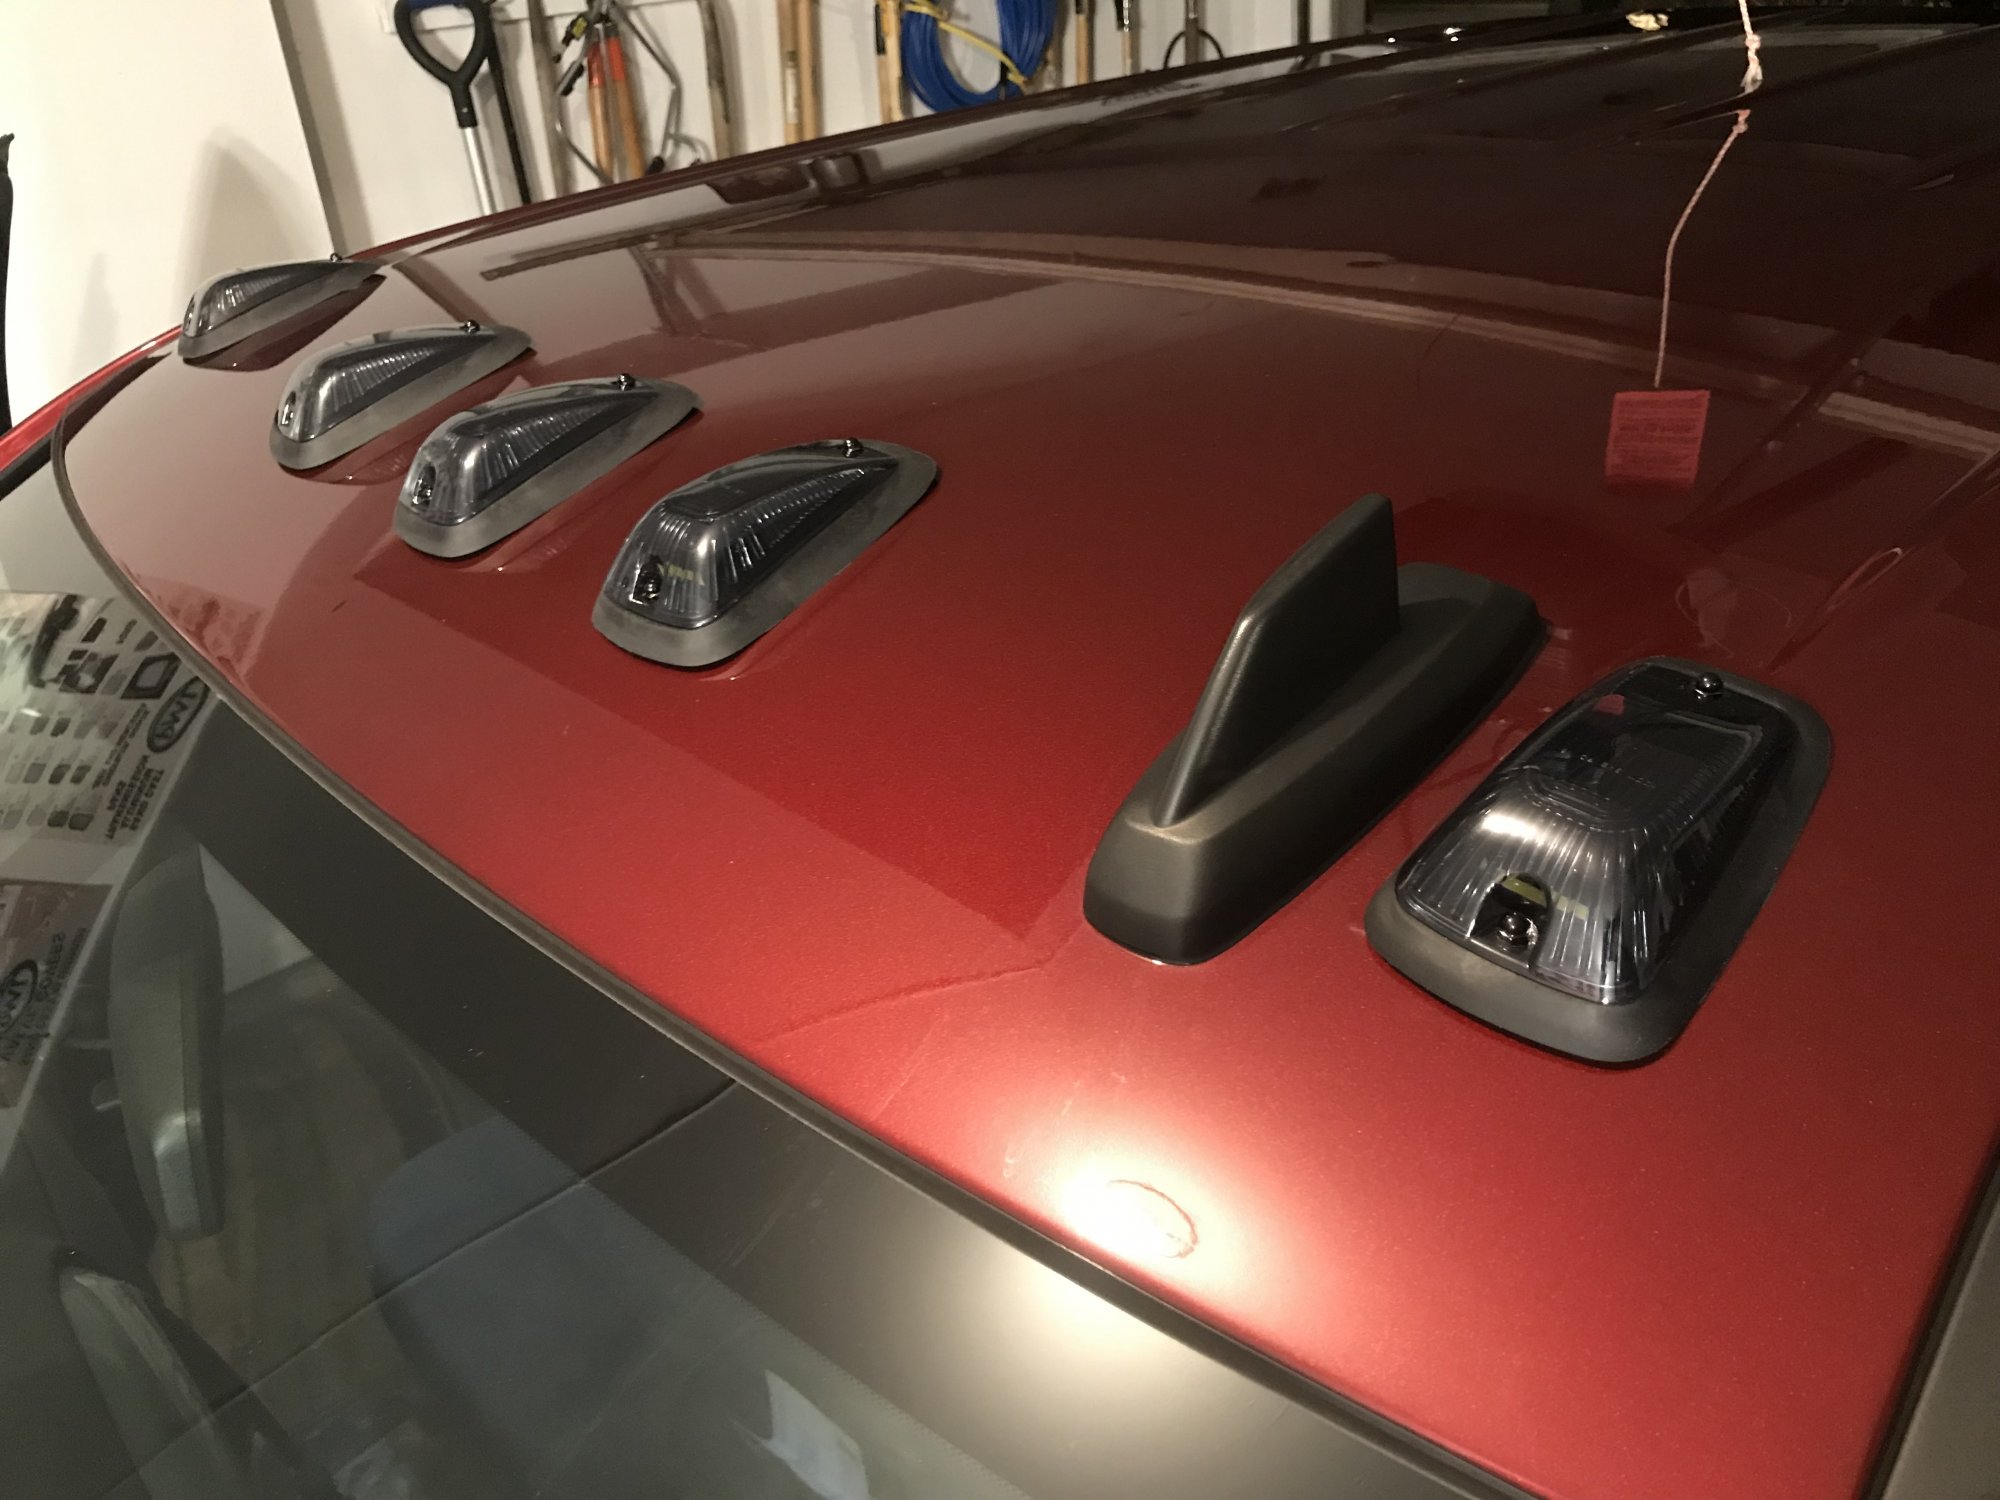
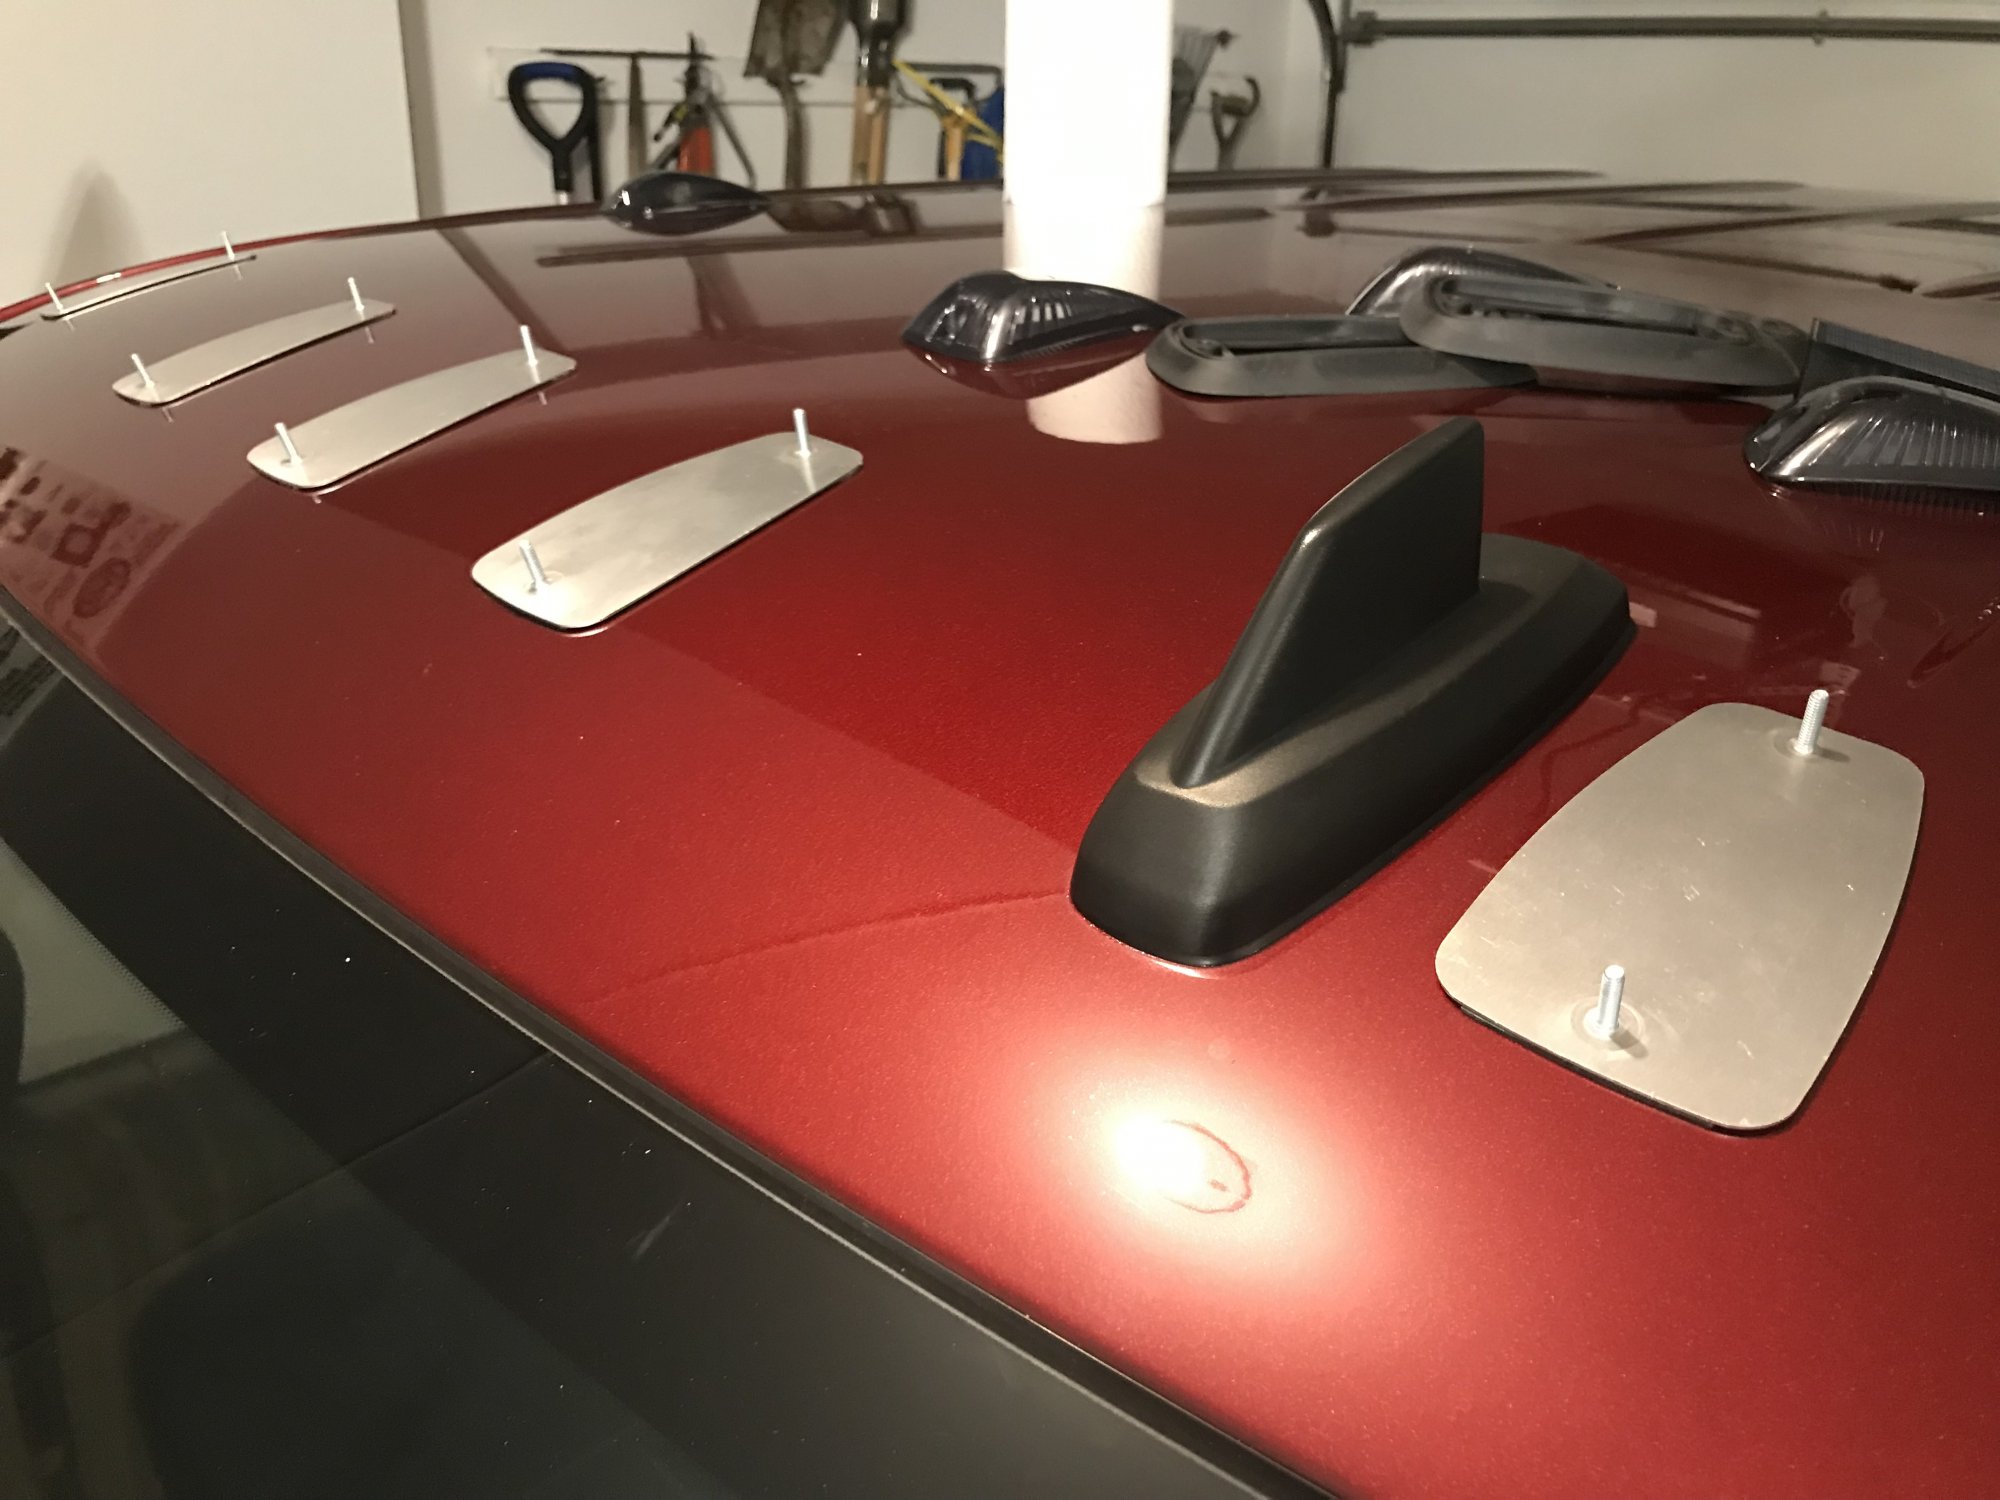
A few more pictures of the lights: Adhesive on the bottom of each light Lay out with the Cab Over America center 0 tape. Final touches, tightening the nuts onto the metal bracket studs to close up the lights.
-
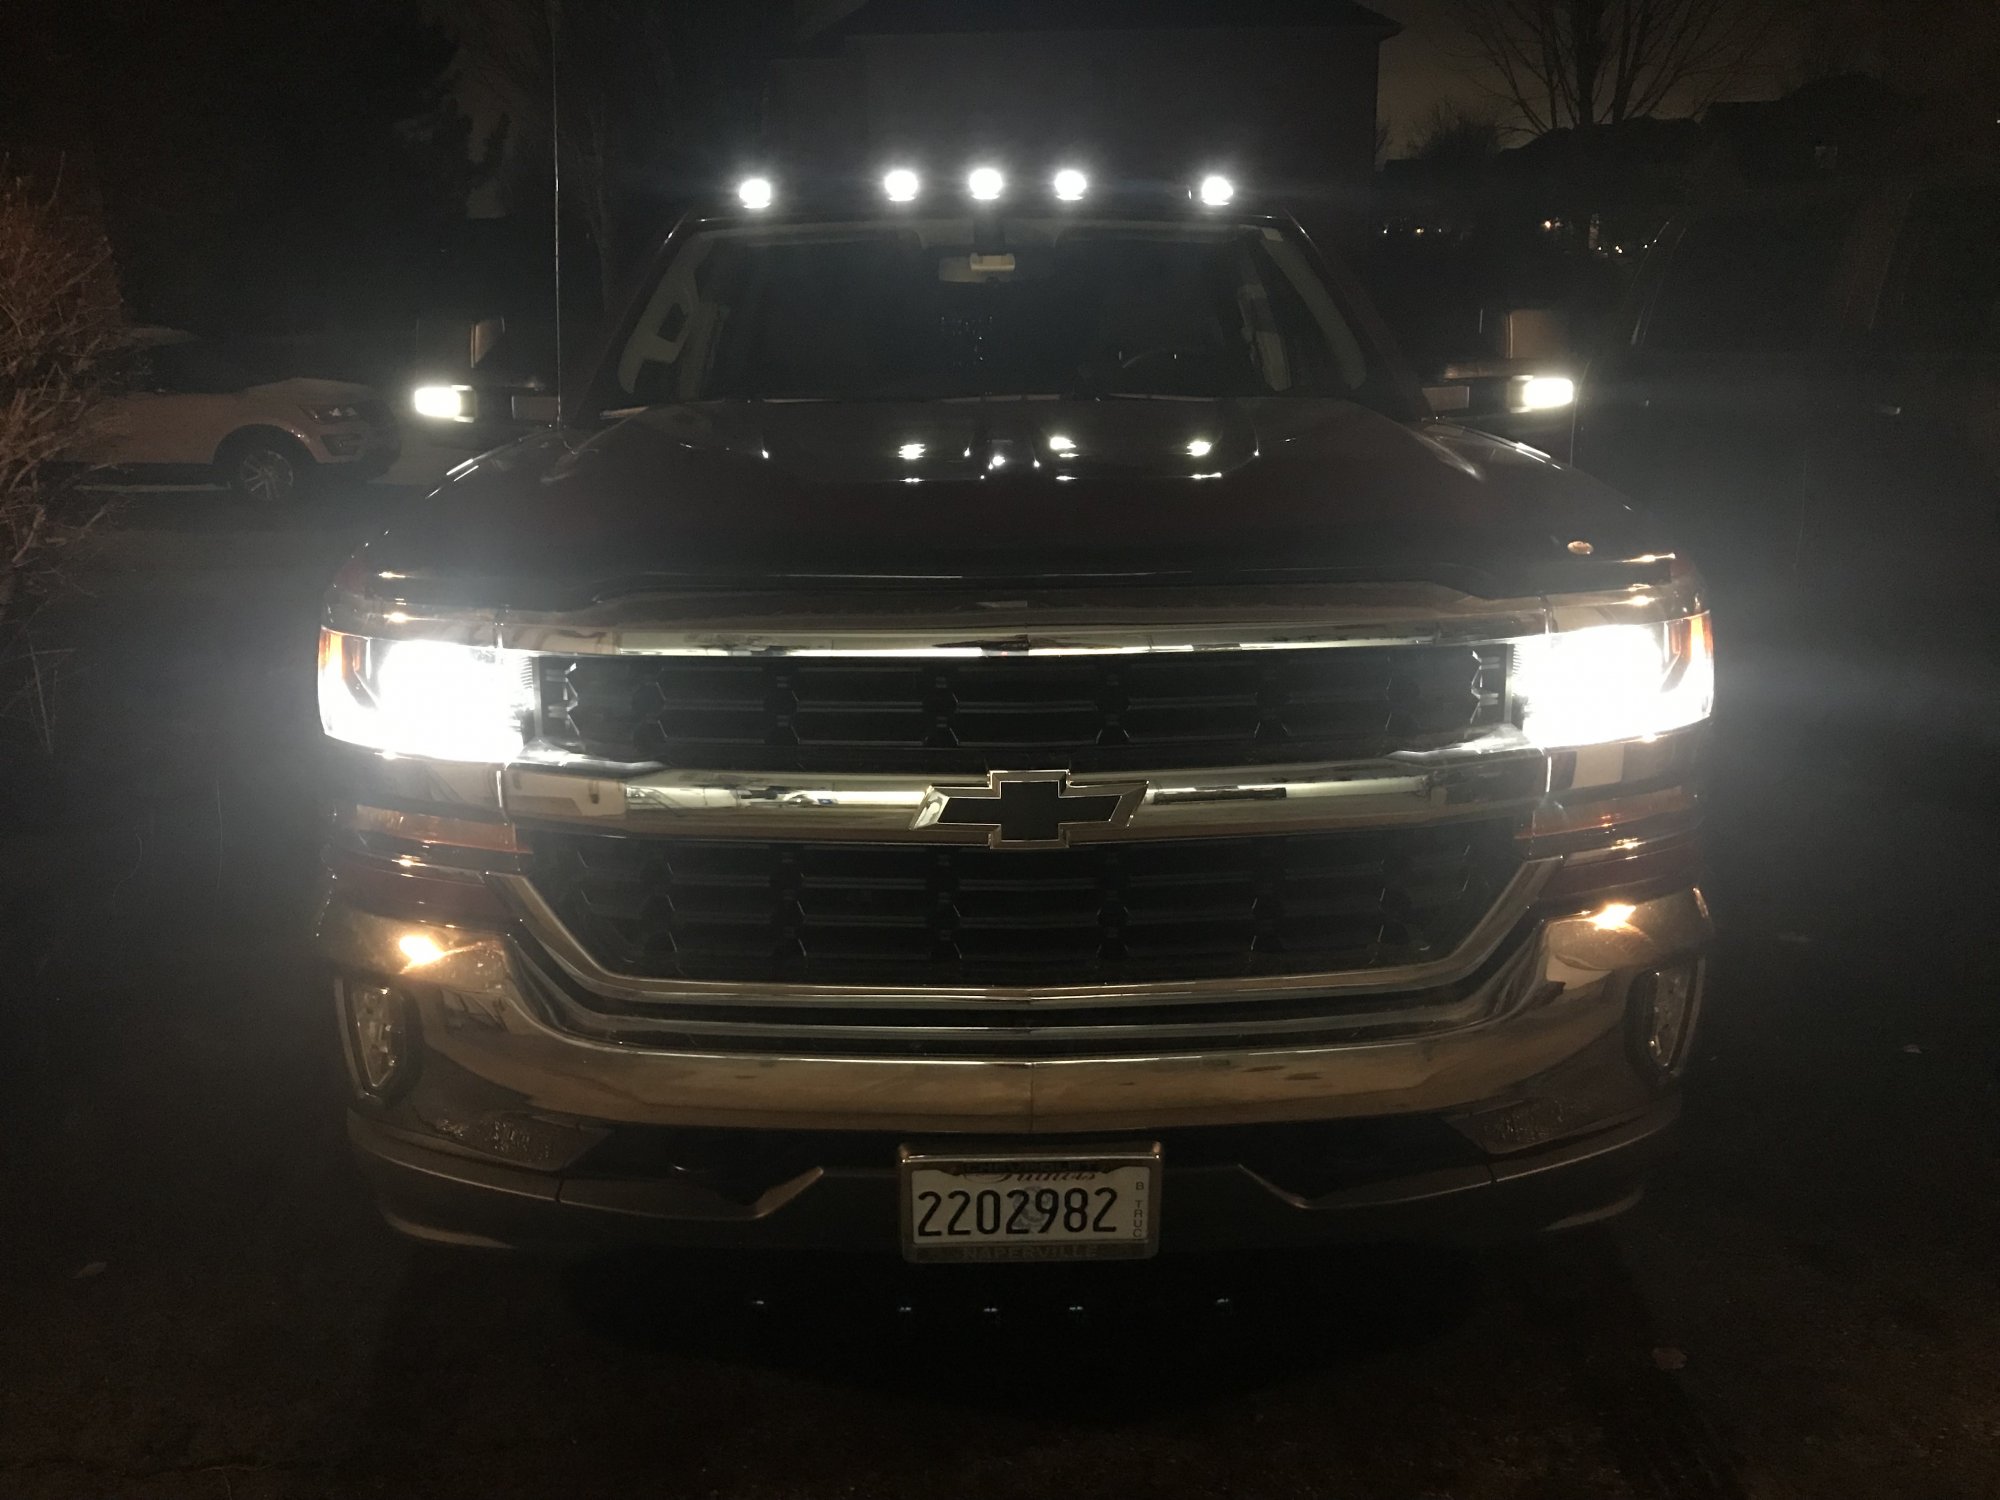
Quick how to and review of the Cab Over America wireless cab lights. Link to parts: https://caboveramerica.com/ The parts: For just under $400 you get a set of 5 battery powered wireless cab lights. Each light consists of 4 parts; the aluminum mounting plate, rubber gasket, LED/PV panel module, and the top lens. The top lenses can be had in clear, amber or smoke. In our case, we went with smoke. You also get two remotes to control the lights. Overall the quality is high and what I would expect from something in this price range. You also get some small lenses that can be place inside the cab lights to change the lights to amber while still using a clear or smoke outer lens. Lastly you are given a Cab Over America tape measure. We laid the tape out but ended up using a tape measure for all measurements. The install: First step was to decide on how you will be playing out the lights. We went with the two edge lights and 3 concentrated in the middle. Others may go with the even spacing all the way across, completely up to you. Here's a test fit. Also shows you the clearance with the shark fin. Remove the two nuts, lens, LED, and gasket so you are just left with the aluminum bracket with screw posts. It was easier to measure and mount the brackets without all the extra parts. We also bent the brackets a bit to fit the counter of the roof in the location they'd be installed. Here they are laid out in position. Wipe down the front 10" of your cab with Isopropyl alcohol. This is to prep the surface for better adhesion. Starting with the cab light nearest to the shark fin, measure 4.5" up from the windshield and 4.5" from the rain gutter to the front stud. This will locate the front mounting post. The rear post of the drivers side cab light should also be 4.5" from the gutter. Using a marker to make temp markings so when you remove the tape backing you can guide the bracket into position. Remove the tape backing, heat up the double stick tape, and install using your guidelines. Repeat for the passenger side light. Find the center of the windshield, measure 4.5" straight back, this will locate the front stud of the center light. Make sure the mounting bracket is straight and mark guide lined with a marker, remove tape backing, heat up the tape, then install. For the side center lights, we offset the lights 7.5" from the center light centerline. Measuring 7.5" from the center light's stud to the side light studs we were able to locate the side lights. Both the front and back studs of the side cab lights are 7.5" from the respective studs on the center light bracket. After all the metal brackets were installed the rubber gaskets were reinstalled, LED modules installed, and the lenses were screwed down. Last step was to sit back and enjoy the lights. They look great with the switchback mirrors! Here is a video of the install if you don't like reading! Thanks! WF41
-
What have you done to your K2 today?
Waterfowler41 replied to block8head's topic in Modifications & Accessories
Thanks for the comment on the video. I just sent an email this morning to them on this exact item. I would love a way to fix the lights into 1 mode (dim). The workaround for now is turn the lights on on your way to the truck so you can confirm settings. Not ideal but all things considered, we have cab lights and didn't drill huge holes in my brother in laws truck.. Hoping some of my electrical friends have some ideas how to modify the remotes to accomplish this! -
What have you done to your K2 today?
Waterfowler41 replied to block8head's topic in Modifications & Accessories
I’m with you in the looks played a roll. I upgraded to the PML cover a few months back. The drain plug is nice and will be helpful with my “drive it into the ground 300k mile” plan for this truck. Mine doesn’t peak out too much with only a 1” lift in the rear Waterfowler 41’s Youtube channel: https://www.youtube.com/user/brittmork -
What have you done to your K2 today?
Waterfowler41 replied to block8head's topic in Modifications & Accessories
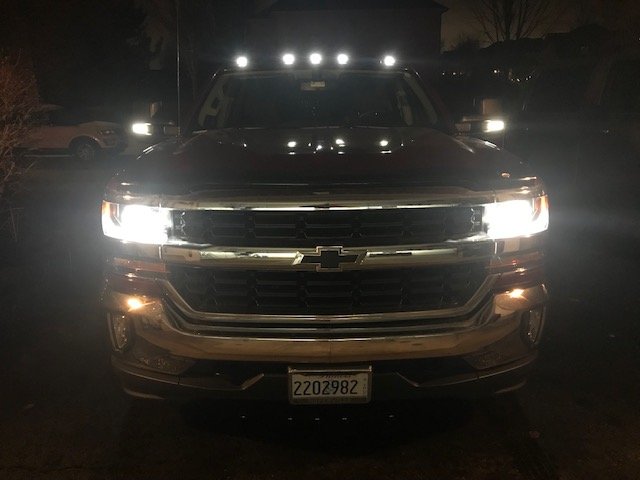
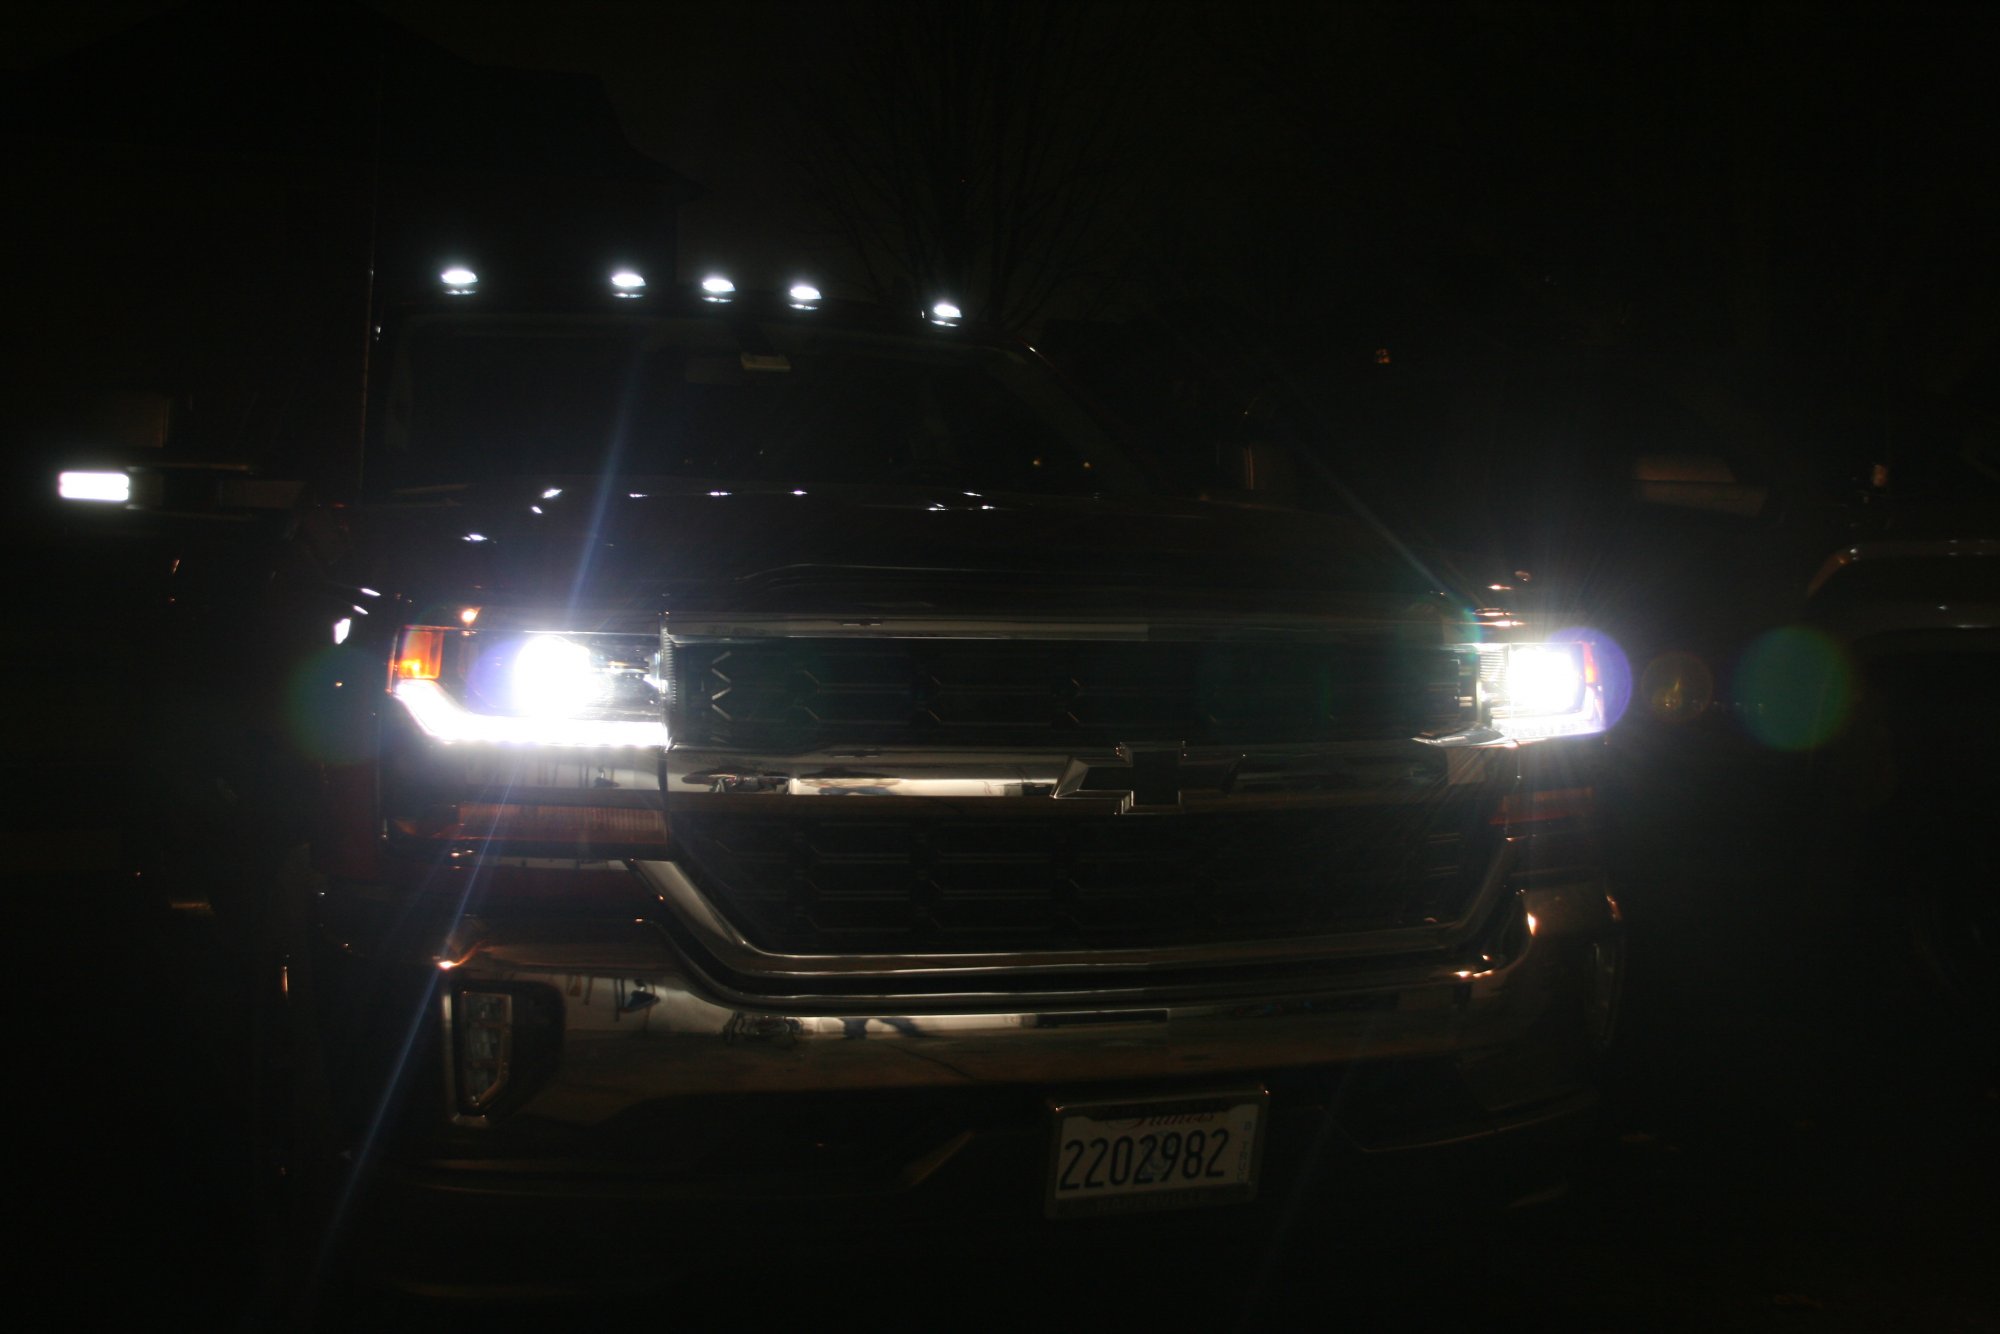
Couldn’t be happier with how well the wireless cab lights went on! They match the Boost Auto switchbacks real well. Here's the link to the install, honestly really impressed with how well these guys installed. Pulled our the SLR for a better night show. iPhone night shot Waterfowler 41’s Youtube channel: https://www.youtube.com/user/brittmork
-
What have you done to your K2 today?
Waterfowler41 replied to block8head's topic in Modifications & Accessories
https://caboveramerica.com/ Yup, their is a tiny PV panel inside the lens. I haven't pulled them apart yet but will tonight when we install. The sharkfin will dictate the layout which is nice, this way there is only a few ways the lights can layout, better than have infinite options. We;ll get into analysis paralysis. Bingo! Guys, I'll follow up with the video on this one pretty quick. Lots of inquiries about it. These are going on the maroon Silverado on my channel. We just installed the BAP mirrors, these cab lights are to compliment his white DRL side marker lights. -
What have you done to your K2 today?
Waterfowler41 replied to block8head's topic in Modifications & Accessories
Cab Over America wireless cab lights going on my brother in laws silverado tomorrow night. I was messing around with these after charging them today. Pretty sweet lights. Waterfowler 41’s Youtube channel: https://www.youtube.com/user/brittmork -
What have you done to your K2 today?
Waterfowler41 replied to block8head's topic in Modifications & Accessories
Lovebugs!!!! Hate’em! Waterfowler 41’s Youtube channel: https://www.youtube.com/user/brittmork -
What have you done to your K2 today?
Waterfowler41 replied to block8head's topic in Modifications & Accessories
In the final stretch of my a-pillar pod install. Waterfowler 41’s Youtube channel: https://www.youtube.com/user/brittmork -
What have you done to your K2 today?
Waterfowler41 replied to block8head's topic in Modifications & Accessories
They dragged their feet so long on getting the 6112’s out you think they’d be a little more cost competitive to the Eibach kit, is basically the same set up. Unless the Bils kit is made of unobtanium or gold... Waterfowler 41’s Youtube channel: https://www.youtube.com/user/brittmork



-
Forum Statistics
250.4k
Total Topics2.7m
Total Posts -
Member Statistics
342,802
Total Members8,960
Most Online
-
Who's Online 3 Members, 0 Anonymous, 303 Guests (See full list)