Search the Community
Showing results for tags 'cab'.
-
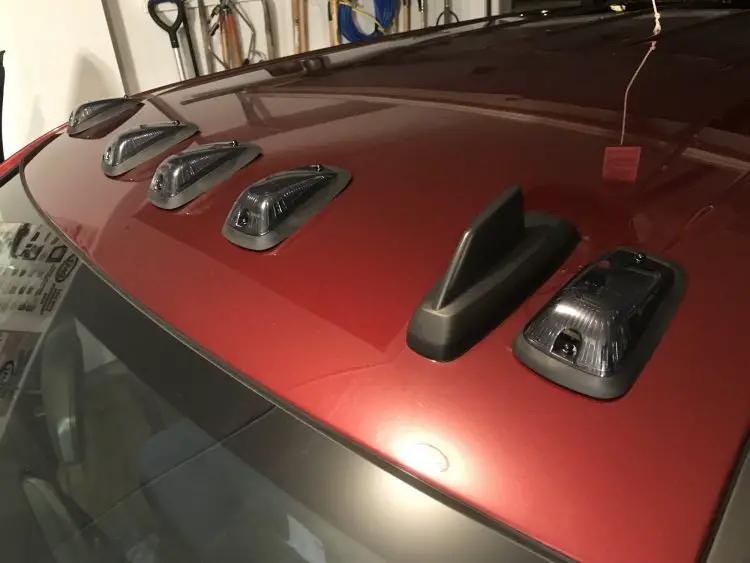
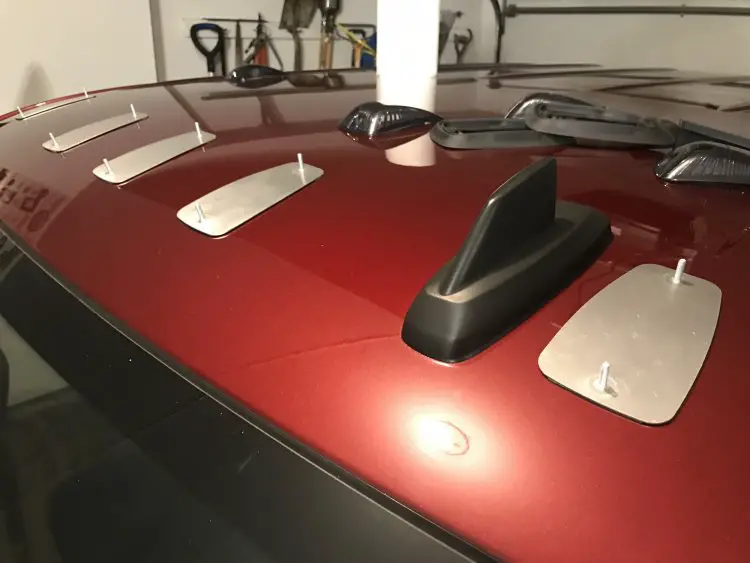
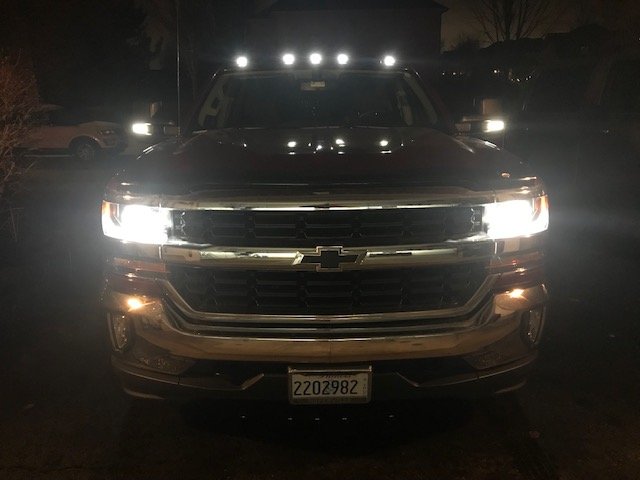
Quick how to and review of the Cab Over America wireless cab lights. Link to parts: https://caboveramerica.com/ The parts: For just under $400 you get a set of 5 battery powered wireless cab lights. Each light consists of 4 parts; the aluminum mounting plate, rubber gasket, LED/PV panel module, and the top lens. The top lenses can be had in clear, amber or smoke. In our case, we went with smoke. You also get two remotes to control the lights. Overall the quality is high and what I would expect from something in this price range. You also get some small lenses that can be place inside the cab lights to change the lights to amber while still using a clear or smoke outer lens. Lastly you are given a Cab Over America tape measure. We laid the tape out but ended up using a tape measure for all measurements. The install: First step was to decide on how you will be playing out the lights. We went with the two edge lights and 3 concentrated in the middle. Others may go with the even spacing all the way across, completely up to you. Here's a test fit. Also shows you the clearance with the shark fin. Remove the two nuts, lens, LED, and gasket so you are just left with the aluminum bracket with screw posts. It was easier to measure and mount the brackets without all the extra parts. We also bent the brackets a bit to fit the counter of the roof in the location they'd be installed. Here they are laid out in position. Wipe down the front 10" of your cab with Isopropyl alcohol. This is to prep the surface for better adhesion. Starting with the cab light nearest to the shark fin, measure 4.5" up from the windshield and 4.5" from the rain gutter to the front stud. This will locate the front mounting post. The rear post of the drivers side cab light should also be 4.5" from the gutter. Using a marker to make temp markings so when you remove the tape backing you can guide the bracket into position. Remove the tape backing, heat up the double stick tape, and install using your guidelines. Repeat for the passenger side light. Find the center of the windshield, measure 4.5" straight back, this will locate the front stud of the center light. Make sure the mounting bracket is straight and mark guide lined with a marker, remove tape backing, heat up the tape, then install. For the side center lights, we offset the lights 7.5" from the center light centerline. Measuring 7.5" from the center light's stud to the side light studs we were able to locate the side lights. Both the front and back studs of the side cab lights are 7.5" from the respective studs on the center light bracket. After all the metal brackets were installed the rubber gaskets were reinstalled, LED modules installed, and the lenses were screwed down. Last step was to sit back and enjoy the lights. They look great with the switchback mirrors! Here is a video of the install if you don't like reading! Thanks! WF41
-
Hi, I have 2 questions. One, I want to do the HD Front end conversion on my 2007 NNBS Silverado1500. I know what I need, and I have decided on the 2011-2013 HD grill and bumper. I have gone on line and seen some people go with the 2007-2010 HD hood and some people go with the 2011-2013 HD hood. Would any one know the difference or if one fits better onto the 1500 truck? And does anyone know how to install the bumper? And the second question was, How can I convert the truck into full electric mode? I have manual windows and no power locks. My truck is extended cab and I would wish for the back windows to work as well. Or does anyone have a really good video on what parts I need and how to do it step by step? I am by no means a mechanic but i do work on my trucks here and there on small things. Thanks in advanced!
-
I have a 2005 Silverado with the single cab. I was curious if I could take the standard center seat, that does not swing down. And swap it out with jump seat that does swing down (found in ext/crew cabs), in to my single cab? I'm looking to gain that armrest and simple storage on top. I have a subwoofer box behind the seats now and want to make sure it fits and all.


