
FREEZE451
-
Posts
43 -
Joined
-
Last visited
Content Type
Profiles
Forums
Gallery
Events
Articles
RPO
Store
Blogs
Everything posted by FREEZE451
-
What have you done to your K2 today?
FREEZE451 replied to block8head's topic in Modifications & Accessories
Cleaned it up -
What have you done to your K2 today?
FREEZE451 replied to block8head's topic in Modifications & Accessories
Put on a Putco Blade as well as two eagle eye pods in the step wells:
-
Couldn't you just avoid the first connector, and plug all the black wires and output into this guy: https://www.superbrightleds.com/moreinfo/wire-connectors/28-12-ga-lever-lock-quick-connect-terminal-blocks/1372/3144/ Saving you one connector? Either way, like mentioned above - clean setup
-
Ah! Well that's good to know. I was wondering that ratio was actually, so appreciate it! Much better to say to people than; "I'm not sure actually, there's just a small space in there to lift it a little."
-
If you also tap the clock in the upper right hand corner you'll get the same radio image
-
Put a 3/4" spacer in front to raise it a little. I'm not sure what amount that in turn raises the front. Tires are Nitto Radial Grappler 33x1250x22 To correct the madneride I had the shop 'relearn' the sensors to the calibration was correct, but I think I might add a washer to each sensor for some extra cushion. The measurements currently from ground to start of fender: Front = 38" Rear = 40" They do rub a hair on full lock, but is kind of expected.
-
Yeah, I thought about putting an adapter in, which I assume just relocates the magnetic suspension arm to the correct angle. Being the shop re-calibrated the arm to '0' degrees in the computer, should balance out.
-
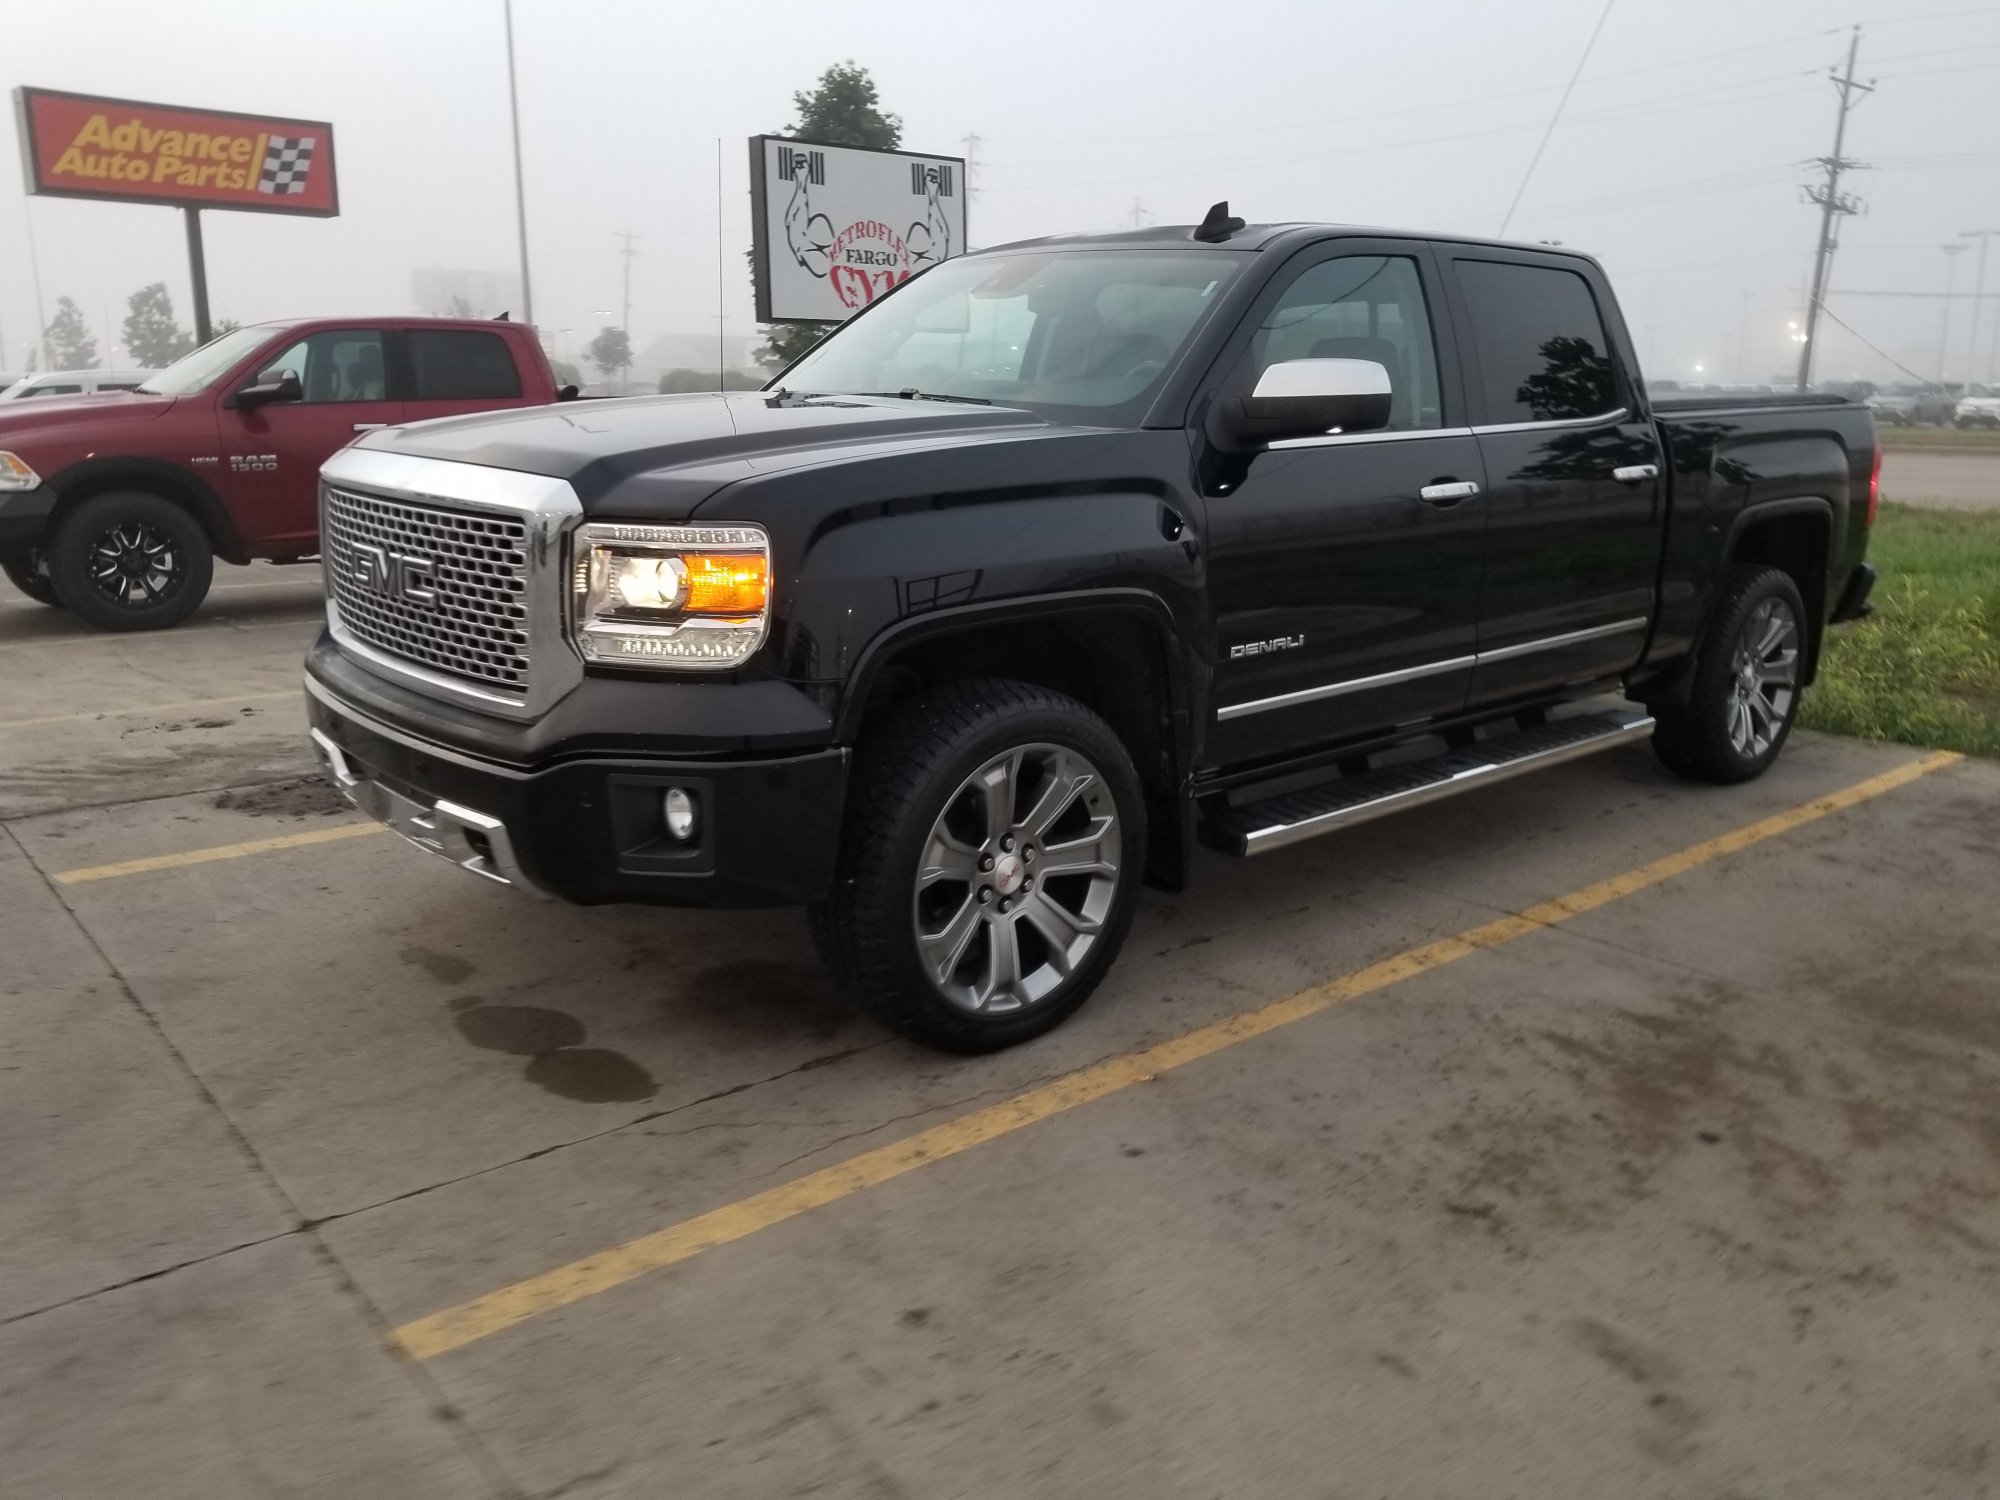
What about Black Silverado/Sierra Photos?
FREEZE451 replied to Chief Bob's topic in 2014-2018 Silverado 1500 & Sierra 1500
Just got the windows tinted last night, love the outcome.
-
Reviving from the dead, but I just had a level kit put in from a local dealer who actually just machines metal spaces for the front. After driving out of the neighboring mechanic shop I could tell it rode horrible, so called them up an asked if the magnetic suspension was touched and they didn't realize this truck had it. So, I brought it back two days later, had them reset the magneride sensors and calibrate them to the position they are when it's not under load - to which I was told "It took me a couple minutes, so if you ever need them done again, swing in an I'll handle them quick." So easy solution. Took it for a spin all seems great again. It does seem a little more rough from factory height, but still a pleasant ride. I didn't end up using spacers or brackets, but may come to regret it if I ever get to sensitive to the ride. My theory is that, although the sensor was re-calibrated, the angle of the arm changes the the speed at which the sensor reacts - probably ever so slightly that I couldn't tell. Probably a mind game. Anyways, just putting my 10 cents in.
-
Post Pics of Your 2014+
FREEZE451 replied to jomuehlbauer's topic in 2014-2018 Silverado 1500 & Sierra 1500
Picked up a 2015 Denali, and absolutely love it! I did get a level kit in, which through of the magneride, so it's currently getting that reset along with the alignment today.


-
Forum Statistics
250.4k
Total Topics2.7m
Total Posts -
Member Statistics
342,853
Total Members8,960
Most Online
-
Who's Online 9 Members, 1 Anonymous, 684 Guests (See full list)