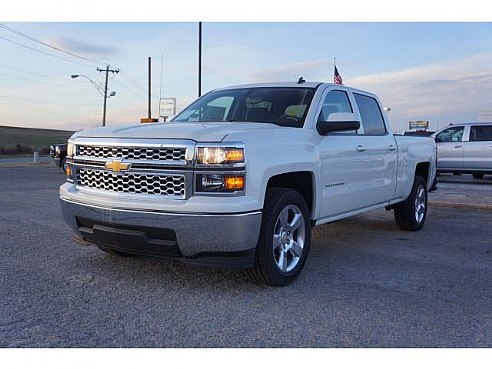
Hey all i figured since I couldn't find the answers anywhere on here id do a quick write up on how I installed the DL3 Mirrors on my 2014 Silverado CC LT trim. My truck originally came with DL8's (heated, power, manual fold) and I've always wanted the DL3 mirrors because i love having signals in my mirrors and the puddle lamps are an added bonus too me. So i started doing my research, checking wiring diagrams, locations, ect. and finally came up with a game plan that i felt was the most reasonable and cost effective for what i was looking to have (also completely reversible need be). **This is what worked for me and I cannot guarantee that its the exact same for everyone, so do this mod at your own risk**
**FIRST AND FOREMOST REMEMBER TO DISCONNECT THE NEGATIVE TERMINAL ON YOUR BATTERY BEFORE YOU BEGIN**
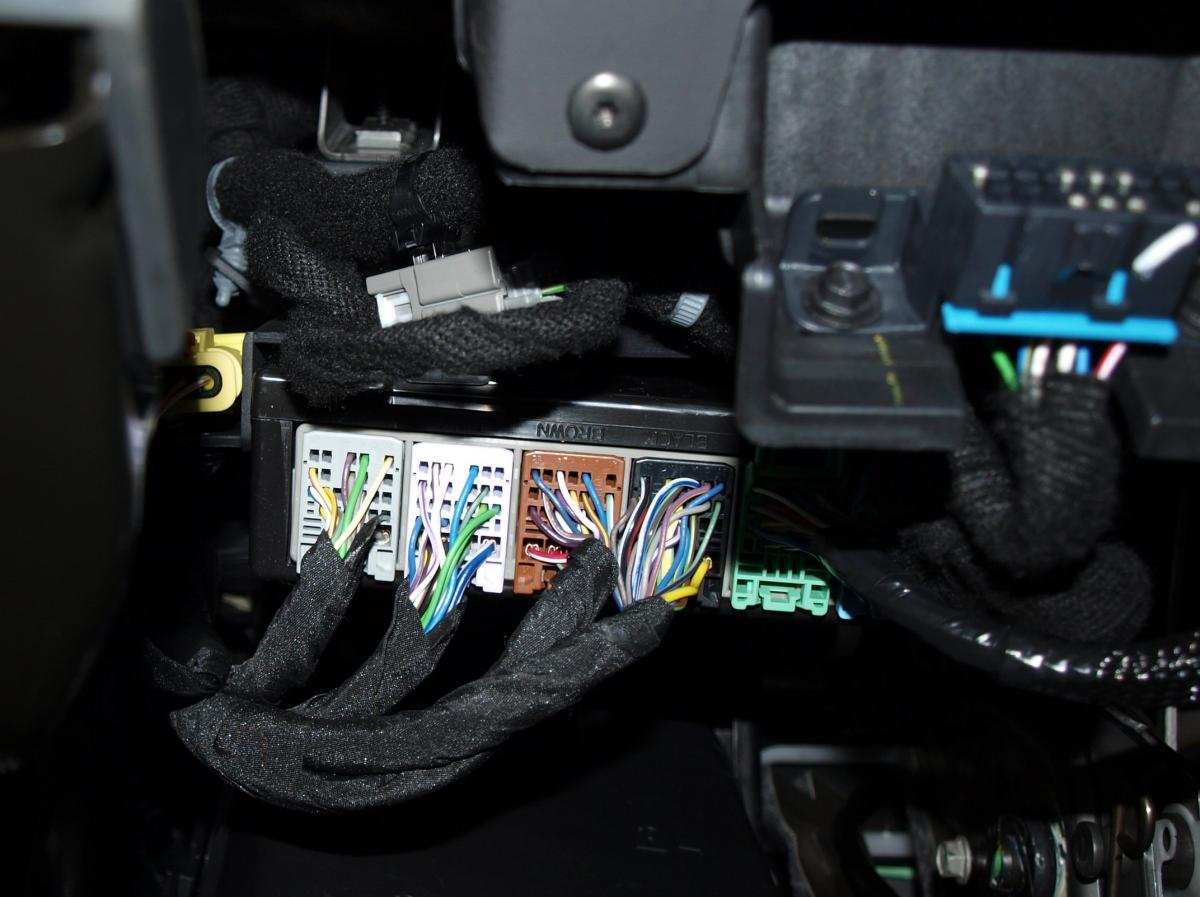
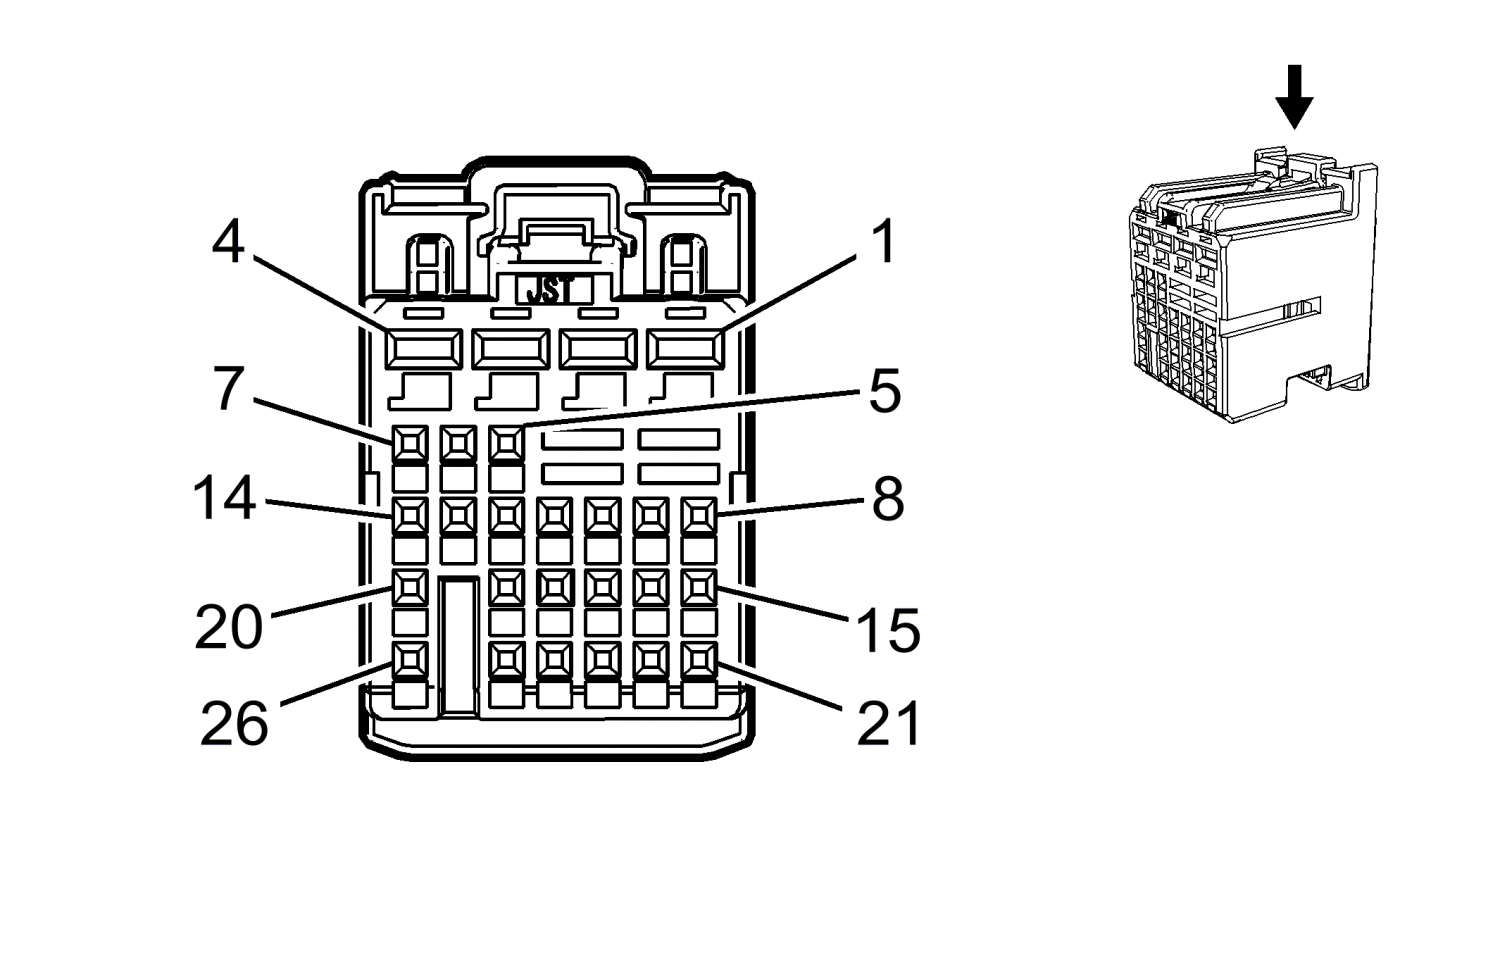
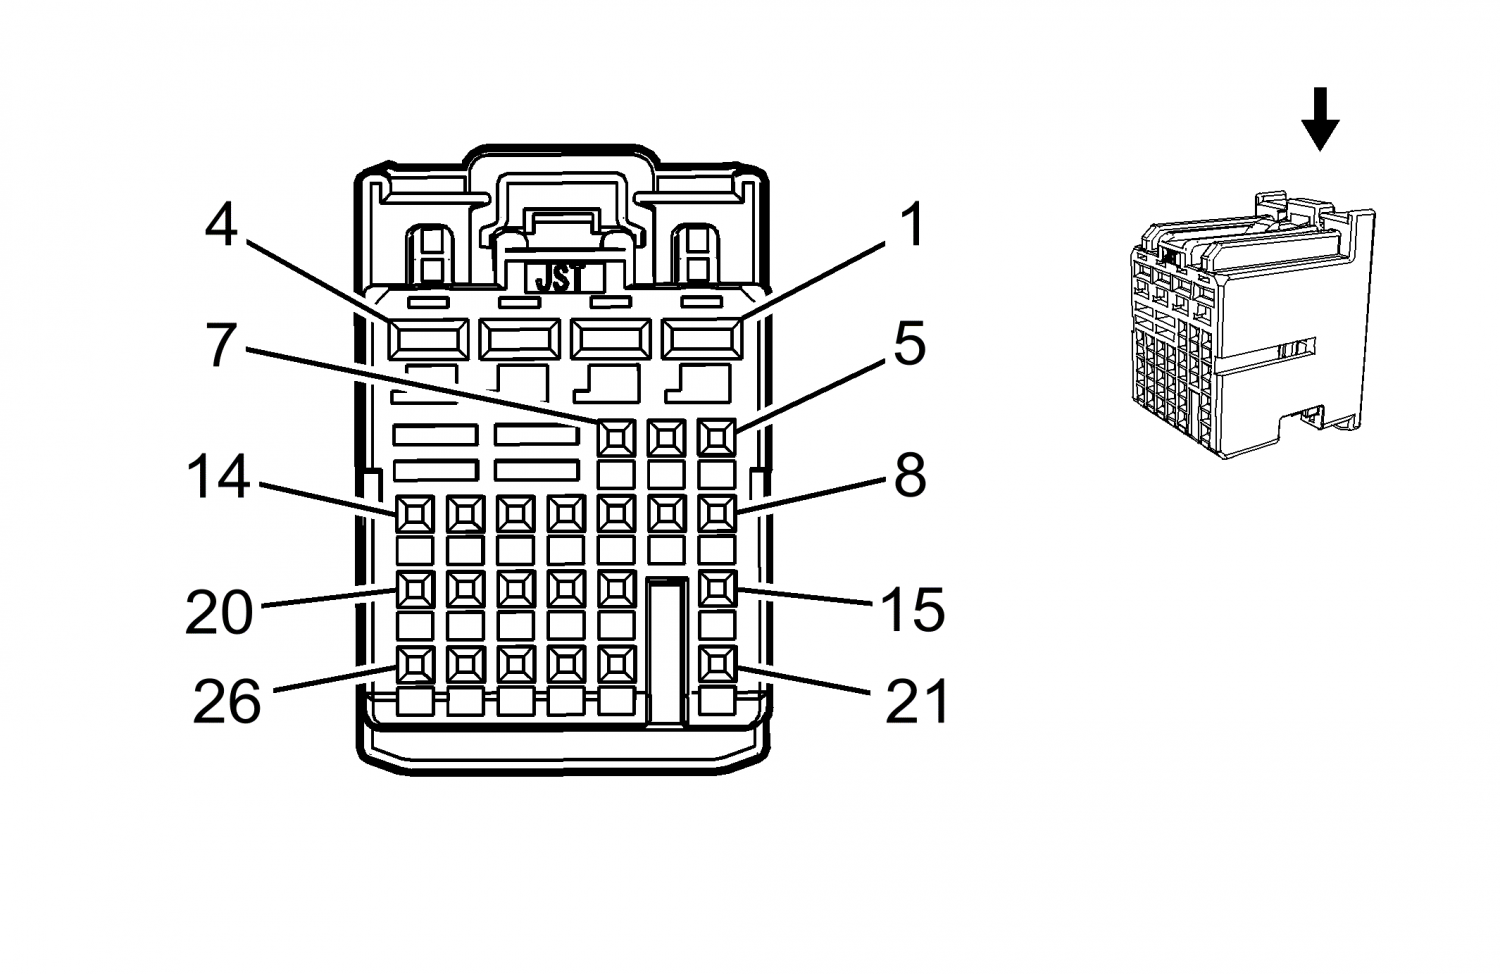
1) I found the wiring I needed under the dash located at the BCM (lower left side of the dash) and one of the wires located at the junction block below the BCM. You'll see in the first picture i have posted below the BCM wiring. You'll need to tap into the LIGHT GREEN WIRE WITH A VILOET TRACER in the BROWN BCM (#4) plug in **wire is going to be pin #3**. (see attached diagram for pin layout) This wire is going to be your right side turn signal wire. I tapped into these wires using T-taps (although i hate using the things because they're not the best connection, i felt they're the best option here so that there are no cutting of wires and all wiring is essentially reversible). The Next wire you'll need to tap into is the DARK BLUE WITH WHITE TRACER in the BLACK BCM (#5) plug in **wire is going to be pin #2**. (See attached diagram for pin layout) This wire is going to be your left side turn signal wire.
2) Next i found the wiring i wanted to use located in the junction block below the BCM in the lower left side of the dash. You'll have to pop the black plastic cover off in order to get to these. Look for the DARK BLUE plug in at the upper left hand side of the junction block. You'll see in the picture there are two GREY wires located in this plug in. You can use either one as they are both for dome light operation and will both work in this application. Again I used a T-tap to tap into this wire so that it would be reversible later on if the need arises.
3) The next step in my process was to begin running wiring from the doors out to the Drivers footwell. I pulled the door panels off, popped the old mirrors off, installed my new DL3's and bolted them down. (pretty straight forward if you don't know how there are topics on door panel removal all over the forums) I then began popping the rubber boots apart between the doors and the rubber plug out out of the door itself (plug where the main harness comes out of the door panel). These do not need to be removed just popped out to gain access. Then using a wire snake (you can also use bailing wire or whatever you have access to instead if you don't have a wire snake) I ran two wires through the plug under the door panel, through the boot and out into the footwell on BOTH the drivers and passenger side. The only obvious difference between the two is the passengers side wire length needs to be substantially longer.
4) Now once you have all four wires (two from drivers door and two from passengers door) ran to the drivers foot well you can begin the arduous task of wiring them up. What i did was chose one wire from each door and crimped them into ONE of the male connectors for the T-Tap. This pair will be used to run the Puddle lamps on the bottoms of the mirrors. Then crimped one male T-Tap connector onto each of the remaining wires <so you'll have a total of 3 connections to be made.
5) Take the first single connection you crimped the male end onto (the one coming from the drivers door) and looking under the dash plug it into the T-tap you installed on the DARK BLUE/WHITE wire at the BCM (label accordingly as this is going to run the turn signal on your drivers side mirror), Take the remaining single male connection and plug it into the T-Tap you made at the LIGHT GREEN/VIOLET wire at the BCM (again label as this is going to be your passenger side mirror turn signal), finally take the pair of wires that you crimped into one male connection and plug it into the T-tap you made at the GREY wire at the junction block below the BCM (this is going to run your puddle lamps so again label accordingly).
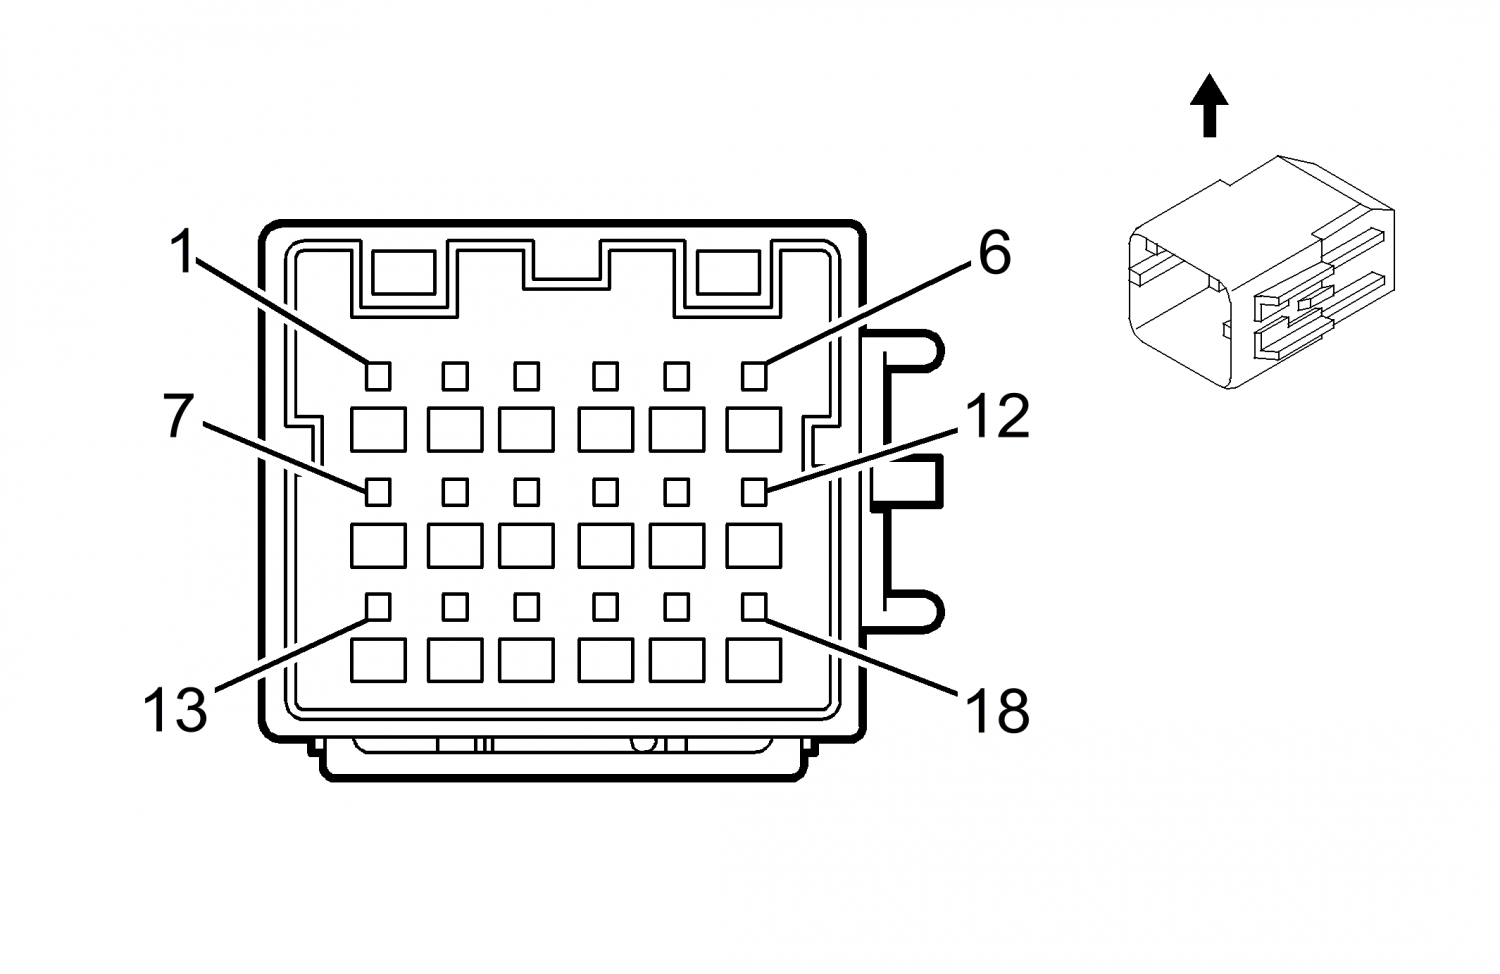
6) Now the fun part; since you now have all of your wires ran, tapped into the correct wires at the drivers footwell and labeled (hopefully) you can begin the wiring at the doors. This is the SAME procedure for both the drivers and passengers doors. What i did here was purchase Male GM pins from my local dealer and crimped them onto the wire ends at the door so that I could just add the pins I needed to my harness and it would be a cleaner install, plus i wanted to be able to unplug and replug the harnesses if i ever needed to take the door apart again. You will see in the picture below that the wire for the puddle lamps (the one you tapped into the grey wire at the junction block) needs to be installed in PIN POSITION #1 of the harness. You can double check that it is in the correct position as it will line up with the ORANGE/WHITE wire when the harnesses are connected. The remaining wire (wire that you tapped into the light green/violet for the pass side and dark blue/white for the drivers side) needs to be installed into PIN POSITION #13 of the connector end. You can double check that you have this in the correct spot as it will line up with the RED WIRE/BLUE when the harnesses are connected.
7) FInally, now that EVERYTHING is wired up and ran where it should be you have one last thing you need to connect. The way i did this may not be what everyone chooses to do, but it worked best for me. The functions of these DL3 mirrors seem to have a ground for the mirror motor operation and a ground for lighting in the harness. The SOLID BLACK wire in the harness coming from the mirror NOT the truck is your main ground, the BLACK WIRE/WHITE TRACER is the ground for your lighting. Therefore what i did here is exposed a little bit of the two wires twisted them over one another and soldered them together/taped them back up. This is done at the harness coming from the mirror so if done correctly you will still be able to plug/unplug the mirrors just as you could before. Repeat this procedure for both drivers and passenger side.
8) Now that everything is wired, begin putting everything back together. Basically do everything in reverse from the way you took it apart. Make sure you put the boots back on both doors completely so that you don't get any water or anything in the wiring. I zip-tied the wiring up in the drivers footwell, put the plastic cover back on the junction box and after making sure i plugged everything back in put my door panels and all trim back on. Reconnect your battery and test them out, flip your turn signals on; both left and right, and look and see that the puddle lamps are coming on with the dome lights (you can turn them on/off the same as your domes and they will dim out when turning off.)
9) You now have fully functioning lighting on your DL3 mirrors (minus the car-wash fold). But I could honestly care less about car-wash fold. Its one of those things that i just wouldn't use enough to take the time to buy a new switch and harnesses and programming thats involved with doing them. Therefore this was the best route for me. I love the puddle lamps, they come on when i open my doors and dim out just as my interior lights do. I can manually turn them on when I turn my domes on and can shut them off the same way. Plus the turn signals in the mirrors (too me at least) are an awesome reminder that I have my turn signal on and they just look super cool.
**Well i hope this helps someone out, i took me a while of tracing wiring and what-not to figure out but once i did i feel like it was a pretty simple upgrade and TOTALLY worth it in my opinion **

 PM me I'll walk you through it