

Atelliott89
-
Posts
74 -
Joined
-
Last visited
Content Type
Profiles
Forums
Gallery
Events
Articles
RPO
Store
Blogs
Everything posted by Atelliott89
-
What Have You Done With Your T1 Today ?????
Atelliott89 replied to Sierra Dan's topic in Modifications, Wheels & Tires
Thanks! I just tapped into the drl. No need to remove the grille just the plastic air intake cover under the front of the hood to access and run the wiring. I wanted to get these installed to get rid of the old ones I had that didn't look go is and half burnt out (different lights then these), so I just used zip ties for now but will fab some kind of brackets eventually. But this is holding up great!
-
What Have You Done With Your T1 Today ?????
Atelliott89 replied to Sierra Dan's topic in Modifications, Wheels & Tires
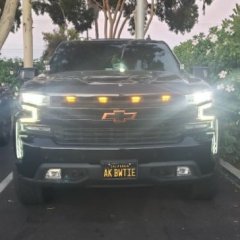
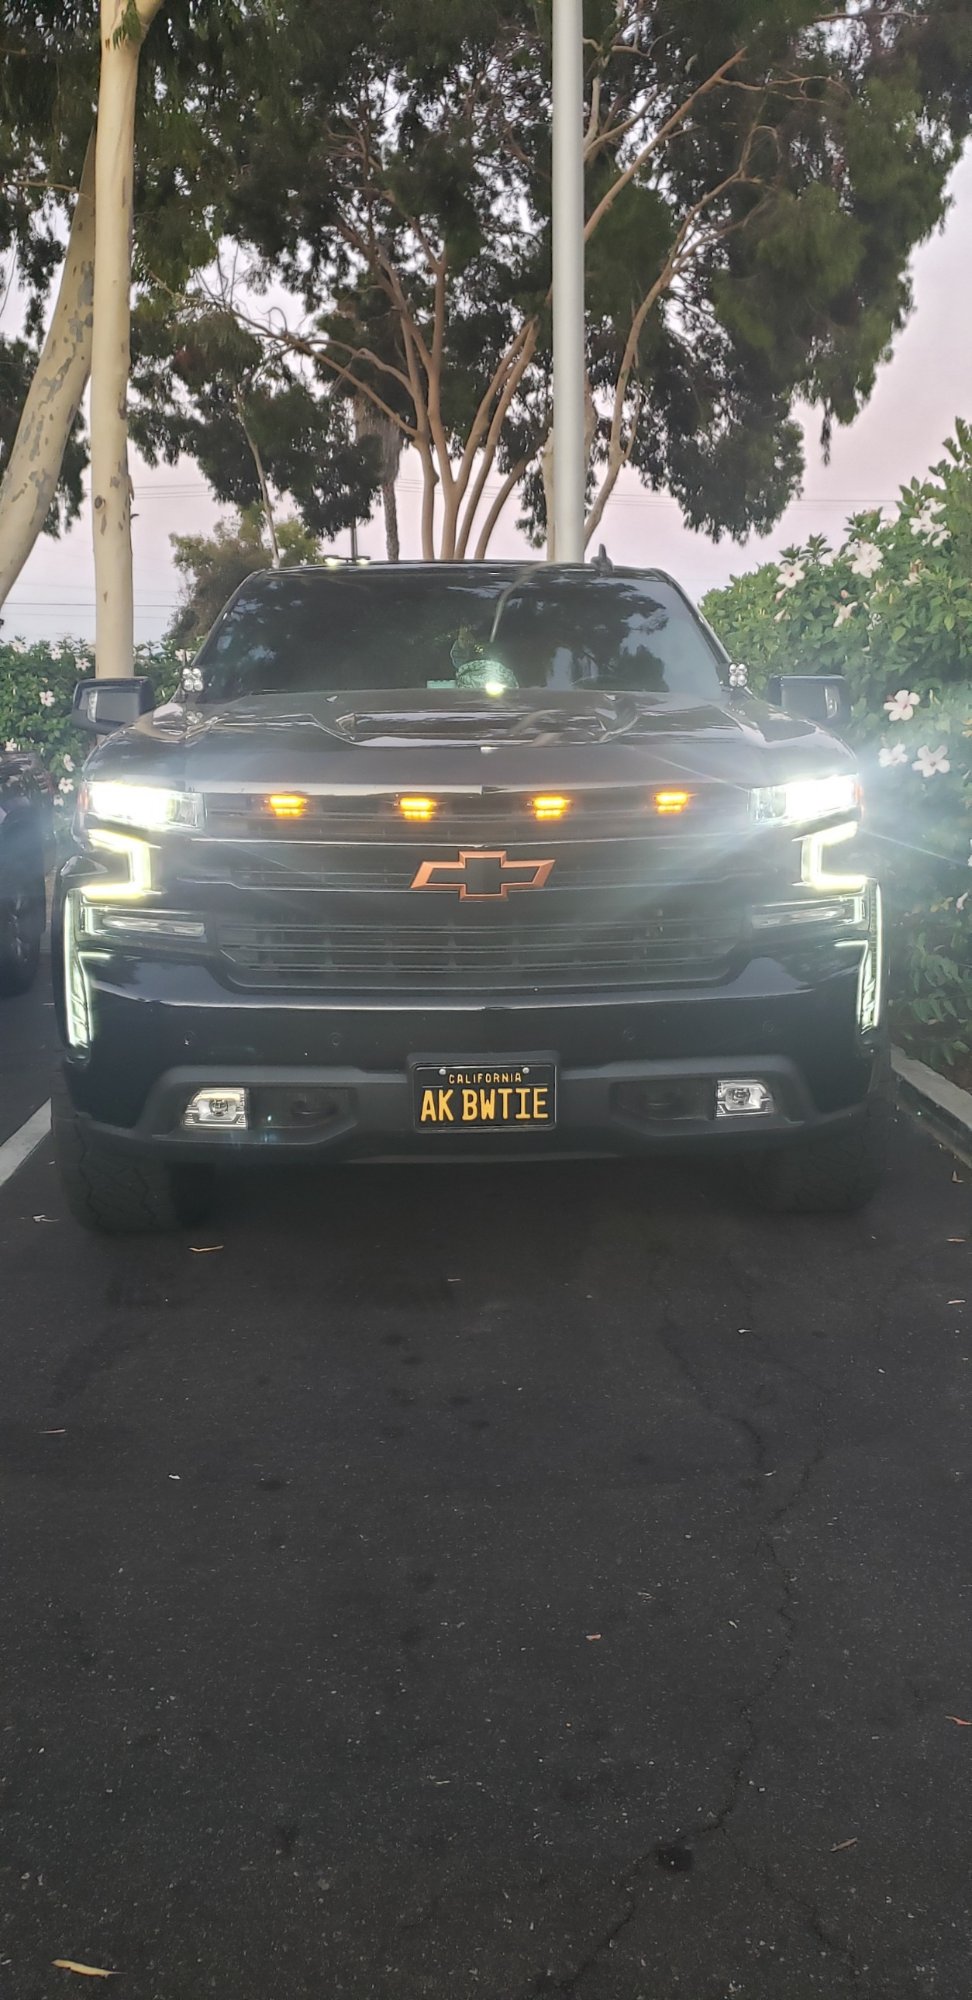
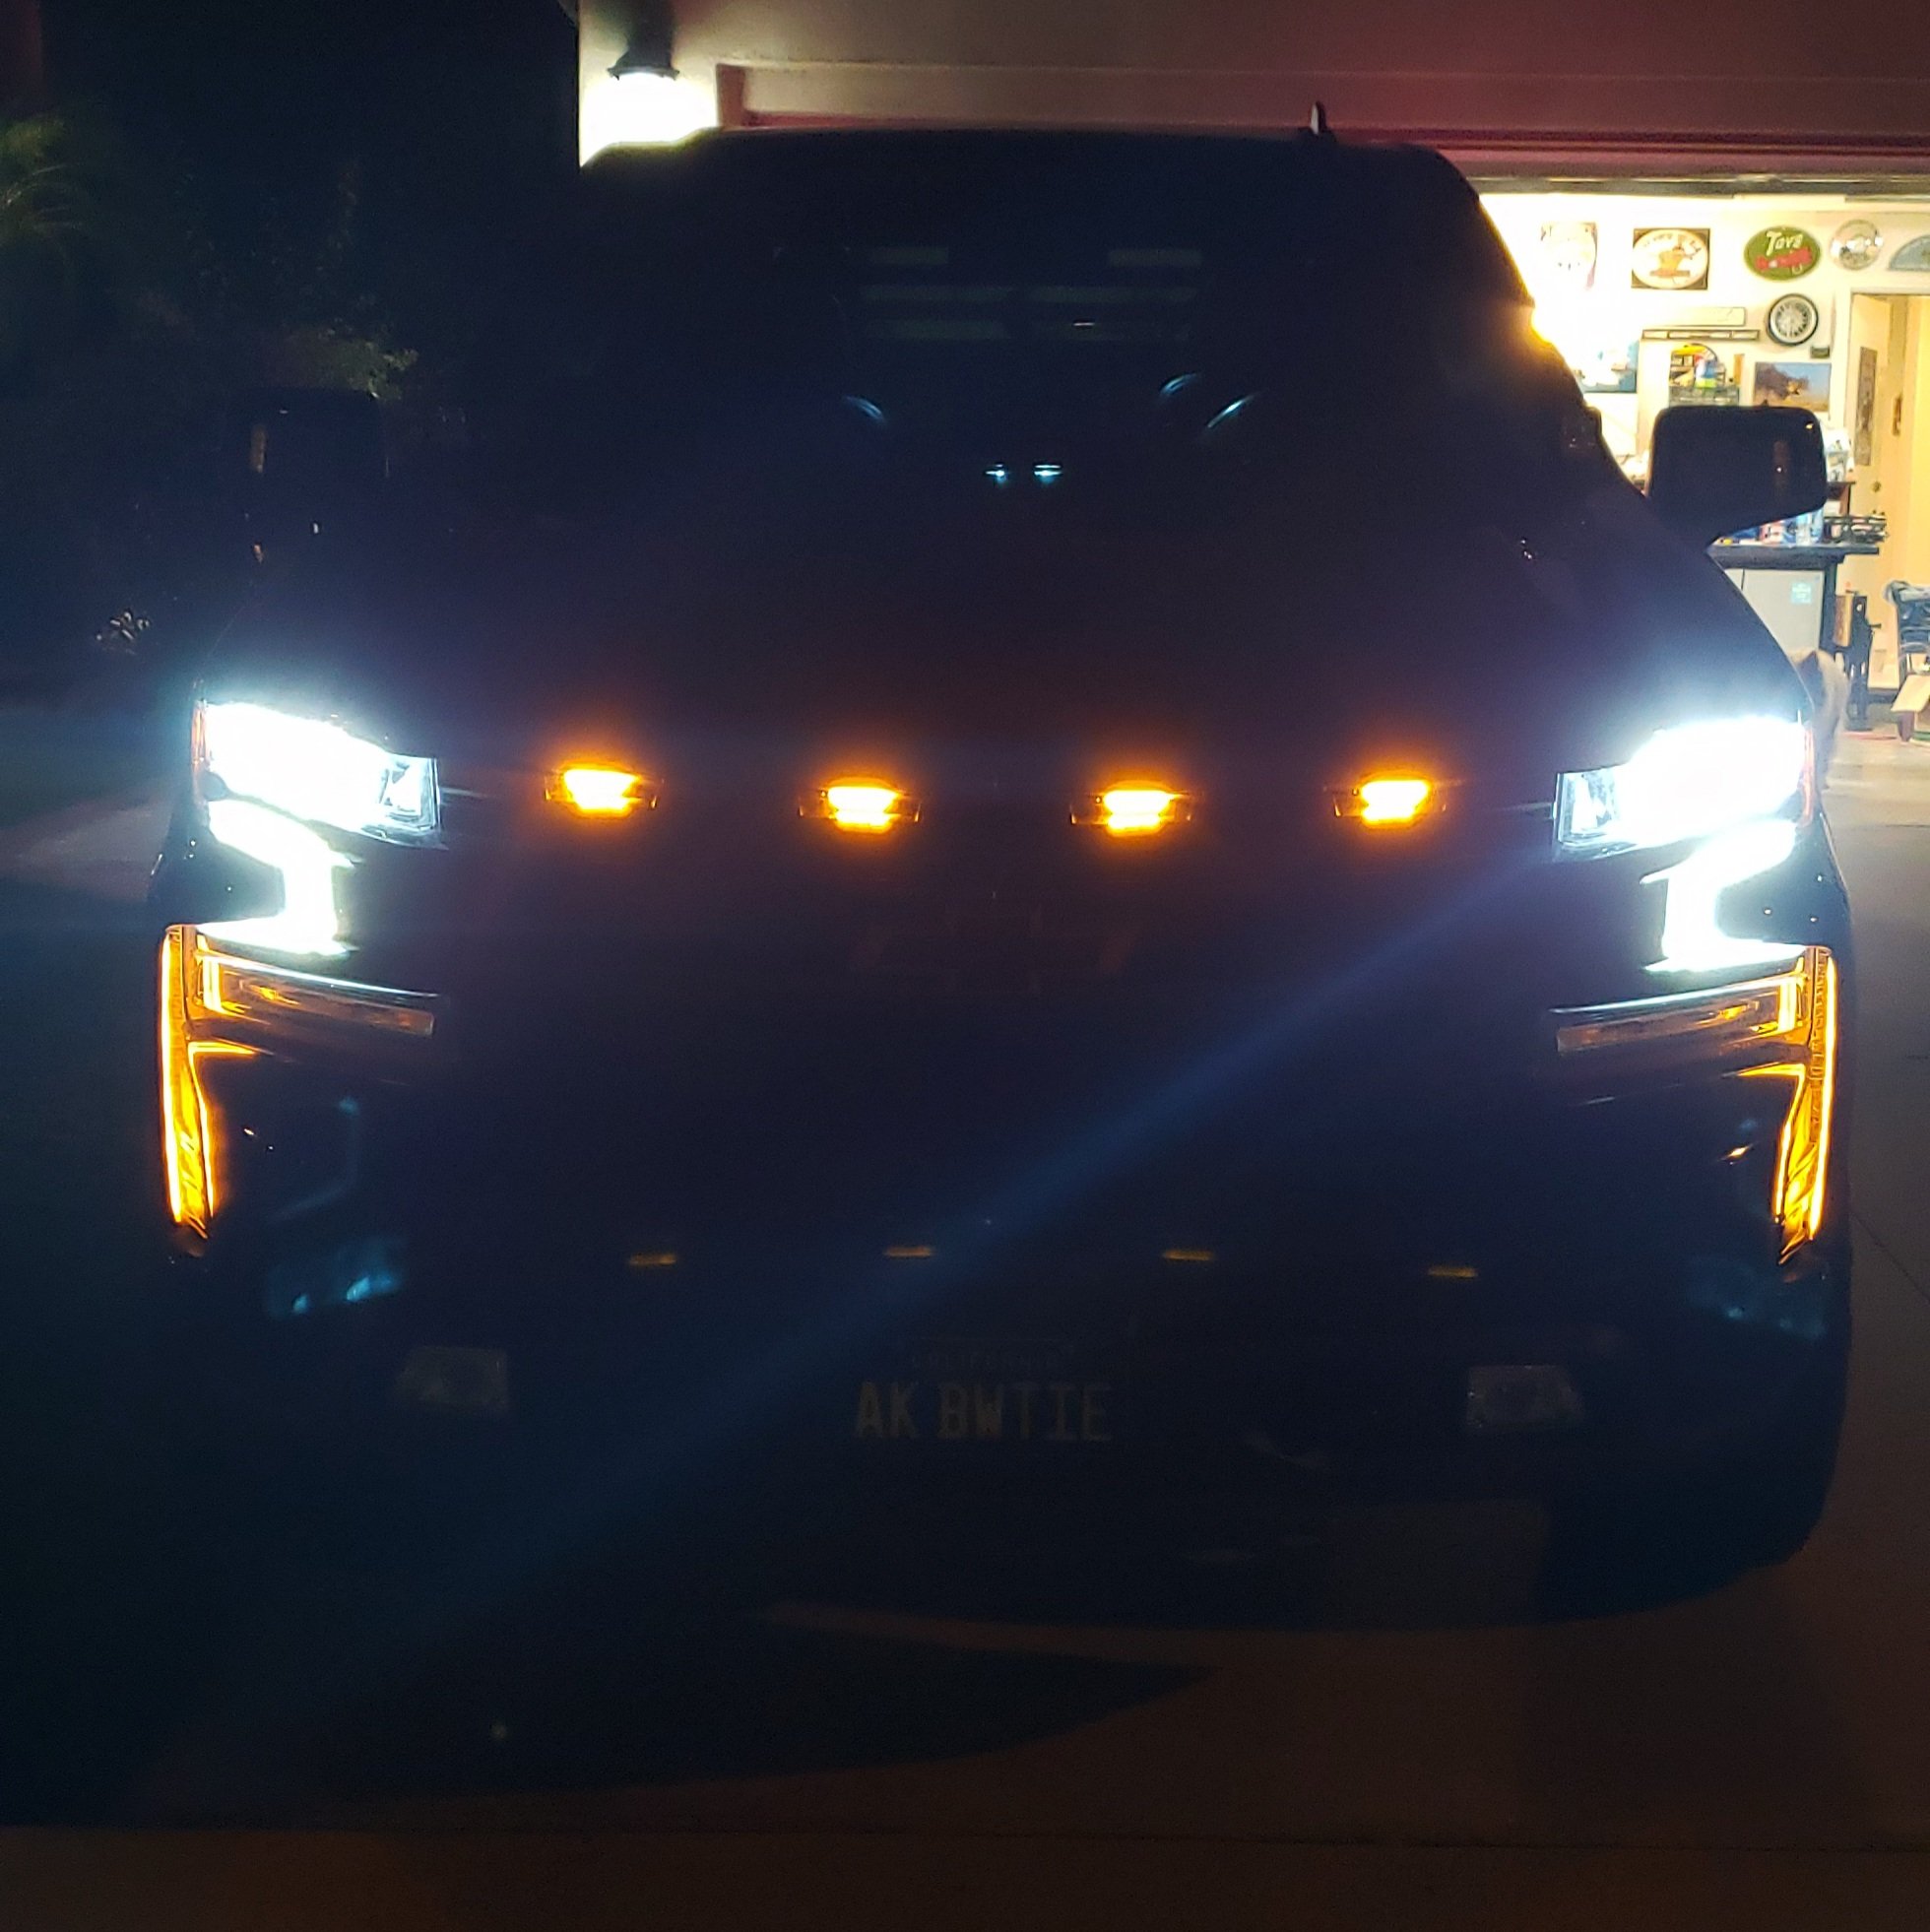
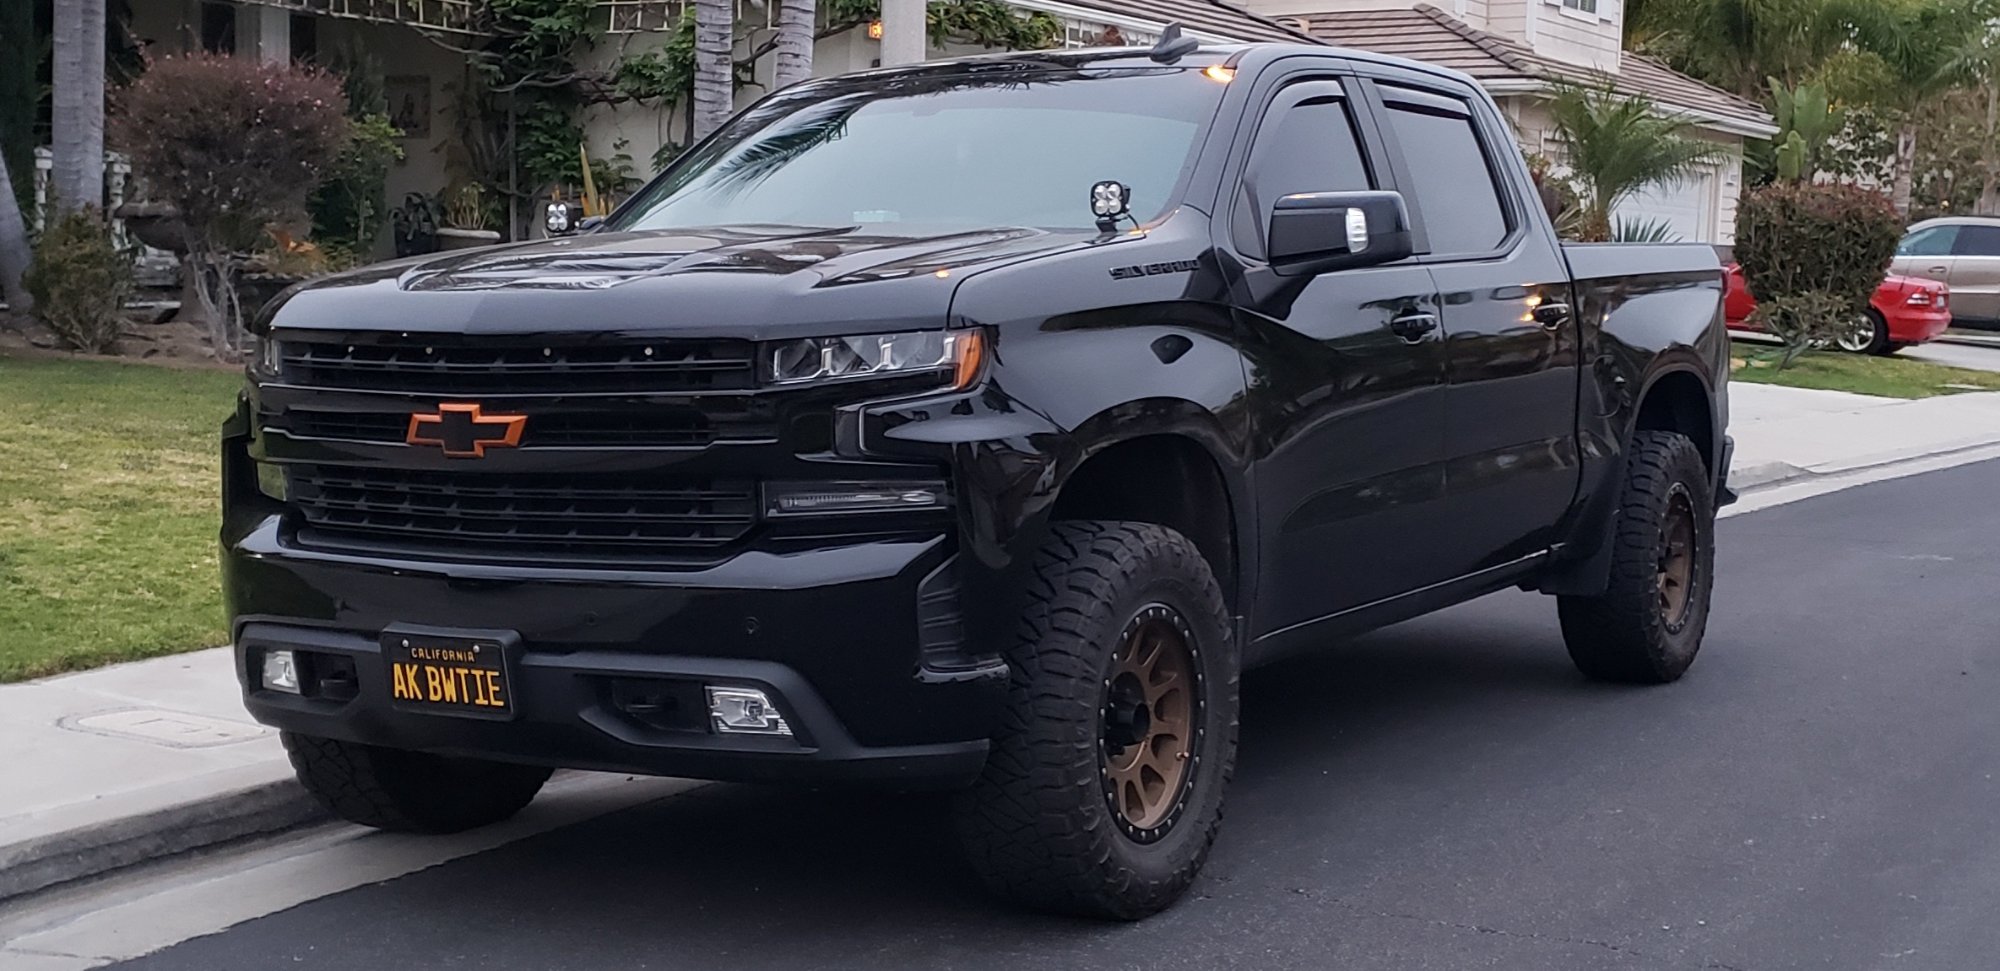
BTW I don't want to hear crap for parking in handicap spot as it is at my work and no one is handicap there and we have limited parking. Lol so we fill the spots and its a wider spot for my truck. Here is the link: https://www.amazon.com/dp/B07SHSZTW3/ref=cm_sw_r_cp_apa_glt_fabc_CAW0YRWKT7B0D2SP52YD It comes with 3, and while I normally like things in 3, I think it looks much better spanking across the grille more with 4.. now I have 2 more lights not sure if I should save in case 1 goes bad or if I should put them elsewhere.
-
What Have You Done With Your T1 Today ?????
Atelliott89 replied to Sierra Dan's topic in Modifications, Wheels & Tires
Thanks! I will find the link. Here's more pics.
-
What Have You Done With Your T1 Today ?????
Atelliott89 replied to Sierra Dan's topic in Modifications, Wheels & Tires
I am looking to upgrade my suspension soon. I was really wanting to go with either baja kits or dirt kings long travel but I think it would be best for me to save some money now, got a little one on the way. I have been looking at rough country. I was skeptical at first about their stage 3 suspension they offer but doing more research it sounds like they have been great for people and a very reasonable price.. I am curious if anyone else has installed this kit. Edit: I think this link takes you to the stage 1 but the highest options is the stage 3 which includes 2.5 coilovers with remote reservoir, aluminum forged ucas, and 2.5 rears with piggyback reservoirs. https://www.roughcountry.com/chevy-suspension-lift-kit-29531c.html?find=2019-chevy-silverado-1500-2wd-739943&sid=P2EsT9os2w -
What Have You Done With Your T1 Today ?????
Atelliott89 replied to Sierra Dan's topic in Modifications, Wheels & Tires
These are the ones. They run white and flow down amber with the turn signal. Only wish was that they were brighter. You see them great at night, not as well in the daytime. https://www.amazon.com/dp/B07M7JFNMQ/ref=cm_sw_r_cp_apa_glt_fabc_ANH7P3Z7S7FJMFVZRY38?_encoding=UTF8&psc=1 -
What Have You Done With Your T1 Today ?????
Atelliott89 replied to Sierra Dan's topic in Modifications, Wheels & Tires
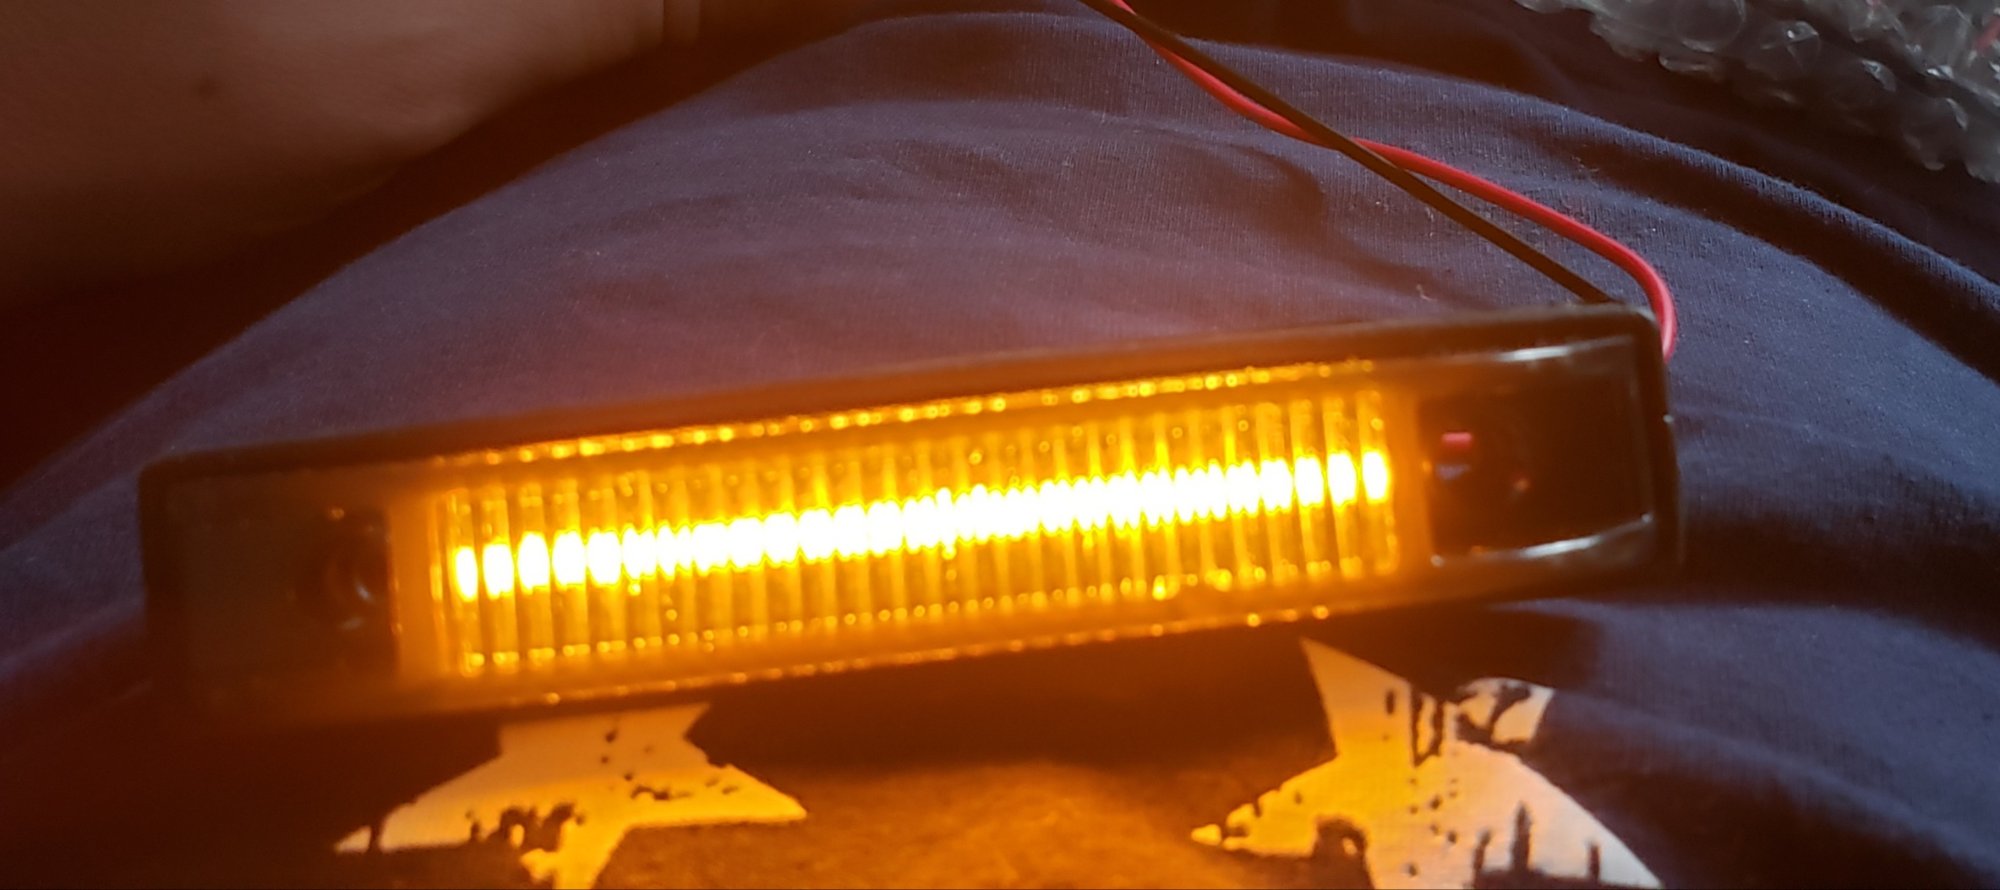
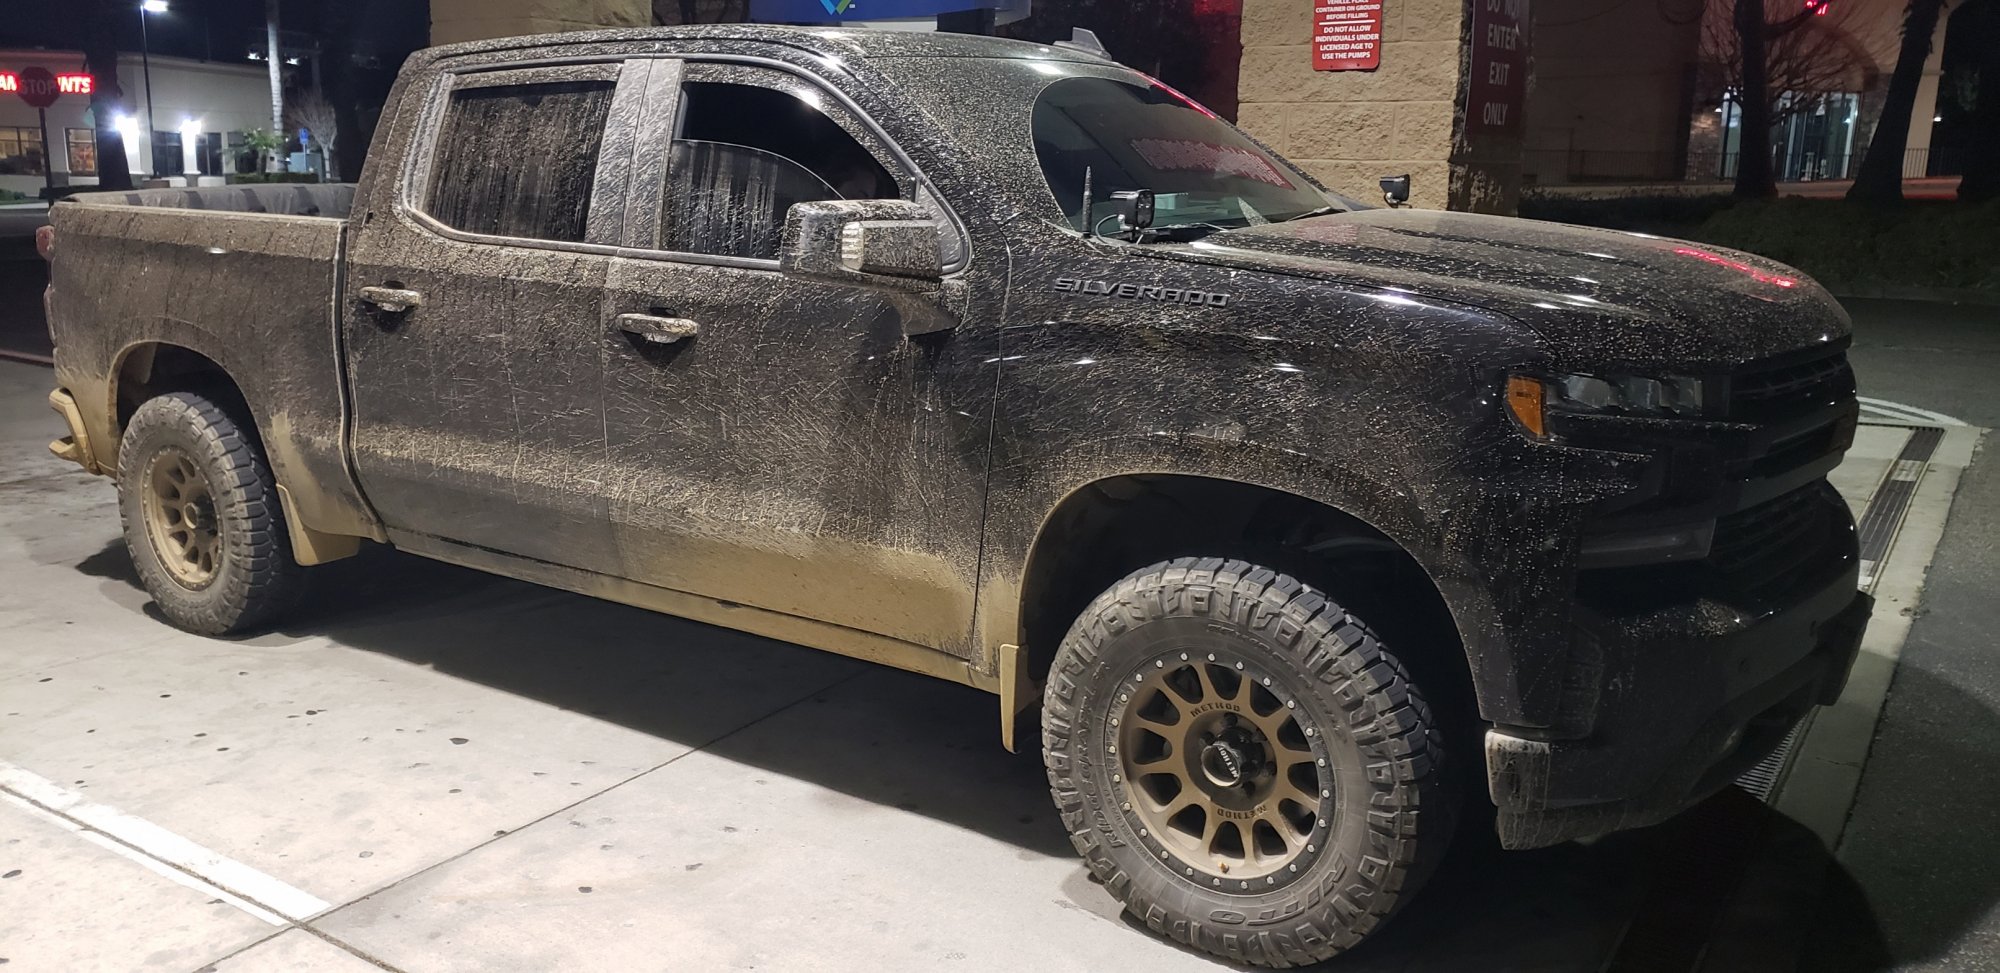
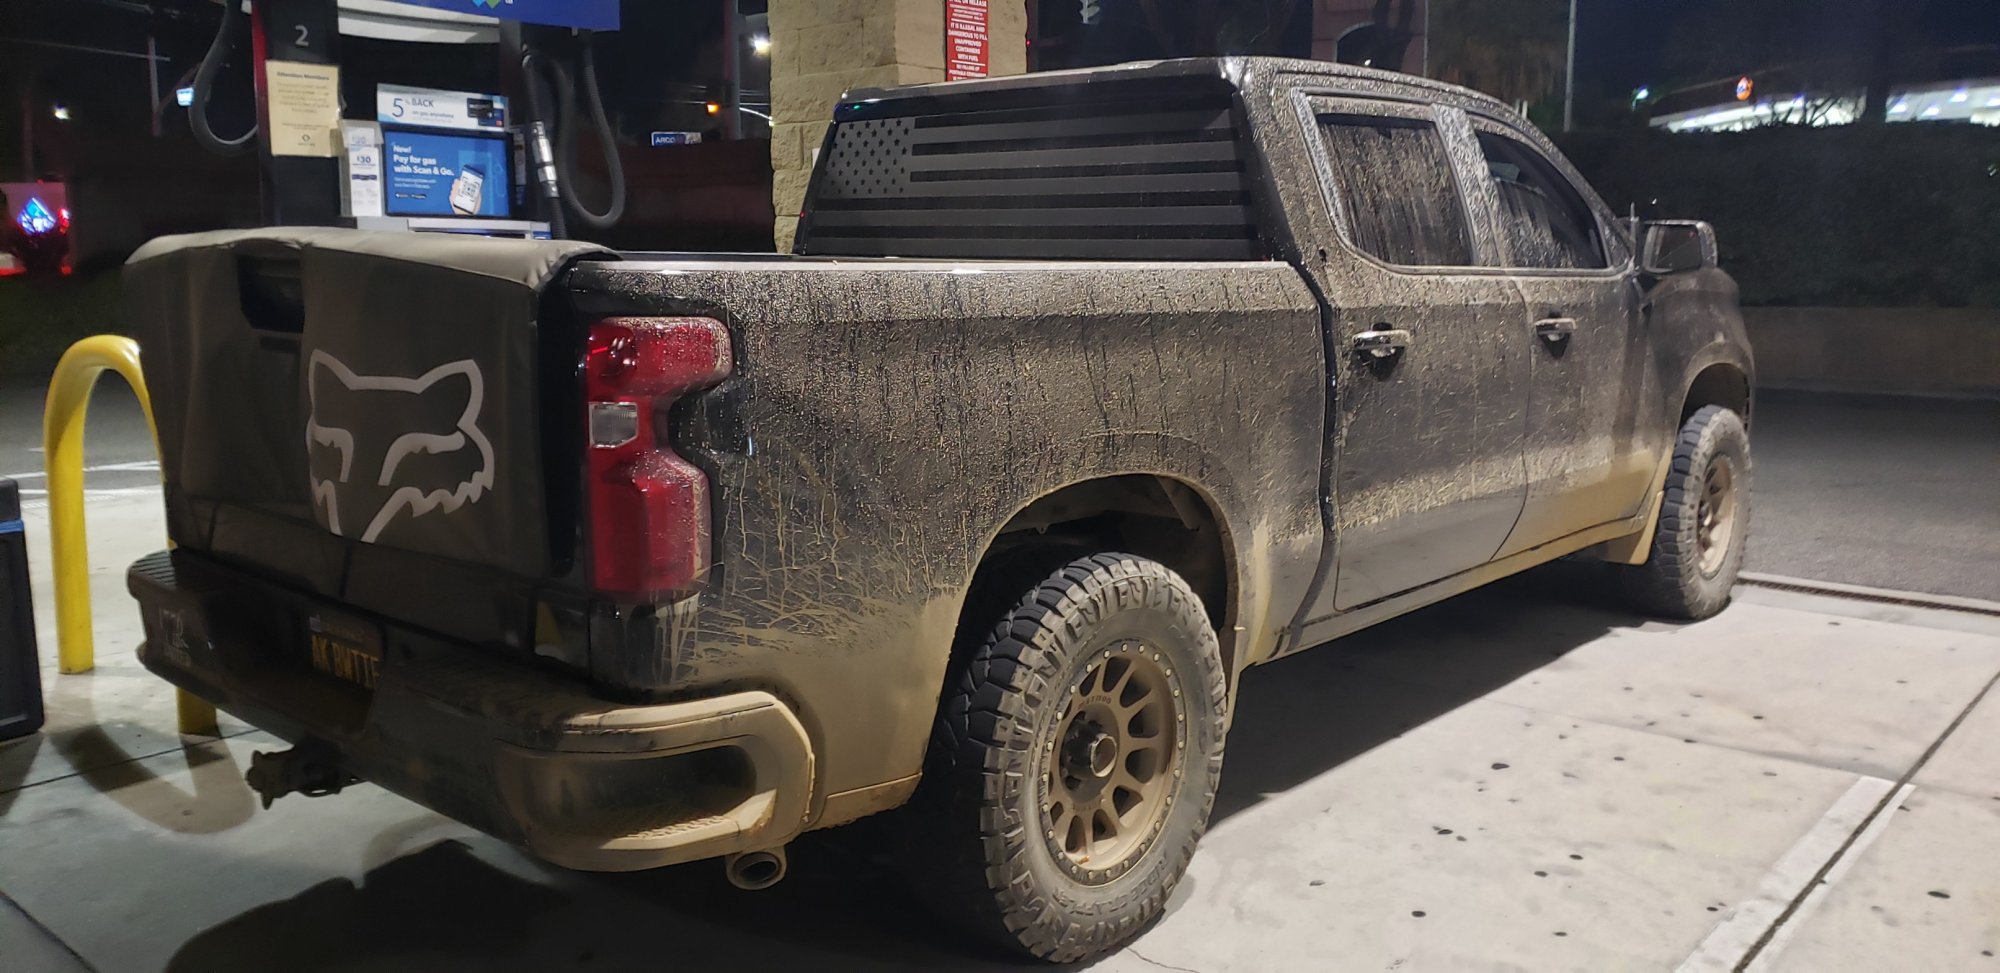
Replaced the round, amber (yellow) marker lights I had installed with these actually amber rectangular marker lights. I think it looks much better. Plus I added my own vinyl on the "Chevrolet" stamped tailgate.. Truck is super dirty from last trail I was on so it doesn't stand out as well. But getting my truck detailed next weekend.
-
What Have You Done With Your T1 Today ?????
Atelliott89 replied to Sierra Dan's topic in Modifications, Wheels & Tires
Congrats on your new truck! I have the same year and trim. The best tint you can go with is ceramic tint. It's much more efficient at blocking out heat. But it does cost a bit more. I got a great deal on mine though. Most places will charge around $600 to $800 for full ceramic. I got mine done from my usual guy for $400. Limo all around, limo strip on wind shield and the lightest film on the entire front wind shield to help with heat. For the bumper and or your entire truck, go with a PPF. It's similar to vinyl wrap but a thicker, more protective film that is clear. That will maintain your stock color. You can also go with a matte type that again is clear but adds a matte look. Hope this helps! -
What Have You Done With Your T1 Today ?????
Atelliott89 replied to Sierra Dan's topic in Modifications, Wheels & Tires
I got my bowtie off without messing with my grille at all. Just need some plastic pry pieces. -
What Have You Done With Your T1 Today ?????
Atelliott89 replied to Sierra Dan's topic in Modifications, Wheels & Tires
What is the part under? I can't find it lol -
What Have You Done With Your T1 Today ?????
Atelliott89 replied to Sierra Dan's topic in Modifications, Wheels & Tires
Awesome thanks! Same here so I will definitely check it out.. I have an idea for those other buttons too.. cover the logos with wrap possibly and see if I can wire them to aux lights or something else. -
What Have You Done With Your T1 Today ?????
Atelliott89 replied to Sierra Dan's topic in Modifications, Wheels & Tires
Pics and details please? -
What Have You Done With Your T1 Today ?????
Atelliott89 replied to Sierra Dan's topic in Modifications, Wheels & Tires
Just a few updates. rewrapped some interior pieces to make it look cleaner, and hit some nice trails with the wife. Can wait to do more mods.
-
What Have You Done With Your T1 Today ?????
Atelliott89 replied to Sierra Dan's topic in Modifications, Wheels & Tires
Yall are way too concerned with what majority has or doesn't have on the road. Lol Frankly I see a lot of stock silver and a lot black, lots of methods, and lots of fuels, etc.. etc.. idg a ****** what people have, I'm only concerned with what I think looks good on my vehicle. Personally, I like black rims typically and bronze when it works. and methods are great wheels and some fuel wheels.. I don't like stock, silver look. But again, that's my opinion and to each their own. You gotta like what you have on your truck. Forget what you see elsewhere. What looks best with your colors/ trim/ and any chrome or blackout. -
What Have You Done With Your T1 Today ?????
Atelliott89 replied to Sierra Dan's topic in Modifications, Wheels & Tires
Oh cool. Love watching the diesel Brothers. 4k is much more reasonable than 10k... stupid California... -
What Have You Done With Your T1 Today ?????
Atelliott89 replied to Sierra Dan's topic in Modifications, Wheels & Tires
Looks good! I've been wanting to do that for a long time.. thinking either a satin black or satin grey. I've been practicing on interior trim pieces so I can attempt the exterior myself but it will be quite a process.. did you do it yourself or have it done? Any tips? / or if you don't mind me asking how much did it run you? It seems like most places around me will cost 10k.. -
What Have You Done With Your T1 Today ?????
Atelliott89 replied to Sierra Dan's topic in Modifications, Wheels & Tires
Got more pics? Did you wrap your truck in a matte black? -
What Have You Done With Your T1 Today ?????
Atelliott89 replied to Sierra Dan's topic in Modifications, Wheels & Tires
Oh OK cool. Yeah my wife and I go down towards San Diego a bit too, my sister lives down there. -
What Have You Done With Your T1 Today ?????
Atelliott89 replied to Sierra Dan's topic in Modifications, Wheels & Tires
Yeah I am! That is about Silverado Canyon looking out towards laguna and Newport Beach. You in that area too? -
What Have You Done With Your T1 Today ?????
Atelliott89 replied to Sierra Dan's topic in Modifications, Wheels & Tires
The lights, brackets, and harness all came together from baja designs. I have seen some for sale before online somewhere. I've seen some by an aftermarket company that are really cool but they don't sell them.. they package vehicles for dealerships and they outfit them as outlander rigs. I want to try to fan some similar. I will see what I can come up with. -
What Have You Done With Your T1 Today ?????
Atelliott89 replied to Sierra Dan's topic in Modifications, Wheels & Tires
Plus I found a huge mud puddle/ lake to go through.. deeper than I thought lol
-
What Have You Done With Your T1 Today ?????
Atelliott89 replied to Sierra Dan's topic in Modifications, Wheels & Tires
Just got back tonight actually from a nice 25ish mile trail today. Got a nice panorama shot.. idk if it will load right..
-
What Have You Done With Your T1 Today ?????
Atelliott89 replied to Sierra Dan's topic in Modifications, Wheels & Tires
I will try to find the link soon. I bought them on ebay for just a couple bucks. I really like them, however, they are a bit more yellow than amber.. I'm going to try to tint them slightly, possibly with an amber tiny.. don't know if it will work. Mounting was simple, drilled a hole through the four brackets where the lights are located and wired to my drl. -
What Have You Done With Your T1 Today ?????
Atelliott89 replied to Sierra Dan's topic in Modifications, Wheels & Tires
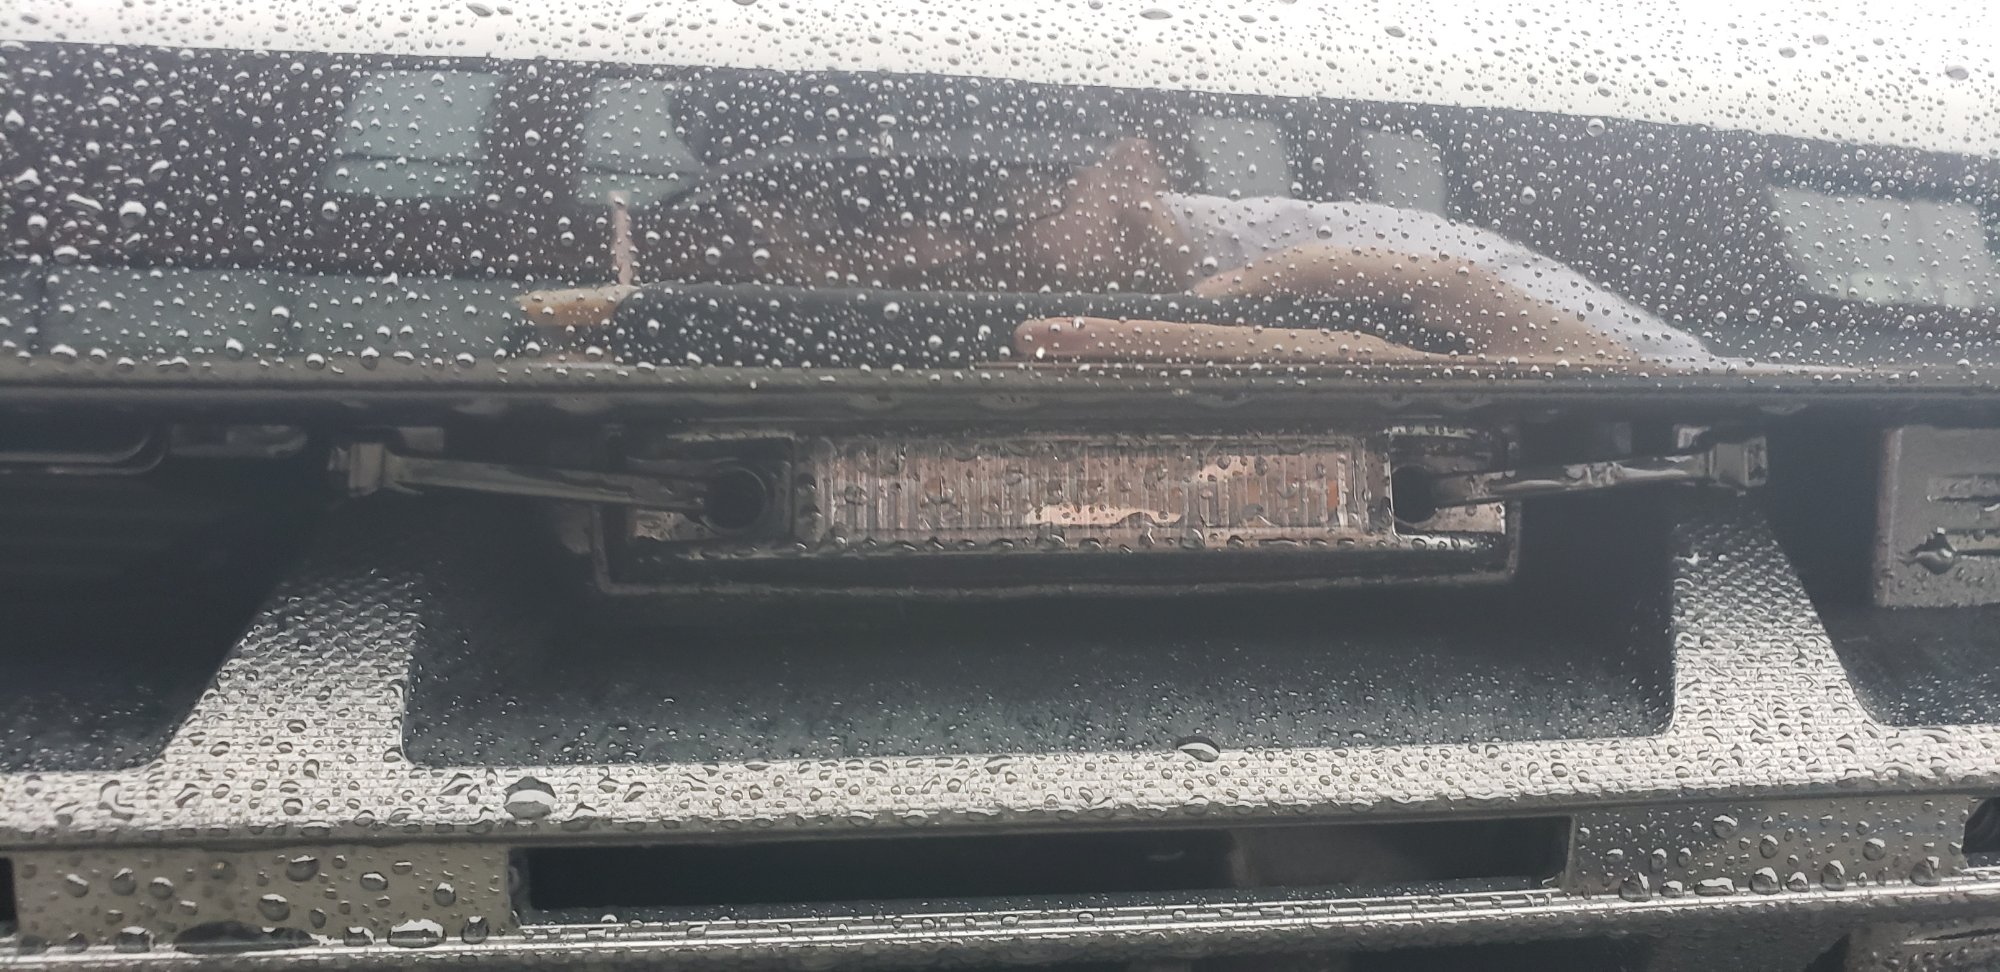
I'll try to post pics tomorrow but the brackets attach on the same bolts as the hood. Sandwiched between the hood and the hoods brackets. Edit: I have this photo showing it from the outside for now.
-
What Have You Done With Your T1 Today ?????
Atelliott89 replied to Sierra Dan's topic in Modifications, Wheels & Tires
Yeah glad you guys like it. Thanks! Just pay attention to the direction and side you use them on. And yes I used vinyl wrap on it.. I've need to redo it though. It's tough to get those inside corners really good. -
What Have You Done With Your T1 Today ?????
Atelliott89 replied to Sierra Dan's topic in Modifications, Wheels & Tires
They are only a handful of pages back. But here's a link to a video too.


-
Forum Statistics
250.5k
Total Topics2.7m
Total Posts -
Member Statistics
342,881
Total Members8,960
Most Online
-
Who's Online 12 Members, 1 Anonymous, 901 Guests (See full list)