Search the Community
Showing results for tags 'repair'.
Found 8 results
-
 Enjoy! Here's a copy of the 2007-2009 GM/GMC factory service manual for trucks. It covers trouble shooting and advice on what and how to repair/rebuild everything with torque specs. 4.3L engine to 6.6L trucks with everything form bumper to bumper... https://www.dropbox.com/s/rflvemxjpqfc4h4/Gmc_Sierra_Service_Manual_Repair_Manual_Fsm_2007-2009_Download.zip?dl=0
 -
 2019 Silverado WT double cab, 4 wheel drive. 10,000 miles. well, what a crappy week. Got rear ended by a vehicle while I was sitting at a red light. 35-40mph impact to my rear hitch and bumper. Totally not my fault, the entire wreck was captured on my dash cam, and all costs listed below are being paid by the other person’s insurance company. And yes, I could see the guy typing on his cell phone with my rear dashcam moments before he slammed into me at full speed. Me and my 10-year-old daughter were in the truck. And yes, we’re both medically fine so I got two estimates today from two different auto body repair companies. Damages… (wait for it) Tailgate has to be replaced, right and left rear bed quarter panels have to be repaired, new bumper, new hitch, and the worst part… when the hitch went forward it sheared the holes in the frame rails where it attaches with bolts to the frame. Basically the 3/4” holes in the frame rail that the hitch bolts go through, became 3 inch holes after being stretched and torn from the impact. Both auto body shops said the entire frame has to be replaced with another OEM frame. They said that they normally could put it on a frame straightener and straighten the frame out, but the shearing in the middle could not be repaired to a point that they could guarantee that the tow rating would remain the same as the engineers at GM designed this frame for. Also, I asked about sectional frame repair. They both told me that GM does not authorize sectional frame repair on these trucks Therefore, a complete new frame is needed. The estimate average between the two body shops was around $12,000. Both shops said it would probably be in the shop for at least two months. The cost of two months rental for a full-size equivalent pick up truck is $99 a day. About $6000 bucks total. (could be more if not finished on time.) diminished value… Online calculators give a total diminished value estimate around $3000 due to the loss of trade-in value because of the now marred Carfax wreck history. (i’ll have to probably beg, plead, and pray to Jesus, to get that money out of the car insurance company. I’ve done it before in past wrecks, but I’ve also been told to, “kick rocks“ before.) and yes before anyone says it, I know I could “lawyer up” to get that money. But I really want to try to do this the right way first. There’s too much unknown of what will come next. Not saying I’m against lawyering up, but I’d really rather not. basically it’s a $21,000 minimum cost to the guy’s insurance company to repair this (when you add up everything mentioned above). keep in mind, my truck only has a actual wholesale value of around $28-$30,000. is it totaled??? Per my state law, if damages exceed 75% of wholesale value, the vehicle is a total loss. However, I don’t know if they are calculating the rental fees, and the diminished value cost in that math. Maybe it’s just the actual body shop work/parts cost. I’m not sure. I would imagine that they would include The total cost to the insurance company, since the Insurance company would not have to pay this if they just totaled the vehicle outright. so I find out in the next couple days what the insurance company is going to decide to do. I really hope they total it and I’ll tell you why… We all know that this truck was built in the GM assembly plant, to exact torque specs, clearances, etc. And a lot of that work was done by robots, calibrated tools, etc. I am sure “Billy Bob“ the autobody mechanic is not going to be as precise. (No offense to Billy Bob) If the vehicle is not totaled, and it is completely disassembled and reassembled by auto body mechanics, I will be selling it the day I get it back repaired. I refuse to drive around a “science experiment“. I feel like it will just be problem after problem from that point on. Forgive me if I’m being dramatic, but I really don’t even wanna take the chance. And God only knows how the hell that would affect my original factory warranty. I can see Chevrolet refusing to do anything with it from that point on. I’ll basically have to be going back to the body shop for any further problems. Then the body shop will blame Chevrolet, and vice versa. What a nightmare. and forgive me for calling the autobody mechanic “Billy Bob“. I have a lot of respect for these guys, and it’s truly an art that takes absolute talent to do. But I think we all know that I’m not wrong in assuming that this truck will not be built back to the same perfection that it came out of the GM plant with. I appreciate any thoughts or insights anyone on here might have. And just a reminder, any solid impact to your hitch will absolutely destroy your entire frame. The guy who hit me was only going about 35 to 40 mph. not sure what’s gonna happen from this point on, but I will be sure to update this post in the next few days If you are a religious type, any prayers are appreciated.
 -
 I'm going to need to have the torque converter on my 2013 Silverado 2500 6.0 replaced & would like to have a price range in mind of what it should cost all said & done when I go to the shop so I don't get ripped off. I know rates & such vary depending on location (I'm in NJ) but I'm just looking for a round about price for this specific truck, maybe from someone who's been there & done that.. Any help would be appreciated. Thanks!
 -
 Spent the weekend at a buddy's ranch, and the brake from a dirt bike dented my 2019 Silverado tailgate. I don't want to have to replace the entire tailgate, and I'm very unfamiliar with all the work that can be done now, so I'm wondering if paintless dent repair could fix this? Or if y'all think just the metal piece can be replaced without the entire tailgate needing to be swapped out? Thanks in advance!
 -
Hi , I have a 2015 Chevrolet Silverado High Country and the blend door actuator the one behind the passenger side air vent in the dash has failed I'm getting cold air on the passenger side and hot air on the driver side when the AC is on anybody know how to take the dash apart to fix that?
-
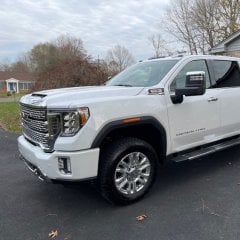
Proud owner of a new 2021 GMC 2500HD that needs some assistance with a problem concerning my driver's side mirror. That problem, was caused my me: The first time I backed the truck into my garage at night, I clipped the driver's mirror on the opening. I have 10' wide doors, so there is no excuse, so give ahead and give me the business! Hopefully you won't. Took a few photos and shared them with the dealer's body shop and I was told I have to replace the mirror at $1800. That parts were available, but nothing that would help me. Let me describe the damage: Looking at the front of the mirror (the side towards you with the mirrors), the lower fixed convex mirror cracked and fell off. The main mirror works fine. It can be remotely controlled and tilts downward when reversing, as I had it setup in settings. The mirror folds and extends with no problems. All the electronics work including the blind spot indicator, front LED white lights, the rear LED white lights and the amber markers. There is not a mark on the mirror housing. What cracked was the black plastic piece that holds the mirrors. The chrome surround housing that the black plastic snaps in to is untouched. The more I look at this mirror, the more I think I can fix it with parts from an identical mirror from a salvage yard. I can post a few photos here if you wish. I'd love to see an exploded parts view from GM, but I don't have that access. This truck has all the mirrors for surround vision, towing and whatever else you can think. If anyone reading this is a GM tech or body shop tech and might be able to give me a hand, I would really appreciate it. Thanks much, Mike
-
From the album: random
My paint job is horrifying. -
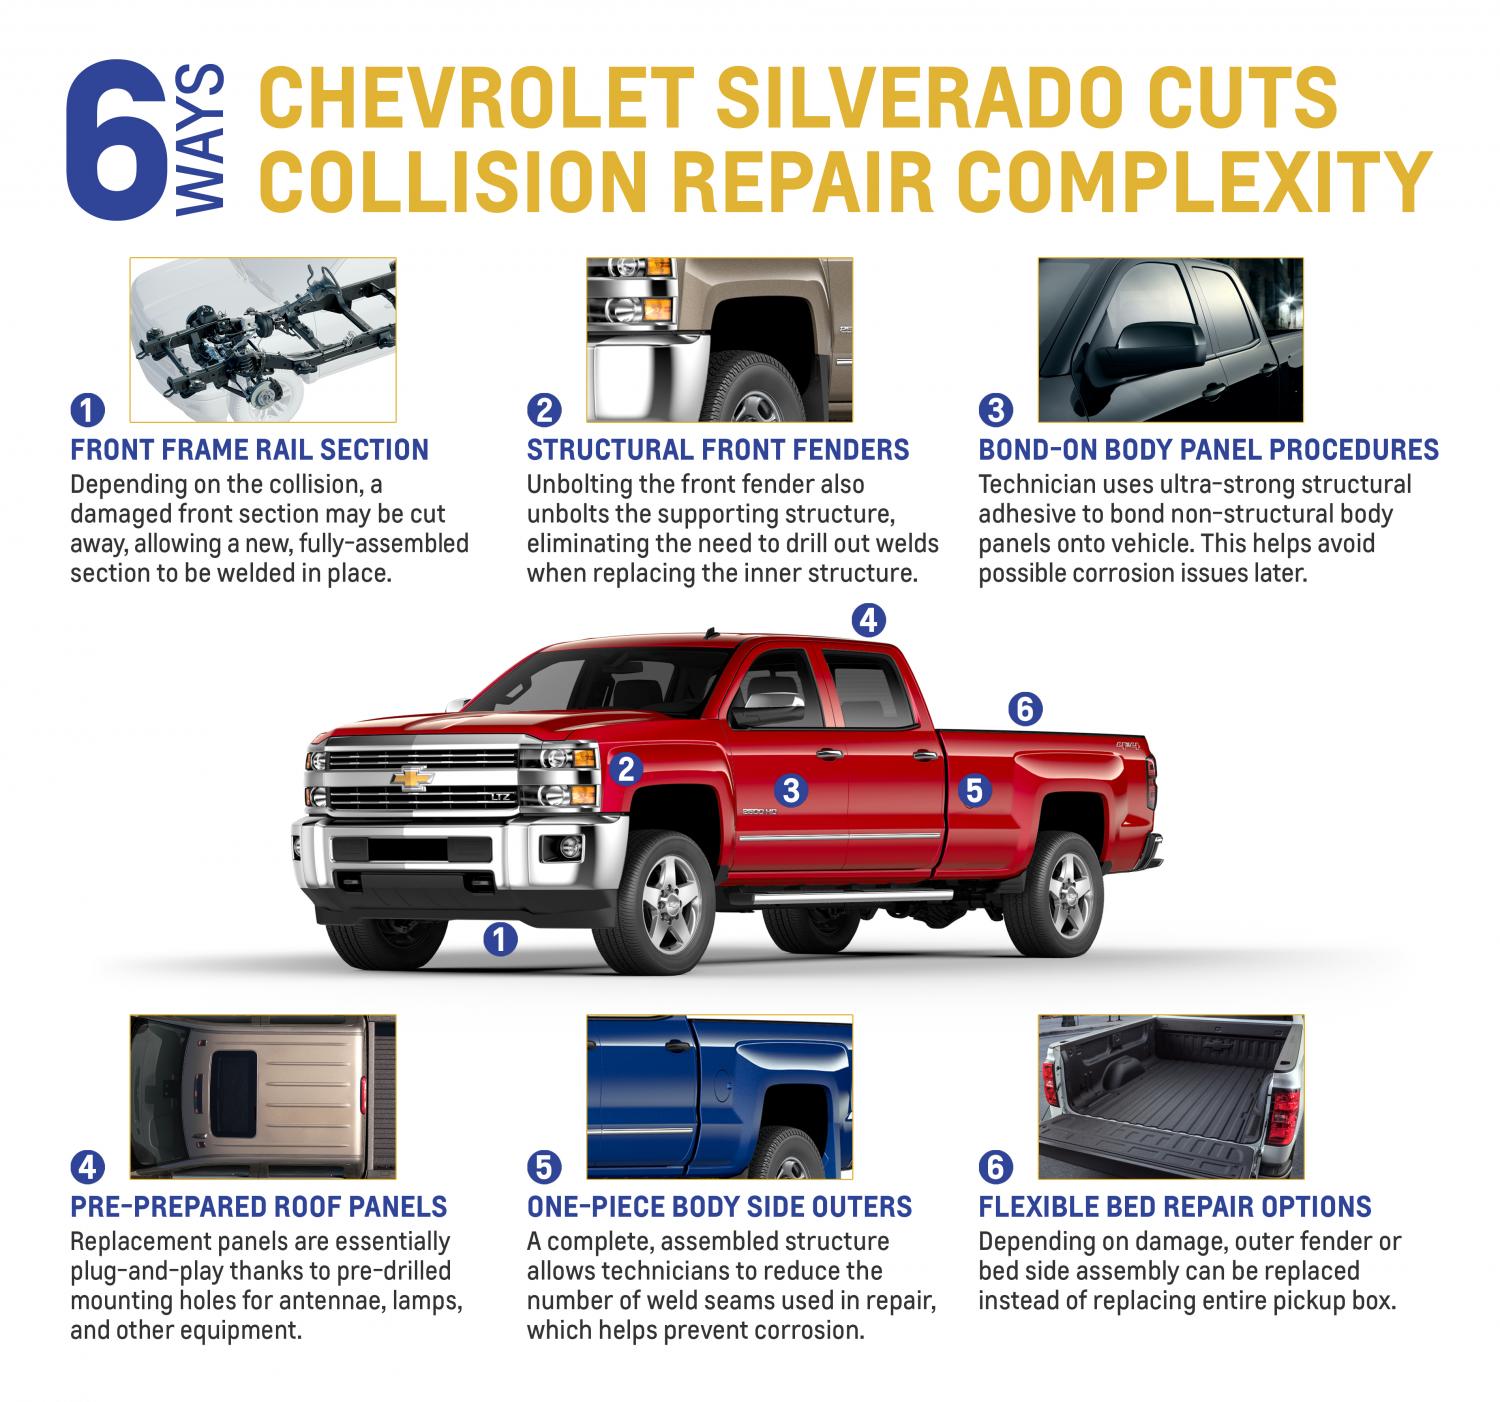 Today Chevrolet released an info-graphic that points out six of the ways that GM engineers designed the Silverado to be more cost effective to repair. Yes, this announcement is timed perfectly to scare Ford F-150 shoppers into thinking aluminum repairs will cost them time and money, but the truth is the Ford F-150 and many other commonplace vehicles have used aluminum body panels for a decade or more. Here are the six things Chevy thinks makes the Silverado easier to repair than competitors' trucks: Front Frame Rail Section Chevy says the leading section of its from frame rails may be removed or repaired making it easier to deal with frame damage. Structural Front Fenders Chevy designed the front fenders to unbolt in one larger piece, rather than an outer skin and inner supporting piece. This makes font end damage faster and simpler to work on. Bond-On Body Panel Procedures Rather than weld, some outer panels can be repaired using construction adhesives. Pre-prepared roof panels Chevy pre-drills holes for studs and accessories on its repair roof panels saving repair time. One-Piece Body Side Outers Chevy said in its announcement "If damage occurs to the outer panels of the cab, technicians can order a complete body side outer, shipped as a single, complete assembly, allowing technicians to cut out and replace only the damaged area instead of the entire assembly." Flexible Bed Repair Options Chevy designed its pickup beds so that owners can repair just the bed or bed box sides. Not all repairs require a full bed box replacement.