

BlkSS
-
Posts
232 -
Joined
-
Last visited
-
Days Won
2
2 Followers
Recent Profile Visitors
4,762 profile views


BlkSS's Achievements
")
Enthusiast (4/11)
97
Reputation
-
2015 Silverado with HUD retrofit/upgrade.
BlkSS replied to Viktorrocks15's topic in 2014-2018 Silverado 1500 & Sierra 1500
@Todd1982, if you can duplicate this again, I'd definitely be interested in buying one as I've had the HUD parts for a few years now and still haven't got around to installing them. This would definitely give me some motivation. -
The bracket just secures the console to the dash to help prevent any movement/rattle in that area. It is not necessarily structurally important.
-
I don't know if this will help you as this is for a 2016 and not the 2017+. RSE 1.pdf RSE 2.pdf
- 106 replies
-
- 1
-

-
- rse
- rear seat entertainment
- (and 9 more)
-
RSE = Rear Sear Entertainment
-
Contact Phil through his website: https://harnessdr.com/
- 1,234 replies
-
- 1
-
-
- jump seat
- sierra center console upgrade
- (and 8 more)
-
2015 Silverado with HUD retrofit/upgrade.
BlkSS replied to Viktorrocks15's topic in 2014-2018 Silverado 1500 & Sierra 1500
@cva617680 since this is a factory option, this shouldn't be too difficult to add depending on how mechanically inclined your are and how much money you're willing to spend. I assume all you should need is the HUD unit, up-level cluster (if you don't already have it), HUD switch, HUD dash cover/hood, instrument cluster bezel, wiring and programming. I don't know if @pgamboa has made a harness for this for the T1s like he did for the K2s but if he hasn't, purchase the dash harness for a pickup that has HUD and at least the same options that you currently have. WAMS offers programming for the up-level instrument cluster so that shouldn't be difficult. Reach out to Phil for the potential harness at: https://harnessdr.com/ and Chris for the programming at: https://www.whiteautoandmedia.com/ Source the needed parts using a VIN from a pickup that already has HUD and go from there. -
@pgamboa recently purchased a T1 and I'm sure he's in the process of developing a harness to streamline this (if he hasn't already) as he did all of this for the K2s. Reach out to him via his website. https://harnessdr.com/ Regarding the factory sub, unlike the 900 series trucks with the Bose amp in the console, the T1s have the Bose amp on the rear wall like the K2s. Since that is the case, I assume the sub connector is part of the body harness that runs all under the carpet. If that is the case, to add the factory sub, you'd just have the add 2 wires from the connector at the amp and run it under the seal plates/carpet/passenger seat to the console, just like on the K2s with you sourcing the opposite sub connector, the corresponding terminals for both connectors and obviously the wiring. I don't know if they made different amps though, i.e. one with a sub out put and another without. If they did make different amps in that aspect, then you'd need a different amp as well. IMO, if you're going to go through all that work and depending on your end goal(s), I'd recommend adding an aftermarket sub as it will sound and perform better than the OEM sub any day. Most parts guys aren't smart enough to remove filters to find parts. If you gave them your VIN, they won't find it without removing the filters. Just as @Chris Stierman mentioned above, as long as you don't have the floor 4wd selector, you should be able to get one unless they are still dealing with backorder issues.
-
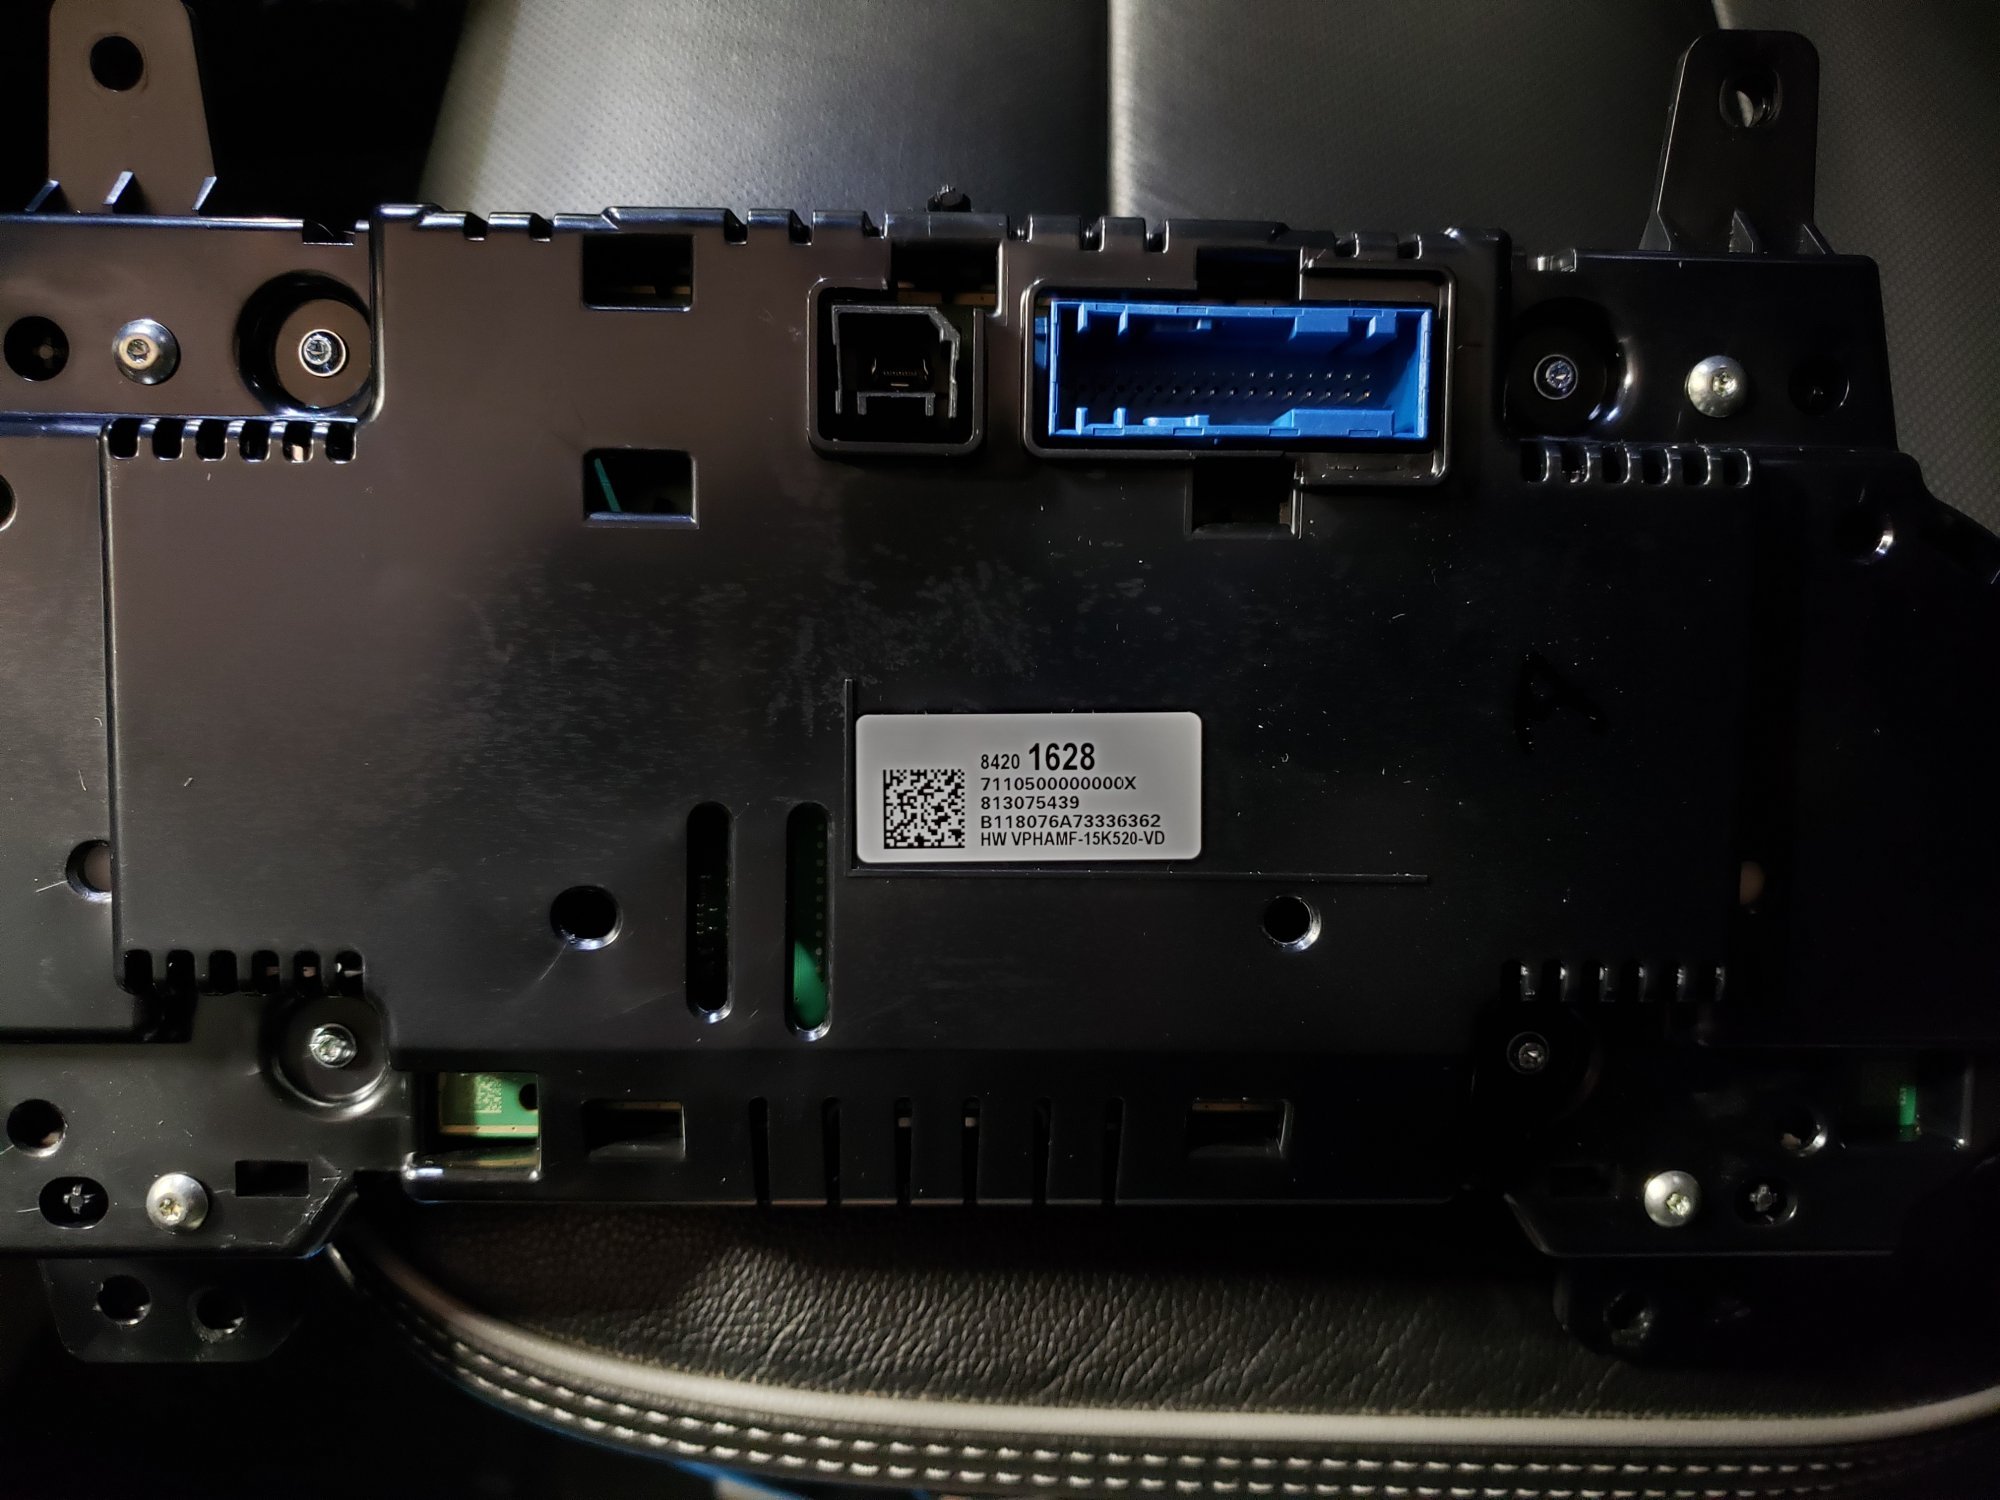
@chevyzr1 here's my cluster. As I previously mentioned, when I have a chance, I'll try to wire in Phil's harness and see if it all works before I go any further.

-
@chevyzr1, thanks for posting. I was hoping to have a chance to pull my cluster sometime this weekend. I'll post my findings once I get it out.
-
@cubangt sent you a PM.
-
You got me thinking about the HUD now. I have a diesel and had Chris program my UHS cluster for HUD about 3 1/2 years ago and I am 99% sure my cluster had the open/unused port on the back for the HUD. I guess I need to double check and if so, wire in Phil's harness I bought and just plug it in to see if it works before I go cutting anything. Thanks.
-
When removing dashes, I pull the steering column so it's out of the way and then you also don't have to worry about getting the the wheel 1 spline off on reinstallation. First, disconnect the battery(ies). Remove the driver's knee bolster (2 torx, pull to remove and then remove the hood release handle). Remove the lower metal bracket that bolts under the steering column and behind the bolster (4 bolts if I recall correctly). Take the covers off of the column directly behind the steering wheel (there may be a screw/torx on the bottom cover to remove to get the covers to pop off as I don't remember 100%). The top cover locks into the bottom cover "sandwiching" the column. You do this in order to gain full access to the wiring harness/connectors that are plugged in on the column as well as gaining access to remove the interlock cable (put key in the ignition and turn to release the lock to remove the cable). Once all the wiring is disconnected, then disconnect the column from the intermediate shaft which is connected via 1 bolt near the fire wall. Once the bolt is removed and the column is disconnected (push up on on the shaft toward the steering wheel to remove as the column will "collapse" up) from the intermediate shaft, don't rotate the steering wheel or you'll then be buying a new clock-spring. There are then 2 bolts and 2 nuts that hold the steering column up to the dash support structure. Once those are removed, it should come right out. If I forgot to mention anything, I apologize but that should be the majority of the column removal. During reinstallation, make sure you get the column shaft pulled completely down on the intermediate shaft and the bolt reinstalled properly and tight where it is holding both shafts together completely. Regarding any rattles/noises. I haven't with mine nor have I had any comebacks regarding something like that and neither should you as long as you put all the screws back in and the metal expansion clips are still on the trim pieces. If you've haven't had anything apart, some of the trim pieces will be EXTREMELY tight and will require a good pull to remove. Make sure you have plastic trim removal tools to assist with those trim pieces as well as to prevent damaging any of the trim/dash. Once again, BAG AN LABEL ALL SCREWS you remove, doing so in parts/sections, i.e. cluster, glove boxes, infotainment screen, etc. as this will help you greatly on the reinstallation saving you time/sanity and helping prevent any noises. Again, on all the trim pieces that snap in, make sure the metal expansion clips come out. If they don't, immediately carefully pry them out with a pocket screwdriver/pick and put them back on the trim piece(s). During removal, be patient and organized and if something seems to be caught, make sure there isn't a hidden screw. During reinstallation, if its fighting you and doesn't want to "go", don't force it or you'll break something. Take a breath/walk away for a moment. It really isn't a bad/hard job at all, just be patient and organized. You may be surprised how easy it is after everything is complete. If you have questions, let me know and I'll try to help as much as possible as long as my memory is cooperating. If you don't get to it soon and if my work allows later this year (spring/summer), I'll be pulling mine again to work on the HUD retrofit, again IF WORK ALLOWS as I've been sitting on all the HUD parts for about 2 years now so my memory should be better by then. Good luck, enjoy and don't get discouraged. Once complete, share the pics.
-
Good to know that there are in fact differences. Don't be discouraged at all as the dash comes out relatively easy. I recommend bagging the screws you remove while labeling where they came from to simplify the reinstallation. That's what I've been doing for years and has eliminated having left over screws. Also, once you get the dash out, you can start laying the new harness in while disconnecting the old harness which helps you get the new harness in the proper location. Even if you don't do it that, when you lay out the new harnesses, you can see where things need to be routed as certain parts of the harness are obvious on where it needs to go. Once again, don't be discouraged and just try to be organized and you shouldn't have any problem.
-
@Michael Sheridan Contact Phil @pgamboa from his website, https://harnessdr.com/
- 1,234 replies
-
- 1
-
-
- jump seat
- sierra center console upgrade
- (and 8 more)
-
To ensure all the ports are active, I can't say 100% in your case as I don't have access to schematics anymore to verify this but I would bet that you need it. When I did the swap, the new dash, console and roof harness all had more wires/circuits, especially at the large main connector where the console connects to the dash due to the additional inputs. There was also an additional USB cable due to the rear USB. Maybe GM cut back on all the different harnesses they used but I know in my case, I needed all new harnesses (or make/add the additional circuits) in order for everything to work 100% OEM. If I recall correctly, the dash harness also had an extra USB type cable where it "T" for the Blu-ray drive in order to send the video signal to the dash screen and overhead screen but I could be wrong. You may reach out to others to see if they have better input like @pgamboa.
-
Forum Statistics
250.4k
Total Topics2.7m
Total Posts -
Member Statistics
342,811
Total Members8,960
Most Online
-
Who's Online 5 Members, 0 Anonymous, 622 Guests (See full list)