

bc-chris
-
Posts
588 -
Joined
-
Last visited
-
Days Won
11
Content Type
Profiles
Forums
Gallery
Events
Articles
RPO
Store
Blogs
Everything posted by bc-chris
-

What have you done to your K2 today?
bc-chris replied to block8head's topic in Modifications & Accessories
had some time over the last few evenings to throw some vinyl over the silver trim pieces in the truck i still have to do the steering wheel (uugghhh.... those two pieces are such a pain to get off!) but that's it. i think the vinyl ties in really nice with the dash gauges and the interior lights if anyone is considering doing this, an absolute MUST is rapid tac - it works sooooo well allowing you to move the vinyl around: rapid tac
-
had some time over the last few evenings to throw some vinyl over the silver trim pieces in the truck i still have to do the steering wheel (uugghhh.... those two pieces are such a pain to get off!) but that's it. i think the vinyl ties in really nice with the dash gauges and the interior lights! oh - if anyone is considering doing this, an absolute MUST is rapid tac - it works sooooo well allowing you to move the vinyl around: rapid tac
-
What have you done to your K2 today?
bc-chris replied to block8head's topic in Modifications & Accessories
are you referring to the lower valance that attaches to the bottom of the bumper? i used tape for a line and then my multi-tool...
-
What have you done to your K2 today?
bc-chris replied to block8head's topic in Modifications & Accessories
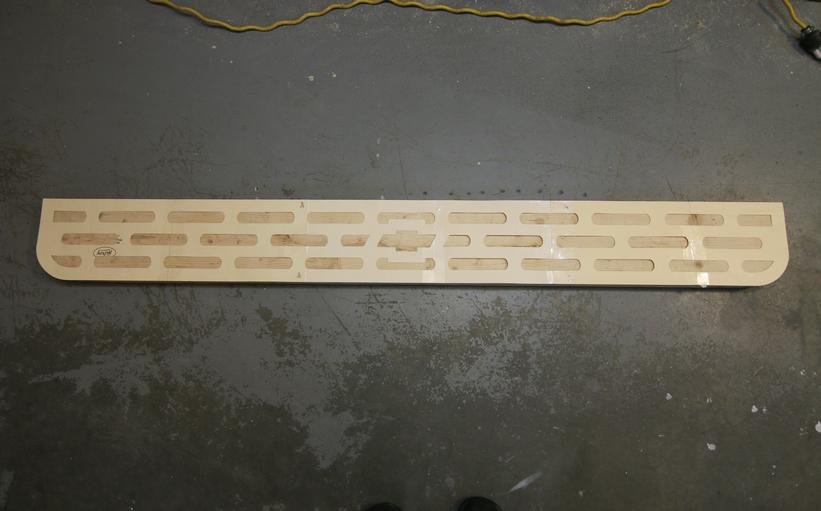
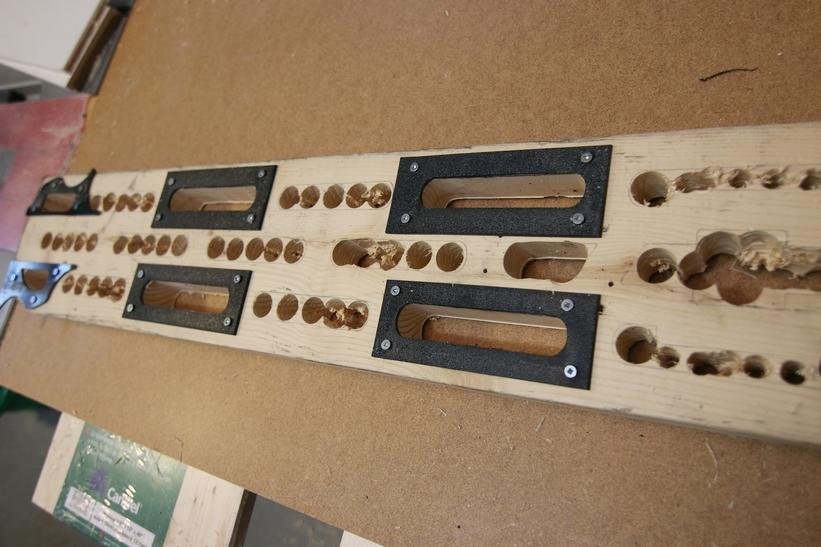
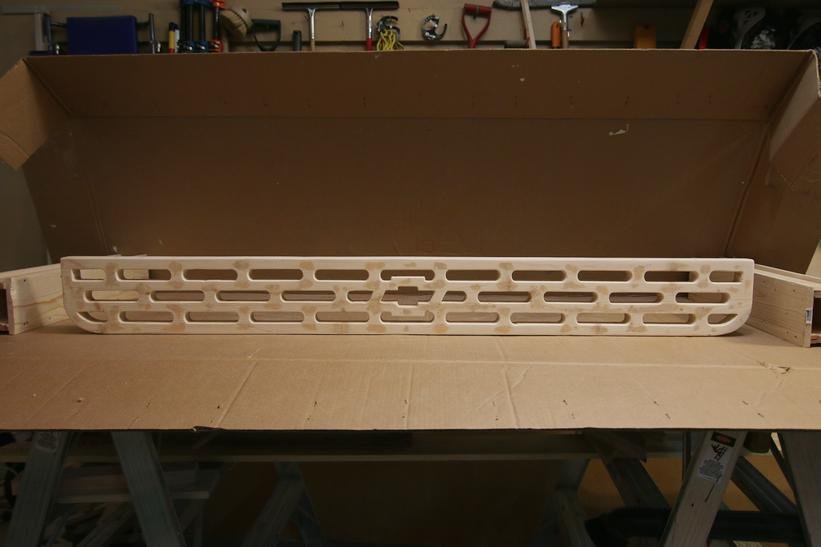
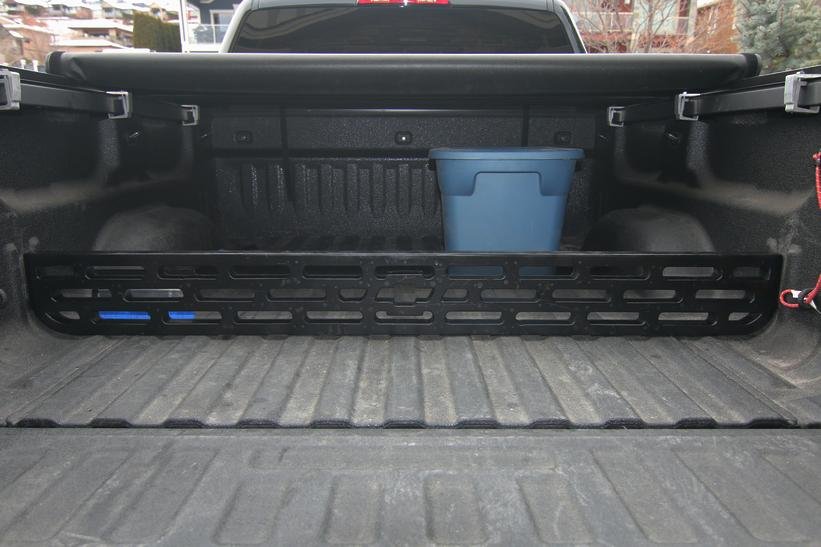
from my garage see this post from page 871 of this thread.... box divider -
What have you done to your K2 today?
bc-chris replied to block8head's topic in Modifications & Accessories
ha! ha! that's one of the next things on my list!!! i'm planning on doing 5 amber LEDs across the front of the grill -
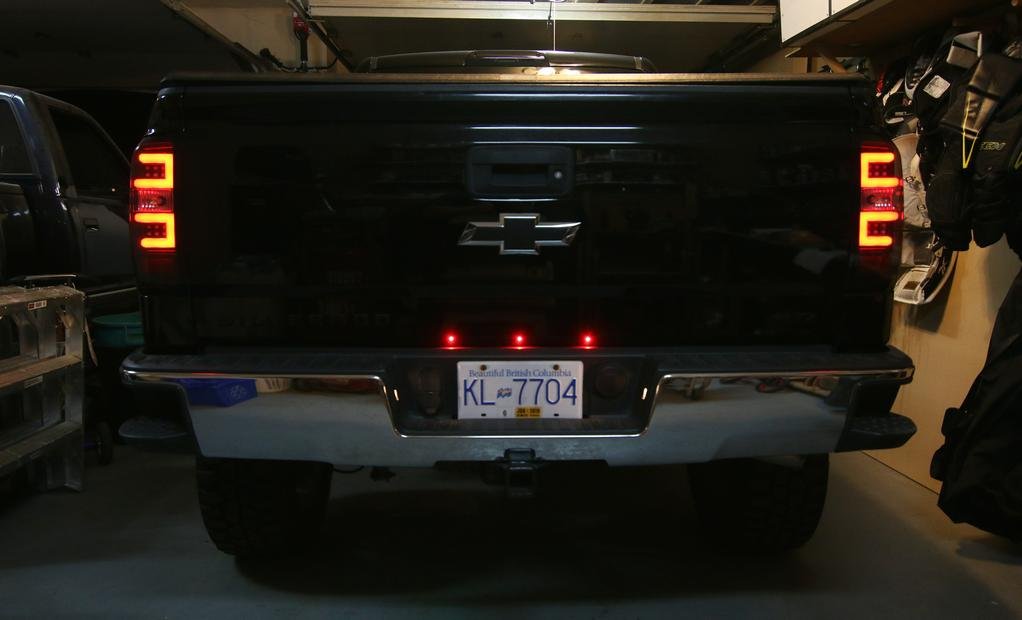
i had a little more time last night after the kids went to bed i added 3 little red LEDs above the license plate. it was really easy to do (especially after i dropped the spare tire down). i took power from the license plate lights, so these will come on with the head lights. i used these: 6mm red LED bolts
-
it's wood - it started life as a 2x8 then it met my router : ) this is from the "what have you done today thread"... box divider
-
What have you done to your K2 today?
bc-chris replied to block8head's topic in Modifications & Accessories
added three tiny red LEDs above the license plate. i used these: LED bolts and got power from the license plate lights (so these will only come on when the headlights turn on)
-
What have you done to your K2 today?
bc-chris replied to block8head's topic in Modifications & Accessories
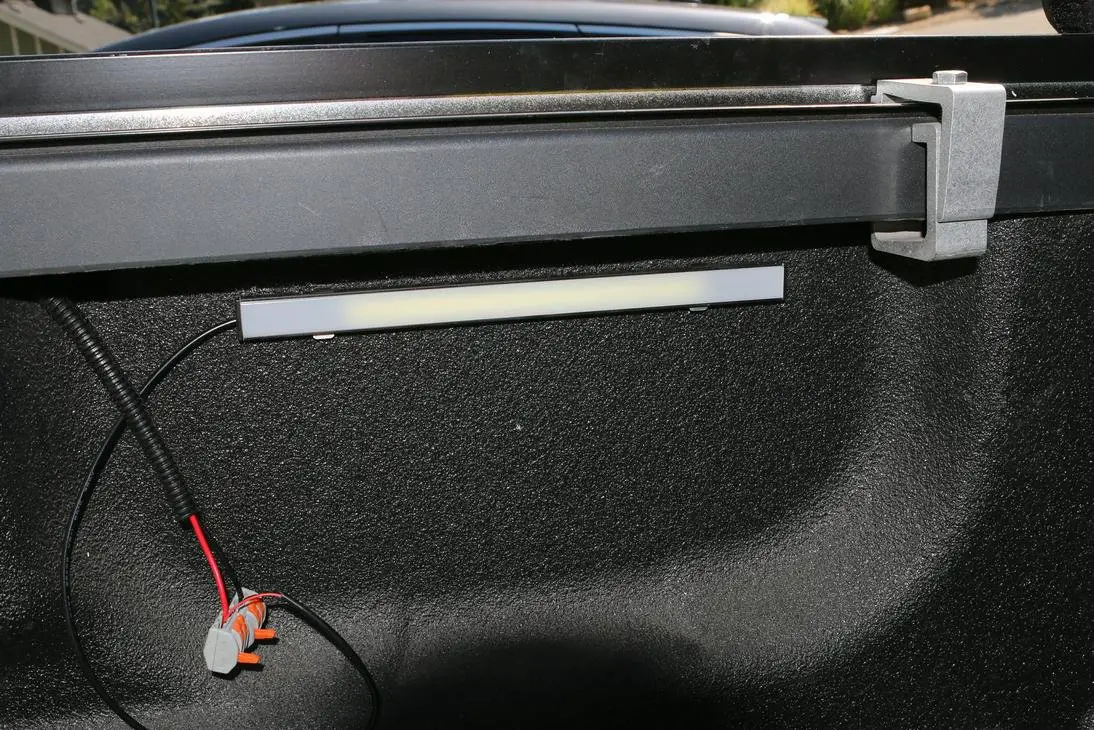
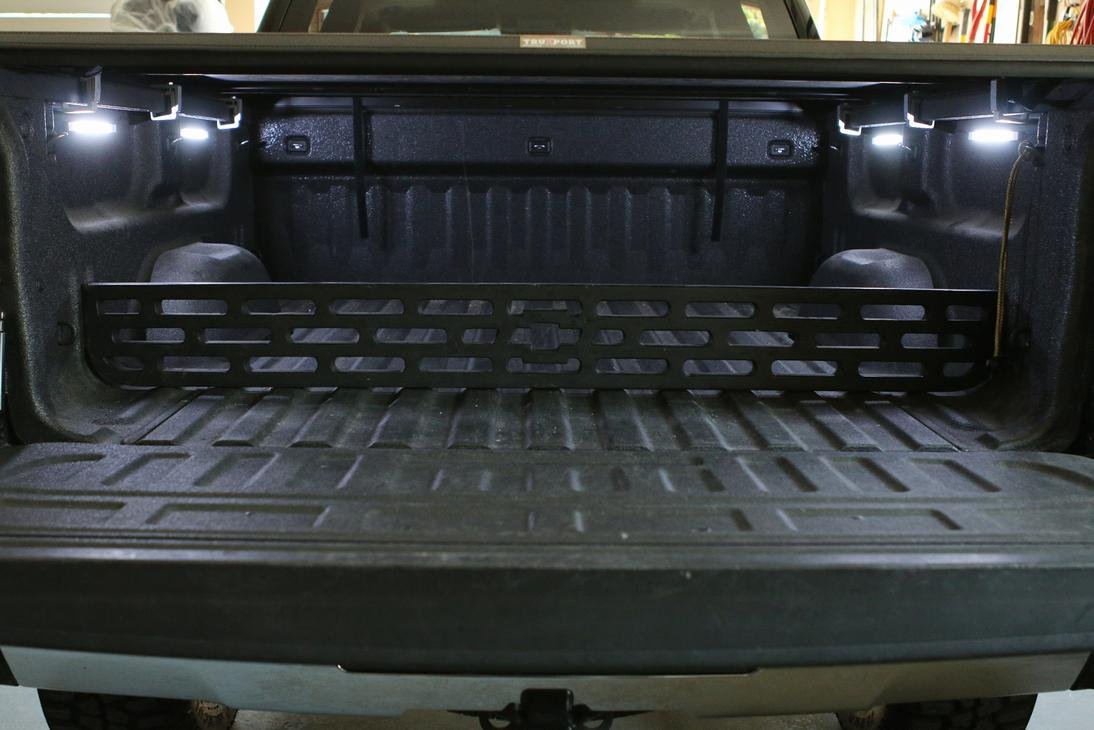
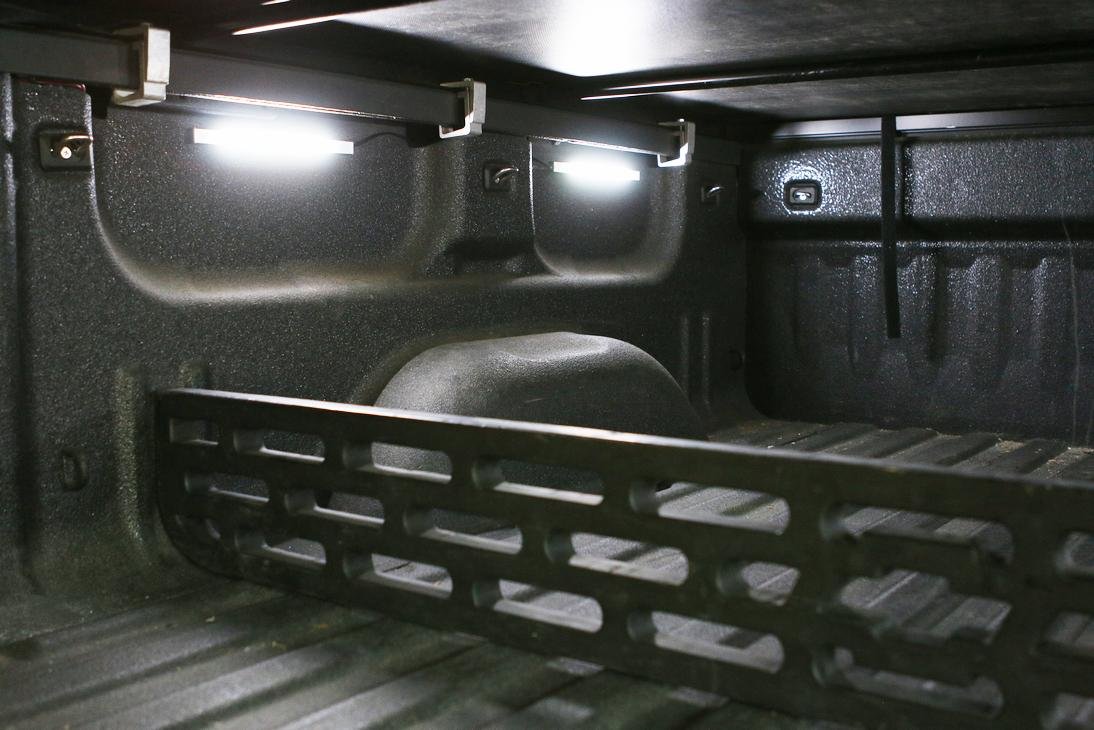
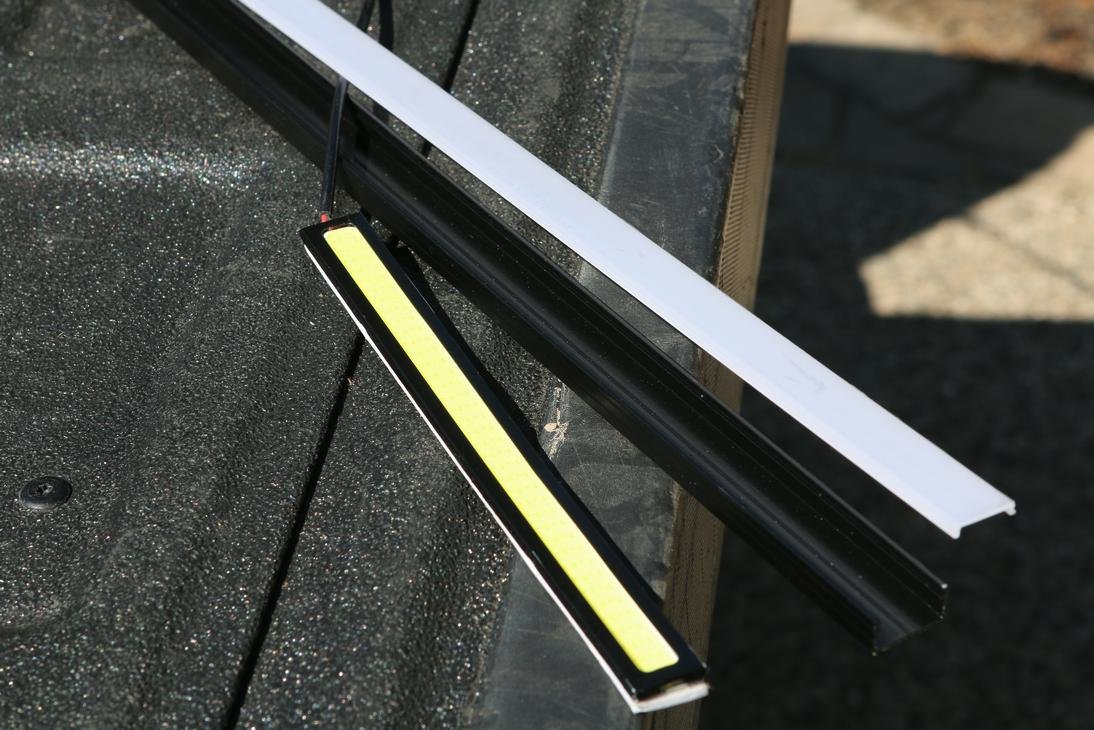
made/installed my own bed lights write up is in my build thread... bed light install
-
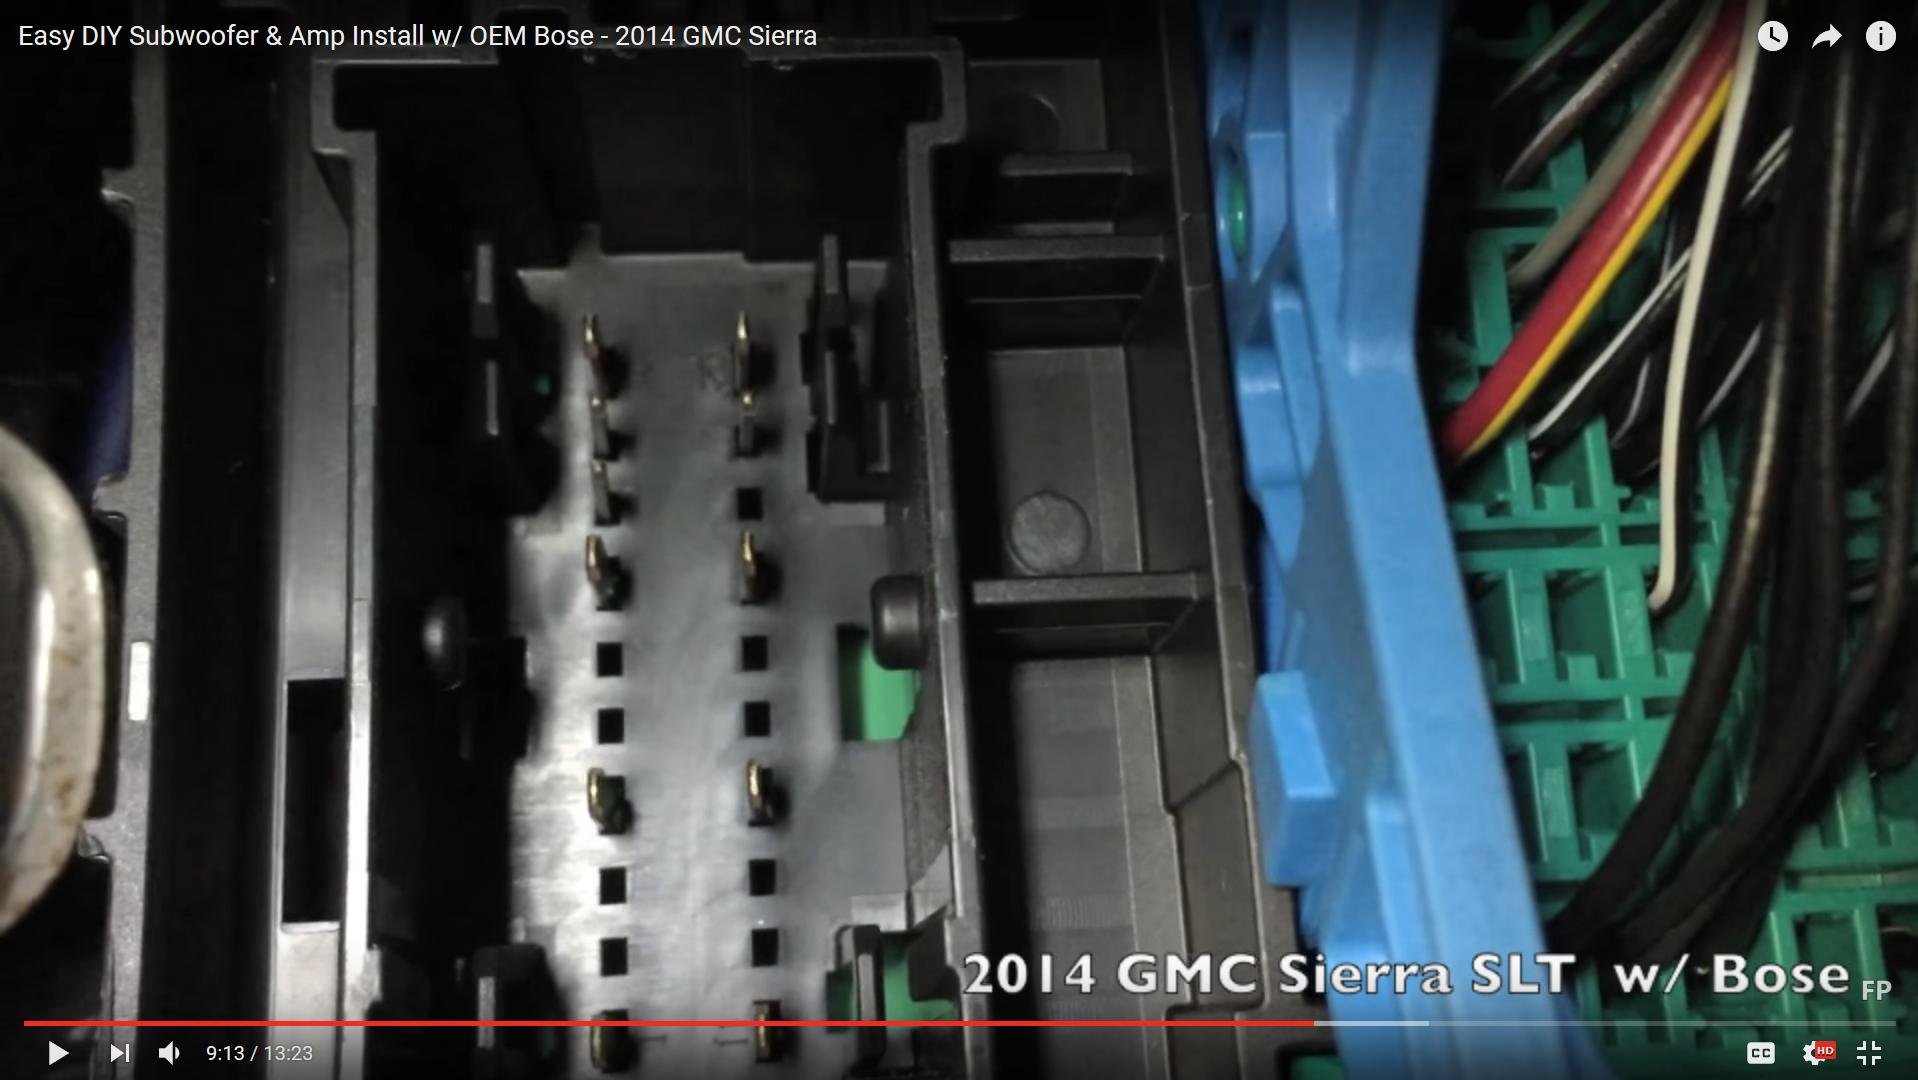
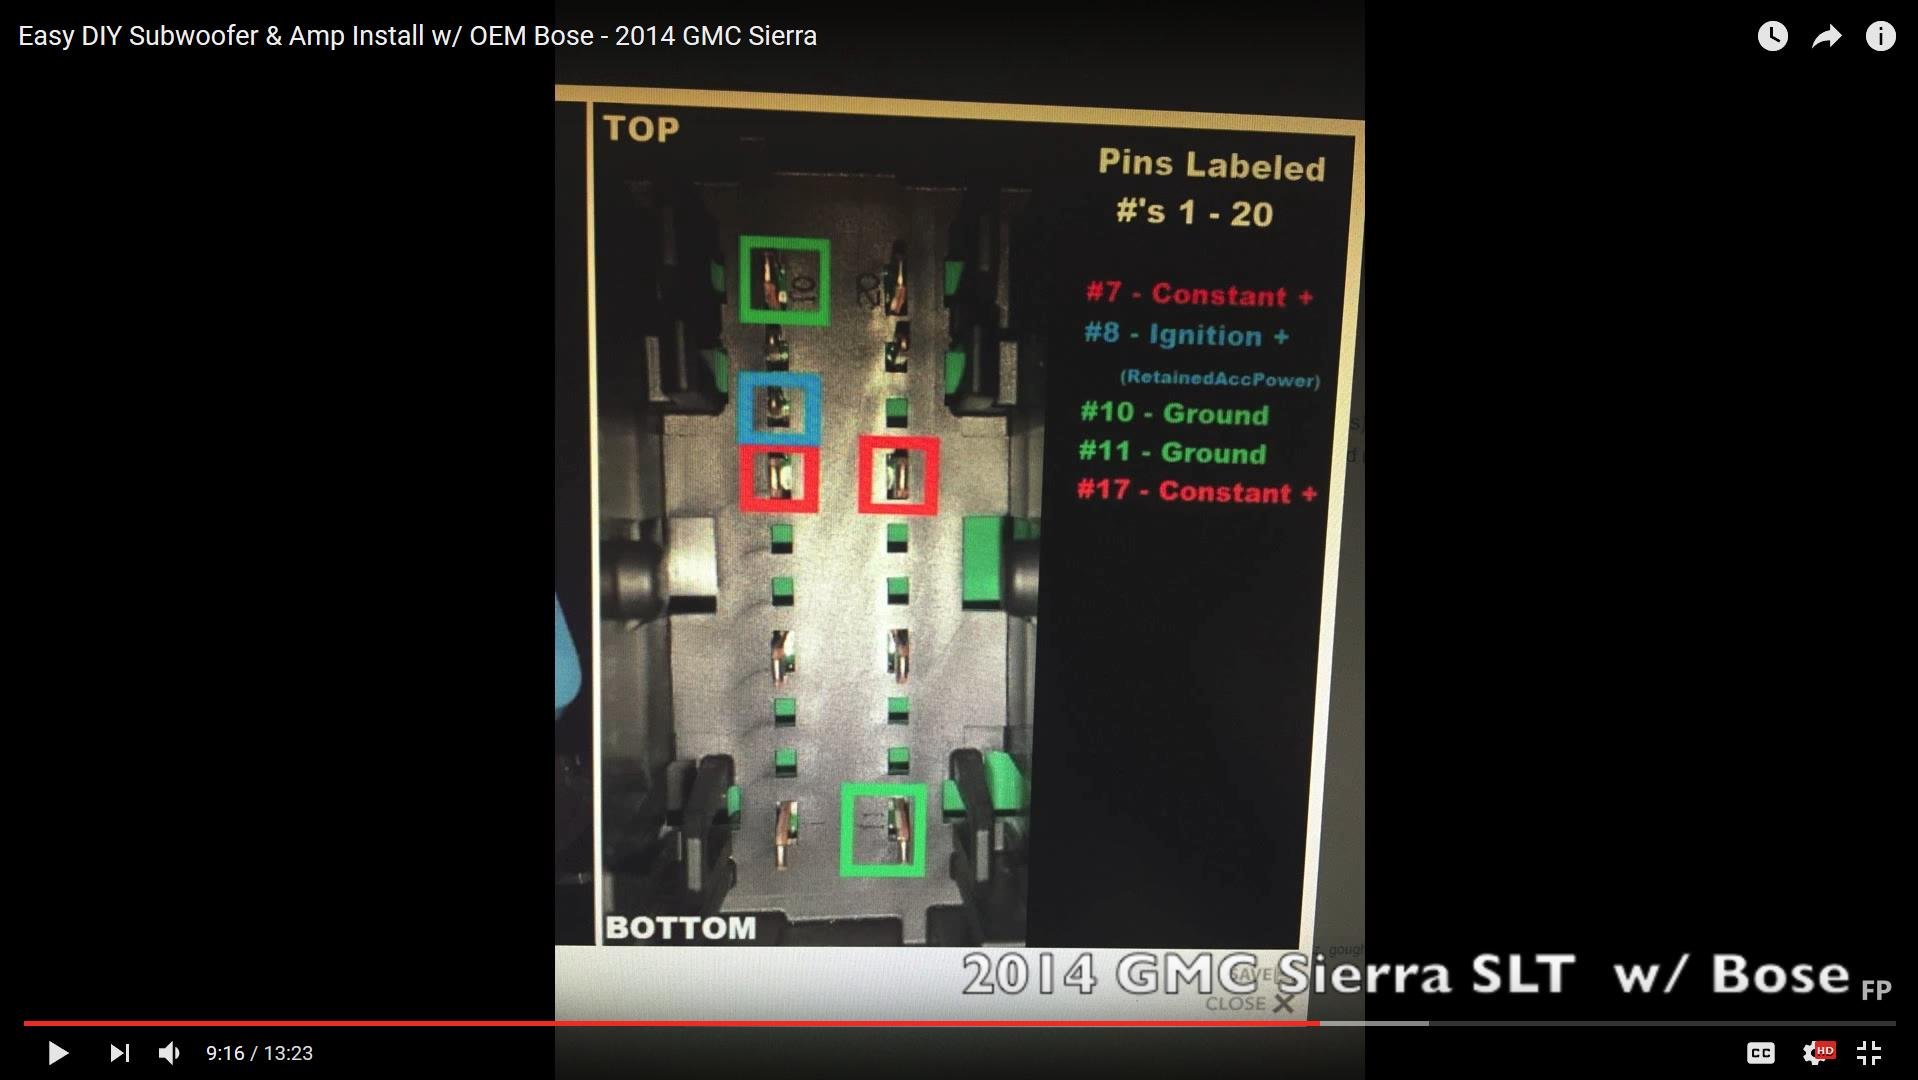
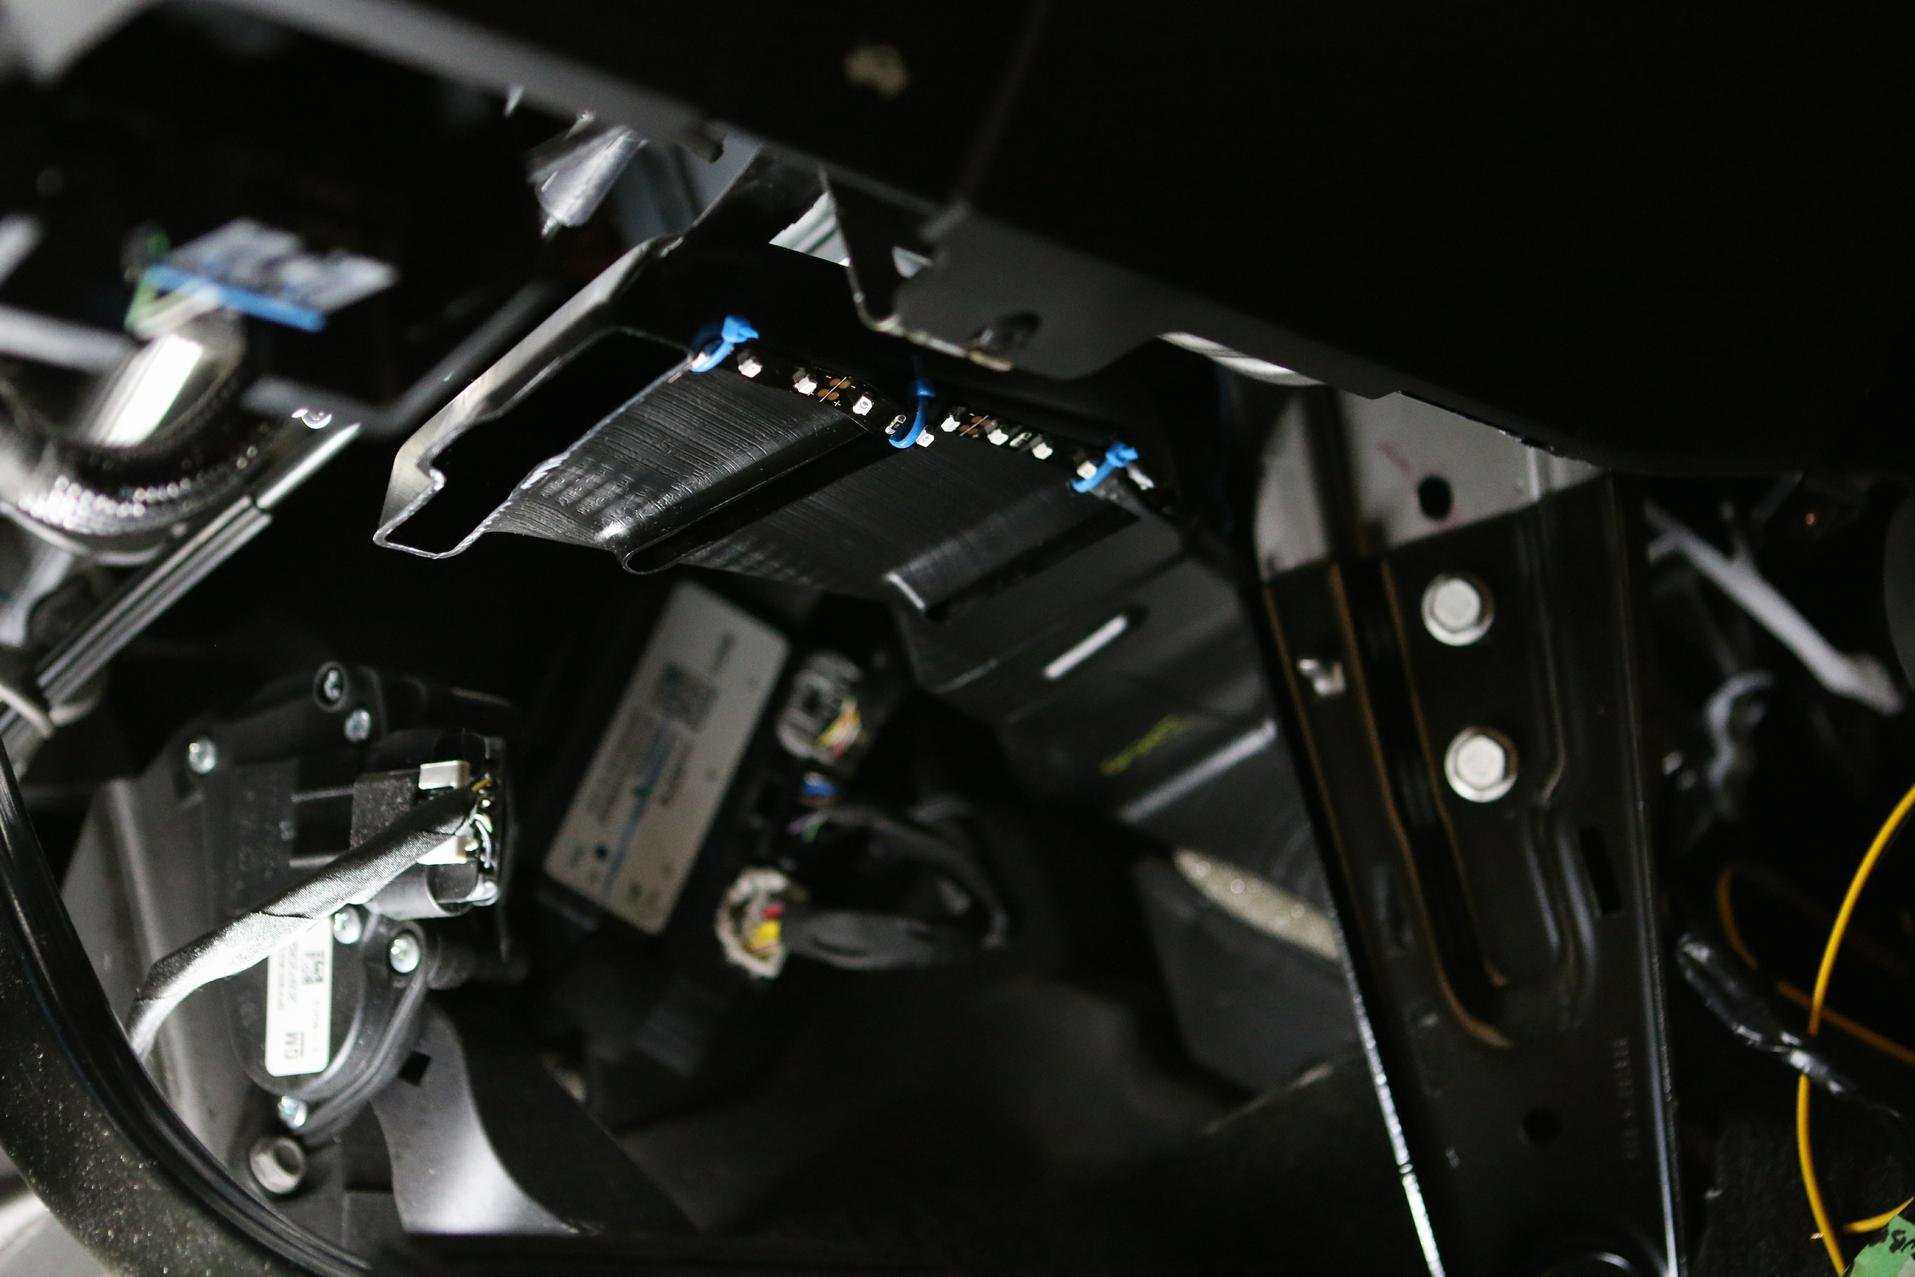
and then the really cool thing i finally got around to doing this weekend... adding lights to the truck bed. i ordered these a while ago: COB LED lights and i also got these: aluminum channels i painted the channels black with some bumper/trim paint and ran "always on power" to the back of the truck. then cut the channel into 4 equal lengths (9.75" i think) i got the power from one of the spare pins on the front drivers side (pin 7 or 17 - either one is fine) then i fished the wire thru both sides of the box the channels come with mounting hardware so a couple of small holes into the side of the truck box for the mounting hardware and the lights were installed they work GREAT!!!! for turning them on/off i went with a rocker switch in the box mostly becuz i know what i'm like.... get to the back of the truck, can't see in, so then i'd have to walk back to the cab to hit the cargo light switch - so i just put the switch in the box. i'm also looking at adding a magnetic switch (it would go in after the manual switch). it works great, but the magnets need to be closer together for it to work. i'm thinking if i use a couple of washers on the walls of the tailgate/truck it should make the magnets close enough. (so it would go magnet | washer(s?) | box (or tailgate) wall). this is the magnetic switch: magnetic-switch the magnets can be up to about 1" apart and the gap between the side of the tailgate and side of the truck is close to that. so yea - pretty pumped with how it turned out. it will make loading my truck after hockey or band gigs really nice!
-
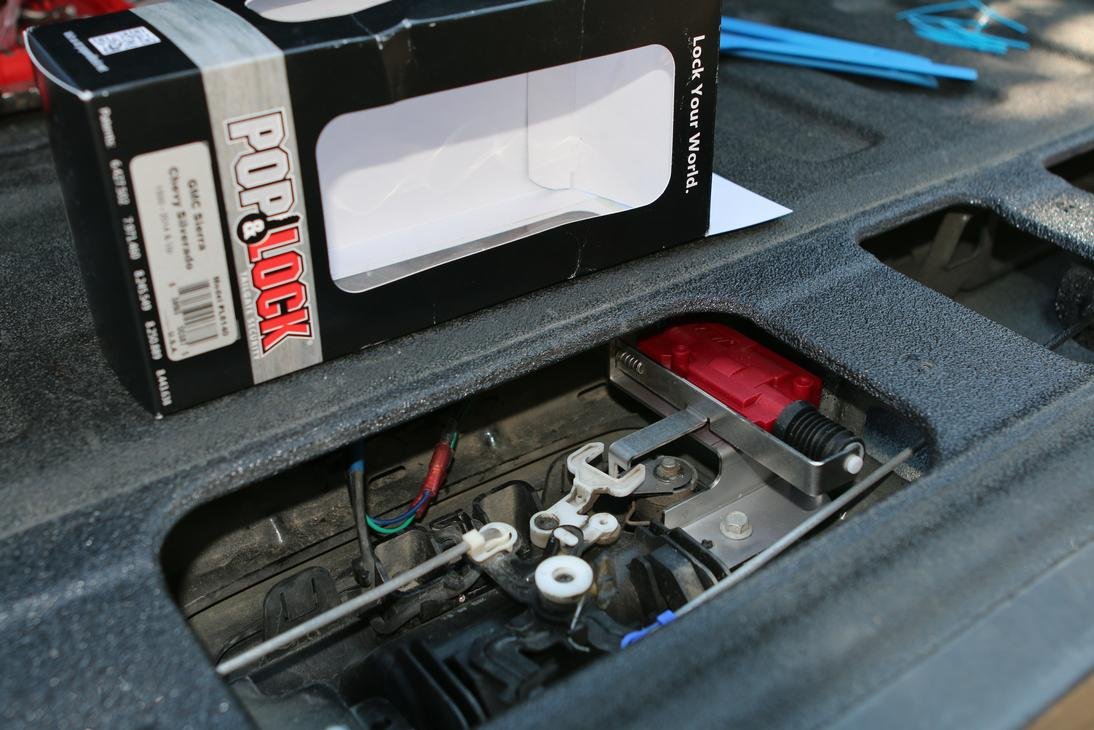
this weekend i installed a pop & lock for my tailgate lock. install was pretty easy for the most part - the only problem is the actuator isn't working correctly. i hit 'unlock' and it unlocks perfectly. i hit 'lock' and it locks, then immediately unlocks - so i'll have to get that replaced. not a bit deal, just kind of annoying
-
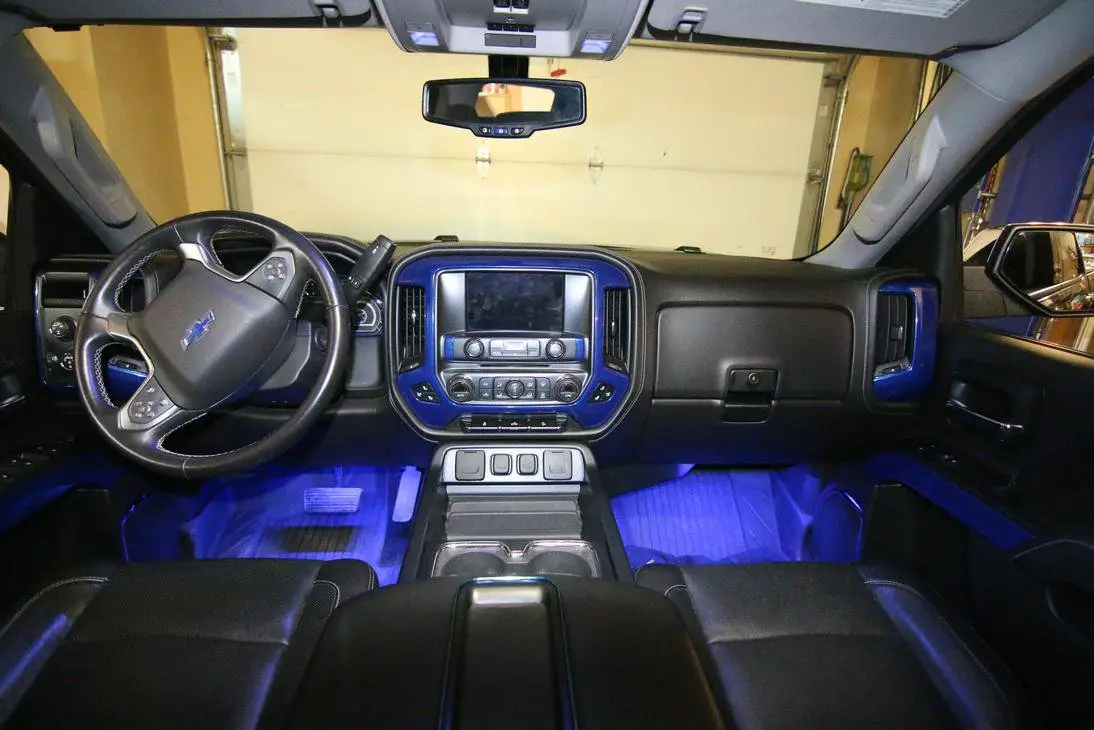
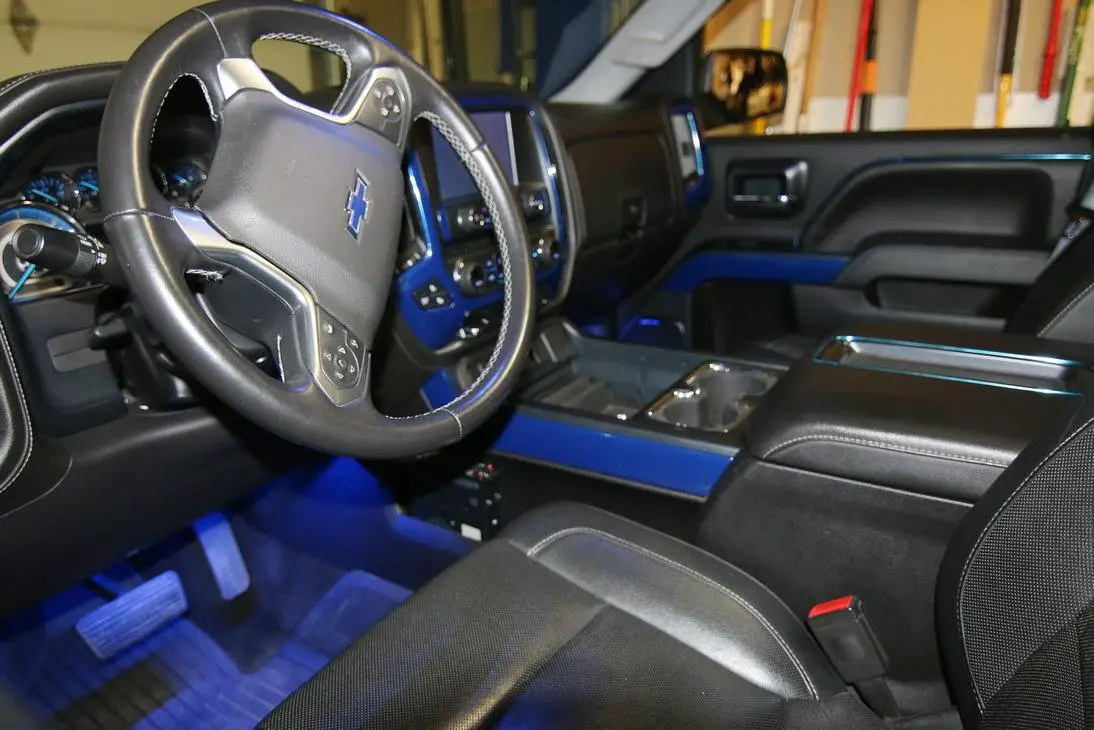
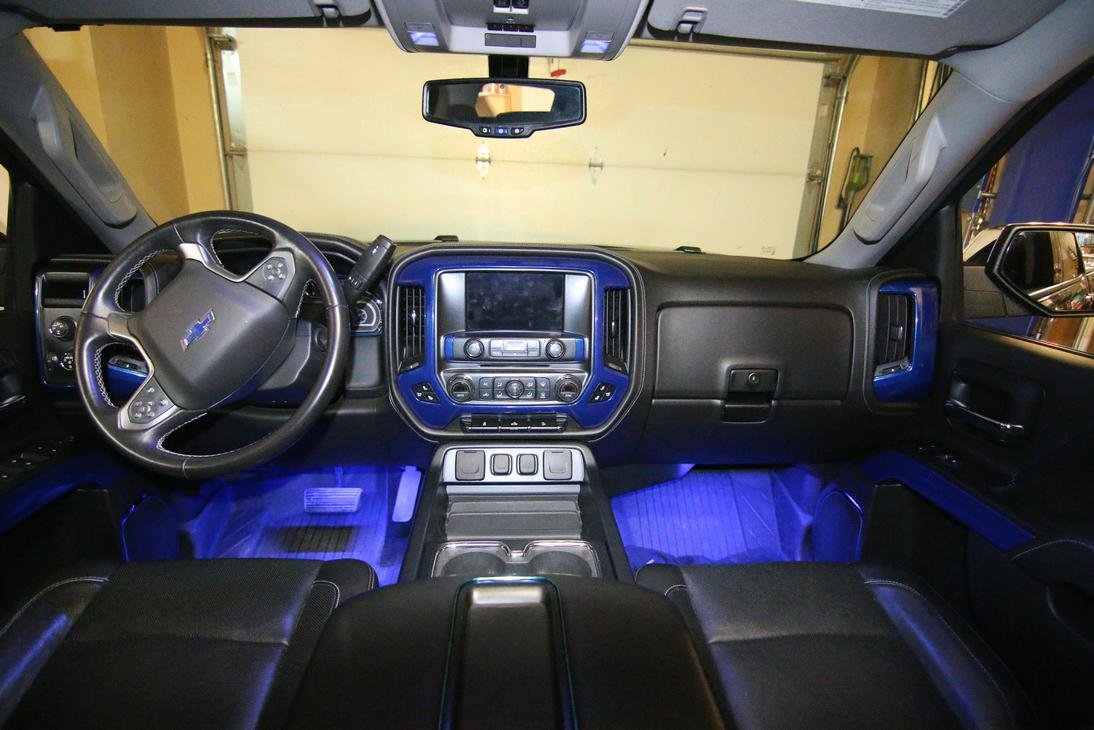
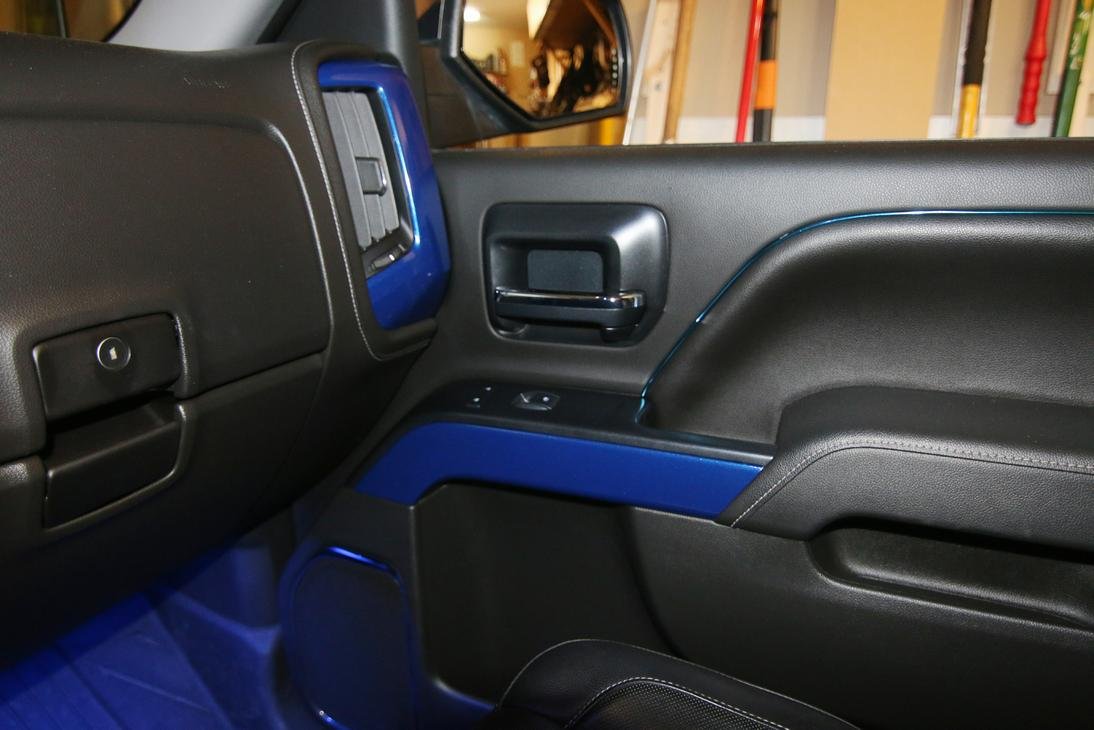
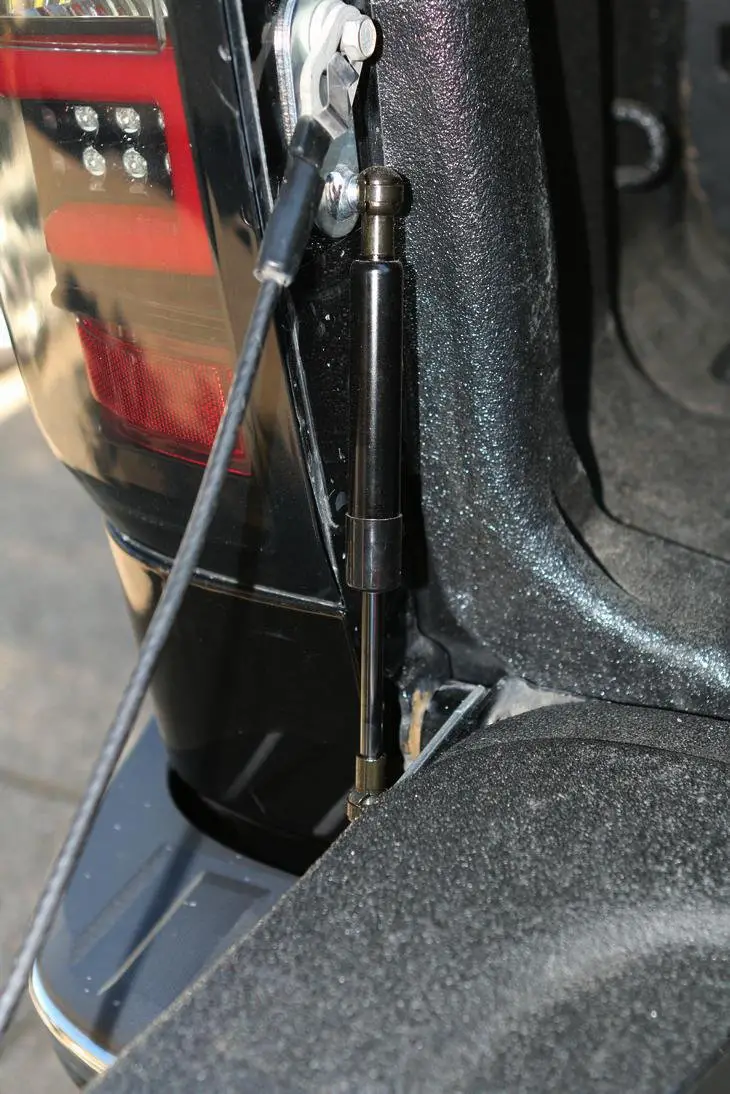
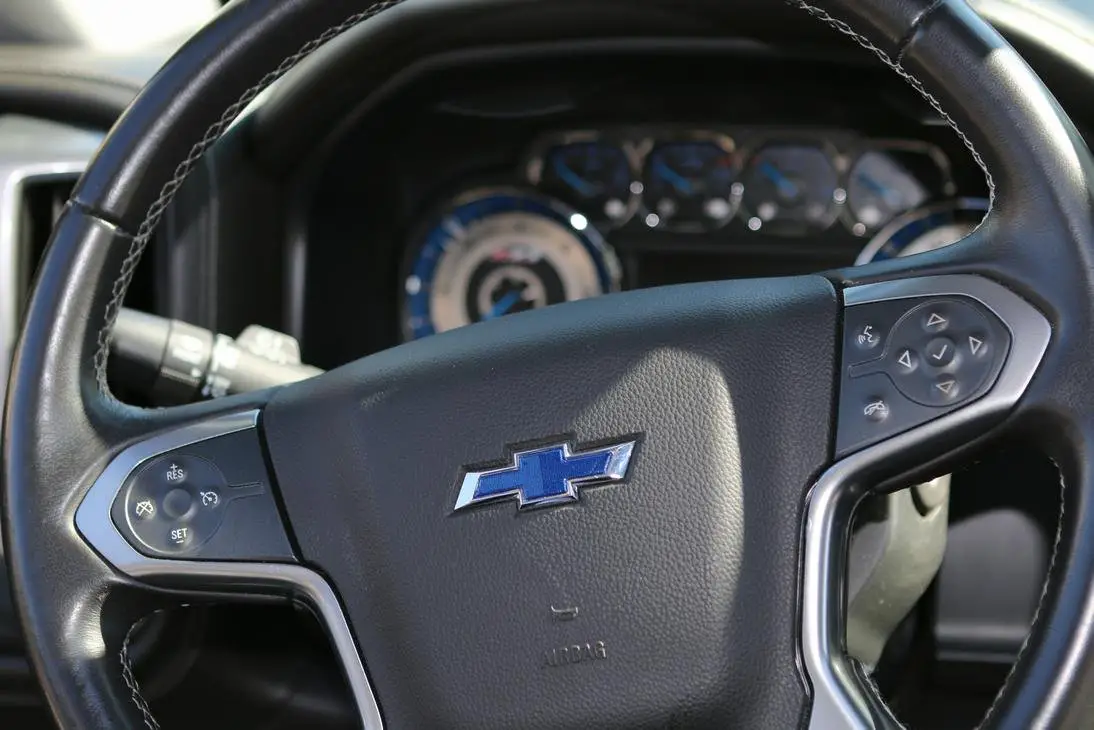
time for a few updates.... a couple weeks ago i added the DeeZee tailgate assist - really easy to do i also want to change up the interior look a bit - i had added silver accent trim stuff a while ago, it was fine but i want to continue with my blue theme, so i got some blue trim. i also tried covering one of the door trim pieces with some blue vinyl. i have some spray stuff coming that apparently makes vinyl installation a lot easier, but i just had to try. i also used a bit of blue vinyl on the steering wheel bowtie (it used to be black vinyl). i need to redo it, but for now it's fine.
-
^^^ those wheels are going to look fantastic on your truck!!!
-
What have you done to your K2 today?
bc-chris replied to block8head's topic in Modifications & Accessories
i'm pretty sure this topic's popularity increased exponentially after pgamboa started modding his truck! ha! ha! thanks Phil! -
it was definitely BLUE... not ice blue. and i'm not on instagram.... or facebook... or twitter... or pinterest... or really anything else! ha! just a couple of message boards
-
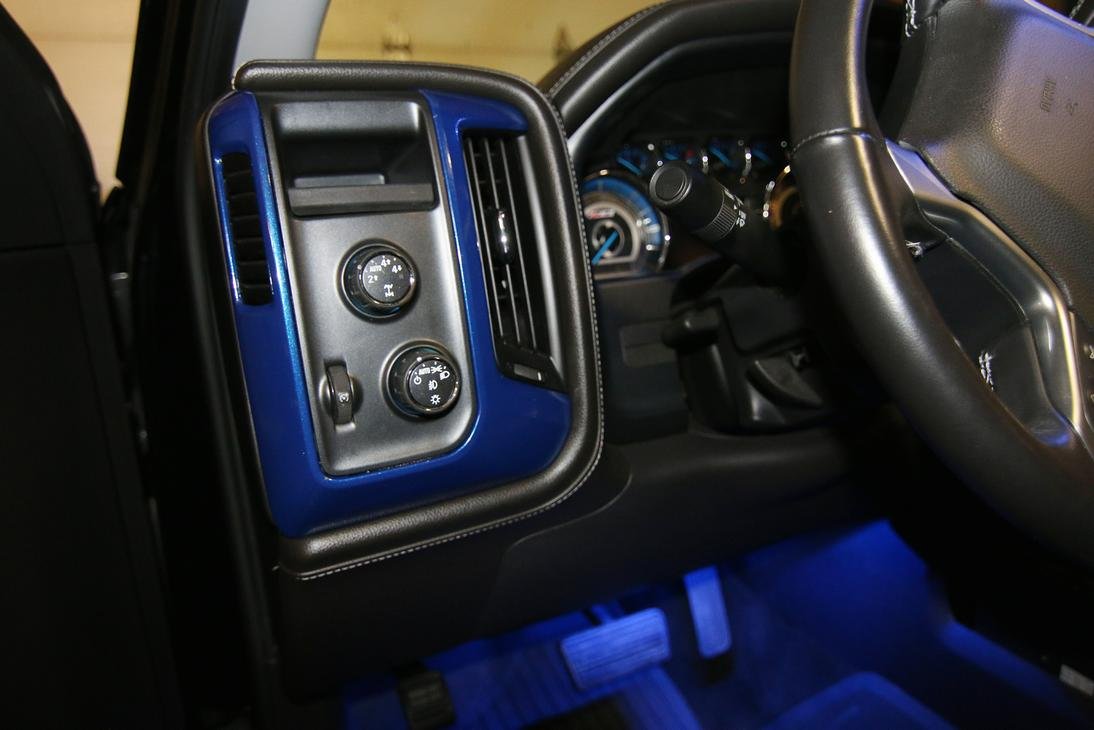
copying my mods - that's AWESOME! to me that's a big compliment! thanks! the plastic for the inside of the cup holder is just thin ABS plastic that i picked up at a local plastic shop. you kind finds all kinds of it online what did i cut it with...heh... a laser cutter! i have my own business and one of the pieces of equipment i have is a laser cutter - so that definitely helped! now, with that being said, it wouldn't be too bad to cut with a jigsaw. i made cardboard templates first, and from there created the cut files for the laser cutter. it's 2 layers of the abs. the bottom layer is a nice snug fit inside the cup holder. the top layer is the exact same shape, but 2mm smaller all around. i epoxied the 2 layers together and the result is a 'lip' that the glow tubing can sit on. i used clear silicone to hold the tubing in place. all of my ambient lighting is tied to the same circuit - i talk about getting power in this post: ambient light this is the video i refer to: https://www.youtube.com/watch?v=spG6oFvVOOk the power stuff is a little after 5 minutes in. some of the ambient light can not be on a dimmer (the cup holder tube light and the light in the back cubby of my center console) so i used these connectors - full power in, power out to lights and a dimmer, then the power from the dimmer went to a connector and from there out to the lights i wanted to dial back a bit. (hope that makes sense)
-
What have you done to your K2 today?
bc-chris replied to block8head's topic in Modifications & Accessories
finally had time over the weekend for a few things.... - gave the truck a bath - replaced the cabin air filter. i last did that when i bought the truck - two years ago (only 16,000 kms and it was still pretty dirty) - added the dee-zee tailgate assist. -
i used oznium lights in my truck - i've been really happy with them - great lights and a great company to work with the footwell lights aren't really a kit - i got these: https://www.oznium.com/flexible-led-strips/led-ribbon and tapped into the wires for the dome lights. i just cut the ribbon to whatever length i wanted (i think you can cut it every third LED) the tricky part was finding stuff to attach them too becuz the double sided tape wasn't cutting it...
-
i've used those connectors in my truck - they work great!
-
What have you done to your K2 today?
bc-chris replied to block8head's topic in Modifications & Accessories
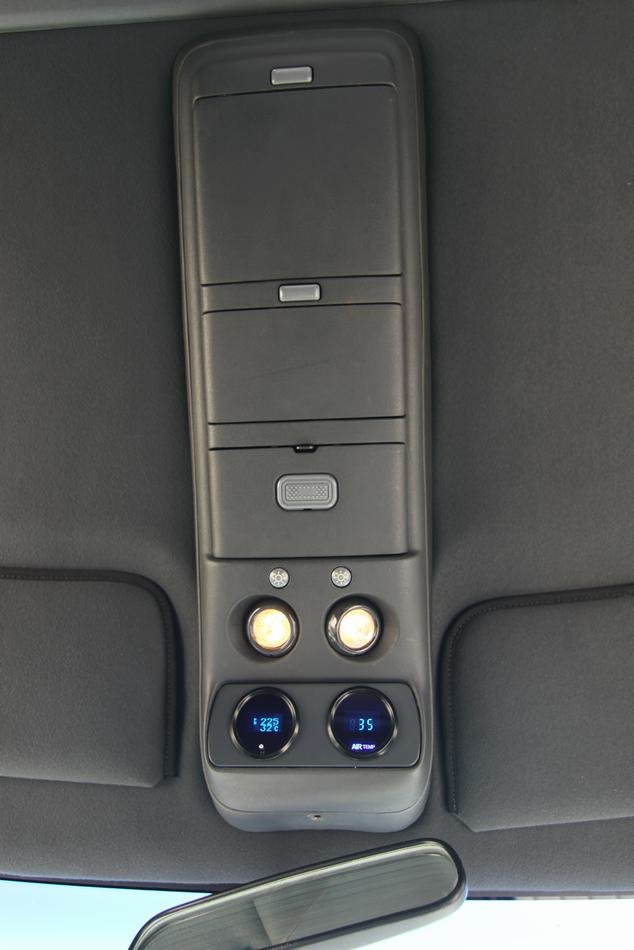
^^ that's AWESOME Phil!!! i know what you mean about cutting into the headliner. i added an overhead console to my '89 chevy and i quadruple checked everything thing before i started cutting! i think the only time i was more nervous with my old truck was when i was drilling into the back of the cab to add a third brake light! ha! good times! -
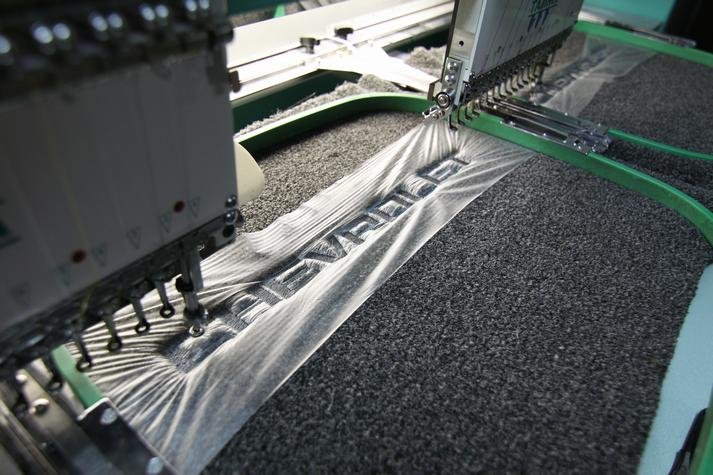
Leather headrest embroidery
bc-chris replied to Viktorrocks15's topic in 2014-2018 Silverado 1500 & Sierra 1500
i assume it is a stock center console - it was in the truck when i bought it (i bought the truck in '97) -
LED Reverse/ Backup lights in rear bumper step cavity?
bc-chris replied to Andy Seibel's topic in Modifications & Accessories
did you contact oznium's customer service? from what i've read they will likely just send you replacement bolt LEDs i've bought a bunch of stuff from them and been very happy with everything. -
Leather headrest embroidery
bc-chris replied to Viktorrocks15's topic in 2014-2018 Silverado 1500 & Sierra 1500
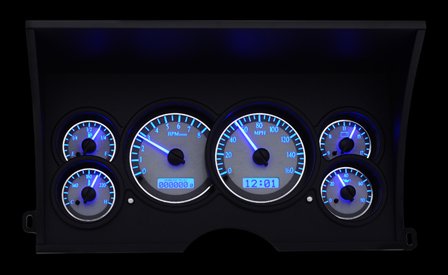
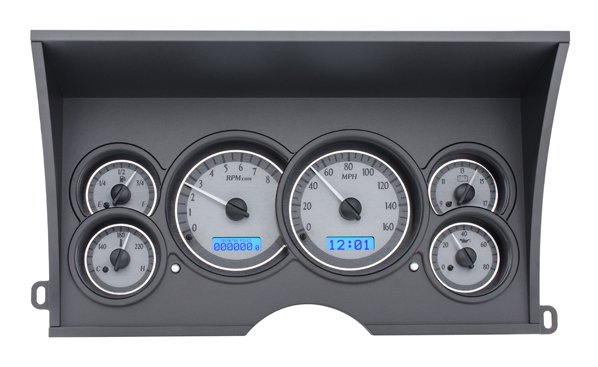
ohhhh... i got lots of pics of my baby!!! there's no way i could get rid of the '89 when i bought my '14 - i just love it too much! (and dumped waaaaaay too much $$ into it ! ha! ha!) http://IMG_5422 by bc-chris, on Flickr ***the "2500" on the door is a joke between myself and a magazine editor... said he couldn't run a feature on my truck unless is was a 2500, so i swapped out the 1500 piece for a 2500 piece - ha! ha! http://IMG_8134 by bc-chris, on Flickr this was taken right after i got it home after having it repainted http://IMG_1021 by bc-chris, on Flickr i also dropped in a digital dash from dakota digital. i like what is in there now, but they've come out with a new version that i really really like and will get at some point... new version: also added an overhead console.... (uggghhh... i remember doing the install that day - it was pretty HOT!!!)
-
Leather headrest embroidery
bc-chris replied to Viktorrocks15's topic in 2014-2018 Silverado 1500 & Sierra 1500
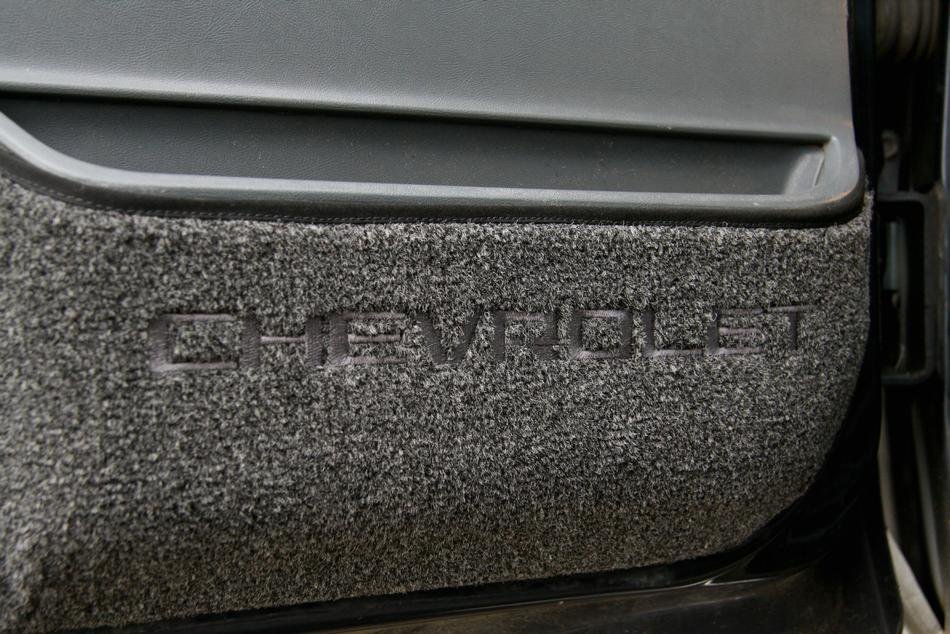
so i own my own business... an embroidery company. one of the first things i did when i got my truck was take it to one of the upholstery shops that i do jobs for. they were worried about keeping the "stock look" of the headrest after re-assembly (since it would all need to be taken apart so that i could embroider the headrest panel) so be aware of that. when i redid the interior of my '89 we had a little fun... lots of chevy logos in the cab.... this was on the door for a while.... then i changed it to this... 89Chevy....
-
ok - actually... my garage is fairly dark right now - so i was able to get a couple pics. the cup holder light is really really close to the stock chevy blue light that's around the controls this is what i got to do the cup holder... https://www.ebay.ca/itm/1-5M-Flash-Flexible-Neon-LED-Light-Glow-EL-Strip-Tube-Wire-Rope-Car-Party-LigBE/122436633451?var=422901943456&hash=item1c81cac36b:g:lMUAAOSw-K9ZL82t and here's a couple pics....


-
Forum Statistics
250.4k
Total Topics2.7m
Total Posts -
Member Statistics
342,759
Total Members8,960
Most Online
-
Who's Online 8 Members, 0 Anonymous, 1,117 Guests (See full list)