
Marv88
-
Posts
961 -
Joined
-
Last visited
-
Days Won
6
Content Type
Profiles
Forums
Gallery
Events
Articles
RPO
Store
Blogs
Everything posted by Marv88
-
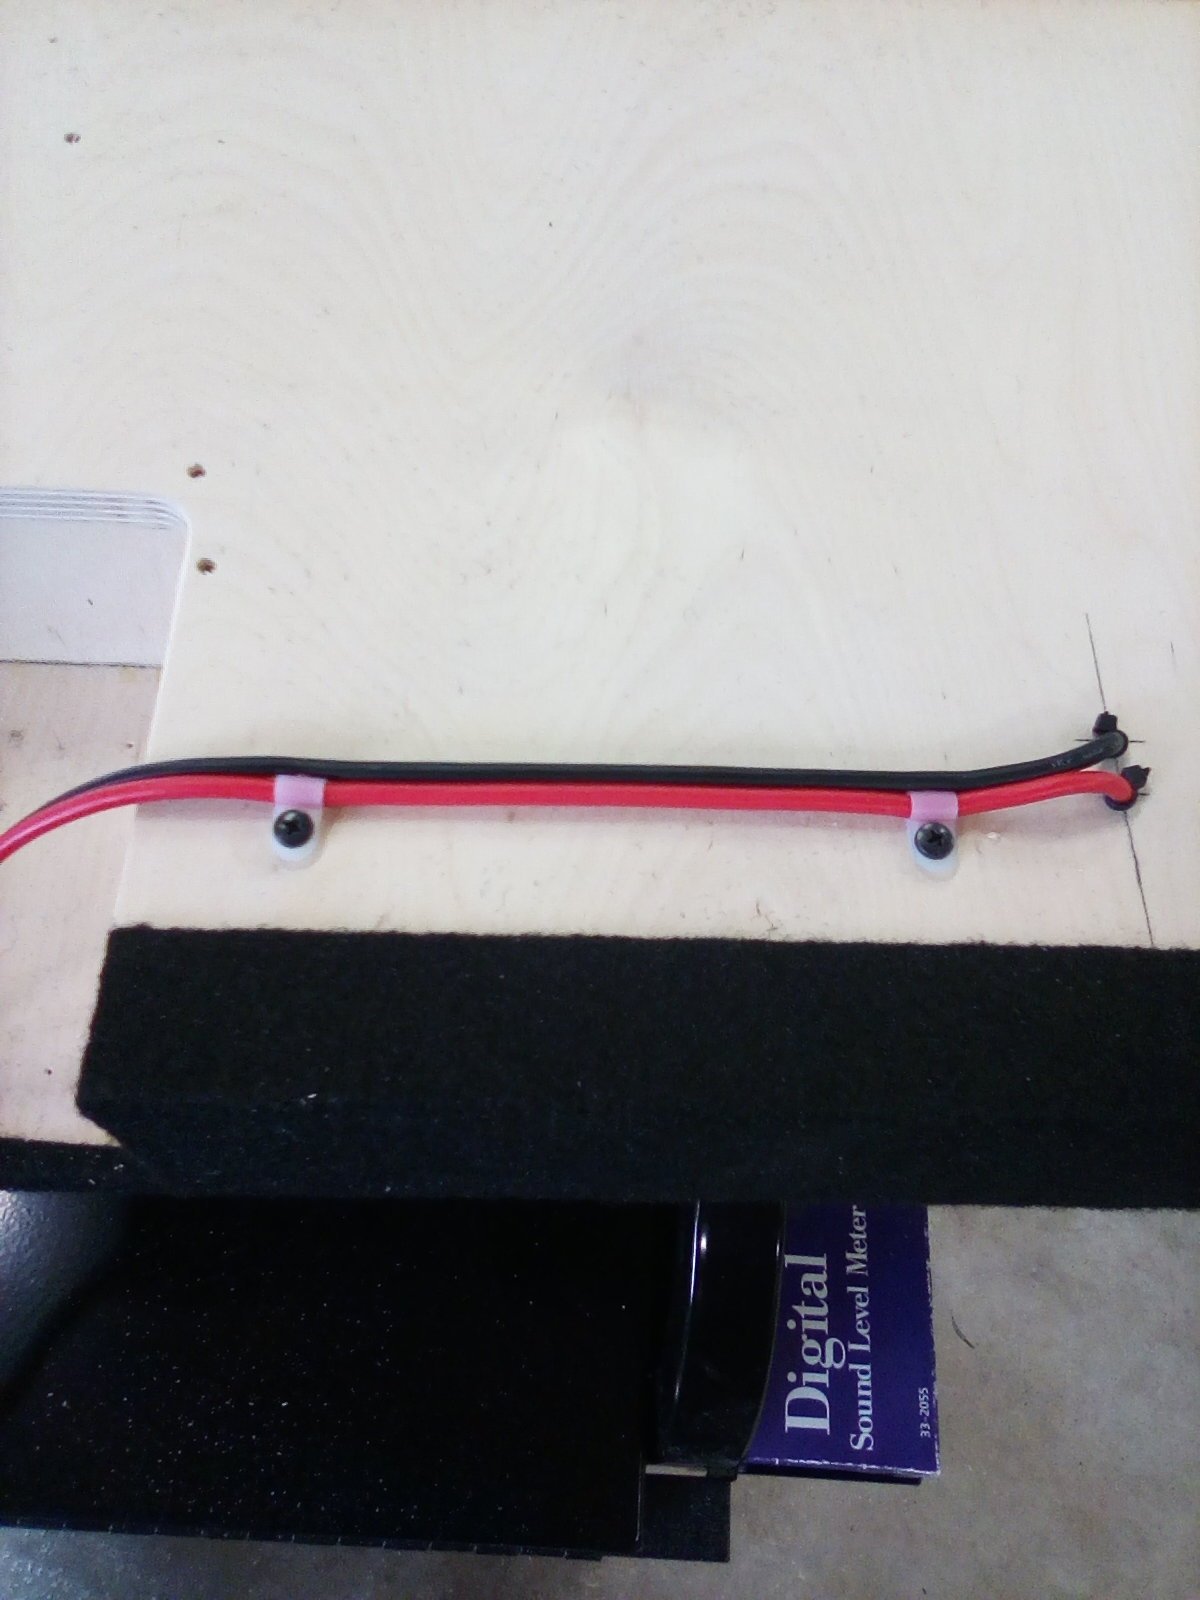
I use bolts in high powered situations and sometimes for guys who need to occasionally remove the enclosure to free up trunk space etc.
- 457 replies
-
- 1
-

-
- deep ocean blue
- rcsb
- (and 11 more)
-
More wiring

- 457 replies
-
- 1
-
-
- deep ocean blue
- rcsb
- (and 11 more)
-
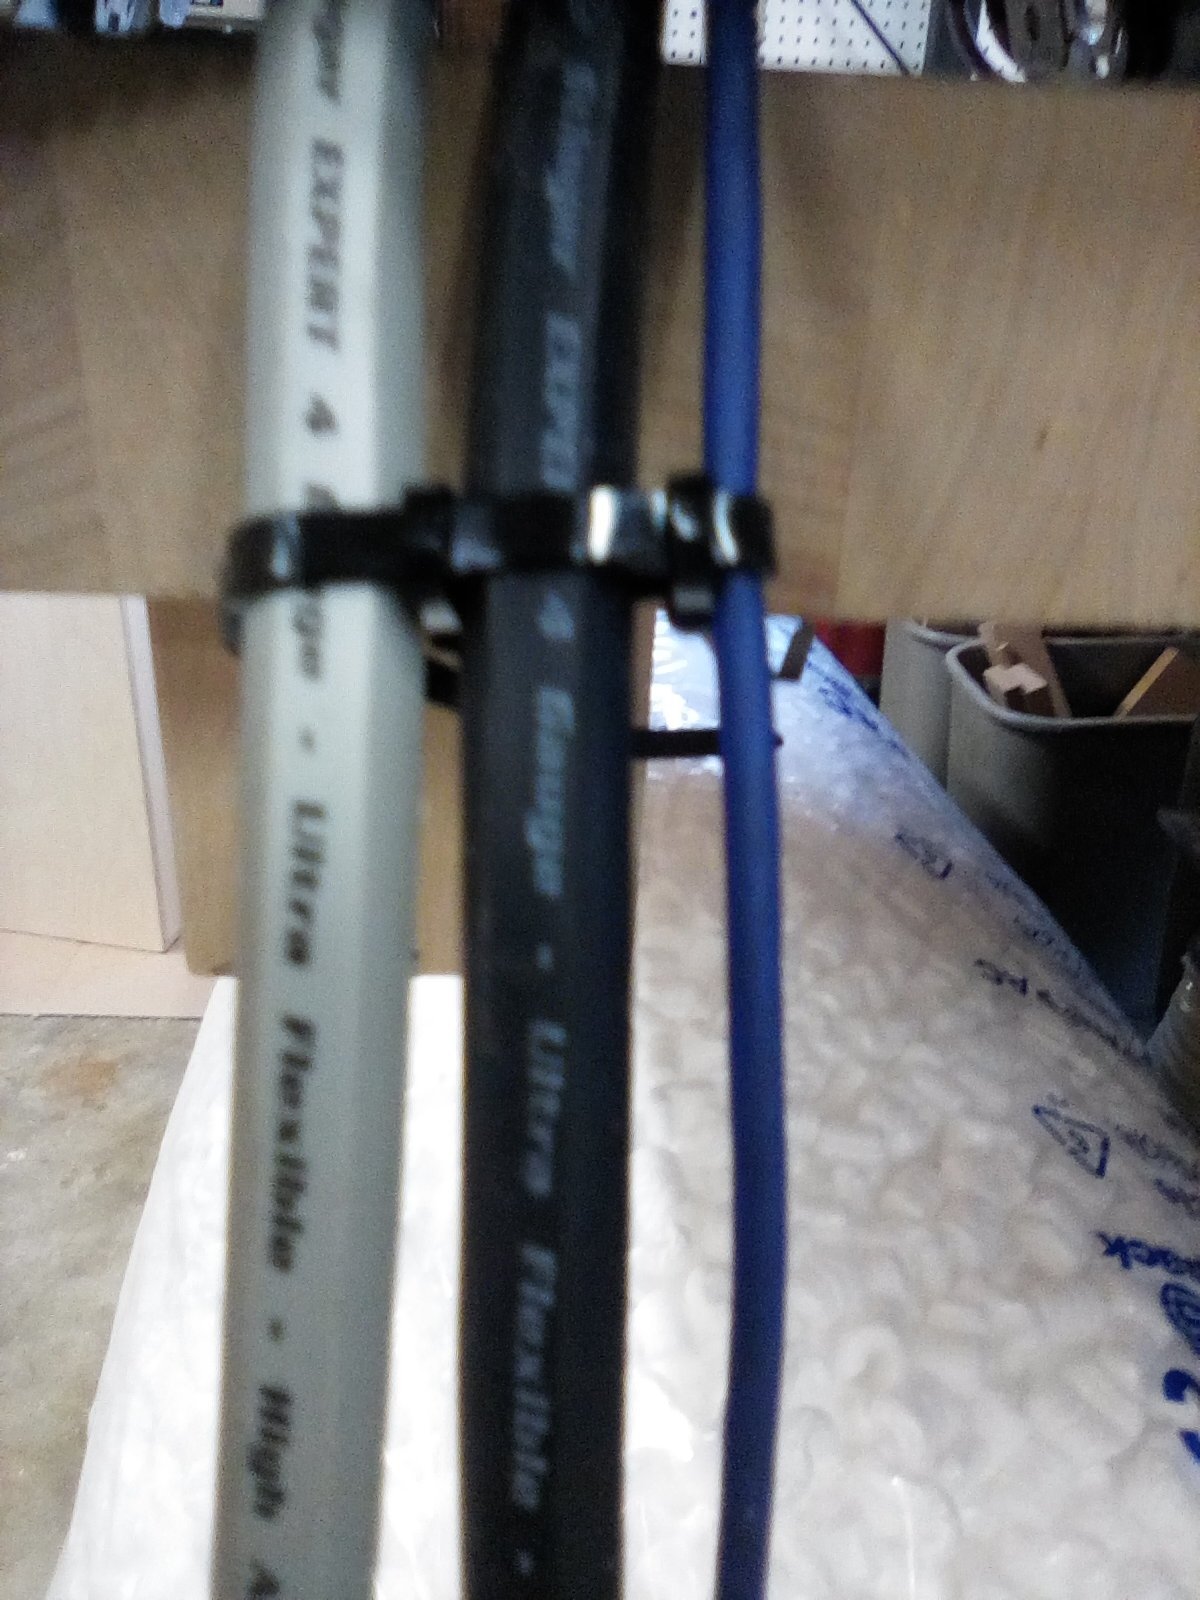
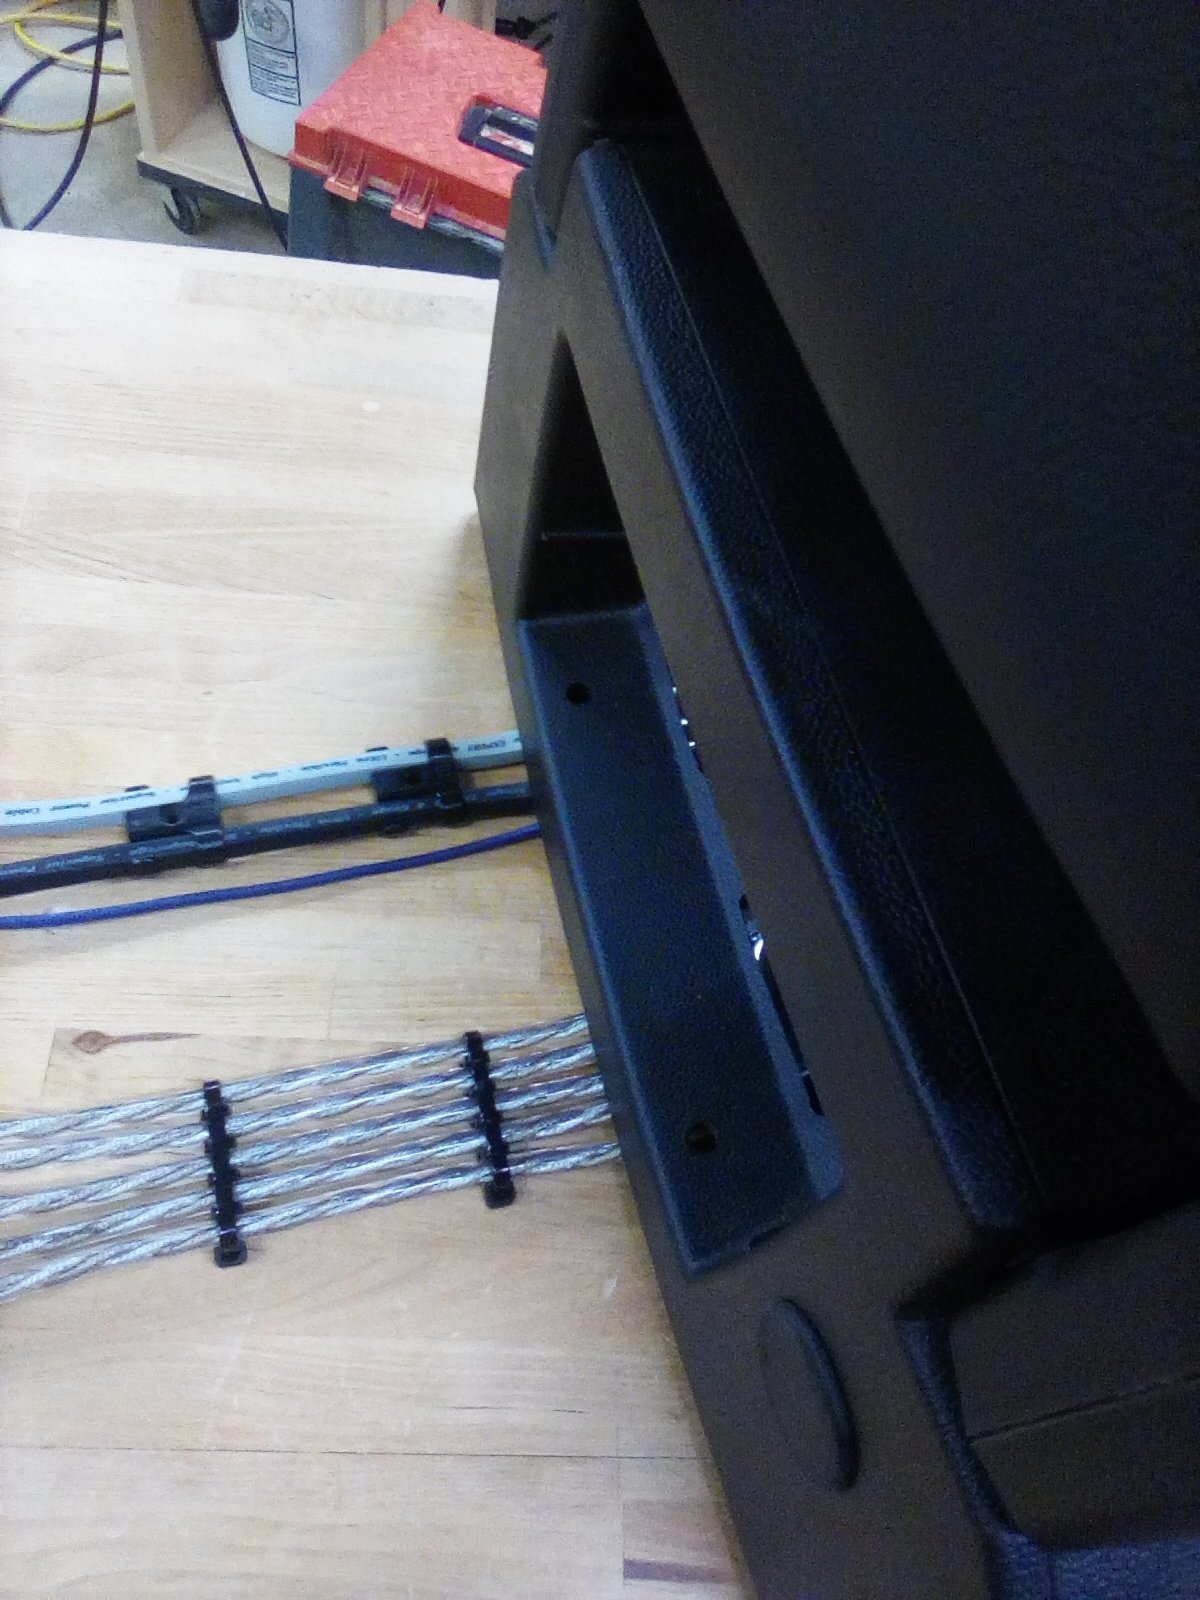
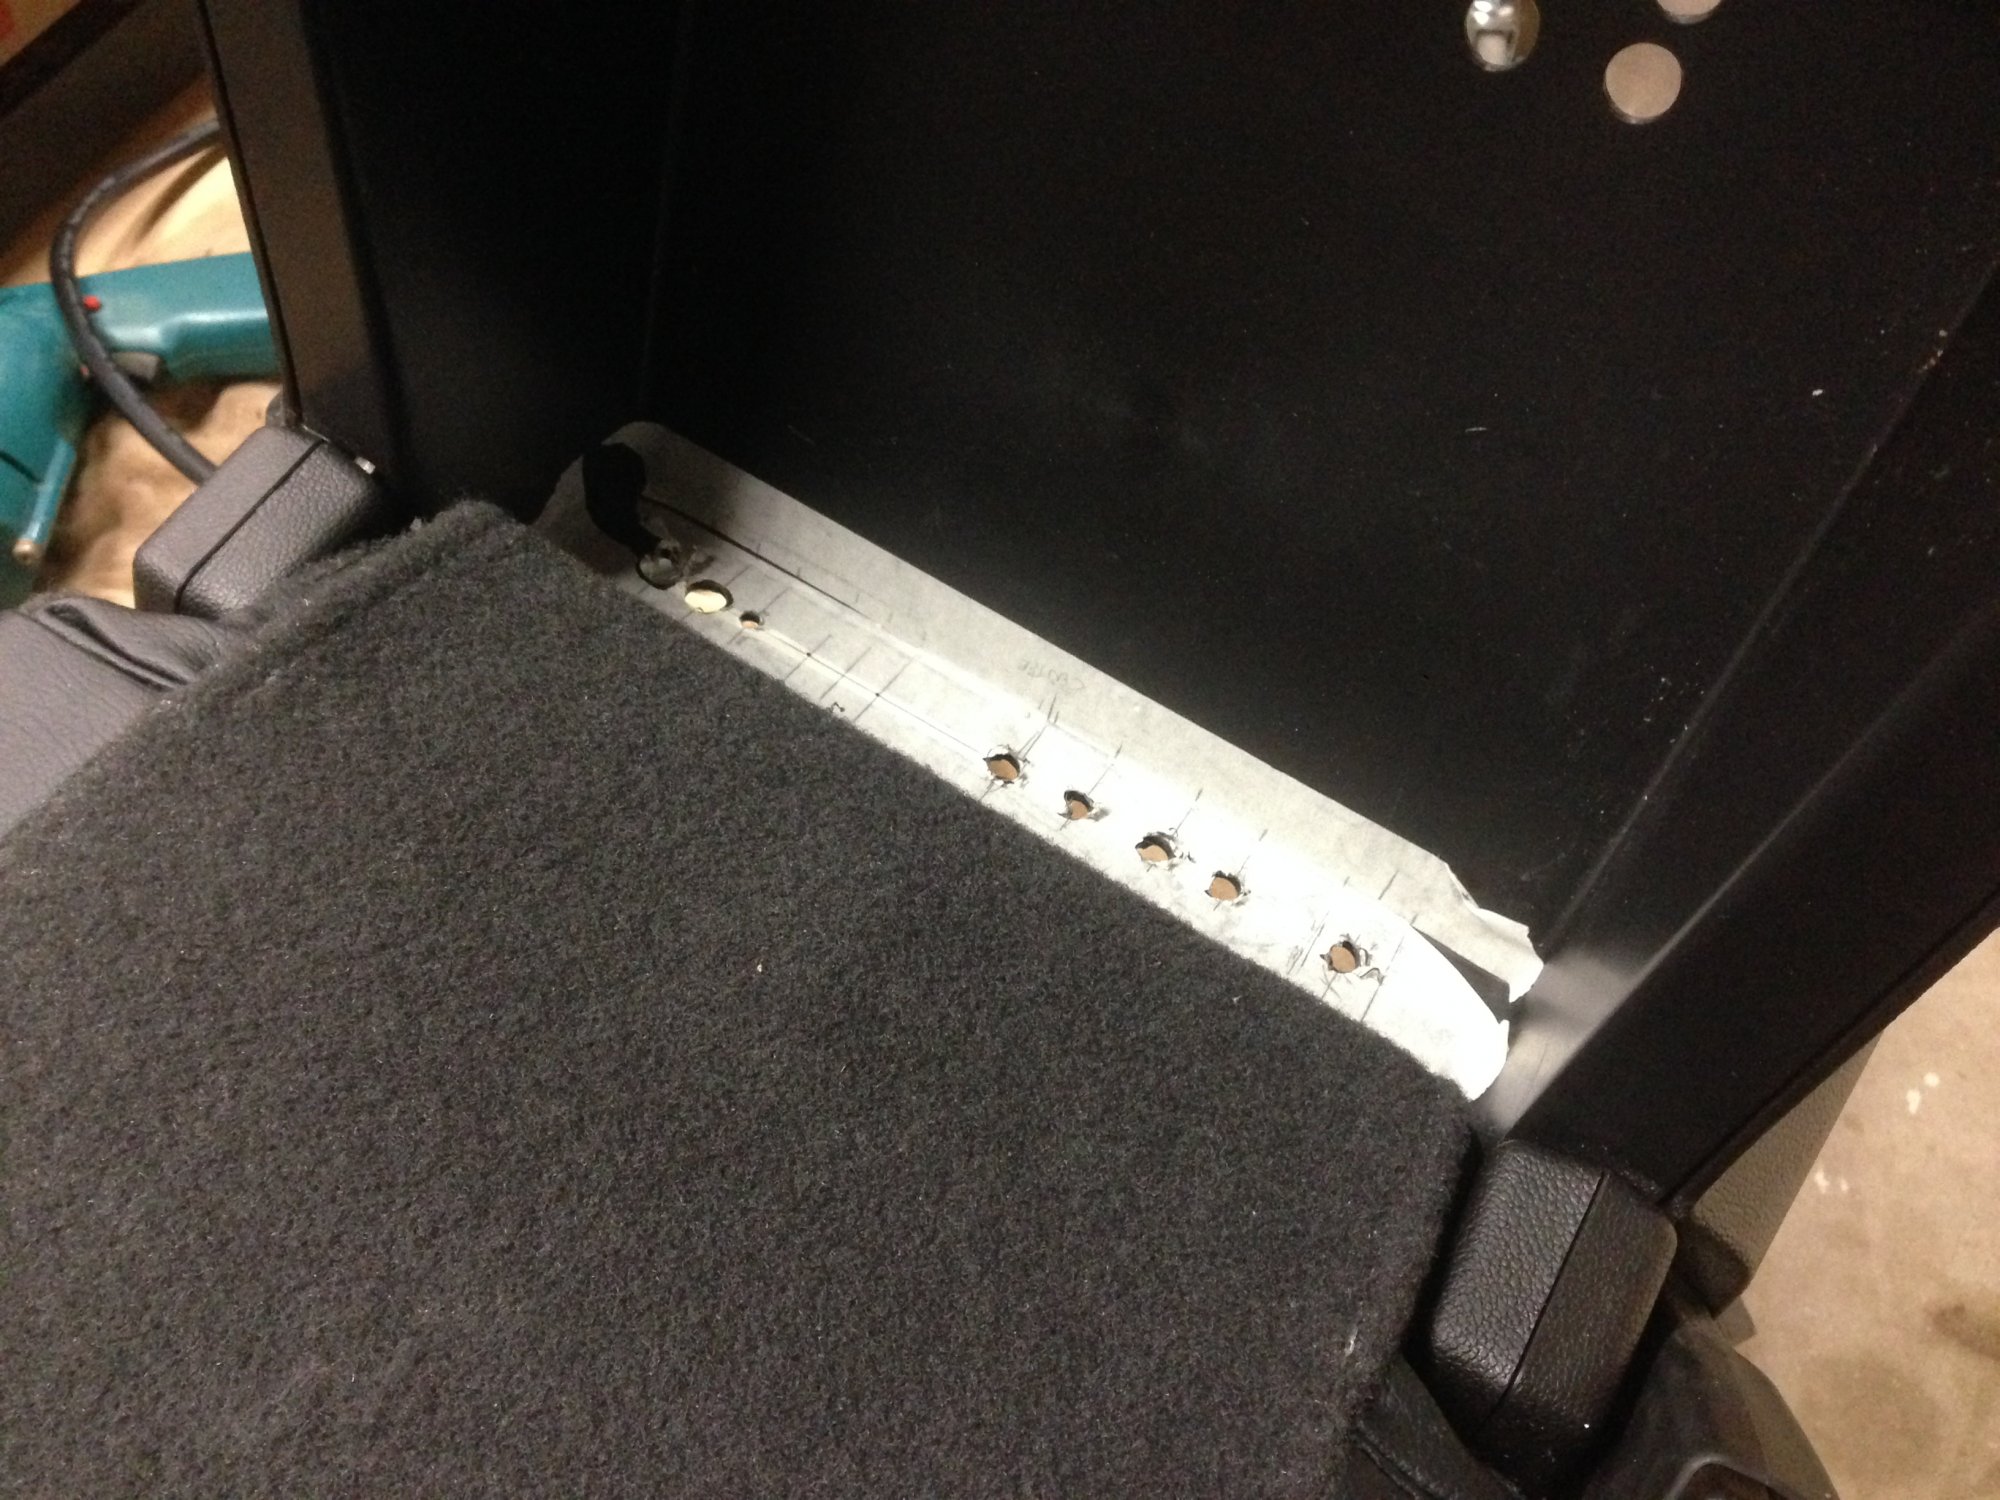
I got tired of replacing cracked/leaky/stripped thread terminal cups so I came up with this simple technique for getting the wires into the enclosure and provide a secure seal. I just drill holes for the wires, put zip ties tightly against the panel on the inside and outside and cover the inside with high temp hot glue or silicone etc.
- 457 replies
-
- 2
-
-
- deep ocean blue
- rcsb
- (and 11 more)
-
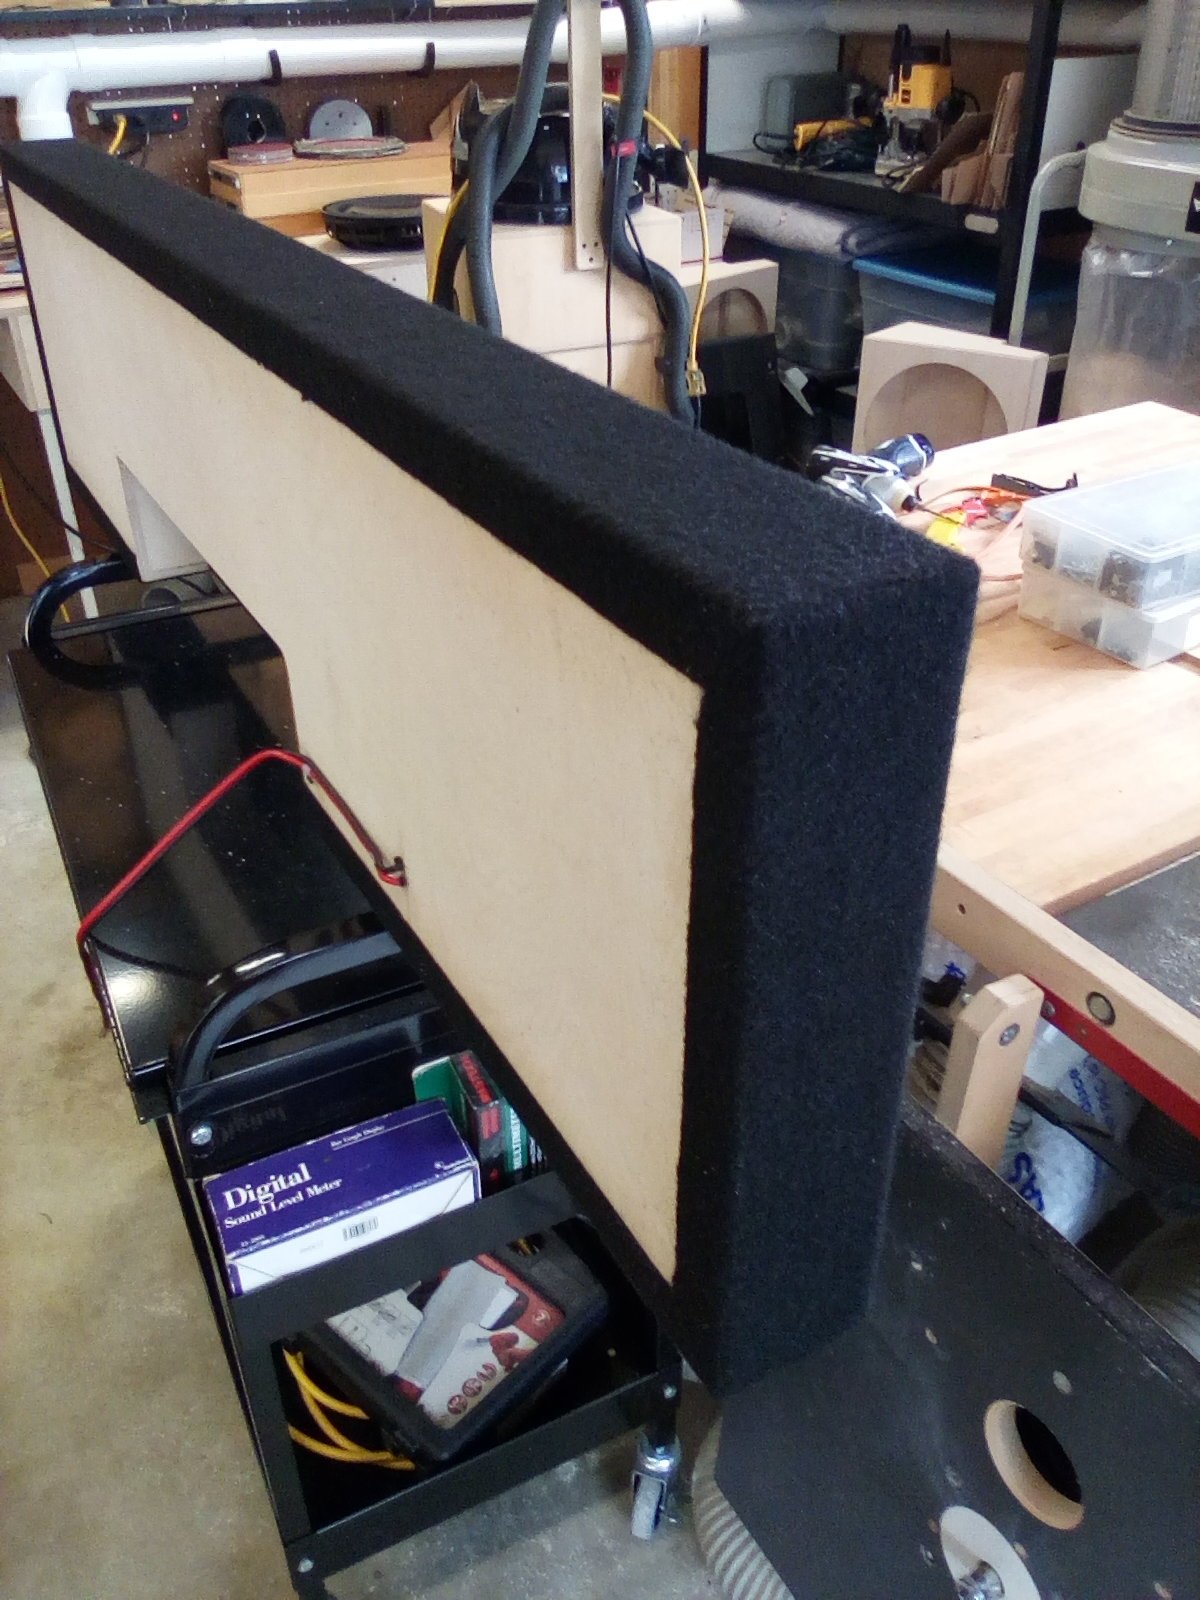
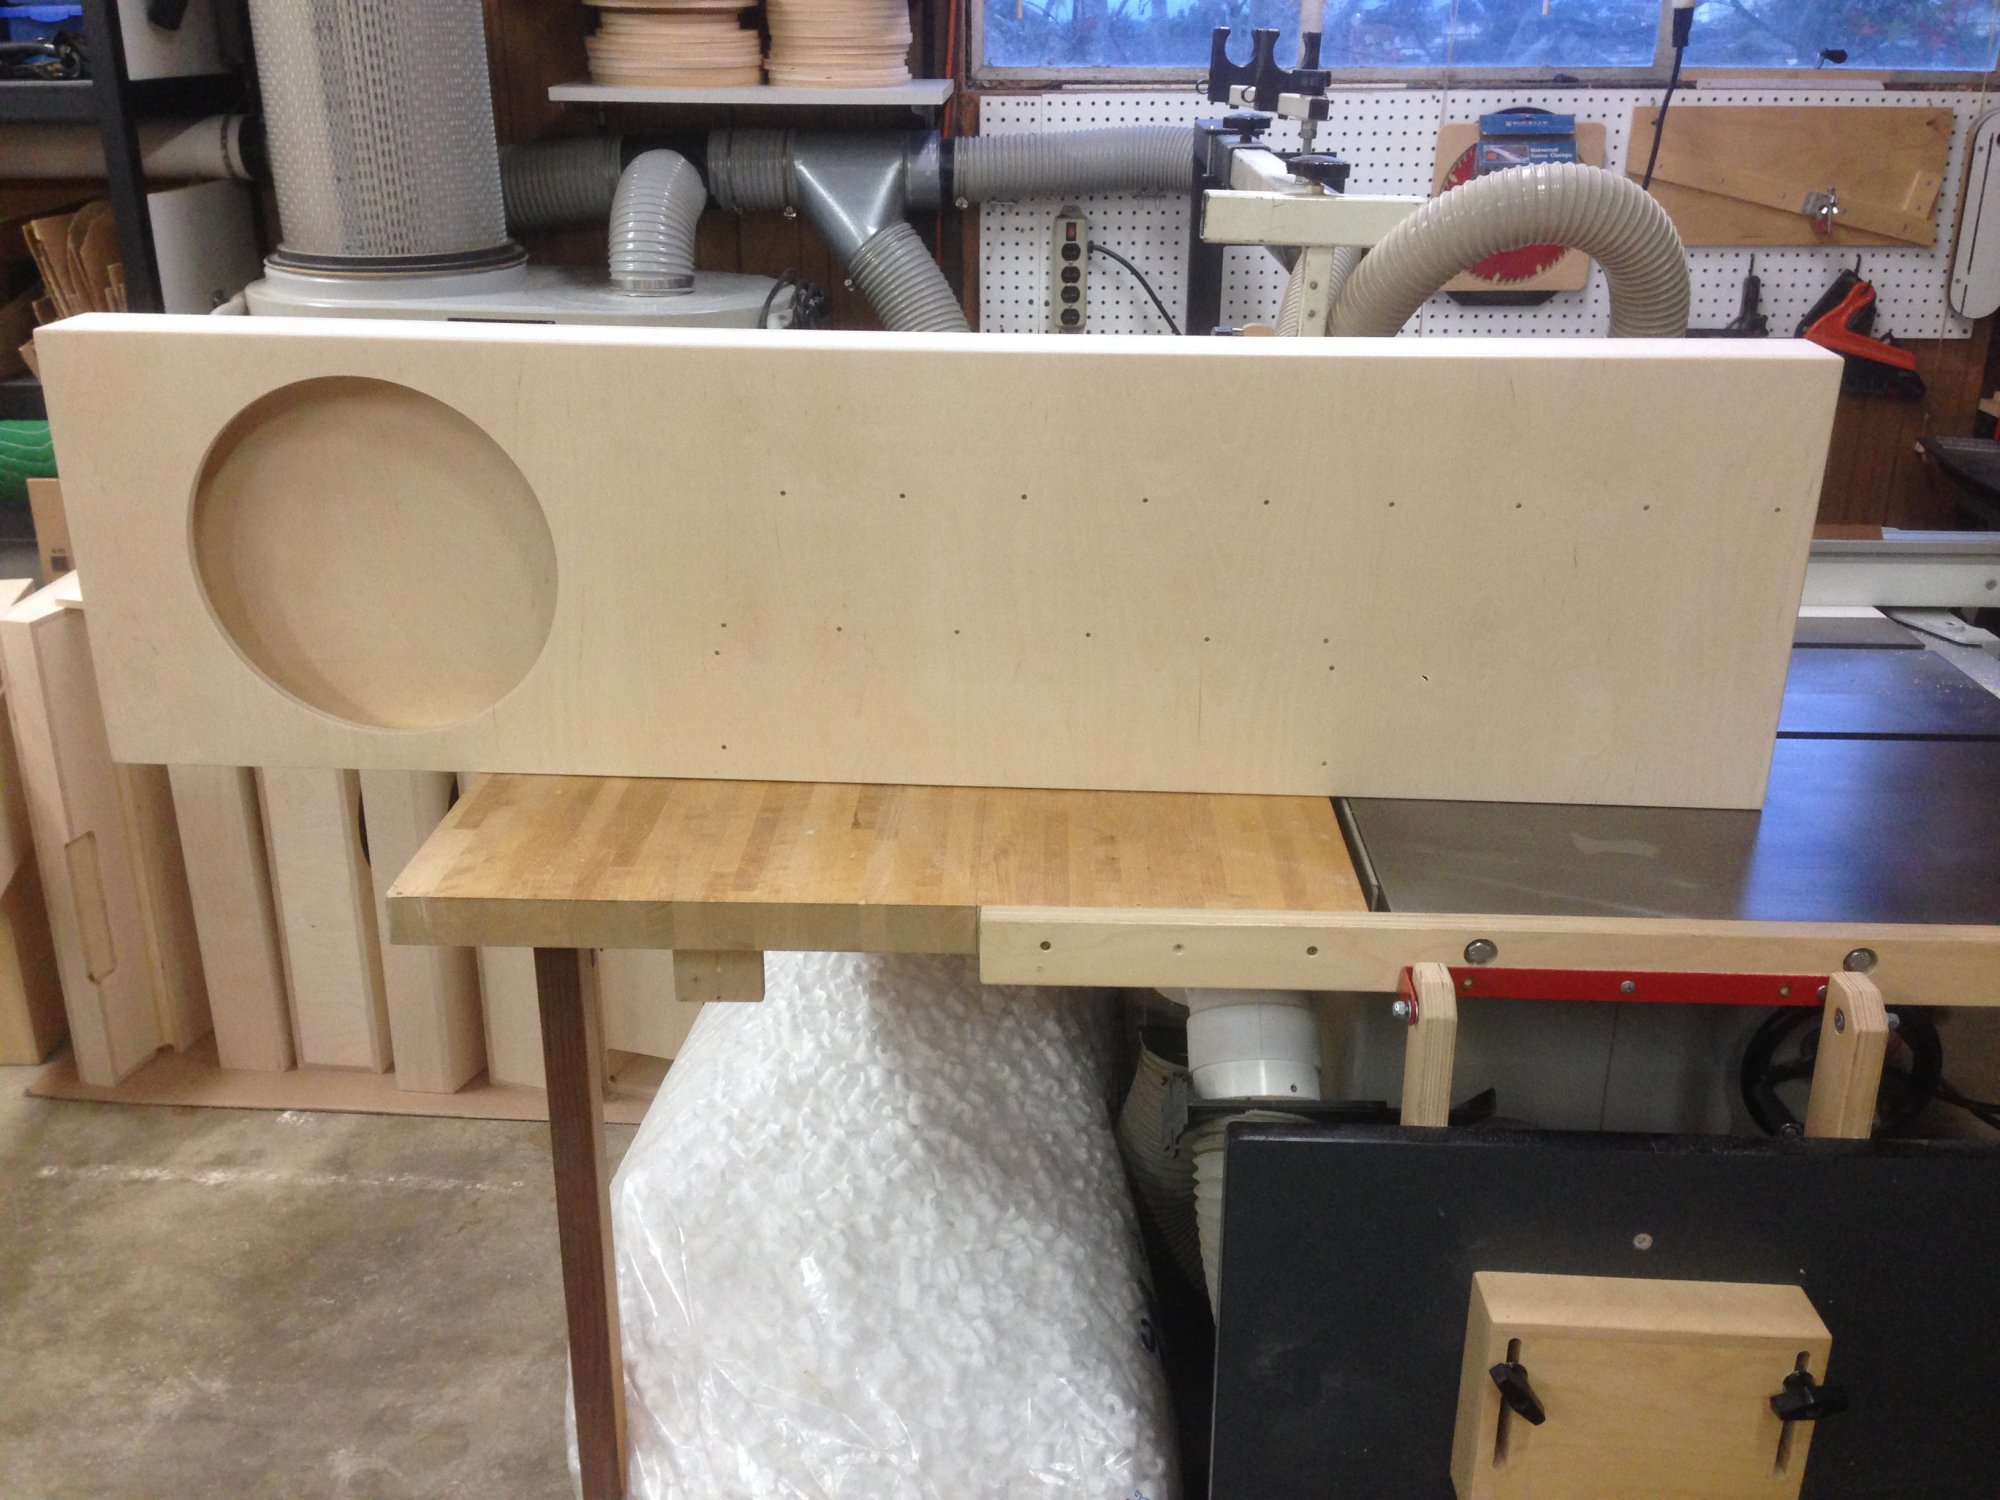
I did it all in one piece and the only seams are at the top and bottom on the ends. Also, I found an automotive grade carpet from an upholstery shop that supposedly is more durable and does not unravel so we'll so we'll see how well it holds up with me throwing stuff behind the seat (it was stiffer than the typical enclosure carpet and cut cleanly but doesn't stretch very much)
- 457 replies
-
- 1
-
-
- deep ocean blue
- rcsb
- (and 11 more)
-
Got my sub enclosure carpeted...
- 457 replies
-
- 1
-
-
- deep ocean blue
- rcsb
- (and 11 more)
-
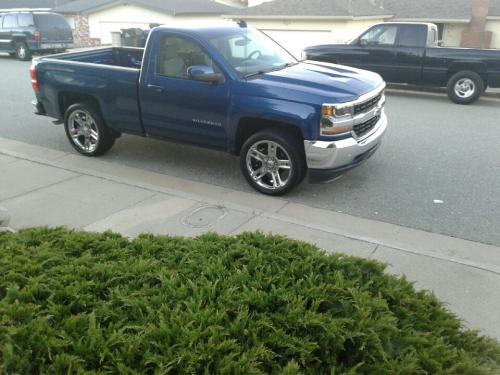
What have you done to your K2 today?
Marv88 replied to block8head's topic in Modifications & Accessories
Carpeted my sub enclosure today....
-
What have you done to your K2 today?
Marv88 replied to block8head's topic in Modifications & Accessories
That's funny..crappy gets spell checked to happy! -
What have you done to your K2 today?
Marv88 replied to block8head's topic in Modifications & Accessories
Thanks and glad that helped! -
What have you done to your K2 today?
Marv88 replied to block8head's topic in Modifications & Accessories
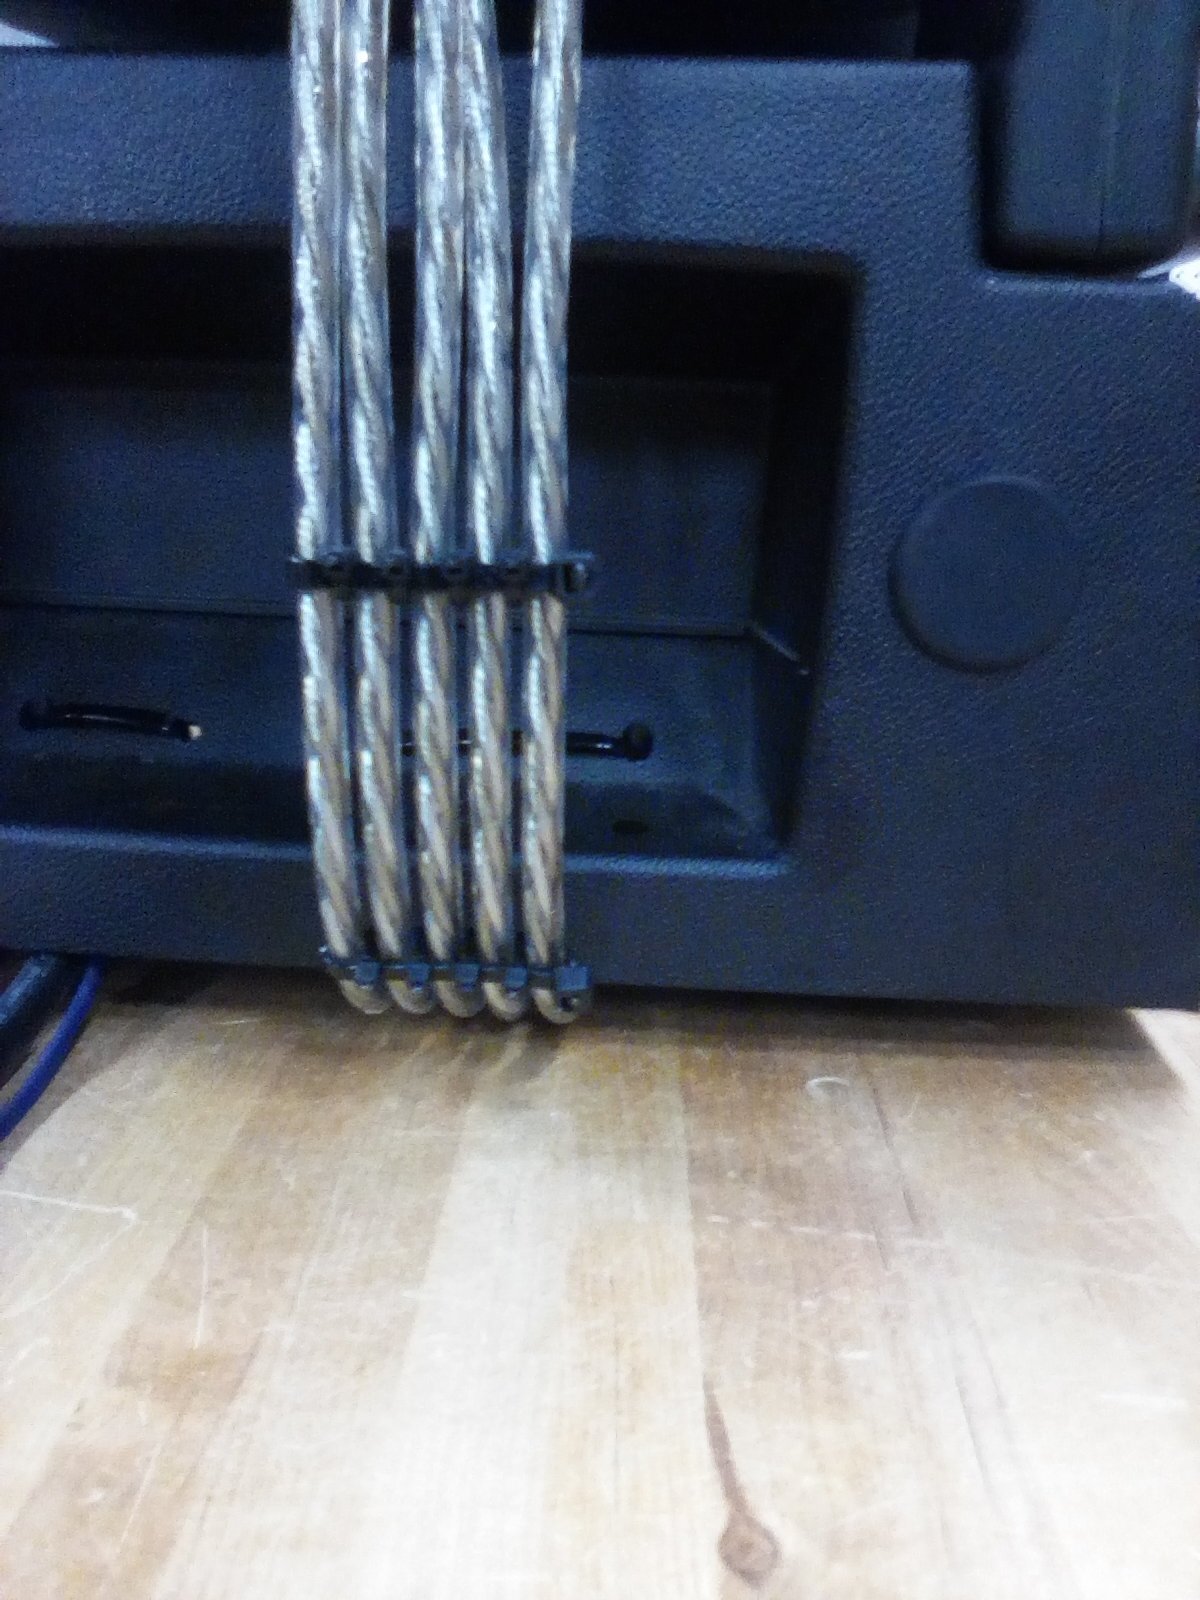
Thank you sir! This trick also works well to keep different size wires organized and spacing can be adjusted by using wider or multiple zip ties in between (sorry for the happy picture but my phone locked up and I can't seem to hold this tablet steady),
-
What have you done to your K2 today?
Marv88 replied to block8head's topic in Modifications & Accessories
Thanks and you are correct on the 5 zip ties. Hopefully this pic explains the procedure and if you have any questions just let me know.
-
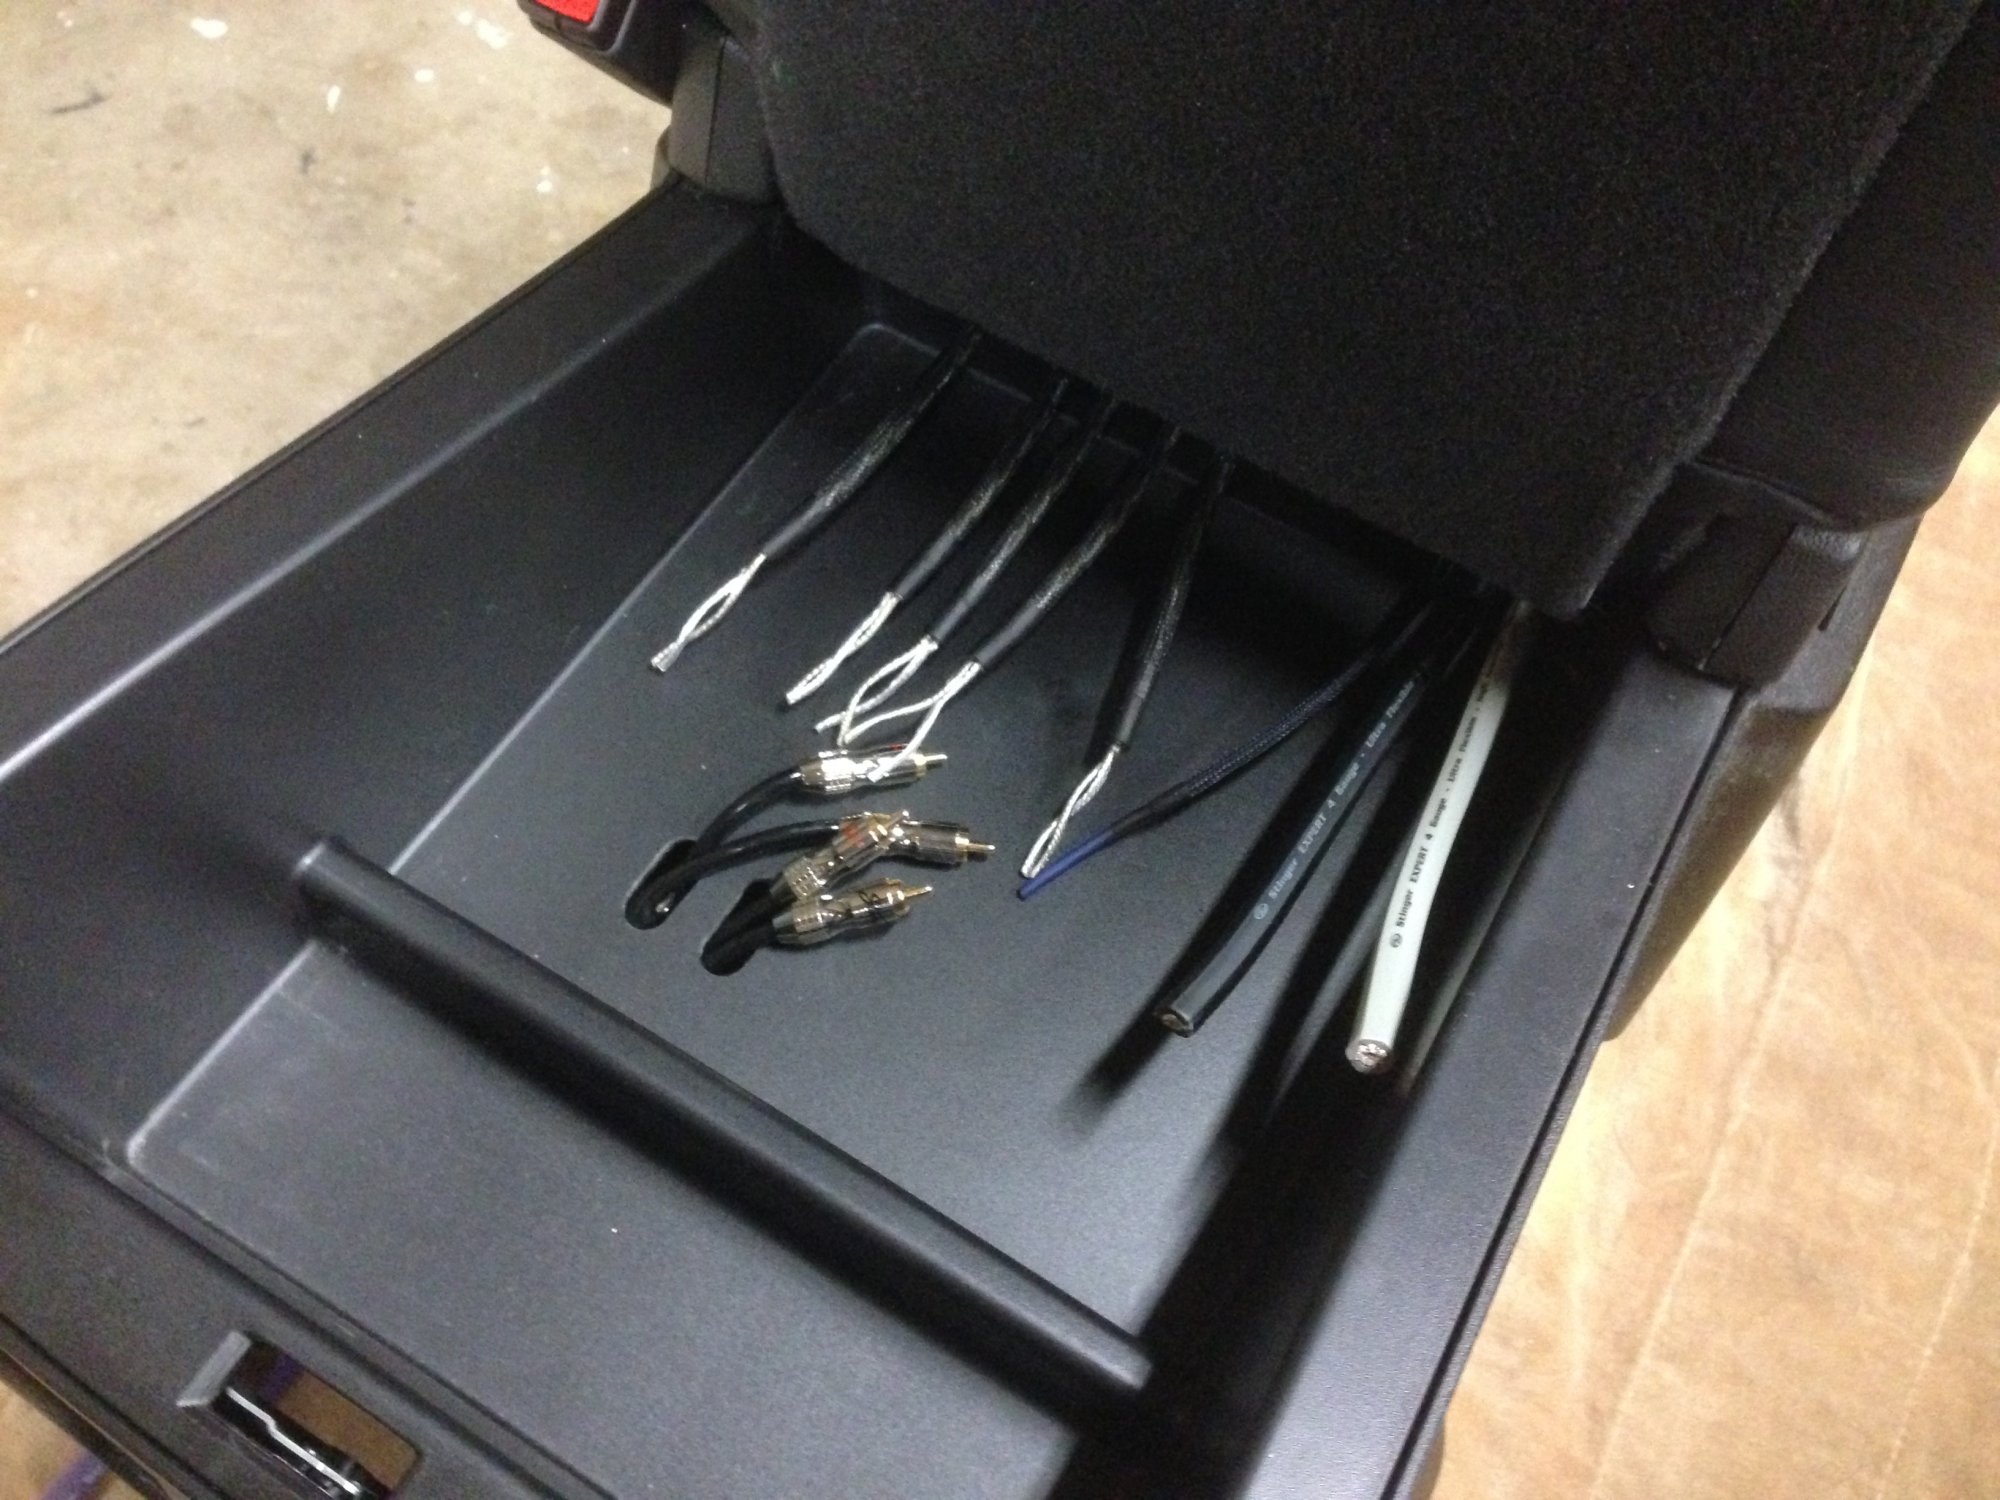
Made some cable organizers from zip ties..
- 457 replies
-
- 1
-
-
- deep ocean blue
- rcsb
- (and 11 more)
-
What have you done to your K2 today?
Marv88 replied to block8head's topic in Modifications & Accessories
Made some cable organizers with zip ties...
-
What have you done to your K2 today?
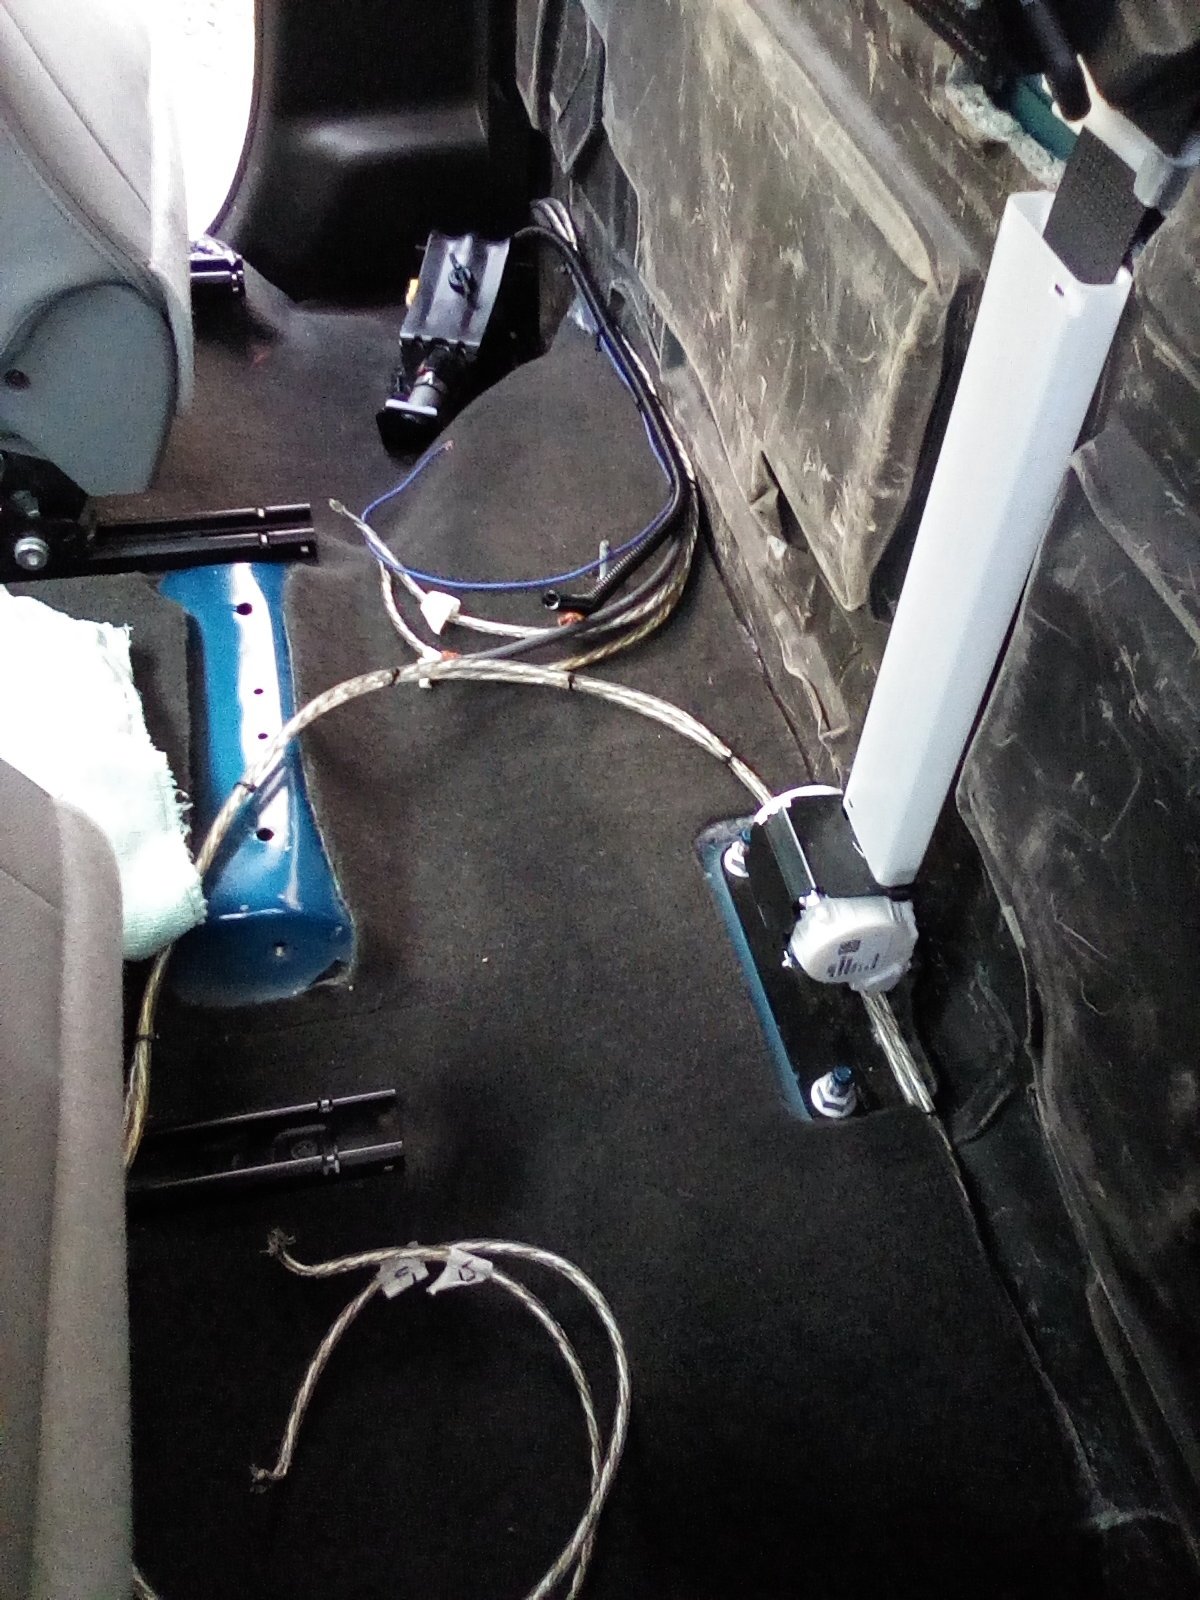
Marv88 replied to block8head's topic in Modifications & Accessories
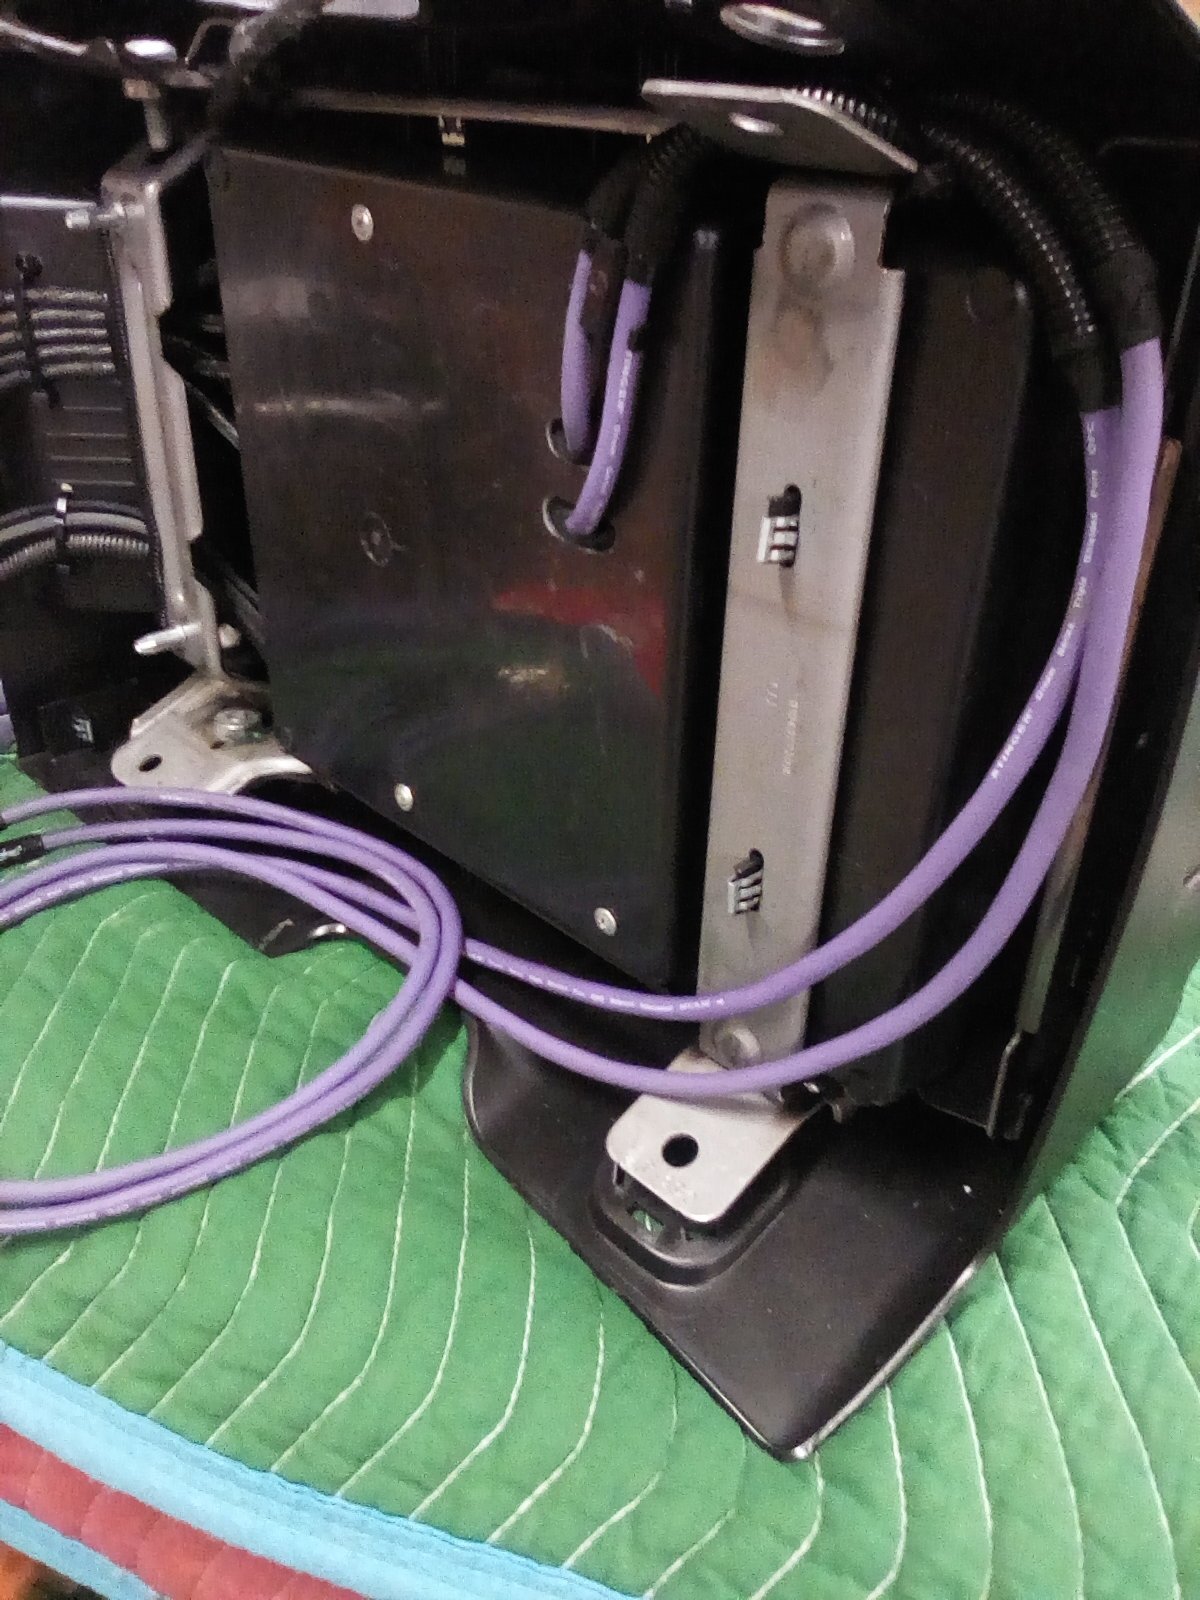
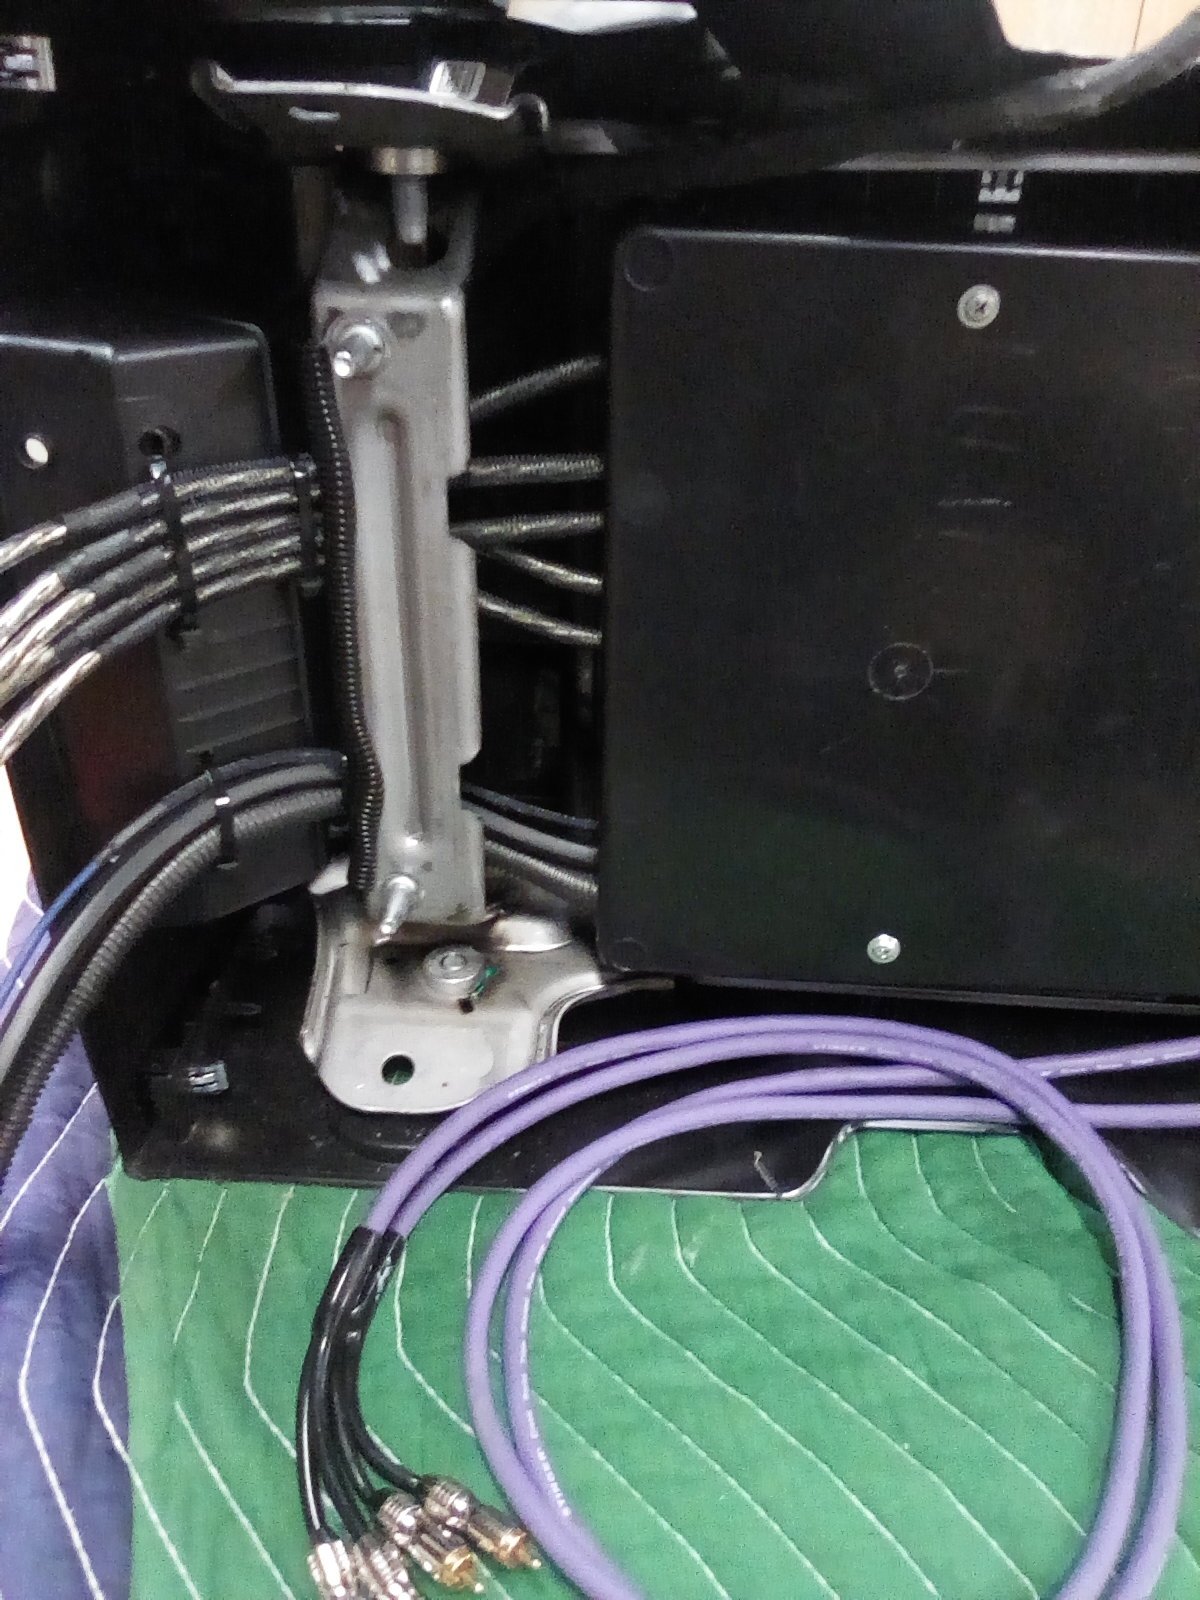
Cleaned up/organized the amp wiring under the jump seat and added some extra protection where wires may contact metal.
-
I cleaned up the wiring underneath tonight and added some extra protection where wires contact metal. I decided to use quick disconnects instead of the terminal strip and as soon as those arrive I'll be ready to reinstall everything.
- 457 replies
-
- 1
-
-
- deep ocean blue
- rcsb
- (and 11 more)
-
What have you done to your K2 today?
Marv88 replied to block8head's topic in Modifications & Accessories
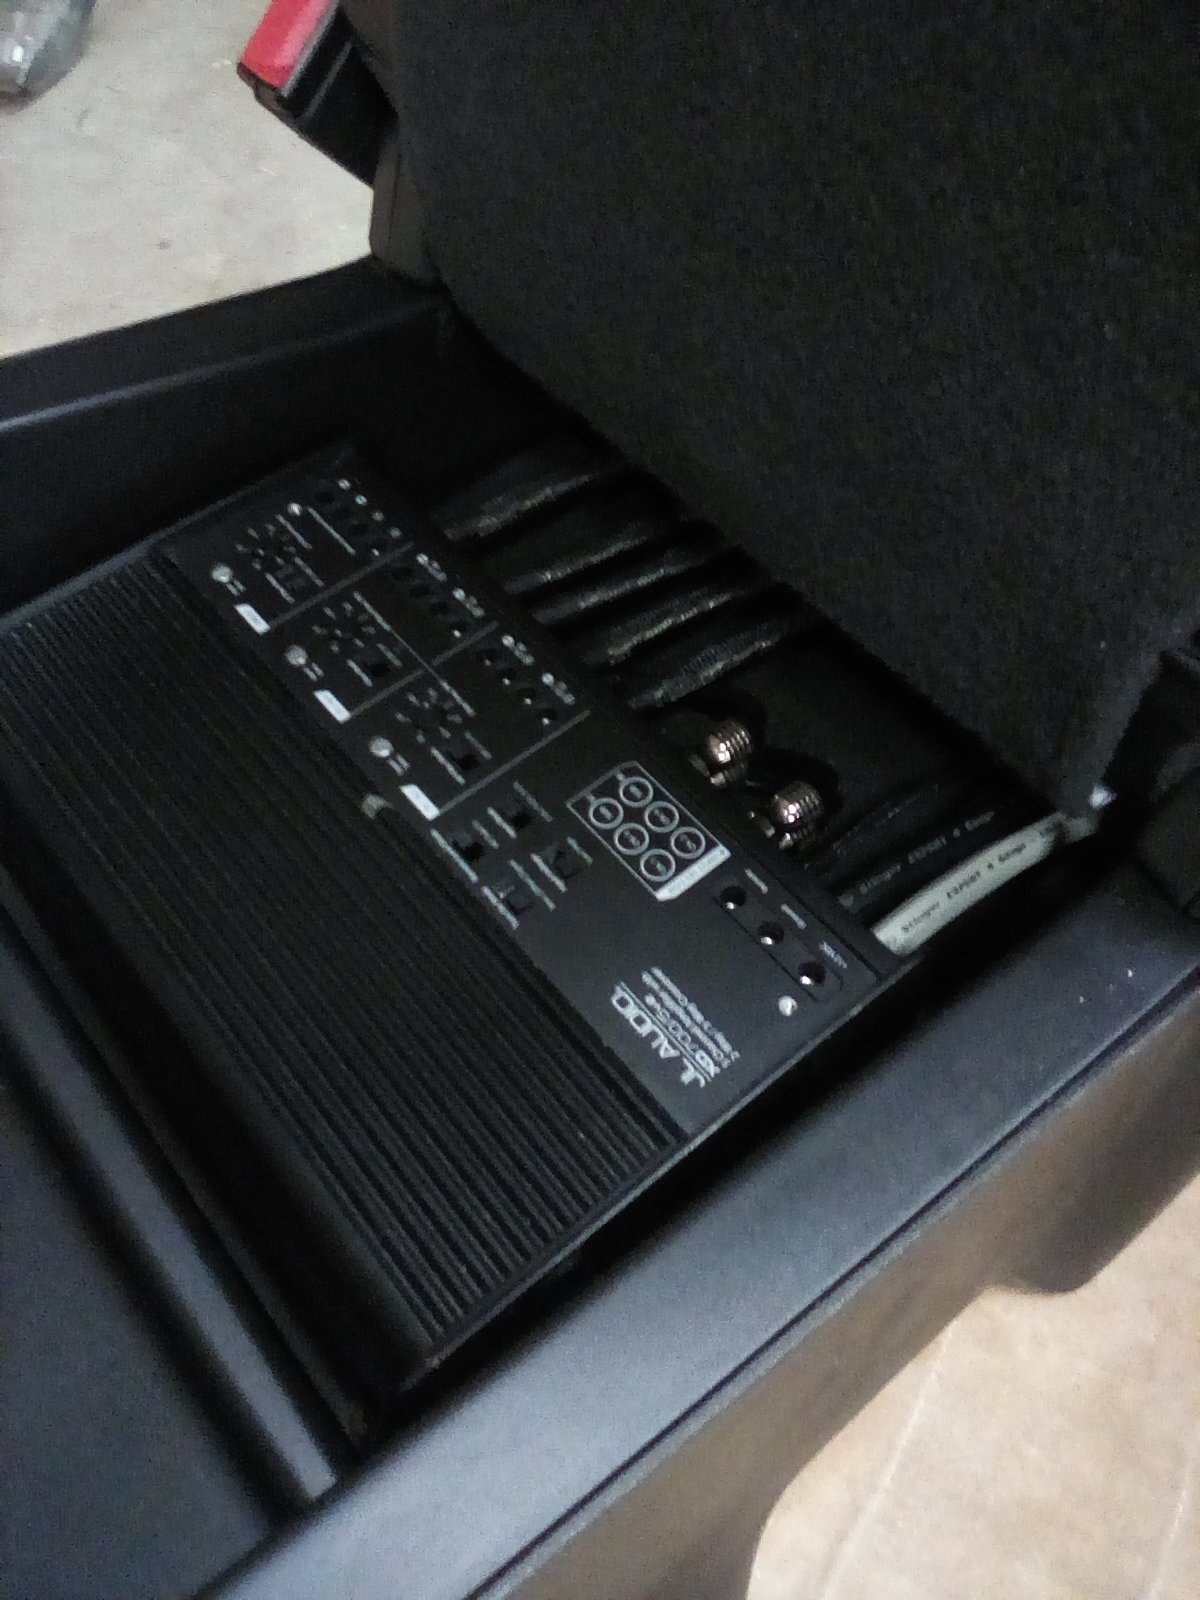
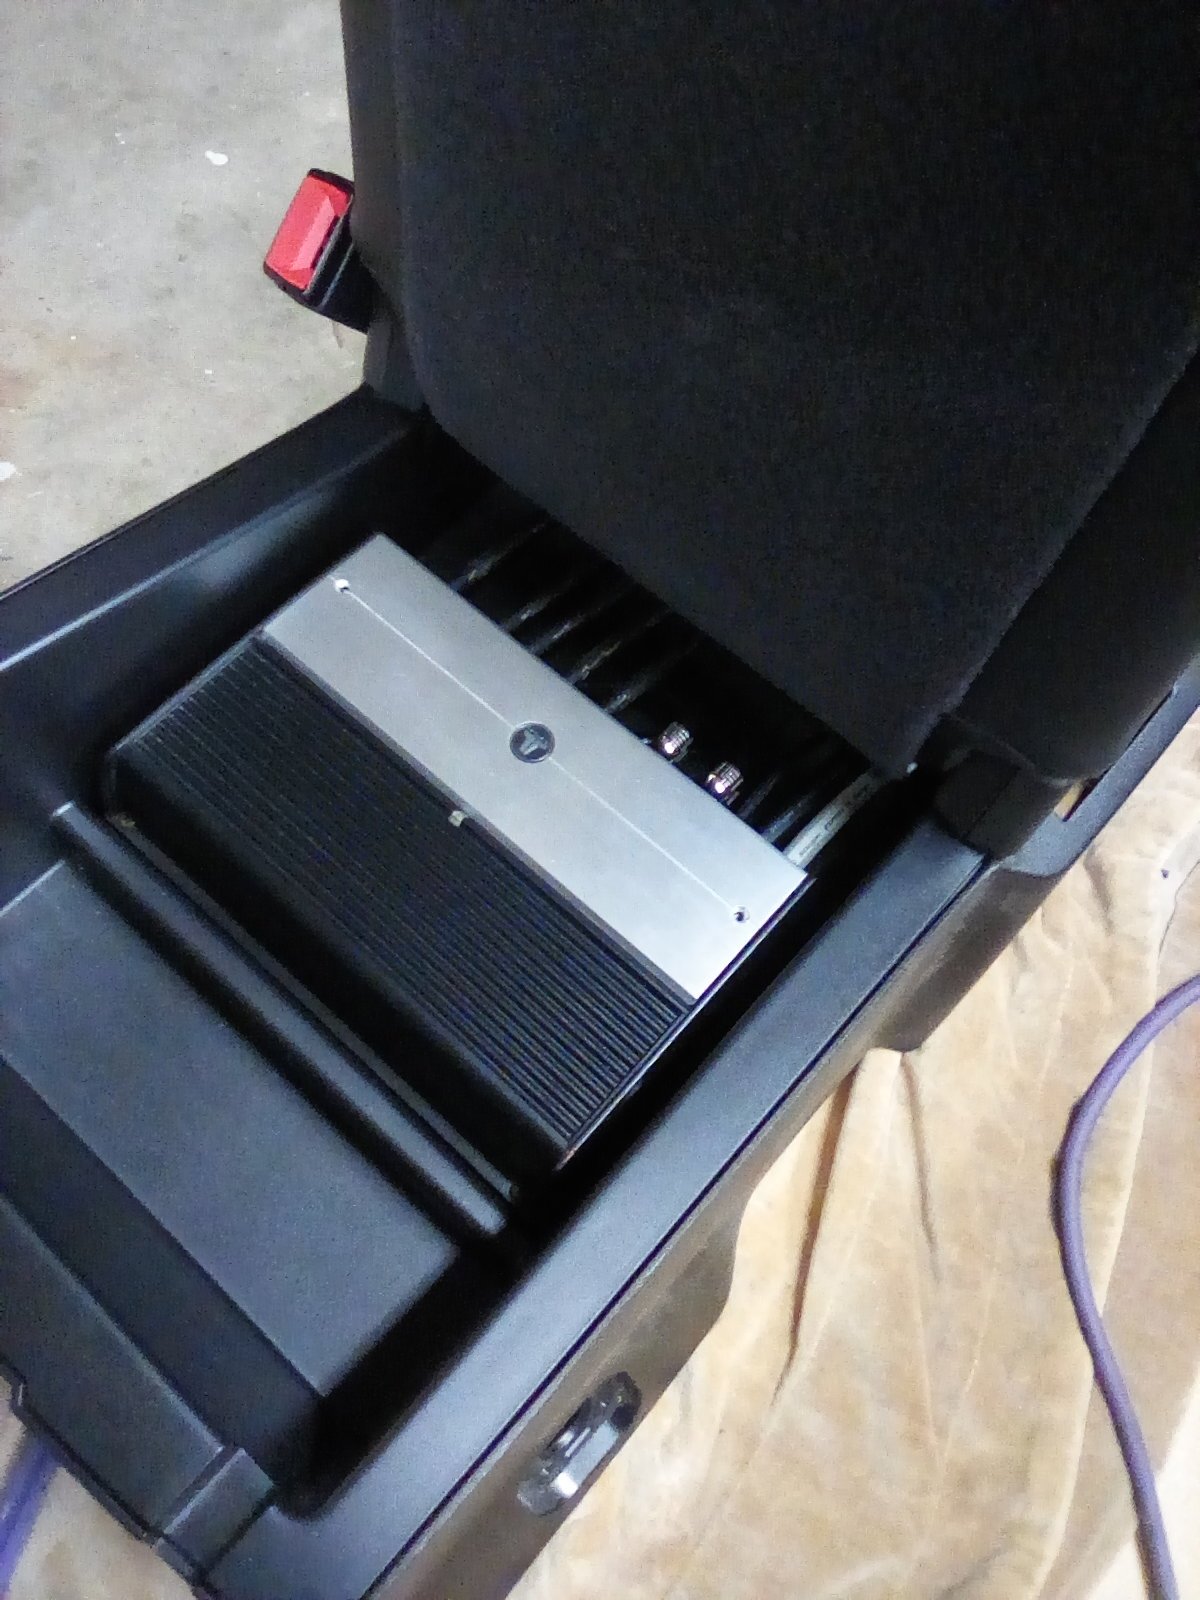
Installed and wired the amp (JL Audio xd700/5v2) in the lower compartment of the jump seat.
-
? I tried to send text you pics but my phone is still acting up and the wouldn't go through.
- 457 replies
-
- 5
-
-
- deep ocean blue
- rcsb
- (and 11 more)
-
What have you done to your K2 today?
Marv88 replied to block8head's topic in Modifications & Accessories
The amp is a JL Audio xd700/5v2 and I had it temporarily in there for a while with no heat issues so I think it will be fine (I was going to drill some holes for air flow but doesn't seem they will be needed. I was planning to mount the amp on the back wall but I changed subs to a JL 13tw5 and the enclosure spans the entire rear wall so no room.
-
What have you done to your K2 today?
Marv88 replied to block8head's topic in Modifications & Accessories
Got started wiring up the jump seat for the amp install.
-
Got started wiring up the jump seat for the amp (JL Audio xd700/5v2). I'm going to put a barrier strip on the back so I can install the amp inside before reinstalling the jump seat and then I'll just have to make connections on the outside..
- 457 replies
-
- 1
-
-
- deep ocean blue
- rcsb
- (and 11 more)
-
What have you done to your K2 today?
Marv88 replied to block8head's topic in Modifications & Accessories
Rain is giving us a break so my buddy came by and did a full detail including clay and wax.
-
What have you done to your K2 today?
Marv88 replied to block8head's topic in Modifications & Accessories
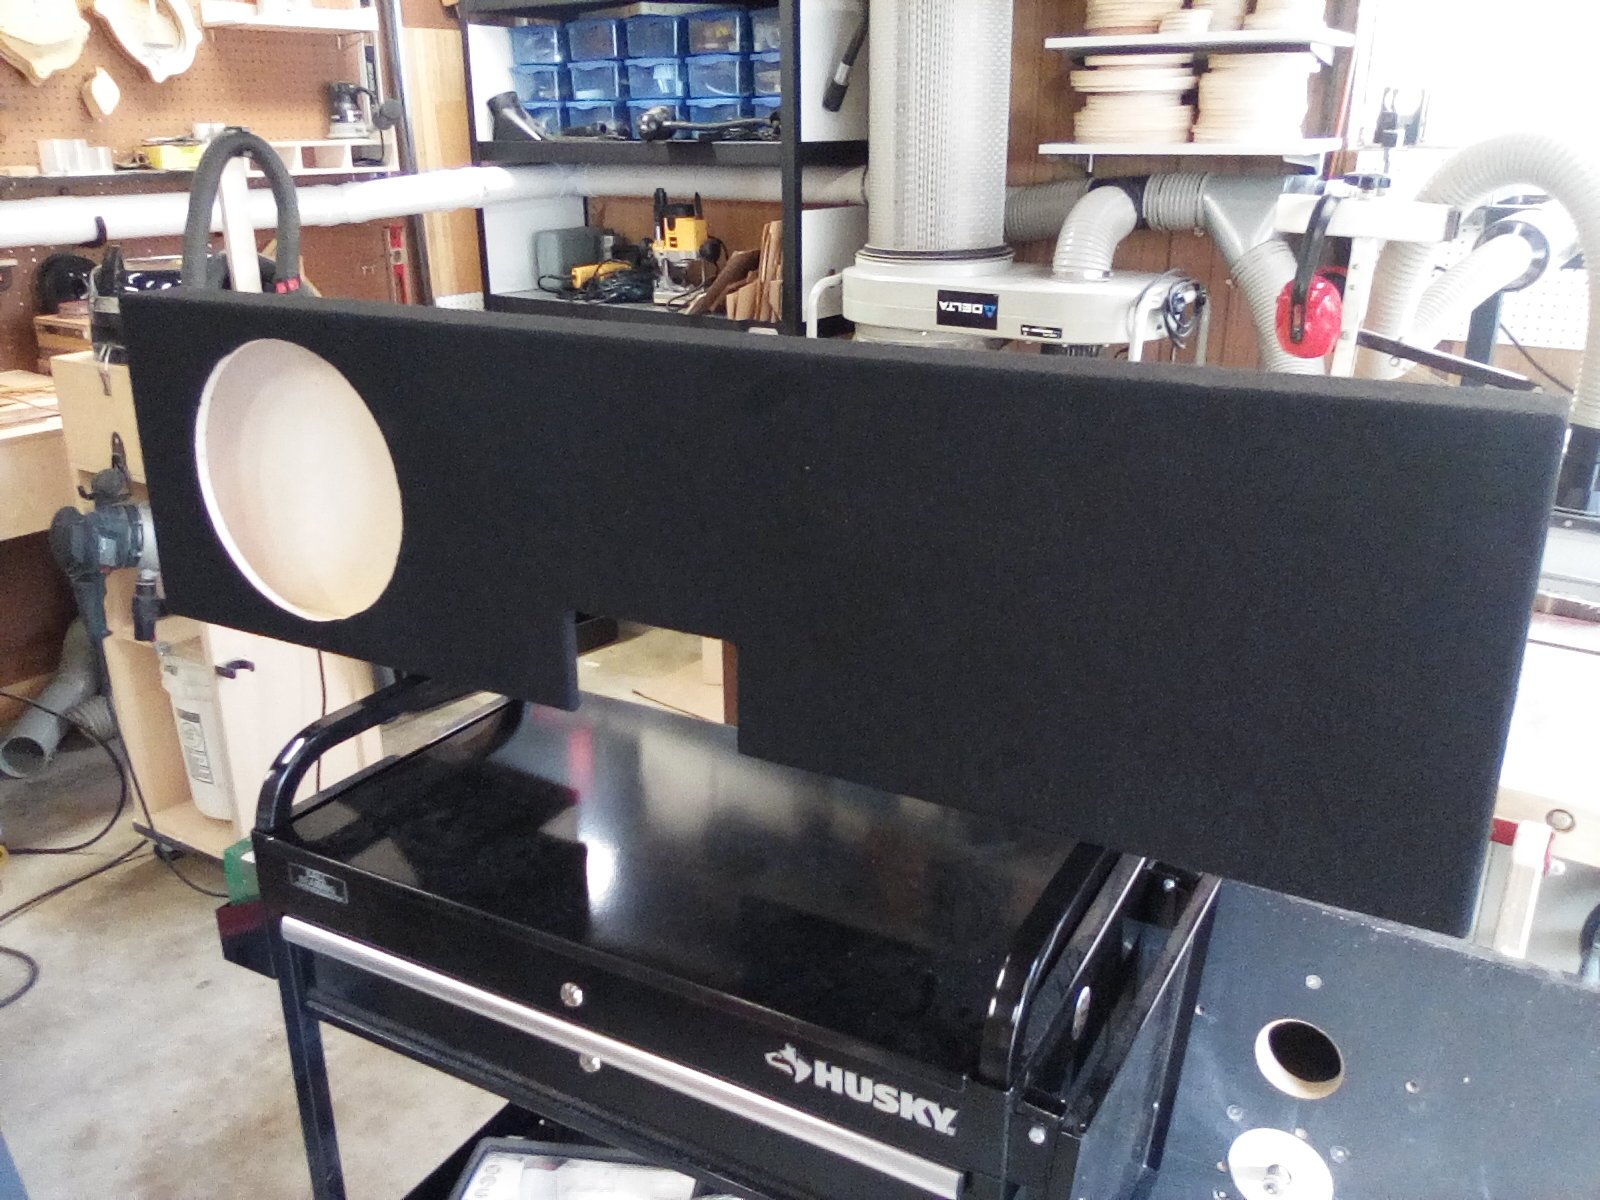
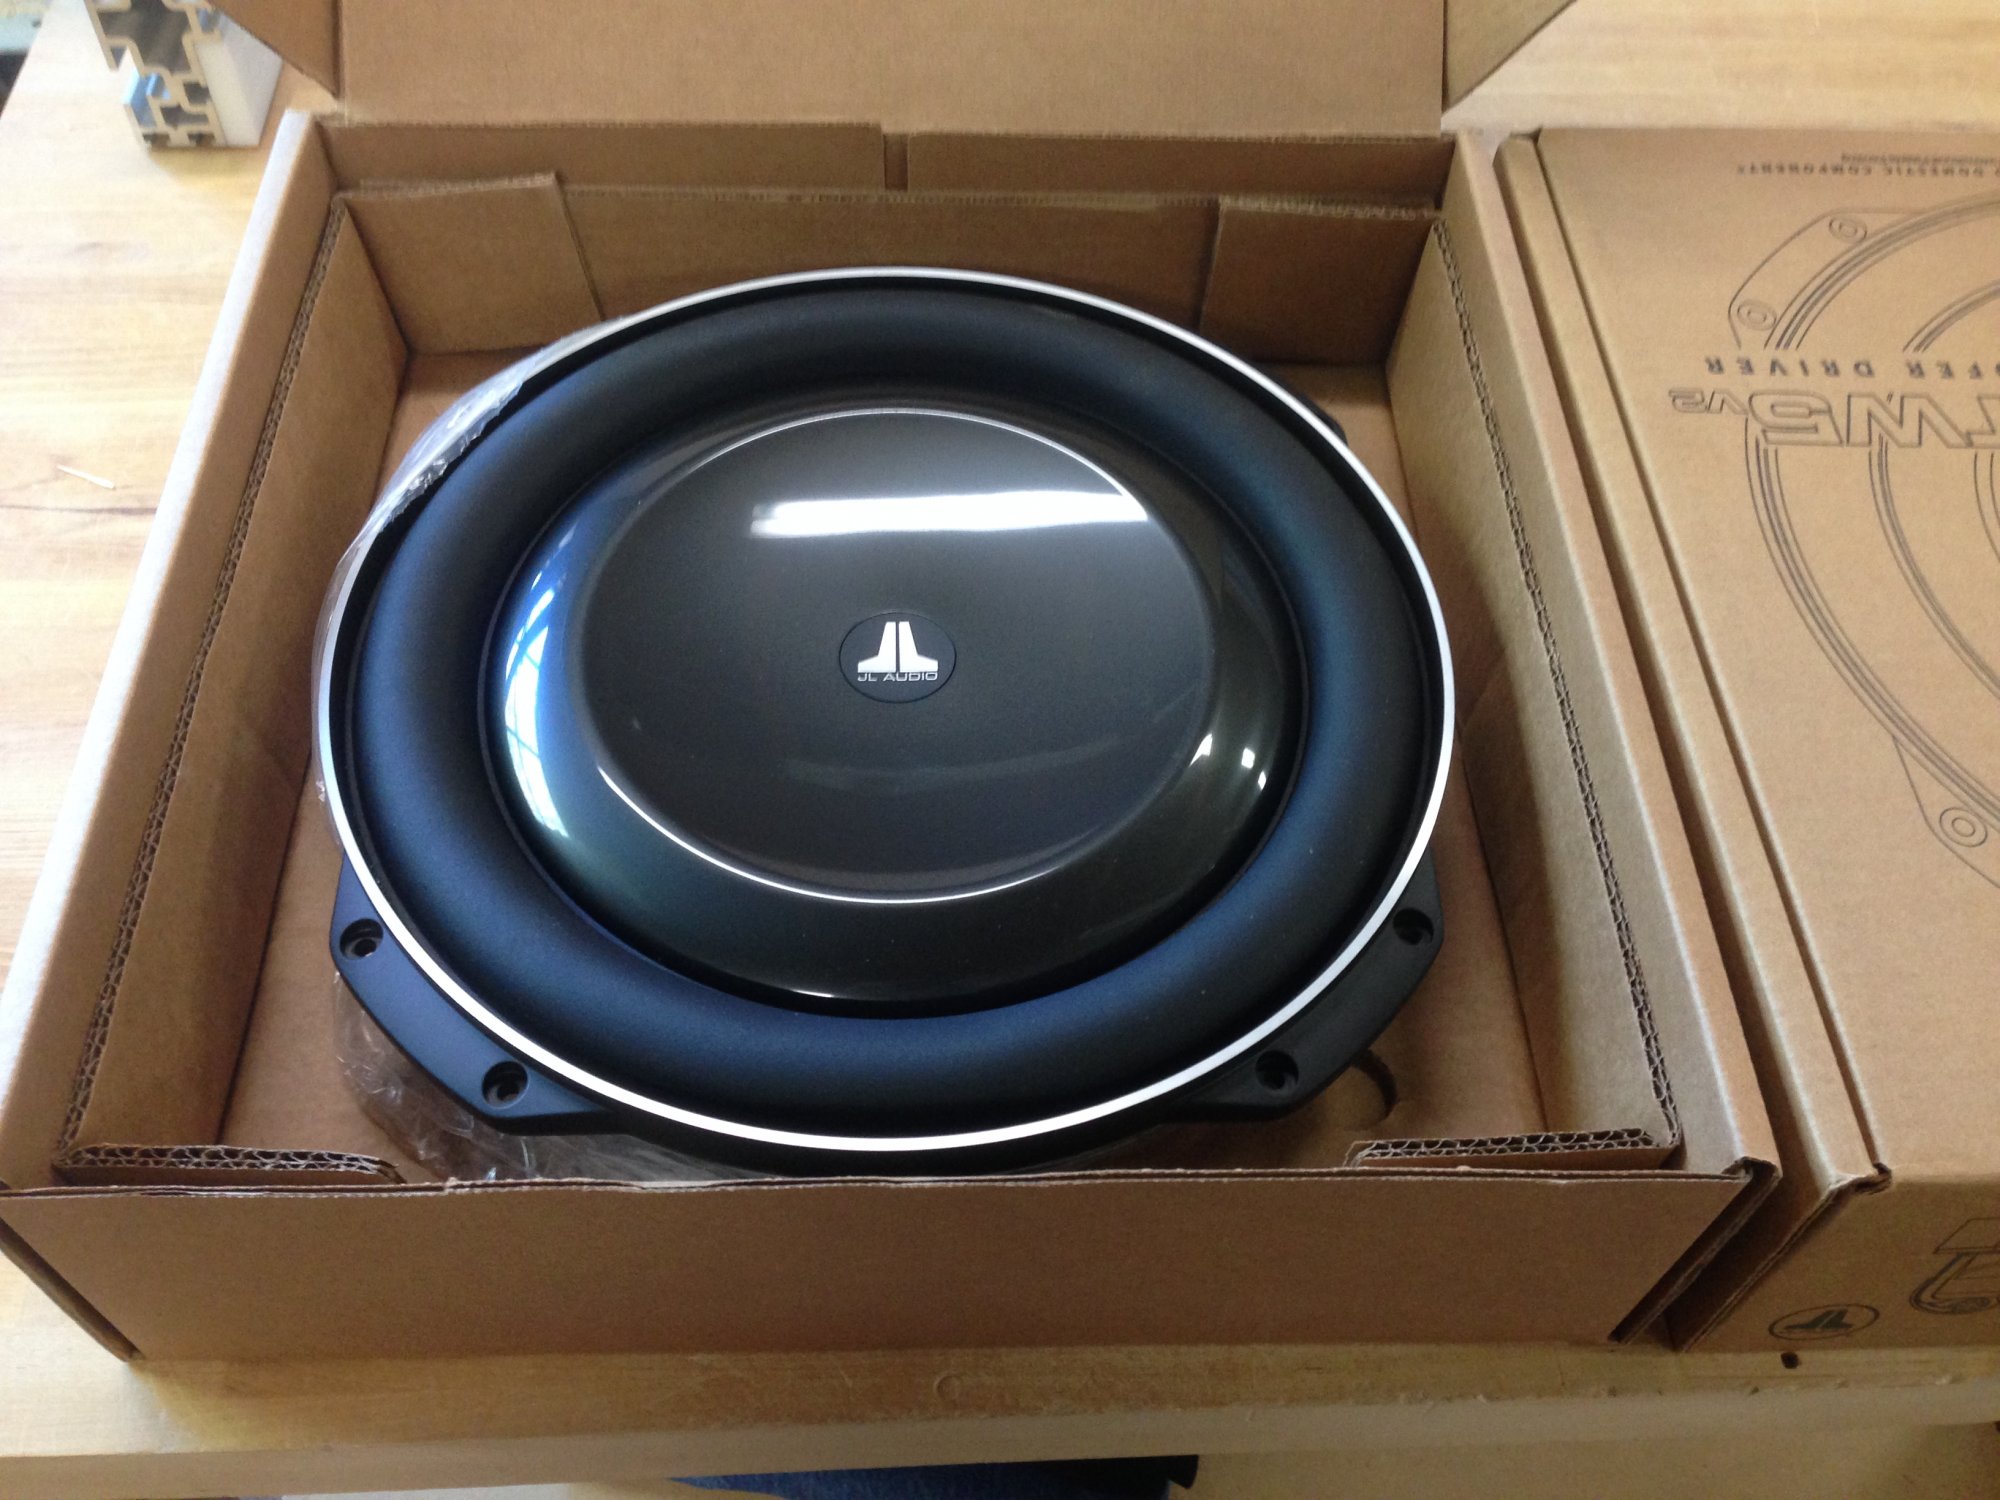
Built yet another sub enclosure for my regular cab and hopefully the last. This one is for a JL Audio 13tw5 13.5" shallow sub which is surely overkill for me but I figured it would be better to have and not need than to need and not have.
-
The enclosure spans the entire rear wall so I'm going to move the amp back to the bottom compartment in the jump seat and it's only 3 3/8" deep so jump seat opens and seats go all the way back.
- 457 replies
-
- 4
-
-
- deep ocean blue
- rcsb
- (and 11 more)
-
I figured it would be better to have and not need than to need and not have so I ditched the 8" sub for a JL 13TW5 (13.5" shallow sub). The notch fits around the seat belt mechanism and tool pouch mounting stud which I'm going to use for a bracket to hold it at the bottom. The top will be bolted through the cavity with nutserts and will have rubber insulators to isolate it from the cab.
- 457 replies
-
- 1
-
-
- deep ocean blue
- rcsb
- (and 11 more)
-
Discovered! Features you may not have known about...
Marv88 replied to txab's topic in 2014-2018 Silverado 1500 & Sierra 1500
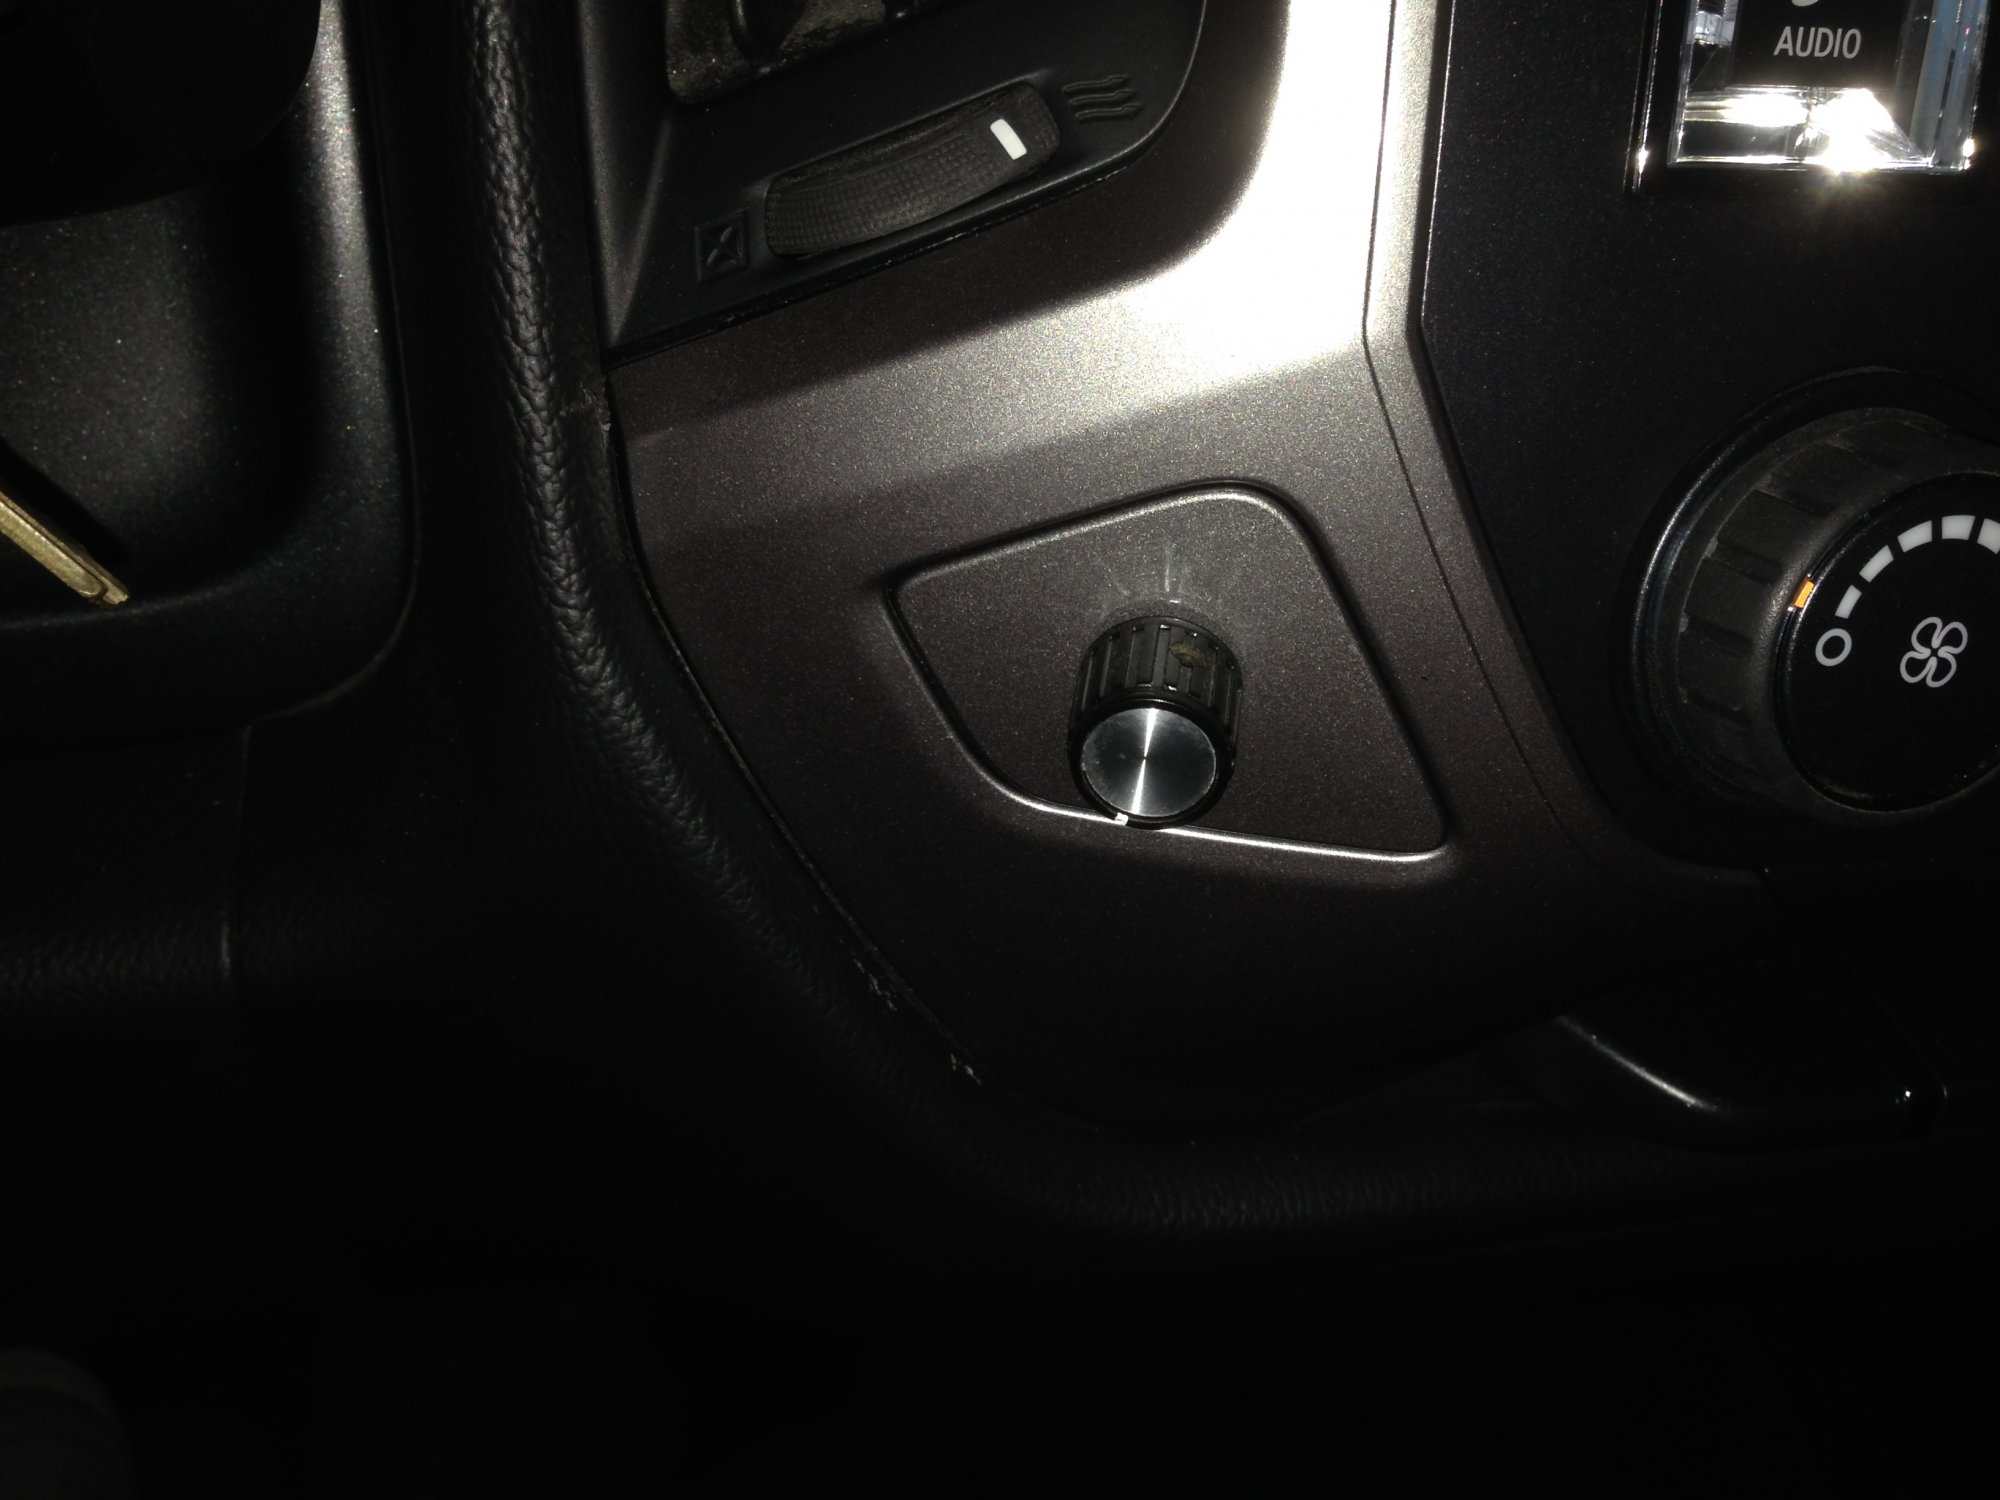
The side trim pieces with the knockouts actually come with the Alpine kit and must be used as your original trim will not work due to the larger screen. I don't have seat warmers (2016 LT) so I put my bass level knob there.
-
Discovered! Features you may not have known about...
Marv88 replied to txab's topic in 2014-2018 Silverado 1500 & Sierra 1500
My truck had the IOB radio which did not come with steering wheel controls nor a CD player which were 2 main reasons I got this however contrary to what I was told by the tech at Alpine I still could not get them to work. If your truck has steering wheel controls already they will work with the included idatalink Maestro module and you maintain "most" of you headunit controlled functions but it's been a while and unfortunately I don't remember exactly which ones I lost


-
Forum Statistics
250.3k
Total Topics2.7m
Total Posts -
Member Statistics
342,725
Total Members8,960
Most Online
-
Who's Online 5 Members, 0 Anonymous, 795 Guests (See full list)