


hotairgypsy
-
Posts
58 -
Joined
-
Last visited
Content Type
Profiles
Forums
Gallery
Events
Articles
RPO
Store
Blogs
Everything posted by hotairgypsy
-
VSE CCV Bypass - Anyone have this installed in their L5P?
hotairgypsy replied to PBNB's topic in Modifications & Accessories
i dont know where you been reading...they make a top notch product..people say lots of great things about them..yes it can be difficult to get a hold of them when you need help sometimes put when you do it is great service... as for the actual question at hand i have the ccv mod and i vented to atmos in my case...I got my ccv from somewhere else but i have plenty of VSE product...for starters i use their tuning on my 22 duramax -
burned out complete front end differential
hotairgypsy replied to hotairgypsy's topic in Troubleshooting, Warranty & Recalls
both of you are sooooo missing the point...we are living in a time we are getting raped in pricing...I looked up gm profits last year and they are in the billions...BILLIONS!!!! they are not hurting...they and many other companies are just taking advantage of people...the least they can do it take care of what they built...there is ZERO reason it should take 5 weeks to fix a truck...they could have gone to the assembly line parts and grabbed what was needed and sent to get it fixed all within 2 weeks. You pay a premium the least you expect is to be taken care of when it is needed...The vast majority of people who buy these trucks are people who actually use them in a work environment...This truck is a business tool...a business piece of equipment...They have no right to take my business down for 5 weeks because of excuses...They not hurting...it is called greed...if they wanted to take care of their customers they could have handled this right away...not give excuses like everyone of us get every single day when we walk into walmart, stop for gas, or just go thru the drive thru...we live in a world of nothing but excuses cuz they can...This crappy service is getting old...so it is not about special service cuz i paid a lot...it about doing whats right in a timely fashion to your customer...everyone one of us(or at least most of us) work hard for ever dollar we get and we want it to go to good use...we are NOT being treated with respect...we are being treated with a whole lot of excuses... -
burned out complete front end differential
hotairgypsy replied to hotairgypsy's topic in Troubleshooting, Warranty & Recalls
we are the same in stories...i just got the parts list from the dealership..this is what i am being told is being replaced. SL-N Plug SL – N Shim Kit SL-N-Gasket SL-N-Lock SL-N-Bearing SL-N-Gasket SL-N-Seal N-Saft SL-N-Case SL-N-Yoke SL-N-Gear Kit SL-N-Adjuster -
burned out complete front end differential
hotairgypsy replied to hotairgypsy's topic in Troubleshooting, Warranty & Recalls
i get it...i was told ring and pinion is being replaced and i am assuming all the other parts inside the dif...i would think it would be easier to just install a complete assembly..who knows -
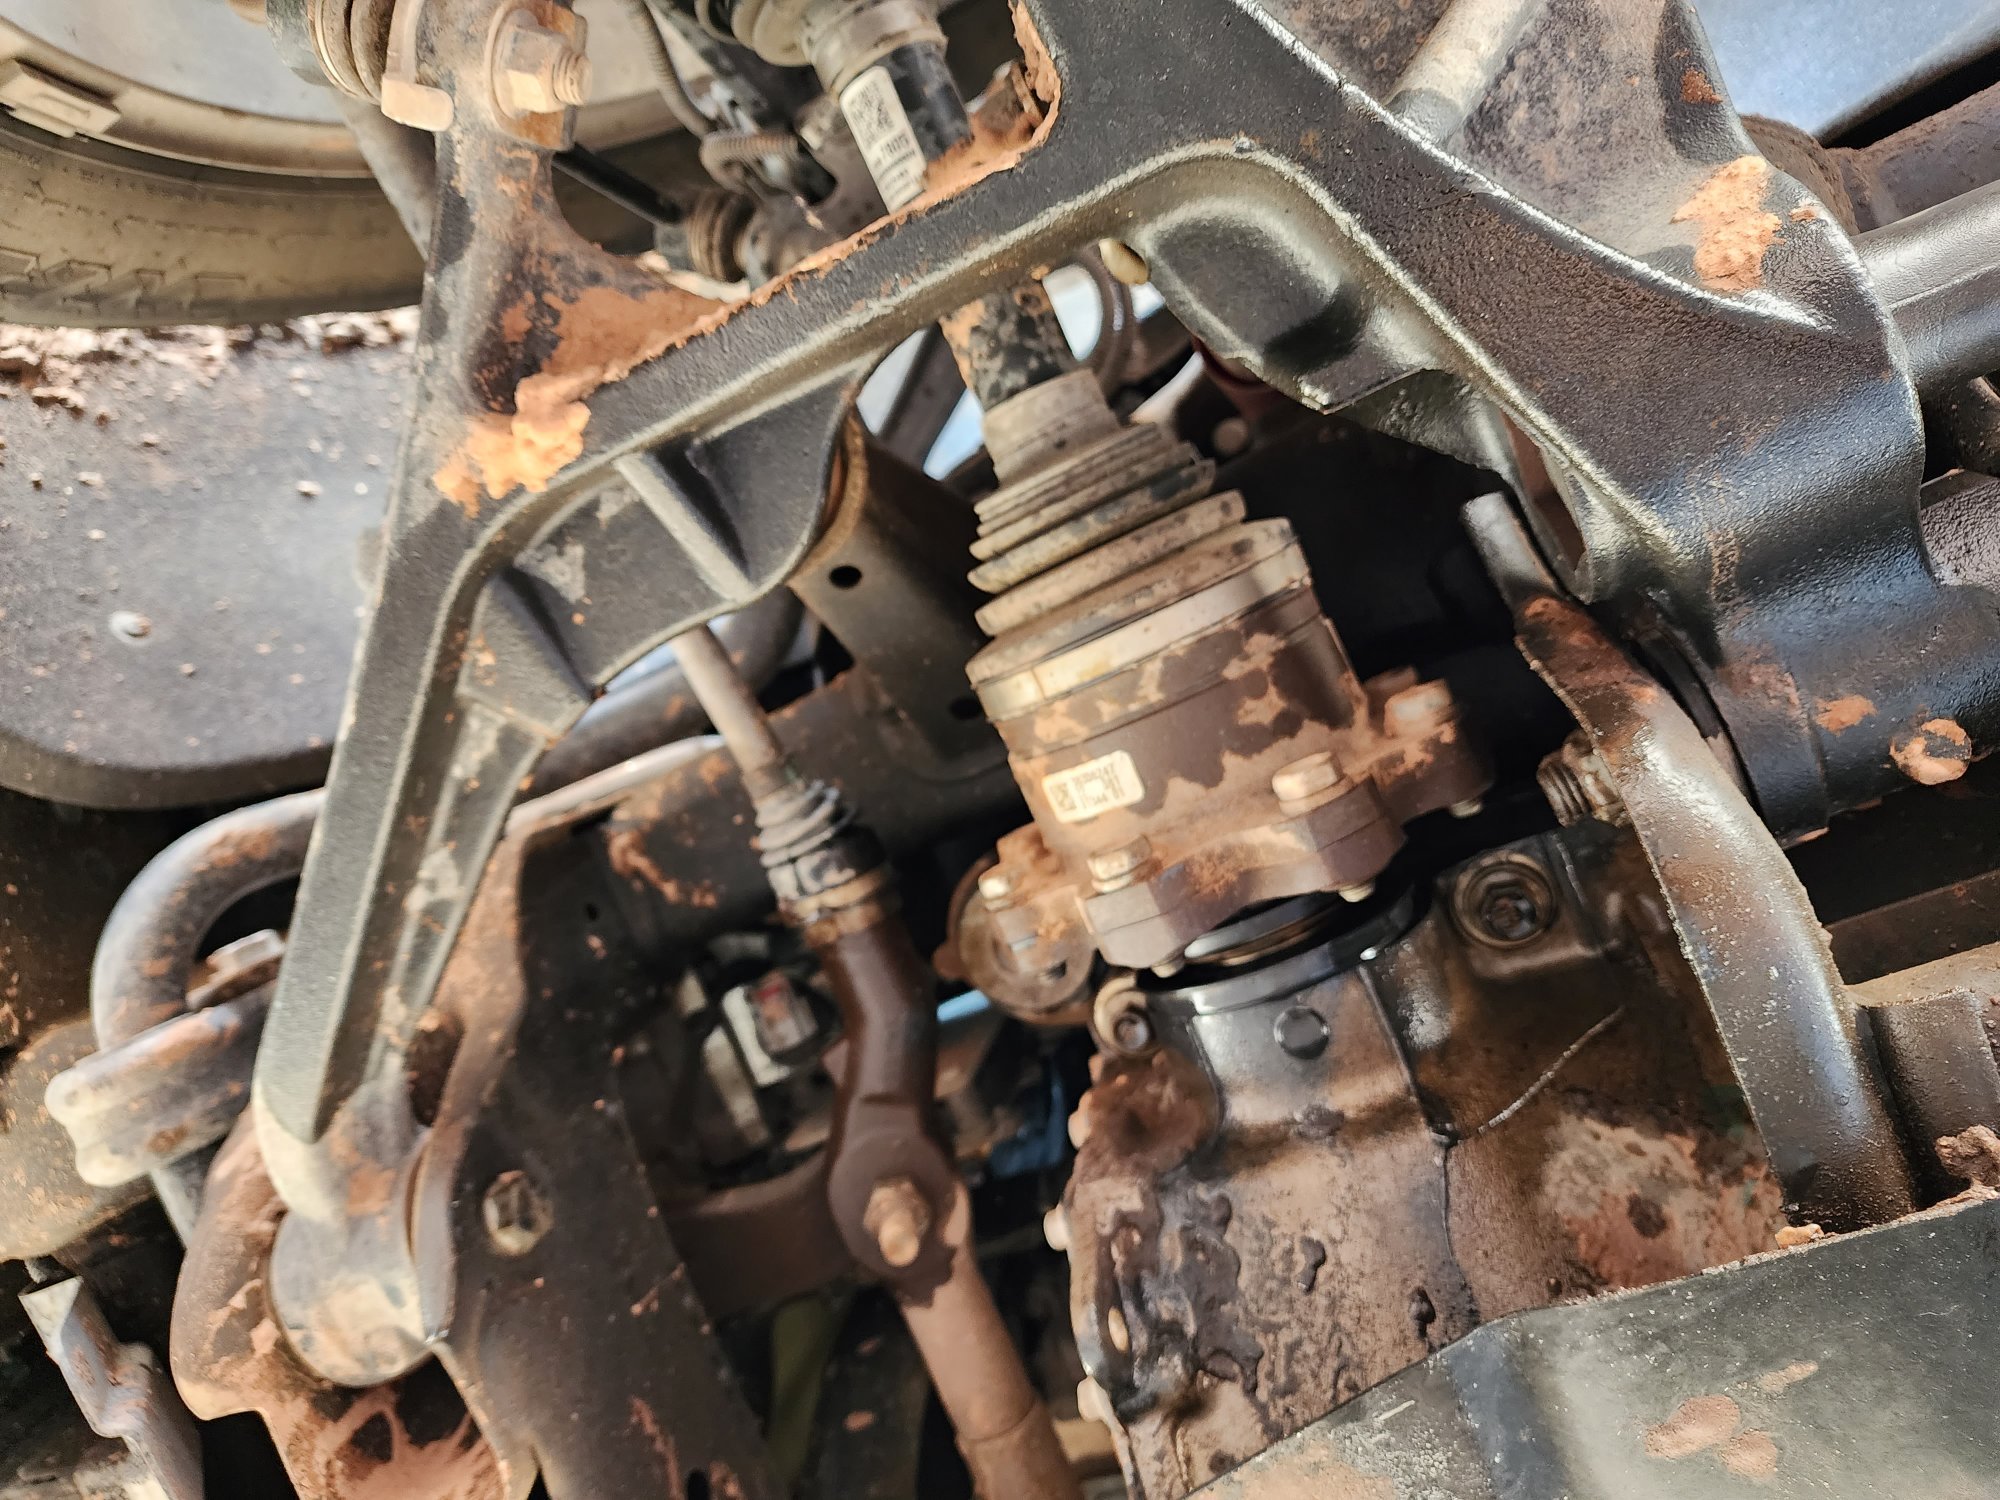
So was coming back towing a trailer from texas and i noticed the truck acting a little dif but was not sure about anything...got home that night and went to bed..next morning i went to disconnect the new trailer and i noticed fluid down the side of it...looked under the truck and saw fluid all over the place...traced it to the front end...took it to the dealership the next day and they still have it. we are starting week 4 of them having the truck and I am told they are waiting on a bearing in the front dif to get the work done. What I was told is one of the seals leaked all the fluid out and burned up everything in the front dif...This soooooooo sucks to have my work truck down for already a solid 3 weeks and they do not offer me another diesel...This truck is my work truck...not a garage queen...has 14k miles on it. They are so terrible in living up to their part of this deal...bad enough this happened but I was told last year they would get my parking sensors up and running in the 4th quarter of the year...well we are here in april and they have not done that either...such a crap experience with a 96k dollar truck buy

-
How to add cab lights to a 2020+ Silverado
hotairgypsy replied to hotairgypsy's topic in Modifications & Accessories
glad my how too is still helping others... -
welcome to the glitches of these newer trucks...i was on a road trip and half way back that happened...it took parking the truck for a gas stop so lets just say 10 min for all to come back online. ...before that stop i pulled over and just cycled the key, stopped and turn off then back on, and that did not fix it. i have had the navi just lock up and not work until a couple of truck cycles.
-
last week they replaced the motor on the driver board and it made no difference..so in the same boat...i did tell them about the bulletin and they said i have the latest software so still have the same issue
-
i just sent the email as per your instructions...This crap is so aggravating...we should not have any issues with this expensive of a vehicle...
-
here is one a bunch of examples i can show
-
2022 GMC 2500HD Denali power assist steps
hotairgypsy replied to sixnickells's topic in Modifications & Accessories
i have problems with my steps also...i open the door and i have no step...mine started the day i drove my truck home...gm doesnt seem to care to fix it...use the scarce parts excuse -
i am having the exact same problem and I do not believe for one second it is a rock...the day i brought the truck it acted up when i got home...the dealership is trying to get a replacement motor for the driver side. the passenger side acts up to but not as much...been just a crap experience with these running boards and I have a whole 2000 miles on the truck
-
on board air compressor mount
hotairgypsy replied to MrTickle's topic in Modifications & Accessories
surprised no one has said anything...i installed my 3 gallon tank on the passenger side behind the power step bar...i could have install a lot bigger one but didnt need a bigger one...i dont know why the pic is turned...it isnt on my computer
- 1 reply
-
- 1
-

-
Multi pro/flex tailgate compatible Hitch
hotairgypsy replied to scwidy's topic in Modifications & Accessories
did you try calling b&w and ask them if they can make you the drop length you need...its a slick setup -
cuz i am dumb....nothing wrong with my 2020 ...just wanted some additional features so just custom ordered it my way...added power running boards, 3500 ...2020 is a 2500, wanted a particular color, multi pro tailgate added, and wanted to start over with miles...i drove heavy the passed couple of years due to covid so just wanted a do over...do things dif going forward...was trying to figure out the other difs in the packages i may gain that i dont know about hence why i made this post...also was dealing with gremlins in the 2020...figured they were due to first year of model crap so want to get away from them..
-
i bought my 2020 dec 2019 so it was when it first came out...well i custom ordered me a new one and it took 8 months to get it but it is here...both trucks are fully load high country trucks...so what new things should i see versus the 2020...rocket launcher?
-
Best reason to order a Sunroof
hotairgypsy replied to sheath's topic in 2020-2026 Silverado HD & Sierra HD
just replaced my 2020 and i custom ordered this one...i could have saved a grand but i ordered the new one with a sunroof...even though the 2020 i probably opened it up less than a dozen times...once you got it you want to keep it -
Inventory and ordering lead times
hotairgypsy replied to Rozz522's topic in 2020-2026 Silverado HD & Sierra HD
ordered my 22 nov 3 and it showed up last wed...took almost 8 months.. -
2020 2500HD OEM LED Headlight Question
hotairgypsy replied to SeanSmith's topic in Modifications & Accessories
i have a 2020 HC with LED and they are bright enough for me...i have been know to change to HIDs in previous vehicles and have had no itch to touch these lights...i even put HIDs on my polaris sportsman -
How to add cab lights to a 2020+ Silverado
hotairgypsy replied to hotairgypsy's topic in Modifications & Accessories
7 months later i have had zero issue with leaks and all is still working just fine...glad others are taking on the challenge!!! -
How to add cab lights to a 2020+ Silverado
hotairgypsy replied to hotairgypsy's topic in Modifications & Accessories
the lights come with a foam liner on the bottom .there is even double thickness right around the mount...i didnt get a pic of that but someone else can upload down the road to the thread.... i tried silicone for the middle one bit i may land up redoing it cuz i think my silicone may have been bad...at least if i have to redo it i only have to drop the center housing and i can get to all the bolts i hope -
How to add cab lights to a 2020+ Silverado
hotairgypsy replied to hotairgypsy's topic in Modifications & Accessories
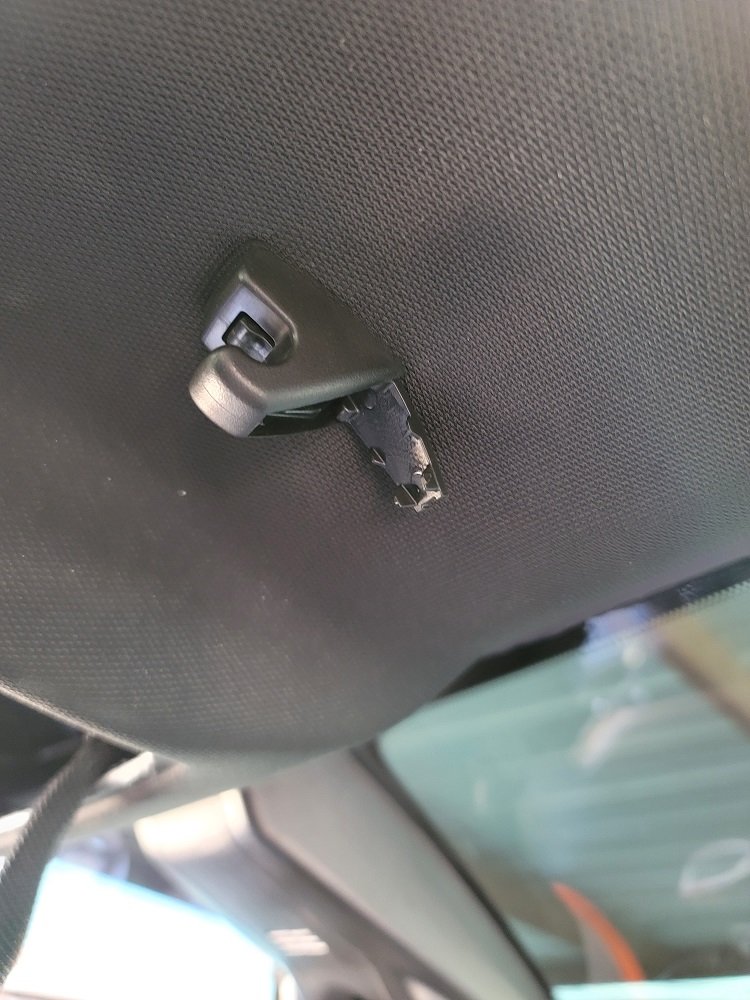
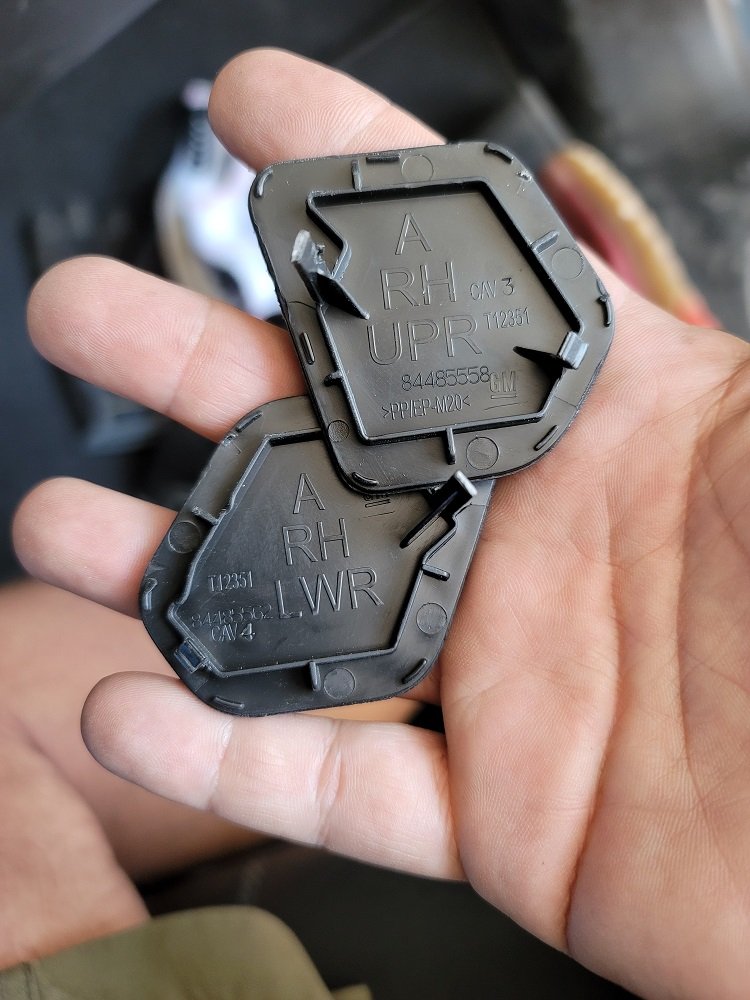
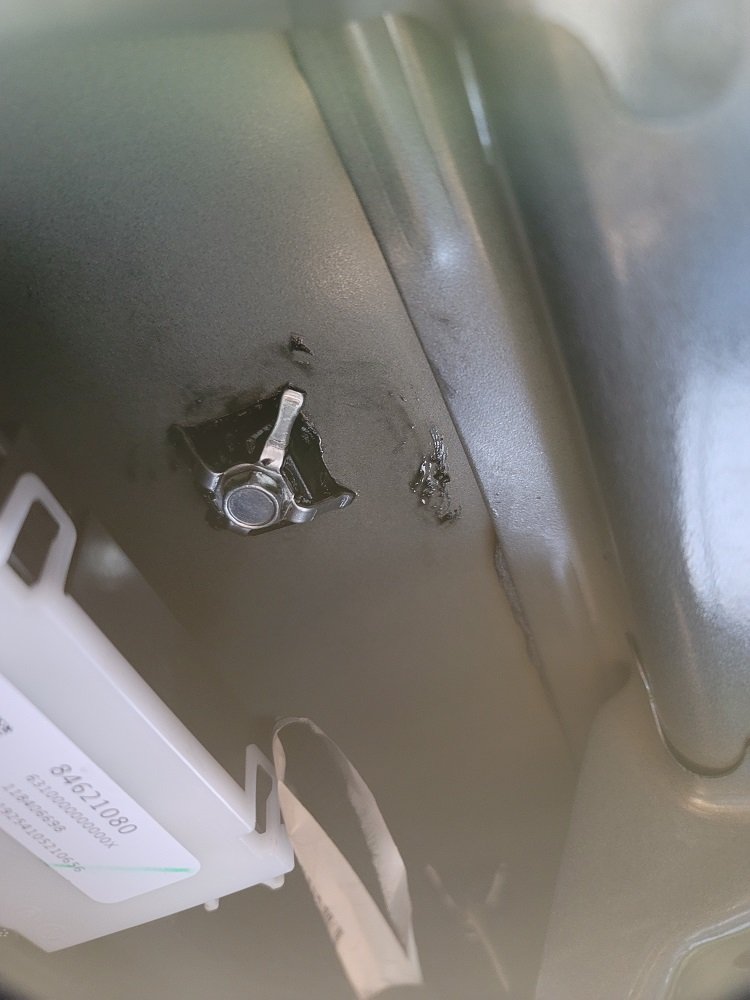
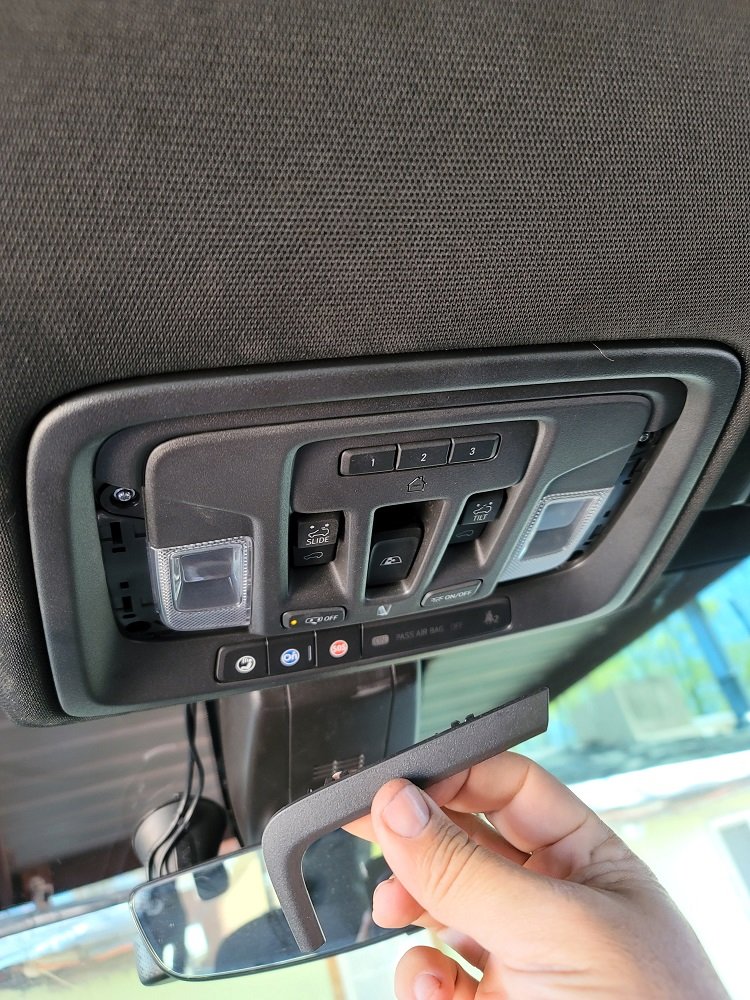
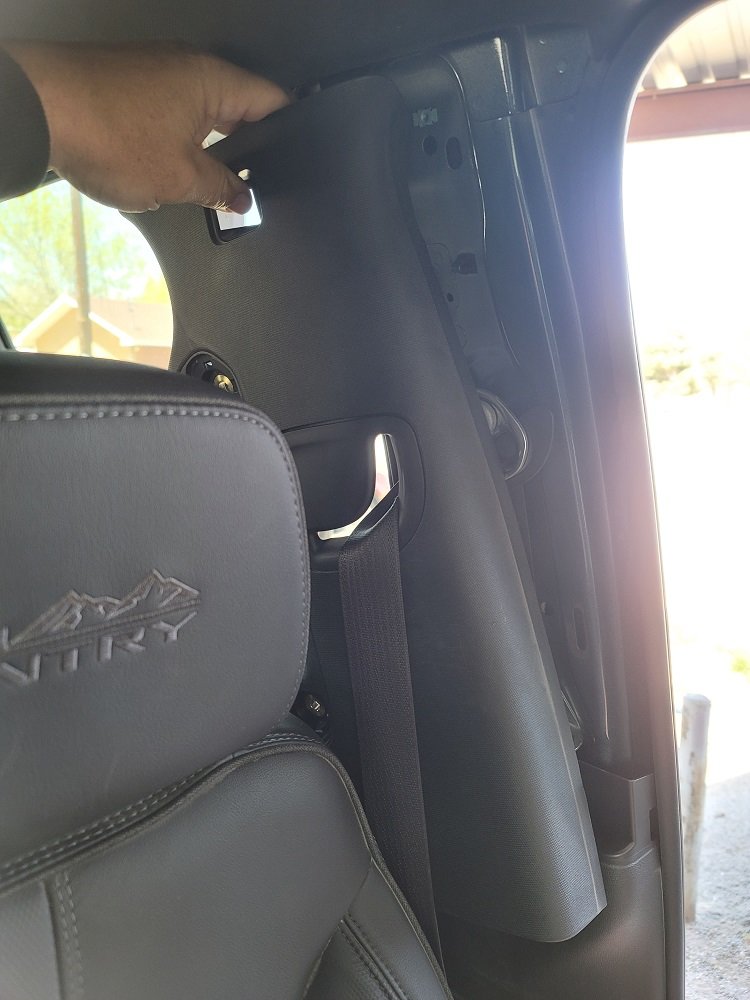
So this pic is the backside of the center light center attachment point so you can see what is looks like after it was screwed down How i got access on the inside was my own way due to having a sunroof...I cannot speak for headliner removal without sunroof. So if i was doing this over again I would first remove the side pillar cover that covers the front seat belts...It has 2 10mm screws and a 7mm screw to be removed. There are a couple of clips holding the panel in place. just pull towards the interior and they will come off easy. i just placed the covers in behind the front seats just out of the way. next you need to pull down the rubber door gasket on both sides and I just let them droop. The your off to the window pillar covers on both sides...once you get to two covers off there will be 2 10mm screws on both sides...there is a really strong clip holding the panel on so you will have to pull on the upper part in towards the stereo...they are really grabbing on...i broke one side removing it. you can see the clip in one of the following pics. you can see the clip in this pic...it is right next to the yellow sticker Next i would remove the overhead console light assembly. It is 2 little covers you pop off and then remove 2 T15 screws that are in the round holes. next it is sun visor time. There is a cover covering the screws at the hinge part..You will need a T15 torq for visors and the center overhead housing...following pics so it disassembled. Worst part of it is the harness that is plugged in. GM glued the harness to the headliner...you will have to reach under it and rip the harness off the headliner so you can get it to the hole to unplug the visor. it is a pain. Take note of the white ring thing and how it is positioned...It is just clipped the visor so you will have to pop it off above pic is just after visor removed with white thing in place. Lower pic is the individual parts The clip that the visor clips into just has an access door to be opened and then a single T15 screw to be removed. here is just a general pic of the visor mounting plate . well at this point I just worked my hands in there and did all the work...i didnt want to a disassemble my sunroof so i just worked around it. If you dont have a sunroof then you probably have lots of room at this point...let me know if you have any other questions and I can fill in the blanks...obviously you just reverse the above instructions to put it all back together.
-
How to add cab lights to a 2020+ Silverado
hotairgypsy posted a topic in Modifications & Accessories
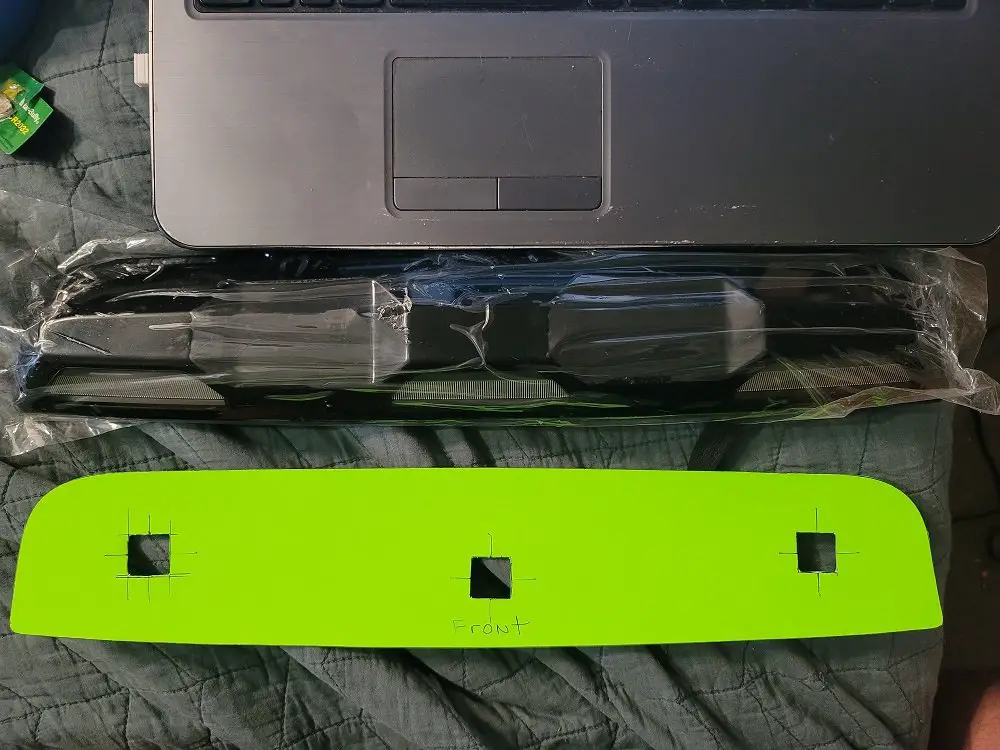
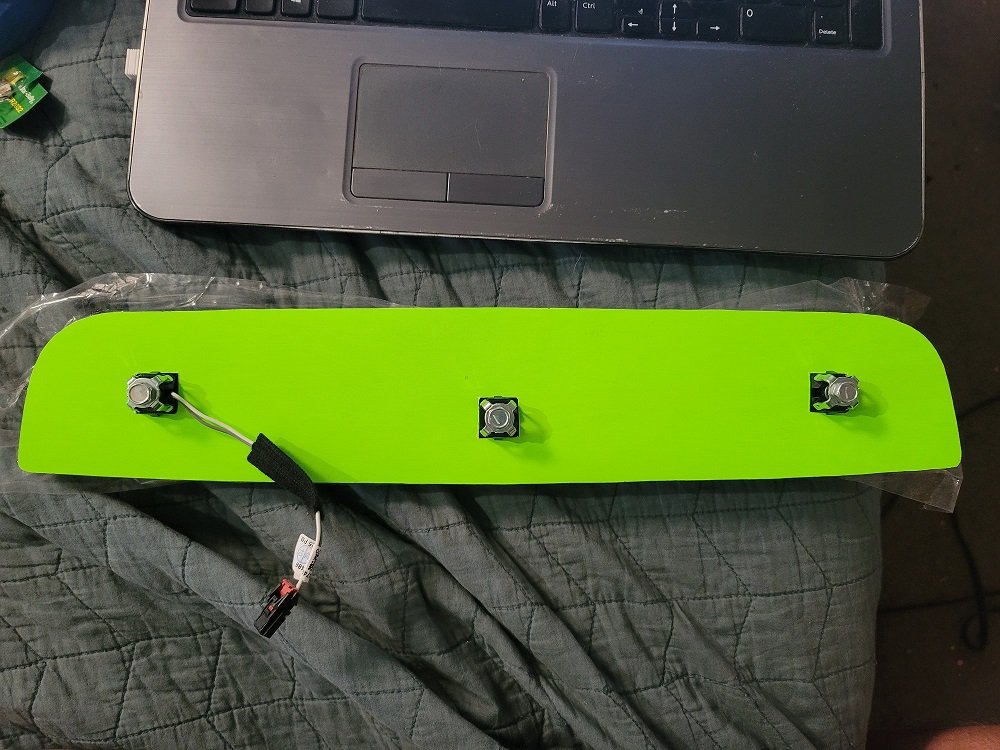
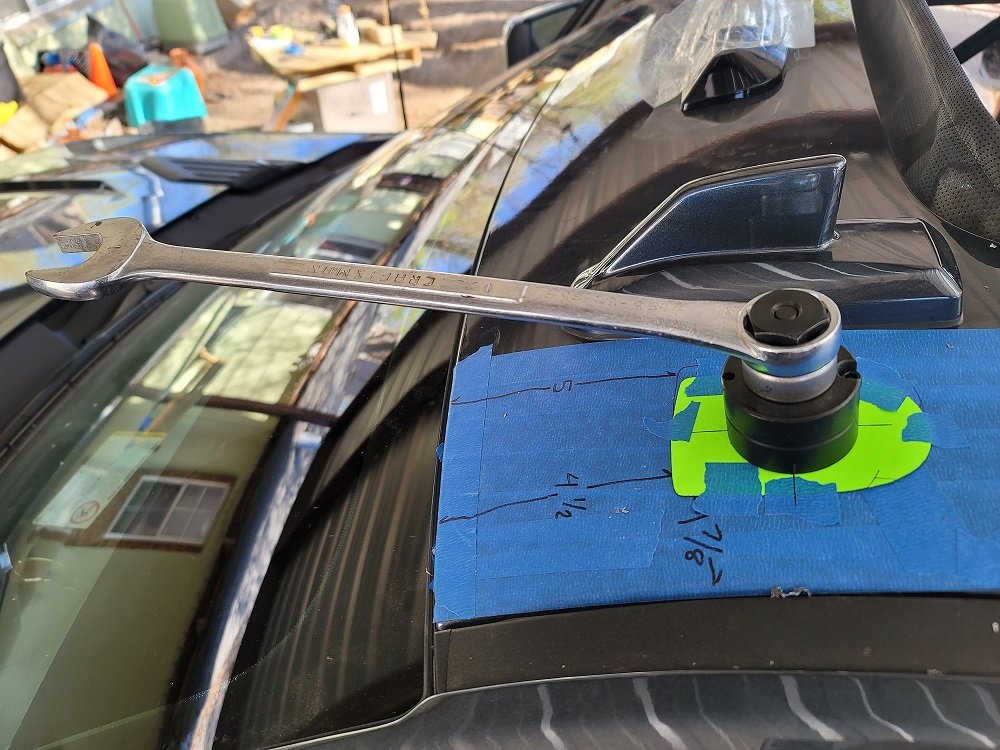
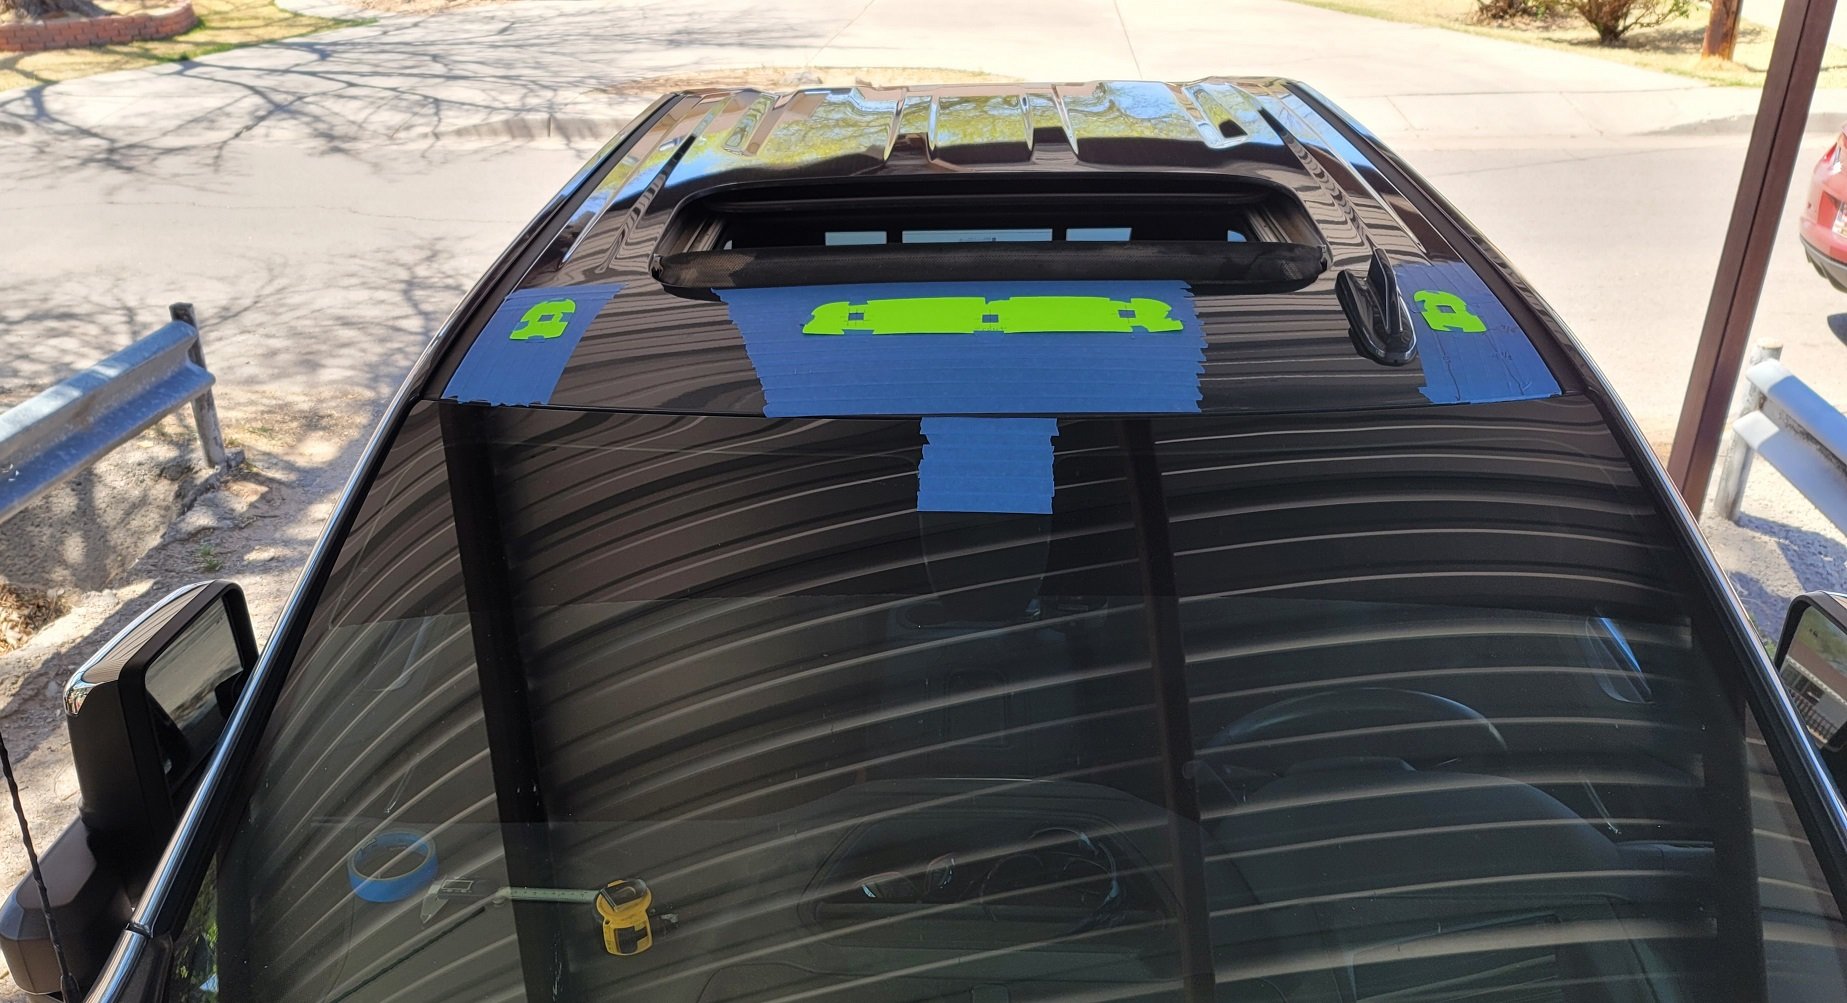
This first think i did was mask off all the area I was going to work so i can reduce the chances of scratches and i could also write on the tape all i wanted. Then i got the lights and made templates of them so i could place on the truck as per the measurements. Here is a tip to use when you are further in the installation...The screw there is a 10MM..The way it is designed is when you pop your lights thru the roof you crank down the 10mm and the 4 legs spread out against the underside side of the roof sucking down the light to the roof. I had a hard time with that so what I did was unscrew the bolt and took off the legs...After i popped on the lights thru the holes I reattached the screw and legs from the underside...BUT before I did that i spread the legs to roughly 45 degrees...This helped me not have to fight the securing the light due to the tight area and helped me work around any sanding i had to do to get the light to seat. Thanks to SEFTON i got a great jump on the measurements I needed to place the templates in the proper area...I also got access to a new 2021 for a few minutes and went over all the measurements for any adjustments. There was some adjustments i did make to this on the fly...the 12 inch measurement is actually a bit over 12 1/8...The 8 3/8 is also a bit over...i was just splitting the difference to get the center light centered. When placing my templates I used a digital caliper so this is why you see the decimal equivalents. The is when i got my templates in place as per my measurements. Once i got my templates in place i used a center punch on all the centers...then i predrilled with a real tiny drill bit...then i got a middle size bit and drilled the holes...after that i drill the main holes with a 27/64th drill bit...once the hole was drilled i did intentionally wobble the drill bit in the hole to slightly widen it so the punch tool would have a tight fit to stay centered...I never tried the next drill bit bigger because I wanted to slowly work my way to the tightest possible fit... Once i got the 27/64 holes drilled i used the greelee tool i had bought to cut out the 3/4 square holes i needed to cut out for the installation...here is the tool and how it breaks down. I just used a 1" wrench with the tool to cut out the holes...very easy tool to use..there is lines on the side of the tool to line up so you can align you square hole. took less than 10 turns to complete the job i would test fit the lights at this point to see how much filing you need to do to help out the fit...you can see one of the 4 alignment marks on the tool I used to line up with my marks on the tape to make sure the square the clocked properly ....once test fit was good i pulled the tape and you can see what the hole looks like before the light is installed. once all 5 holes were done you can see what you are left with here...i cleaned out the tool after every hole was punched. At this point i ran the harness and got everything plugged in...There are holes predrilled for all the fasteners so once you plug in the harness to the truck just aligned the fasteners to the holes and your done real quick...factory plug is in the driver pillar up towards the top. Harness just plugs in.. above pic before plugging in..below pic is once I plugged the harness in. Once I got all secured down and plugged in I just activated the remote to test the lights and here is it with the new cab lights. Yes there are steps to working this the headliner in side...The next post with cover generalities of what you need to do to get to the underside of the roof.
-
Let's install the "upfitter switches"
hotairgypsy replied to blamkin86's topic in Modifications & Accessories
well count me in on one more install..my truck didnt have it installed so ordered the kit and got it done...now i am up and running...thanks again for this how too -
This is to give people an idea of what i am doing














-
Forum Statistics
250.6k
Total Topics2.7m
Total Posts -
Member Statistics
342,995
Total Members8,960
Most Online
-
Who's Online 10 Members, 1 Anonymous, 315 Guests (See full list)