


Another JR
-
Posts
1,103 -
Joined
-
Last visited
-
Days Won
9
Content Type
Profiles
Forums
Gallery
Events
Articles
RPO
Store
Blogs
Everything posted by Another JR
-
Drive shaft Vibration
Another JR replied to Dracer173's topic in Troubleshooting, Warranty & Recalls
Driveshaft vibration seems very unlikely to me. Does the tone you hear vary in frequency directly with variation in speed? If not, and it only comes on above a certain speed, it’s likely to be an aerodynamic turbulence related tone. These trucks are not very streamlined. -
Drive shaft Vibration
Another JR replied to Dracer173's topic in Troubleshooting, Warranty & Recalls
What makes you think it’s the driveshaft? At 80 mph with 34 inch tires the rotating frequency of the wheel is 13 hz and the rotating frequency of the driveshaft is 49 hz. -
2022 2500 Denali tailgate harness and camera
Another JR replied to Rcunningham's topic in 2020-2026 Silverado HD & Sierra HD
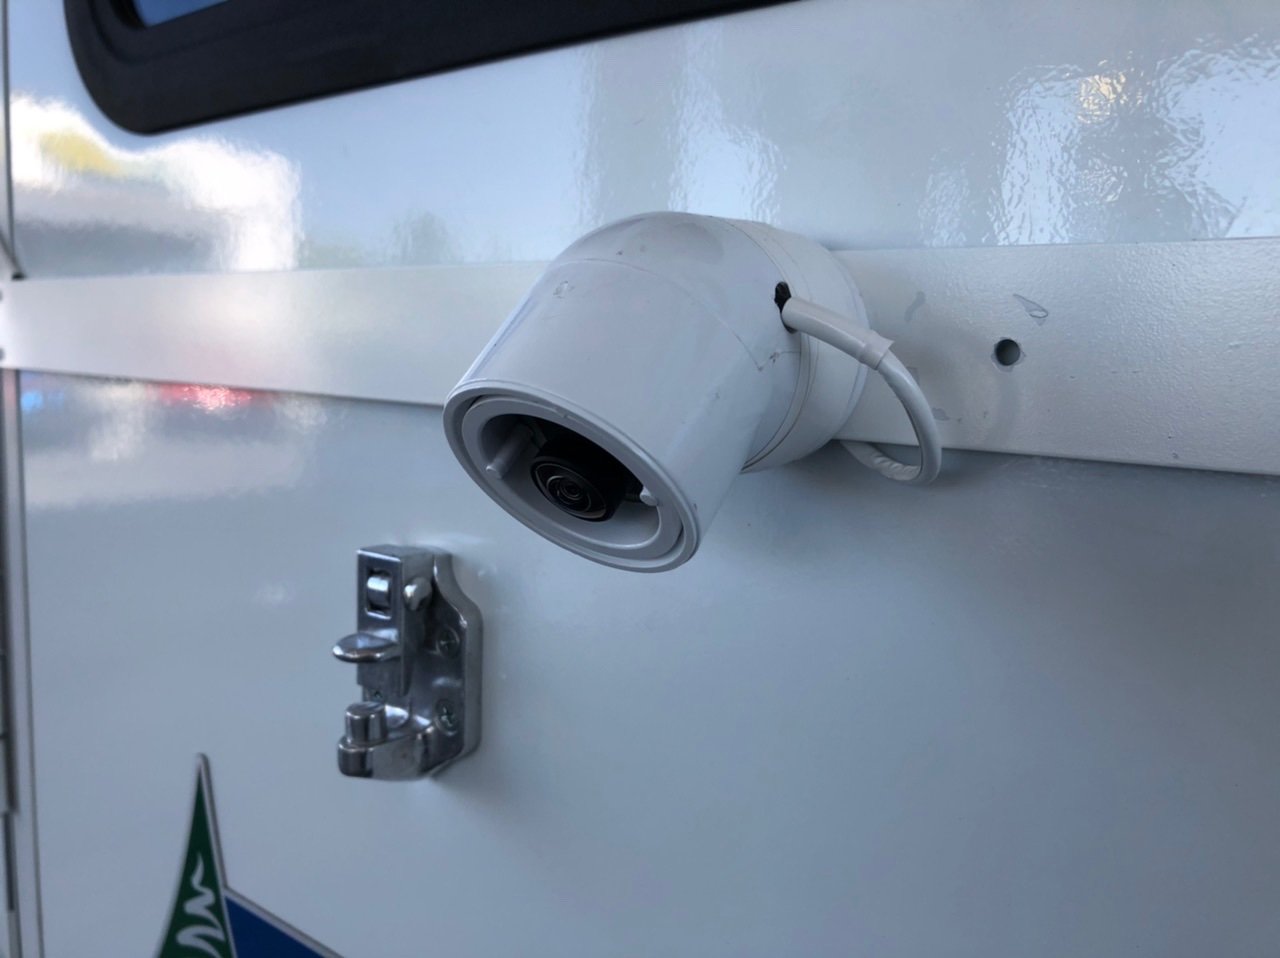
The camera gemarsh listed can be bought from an on line gm parts seller for about $100. That’s the camera I used. You can buy a cable from Pasternack.com for about $30. No need to spend the money on an entire tailgate harness that may not be long enough anyway. I can give more details about ordering the cable if you are interested. Here is my camera installation on the back of my camper. With it tilted 45 degrees down in that pvc ell, the view is identical to the tailgate camera view.
-
Heavy Duty Front Spring for Travel Trailer?
Another JR replied to ARM3's topic in 2020-2026 Silverado HD & Sierra HD
I just changed my torsion springs from the original heavy duty camper springs I ordered (5600 FGAWR) to the base springs for my model (5200 FGAWR). I posted a detailed description of the job in the mods subforum. Bottom line it was surprisingly easy, took me 2.5 hours (now that I’ve done it once I could do it again in 90 minutes), and the two new springs cost about $520 shipped plus whatever tax applies. Autozone loans the special tool you need. See my post for the tool number. The ride is noticeably a little better, but the big difference is when I go over speed bumps and other large dips and bumps. It’s definitely softer, which is what I wanted. I would imagine going from the 6000 FGAWR bars to the 5200 bars would be a very noticeable improvement in ride with no plow attached. -
I took my Four Wheel Campers pop-up off the truck to do this job and to add an external gray water tank. I’ll post on the ride/handling difference after I have it back on for a bit.
-
More photos:
-
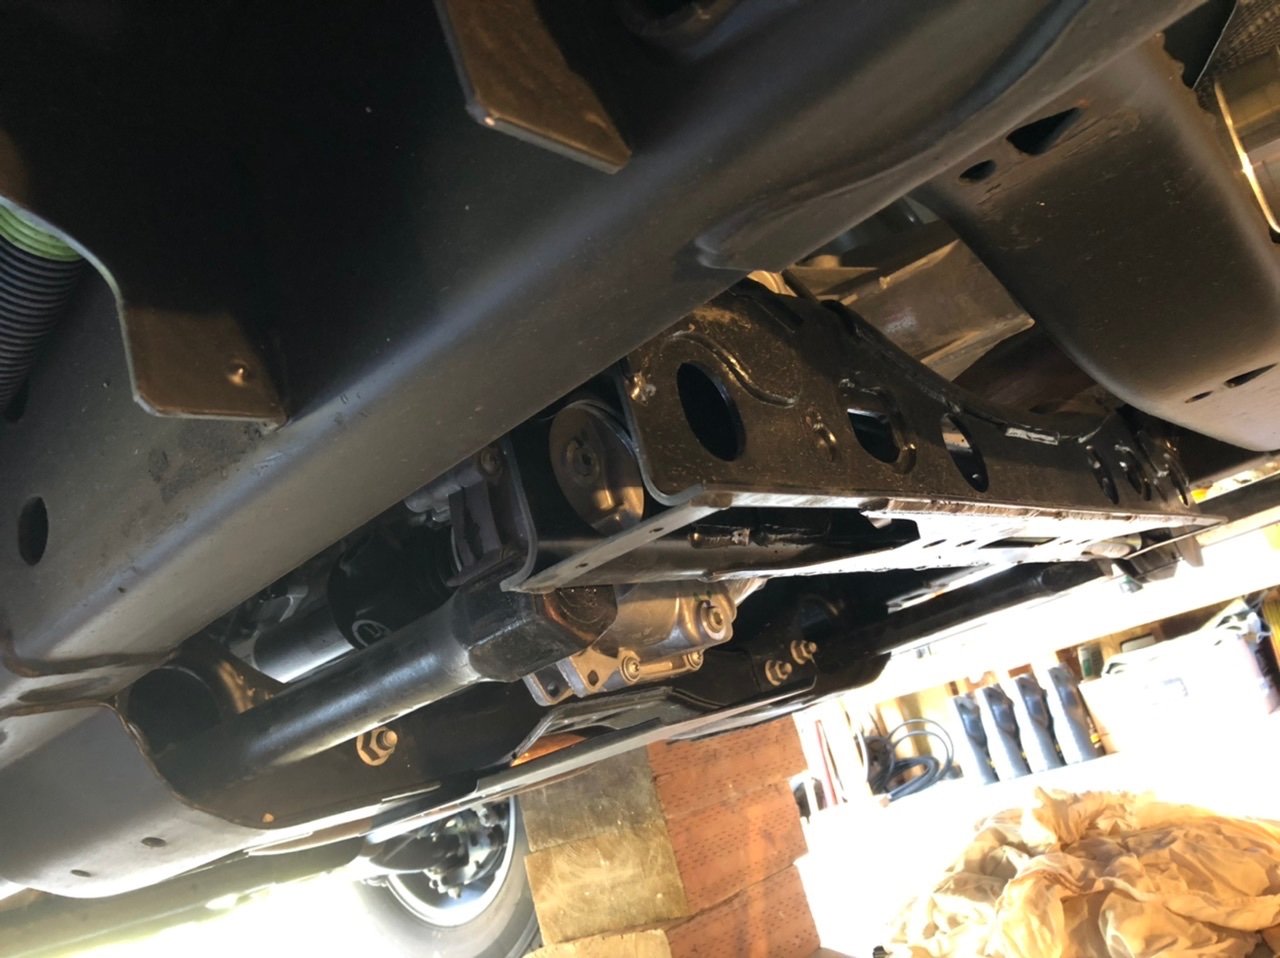
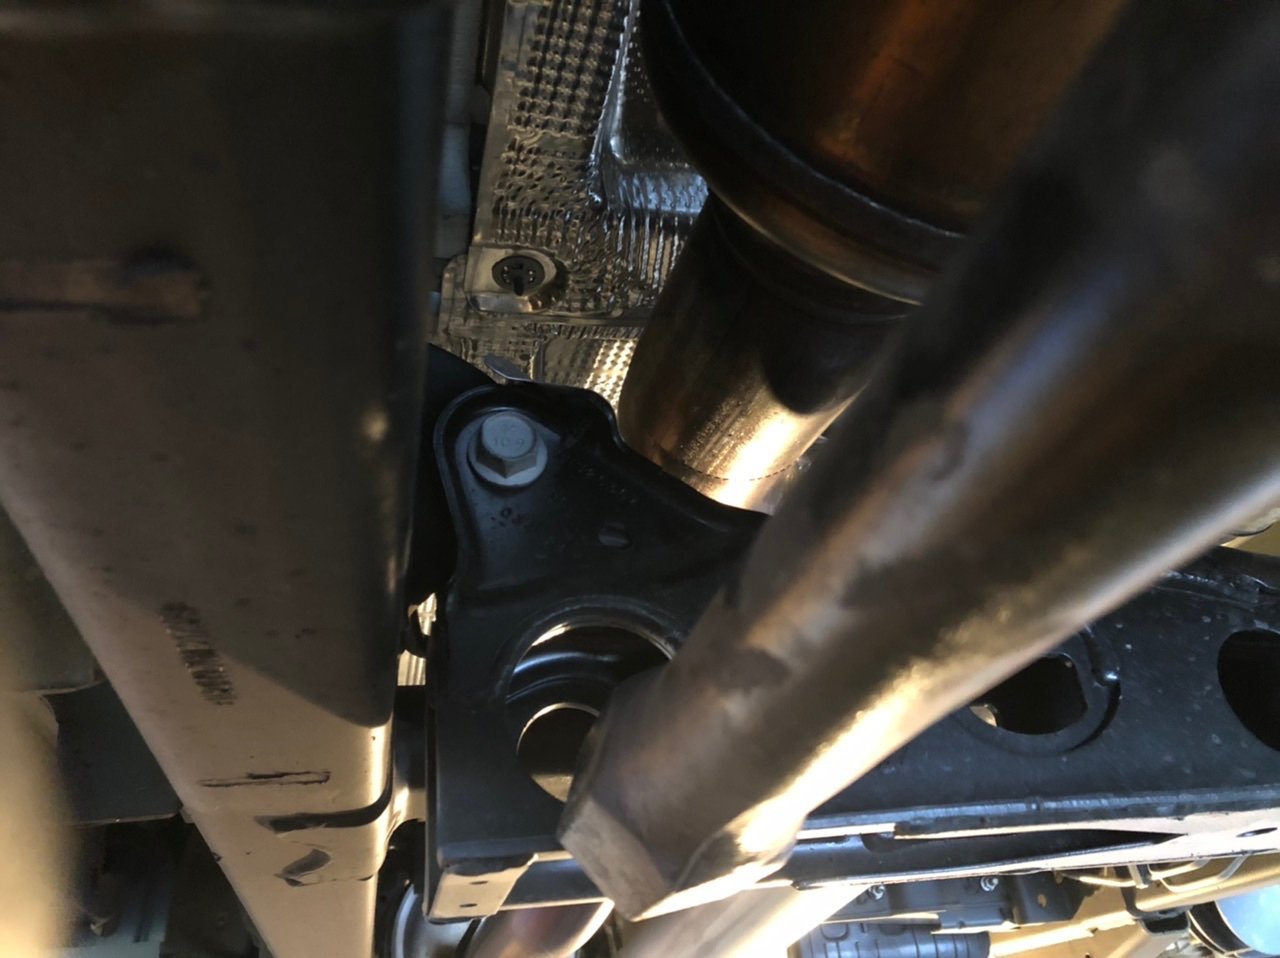
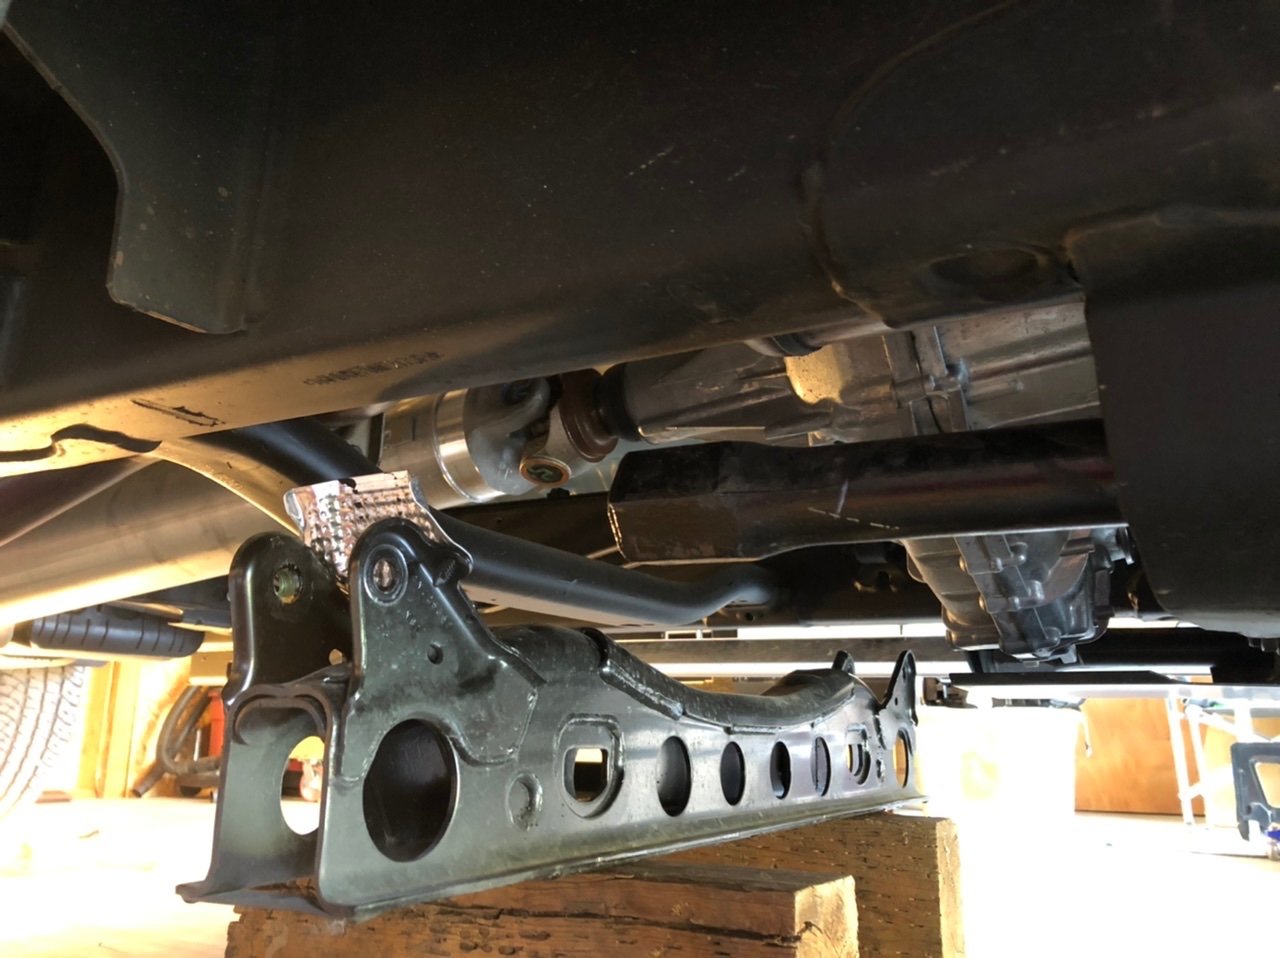
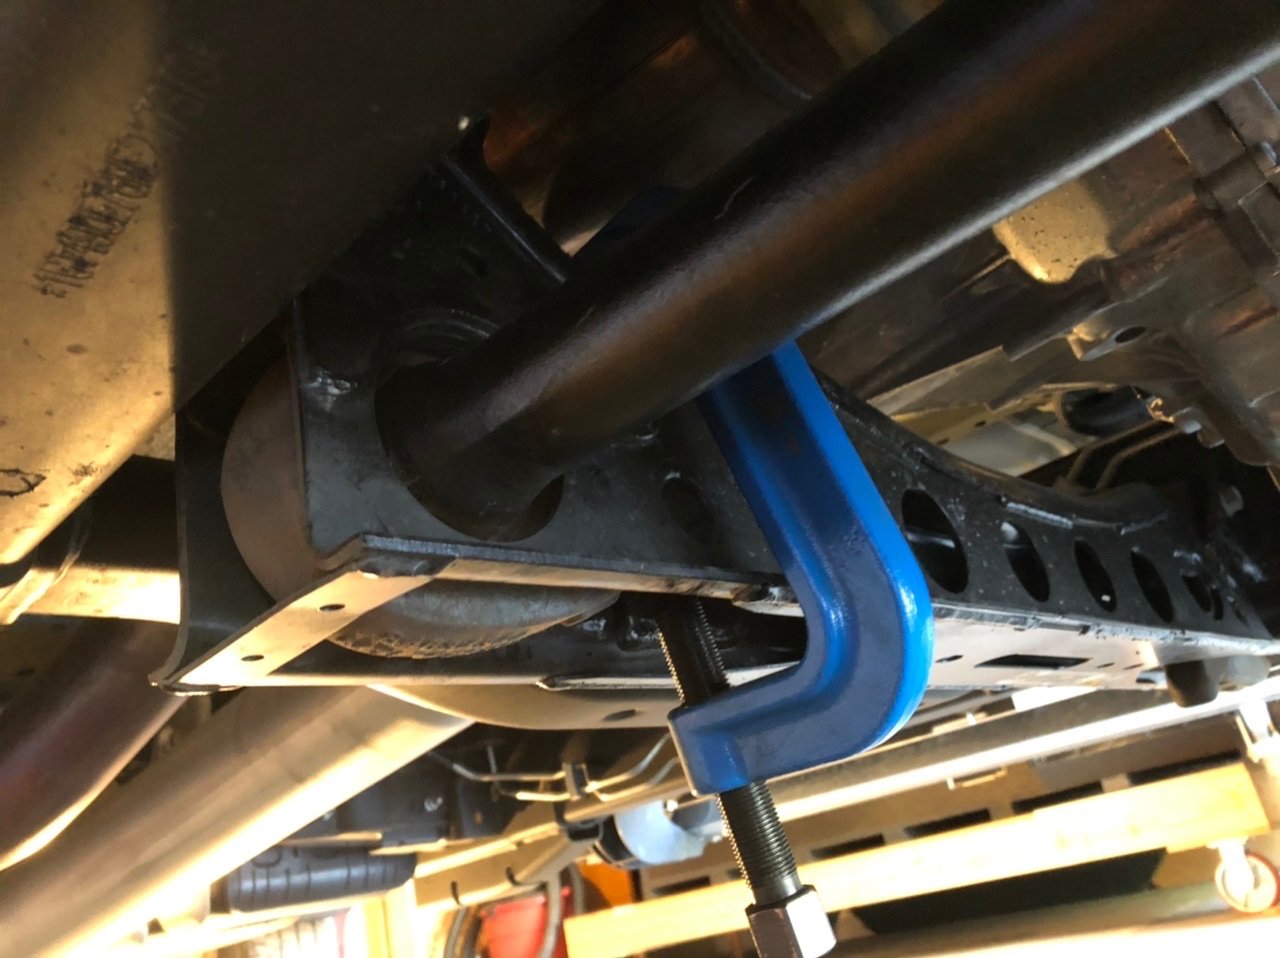
Hi All, I’ve mentioned in a few threads that I was planning to swap out the optional 5600 lbs FGAWR heavy duty camper springs and install the base 5200 lbs rated springs on my GMC 3500hd cclb srw gas truck. I just did the job this morning and wanted to report on it because it was actually quite easy. The parts (left and right torsion bars) totaled $570 with shipping and 10% WA sales tax from my local Chevy dealer. It was the same price as the on line dealers and the shipping pickup is more convenient. Plus I like them and want to give them business. My GMC dealer next door charges msrp for parts. The job took me 2.5 hours, but the first 20 minutes of that was figuring out how to properly jack and support it because it was the first time for me on that truck. The torsion springs were not stuck at all to either the lower arm or the torsion key, and once they were unloaded everything came apart easily. My truck is 12 months old and I store it indoors so no rust. First thing is to set up for the job on a flat, level surface with gas tank near empty, and measure the height of the front suspension. I measured from the bottom of the wheel to the fender edge to eliminate tire deflection as a variable. Next jack up the front of the truck. I jacked each side separately on the main frame member just forward of the transmission mount crossmember, and supported the frame on the actual front jack point just forward of that. You don’t need to jack the wheels off the ground - just raise the front end about 3 inches to mostly unload the suspension. The rest of the spring unloading can be handled at the torsion key. However, you do want to jack it up at least this high or the forces on the tool would be higher than I would be comfortable having. For safety, always keep your head, hands, and fingers where they won’t get hit if the tool suddenly fractures. There’s a lot of force and a lot of energy stored, and you never really know how good foreign steel is. I borrowed the torsion spring unloading tool from Autozone’s tool loan program. They have both the smaller and larger tools for GM trucks, but they don’t have them identified properly in their computer system. The tool you want is the larger one - the CTA 4045 pictured below. The smaller gray one won’t fit. I did not have any clearance problem with the exhaust system putting the tool in on the right side. I had at least 1/4” clearance. i counted the turns when i removed the torsion key adjustment bolt on each side and used that as my starting point for the new springs. It ended up being within one turn to achieve the previous height with the new bars. Once the adjustment bolts are unloaded by the tool, you back them all the way out, and remove the piece the bolts thread into (can’t remember the name). Then loosen the tool to completely unload the torsion spring. Repeat for the other bar. Now wiggle the torsion spring and shift it forward, being ready to catch the torsion key when it falls off the end of the spring. Repeat for the other spring. Removing the frame member that contains the torsion keys at the rear end of the springs was two bolts, not excessively tight. The cross member is not heavy but you need to support it when you remove the two bolts because it doesn’t have clearance to angle much to one side or the other. It needs to come relatively straight down. Once the cross member is out of the way, the torsion springs slide rearward and come out. The springs typically are not perfectly straight, and mine were installed with the bow upwards. I checked my new bars and put a mark on them and installed them the same way. It probably doesn’t matter, but that’s what I did. Reverse all of that to reinstall everything, and reload the torsion springs the same number of bolt turns as before as a starting point. After you take the truck off the supports, you need to roll it forward a few feet and back to relax the tires and get an accurate initial height adjustment. My plan is to drive the truck a bit and check the adjustment. Since I’m putting it back at exactly the same height, I should not need an alignment, but I’ll post in a few days if that isn’t the case. The general ride feel after the change is a bit softer. It’s definitely noticeable but not a large change. It is very noticeably softer when I hit a larger bump or dip in the road. Here are some photos from the job:
-
Second battery connection for winch install
Another JR replied to jderbabian's topic in 2020-2026 Silverado HD & Sierra HD
The upfitter switches, when all wired up, control relays in a relay pack that you install under the dash. You would connect your loads to the connector from that relay pack. That relay pack gets power from a wire that is connected to the 60 amp fuse that is near the 200 amp fuse. The upfitter switch relays are only rated for 20 or 30 amps (I think 3 are 20 amp and 2 are 30 amp). If you want to switch and power anything that draws more current than the kit relay can handle, you would use the upfitter circuit to in turn control a user supplied larger relay on a user supplied wire from the battery. Don’t forget to install an appropriate fuse at that big battery connection if you do that. -
Second battery connection for winch install
Another JR replied to jderbabian's topic in 2020-2026 Silverado HD & Sierra HD
He’s going to be happy you tracked that down. I think it’s exactly what he’s looking for. Nice job. -
Second battery connection for winch install
Another JR replied to jderbabian's topic in 2020-2026 Silverado HD & Sierra HD
The VIN is in this photo of my weight stickers. The more I think about it the more certain I am that those fuses were added by me as part of the upfitter switch kit of parts. The 60 amp fuse is for direct wiring to the kit’s relay box and the 200 amp fuse is for supplying any larger load passing through a separate user supplied large relay controlled by an upfitter switch. I don’t know if they sell just those fuse block parts separately.
-
Second battery connection for winch install
Another JR replied to jderbabian's topic in 2020-2026 Silverado HD & Sierra HD
I’d suggest putting fuses on that temporary wire at each battery. The consequences of a hot short if either end is not fused could be a fire. I can provide my VIN to help you search for parts if you decide you want to replicate the factory configuration. -
Second battery connection for winch install
Another JR replied to jderbabian's topic in 2020-2026 Silverado HD & Sierra HD
I have a 2021 3500hd gas truck with the second battery from the factory. I assume your truck is gas or it would have had the second battery for starting. That 200 amp fuse you have circled is present but unused on my truck. I believe that fuse, the 60 amp fuse next to it, and the associated bus bar were part of the upfitter switch kit that I ordered with the truck. I have not done the full installation to connect the switches, but i believe i installed those pieces on the battery shortly after i took delivery. My truck’s wire to the aux battery has a 100 amp fuse at each end. Here are pictures of the main and aux battery fuse blocks. Everything is stock except for the connection to the main battery via the 80 amp fuse with the red shrink tube and the upfitter switch fuses. That red wire goes to the dc to dc charger in my camper.
-
I have no experience with the 2015 generation of the 5.3. My 2004 Yukon XL 5.3 is an early generation throttle by wire and it feels like there’s a little lag in it but only if I look for it. From what was described above, the posters above seem to be talking about a device that changes the gain of the throttle control (requiring less pedal movement for a given throttle plate movement), but does not affect any actual lag that is in the system. I don’t notice any lag, and personally am fine with the pedal action.
-
Yes, that feeling of having a stiff, lightly loaded front axle that rebounds quickly and a loaded rear axle that rebounds slowly does not feel good, and causes the front to feel like it’s bouncing too high sometimes. It’s just a wrong suspension tuning. I like the response of the axles to be the same, or the rear to be stiffer. It’s just what I’m used to and provides a better feeling of control. I have that effect, although to a lesser degree, on my truck with the 1800 lb slide in camper installed (1700 lbs on rear axle and 100 on front axle) combined with having the 5600 lb “heavy duty camper springs” in the front. (When the truck is empty the front and rear axle response is pretty well matched with the camper springs - they’re BOTH too stiff.). That’s why I’m installing the base 5200 lb springs - to have better matched axle response when the camper is on. A softer ride will be a bonus. My new torsion bars just arrived today, so I may do the swap this weekend.
-
2200 lbs pin weight 2 inches behind the axle unweights the front axle only about 25 lbs. When towing, the pulling force with that big 5th wheel applied at the pin height unweights the front wheels by up to around 300 lbs, and adds that same weight to the rear axle. When braking the opposite happens. That pin weight settles the rear end a little over 2 inches (my slide-in camper is about 1800, and it settles 2 inches - does not hit overloads). Your front axle is not affected in this static condition (other than the measly 25 lbs). This rear end squat nicely “levels” the truck, the way it’s supposed to be done, but is enough that I needed to adjust the headlights down. I just leave them that way. It’s very easy to adjust them. You just need a long 5 mm hex wrench and a good location to see the light pattern.
-
Broken Rear Window
Another JR replied to HydrogenCyanide's topic in 2020-2026 Silverado HD & Sierra HD
Call your dealer’s service department. Chances are they’ve replaced some of these for leaks and can give an accurate quote. Then decide if it’s worth an insurance claim. -
Heavy Duty Front Spring for Travel Trailer?
Another JR replied to ARM3's topic in 2020-2026 Silverado HD & Sierra HD
No. Only the shocks are different. The torsion springs for the truck and the FGAWR are set based on the basic truck configuration, then there are two options - heavy duty camper springs (400 lbs higher FGAWR), and plow pkg (400 to 1200 lbs higher FGAWR depending on base configuration). For my 3500 cclb srw gas, for example, base FGAWR is 5200. I ordered camper springs, which are 5600, and plow package for my truck would be 6000. After a year of driving it I have decided I don’t need the camper springs for my lightweight popup truck camper, which it turns out only adds 100 lbs of load to the front axle, so I just ordered the 5200 torsion bars to modify it back to the base configuration for a little better ride. I’ll post on how the mod goes in a few weeks. I’m going to get the Autozone loaner torsion bar tool and try it this weekend to make sure it’s the right one for the new trucks. Reviews say it is the right one. -
I’m curious what your model year is and under what conditions you experience delay or lag in throttle response to the pedal. I have a March 2021 gas truck and have not noticed poor pedal response. Thanks.
-
I’m happy to do measurements, pictures, or answer questions. It’s easy right now when the camper is out. I went through the same kinds of questions when I was trying plan an installation without the products in front of me.
-
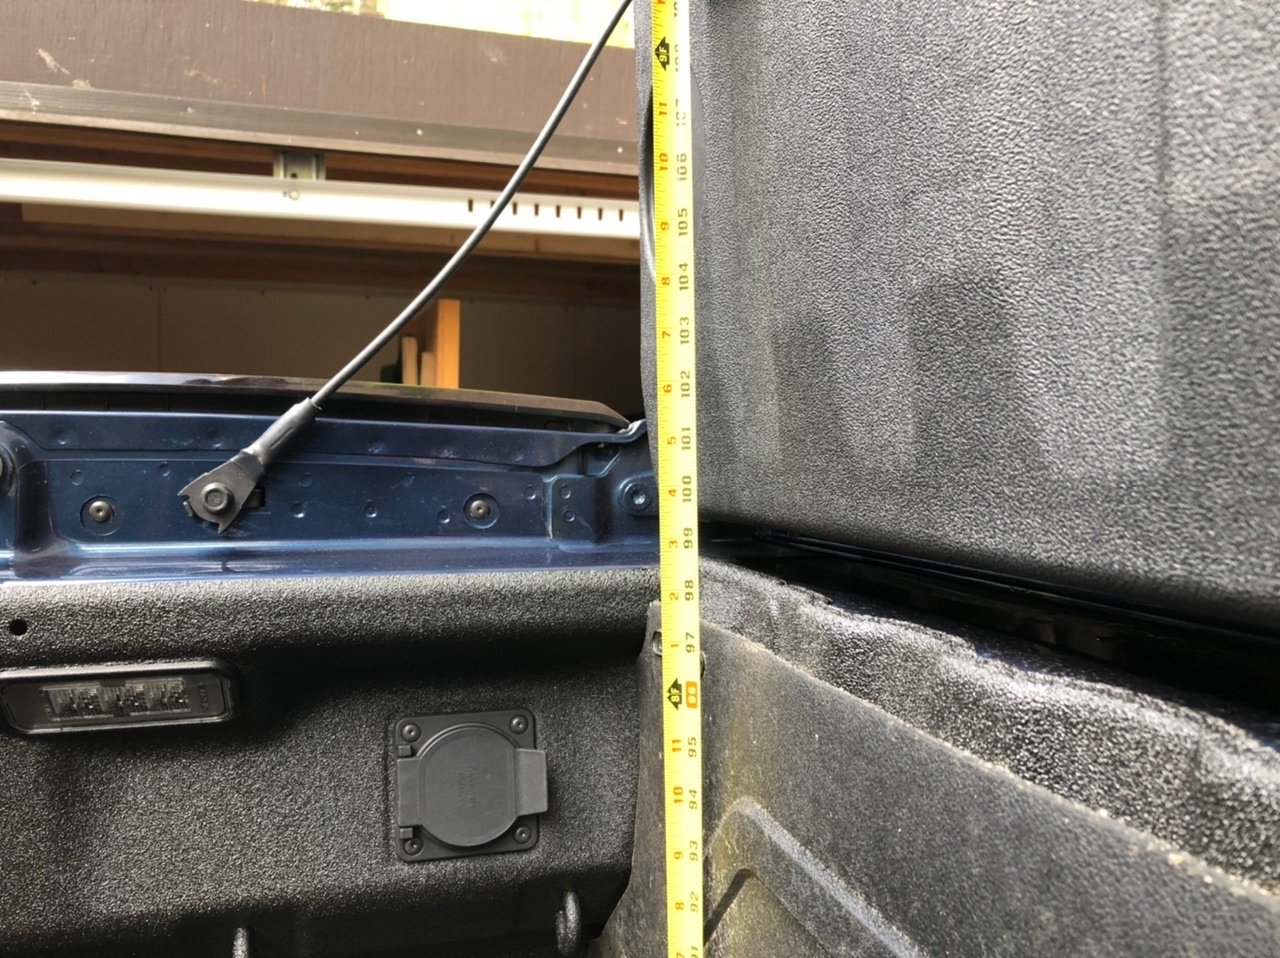
This picture was taken with the end of the tape measure against the front wall of the bed at the floor. The top rail of the front wall extends rearward into the bed 2 inches. So your bumpers are against the lower front wall and the rail is 2 inches closer to the front wall of your camper. Figure accordingly. It’s 101 inches from the lower front bed wall to the end of the sheet metal behind the tail light the tail light itself protrudes another inch.
-
Seems like maybe you’ve answered your own questions, but I have my camper off my 2021 3500 hd srw right now and could take bed measurements if you’d like. I have the factory sprayed-in bedliner.
-
Agreed. I was just explaining why you don’t want to do that and why you probably don’t want to buy a used truck from someone like that. If they weren’t pulling heavy weights up long climbs, and not applying max torque (like pulling a big boat out of the water) it probably is just fine. There is a legitimate physical reason to break it in, though.
-
I have a 2021 3500hd gas, and my neighbor has a 2021 3500hd diesel dually. We talk trucks whenever we see each other. My neighbor’s truck has the stock suspension and tires. He experienced symptoms very much like these on the highway. He was driving along, then all of a sudden wham, the rear wheels locked up, then he could hear drive train whirring with no torque. He restarted it and was in some kind of limp mode and would move, but he decided to have it towed. His transfer case was destroyed and had to be replaced. The dealer said it was a fault in the four wheel drive control switch or computer (I can’t remember which one he said) that apparently had it try to switch to 4 low at high speed. It may be that others of you are having the same thing occur, but the traction situation at the time (srw vs dually, speed, tires, road conditions, etc) doesn’t generate enough torque to break the drive train, so the dealer doesn’t get that giant hint that it’s not brakes.
-
I have not done it before, but there are youtube videos showing the process. Jack up the front to unload the suspension. Use torsion bar clamp tool to unload the torsion key bolt and remove the bolt. Slide the torsion bar free of the front arm (may need to be hammered if stuck). Remove torsion bar cross member so torsion bars can be moved free of the frame. Installation is reverse of this. I’m hoping if I set the height exactly the same I won’t need an alignment, but we’ll see.
-
If you decide to switch to the Victron 30 amp charger, I can confirm that 6awg wiring is adequate from end to end and the associated voltage drop still allows the engine running detection logic to work without having to do the test cycling it does with a greater voltage drop. This is for a slide in truck camper with the charger and camper battery in the rear corner on a cclb truck, so a nearly 30 foot wire run. if you don’t know what that means I can explain it further.









-
Forum Statistics
250.5k
Total Topics2.7m
Total Posts -
Member Statistics
342,914
Total Members8,960
Most Online
-
Who's Online 1 Member, 0 Anonymous, 1,309 Guests (See full list)