


TigerTruck
-
Posts
43 -
Joined
-
Last visited
Content Type
Profiles
Forums
Gallery
Events
Articles
RPO
Store
Blogs
Everything posted by TigerTruck
-
Tailgate won't open due to tonneau cover?
TigerTruck replied to TigerTruck's topic in 2019-2026 Silverado 1500 & Sierra 1500
I came up with a solution if the tailgate fails to open. The cover is opened by squeezing two latches together to release the cover. These latches are 2" apart. I bought a pair of needle nose pliers 16" long. I heated up the ends and spread them out in a gentle S curve to they are a bit over 2" wide when fully opened. There is just enough clearance to slip the pliers under the cover and engage the latches. I now carry the pliers, a plastic pry tool ( to pry up the cover when the latches are disengaged), and a torx screwdriver to take apart the tailgate. The bins under the backseat provide a convenient storage area. I have since had two more times when the tailgate has not opened but it only lasted a minute before the tailgate started functioning again. The issue is so infrequent that taking it in for service would be a waste of time. -
Tailgate won't open due to tonneau cover?
TigerTruck replied to TigerTruck's topic in 2019-2026 Silverado 1500 & Sierra 1500
Cover was installed a few months ago and never had this problem. I think it was a combination of opening the tailgate a few inches then closing and the cover was a little low on the left side. I made adjustments and seems to work fine. I'm now concerned about the tailgate failing again from a mechanical reason with the cover closed. I'm trying to come up with a way to open the cover while its closed and tailgate up. -
Went to put something in the bed of my truck and after pushing the button, nothing happened. All the lights came on and the tones sounded but no movement. I let it sit overnight and the next morning the tailgate worked fine. Here's the what happened leading up to the tailgate not working. The truck is new, purchased on 12/6/25 and like usual, i put a bunch of accessories on it. First was a bed liner, next was a ACCESS tonneau cover. Tailgate worked fine until yesterday. I had rolled the cover back to put stuff in the bed. Yesterday, I rolled it back down, opened the tailgate a few inches and snapped the cover closed, and closed the tailgate. A short time later, I tried to open the tailgate and it would not open. The next day it worked and I noticed that one side of the cover was about 1/8" below the side rails. I re-adjusted and works fine. Research revealed only one youtube video that says when opening the tailgate, it must be fully opened before closing. Is this true? Owners manual make no mention of this.
-
My 2026 Silverado is great and all those cameras can be helpful. Has anyone heard anything about adding the Surround Vision Recorder option I have seen in other GM models? It really seems like a waste not being able to record from the cameras. I installed regular front and rear dash cams but the OEM cameras would be a better option
-
Not really that hard to fill the trans fluid. It can be a little messy but not at all hard. Plenty of videos on how to do it on Youtube. Hardest part is removing the pan. I was able to rotate the pan and it came right out. No jacking of exhaust needed. I did mine when the temp sensor went out. That was an easy, messy replacement, too.
-
NS300L Head Bolt Thread Repair 2015 Silverado L86
TigerTruck replied to TigerTruck's topic in Engines & Drivetrain
You can only drill and tap 9 holes. Save the hole #10 in a space that is easy to do. You will have to set the insert next to the last hole to finish the job. Each hole must be oil free. You will need multiple cans of BrakeKleen to clean the holes. Please note: MAKE SURE YOU HAVE GOOD VENTALATION, BRAKEKLEEN STINKS!!!!! I cleaned them this way: start at the upper holes and spray slowly into the hole until the junk coming out clears up. CAREFULLY AND SLOWLY, with a rag covering the hole, blow out the brakekleen. I repeated this at least two more times and the final time used lots of air to dry the hole out. I then spray the insert to make sure it was oil free. The rag will catch most of the brakekeen. Immediately toss the rag outside. The instructions say to screw in an insert to make sure the hole is deep enough. I tried to do this but I got worried that the insert would get stuck because it did not screw in cleanly. I found out that as long as the holes are drilled fully and the holes are tapped fully, the inserts will screw in all the way with the threadlock applied. The threadlock acts as a lubricant and I did not have any real problems screwing in the inserts. I allowed the threadlock to set up for 24 hours but I don’t think it really set up since its so cold in my garage. I do have a heater that I use while working but I turn it off overnight. I reinstalled the head and had no problems with the bolt holes. I did purchase a new digital angle torque wrench from Lowes that made torquing and the final two angle tightening sequences a lot easier. Even still, that one lower head bolt next to the firewall was tough. -
NS300L Head Bolt Thread Repair 2015 Silverado L86
TigerTruck replied to TigerTruck's topic in Engines & Drivetrain
Tapping the hole, long bit
-
NS300L Head Bolt Thread Repair 2015 Silverado L86
TigerTruck replied to TigerTruck's topic in Engines & Drivetrain
Tapping the hole, short tap
-
NS300L Head Bolt Thread Repair 2015 Silverado L86
TigerTruck replied to TigerTruck's topic in Engines & Drivetrain
Newly threaded hole. Appears to be off a little bit. This only happened withe one hole.
-
NS300L Head Bolt Thread Repair 2015 Silverado L86
TigerTruck replied to TigerTruck's topic in Engines & Drivetrain
Fully drilled hole. That mark in the center is where the ground tip of the drill bit hits.
-
NS300L Head Bolt Thread Repair 2015 Silverado L86
TigerTruck replied to TigerTruck's topic in Engines & Drivetrain
Stock undrilled head bolt hole
-
NS300L Head Bolt Thread Repair 2015 Silverado L86
TigerTruck replied to TigerTruck's topic in Engines & Drivetrain
Long bit that comes with the kit
-
NS300L Head Bolt Thread Repair 2015 Silverado L86
TigerTruck replied to TigerTruck's topic in Engines & Drivetrain
Medium Bit
-
NS300L Head Bolt Thread Repair 2015 Silverado L86
TigerTruck replied to TigerTruck's topic in Engines & Drivetrain
Short bit
-
NS300L Head Bolt Thread Repair 2015 Silverado L86
TigerTruck replied to TigerTruck's topic in Engines & Drivetrain
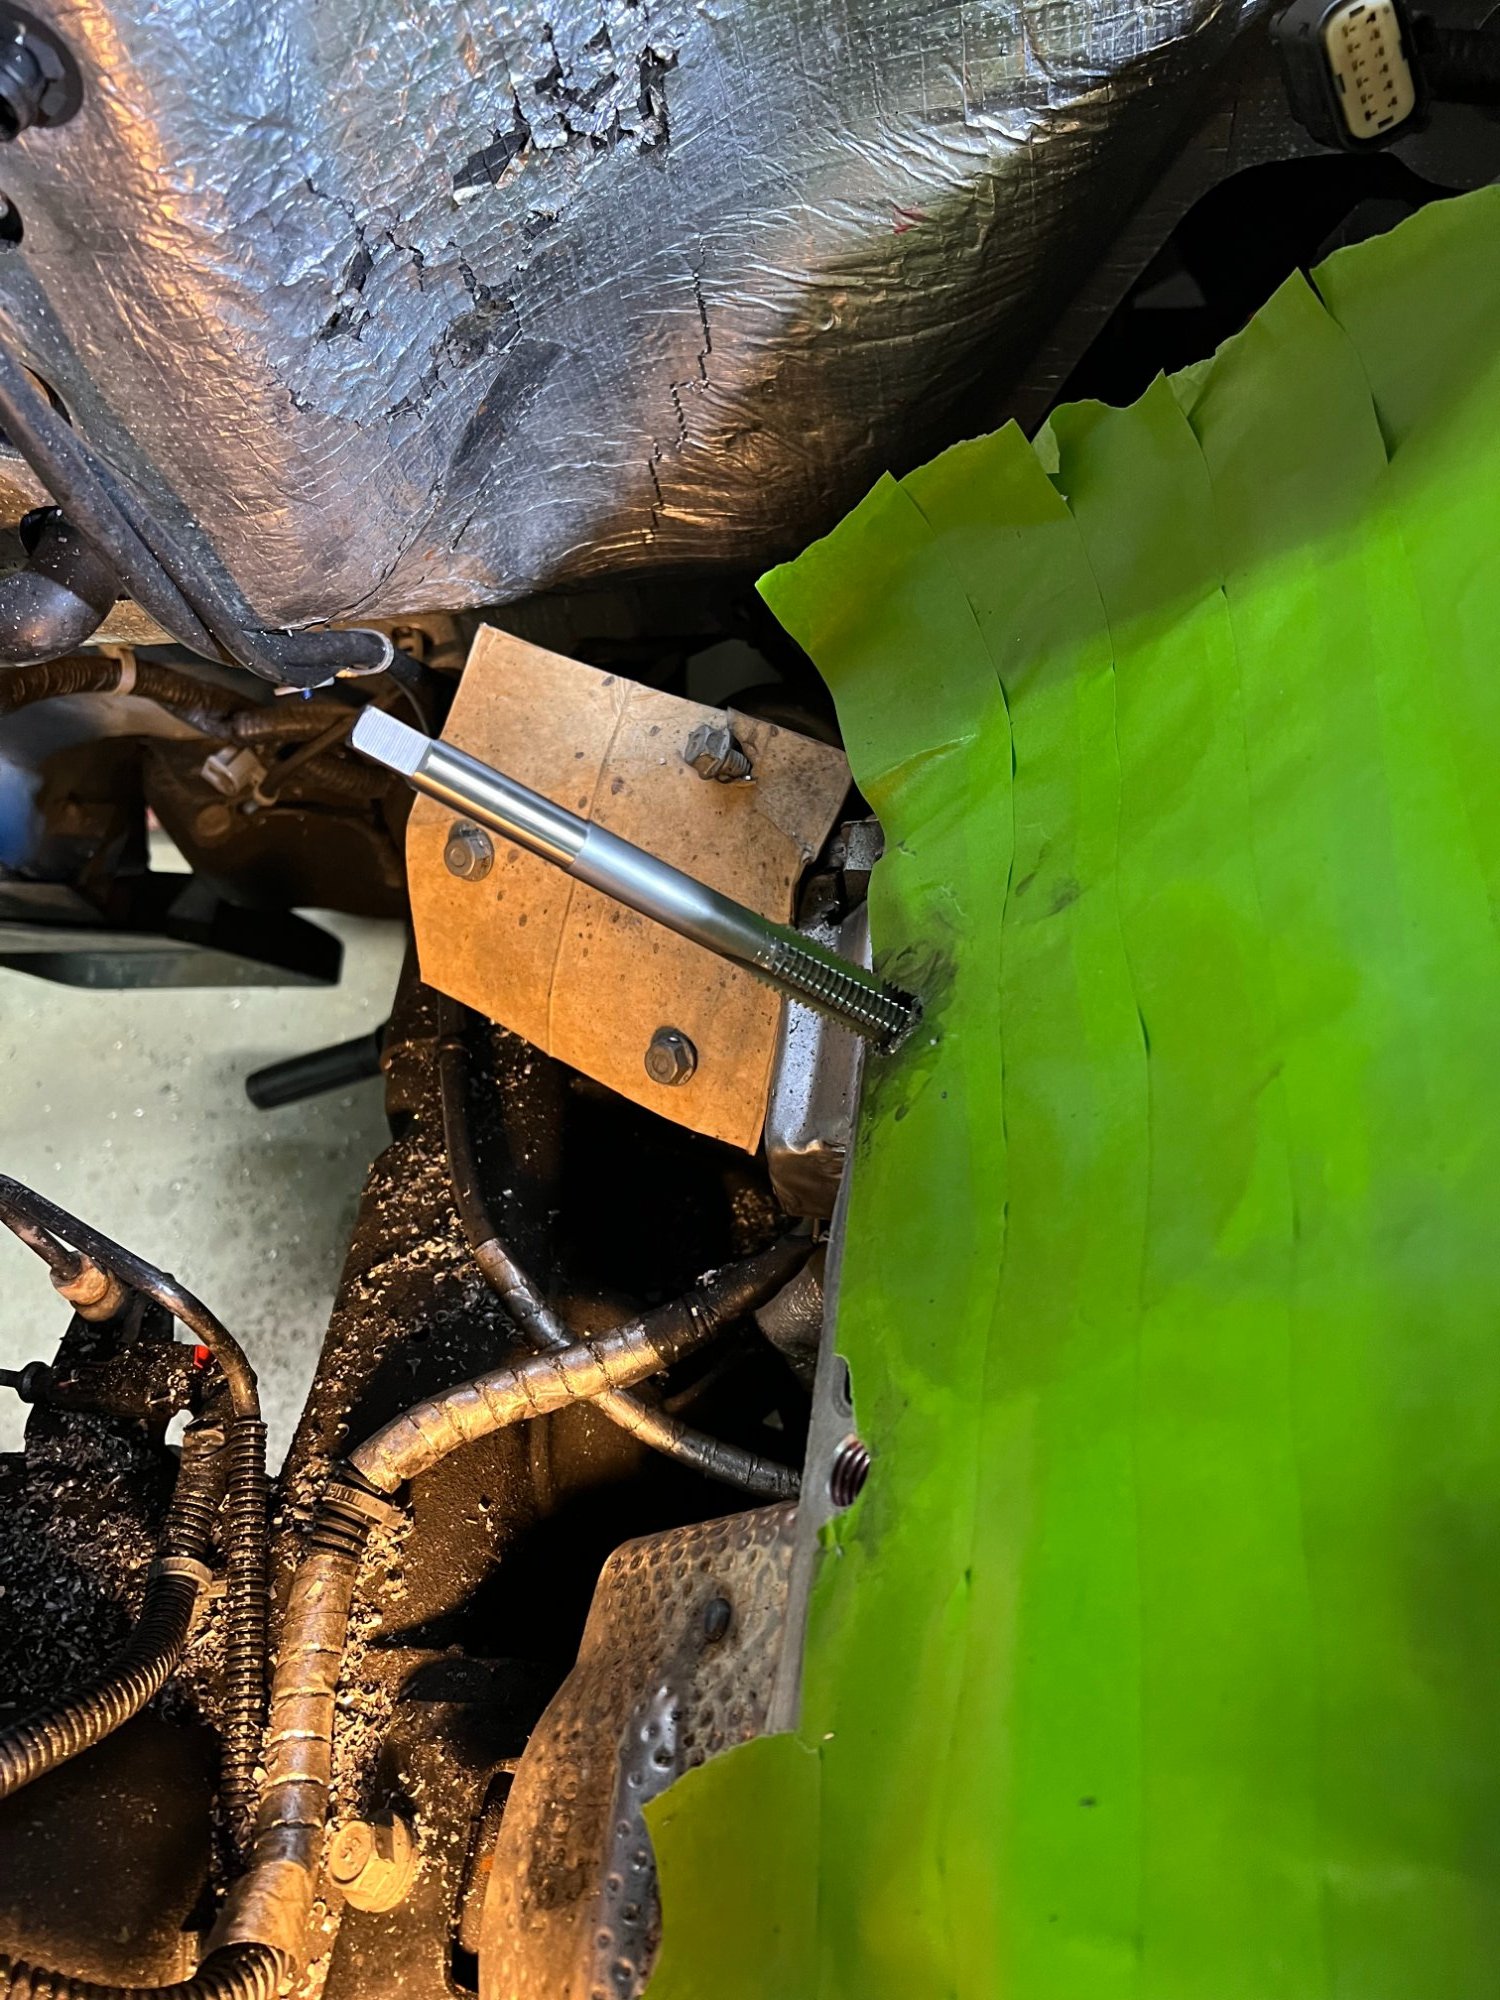
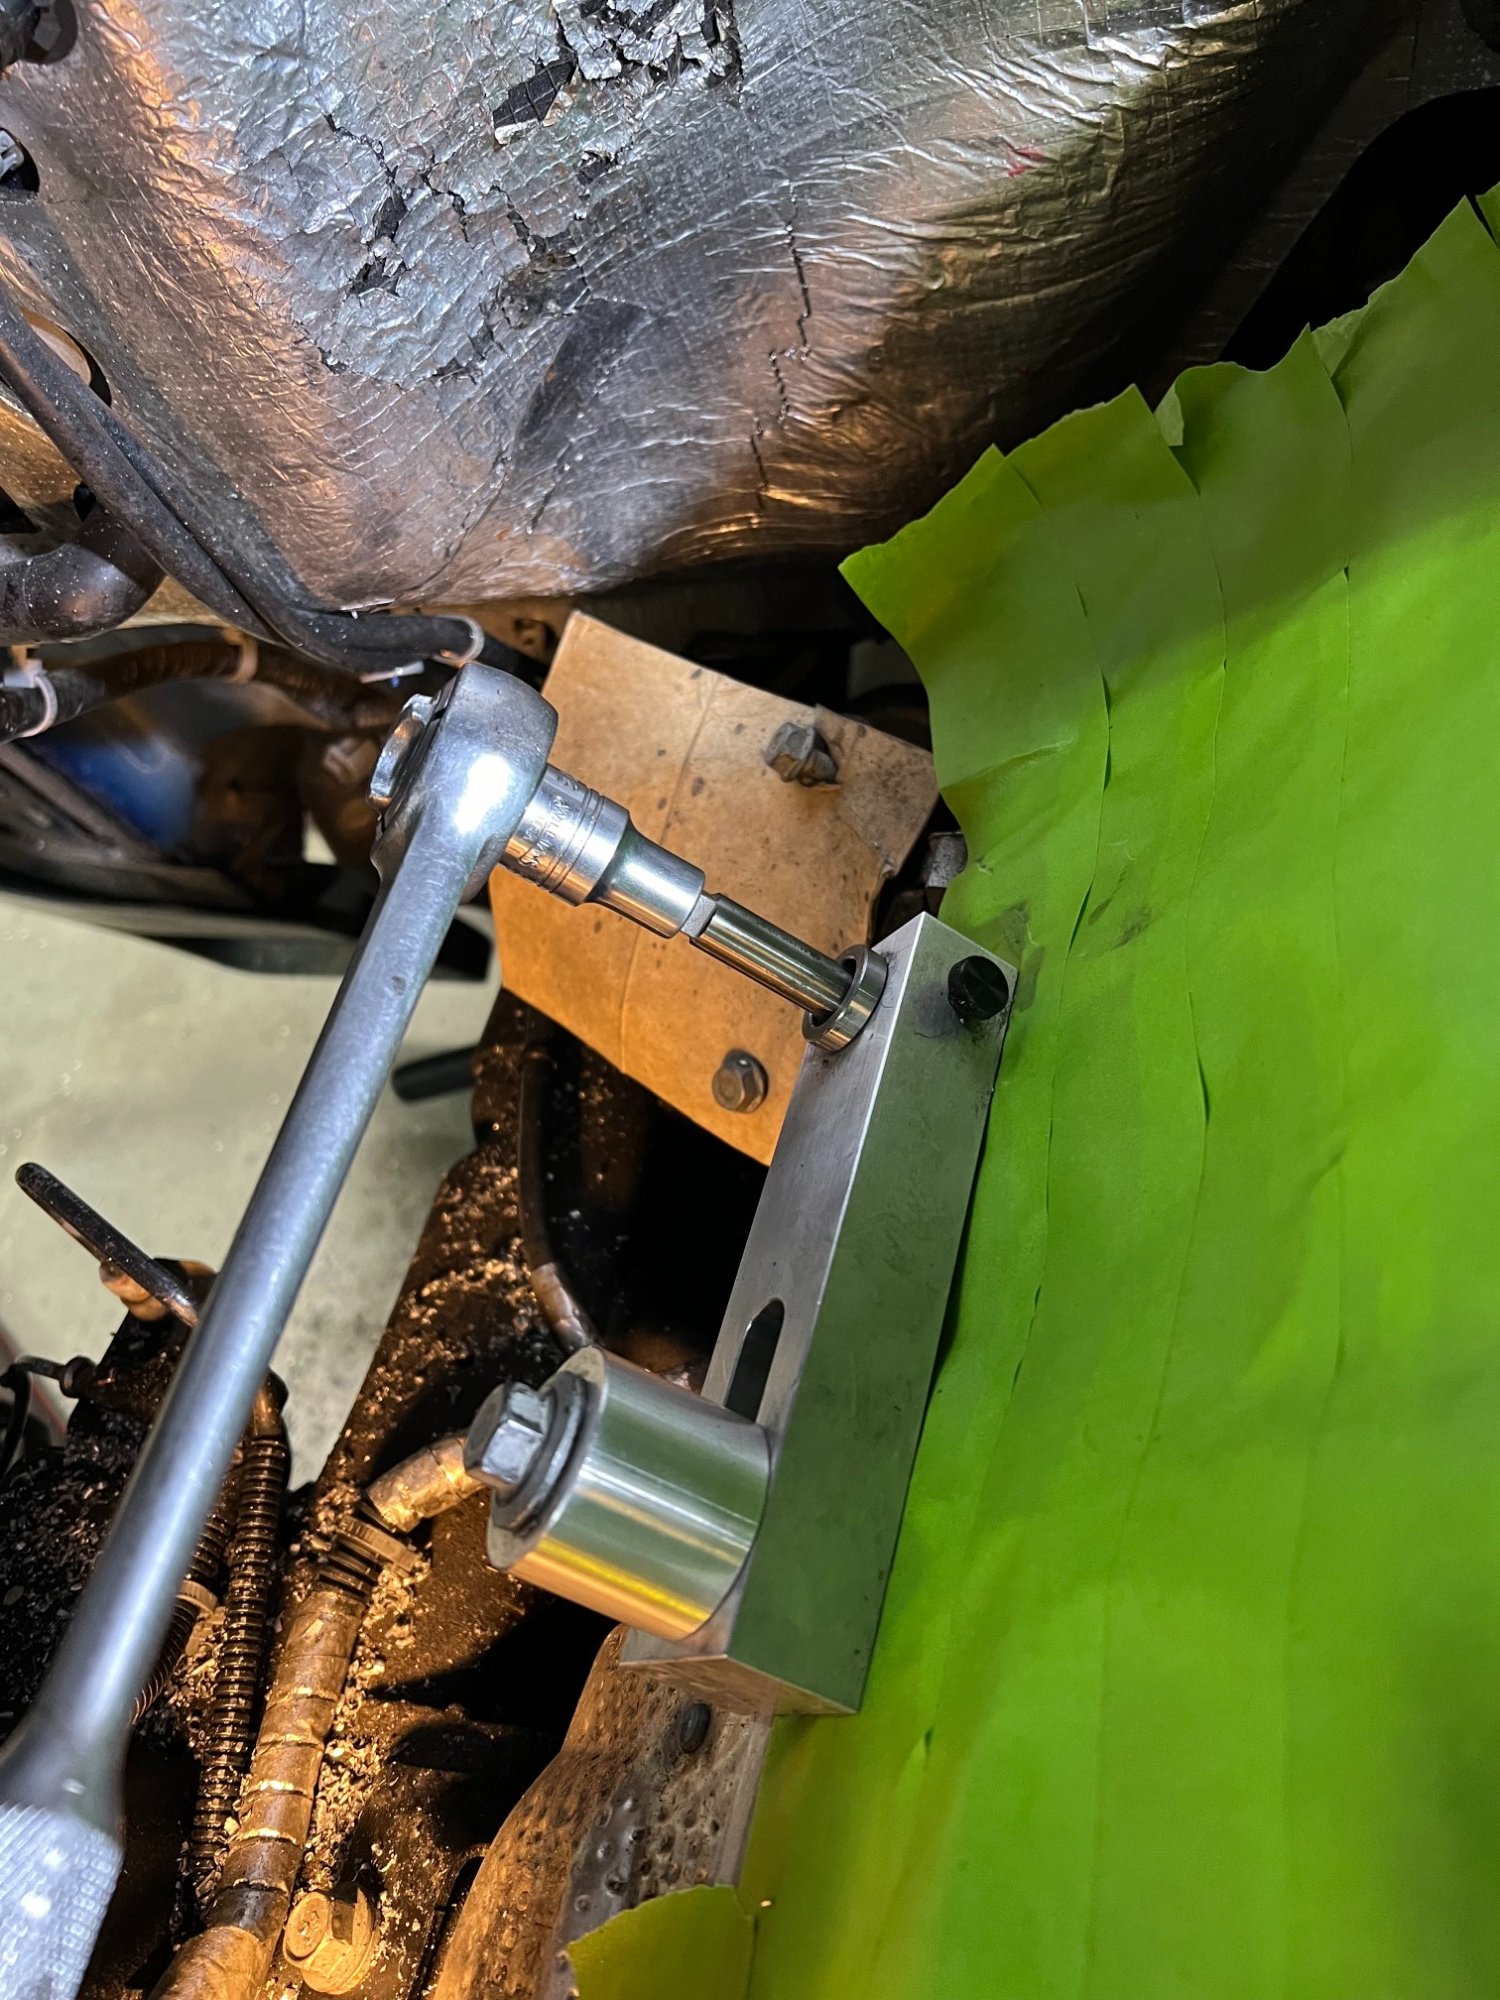
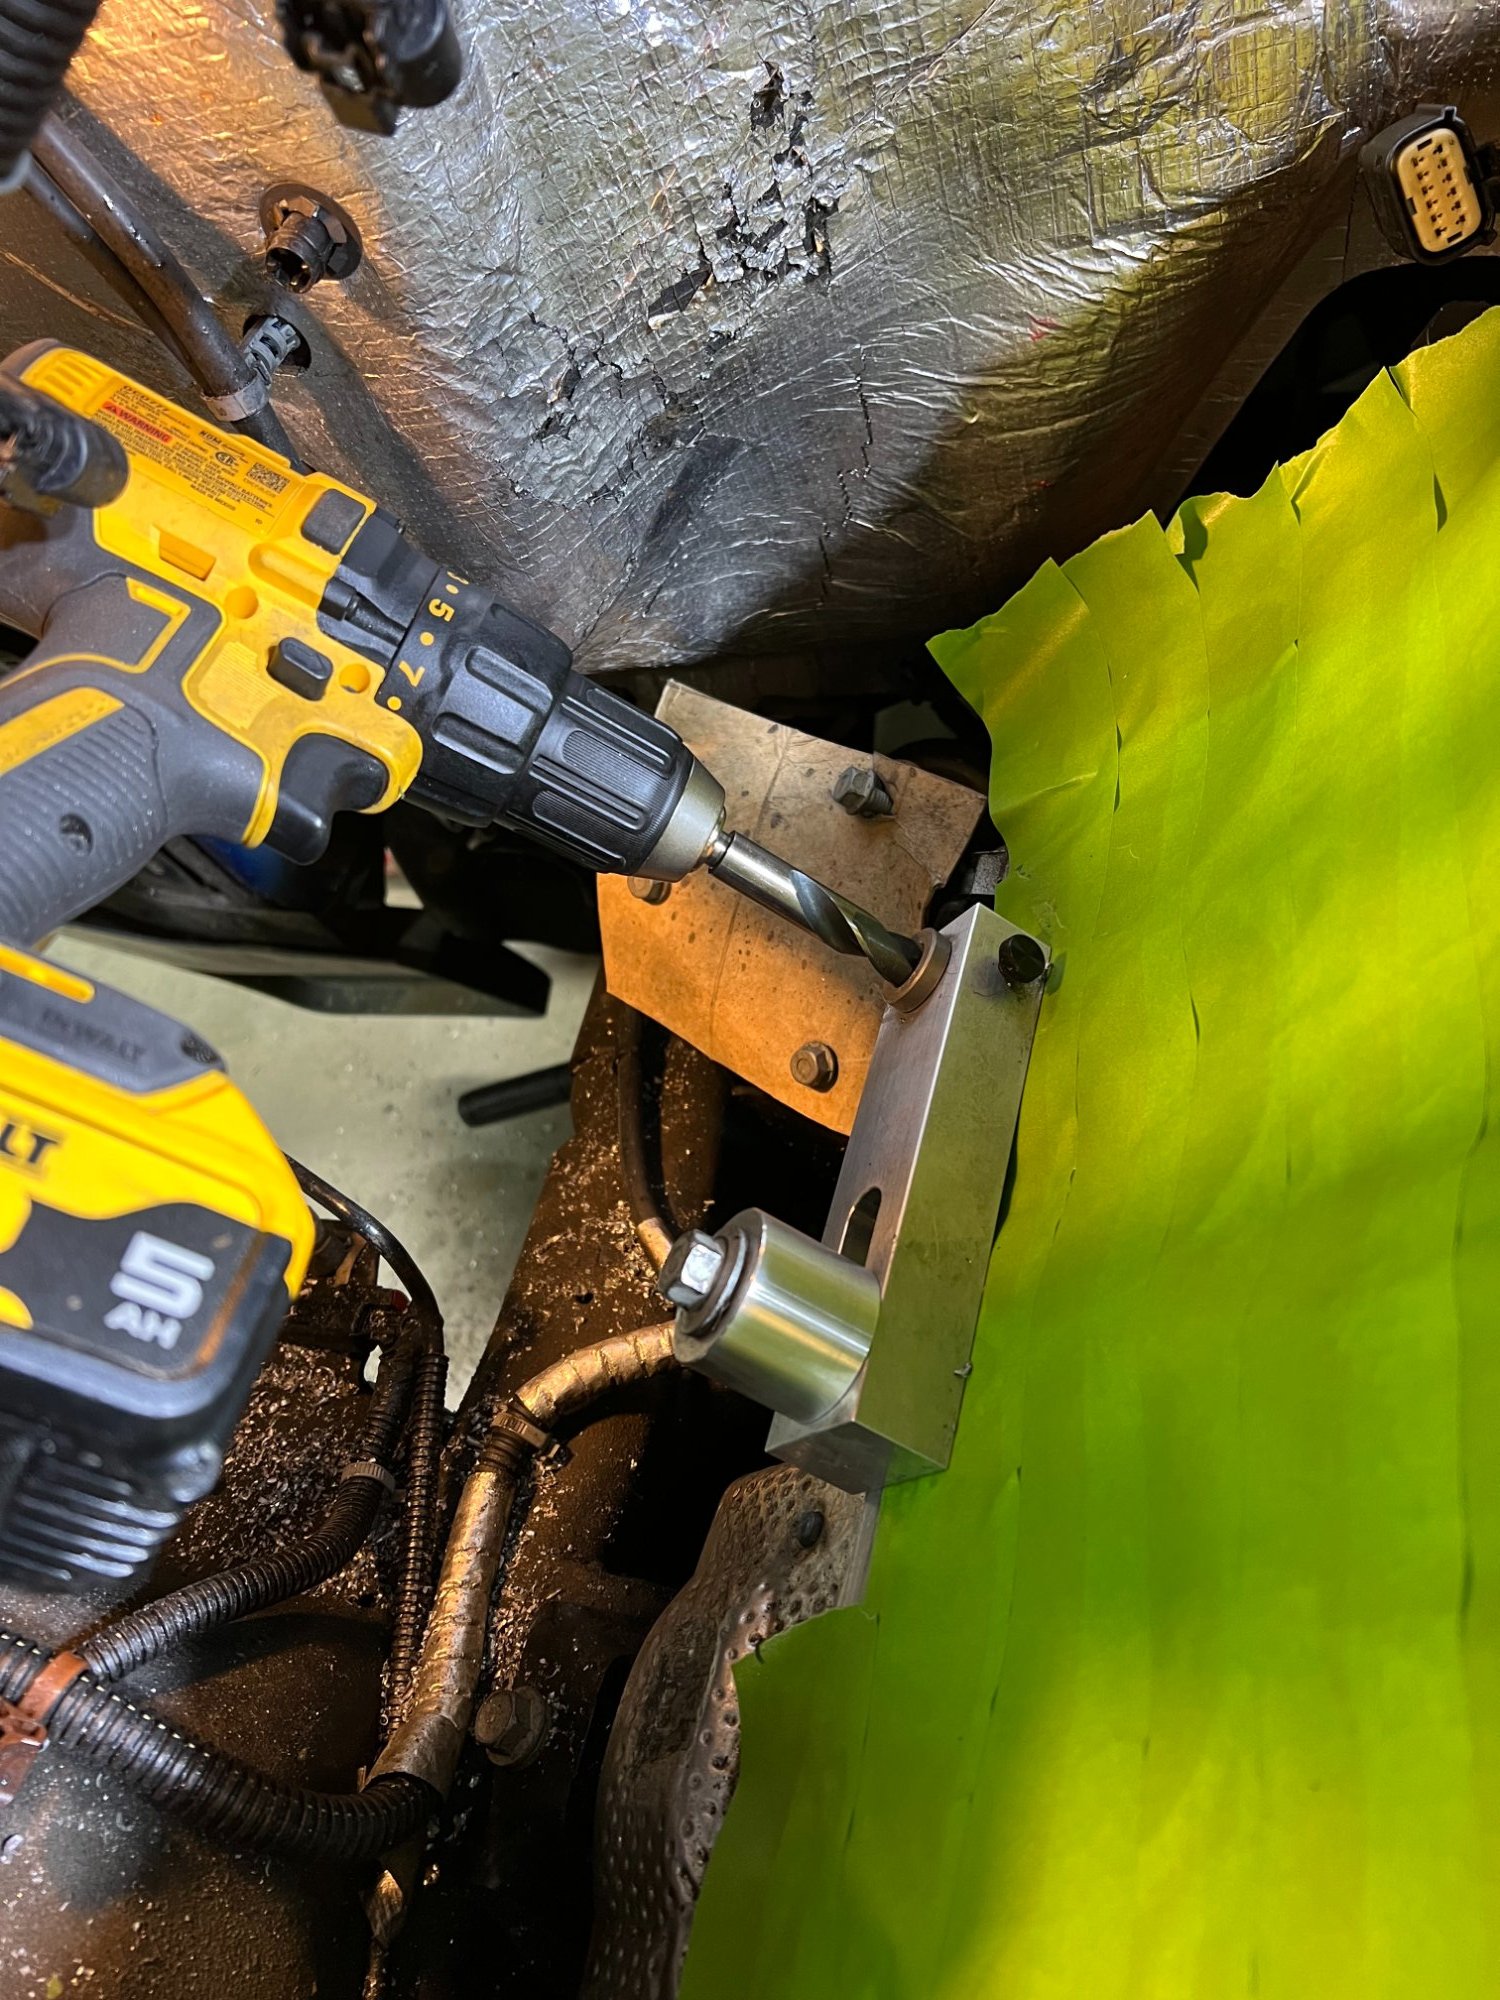
The holes in question are the two next to the firewall and the next lower one from there. I must have not taken a picture of the angle adapter being used. Basically, I set up the jig and used the short drill bit. Things may get tight so you may need to put the bit in the jig and attach the angle drill adapter to the bit. Then attach your drill to the adapter. Drill as far as you can. Back out and remove the adapter then remove the bit. Remove the jig and repeat with the short drill, being careful not to tilt the drill bit. Use air to blow out the chips. Be careful, the chips will fly everywhere. Wear eye protection. After drilling with the short bit, repeat the process with the next 3/8 shank bit without the jig. This bit will go to the bottom of the hole. Remove the adapter, then remove the bit. Use air to clear the hole. Wear eye protection. I used a Depstech endoscope for every hole. You need to make sure the hole is drilled to the bottom, then to make sure the hole is tapped to the bottom. Instructions say to not use any powered drills to tap the holes. I used a 7/16” ½” drive 12 point socket to do the tapping and a 3/8” drive speed wrench to remove and screw in the taps. Tap Magic was added each time to the drill and tap. The small tap can be screwed in as much as you can. Remove the tap, remove the jig, and clean the hole. Insert the longer tap and screw down with the speed wrench, then tap ¾ of the way down with the rachet. Remove tap, blow out hole, and screw the tap 7/8 down, repeat and finally screw the tap down until it stops. Do not force any futher. Remove, blow out, inspect with endoscope. -
NS300L Head Bolt Thread Repair 2015 Silverado L86
TigerTruck replied to TigerTruck's topic in Engines & Drivetrain
This is the angle adapter I used. Very cheaply made but it barely did the job before breaking. 90 Degree Right Angle Adapter, 0.8-10mm Right Angle Bend Extension 8mm Hex Shank Cordless Drill Attachment Adapter for Electric Drills(black)
-
NS300L Head Bolt Thread Repair 2015 Silverado L86
TigerTruck replied to TigerTruck's topic in Engines & Drivetrain
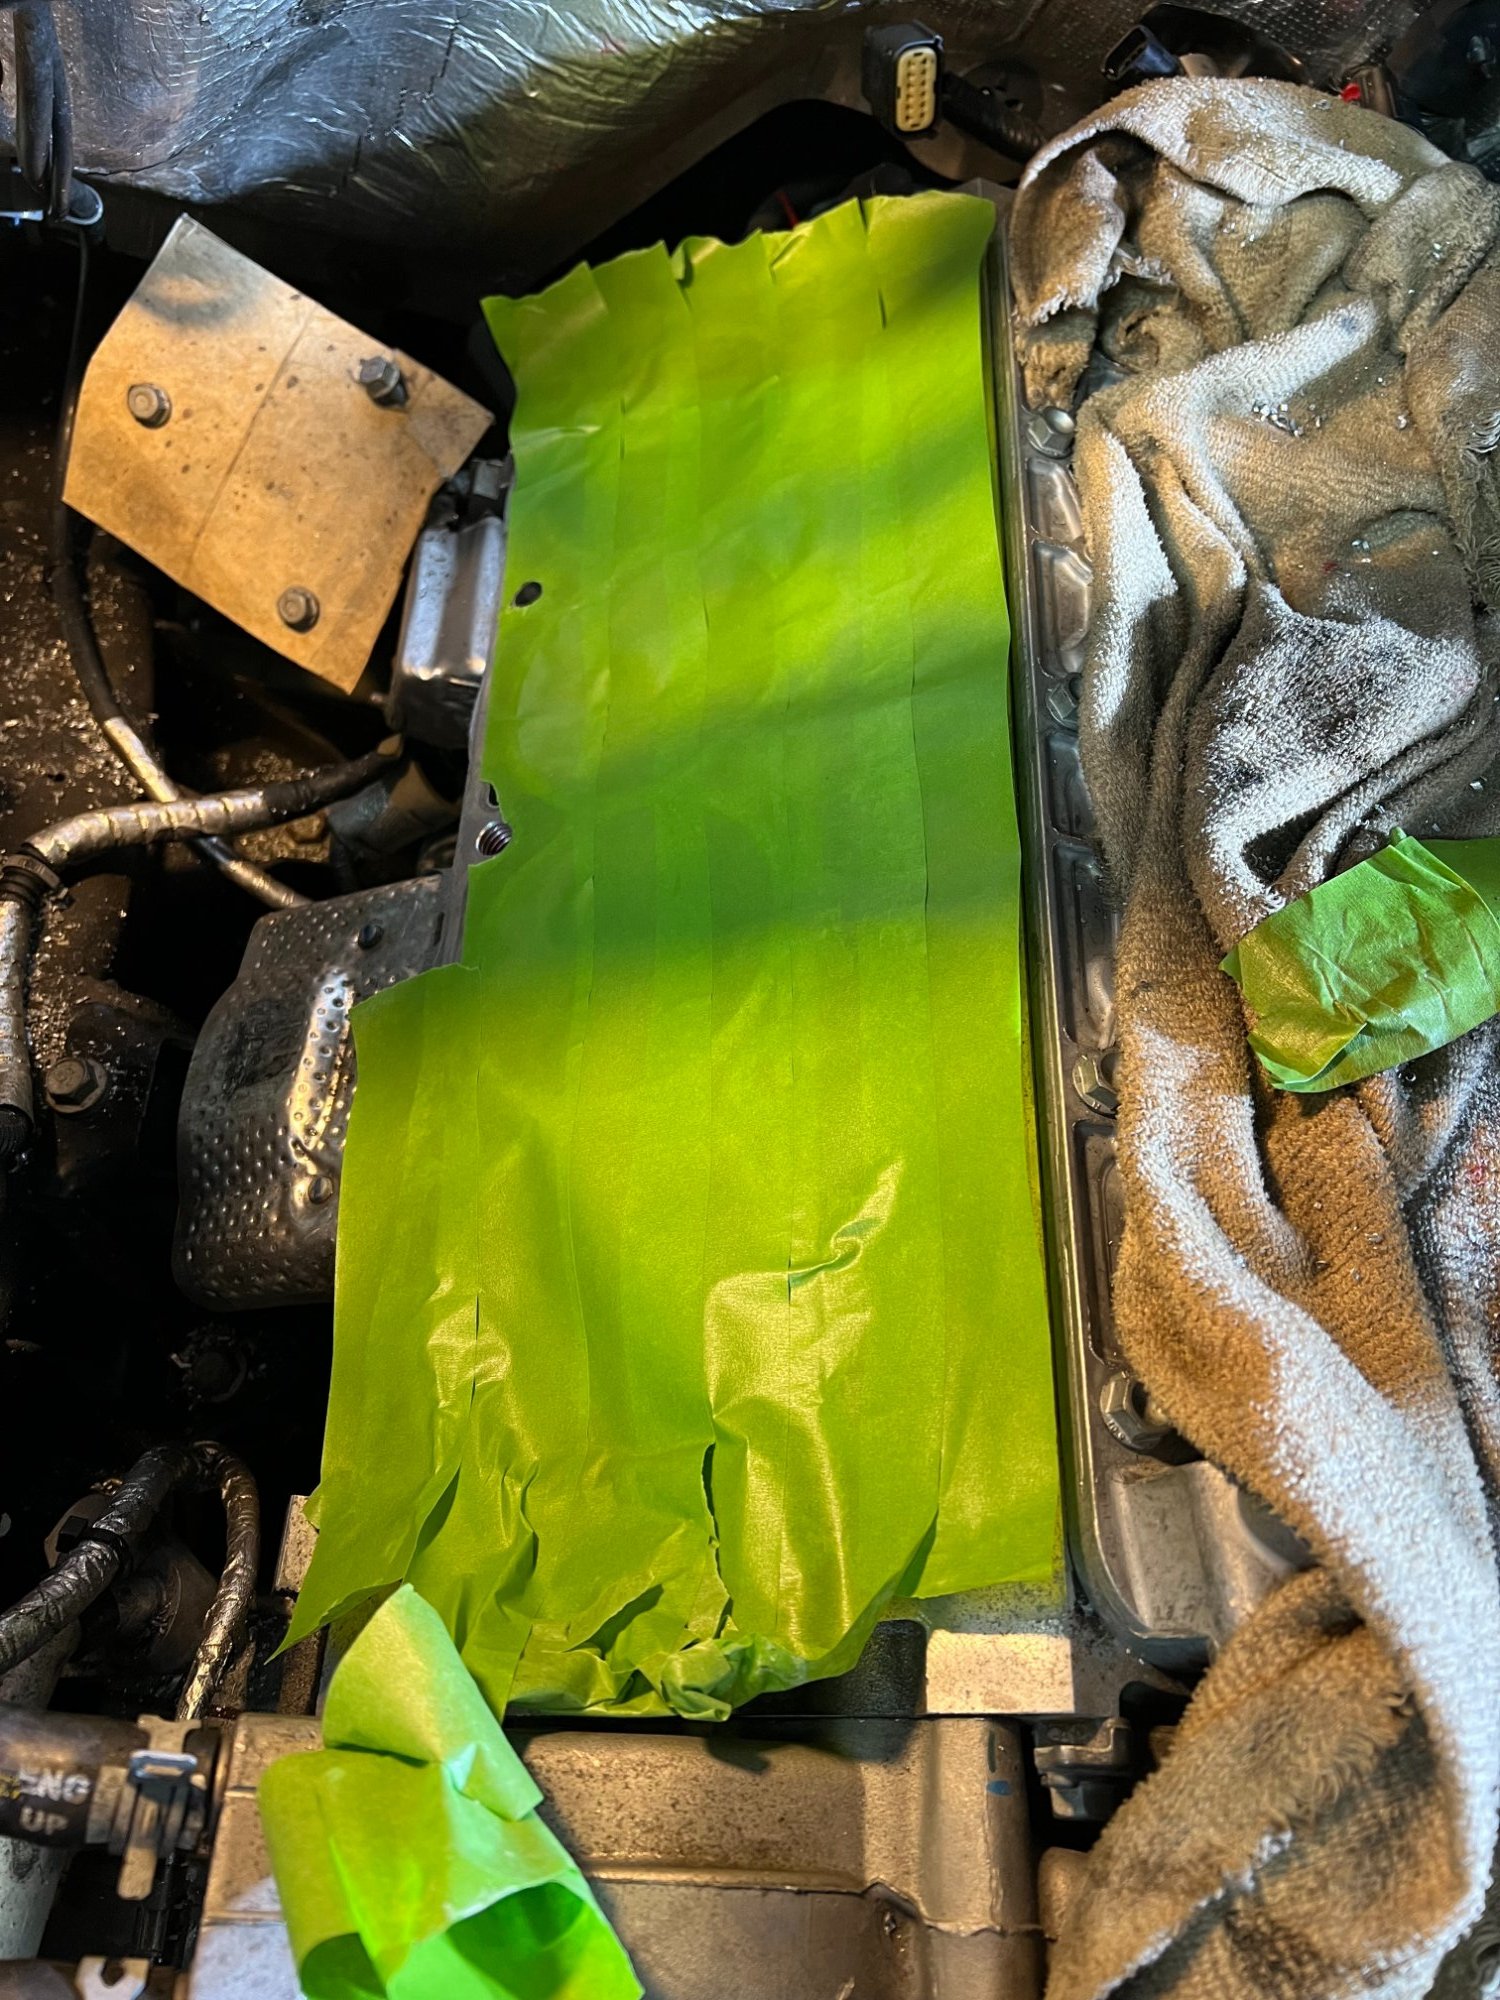
Tape the block. Tape does not stick to good if there is even a small amount of oil on the block
-
NS300L Head Bolt Thread Repair 2015 Silverado L86
TigerTruck replied to TigerTruck's topic in Engines & Drivetrain
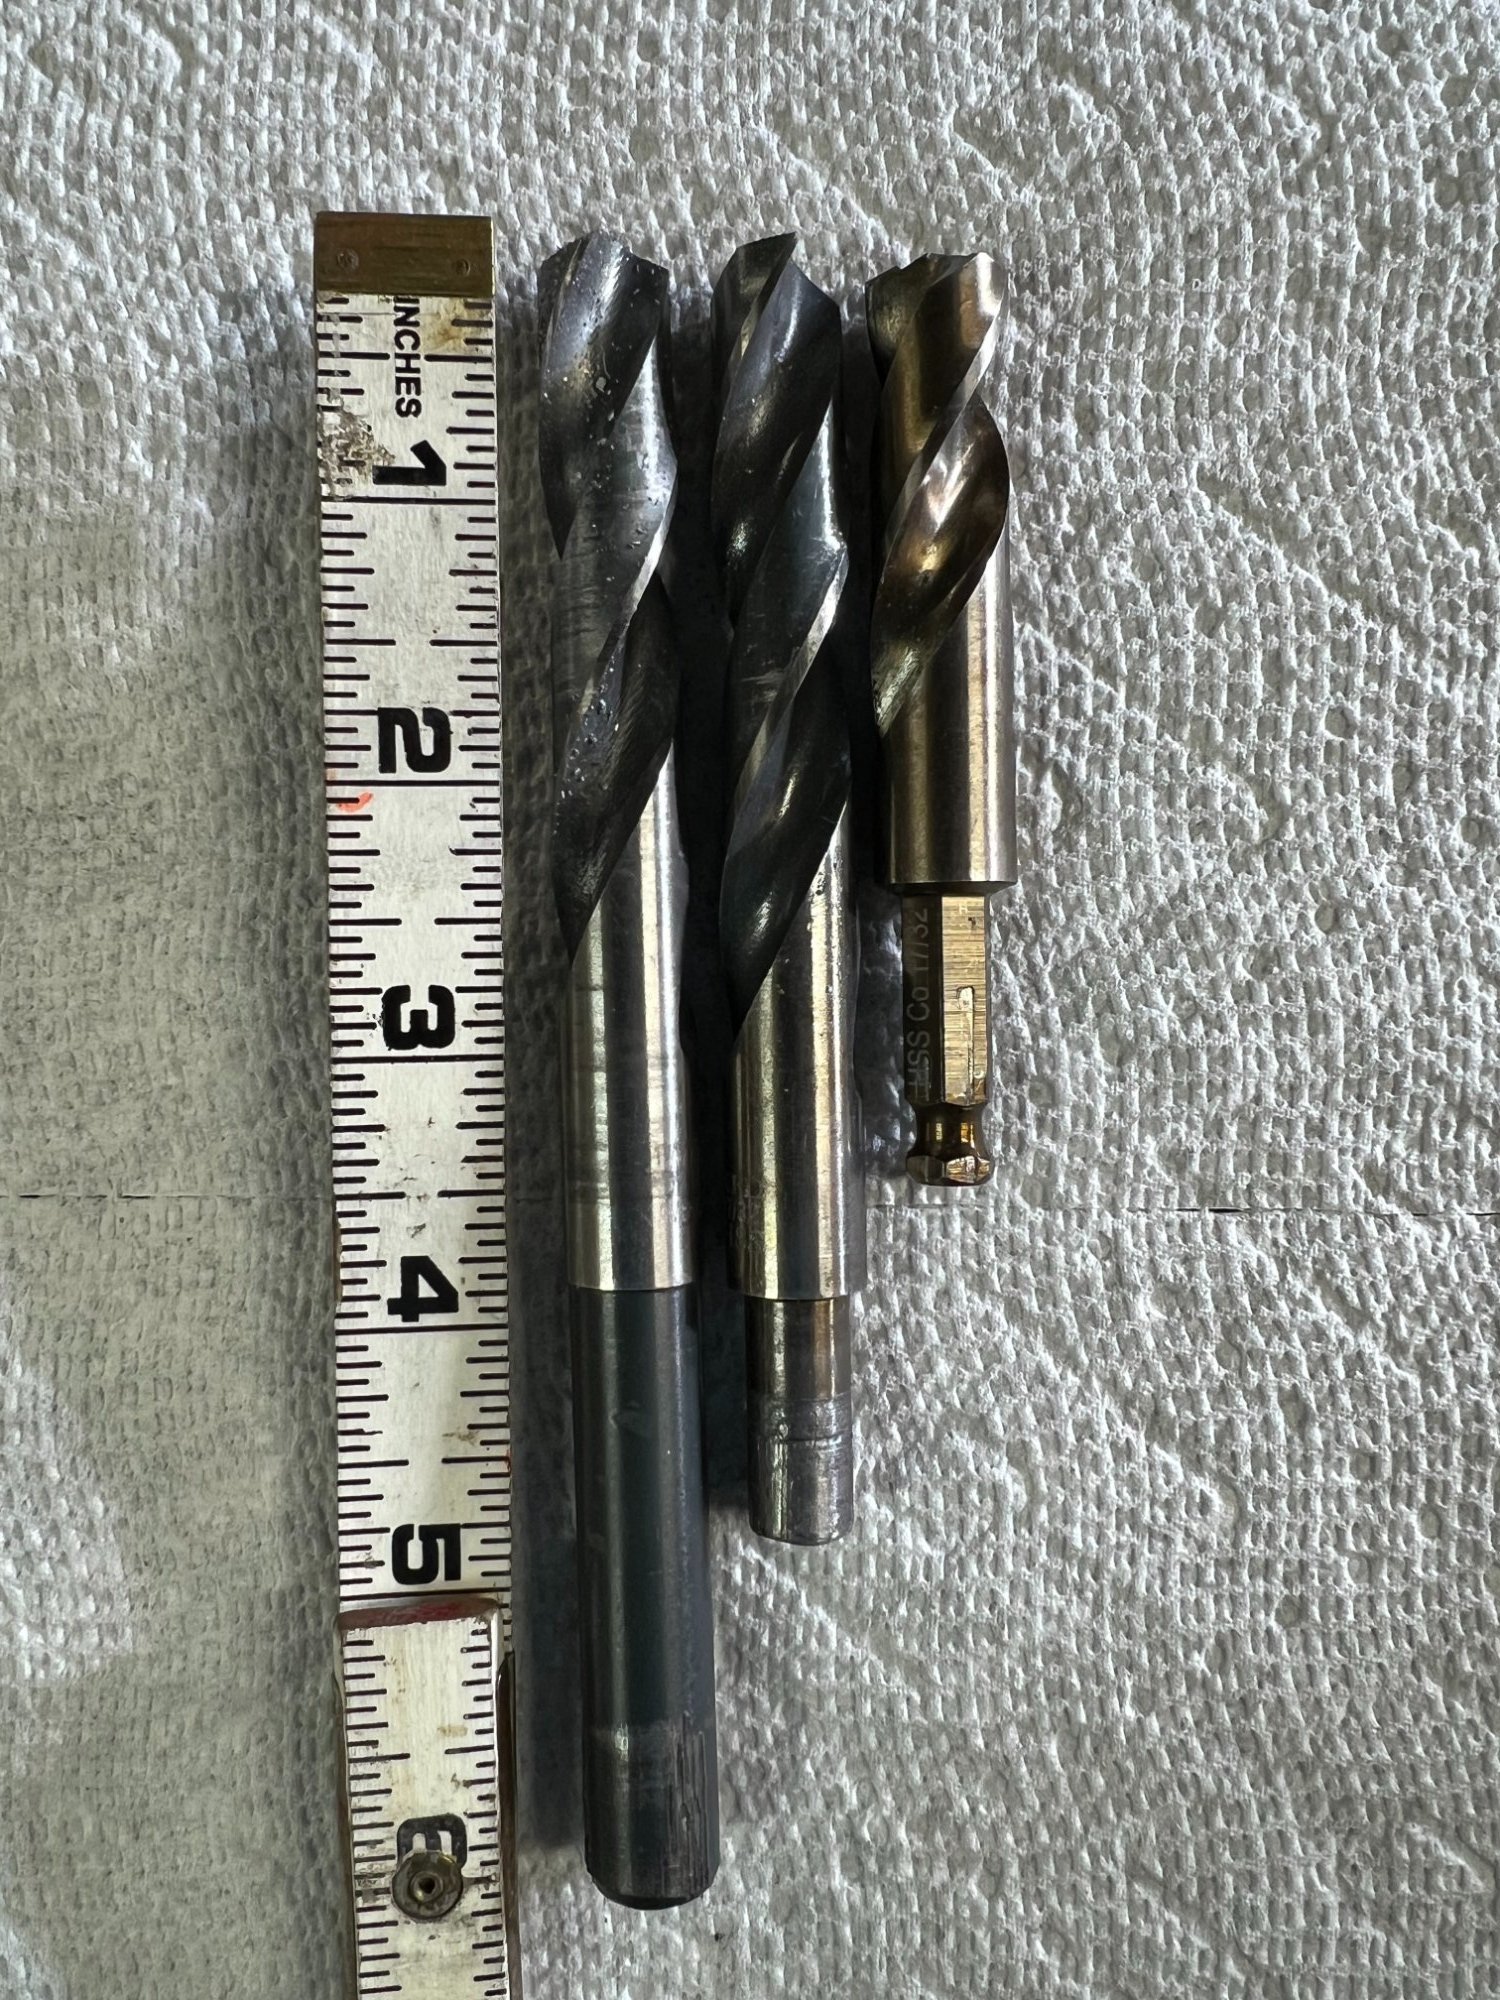
This is all the drill bits I used
-
NS300L Head Bolt Thread Repair 2015 Silverado L86
TigerTruck replied to TigerTruck's topic in Engines & Drivetrain
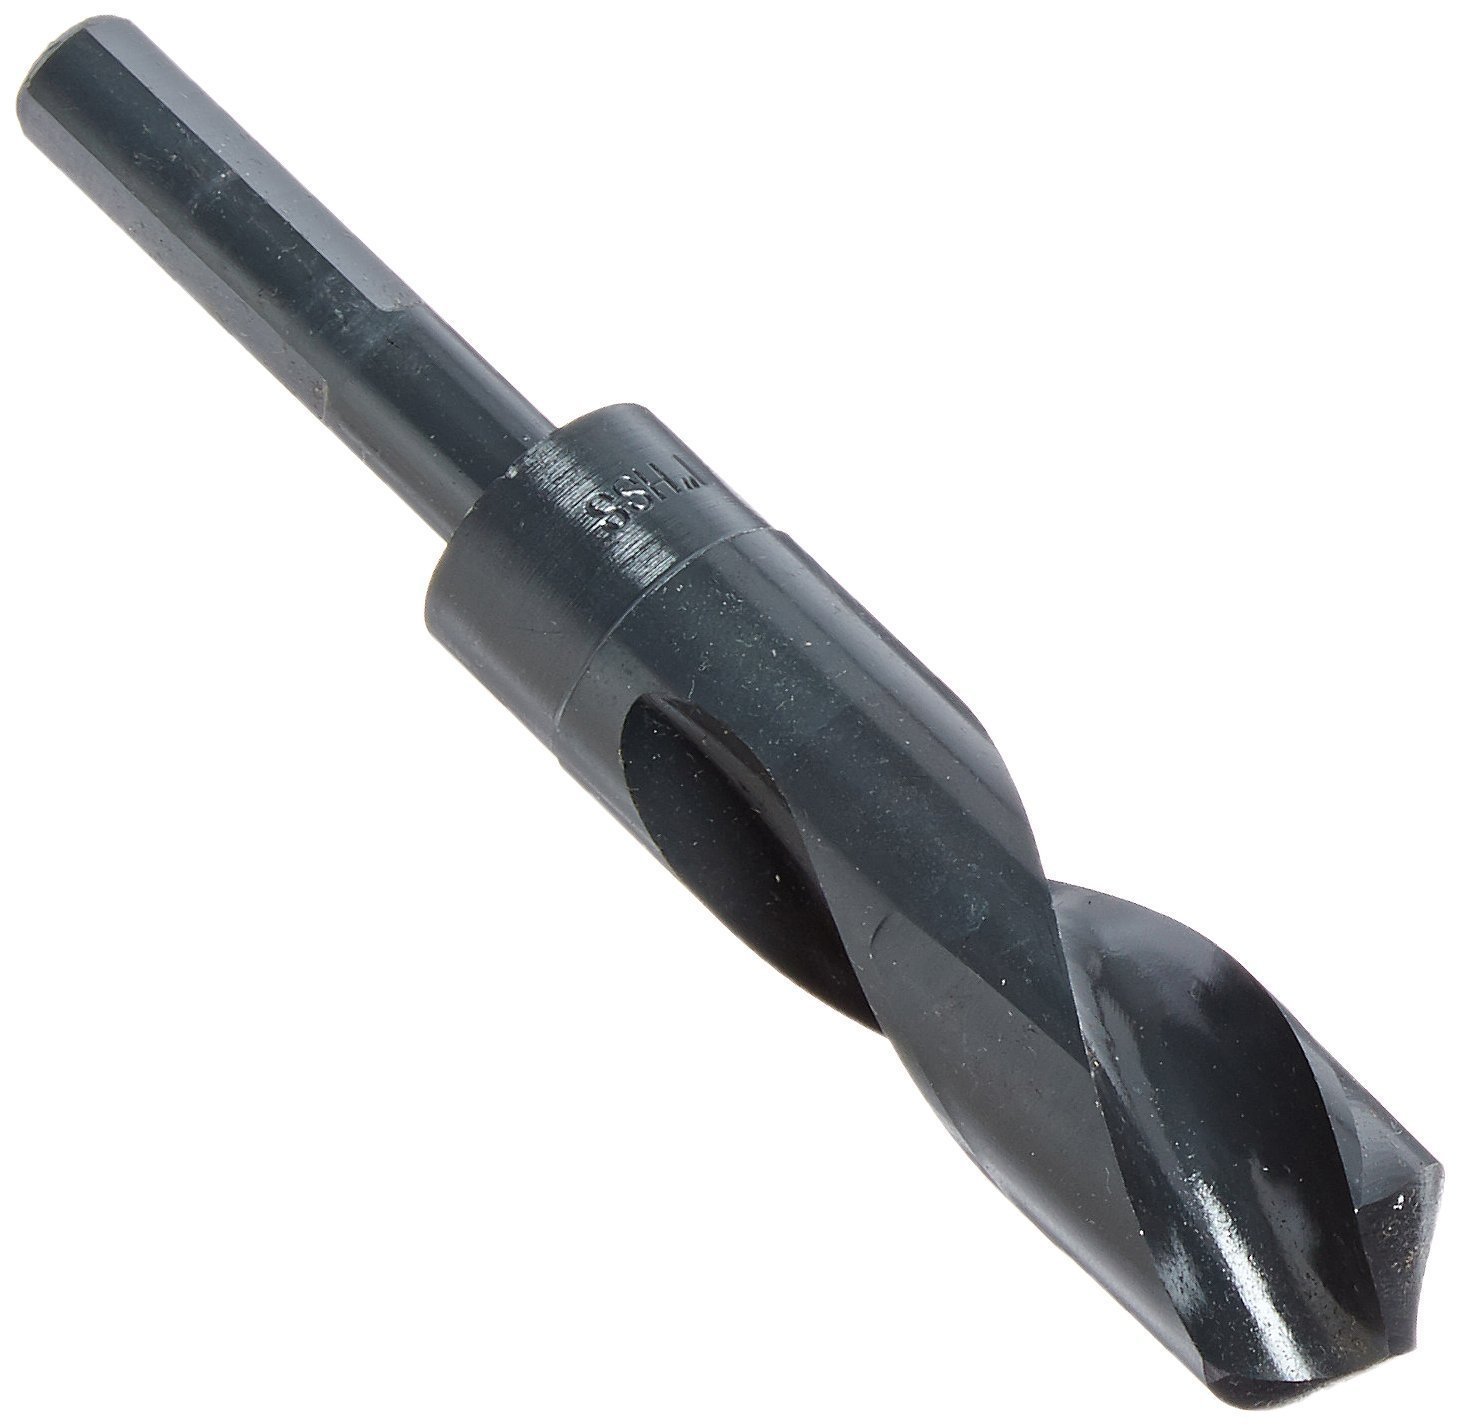
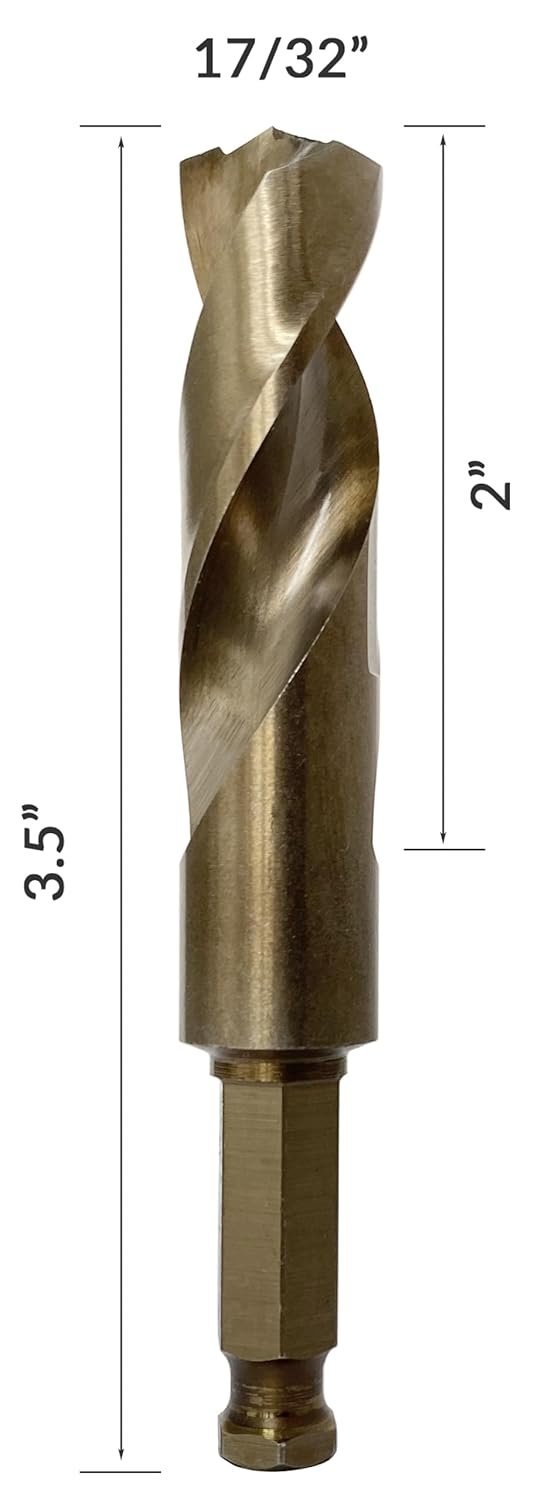
This is the intermediate drill bit. The shank needs to be cut so the drill fits right up to the reduced part of the bit. Drill America - DWDRSD3/8X17/32 17/32" High Speed Steel Reduced Shank Drill Bit with 3/8" Shank, DWDRSD Series
-
NS300L Head Bolt Thread Repair 2015 Silverado L86
TigerTruck replied to TigerTruck's topic in Engines & Drivetrain
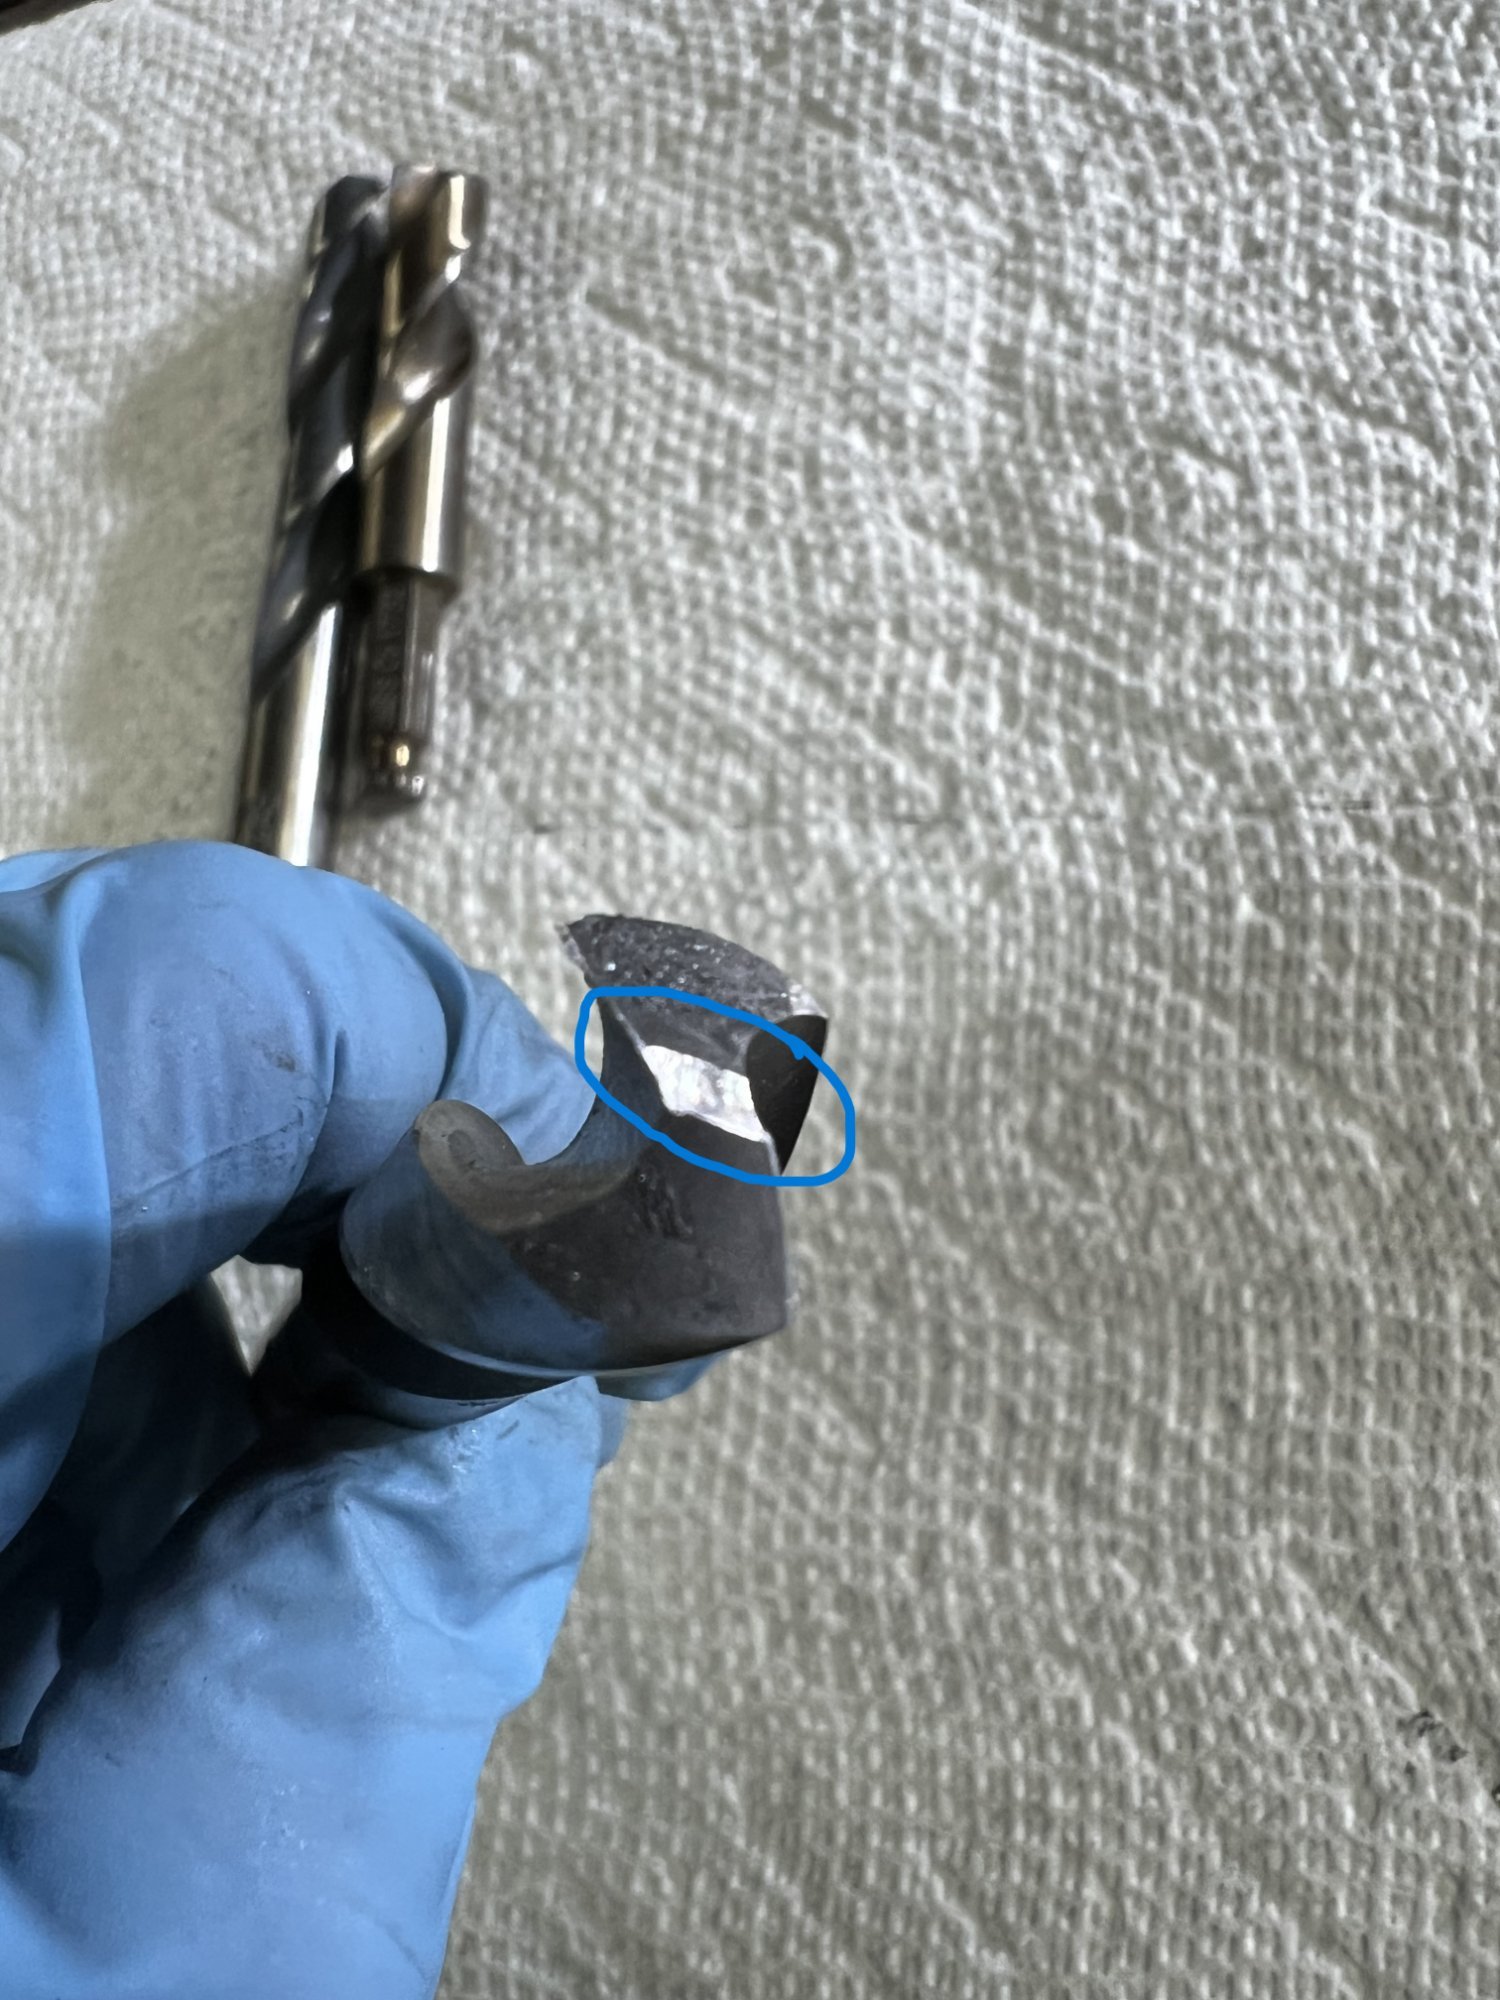
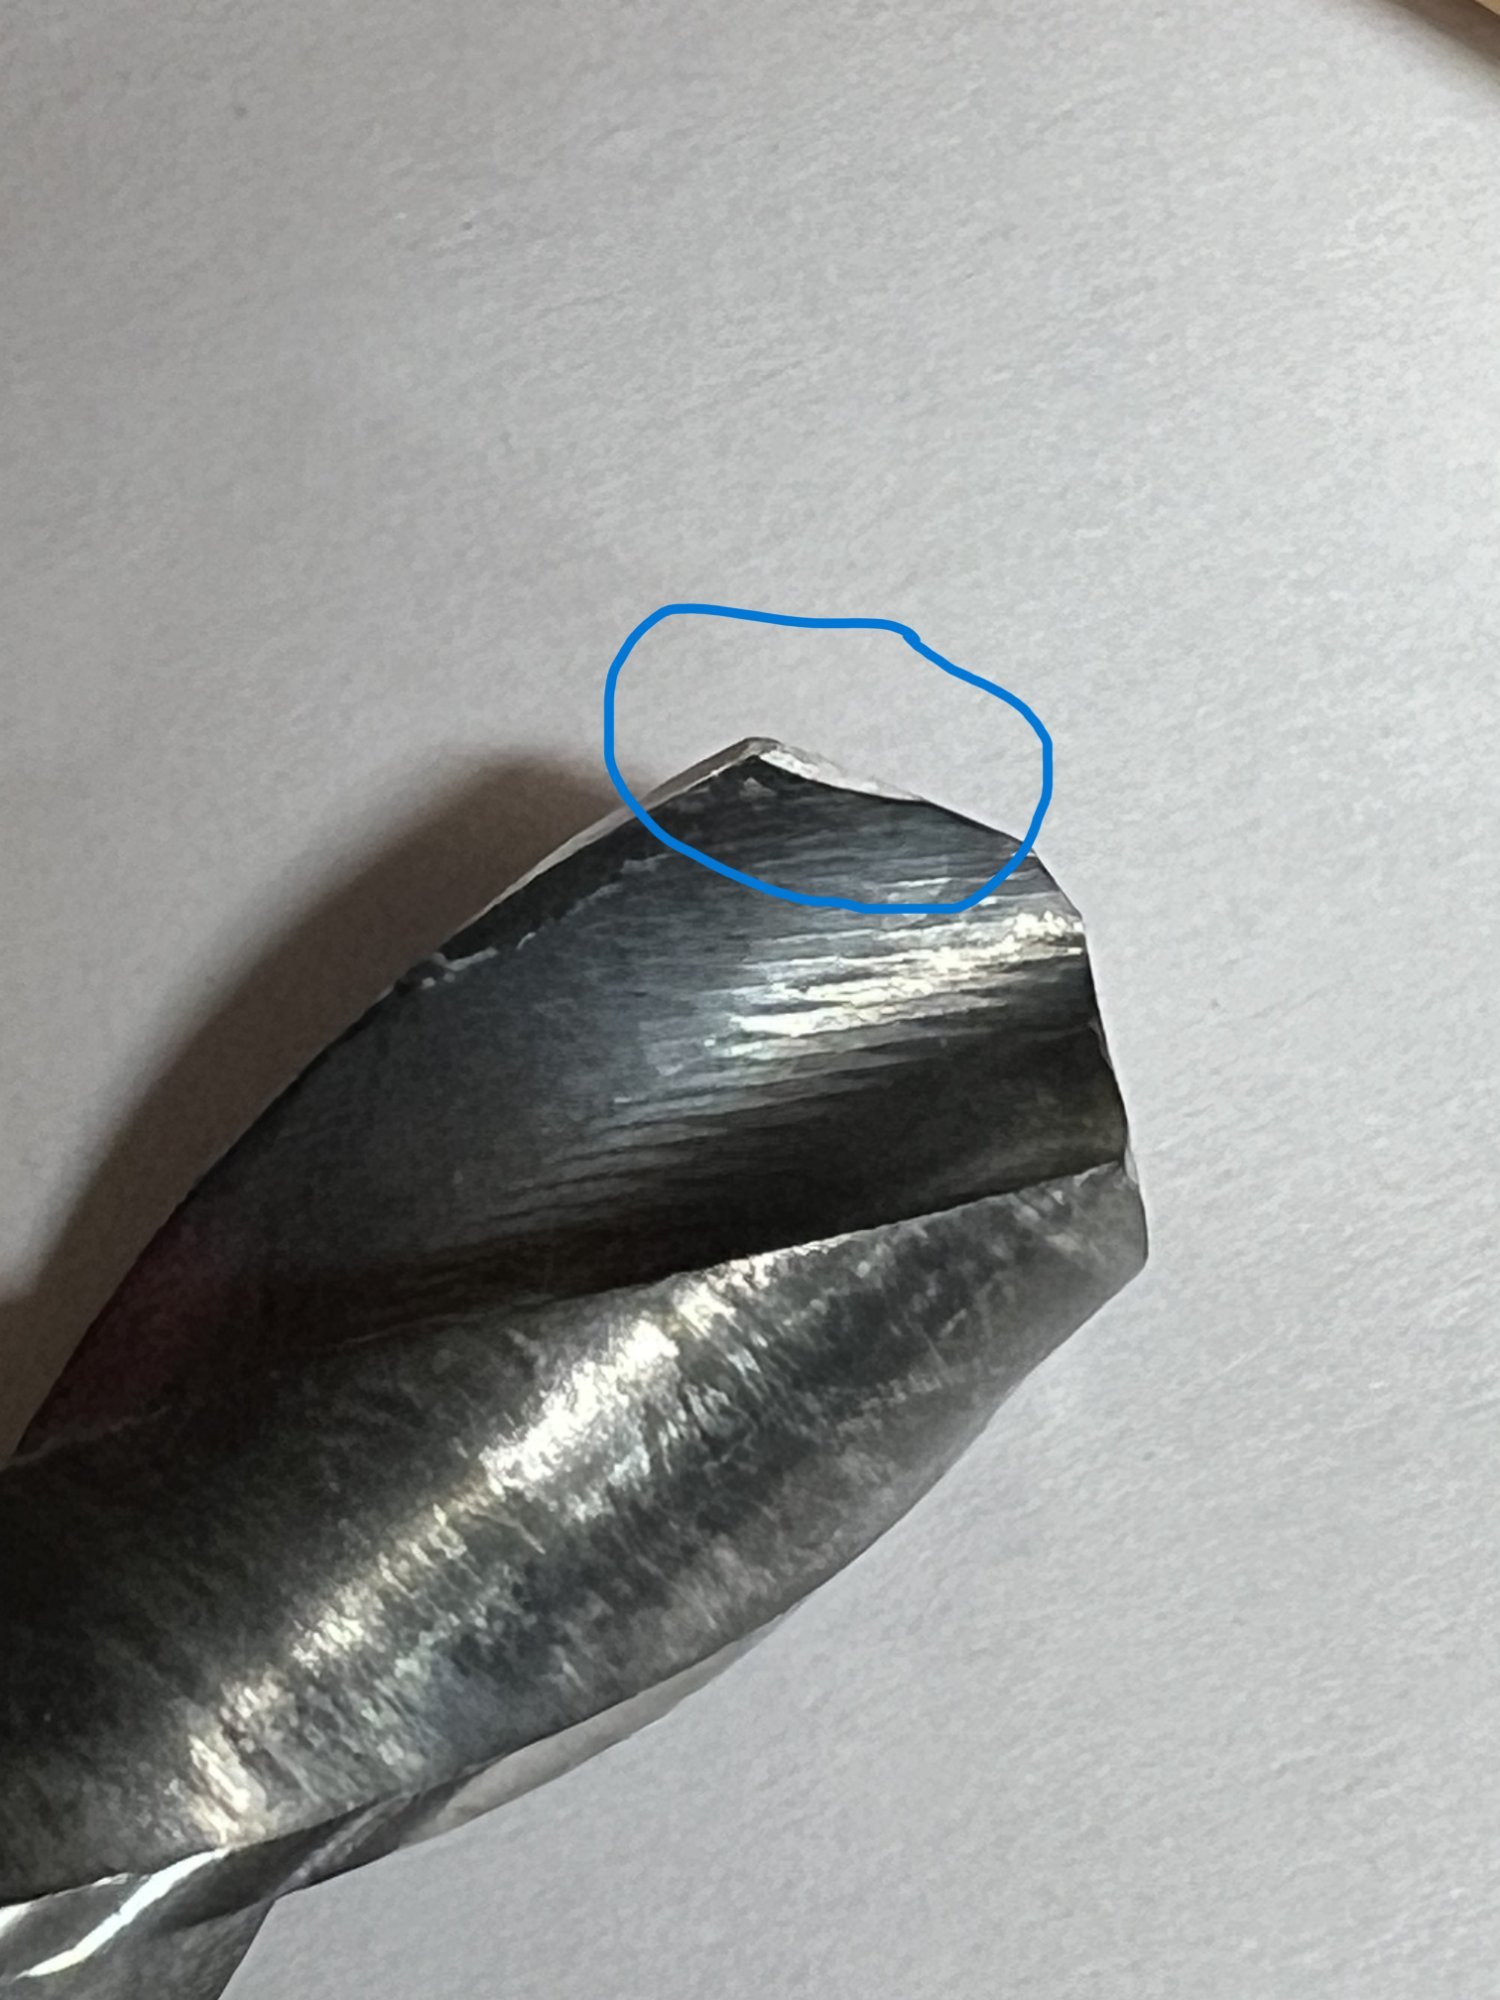
Vendor says this must be ground down to prevent drilling past the bottom of the hole
-
NS300L Head Bolt Thread Repair 2015 Silverado L86
TigerTruck replied to TigerTruck's topic in Engines & Drivetrain
Per the Vendor, This must be filed on all drill bits used.
-
NS300L Head Bolt Thread Repair 2015 Silverado L86
TigerTruck replied to TigerTruck's topic in Engines & Drivetrain
This is the short drill bit I found on Amazon: NordWolf 17/32" M35 Cobalt Stubby Drill Bit for Stainless Steel, Hard Metals & Cast Iron, with 5/16" Hex Shank for Quick Chucks & Impact Drivers
-
Basically, I Some background: I have another active thread called DOD Delete and New Jersey OBD2 inspections. have had AFM lifter failure on cylinder number four 4 times now. Dealer covered the first three times. Now warranty is expired. The subject of this thread is the problems I ran into replacing the lifters and VLOM. During assembly, the seventh head bolt tightening the final 60 degrees resulted in the threads pulling out. I guess 4 times removing and replacing the head was the limit. Research on fixing the threads lead me to the NS300L M12x1.75 Head bolt repair kit for the Gen V engines, sold on eBay. The kit is rather pricy but it includes just about everything needed to repair all 20 head bolts. The kit is very straight forward to do but doing the job with the engine in the vehicle presents some obstacles that needed to be conquered to complete the job. Since the issue was on the Right Passenger side, that is the only side I worked on, doing all 10 bolt holes. The kit included enough inserts to do all twenty head bolt holes. I would say that if you are skilled enough to disassemble the right side of your engine, then this job is not that difficult. Clean all oil and antifreeze from the head surfaces and use wide painters tape to cover the left head intake openings on the head and cover the whole right side block face to prevent chips from entering the engine. The first thing to do is remove the passenger side wheel liner. That provides lots of space to access the exhaust manifold, spark plugs, wires, and lower head bolts. Also, removing the exhaust manifold is a must. Another thing to do is take off at least the tire on the side you are working on and lower the truck as much as possible. Even doing this, I needed a step ladder and a seat cushion to lean into the engine compartment to reach anything at the rear of the block. I would say that 7 of the 10 head bolt holes are readily accessible with the long drill bit that comes with the kit. The rest you need to get creative. It became obvious that a ½” drive angle drill is out of the question. Just not enough room. I scoured Amazon to find 17/32” drill bits with a 3/8” shank. Plus, you will need a 3/8” drive angle drill adapter. I found the perfect one on Amazon but it was so cheap that I was barely able to use it on the three holes before it stripped the gears. I found two drill bits that will work but they need to be modified slightly as per the vendor. I used a hand diamond file from Home Depot for $8 to file the flutes and ground the tip on a bench grinder. I cut about 1” from the longer 3/8 bit shank for more room.
-
I plan on doing the DOD delete in the future with my '15 Silverado 6.2. I just replaced some bad lifters on passenger side. Since you want to do the delete, the easiest would be to remove the heads, ac compressor, vacuum pump while in the truck since they need to come off anyway. Once that is done, removing the engine is a lot easier. All that is left is Starter, cooler lines, bellhousing bolts, motor mount bolts, torque converter bolts, and some wires. Support the tranny and pull it out. With the engine out, you can do the torque converter and remove the engine oil pan to help deal with the oil pump. I may pull my engine if I have issues with the timing chain as shown in DOD videos.
-
Its hard to tell but it looks like the AC belt is rather new looking. Was it changed recently. This is a stretch belt which puts tension on the AC compressor. I doubt that it backed its way out. Did you have any other work done? Maybe lifter problems? AC compressor work? Those repairs require the AC compressor to be removed. Maybe it was never reinstalled. From the looks of the bolt being dirty and greasy, it looks like its been out of place for an extended period of time.







-
Forum Statistics
250.5k
Total Topics2.7m
Total Posts -
Member Statistics
342,990
Total Members8,960
Most Online
-
Who's Online 2 Members, 0 Anonymous, 559 Guests (See full list)