

spaceghost2000
-
Posts
27 -
Joined
-
Last visited
Content Type
Profiles
Forums
Gallery
Events
Articles
RPO
Store
Blogs
Everything posted by spaceghost2000
-
My (potential) headlight fix...
spaceghost2000 replied to ajs67donzi's topic in Modifications & Accessories
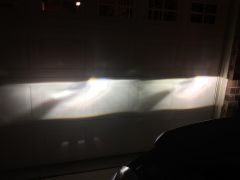
@laughey What angle did you install your SV4's? I just installed mine and they throw up a horrible light pattern compared to my older XB HID's. Are the LED's supposed to be pointing straight up/down? I keep seeing people mention 3/9 o'clock position and I tried that 1st, and it was pretty bad so I tried the default (however the bulb shipped to me) and it was off angle and a little better but still huge sections of darkness, which I assume is caused by the LED's only being on one side or the other. I didn't have time to try any other angles, and came looking for some advice in the forums but have yet to see any posts about which way the bulbs are supposed to be. -
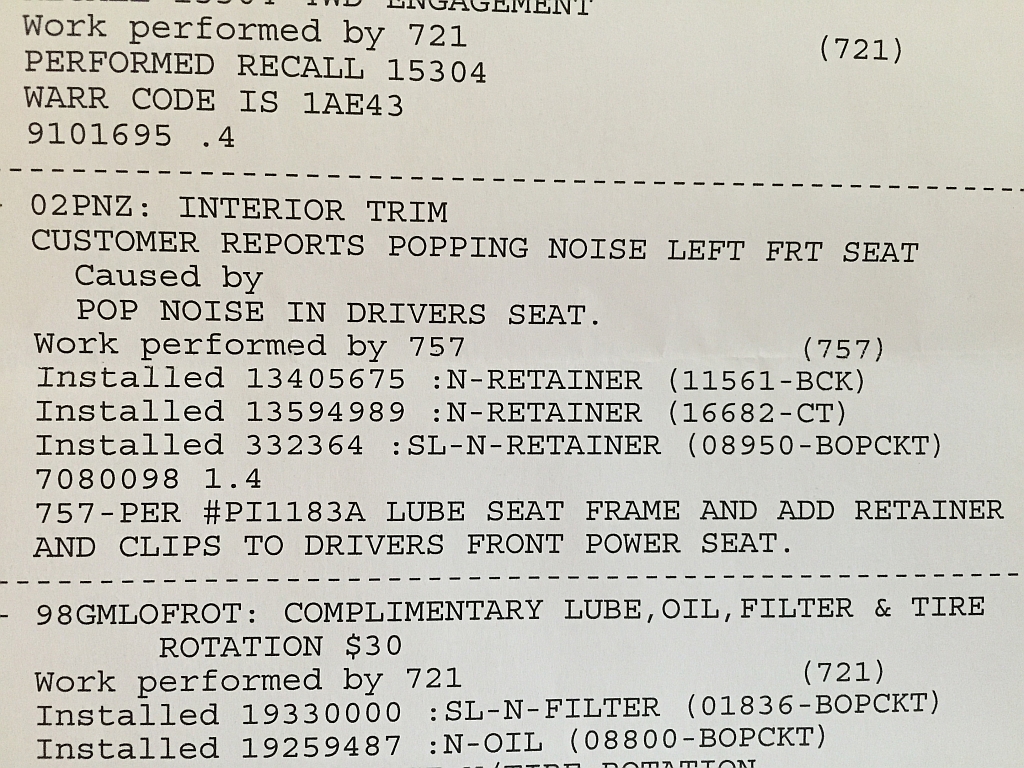
5 months with PI1183A and all is good! Knocking on wood and keeping fingers crossed.
-
HID Headlight Bulbs / HID Projector Retrofit
spaceghost2000 replied to MotoMedic's topic in Modifications & Accessories
The factory wiring remains in place as it enters the light from a different location than the back of the cap where you will need to drill into for the new harness wiring. Right now I could pull the HID bulb out and use the old halogen bulbs (using stock wiring). I would imagine if you sold or leased the truck you would remove the kit and wiring, and seal up the hole you drilled in the cap...or try and buy a new cap (not sure they are sold separately)... If you are doing a real retro I believe that would entail opening the headlight to put in better projectors..then it's really up to you on how you complete your wiring..meaning you could try and use the factory wiring for the retro which would deviate from what us "bulb swappers" are doing. But I would imagine if you did a real retro you would still need the HID ballasts and wiring harness as the stock system isn't set up for that type of bulb. So I can't really answer this definitely as it really depends on what you do with the light and whether you use the Sierra Spec wiring harness, etc. I really don't know all that much about it as this was my first bulb swap. -
HID Headlight Bulbs / HID Projector Retrofit
spaceghost2000 replied to MotoMedic's topic in Modifications & Accessories
What you quoted in your post was regarding the caps for the Chevy lights, which are different than the GMC. The GMC caps are like a dome, you just need to do the required drilling for the wiring grommet for the kit. -
HID Headlight Bulbs / HID Projector Retrofit
spaceghost2000 replied to MotoMedic's topic in Modifications & Accessories
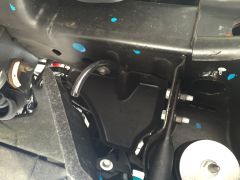
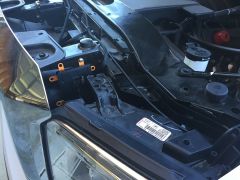
There's 2 pieces of steel spot welded there, so it's pretty thick. I used a sheet metal self tapping screw.. Depending on when you bought your harness, there looks like there is 2 or 3 different grounding wires. I just recently purchased the harness and there were only 2 ground wires. The first picture is the main one...the other one (the capacitor harness) was grounded the same way to the frame next to the relays (on top under the fender washer). This is under the huge plastic shroud covering the radiator, next to the passenger side headlight... -
-
-
From the album: R/X Oil Catch can
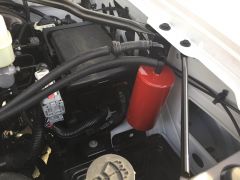
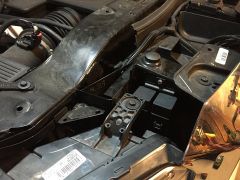
there is a triangular plastic shroud next to the wheel well underneath the spare battery tray with a perfect size hole for some kind of tube, which I took advantage of. Will make emptying the can much easier! This is laying on the ground looking up towards the battery box, driver's side -
From the album: R/X Oil Catch can
-
From the album: R/X Oil Catch can
-

From the album: R/X Oil Catch can
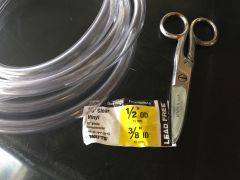
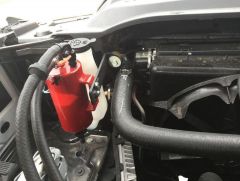
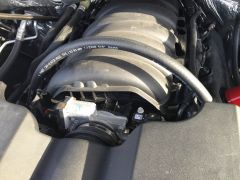
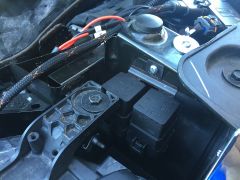
Couldn't really get to the valve when installed next to the cross brace so I recently moved the can forward to an existing bolt holding the radiator housing. Used the nipple R/X provided and bought some 1/2" Vinyl tube. I utilized an existing hole in the battery box. -
From the album: R/X Oil Catch can
This stuff smells aweful. You can definately tell it's oil and gas and who knows what other nasty fluids are left over from combustion -
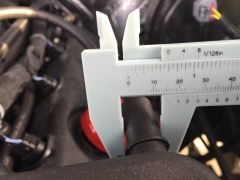
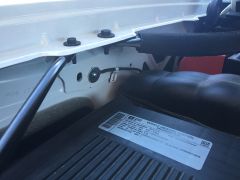
bad caliper, but shows it is 5/8" barb on airbox
spaceghost2000 posted a gallery image in General/Off Topic
From the album: R/X Oil Catch can
-

From the album: R/X Oil Catch can
R/X thinks the airbox is 1/2" but I showed them otherwise (see next picture). Eventhough I bought a kit, they did not send a 5/8" hose or adapter. I couldn't find any cheap 3/8" to 5/8" adapters so I had to jump up twice in size. -
From the album: R/X Oil Catch can
R/X says this is 1/2" hose, the barb is 5/8", I could not get the 1/2" hose they sent to fit -
From the album: R/X Oil Catch can
Original placement was where R/X shows in their installation videos (attached to the master cylinder). I felt a small vibration in the accelerator pedal mounted there, like a cell phone was vibrating all the time. Tightened the bolts and the vibration went away, but came back a week later. Not a good point to mount the can. This is the 2nd location I mounted but it's not very good either as it's difficult to get to the valve to open and hard to find a container short enough to fit above the battery box and below the can. -
TRS Morimoto HID lights
Images added to a gallery album owned by spaceghost2000 in General/Off Topic
-
-
From the album: TRS Morimoto HID lights
I inserted the HID bulbs in the same orientation as the factory bulbs (12 o'clock position), and they had a horrible shadow. Turned them to the opposite, 6 o'clock position, and they work fine now. -
From the album: TRS Morimoto HID lights
-
From the album: TRS Morimoto HID lights
-
From the album: TRS Morimoto HID lights
-
relays, passenger side under plastic shroud next to headlight
spaceghost2000 posted a gallery image in General/Off Topic
From the album: TRS Morimoto HID lights
-
HID Headlight Bulbs / HID Projector Retrofit
spaceghost2000 replied to MotoMedic's topic in Modifications & Accessories
installed the TRS Sierra Spec kit, Morimoto 35w, 5500k bulbs. Much better than stock. Tried to take pictures before/after but my iphone actually takes pretty good pictures at night and they both end up looking similar...but there's a very big difference. I grounded on the passenger side, paint sanded down to bare metal and a large fender washer used... And FYI to you Sierra owners, the bulbs should be inserted with the connectors/wiring coming off @ 6 o'clock position (straight down).
- 3,363 replies
-
- 1
-

-
- hid
- headlights
- (and 1 more)
-
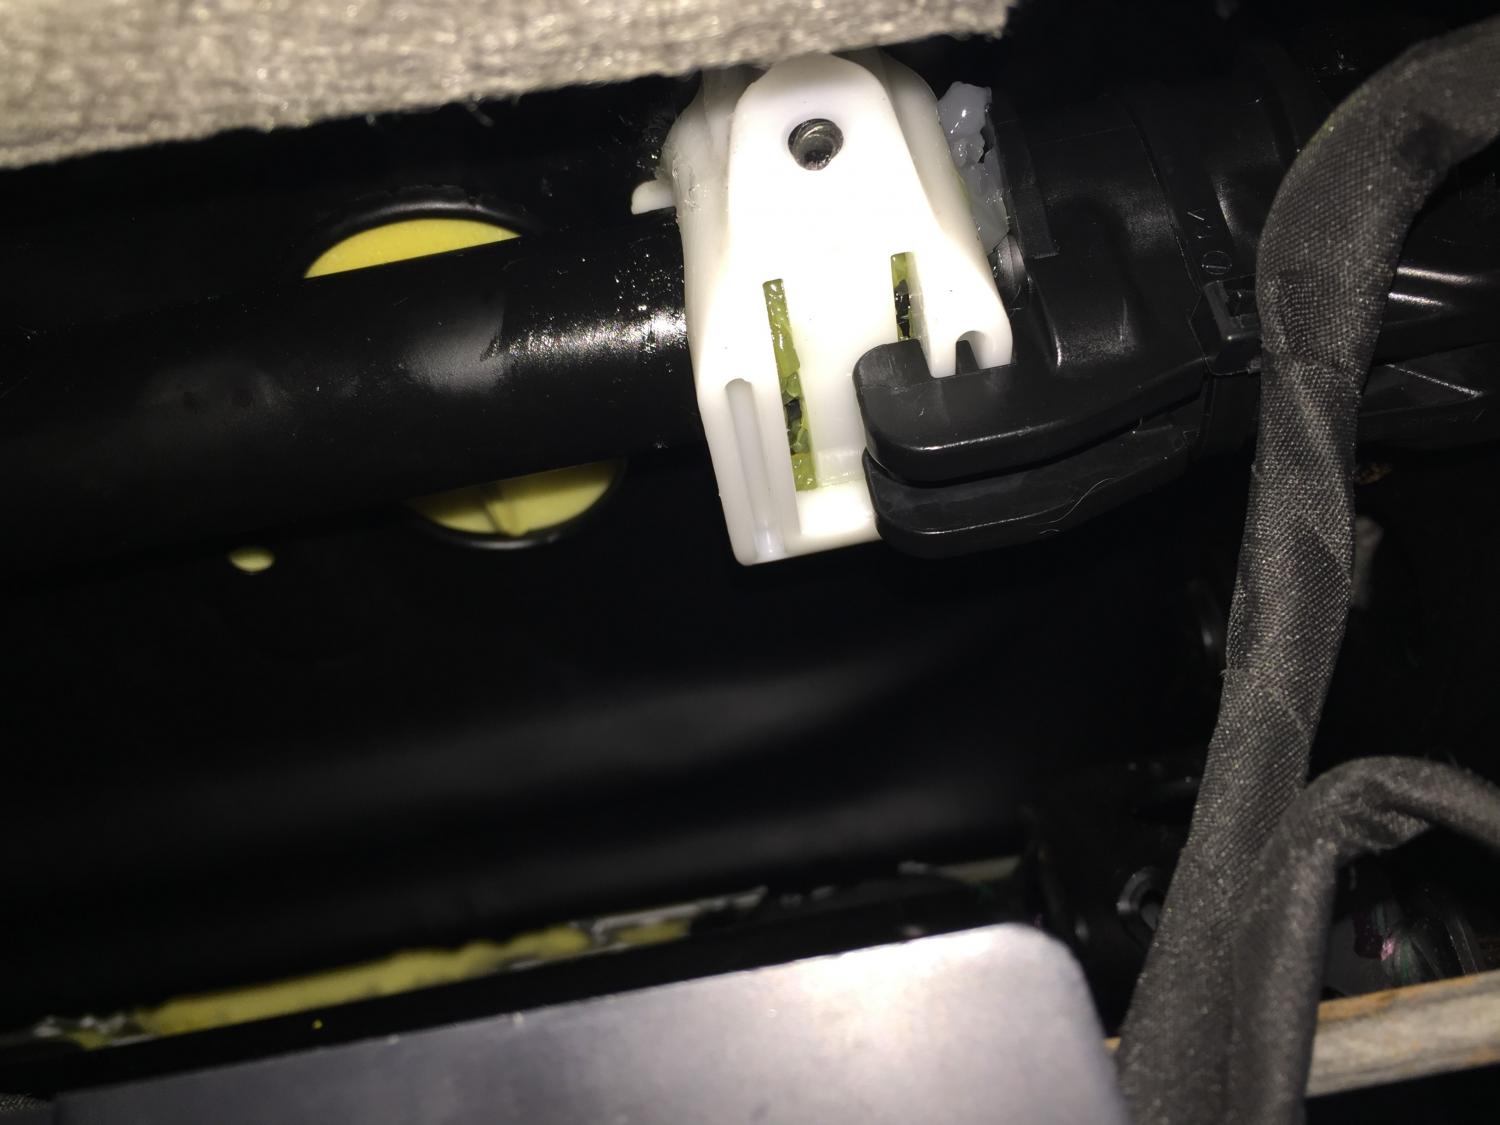
I had the hose clamp in place, lasted about a month or two before it started slipping. Tried to tighten, but would still slip. Went to the dealer for a recall (15304) fix and asked them to change oil and take a look at the seat. They acknowledged the seat issue and the svc mgr said they have a fix, but it doesn't always work. At least he was being honest. They performed PI1183A http://oemdtc.com/12126/front-seat-lateral-movement-andor-click-type-noise-while-driving-2014-chevrolet-silverado-gmc-sierra Seems solid so far, only time will tell if I need to go back to the hose clamps. Svc mgr said he could order new tracks but he is supposed to perform PI1183A first, and to let him know if it starts slipping again. Appears to be a newer than PI1376. Didn't see any shims mentioned and I do see that black-ish plastic retainer that's in the last picture of the instructions linked above.

-
Forum Statistics
250.4k
Total Topics2.7m
Total Posts -
Member Statistics
342,857
Total Members8,960
Most Online
-
Who's Online 9 Members, 0 Anonymous, 727 Guests (See full list)