

2003 SSEi
-
Posts
142 -
Joined
-
Last visited
-
Days Won
1
Content Type
Profiles
Forums
Gallery
Events
Articles
RPO
Store
Blogs
Everything posted by 2003 SSEi
-
placeholder for pictures
-
placeholder for pictures
-
placeholder for pictures
-
place holder for picture
-
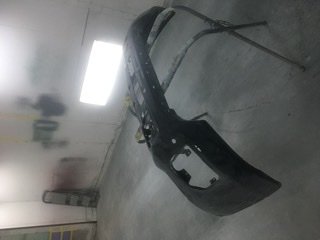
Some pics of the bumper getting painted

-
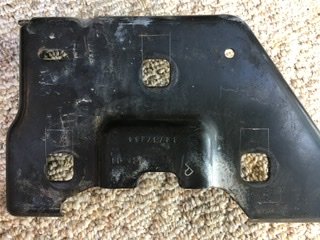
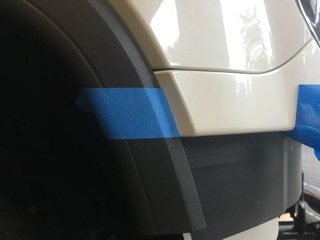
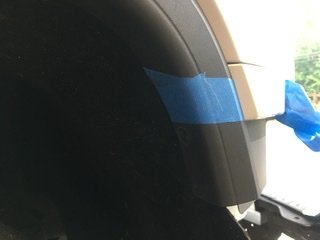
Ok Members, Here is the all inclusive way to swap a GMC K2xx 1500 front bumper to a 2500 Front Bumper. This is for the Sierra only, the Silverado is/may be different. First lets start with what IS needed the part numbers if applicable. HD Grille (PN Varies ) HD Bumper assembly (PN varies) HD "headlight fillers"( GM list's them as 'Top Cap Assembly) --------LH PN 22831429 Paintable --------RH PN 22831430 Paintable HD headlight filler brackets ( GM lists them as Fascia Bracket assembly) --------LH PN 23451021 --------RH PN 23451022 ****I will also mention the Front bumper to inner Frame support brackets. I got them with my 2500 bumper when I purchased it, so I used them, and they work and fit great. Im sure but cant say for certain if the 1500 bumper for frame supports can be made to work. Once all the swap parts are acquired, then you can begin modifying the parts on the current truck The 1500 Bumper mounts have to be used. I attempted to try and use the 2500 brackets and the mounting holes are in the wrong location, as well as it makes the bumper sit way too far forward away from the truck, As for the 1500 modifications, the 3 mounting holes will need slotted so the bumper brackets can sit lower to accommodate the additional height of the new bumper. Reinstall the brackets and drop them down until they hit the frame. ***** I spaced my brackets up a bit off of the frame. I felt the gap between the headlight fillers/grille, and the bumper was too much. with a little spacing you can get the gap nice and tight***** I also used 3 additional washers behind the brackets to space the bracket away from the frame. With out the additional spacing the bumper sat too close and didn't align in the wheel well Once the frame brackets are situated, you can move onto the fascia brackets. they are a simple swap, unbolt the 1500 and swap them for the 2500 brackets Now install the headlight fillers onto the fascia brackets that were just installed. The headlight filler assembly's will also use a bolt location from the 1500 grille that the 2500 does not use. Now its time for the bumper. Install the bumper onto the frame brackets. The 1500 brackets will only allow the Upper hole closest to the grille to be used for attachment. The Bumper will fit pretty tight onto the brackets. As I said earlier I was able to use the 2500 Inner bumper to frame brackets , they were the correct length, and shape to fit around the frame Mounts The last big modification is the fender well trim. The 1500 trim is much longer as shown by the blue tape line. The trim needs cut on the bottom of the tape to align with the headlight fillers When it’s all said and done the top pic is the OEM 1500 Denali and the Bottom is the 2500 Denali Swap (yes I know the fog lights aren’t in but I was excited to take a pic)
-
Class 2 Sticker on the Windshield...
2003 SSEi replied to Twodose's topic in 2014-2018 Silverado 1500 & Sierra 1500
Im Lucky, no emissions in my County, so only one sticker on the windshield for me. The Class 2 Sticker is in the glove box -
I have the install directions that @tbarn sent me. Its a huge file so it needs to be emailed. The printed directions are about 35+ pages. This is because the Trucks and SUV's are in the same install directions. If you bought the correct K2xx headrest kit, you can install it your self with out any issues.
-
CTS-V 6 Piston Brembo Brake retrofit?
2003 SSEi replied to CCWray's topic in Modifications & Accessories
I have not confirmed but I believe the Aftermarket Rotor part number for the 16” rotor is Centric #120.62180 -
CTS-V 6 Piston Brembo Brake retrofit?
2003 SSEi replied to CCWray's topic in Modifications & Accessories
-
CTS-V 6 Piston Brembo Brake retrofit?
2003 SSEi replied to CCWray's topic in Modifications & Accessories
-
CTS-V 6 Piston Brembo Brake retrofit?
2003 SSEi replied to CCWray's topic in Modifications & Accessories
-
CTS-V 6 Piston Brembo Brake retrofit?
2003 SSEi replied to CCWray's topic in Modifications & Accessories
-
CTS-V 6 Piston Brembo Brake retrofit?
2003 SSEi replied to CCWray's topic in Modifications & Accessories
-
CTS-V 6 Piston Brembo Brake retrofit?
2003 SSEi replied to CCWray's topic in Modifications & Accessories
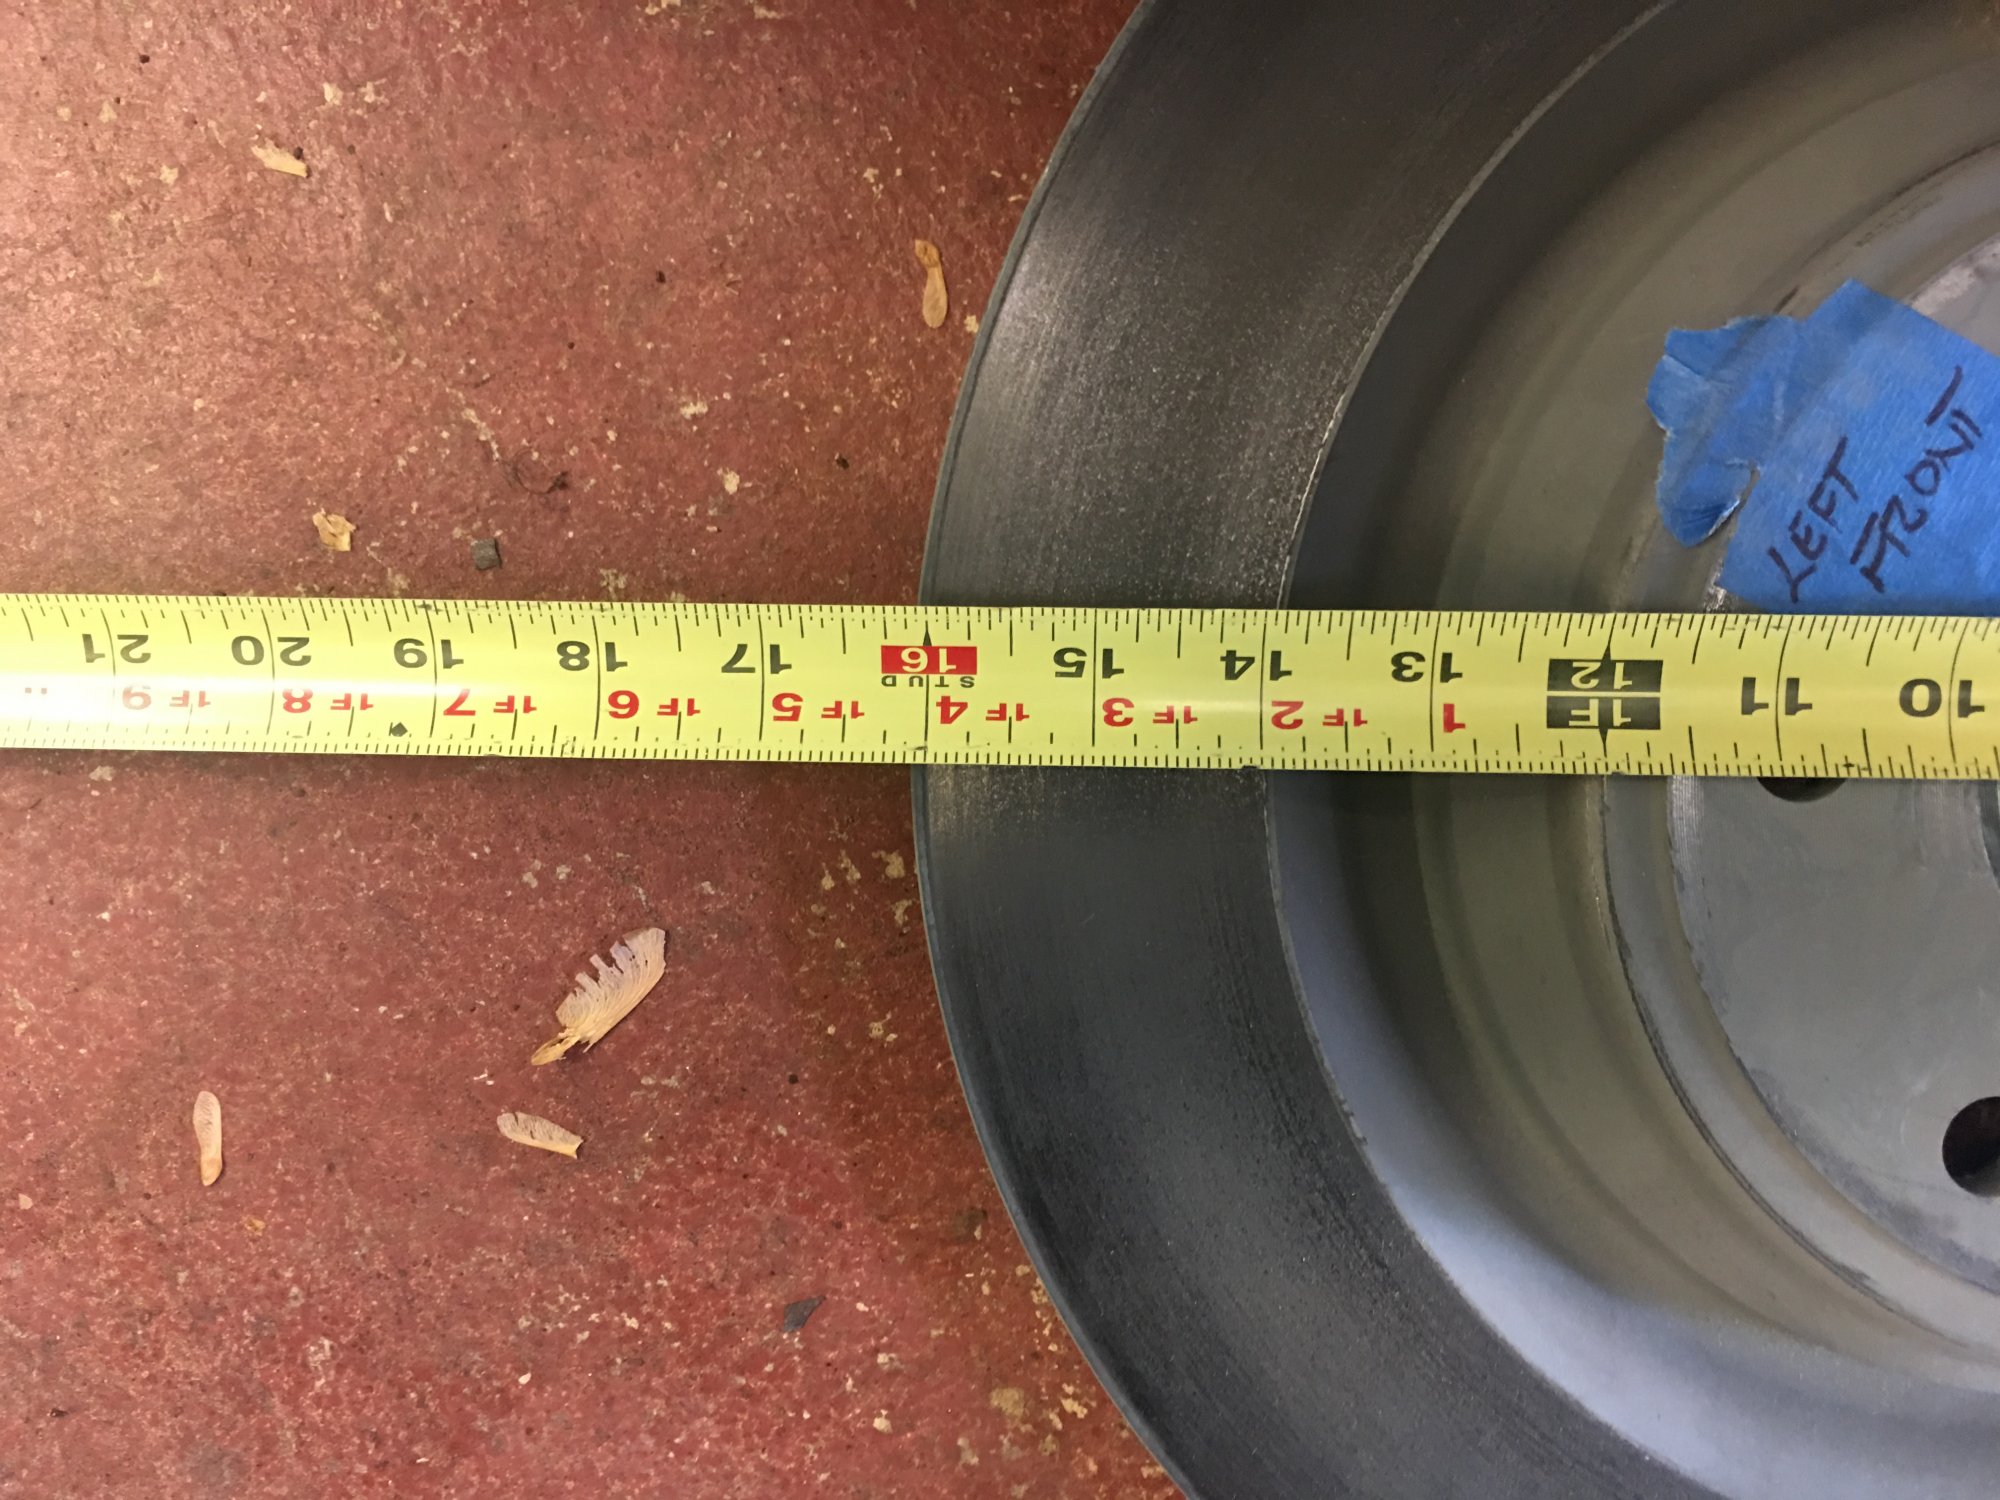
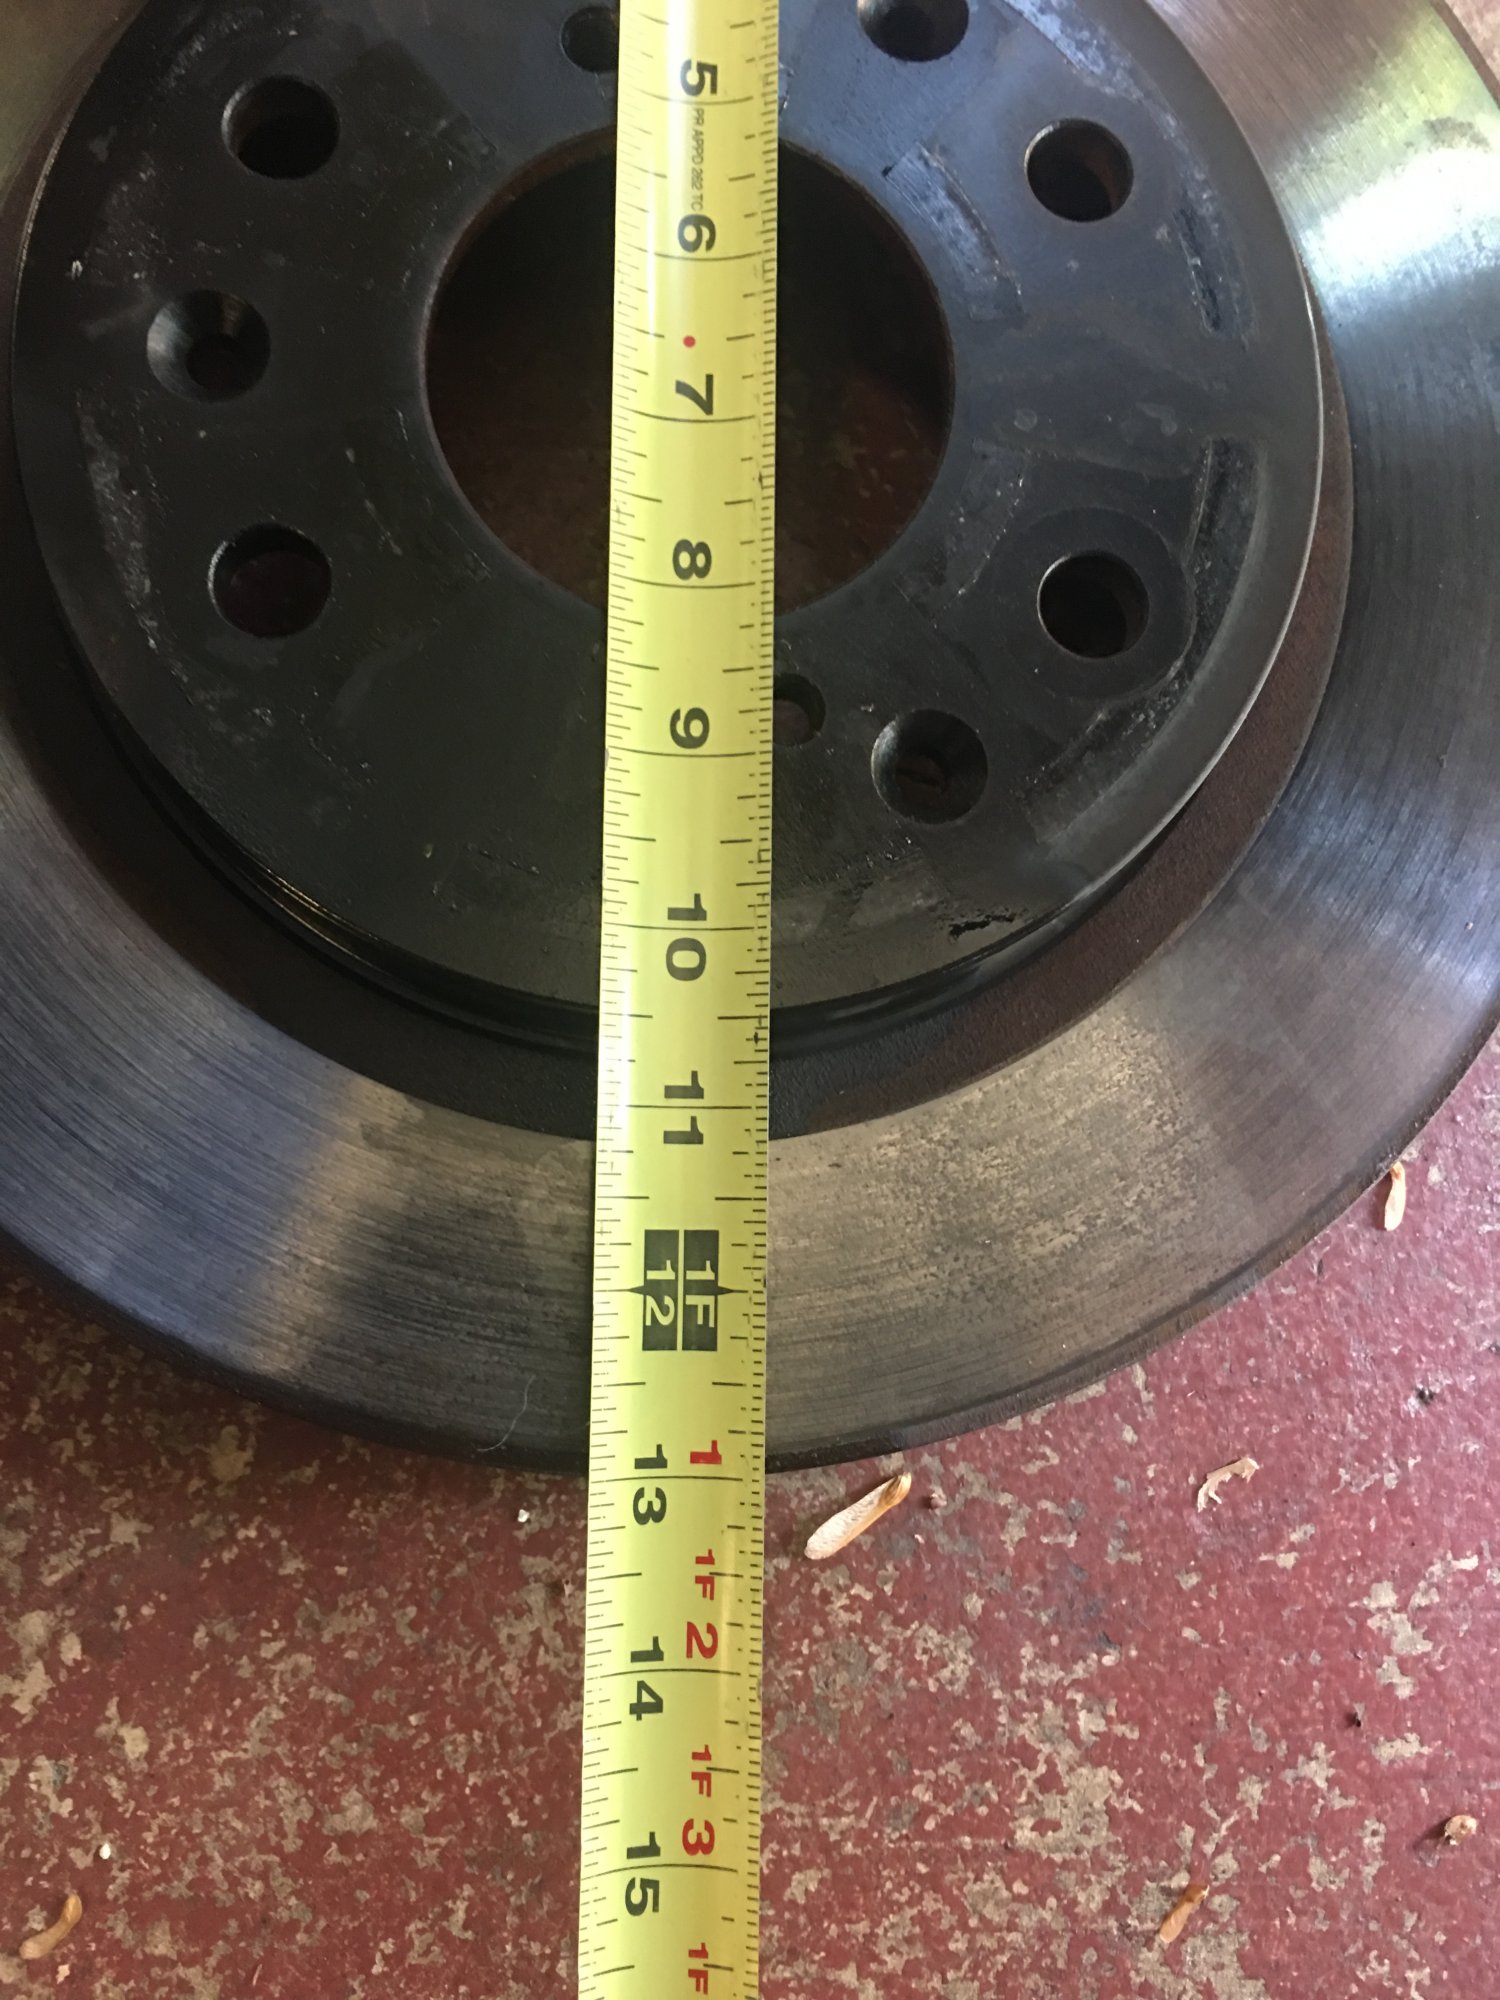
Here are the pics I took of my GMC setup. (multiple posts because of the photo limit)
-
CTS-V 6 Piston Brembo Brake retrofit?
2003 SSEi replied to CCWray's topic in Modifications & Accessories
Yes it is I have it on my Denali. It works with 20 or 22” wheels. Really makes a difference from the OEM setup -
@Vuk Excellent Post/write up with Pictures. I will be collecting parts soon for this mod.
-
Thanks for the great post and part numbers. Do you have any pics of the install or the finished product.
-
“Check xm antenna” after sharkfin swap
2003 SSEi replied to tsdrumm's topic in Modifications & Accessories
Correct. yes I get the red light on the mirror. My Orignal Antenna was the 2 wire purple connector, my new antenna is the 2 wire purple, and 1 wire gold -
“Check xm antenna” after sharkfin swap
2003 SSEi replied to tsdrumm's topic in Modifications & Accessories
With my painted 15+ antenna on my 14, my compass works 100% as does my Nav, on Star is not active so I don’t know about that. I just get the check XM antenna message. -
With the new bezel and not having to cut into the dash with this one, does the HUD retain the same mounting in the dash like the last version??
-
“Check xm antenna” after sharkfin swap
2003 SSEi replied to tsdrumm's topic in Modifications & Accessories
I also swapped to the painted antenna, and lost XM. My issue was that my 2014 Antenna only had the purple connector, and the new Painted Had the Same purple antenna, but also a gold connector. I believe that the XM antenna is the gold connector in the 15+ trucks, where it was in the purple Connector in 14. I believe that its as simple as swapping the antenna switcher that is on the passenger side upper dash under the speaker trim, and XM cable, but I would like to get a thread together and see what part numbers are, as I don't have access to GM documents. -
Interested in the Development of the HUD with the smaller Trim Ring. Please keep us Posted !!!
-
CTS-V 6 Piston Brembo Brake retrofit?
2003 SSEi replied to CCWray's topic in Modifications & Accessories
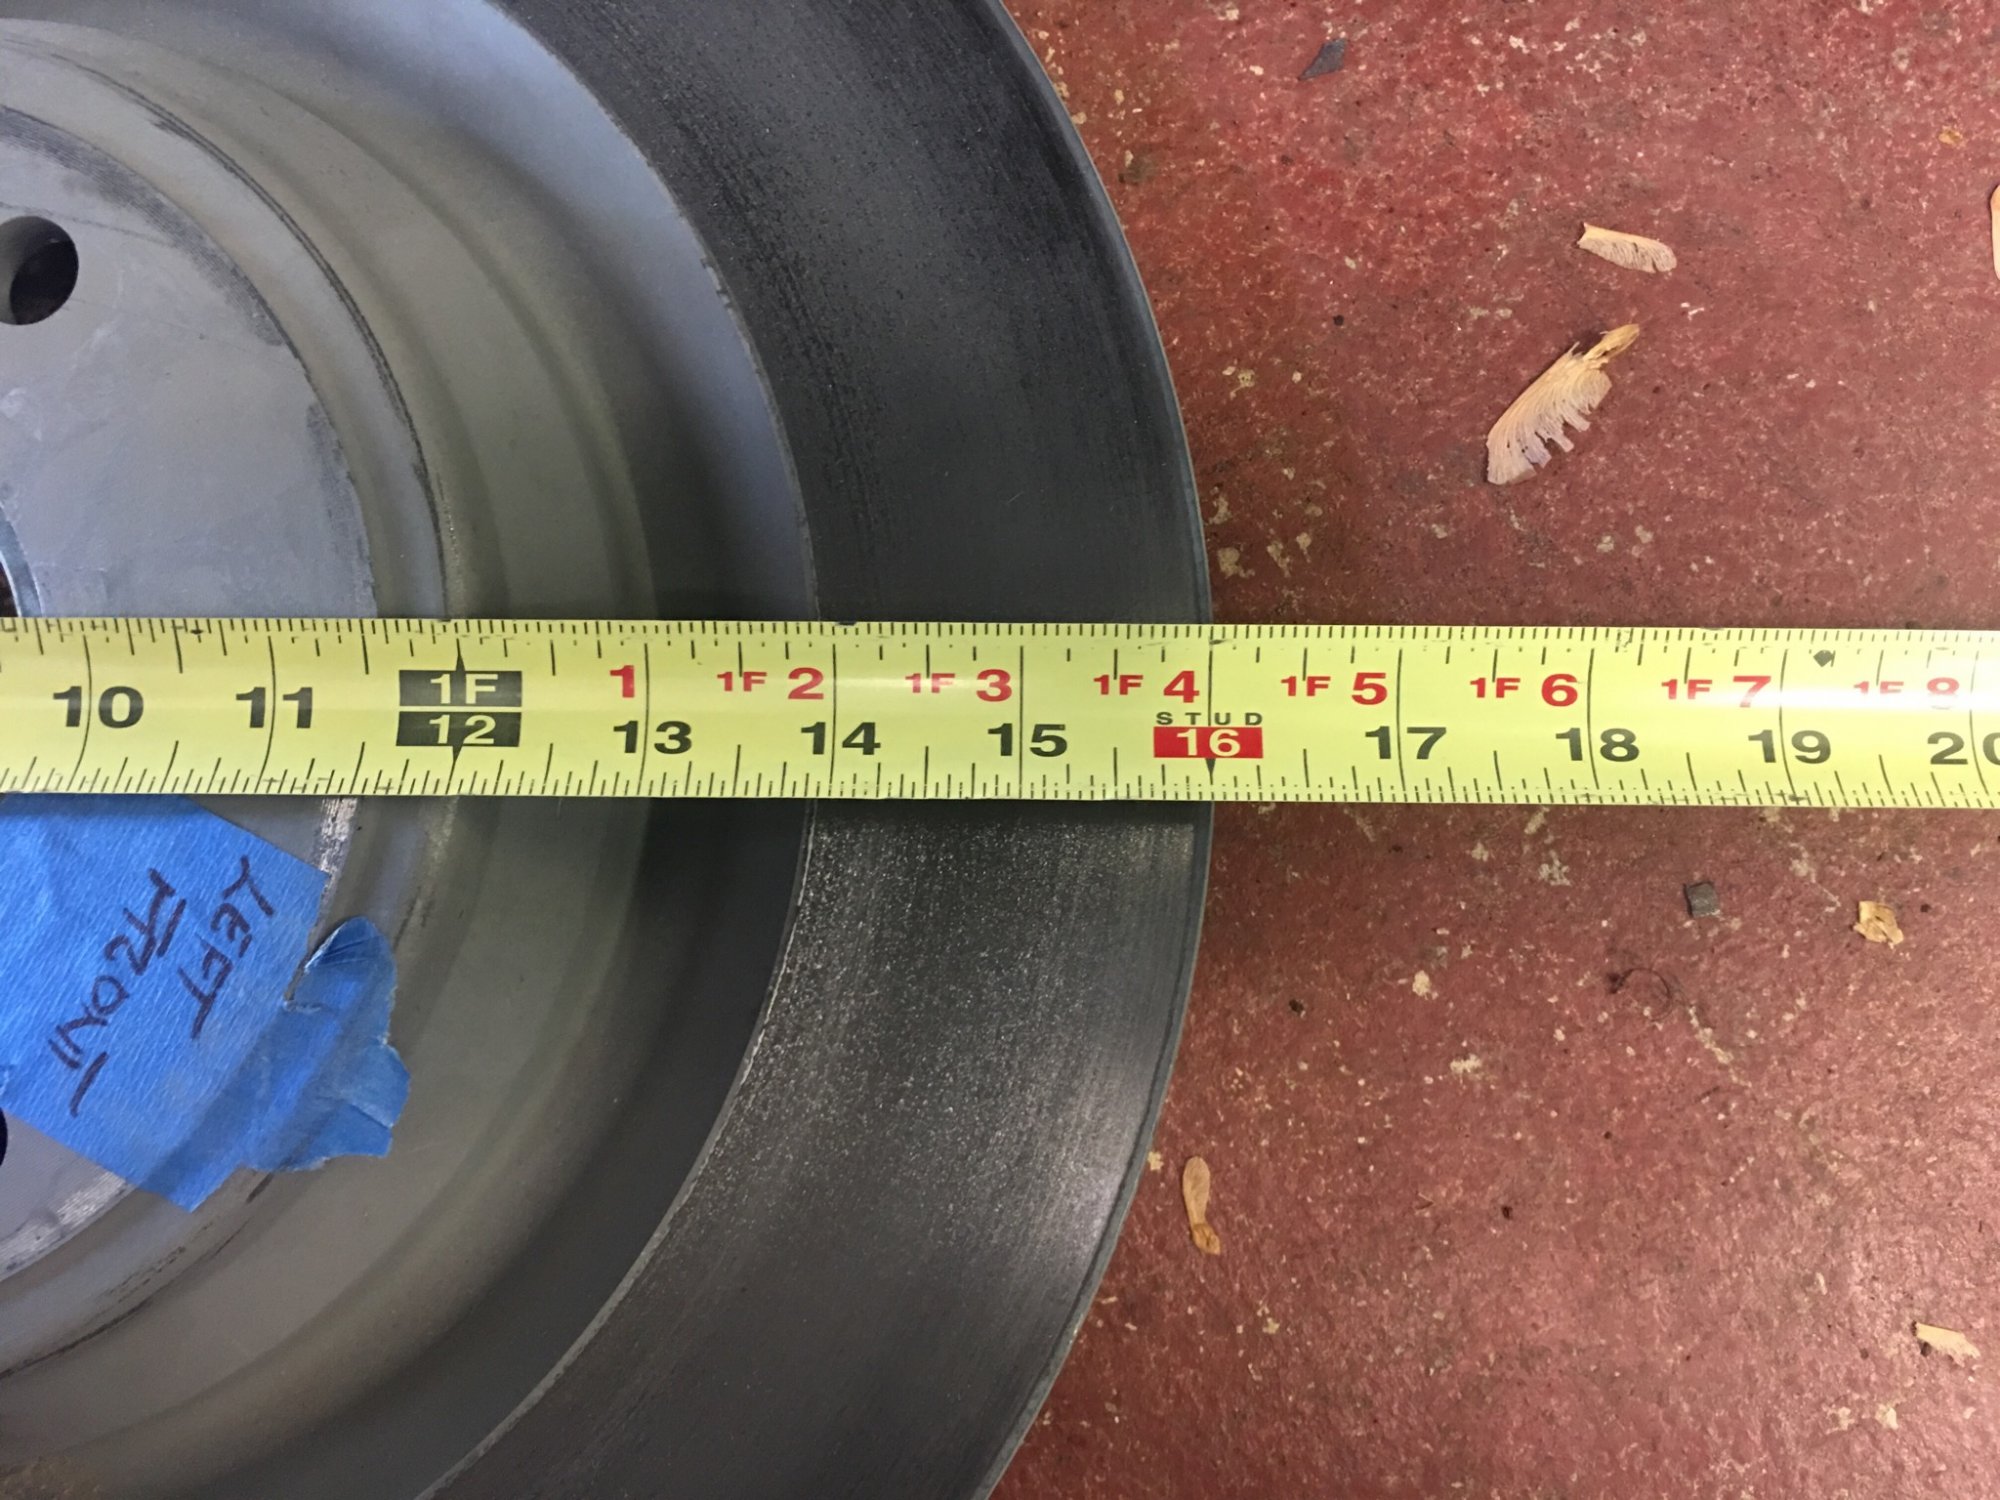
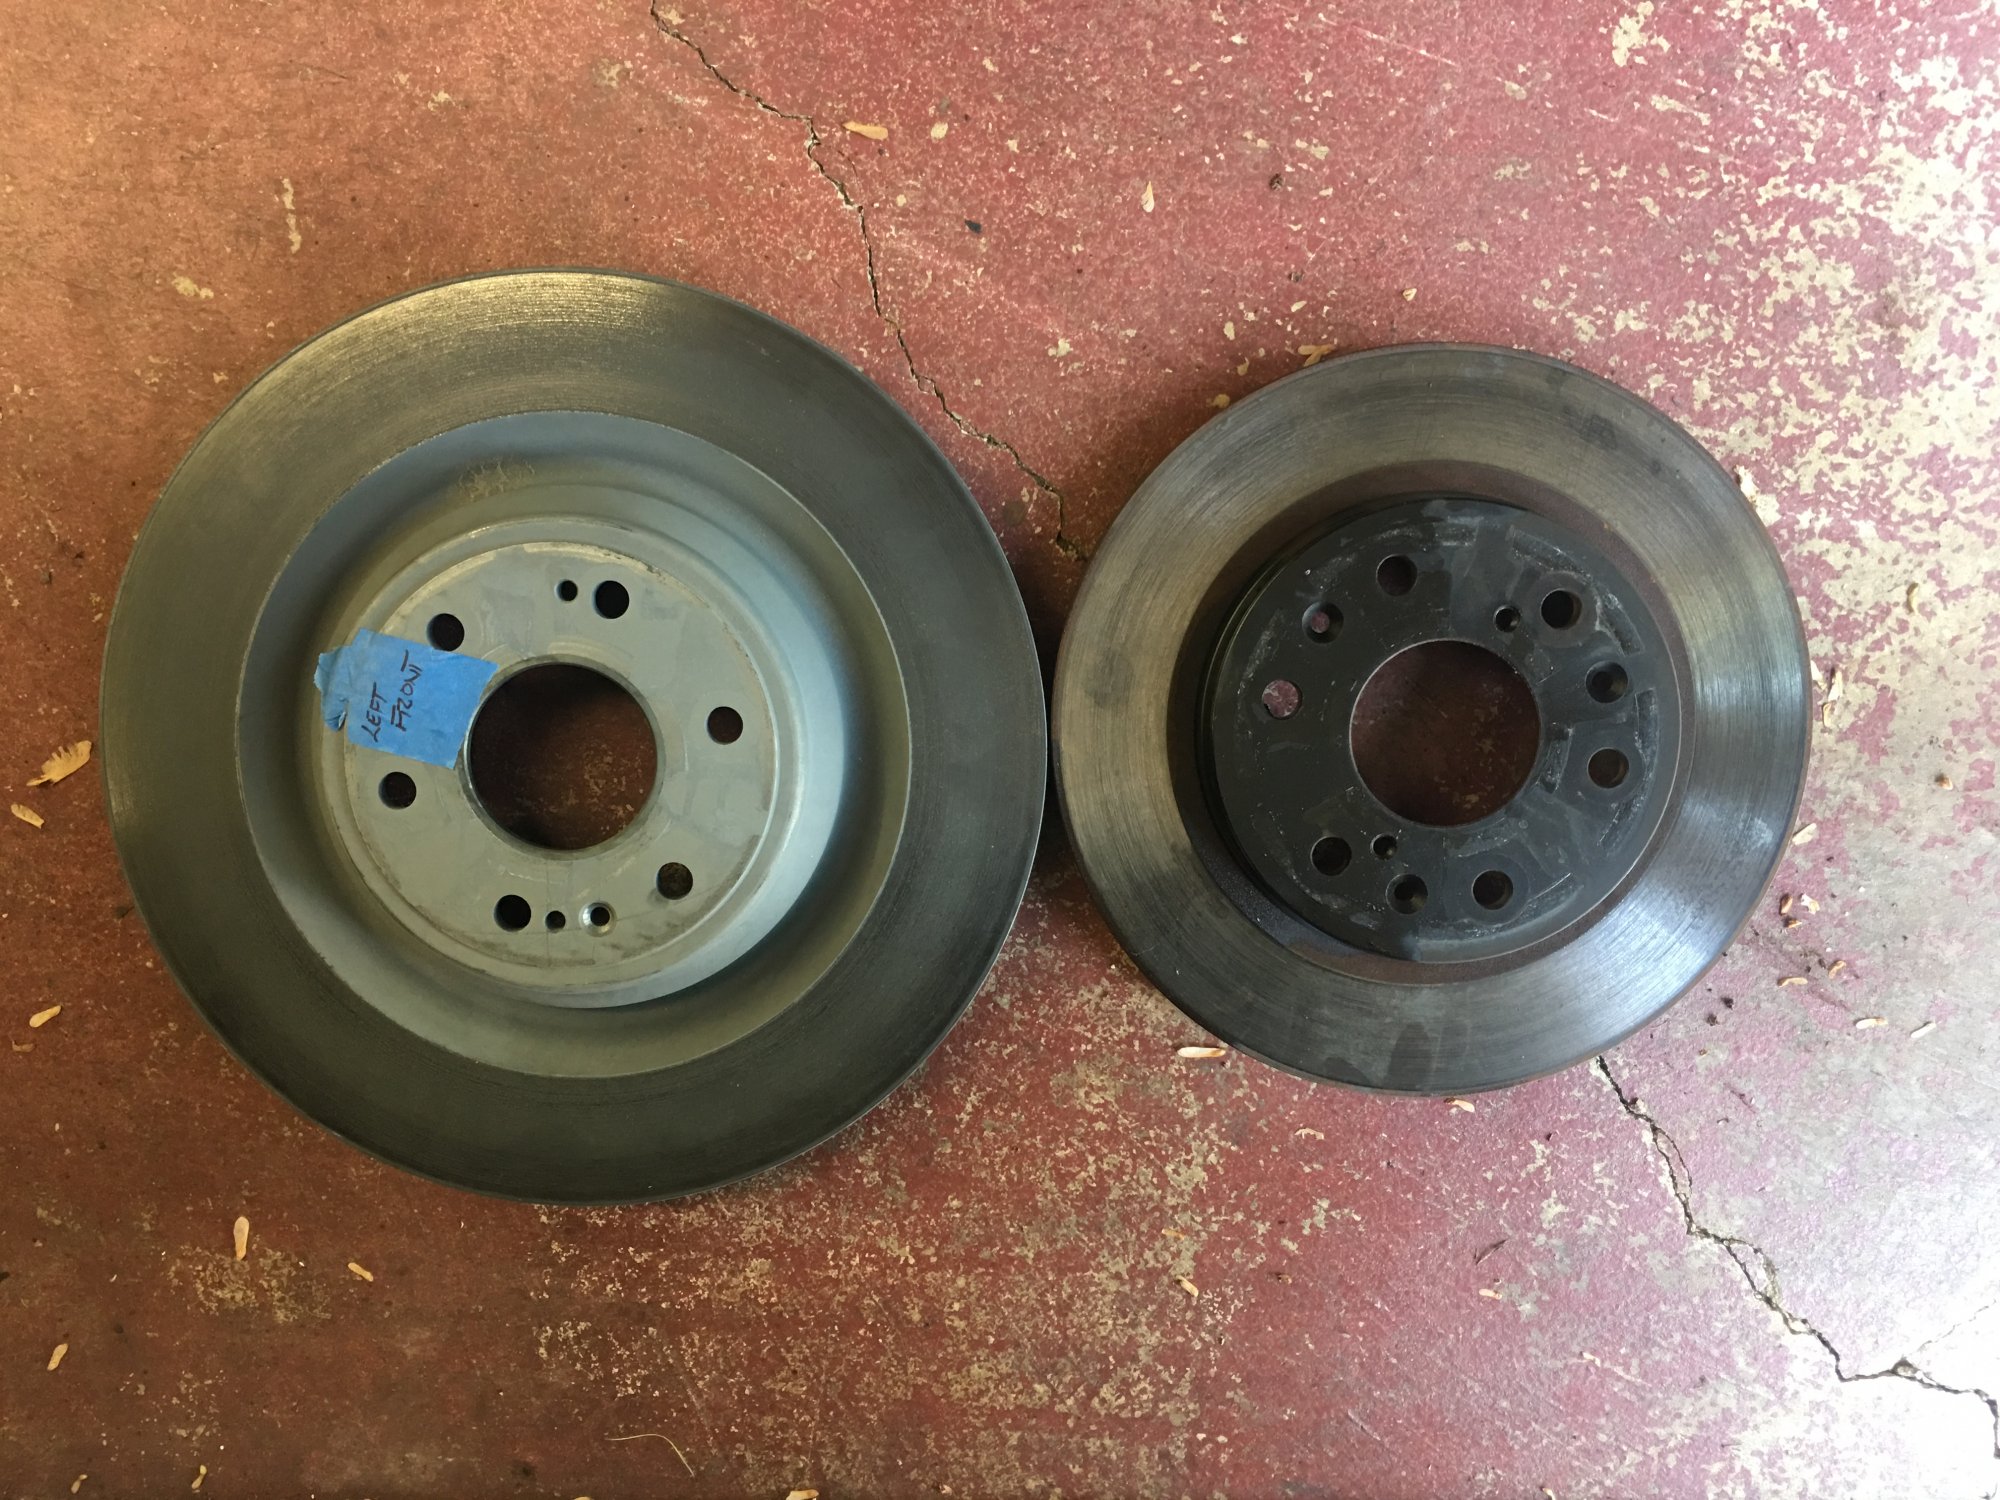
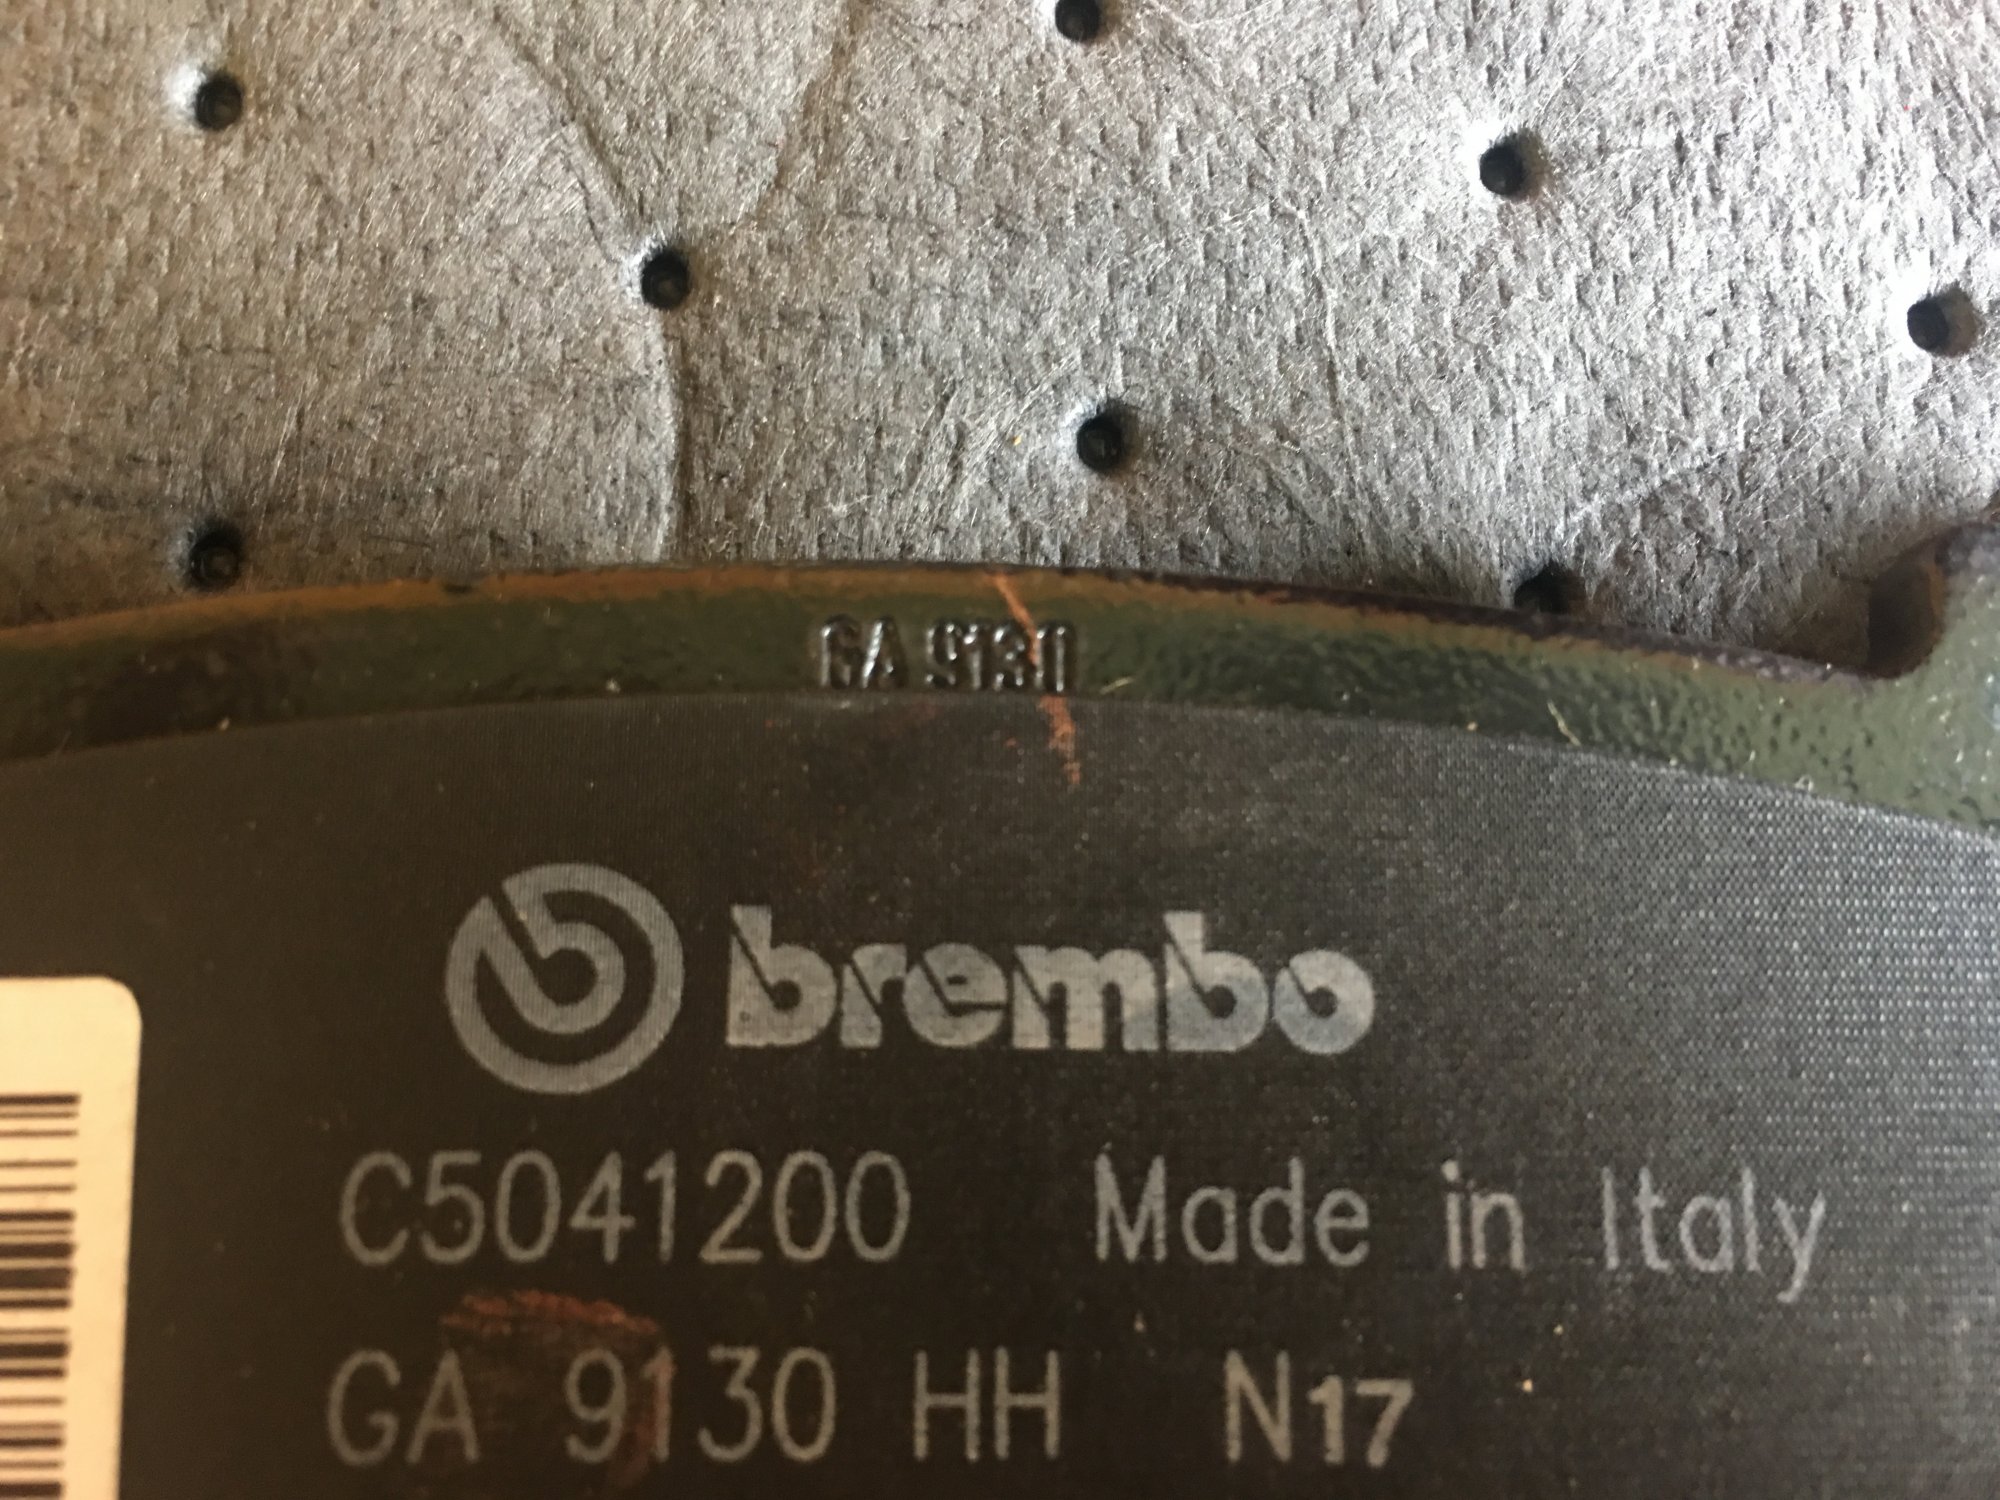
First pic is the Brembo Rotor Second pic is the stock rotor. Last pic the the comparison
-
CTS-V 6 Piston Brembo Brake retrofit?
2003 SSEi replied to CCWray's topic in Modifications & Accessories
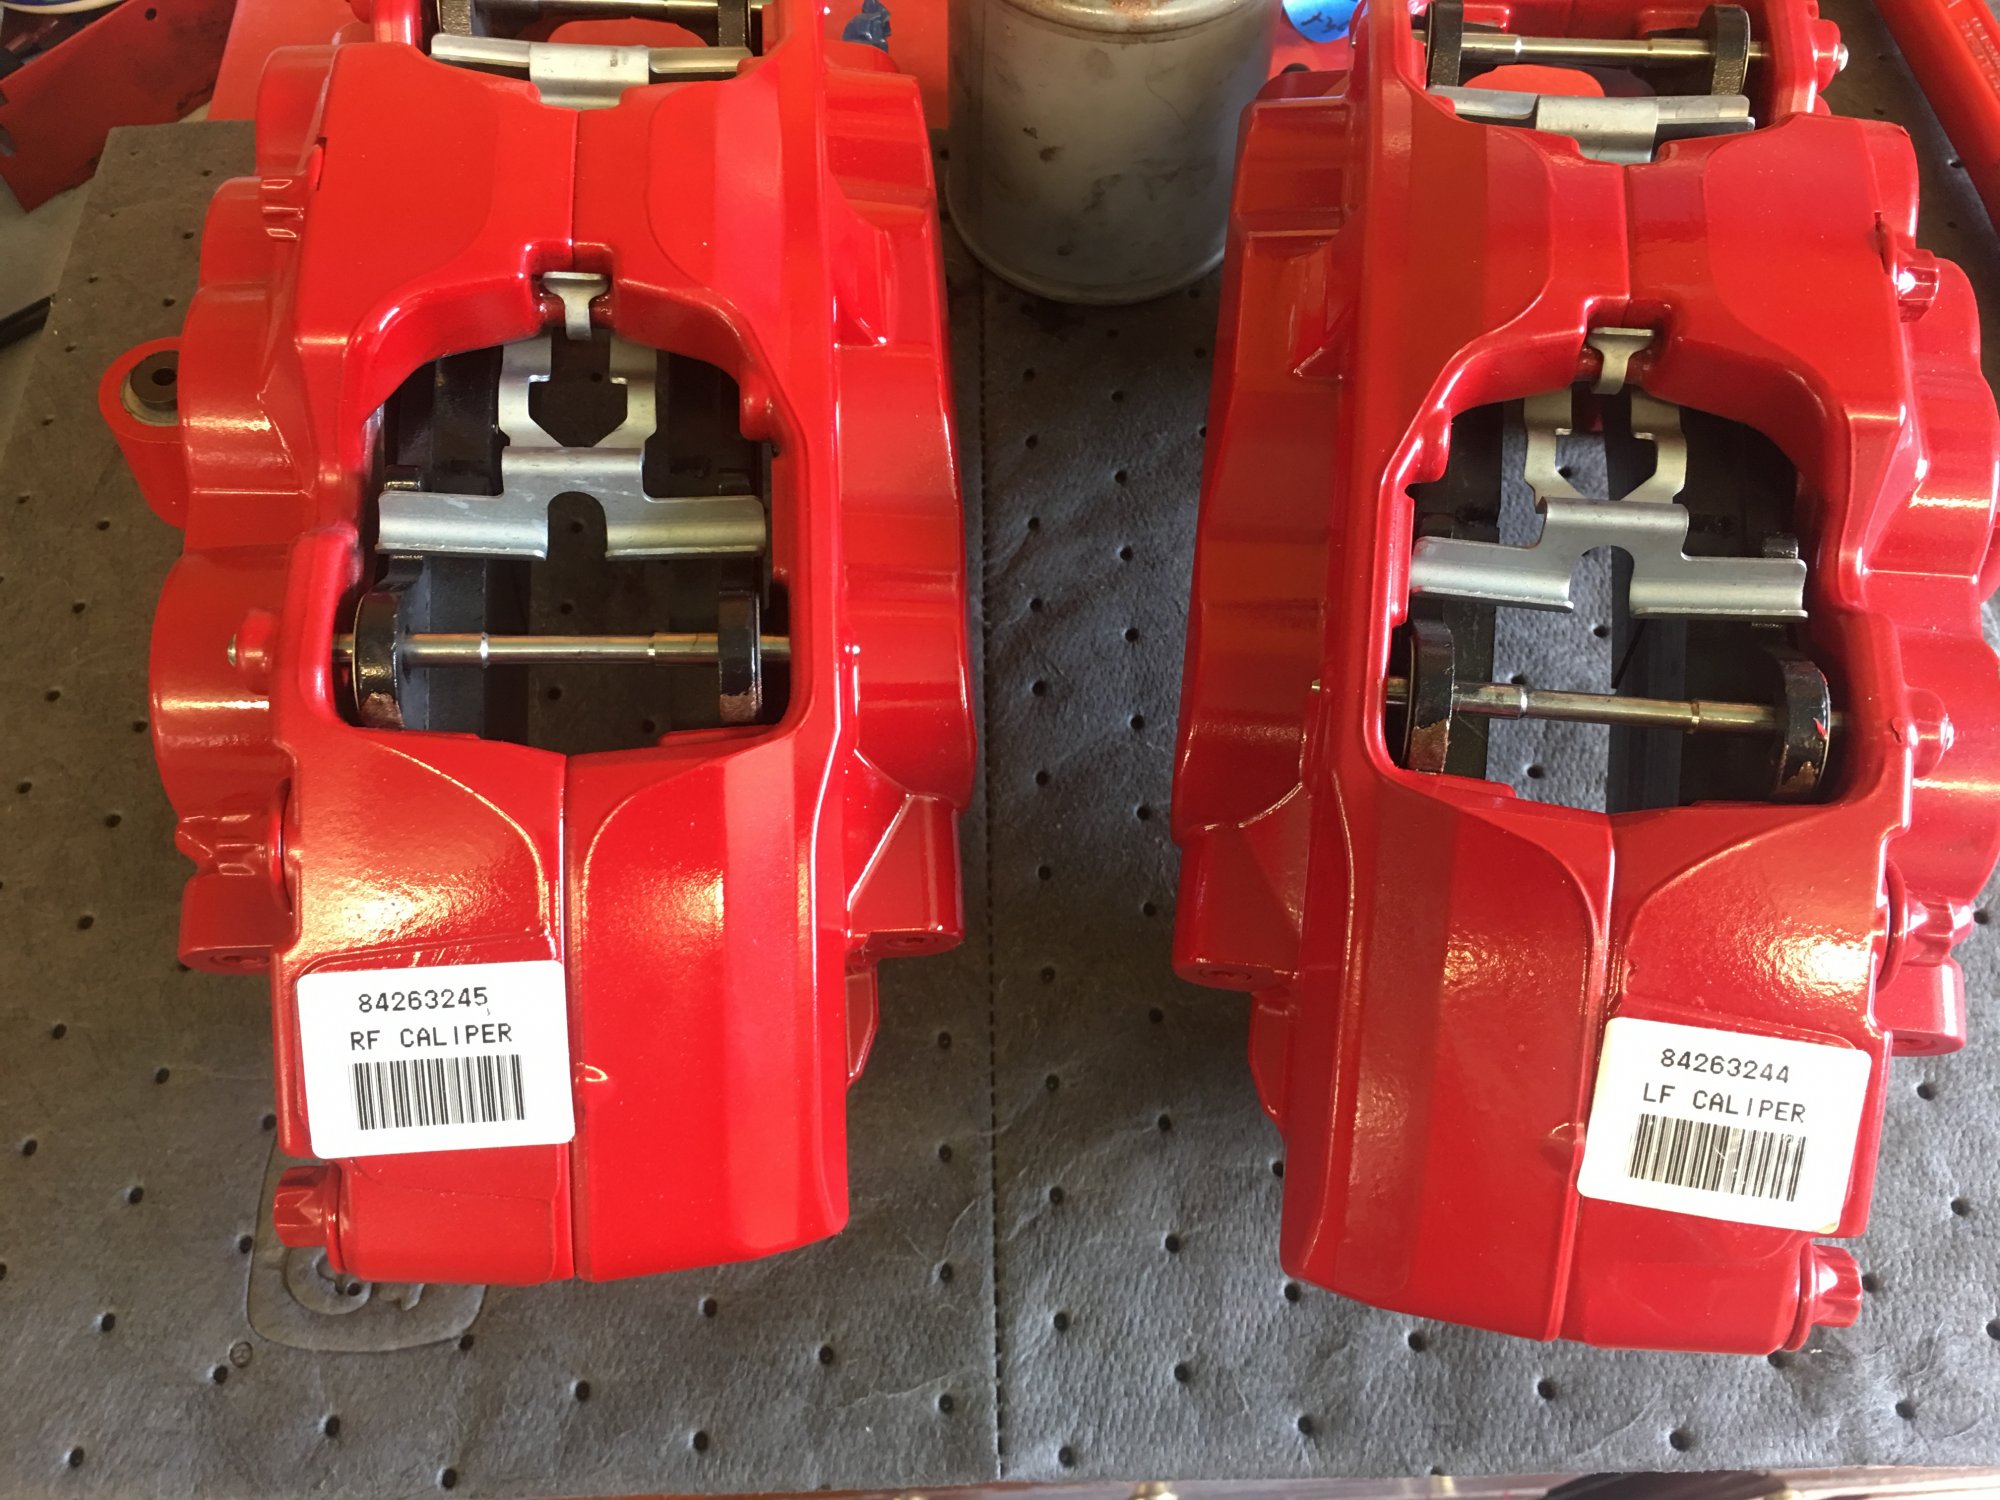
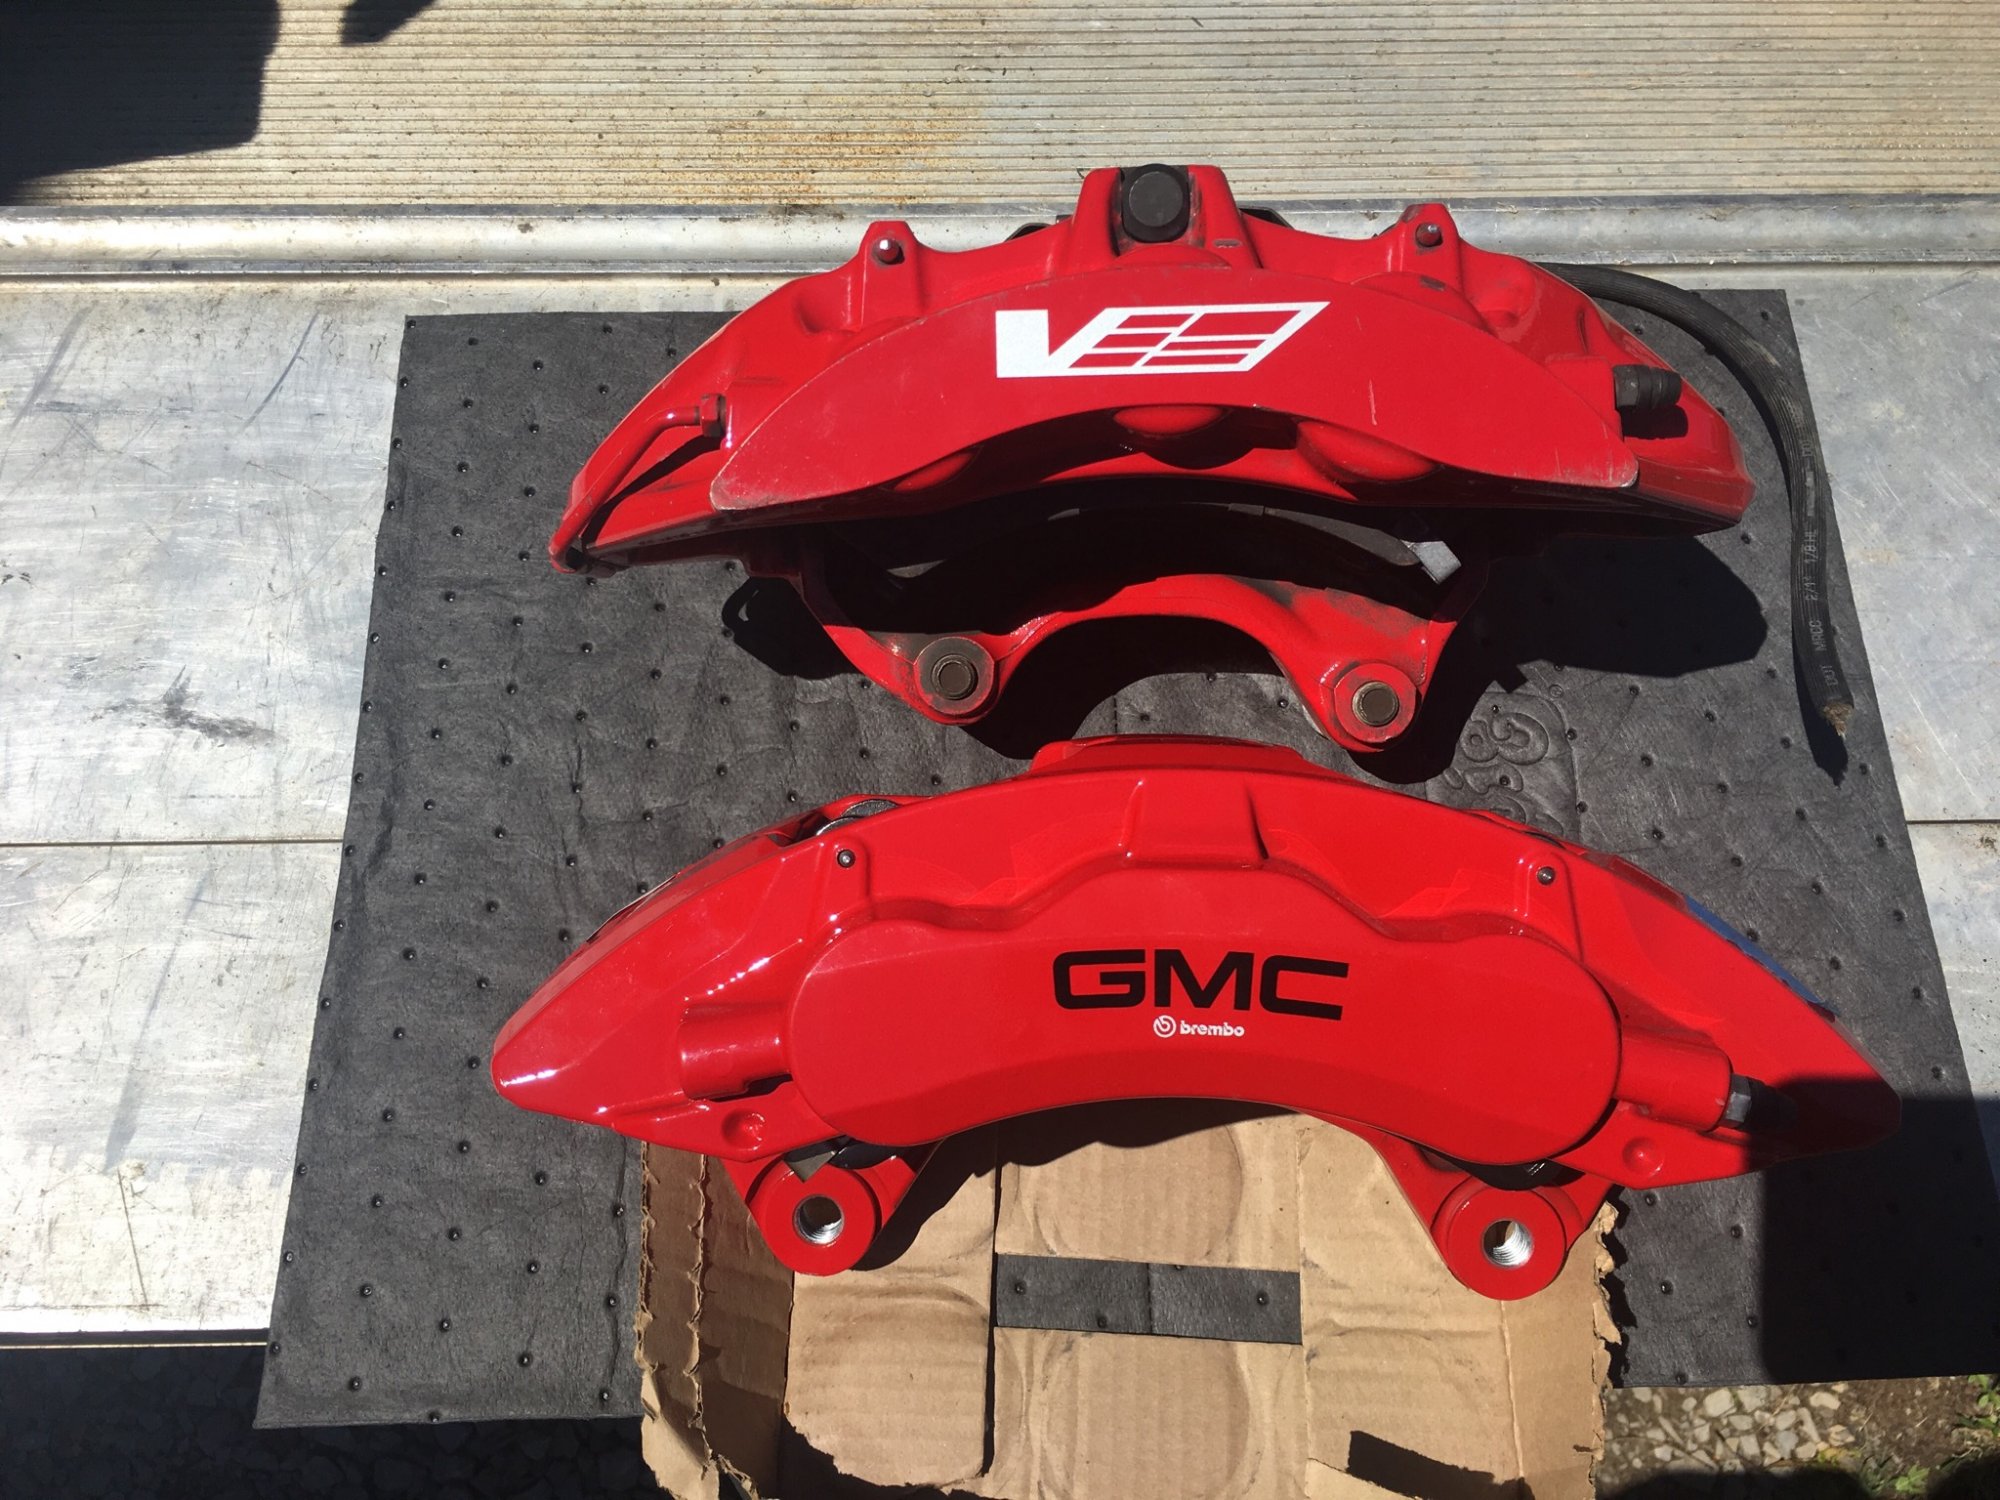
I have the OEM GMC Brembos as well as a set of CTS-v 6 pistons I installed on my other car. Here is a comparison of the 2. Your going to need a massive adapter bracket, and may not work because of the CTS mounting ears hitting the spindle. Plus the GMC Brembo uses a Larger Brake Pad than the CTS, and is physically larger also


-
Forum Statistics
250.4k
Total Topics2.7m
Total Posts -
Member Statistics
342,750
Total Members8,960
Most Online
-
Who's Online 15 Members, 2 Anonymous, 1,619 Guests (See full list)