
Gangly
-
Posts
1,333 -
Joined
-
Last visited
-
Days Won
8
Content Type
Profiles
Forums
Gallery
Events
Articles
RPO
Store
Blogs
Everything posted by Gangly
-
what's everyone paying for oil changes?
Gangly replied to shudog's topic in 2019-2026 Silverado 1500 & Sierra 1500
I've had my fair share of dealership ineptitude and deficiency. I am young enough, and capable enough, to be able to avoid going through it again by performing my own maintenance and repairs, but as I age I wont be able to and will need to rely on a dealership. I recently had my transmission fluid changed at the dealership because I didn't have the time to do it myself, and sure enough when I get home to check the work performed, its leaking at the pan gasket because 2 bolts weren't adequately torqued. I have no doubt that the technicians know how to perform adequate services, I just doubt the ability of a rookie technician performing a menial task for the 1000th time, to stay focused on the task and to not get sloppy. For more involved work such as head gasket replacement, transmission rebuilds, etc. that a senior technician would perform, I don't worry about a dealership messing it up. Its the little tasks with the beginner mechanics that worry me the most. -
With a lift, AT's, and removed front air dam, my Z71 is getting around 21 mpg on the freeway doing 75-79 mph. If I drop the speed down to 70 mph, I'll get 22+ mpg. Current odometer reading is 120K+
-
what's everyone paying for oil changes?
Gangly replied to shudog's topic in 2019-2026 Silverado 1500 & Sierra 1500
I change the oil myself so about $55-$60 for 8 quarts of quality oil and a quality filter. Changing the oil myself allows me to inspect the underbody and make sure everything is good. The only reason I was able to catch and repair a transfer case leak was because I noticed it when I was under the truck doing an oil change. Otherwise, I never would have known of the leak until it was too late which would have cost A LOT of $$$. -
I would agree, that doesn't appear to be a leak, but a drip that occurred during assembly, and the fluid cured into a hardened surface on the oil filter housing. Absolutely nothing to worry about.
-
The red is not a leak, its hardened polymer material from the electrical connection. The green circle is identifying a current leak that can be seen on the oil temperature sensor mounting location. The leak appears to be coming from the oil feed or oil return line for the turbo, both lines being mounted above the oil temperature sensor. Each has its own gasket, but with a better picture I am certain we could probably tell you which one.
-
Method to suggest future changes?
Gangly replied to Sam Morgan's topic in 2019-2026 Silverado 1500 & Sierra 1500
Great ideas! As far as the camera recordings are concerned, newer vehicles that have body and dash cameras are actively recording video while you drive. In the event of an impact, images will be stored and can be extracted using the correct software and hardware through the Bosch/Vetronix Crash Data Retrieval (CDR) tool. The CDR kit, combined with Berla, has been a game changer in the accident reconstruction community. -
redundant
-
That's what I am referring to. I believe a severe decline in electing this as an option created a situation wherein GM made it "standard" on the purchase sheet now, and included it in the price of the purchase.
-
I could very well be mistaken, but I believe GM was contractually obligated to continue OnStar subscription services in their vehicles. As a result of dwindling/no consumer interest in the subscription, but with a contractual requirement to continue its use in their vehicles, they began to mandate the "option" in their vehicles and tie in the price of a subscription with the purchase price of the vehicle to be able to keep from loosing money on it. Honestly, how many people prefer OnStar's navigation over Google, Apple, Waze, etc.? 1 person in 1,000? If you're involved in a crash and want emergency response contacted, Apple and Andriod have done this for a while now. Other than emergency services, and navigation, the OnStar services are obsolete, and I would argue even those options are obsolete compared to what's readily available on our phones. The GM app is nice, and being able to track, unlock, and remote start from a distance, etc. is nice to have, but that should be standard on higher end models, and not linked to a subscription based software.
-
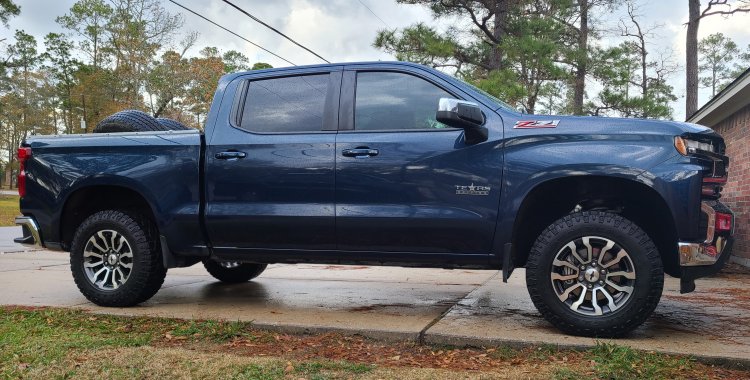
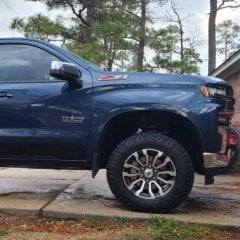
What wheels?
- 1 reply
-
- 1
-

-
If you need something immediately, cardboard ziptied to the grill will get you by. However, I'm in the south and I have RARELY driven in conditions that required it, so I'm sure other people will have better answers.
-
Clutch and brake wear can smell similar, anybody who has been to a quarter-mile track will attest to that. My guess is your traction control system is working HARD in the snow and your brake system is getting heavily used as a result. Go into 4Hi and turn off your traction control, or go into 4 LO and it will turn it off by default settings.
-
2021 GMC Sierra AT4 6.2L Supercharger build
Gangly replied to SierraStorm21's topic in Modifications, Wheels & Tires
Thanks for the nice writeup and great pictures. 12's is a VERY respectable number for a 1/2 ton truck in the quarter-mile, impressive! -
Transmission leak!
Gangly replied to 19gmcsierraat4's topic in 2019-2026 Silverado 1500 & Sierra 1500
The output shaft seal is a very easy fix, just time consuming to get the transfer case off. I had the transfer case out, replaced a shaft seal, and back in the truck in an afternoon. Luckily your still in warranty, good luck! -
Also, there are often times ditches or dirt mounds that I can use to back the truck up to so that the dirt bike can often be rolled right off the back of the truck without the use of the ramp.
-
I attach to the handlebars and the rear tire, and haven't had any issues. I'm 6'7 so I haven't had any issues loading the bikes myself with a ramp, but if you are of a shorter stature, a longer ramp would be highly recommended to keep the angles and forces required at a minimum. I'm pretty stretched out when I do it.
-
$2.31 - credit card.
-
2021 LM2 3.0 Coolant Control Valve
Gangly replied to d9gdon's topic in Engines & Drivetrain (V8, Duramax, TurboMax)
Single Use Fasteners and Components Engine Coolant Thermostat Housing Gasket Oil Level Indicator Seal Removal Procedure Caution: With wheels of the vehicle facing straight ahead, secure the steering wheel utilizing steering column anti-rotation pin, steering column lock, or a strap to prevent rotation. Locking of the steering column will prevent damage and a possible malfunction of the SIR system. The steering wheel must be secured in position before disconnecting the following components: The steering column The intermediate shaft(s) The steering gear After disconnecting these components, do not rotate the steering wheel or move the front tires and wheels. Failure to follow this procedure may cause the SIR coil assembly to become un-centered and cause possible damage to the SIR coil. If you think the SIR coil has became un-centered, refer to your specific SIR coil’s centering procedure to re-center SIR Coil. Disconnect the battery negative cable. Battery Negative Cable Disconnection and Connection Secure the steering wheel so it will not turn when the upper intermediate steering shaft and steering column are disconnected. Engine Oil Level Indicator (1) » Remove Open In New Tab Zoom/Print Drain the cooling system. Cooling System Draining and Filling Front Wheelhouse Liner » Remove — Front Wheelhouse Liner Replacement Mid Intermediate Steering Shaft Bolt (1) » Remove Open In New Tab Zoom/Print Upper Intermediate Steering Shaft (1) @ Intermediate Shaft » Separate Open In New Tab Zoom/Print Engine Wiring Harness Bracket Nut (1) » Remove [2x] Open In New Tab Zoom/Print Engine Wiring Harness Bracket (2) » Reposition Oil Level Indicator Tube Stud (1) » Remove Open In New Tab Zoom/Print Clip (2) @ Oil Level Indicator Tube » Remove Oil Level Indicator Tube Bolt (1) » Remove Open In New Tab Zoom/Print Oil Level Indicator Tube (1) @ Lower Crankcase Extension » Remove Open In New Tab Zoom/Print Oil Level Indicator Seal (2) » Remove and DISCARD Place a drain pan under the engine coolant flow control valve. Hose Clamp (1) » Disengage [4x] — Hose Clamp Replacement Guidelines - Spring Type Open In New Tab Zoom/Print Thermostat Bypass Hose (5) @ Engine Coolant Flow Control Valve » Remove Engine Oil Cooler Coolant Inlet Hose (4) @ Engine Coolant Flow Control Valve » Remove Thermostat Bypass Hose (3) @ Engine Coolant Flow Control Valve » Remove Radiator Inlet Hose (2) @ Engine Coolant Flow Control Valve » Remove Reposition hose(s) and hose clip(s) as needed. Open In New Tab Zoom/Print Electrical Connector (1) @ Engine Coolant Flow Control Valve » Disconnect [3x] Hose Clamp (1) » Disengage — Hose Clamp Replacement Guidelines - Spring Type Open In New Tab Zoom/Print Thermostat Bypass Hose (3) » Remove Thermostat Bypass Pipe Bolt (2) » Remove Open In New Tab Zoom/Print Hose Clamp (1) » Disengage — Hose Clamp Replacement Guidelines - Spring Type Exhaust Gas Recirculation Coolant Return Pipe (3) » Remove Disconnect electrical connector (1) at the brake master cylinder and position the harness aside. Open In New Tab Zoom/Print Engine Coolant Flow Control Valve Bolt (1) » Remove [6x] Open In New Tab Zoom/Print Remove the engine coolant flow control valve (2) through the wheel opening. Engine Coolant Thermostat Housing Gasket (3) » Remove and DISCARD Remove the drain pan. Transfer components as necessary. Cleaning and Inspection Procedure - Conditional Note: The following cleaning and inspection and/or overhaul steps are ONLY to be performed as determined necessary based on the condition of the part being removed with the intention of reinstallation. The labor time to perform any of these steps is not included in the base labor time and if required would need to be documented and submitted as Other Labor Hours for warranty claim reimbursement. A description of the repairs performed must be documented in the technician correction comments. Clean the engine coolant flow control valve (1). Open In New Tab Zoom/Print Inspect the engine coolant flow control valve (1). Replace the engine coolant flow control valve (1) if any damage is found. -
Transmission shudders.
Gangly replied to W4LWQ's topic in Engines & Drivetrain (V8, Duramax, TurboMax)
I'm getting a shutter on downshifts, specifically around 10 mph. I don't get it anywhere else, just when slowing down and reaching that speed. -
LT Trail Boss - Poor Value?
Gangly replied to Egghaus's topic in 2019-2026 Silverado 1500 & Sierra 1500
-
DIY Trans fluid and filter change
Gangly replied to schindles's topic in Troubleshooting, Warranty & Recalls
You don't have to drop the exhaust to do it. A slight pull on the crossover pipe with a pry bar will lower the exhaust enough to get the pan out. -
I love a good, well oiled, duck canvas, wrench roll. The plastic ones don't seem to last as long due to brittleness with age, and they can get sloppy with oils. I keep various box end combination wrench sets in duck canvas wrench rolls, but I have yet to find one that will allow the proper fitment of a 15 piece ratcheting wrench set, specifically the Milwaukee Flex Head wrenches. The wrench slots on every one I have tried, or read about, are too small and I cant fit the Flex Head wrenches in the slots. Does anybody know of a wrench roll that will for sure accommodate larger flex head wrenches, specifically the Milwaukee Flex Heads?
-
2020 1500 5.3 8-speed trans temp
Gangly replied to trp34g's topic in Engines & Drivetrain (V8, Duramax, TurboMax)
Install the TBV and be done. -
Rig preparation for Dempster to Arctic at Tuktoyaktuk
Gangly replied to EXSlider400's topic in Modifications, Wheels & Tires
Things I always have with me when I'm camping, or doing some remote off road driving, in addition to what you mentioned above: A small impact driver and a portable tool set (wrench roll and socket set). You never know when you might need some tools to repair a broken headlight, tail light, CV, remove a skid plate for debris removal, etc. Also, I'm an admitted tool snob, but I firmly believe that you shouldn't cheap out on the tool sets. The last thing you want to do is be stuck in the middle of the woods/trail/beach with no way to fix an issue because the wrench or socket wasn't correctly tooled and rounded off a nut or bolt. Downloaded or printed wiring schematics, diagrams, and component replacement procedures. Nobody ever mentions this, but its a good idea to have downloaded, or printed repair procedures for COMMON off road driving/camping issues (broken CV, wheel torque specs, winch schematics, headlight replacement, etc.). If you need to replace a CV while in a remote area, having a printed repair procedure is a blessing. Having the proper torque specs for something as simple as replacing a wheel and tire is very handy to have. A small folder of compiled common repair procedures can fit under the seat easily and is a life saver if its ever needed. Portable Air Compressor and tire patch kit. I have a VIAIR compressor that hooks up to my battery, as well as a Milwaukee battery powered air compressor incase my truck battery ever dies for some reason. Being able to patch a flat on your own is crucial, being able to air it up afterwards is more crucial If you don't have a winch, get a come along with extra cable. Self explanatory if your doing remote solo trips. Kudos to you for starting your planning this early, it most certainly gives you time to come up with things you wouldn't consider if you waited to the last minute, which I unfortunately do more times than not. -
There is no output shaft on the front driver's side of the differential. There is a CV, or "drive shaft" that connects the front differential to the driver's side knuckle/hub assembly, but that's it. If you are looking for the internal "Intermediate Shaft", that's on the passenger side and will require the CV shaft to be removed, and then the intermediate shaft housing to be removed as well. I think you are referring to the CV shaft though, in which case all you need to do is disconnect the UCA from the knuckle/hub assembly on the driver side, tilt the knuckle/hub assembly down and pull the CV out. Start to finish it's a 2 hour job to remove and replace if its your first time, 30 minutes if you've done it before.

