

tsdrumm
-
Posts
216 -
Joined
-
Last visited
Content Type
Profiles
Forums
Gallery
Events
Articles
RPO
Store
Blogs
Everything posted by tsdrumm
-
I lost a 305 in my 95 C1500 when the adapter that bolts into the block that the oil filter screwed onto let go as I was driving down the road. I dumped all the oil out and even though I pulled over as soon as the oil pressure dropped I burned the rod bearings enough to justify replacement. GM warrantied it. So not because of the oil or too long between changes, but sort of oil related.
-
306K5's Write off rebuild 2014 Silverado LT
tsdrumm replied to 306K5's topic in Member Build Threads
This looks like it’s going to be a good story. Please post lots of details on how you got the HD front clip installed. -
285/55/r20 on 20x12's -44 offset
tsdrumm replied to Mitchell Jackson's topic in Modifications & Accessories
285/55/20 stretched onto a 20x12 looks awful. 305/50/20 would look better. but either size with just a 2.5” level is going to require a decent amount of trimming too. -
Got any pics of that?
-
I’ve only ever bought Chevys. ‘84, ‘95, ‘03, ‘06, and ‘14. The only real regret is not keeping them all.
-
Nitto Trail Grapplers, who's running them?
tsdrumm replied to dieselfan1's topic in Modifications & Accessories
here’s my 10 year older trail grapplers. Probably have around 35-40k on them total between the two trucks.
-
Nitto Trail Grapplers, who's running them?
tsdrumm replied to dieselfan1's topic in Modifications & Accessories
I’ve had the same set of trail grapplers for 10 years and two trucks. They’re still well over 50% tread. They wear like iron. I’m replacing soon just due to age and maybe a wheel diameter change. I never ran them in winter, but the only caution I will give is they are not siped. So I always take it easy on wet roads because they do like to break loose. not sure if I’ll get them again just because after that long I just want to have something different. Not because I didn’t like them. It down to another set of trails, toyo mt, toyo rt, or maybe MT ATZ P3. All depends if I stick with 20s or go up to 22s. -
CST 4.5 lift with Bilstein's ????
tsdrumm replied to Donzi4me's topic in Modifications & Accessories
The CST lift drops the front end the full 4.5 inches. So you could run the bilstein struts as you have them configured now with the CST strut spacer and end up with 6.25 inches of lift and suspension angles like you have now. You would have to lift the rear up accordingly as well, if you tell CST they could probably provide a taller block to compensate. Yes you would need longer rear shocks too. -
That’s a Bronco Sport. It is a soccer mom grocery getter. The real Bronco from the commercials isn’t out yet.
-
Suggestions on a cut cross member
tsdrumm replied to Carlos Cadenas's topic in Modifications & Accessories
I would say that it is quite literally broken down. -
Suggestions on a cut cross member
tsdrumm replied to Carlos Cadenas's topic in Modifications & Accessories
Did you get a warranty when you bought the truck? Would be a tough fight but maybe you have some type of recourse. -
Suggestions on a cut cross member
tsdrumm replied to Carlos Cadenas's topic in Modifications & Accessories
That’s definitely a cut from a prior lift install that has been removed and then welded back. The only way to fix it is to reweld the area. -
Got any more pics and specs on this truck?
-
2007 GMC Acadia. Brand new platform and first year. We special ordered it was soon they were taking orders. Waited months to get it. From a design and features standpoint it was perfect for our family. problems from day one. Transmission programming, sunroof leaks, squeaky brake pedal, moaning steering. The dealer really tried, replaced the steering rack, pump, column, master cylinder, and performed numerous TSBs. It made so many awful sounds we named it Mona. Final straw was when the water pump failed, it overheated, shutdown and left my wife and son stranded on the road. Traded it in with only 41,000 miles on it, and she’s been in a Yukon and Tahoe ever since. Still to this day she says that was her favorite car from a design and fitting her needs standpoint. But she refuses to get another because of the experience with that one.
-
6-7" lift that doesnt increase track width
tsdrumm replied to vhreso's topic in Modifications & Accessories
Glad to see those wheels finally get some worthy tires. -
Bose or non-Bose radio? Blue or red cluster? What year did it come out of?
-
Sold: 2.5 HMI and Radio from WAMS, $300+ shipping
tsdrumm replied to skyline2413's topic in Modifications & Accessories
So this won’t work in a truck with Bose? -
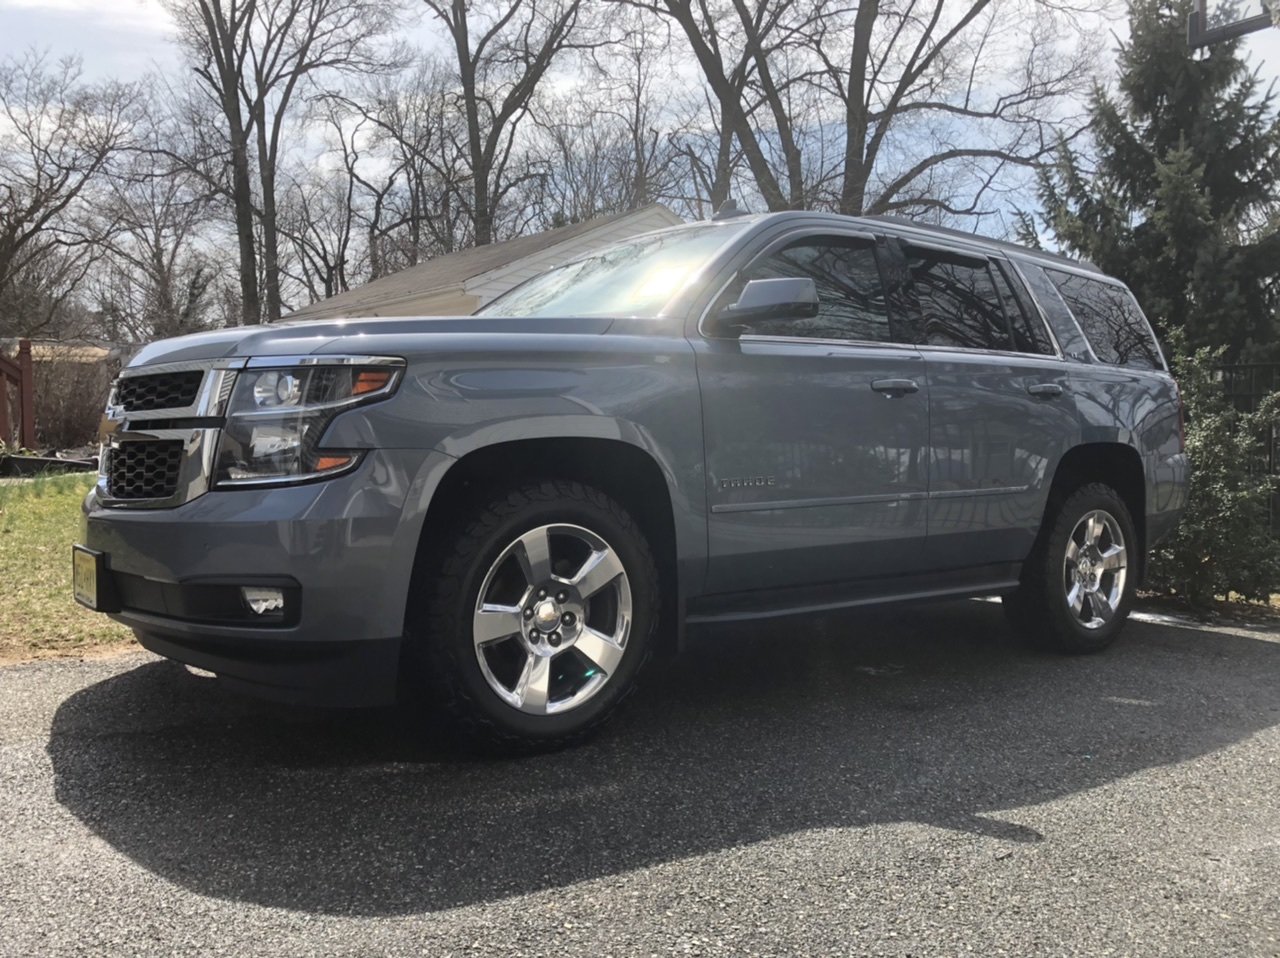
not a truck but our Tahoe, all stock except 275/55 KO2s
-
Could you get a measurement from the face of the rotor to the outermost protrusion of the caliper and the measurement of the wheel mounting surface to the same location on the caliper? Might help us figure out if these will clear wheels before finding out we need spacers. Thanks.
-
“Check xm antenna” after sharkfin swap
tsdrumm replied to tsdrumm's topic in Modifications & Accessories
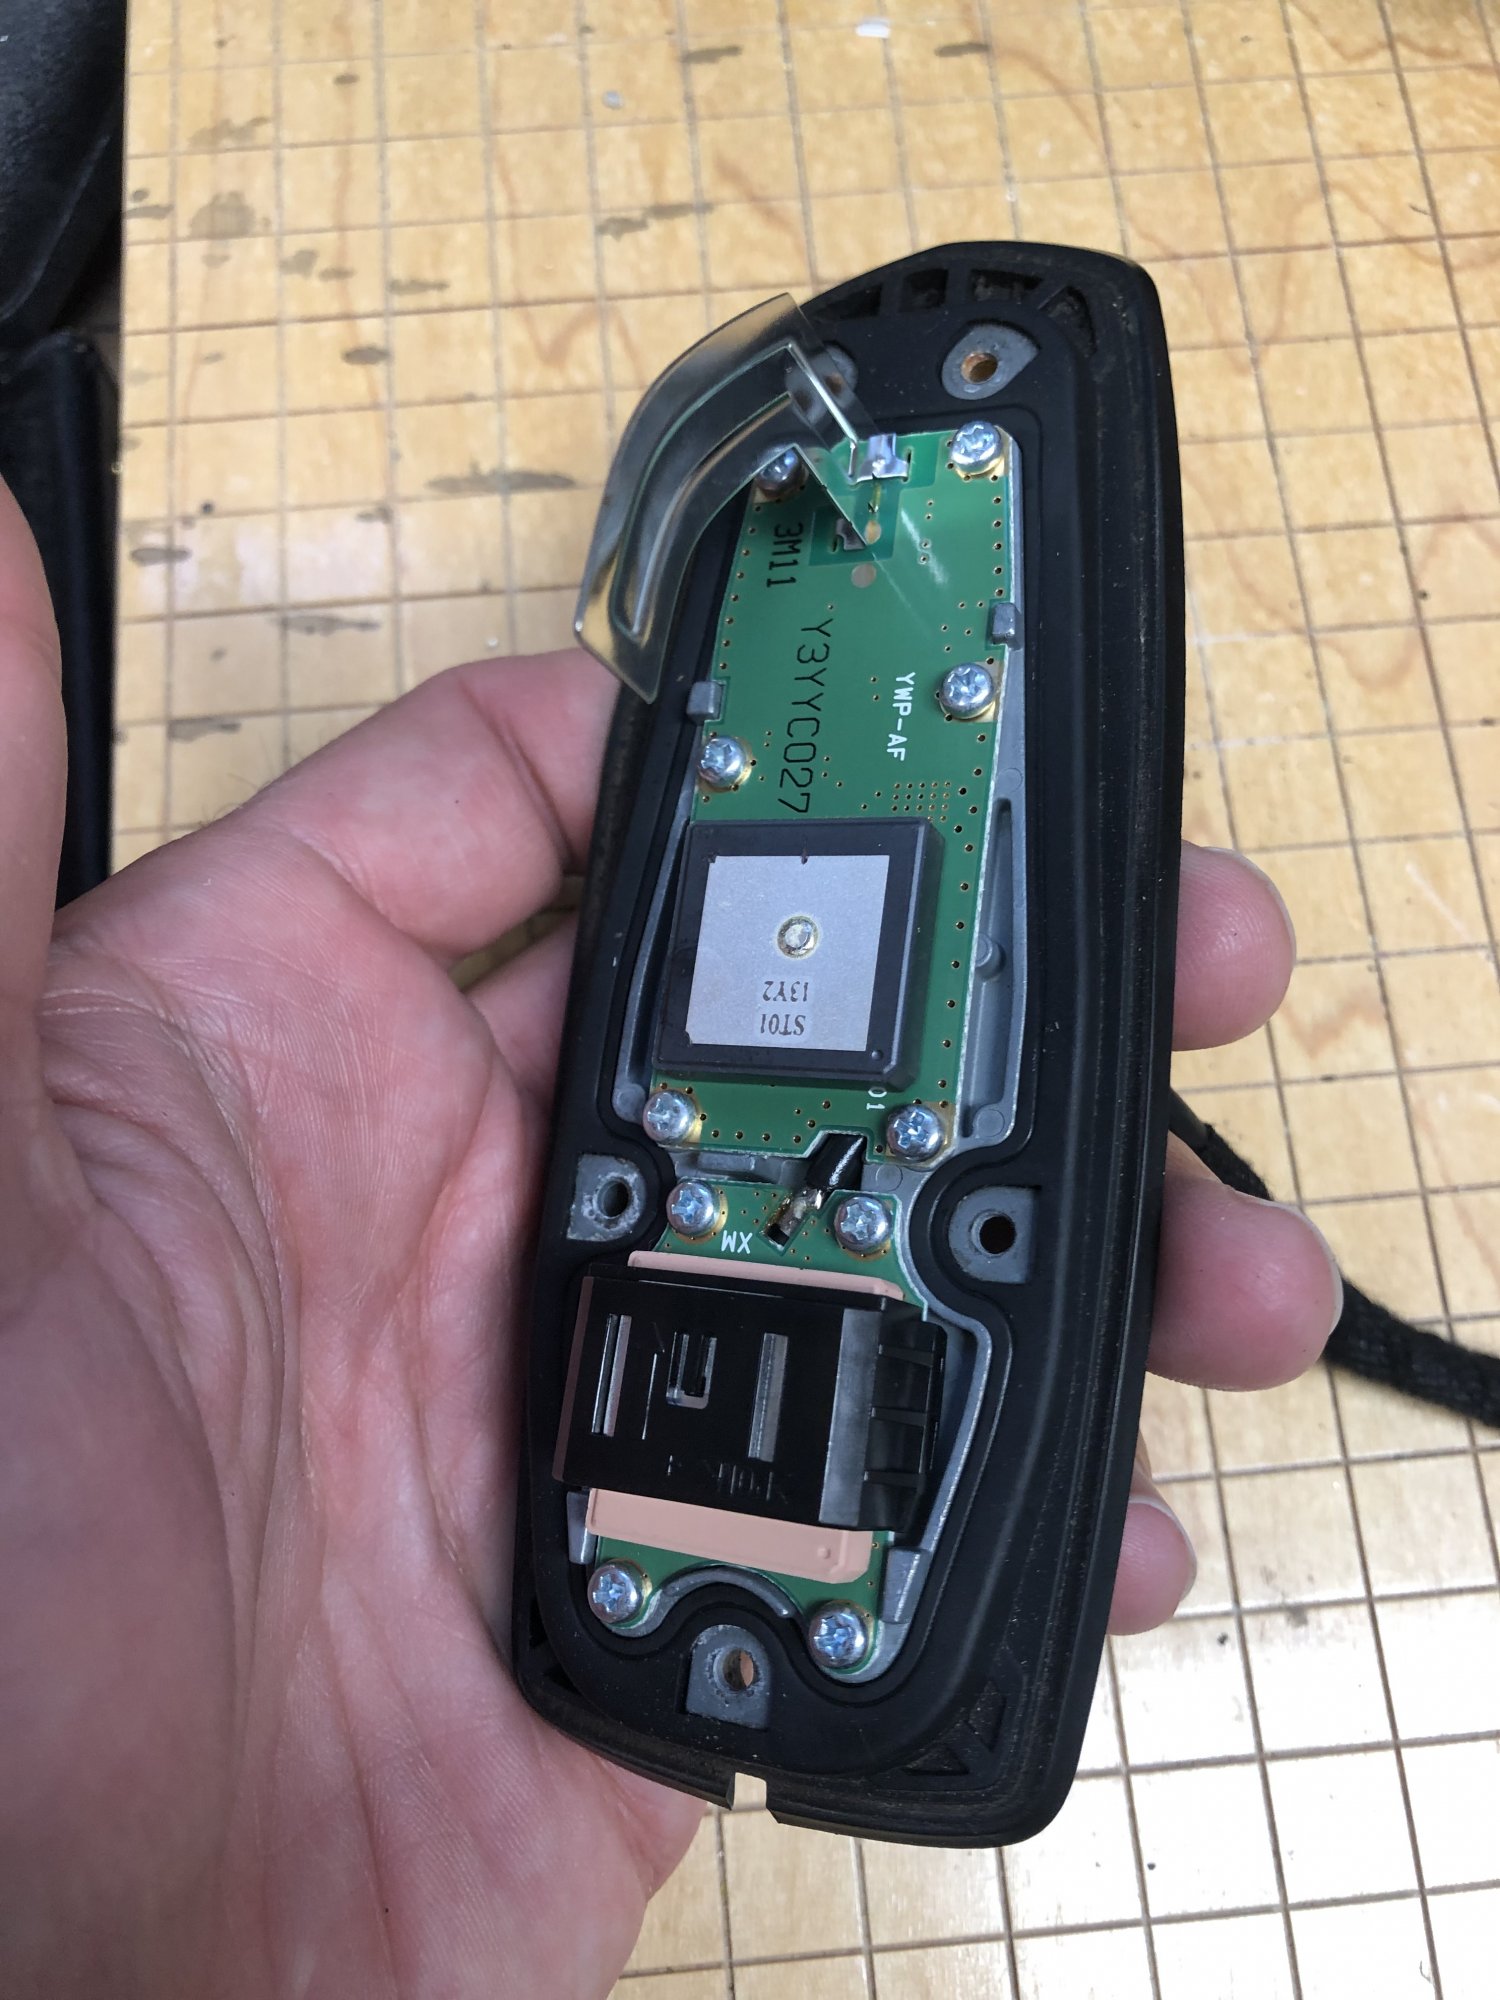
Then I screwed the second circuit board onto the adapter plate. Put the wires back into the connector, XM in pin 2, other thing in pin 1. Then re wrap the wires with fabric tape. Reinstall the painted cover.
-
“Check xm antenna” after sharkfin swap
tsdrumm replied to tsdrumm's topic in Modifications & Accessories
Time to swap circuit boards. The XM one is easy, it is a direct swap. Same size, same screw pattern. The other circuit board is not. The one from the old antenna is much smaller and none of the screw holes align with the new antenna base. So I gave my son the circuit board from the new antenna and he 3D printed me an adapter plate for the old circuit board. Here it is installed.
-
“Check xm antenna” after sharkfin swap
tsdrumm replied to tsdrumm's topic in Modifications & Accessories
On the new antenna base unscrew the two circuit boards. Cut the connectors off all three wires and toss it all in the garbage. Now take a drill and make the wire hole in the new antenna base plate big enough to fit the wires of the old electronics through the hole. I used a 1/4” drill bit.
-
“Check xm antenna” after sharkfin swap
tsdrumm replied to tsdrumm's topic in Modifications & Accessories
On the old antenna, mark the wires and pin locations, then with a little regular screw driver pop out the white clip that holds the wires into the connector. Take out all the little screws that hold the two circuit boards to the base plate. The end on the wires are too big to pull up through the wire hole in the base plate. Then use something to cut a slot in the old antenna base plate (I used a dremel with a cut off wheel) so that you can get the wires out of the base plate.
-
“Check xm antenna” after sharkfin swap
tsdrumm replied to tsdrumm's topic in Modifications & Accessories
These are the electronics inside the new antenna. These all get relegated to the trash bin.
-
“Check xm antenna” after sharkfin swap
tsdrumm replied to tsdrumm's topic in Modifications & Accessories
These are the electronics inside the old antenna. The small black one at the bottom is marked “XM” and has one wire that goes to pin 2 on the connector. Not sure what the top thing does, but it’s wire goes to pin 1. Some people have done this by only swapping the XM piece and claim everything works as it should. I’m a “it has to be there for a reason” kind of guy so I swapped both pieces.


-
Forum Statistics
250.4k
Total Topics2.7m
Total Posts -
Member Statistics
342,855
Total Members8,960
Most Online
-
Who's Online 9 Members, 1 Anonymous, 857 Guests (See full list)