Search the Community
Showing results for tags 'gauges'.
Found 5 results
-
Ok, We are all familiar with the instrument cluster (servo) issues with the early 2000's trucks... I have the same story. gauges started to fail one at a time. For the last several years, all I had working was the fuel gauge. (I would measure speed by my GPS, and I have an OBDII module where I could read oil pressure, coolant, anything else...) Anyway, I drove my wife's vehicle to work for a night because she was loading some stuff to take elsewhere. When I got in my truck the next night, I noticed she had moved the steering wheel up. I moved it back down to my preferred position, and when I started the truck, ALL my gauges worked... I even had lights lit that had been out for years... But the REALLY odd thing, is my odometer now shows ~ 80k less miles than it did last week... I was under the belief that the mileage was in the "computer", not the dashboard... and my wife never even started the truck, only loaded some things in to it.... Anyone have any thoughts?
-
 Went to start the truck today and when I turn the key I get nothing. Dash and radio don't light up. Checked all the fuses and relays that I thought might be applicable, but everything looks fine. Battery has a full charge, Interior lights work, but the passenger side headlight doesn't come on and the driver's side turn signal doesn't blink when locking and unlocking the truck. Anyone heard of this issue before? I have a 2016 Sierra 1500 5.3L Z71 with 10,000 miles. Haven't had any issues until now.
 -
 Hello all! I am hoping for a little help to get me started in the right direction. My work truck is a 2011 GMC Sierra 2500HD Diesel, and I apologies in advance for the length of this post! In the summer I started having issues with my truck batteries draining completely while parked. Anytime I didn't drive it for a few days, dead. Batteries tested as needing replacement (they were 9 years old). Replaced both batteries and back to life! Fast forward several months and I thought I had the same issue, dead batteries and the truck remotes wouldn't unlock the doors. Unlucky me, somebody also tried to steal the truck a bit before this and punched out the lock so I couldn't get in. Quick call to the tow truck and the door was unlocked. I popped the key into the ignition and it started right up so I guess the batteries weren't dead? At the time I thought that was strange but the remote door locks were working again and I headed off to buy a new lock cylinder and batteries for the Fobs. I wondered at this time if the issue was the non-stop rain we were having. I noticed that the drivers side rear passenger seat belt was wet when I unrolled it and thought there may be water getting into the truck somehow, but the headliner looks dry. I really should have installed the cylinder but didn't because, well, it was raining and I didn't have a garage to work in. During these few weeks the door worked just fine most of the time. At times it seemed like the truck just wouldn't wake up until I had pressed the FOB enough times and uttered a curse or two, and then it happened again. Locked out. Called the tow truck again and got the doors unlocked. Truck starts but this time the remote unlock doesn't come back to life. I sucked it up and installed the new lock cylinder in the pouring rain so at least I could lock the doors. At this time I started getting messages through the DIC about the TPMS needing servicing. I drove randomly for the next month and a half without getting the situation fixed due to...life happening fast and hard. Then I noticed that while I was driving the gauges looked like the reset. Everything dropped to zero and the lights for the airbags, check engine etc lit up. I got messages across the DIC to have the air bags and 4x4 system serviced, and the radio went dark. Within a second or two the gauges came back to life and the radio restarted and all went back to normal. I checked the battery terminals to make sure they were clean and tight then wrote it off to a bad road and didn't think more of it. I clipped off the wiring for the camper harness as I noticed it was corroded and potentially arcing, and I pulled the fuse on the obstruction system (parking sensors) because of error codes for an open ground and bad sensor. (I don't use the system anyway because of hitches and trailering) Over the last 3 weeks the gauges have started to reset themselves more and more frequently while driving, and once the engine didn't shut down when I turned and removed the key. I quickly put the key back in, gave it a quick turn on and off and the truck shut down. I have had the batteries die twice in that time and I don't know if it was my toddler playing with the cab lights or something else. As of yesterday the gauges and radio will only work when the truck initially starts. After the start they will operate for a few seconds then warning lights galore and gauges drop to zero. Radio goes dark, but HVAC stays on. Dash remains lit up and DIC works but the transmission selector doesn't show what gear the truck is in. Turn indicators will illuminate but not flash. Once even with the truck off and the key out the HVAC stayed on and the blower kept running. Buttons on the climate control panel were nonresponsive so I had to pull and replace the fuse on the HVAC. I know that the truck will need to go and get professionally assessed, however I am hoping for a little guidance as to what the issue(s) could be. Given the holidays and weather, getting an appointment to get the truck checked over hasn't been easy and I want to make sure I get it into the right type of shop. Any guidance or insight is appreciated. Again, sorry for the rambling nature of the post.
 -

From the album: Gauges
Before temp sender and sensor replacement. -
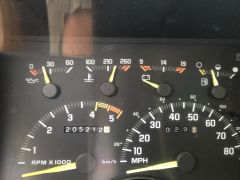
From the album: Gauges
engine off, after coolant,engine sensor and sender replaced.