Jump to content

The Nightmare (rc 3" Lift) Is Over - New Setup (ccm 2.5" Lev


Recommended Posts

Posted

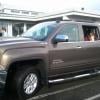
Finally got a chance to clean up the truck today. Many of you know all of the issues I had with that piece of shit RC 3" lift. Well, long story short, they bought it back from me. The truck would never align right, and the Upper Control arms would hit the coils when the suspension flexed (and yes, I had two shops look at and try to fix this). That is why I am so opposed when people ask about the "new" RC 3.5" lift. The pictures look exactly the same as the one I had. They can tell you they re-designed it all they want, but it isn't worth the risk. Not to mention, you have to drill out the knuckles and they expect you to stack rear blocks instead of giving you a solid 3" block in the rear. It is just cheaply made and I wish I would have listened to all of the warnings people gave me before I bought it. While the shop was taking it off, I had them put the CCM 2.5" leveling kit in there and leave my 3" rear blocks.


Here are how close the UCA's are to the coils.


IMG_3378.jpg


The install was pretty much straight forward, and i'm glad I did it my self vs. paying a shop to do it. It took me and a couple of friends about 10 hours (including beer breaks) and taking our time of course. I've never installed a body lift before, and it was pretty simple. I would really recommend this setup for anyone wanting a 4" lift or looking at that piece of shit Rough Country lift. The total investment for this (4") lift was under $500 including rear blocks and the ride isn't affected much at all.


Installing:


Cab and Right side of bed done...


139.jpg


137.jpg


136.jpg


This is the day I installed the Zone (Before):


130.jpg


131.jpg


And this is after:


IMG_1624.jpg


IMG_1622.jpg


IMG_1643.jpg


IMG_1642.jpg


IMG_1638.jpg


IMG_1641.jpg


IMG_1637.jpg


IMG_1632.jpg


IMG_1631.jpg


IMG_1626.jpg


IMG_1622.jpg


IMG_1627.jpg


I still have to go back and adjust the front bumper, it was just getting late. Like I said, this is the perfect setup for 32"-33" tires in my opinion. It is also good for someone on a budget or like me, don't know much about suspension lifts. Right now, the tires are worn out 285/60/18's and I plan on going up to 285/65/18's (close to a 33" pictured above) soon.


Fender Measurements are with the worn out 285/60/18's:


Front: 40.25"

Rear: 41.25"


Cleaned the wifes tahoe today also :( ...


167.jpg


IMG_1647.jpg

Posted

Looks great man! Sorry you had to deal with so much crap from the Rough Country 3" lift, I cant believe people are still interested in putting it on their trucks after reading your posts. Enjoy the truck.

Posted

Hey Nick,

You had advised me earlier about the RC combo kit. Your truck looks great. Love the rake, too. Pictures just in time, I bought a 2.5" front/3" block off of ebay that should be in tomorow. I was thinking about leaving in the 1" stock block and stacking but i really like how your sits. I'll probabaly take out the stock block.This ones for my 09 Silverado. Kit seems pretty straight forward, the guy has sold like 25 of them in Feb. alone.


http://cgi.ebay.com/ebaymotors/2007-2011-C...sQ5fAccessories


James

Posted

Oh and by the way, great minds think alike! This is my 2007 Sierra with the same wheels as your Hoe. And, Im gonna stack a 1.5" Zone BL after the lift kit. Prob. sometime this summer when it warms up!


post-73637-1298851150_thumb.jpg


James

post-73637-1298851150_thumb.jpg

post-73637-1298851150_thumb.jpg

post-73637-1298851150_thumb.jpg

Posted

That looks good James. The block you are buying is a 2.5" block, not a 3" it looks like. I almost wish I had one similar, sometimes I can notice the rake, and other times I can't. What ever you do, I wouldn't stack the blocks. It isn't safe, plus if you did, the U-bolts coming with your kit are probably useless (just enough for 2.5", not long enough for 3.75" of lift). The factory block on NNBS's I think is 1.25" tall. You would need larger ones right off of the bat.


I like the polaris in the background also. Here's mine.


e88fea51.jpg

Posted

your right, 2.5" block in the rear. Crap, hopefully that .5" wont make that big of a diff. I think the way the Silv. tires fit in the wells looks better with the stock rake.


James

Posted

Nice quad! My ATP has been super reliable, use it to plow a mile of dirt road since 04 (i believe) and the winters up here can be brutal! I think im going to retire her for the kids and jump into a side by side.


James

Posted
Finally got a chance to clean up the truck today. Many of you know all of the issues I had with that piece of shit RC 3" lift. Well, long story short, they bought it back from me. The truck would never align right, and the Upper Control arms would hit the coils when the suspension flexed (and yes, I had two shops look at and try to fix this). That is why I am so opposed when people ask about the "new" RC 3.5" lift. The pictures look exactly the same as the one I had. They can tell you they re-designed it all they want, but it isn't worth the risk. Not to mention, you have to drill out the knuckles and they expect you to stack rear blocks instead of giving you a solid 3" block in the rear. It is just cheaply made and I wish I would have listened to all of the warnings people gave me before I bought it. While the shop was taking it off, I had them put the CCM 2.5" leveling kit in there and leave my 3" rear blocks.


Here are how close the UCA's are to the coils.


IMG_3378.jpg


those rims on the tahoe are awesome!


The install was pretty much straight forward, and i'm glad I did it my self vs. paying a shop to do it. It took me and a couple of friends about 10 hours (including beer breaks) and taking our time of course. I've never installed a body lift before, and it was pretty simple. I would really recommend this setup for anyone wanting a 4" lift or looking at that piece of shit Rough Country lift. The total investment for this (4") lift was under $500 including rear blocks and the ride isn't affected much at all.


Installing:


Cab and Right side of bed done...


139.jpg


137.jpg


136.jpg


This is the day I installed the Zone (Before):


130.jpg


131.jpg


And this is after:


IMG_1624.jpg


IMG_1622.jpg


IMG_1643.jpg


IMG_1642.jpg


IMG_1638.jpg


IMG_1641.jpg


IMG_1637.jpg


IMG_1632.jpg


IMG_1631.jpg


IMG_1626.jpg


IMG_1622.jpg


IMG_1627.jpg


I still have to go back and adjust the front bumper, it was just getting late. Like I said, this is the perfect setup for 32"-33" tires in my opinion. It is also good for someone on a budget or like me, don't know much about suspension lifts. Right now, the tires are worn out 285/60/18's and I plan on going up to 285/65/18's (close to a 33" pictured above) soon.


Fender Measurements are with the worn out 285/60/18's:


Front: 40.25"

Rear: 41.25"


Cleaned the wifes tahoe today also :idiot: ...


167.jpg


IMG_1647.jpg

Posted

Sucks you had all those issues. I just installed the 7.5" rc and was worried about the uca's hitting coils as well. At full droop they are close but not hitting. I don't wheel this truck so I am not worried about it.

Archived

This topic is now archived and is closed to further replies.

  • Recently Browsing   0 members

    • No registered users viewing this page.
  • Forum Statistics

    250.4k
    Total Topics
    2.7m
    Total Posts
  • Member Statistics

    342,866
    Total Members
    8,960
    Most Online
    Greg3160
    Newest Member
    Greg3160
    Joined
  • Who's Online   1 Member, 0 Anonymous, 556 Guests (See full list)

  • Latest Articles

  • Posts

    • Late reply, but yes—it works on the SLT trim. Compatibility comes down to the plastic shroud shape behind your mirror, not the trim badge itself. On the SLT with auto-dimming, it uses a plug-and-play Y-harness off the mirror/rain sensor power, so no need to run wires down to the OBD port. If anyone's ever unsure about fitment, just drop a photo of your mirror housing and we can double-check it.   Appreciate the detailed feedback on the install! On the windshield glare—we actually took feedback like yours and developed a dedicated CPL (polarizer) filter to cut down dash reflections on sunny days. If you're still running the cam, shoot me a DM. I'd be happy to send a CPL filter over for you to test out—no charge. 
    • There are no stickers in your glovebox?
    • Look at the numbers on the stickers in the door jam...
    • Yes, every time the developer updates his code, you must recompile. I will private message you with the latest because it changes pretty much with every version.
    • After I wrote that reply I went for a ride. 85 F out. So trans started at 85 F and it shifted the same as it did an hour latter at 168 F. I've never actually recorded the to cold to shift point but it is under 32 F before they start hanging on to a lower gear or leaving the converter unlocked. Both intended to heat fluid.    Yes, brake or bake. Absolutely.      Your welcome. True research ended decades ago. Field trials are still in play.    There is a thing called oxidation onset temperature. This is the heat related oxidation not the O2 exposure kind. For mineral oil that starts at 140 F. So what happens after 140 F? Each 20 F cuts fluid life in half! Does using a Full Synthetic improve that? Yes! By how much? Depends on the base oil type and a few other factors. But enough to notice. Some esters are even higher. There are even synergies between types the will raise it higher than any one component is alone.    Then there is "Hindered" oils. Antioxidant additives. Hindered Polyol Esters can sit at 500 F for years in a turbine.   When a blender brags his oil will 'take 500 F" in service he doesn't specify for how long. Water will dance on a 500 F hot plate for several seconds. @newdude put up a chart showing the relationship between fluid temperature and it's life in an automatic transmission. Here's a version of that chart for Group III based oils. These temperatures are those in the pan as observed as 'normal'. that is you drive as you do for as long as you do under what load you ask of it and whatever that temperature is this graph applies to. Flash temperatures of a few minutes isn't what his means.    Note that fluids held at a constant 240 F have a service life of only 20K miles. 220 F explains the factory exchange limit, eh? My equipment I keep under 180 F and I'm good if the cooler will hold it as low as 140 F. But that's me.   
  • GM-Trucks.com Clubs

  • Popular Contributors

×
×
  • Create New...