
-
Recently Browsing 0 members
- No registered users viewing this page.
-
Forum Statistics
250.3k
Total Topics2.7m
Total Posts -
Member Statistics
342,732
Total Members8,960
Most Online
-
Who's Online 7 Members, 0 Anonymous, 1,087 Guests (See full list)
-
Latest Articles
-
Posts
-

By cherryred21duramax · Posted
Thanks @newdude, guess I'll keep looking. Test driving so many trucks that have obvious things broken, I'm thinking "if they couldn't even be bothered to fix the power seat," what else is broken". Just drove a 2021 where the power seat motor was grinding/binding and wouldn't do anything but make a terrible sound. An owner that puts dents on the bumper, doesn't fix a seat motor, and had spotty service intervals (along with missing major services) doesn't give me the best of confidence. Amazed at the number of people that will finance a $60k+ truck, run it into the ground, then trade with a loan balance (every single one had "loan/lien reported" on the CARFAX at the last year of registration). -
 Not true! I have been runing them since 2006 F250! suspension component that works as a sway bar, a traction bar, and a helper spring points directly to the RoadActive Suspension (RAS) kit. Works as a sway bar, a traction bar, and a helper spring.
 -
.thumb.JPG.2c573de60d3a3a4407c7d92298db46dd.JPG)
By Grumpy Bear · Posted
Here's a starter kit: CC Jensen, a Danish oil testing Concern gives us the following guidelines: ISO 14/12/10 Very Clean Oil ISO 16/14/11 Clean Oil ISO 17/15/12 Lightly Contaminated ISO 19/17/14 New Oil ISO 22/20/17 Very Contaminated and not suitable for any service. In addition CC Jensen gives a table showing how engine life is increased by cleaning up the oil. For example cleaning the oil from 19/17/14 to 13/11/8 will extend motor life by a factor of 6X. But even cleaning it two “Life Extension Classes” will double motor life. So perhaps giving those classes would be useful: 21/19/16 20/18/15 19/17/14 18/16/13 17/15/12 16/14/11 15/13/10 14/12/9 13/11/8 ************************************* https://testoil.com/program-management/setting-iso-cleanliness-targets/ Third paragraph from the bottom will give a starting point. Your next question should be, okay 10um at what Beta ratio and the answer is in the graph Beta 75. Then the next question is what is your chosen filters profile? (Purolator PL series below) The red dot is Beta 75. This was the information I obtained from MANN a few years ago. So the best filters, Purolator One, AMSOIL EA, FRAM Ultra, Royal Purple, Bosch Premium should get a doubling engine life over filters like Purolator L, any service filter from any quick lube, WIX, NAPA, STP, Mobil 1, Purolator BOSS. And as noted by CC Jensen a 2-5 micron @ Beta 200 bypass system has the capability of a six fold improvement. AMSOIL has such a system as does Donaldson. Now having said all that testing is the touchstone. Test the oil NEW and test it with your chosen filter. Then test over milage. Do the work, get the result. But understand this in NOT absolute BECAUSE this is one factor in isolation. Example: A valve spring supplier can state that with cam X and a valve train of Y grams the valves will not float to 7K rpm. is that true if the builder choose a system 20 grams over limit? Common sense must be used and limits understood. -
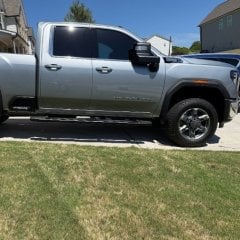
.thumb.JPG.2707f5cf70ec02838ebf5bc9a9c2f7dc.JPG) This doesn't look like a GM truck. Not needed on a HD truck
This doesn't look like a GM truck. Not needed on a HD truck -
 It varies a ton around me. Some places are still at $5.00 or higher and others are way down into the $4's. Offroad diesel was $4.02 at the one station I passed today.
-
-
GM-Trucks.com Clubs
-

Black Truck Club
Open Club · 612 members
-

White Truck Club
Open Club · 380 members
-

Canadian Owners Club
Open Club · 282 members
-

Red Truck Club
Open Club · 156 members
-

diesel 3.0
Open Club · 279 members
-

Texas Owner's Group
Open Club · 371 members
-

NorthSky Blue Club
Open Club · 118 members
-

Midwest Owner's Group
Open Club · 212 members
-

2015 Custom Sport Club
Open Club · 5 members
-

GM Snow Plowing Club HD
Closed Club · 14 members
-
-
Popular Contributors
-


Recommended Posts
Archived
This topic is now archived and is closed to further replies.