Jump to content

2015 Sierra 1500: HID Install and Rigid DOT LED Fog Lights Install

Recommended Posts

Posted

Sorry for all the spelling/grammar errors. Just wanted to put this out there real fast

Quick write-up to answer a few basic questions that I did not know when I went into installing a TRS Morimoto HID kit and Rigid DOT approved fog lights. My goal is not a full how-to but just to comment on my findings. Hopefully this will help people that are on the fence about these mods. Shoot me a PM if you have more specific questions.

HID Install: TRS Morimoto Sierra Spec kit.

This seems like the best kit on the market for aftermarket HIDs. Quick shipping, here in the US, real customer service to answer all questions. I ordered 4500K bulbs that match the LED running lights perfectly. Although, Im going to order some 5500K bulbs for a pinch more blue color. Just a personal thing here, but know that 4500K match the LEDs very closely.

Driver side: This side is a cake walk, just unscrew the headlight cap and disconnect/take out the bulb. You will need to drill a hole in the back of the cap. I used a 1 spade bit, right dead center all the way through it. Go slowly and where you drilled should be nice and smooth. You want it smooth so the seal will fit nicely. For peace of mind, I used some hot glue to double seal it. Thread all wires and put the HID bulb in. It goes one way, it will sit flush and centered. Plenty of room on this side if you do not have a second battery.

Passenger side: A little more work for this side.

1: I removed the large plastic cover that spans the whole under hood up front. It is held in by 14ish plastic pop-rivet things. This just gives tons of room to mount the ballast and keep them all out of the way if you would like. This is not a necessary stop.

2: remove the air box. Disconnect the MAF, unscrew the large hose clamp that holds the intake hose to the air box. Make sure all surrounding hoses are free and not hooked on. The air box can come out as one piece, it is only held in by two pressure rubber fittings on the bottom. If you just pull up, it will pop out. Once the fittings are free, just do some careful maneuvering and you will get it out. Watch for your coolant hoses/end fittings.

3: unscrew the headlight cap, drill the 1 hole, thread wires, install bulb, and reinstall the cap. This just gets the bulb out harms way and you just have to focus on simple wiring.

4: on the wiring harness; one lead will be for positive, one for negative. Just hook these up to your battery and ensure your terminal connections are tight. Wire routing is a personal things so you can really run them anywhere. Zip ties work great to keep it hidden.

5: this is the side you must run the capacitor that is included with the kit. The only special thing here is you must find a good ground for this wire. Pretty much any bolt touching frame/large metal will work. Find one and scuff the surface a little as paint will prevent a true group from working. I attached mine to one of bolts holding the strengthening brace/rod by the air box. Just take the bolt out, scuff the paint, reinstall with the ground sandwiched in-between.

6: pretty much plug and play from here. Here is a great diagram to follow. Here is a link to the picture on another forum. http://gm-volt.com/forum/showthread.php?105665-Cheap-quick-HID-option-from-Amazon-50&p=1544346

7: ensure the Relay (two large cube shaped thing) is mounted pointing up and in a dry area. I mounded right by the air box, just zip-tied to an unused hole here.

8: check to ensure the headlights work!

9: run your wires, mount the ballast wherever you would like, and reinstall the air box (watch for hoses/fittings! reconnect the intake hose, reinstall the MAF. Done. I had no error codes or anything like that.

___________________________________________________________________________________________________________________________________________________

Rigid LED Fog Light Install

I wanted to replace the OEM fogs with the Rigid DOT approved lights. I ordered the lights on Amazon ($220) and the Sierra Rigid mounting brackets on Amazon as well. Silly money for a bracket but they work well!'

Quick notes- there is enough room on both sides for this install without taking anything off!

1- Fog light removal. Disconnect the power cable from the back, and move it aside. Each fog has 3 (one on the bottom, two up top) plastic knob feeling things that stick out about 1/2. For each one you will just pinch it together and push out towards the front of the truck. I got mine with my fingers, you can use some small pliers too. Once all 3 are lose you can pull the whole light out the front.

2- Removing the circular plastic housing. From the back there are maybe 5 plastic tabs that hold the circular plastic hosing into the bezel. Just press them and push towards the front. You may have to go around to each of them a few times as they like to pop back into place. This is very easy to do by hand. Just pull the whole plastic piece out the front.

3- You will need to do some cutting. I am not sure why Rigid site says no cutting, I see no way of doing this without cutting. Luckily, the plastic bezel has slits around it that you can follow. I found the best tool for this job was a fine tooth coping saw blade or small hack saw blade. You can really control this and make it look good.

3.5 on the driver side all you will need to do is cut the bezel around the plastic circle and you are good to go. On the passenger there is a piece of plastic behind the bezel that must be trimmed or the light will hit it and will not sit flush. I used some tree trimming shears and they worked great. Just trim it back 2-3 inches.

4- Wiring- I did it simple, pulled the plug off of the Rigid wire exposing the positive and negative wires. Cut the OEM fog light connector off (LEAVE 4-5 or wire) so you can reconnect it one day if needed. Connected the wires (FYI: color wire to color wire, and black to black). Wrap in some electrical tape or shrink tubing and you are good to go! There are ways of using connectors but this way was simple and I did not see any harm as there are two wires, positive and negative. If you just leave some wire, you can always reconnect it and make it look OEM again.

5- Mount the lights in the bracket and put the assembly in the fog hole. Go to a flat wall, truck level, and ensure the light is level, and at the right height before drilling the securing bolt holes.

5- Rigid provides instructions that are pretty helpful. Make sure your bolt holes are aligned well. I was also able to get all nuts on using a wrench on the back and Allen key to tighten from the front. Just use some zip-ties to secure all wires from behind. Really pretty easy for an install.

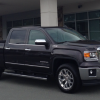
I just did the install, the light output it great! Ill attached a few pictures of just HIDs on and then Fogs on. Ill get some better pictures up later when I have more time. Ill also attach some other picturespost-147560-0-84407700-1440985110_thumb.jpegpost-147560-0-73453400-1440985111_thumb.jpegpost-147560-0-19700700-1440985113_thumb.jpegpost-147560-0-46216000-1440985115_thumb.pngpost-147560-0-59579700-1440985116_thumb.jpegpost-147560-0-16281200-1440985117_thumb.jpegpost-147560-0-24378300-1440985139_thumb.jpeg


post-147560-0-84407700-1440985110_thumb.jpeg

post-147560-0-73453400-1440985111_thumb.jpeg

post-147560-0-19700700-1440985113_thumb.jpeg

post-147560-0-46216000-1440985115_thumb.png

post-147560-0-59579700-1440985116_thumb.jpeg

post-147560-0-16281200-1440985117_thumb.jpeg

post-147560-0-24378300-1440985139_thumb.jpeg

post-147560-0-84407700-1440985110_thumb.jpeg

post-147560-0-73453400-1440985111_thumb.jpeg

post-147560-0-19700700-1440985113_thumb.jpeg

post-147560-0-46216000-1440985115_thumb.png

post-147560-0-59579700-1440985116_thumb.jpeg

post-147560-0-16281200-1440985117_thumb.jpeg

post-147560-0-24378300-1440985139_thumb.jpeg

post-147560-0-84407700-1440985110_thumb.jpeg

post-147560-0-73453400-1440985111_thumb.jpeg

post-147560-0-19700700-1440985113_thumb.jpeg

post-147560-0-46216000-1440985115_thumb.png

post-147560-0-59579700-1440985116_thumb.jpeg

post-147560-0-16281200-1440985117_thumb.jpeg

post-147560-0-24378300-1440985139_thumb.jpeg

Posted

Nice. The only thing that bothers me about the Rigid lights is that they are square. They don't really fit in on the front end of the Sierra. They stick out like a sore thumb. If they made a round version I would definitely install them.

Posted

Thanks for the write up, going to be installing this same TRS kit over the weekend.

Could you post some pics of where you mounted the relay, ballasts, and igniters? A picture of your cables connected to the battery would be nice as well. Thanks.

Archived

This topic is now archived and is closed to further replies.

  • Recently Browsing   0 members

    • No registered users viewing this page.
  • Forum Statistics

    250.4k
    Total Topics
    2.7m
    Total Posts
  • Member Statistics

    342,839
    Total Members
    8,960
    Most Online
    JustusTX
    Newest Member
    JustusTX
    Joined
  • Who's Online   3 Members, 1 Anonymous, 592 Guests (See full list)

×
×
  • Create New...