

-
Recently Browsing 0 members
- No registered users viewing this page.
-
Forum Statistics
250.4k
Total Topics2.7m
Total Posts -
Member Statistics
342,840
Total Members8,960
Most Online
-
Latest Articles
-
Posts
-
 Probably not their first rodeo, so it should go as planned most likely. Typically the service manager or tech doing the swap will put some seat time to shake it down after they get it all put back together. We usually put 50-100mi before we hand them back so if something happens, its not after you get it. A coolant leaks, oil leaks, a ground left off or loose, vibration, etc. The new engines so far have been good? There's been a couple that have popped out there again (the replacement engine) but most have been okay.
 -
 To me it honestly makes zero difference what filter you run. It's not a race engine, just a truck engine that's mostly bumming highways and it just needs a filter that filters oil. The filter used to be a 7060 and the long version was a 7045. Now it's the newer updated filter that the K2XX trucks and newer run, the 100255 I believe if we are using napa numbers. Any of those filters is going to do the job. I wouldn't overthink it, to me it makes no difference because those first filter numbers worked for 18+ years before the spec suddenly changed.
 -
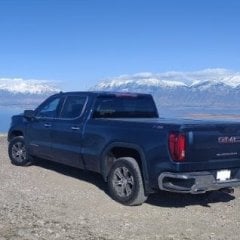
By cautious optimist · Posted
My phone (OnePlus) requires a proprietary charger to get the full 80w fast charging benefits. The only option to get these fast charging benefits is a 12v plug. Any other charger and my phone defaults to 25w charging. I also have a tire inflator with a back up 12v plug. USB would never keep that thing going in a pinch. Putting just one in the trucks wouldn't hurt. Good laptops still include at least 1 USB-a port. -
2017 Sierra 1500 SLT I read that there’s a bolt on the battery brace that sometimes gets loose. I checked all the bolts around there that I could, and all were tight. This sounds more like it’s under the dash, maybe closer to the driver footwell. Anyone else have this problem, or know a possible cause? https://imgur.com/a/kaQRZZH
-
 Morning here- I have a 2013 GMC Sierra 1500-5.3 L engine (low mileage -two owner)--I'm retired now-so I don't drive as much--anyway-just had the oil /filter changed-I have always used Amsoil Synthetic and NAPA gold oil (#7045) filters-now i read that GM has changed the oil filter requirments for these engines- and they (GM) recommends/ want to go w/ a different filter w/ more psi rating on the relief valve (in the filter) to open like 22 psi. The above featured one I mentioned shows 12-15 PSI--which doesn't kmeet these new specs.. Wow-stuff is like getting more/more technical all the time. I think it looks like trying to avoid these sticky lifter problems. Any thoughts or recommendations here? I'm kinda confused-- Thank you- glenn
-
-
GM-Trucks.com Clubs
-

Black Truck Club
Open Club · 612 members
-

White Truck Club
Open Club · 380 members
-

Canadian Owners Club
Open Club · 282 members
-

Red Truck Club
Open Club · 157 members
-

diesel 3.0
Open Club · 281 members
-

Texas Owner's Group
Open Club · 371 members
-

NorthSky Blue Club
Open Club · 118 members
-

Midwest Owner's Group
Open Club · 213 members
-

2015 Custom Sport Club
Open Club · 5 members
-

GM Snow Plowing Club HD
Closed Club · 14 members
-
-
Popular Contributors
-
.thumb.JPG.2c573de60d3a3a4407c7d92298db46dd.JPG)



Recommended Posts
Archived
This topic is now archived and is closed to further replies.