Jump to content

Heated/Cooled KB6 Seats in 08 Sierra SLT


scdean

Recommended Posts

Posted

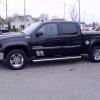
I have an 08 Sierra SLT, basic cloth power seats, no heat/manual recline (VIN 2GTEK13M981288038) . I have installed the KB6 heated/cooled seats from an 09 Escalade. Direct bolt in. I got the proper door handles and the switches for both front doors from a Yukon Denali.

The door handles are Part Nos 15935954 and 15935951.

The switches are Part Nos 25818781 and 25818780.

The problem I'm having is the seats have a large (30 pin?) connector for all of the electronics and my wiring harness has just a few pins for the basic power.

What is required to get these seats to work? Obviously I need a new wiring harness and require a flash of the BCM. There are a couple of people here (rich22 and louie730) that have done this but I think they started with trucks that had heated seats already.

Can I use a wiring harness from a 2012 SLT that has these seats as an option? I found a '12 with VIN 3GTP2WE78CG176229 that has these seats.

Any help is GREATLY appreciated.

Scott.

  • 4 months later...
Posted

Scott, how did this go for you? I have a 2012 SLE with cloth power driver and manual passenger. Purchased Heat/cool/power/memory seats from 2011 Suburban and planning for the upgrade now. Any advice or commentary appreciated beyond measure.


Thx,

Rod

  • 3 weeks later...
Posted

This might help, I'm working on getting my seats working as well.


Driver KA1 seats

6D9Kh.gif


Passenger KA1 seats

BMFnR.gif


Driver x88,z88, with KB6

ACaGt.gif


Passenger x88,z88, with KB6

xIukj.gif

Posted

Well, it's has been quite an adventure. My truck had basic cloth 6-way power seats, no heat. The first row seats I got from an Escalade were 12 way heated/cooled (KB6) with a big 30 pin connector. Coming out of my floor was a smaller connector, obviously not plug & play. So I got a VIN number from a Sierra Denali that has the heated/cooled seats and ordered a complete wiring harness ($700!) for that truck. I changed the complete wiring harness which went pretty well. Wherever I had a plug from the old harness, I had a plug on the new harness, plus a couple of leftovers which I expected. I took the truck to the dealer for programming. After a couple of hours they couldn't 'find' the seats on the network, so they weren't able to program them. My dealership charges $120/hr. They said they could keep trying but may still have no luck. The seats have sensors in them for the airbags so my truck's computer was looking for the module from the old seats. All of my warning lights were on: Service Traction Control, Service ABS, Service Stabilitrack, Sevice Airbags...The truck was haywire. Since I have spent about $3,300 with no end in sight, I have decided to go back to the original seats and got Katzkins for them. All is not lost, though, as I did get the buckets installed in the back which was really what I wanted. I'll have to see if I can sell the two front buckets. If your thinking of trying it, you will need a buddy that works at a GM dealership that doesn't mind spending hours helping. With all of the electronics, it's really complicated.

I also got the door switches and new handles which installed fine. They lit up but that's it.

As far as wiring diagrams, the only thing I could get in all my searching was on the attached web page. I don't even know how I found that.


Regards,

Scott.

  • Reply
  • Report
  • Edit
  • Delete


Posted

My 2012 tahoe had leather 6 way adjust without heat or cooling. I also had a smaller connector for the seat and a different connector for the air bag. I was lucky enough to have the chassis side of the 30 pin connector and the chassis side of the air bag connector. Of these wires, all power seat, seat belt sensor, weight on seat sensor, and airbag wires had the same color and everything wired up and worked perfectly. I now have about 6 wires coming off the chassis sides pigtail of the 30 pin connector that need to wire into the rest of the truck correctly. the wiring diagrams that we have both found show these wires. I also installed the heat/cool switch in each door panel and plugged them into the empty connector in the driver and pass window/door lock module.


the difference in my application is that my new seats came from a 2012 lt suburban and are 6 way adjust (like my old seats), heated cooled, and do not have memory. My door panel switches do not have the memory buttons either. I got a great deal on the seats and switches so i figured i could do without the memory feature. i have only seen these exact seats in 2012 vehicles and the newest diagrams ive found are for 2011 and older.


I believe I need to buy a "seat climate control module". this should connect to the remaining wires at each seat, i can feed it a CAN line connection and an ignition 30 amp relay 12 volt source (I will need to add this because i did not start with heated seats.)


So my seats are not KB6 (not sure what they are called) and i do not have memory but i believe following the diagram but bypassing the CAN around the "memory module" should work. I have OEM reflashing capabilities and have been looking for a 2012 truck that has folding mirrors, with heated/cooled seats but no memory. I can then flash this VIN numbers config into each door panel module. I have yet to get the heated cooled lights to turn on when trying a few VINs i have found online.


Anyone out there have any ideas, where would this module fit? Do you still have that harness you bought?

Posted


I got everything working! The drivers seat is the primary and most of the wires wire directly across to the passenger seat, I tapped into the existing "low reference" and "GMLAN CAN BUS line" to feed the seats where the diagram calls for them. The only wire i had to run to the dash was a new 10 amp fused ignition 12 volt source to power the heater/cooler (small red with white wire). I reflashed each door control module with a VIN number that had heated/cooled seats and everything worked right away.


All in all there are about 20 misc connections that I had to make, I made a new harness with 7 wires that runs between the seats and under the center console to connect the seats together.


  • 1 year later...
  • 7 months later...
Posted

Hi, I'm new to forum and I have a 2014 3500 HD sle w a duramax. The truck has a split leather bench w power on drivers side only. I picked up 2013 heated and cooled front seats, rear seat, door panels, console & carpet from Denali HD for $1200. So I'm wondering if I can purchase a floor harness and have BCM programmed or if floor harness is part of the whole dash harness. I have all the switches in the door panels and the wiring for panels should this plug in to existing or will this be different a swell? Any help or advice is greatly appreciated.

  • 1 year later...
Posted

Ok so since I have received a lot of help from this thread I thought I would contribute a little. I have been on a very long search to do this change my self and been through a lot of trial and error. I tried using the charts on this thread to map out which wire needed to go were, tried prior to that using the help of another thread that did not work for me and finally came to the solution that I needed to do something a little different.


So for those that are thinking about wether or not to do this mod and how to do it I will map it out and make it easier.


My truck is a 2009 GMC 2500 SLT. I purchased AC/Heated seats out of a 2011 denali 2500 that had the MSM module (Under driver seat) and CCSM module (under passenger seat) already. I also purchased the door switched for both sides.


Next suggestion is to get a body harness from a 2011 denali truck with KB6.

To save you time the part number is 22768056

You can google GM 22768056 and you will see several places come up to purchase this from I paid 200 dollars shipped.

This part will plug directly into the fuse box inside the cab and to the BCM module and the will go to each of the doors and the back of the truck also to the seats. I can tell you placing this harness is a million times easier than trying to splice in the seat to seat connections and adding the other wires.


​The change that was done though is a different SDM module was used in 2011 and it relocated to the center console. I was able to track down the schematics for each harness and have an excel spread sheet with the wires that have to be moved from the 2011 harness to the 2009 harness. No splicing needed just relocation. This change was done in 2010 so if your truck is 2010 or newer you will not have to worry about that. you can pm me for this excel doc.


You will have to have the door switches programmed/calibrated to a vehicle with the KB6 option and I programmed the MSM module although I do not think it was needed.

Hope this help those that are wanting to do this. Finding the information on that body harness though was a life saver to me and made it a lot easier. The next part of the SDM module was also very helpful.

  • 2 months later...
Posted

tnutt19 i just sent you a PM - i can't believe that you or mdweiss were able to get those things working. my challenge is much more straight forward... heated/airbag seats in a 2500 suburban without the cooled option - replacing exact same seat except with cooled KB6 option. I am basically missing only B10 and B11 on the truck side of the X303 harness...

Posted

trying to locate circuits 7009 and 5918 so i can add the wires that are missing... any help?

  • 3 years later...
Posted
On 5/11/2016 at 3:07 PM, Tnutt19 said:

Ok so since I have received a lot of help from this thread I thought I would contribute a little. I have been on a very long search to do this change my self and been through a lot of trial and error. I tried using the charts on this thread to map out which wire needed to go were, tried prior to that using the help of another thread that did not work for me and finally came to the solution that I needed to do something a little different.


So for those that are thinking about wether or not to do this mod and how to do it I will map it out and make it easier.


My truck is a 2009 GMC 2500 SLT. I purchased AC/Heated seats out of a 2011 denali 2500 that had the MSM module (Under driver seat) and CCSM module (under passenger seat) already. I also purchased the door switched for both sides.


Next suggestion is to get a body harness from a 2011 denali truck with KB6.

To save you time the part number is 22768056

You can google GM 22768056 and you will see several places come up to purchase this from I paid 200 dollars shipped.

This part will plug directly into the fuse box inside the cab and to the BCM module and the will go to each of the doors and the back of the truck also to the seats. I can tell you placing this harness is a million times easier than trying to splice in the seat to seat connections and adding the other wires.


The change that was done though is a different SDM module was used in 2011 and it relocated to the center console. I was able to track down the schematics for each harness and have an excel spread sheet with the wires that have to be moved from the 2011 harness to the 2009 harness. No splicing needed just relocation. This change was done in 2010 so if your truck is 2010 or newer you will not have to worry about that. you can pm me for this excel doc.


You will have to have the door switches programmed/calibrated to a vehicle with the KB6 option and I programmed the MSM module although I do not think it was needed.

Hope this help those that are wanting to do this. Finding the information on that body harness though was a life saver to me and made it a lot easier. The next part of the SDM module was also very helpful.

Can you email me a copy of that excel document please [email protected]


I have an 07.5 sle with manual cloth seats that I’m looking to do the mod on. Found some 2009 Escalade seats with heat/cool. I also pulled a complete dash/floor harness & bcm from a 2011 seirra denali 1500. My original plan was to just use it all but after digging a little found that where the harness comes through the firewall and  plugs into engine harness the plugs are completely different. So my next plan of attack was just to use the floor portion of the Denali harness like the one @Tnutt19 ordered. Any added info anyone can give me would be greatly appreciated. Also have colour matched door panels that have the inside door handle above the armrest as well as the door switches, harness and cable to open door ready to install.

Archived

This topic is now archived and is closed to further replies.

  • Latest Articles

  • Posts

    • Have considered installing a DC to DC charger in your camper to replace your isolator?  
    • Common failure.  You need to replace the fuel door housing.   The painted cover transfers over to the new housing.  To remove the old one there is 4 spots where you poke the plastic to release it.  
    • No such thing as regenerative braking on a pure ICE vehicle.     Regenerative braking is the re-capture of energy from electric motors and stores it in the battery pack.  So hybrids, PHEV and EVs have regenerative braking.     What you are seeing is the charging system changing modes is all.  Its likely entering charge mode for some sort of reason is all.  All of the charging modes will be listed below.   As for L10 vs D.  L10 turns off automatic grade braking.  L10 puts you in control of grade downshifts where in D it will automatically do it based on brake pedal position and other factors.  Otherwise L10 and D drive exactly the same aside from that one aspect.    Battery Sulfation Mode The BCM will enter this mode when the interpreted Generator output voltage is less than 13.2 V for 45 minutes. When this condition exists the BCM will enter Charge Mode for 2–3 minutes. The BCM will then determine which mode to enter depending on voltage requirements.   Charge Mode The BCM will enter Charge Mode when ever one of the following conditions are met:   Windshield wipers are ON for more than 3 s. Climate Control Voltage Boost Mode Request is true, as sensed by the HVAC control module via serial data. High speed cooling fan, rear defogger, and HVAC high speed blower operation can cause the BCM to enter the Charge Mode. The estimated battery temperature is less than 0°C (32°F). Battery State of Charge is less than 80%. Vehicle speed is greater than 145 km/h (90 mph) A current sensor malfunction exists. System voltage is determined to be below 12.56 V When any one of these conditions is met, the system will set targeted generator output voltage to a charging voltage between 13.9–15.5 V, depending on the battery state of charge and estimated battery temperature.   Fuel Economy Mode The BCM will enter Fuel Economy Mode when the estimated battery temperature is at least 0°C (32°F) but less than or equal to 80°C (176°F), the calculated battery current is less than 15 A and greater than −8 A, and the battery state-of-charge is greater than or equal to 80%. Its targeted generator output voltage is the open circuit voltage of the battery and can be between 12.5–13.1 V. When fuel economy mode is active, the generator is not charging, only maintaining open circuit battery voltage. The BCM will exit this mode and enter Charge Mode when any of the conditions described above are present.   Headlamp Mode The BCM will enter Headlamp Mode when ever the head lamps are ON (high or low beams). Voltage will be regulated between 13.9–14.5 V.   Start Up Mode When the engine is started the BCM sets a targeted generator output voltage of 14.5 V for 30 s.   Tow/Haul Mode (if applicable) Pressing the Tow/Haul Mode button located on the center stack, the vehicle system voltage is raised and the remote (non-vehicle) battery will be charged. Having the headlamps on will raise the system voltage and if the Tow/Haul button is applied it will not serve any purpose. The voltage is regulated between 13.9-14.5 V.      
    • Hello from Australia Just sharing that there is now a way to delete the active shutters entirely with just a plug in module. Opens up tons of room to light bars etc.
    • I have an observation and a question... 1) I watch the voltage closely because I have had to dial in the cut-in/cut-out voltages of the battery separator to my camper.  The "smart" charging drives me nuts.  Anyway, I noticed that when coasting for a while, and especially if lightly using the brakes (though not necessary), the voltage goes up from mid/high-13 volts to mid/high-14 volts.  Then it drops back down after stopping or going again.  Consistently!   The only explanation I can come up with is REGENERATIVE BRAKING!  Well, maybe that's a little bit of an exaggeration, but it's certainly free extra battery charging.   2) Driving on mountain roads I will use L and vary the max gear.  Things straighten out and I end up in L10.  Sometimes I leave it there for a while.  Is there any difference between L10 and D?   
  • GM-Trucks.com Clubs

  • Popular Contributors

×
×
  • Create New...