
-
Recently Browsing 0 members
- No registered users viewing this page.
-
Forum Statistics
250.4k
Total Topics2.7m
Total Posts -
Member Statistics
342,859
Total Members8,960
Most Online
-
Latest Articles
-
Posts
-
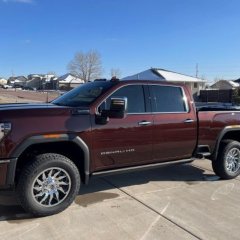
I'm not sure if this should be a reply on this thread or a new topic, let me know if it's out of place. This my first post. Thanks 85077522 - ACDelco GM Genuine Parts Brake Master Cylinders. Anyone else had to replace this brake master cylinder yet. I didn't do any brake work, it looks like new parts and I've had the truck for about 4k miles. When it started to throw codes I did the calibrations with a bidirectional scanner and got the codes to clear but they came back so i did the routine; base bleed, automated bleed and final base bleed. All that with Bosch ES16-32N fluid (please look it up). That seemed to fix it but 100ish miles later it failed again so I ran the same process but with a pressure bleeder this time and got the same results, fixed for 100ish miles. The original fluid looked bad and I thought I got most of it out. The codes; P25A2, C05B0-00, C2A1B. I can get them to clear but not for long. The C05B0 indicates a leak in the front circuit (which is bone dry) so I'm thinking of doing the bleed process on that front again today and I don't know if that's taboo to just do the front but at this point it seems like it's worth the try anyway. The new master cylinder/module unit is supposed to get here today. But now I'm pretty much convinced this install is over my head. I've called several shops and some mobile guys that I know but this thing is like radio active material scary wise. I did get 2 local shops say they should be able to do it, one says he has the SPS2 programing capability. And with the battery disconnected is there supposed to be pedal resistance, mine is to the floor, then if I pump it I can get some resistance.
-
 I wasn’t commenting on your post. Certainly wasn’t arguing. I was making an observation on my long term experience with supposedly proper length of driving for proper heat cycles. Works for me. Although I have seen water or vapor come out of exhaust when vehicles weren’t run very long and shut off. It’s very humid in the morning. Then hot and humid.
 -
.thumb.JPG.2c573de60d3a3a4407c7d92298db46dd.JPG)
By Grumpy Bear · Posted
Not what I said but I can work with it anyway. Complete combustion produces CO2 and H20. When it's cold enough you can 'see' it as water vapor but it is always there and more so the better the tune up. It's physics, not an argument. In a cold motor when the cylinder jacket is below the condensation temperature the water goes to the pan and not the PCV system. Heating the oil moves it from liquid to vapor where it is removed by the PCV system. When and how much depends on temperatures. Of the air, the water and so on. It has little to with the humidity. Water is a combustion product. -
 I can only guess as well that something was clicked on that brought you to the half ton choices by accident. By all means try again and chose the 3500 and sort out that its the cab and box configuration you want and choose four wheel drive ( rather obvious to have a transfer case ) and to make sure the dually isn't chosen. I find or at least did a couple of years ago when I was sifting through the options that it would sometimes jump ahead after choosing the series of truck and in this case 3500 and skip some of the other initial configuration choices and have to watch the heading bar and sometimes back up by choosing the first in the series of option break downs. I think sometimes the computer will remember items that were last chosen and skip over the first part. Anyway go through it all and depending on the trim level chosen and I think the LT is one that may fall into that where the option of having the 4 high auto transfer case can be chosen, where as a High Country doesn't show that option as it just comes with the fancier ( not necessarily better though in terms of potential problems ) transfer case but for sure both transfer case choices are equipped with high and low range in the HD truck segment. Like Newdude said who works at a dealership, its the half tons that are the ones that will come with the single speed unless certain options or trim levels are chosen that add the two speed transfer case but as your looking at an HD, you don't have to worry about that hot mess. One item that at least didn't show up and not sure if it does yet or not in the HD options on the manufactures pubic website is the upfitter in cab switch option if one is desiring that. Unfortunately its not wired in at the factory but the panel with the switches is on the dash but the wiring harness to be installed gets tossed under the rear seat to be installed by whomever after the fact to complete the installation.
 -
 Yesterday we brought home a 6yr old Havanese dog from a nearby SPCA. We've had her for 24 hours and we are delighted with how well she is adjusting to her new home. It was a huge decision to adopt a dog at this stage in our lives but we believe we made the right choice! it was reported that her first 6 years were ones of neglect. I think she's already realizing her life is going to get a whole lot better... so is ours!
-
-
GM-Trucks.com Clubs
-

Black Truck Club
Open Club · 612 members
-

White Truck Club
Open Club · 380 members
-

Canadian Owners Club
Open Club · 282 members
-

Red Truck Club
Open Club · 157 members
-

diesel 3.0
Open Club · 281 members
-

Texas Owner's Group
Open Club · 371 members
-

NorthSky Blue Club
Open Club · 118 members
-

Midwest Owner's Group
Open Club · 213 members
-

2015 Custom Sport Club
Open Club · 5 members
-

GM Snow Plowing Club HD
Closed Club · 14 members
-
-
Popular Contributors
-
1

-
2
-
3

-
4
-
5

-
-

Recommended Posts
Archived
This topic is now archived and is closed to further replies.