

-
Recently Browsing 0 members
- No registered users viewing this page.
-
Forum Statistics
250.5k
Total Topics2.7m
Total Posts -
Member Statistics
342,986
Total Members8,960
Most Online
-
Who's Online 9 Members, 1 Anonymous, 511 Guests (See full list)
-
Latest Articles
-
Posts
-
 I think this subforum was created for the new generation pickup trucks (2027-) with the 3.0 but I don't think it's a big deal either way. There are probably 2027 model-year specific changes for the SUV's too. I was just curious if you had issues with your 2025 3.0. I'm still under 10k miles on mine and fingers crossed I don't have thrust bearing issues. I'm guessing not, since you're willing to buy another one! It's a good engine minus one or two manufacturing whoopsies.
 -
.thumb.JPG.2c573de60d3a3a4407c7d92298db46dd.JPG)
By Grumpy Bear · Posted
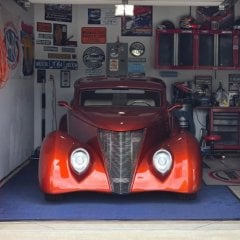
Wife has enough metal in her she hides from the scrapper. -
By Jus Cruisin · Posted
Djannoyed was a one hit wonder. Posted and disappeared. -
 I have pictures of the before and after x-rays for my past three joint replacements. Your analogy is a good one as I have some modern, high tech parts hidden behind old, body panels!
 -
 I thought my stock Ranchos were fine most of the time. I installed 5100s because of all the conjecture online, and honestly I wish I had left the Ranchos on, only because I don't tow and haul very often. Towing or hauling, the 5100s are much more compliant. However, riding empty, the Ranchos were better.
-
-
GM-Trucks.com Clubs
-

Black Truck Club
Open Club · 613 members
-

White Truck Club
Open Club · 381 members
-

Canadian Owners Club
Open Club · 282 members
-

Red Truck Club
Open Club · 158 members
-

diesel 3.0
Open Club · 281 members
-

Texas Owner's Group
Open Club · 371 members
-

NorthSky Blue Club
Open Club · 118 members
-

Midwest Owner's Group
Open Club · 213 members
-

2015 Custom Sport Club
Open Club · 5 members
-

GM Snow Plowing Club HD
Closed Club · 14 members
-
-
Popular Contributors
-



Recommended Posts
Archived
This topic is now archived and is closed to further replies.